Nuuze's CDA 225G build

Nuuze

Active Member
View Badges
Joined
Oct 1, 2007
Messages
153
Reaction score
150
Location
Bay Area, California
Rating - 0%
0   0   0
Well, here I go again! Since getting back into the hobby about a year ago, we decided to redecorate the house. My current build is a peninsula tank separating the fish room and home gym in our front formal rooms of the house. We come to find we need more room for the gym so we need to move the current tank. https://www.reef2reef.com/threads/nuuzes-red-sea-reefer-peninsula-650-adventure.661472/ So I decided to get another tank setup then transition all the livestock over with some additions!

Tank I have decided to go with is a Crystal Dynamic Aquarium. I've been talking with Zoya for the past week and he was very helpful in answering all my questions. Originally I was going to go with a 260 gallon (72x36x24) then realized the stand will not fit through my doorway (max 35") with door off. An alternative was to go with a Framing Tech stand, but they did not reply to my email. After talking with Zoya, CDA tanks are warrantied for 5 years with their stand, 3 years with Framing Tech and 1 year without the two mentioned. 5 years (hoping I'll never need it) sounds better for the amount I will be spending. So I decided to go with a 225 gallon (72x30x24)

Tonight I placed my deposit!

Tank
225 Gallon CDA 72x30x24 Starphire eurobraced tank
-3 sides Starphire
-1/2" glass
-Bottom perimeter brace
-Reinforced vertical seams
-Overlapping double top brace
Starboard bottom
Modular Marine 36" overflow
Bean Animal plumbing kit with 2-port manifold

Stand
72x30x42
Steel stand with Baltic birch deck
Black magnet-mounted panels
Electric panel
Stainless steel leveling feet


1611559979044.png


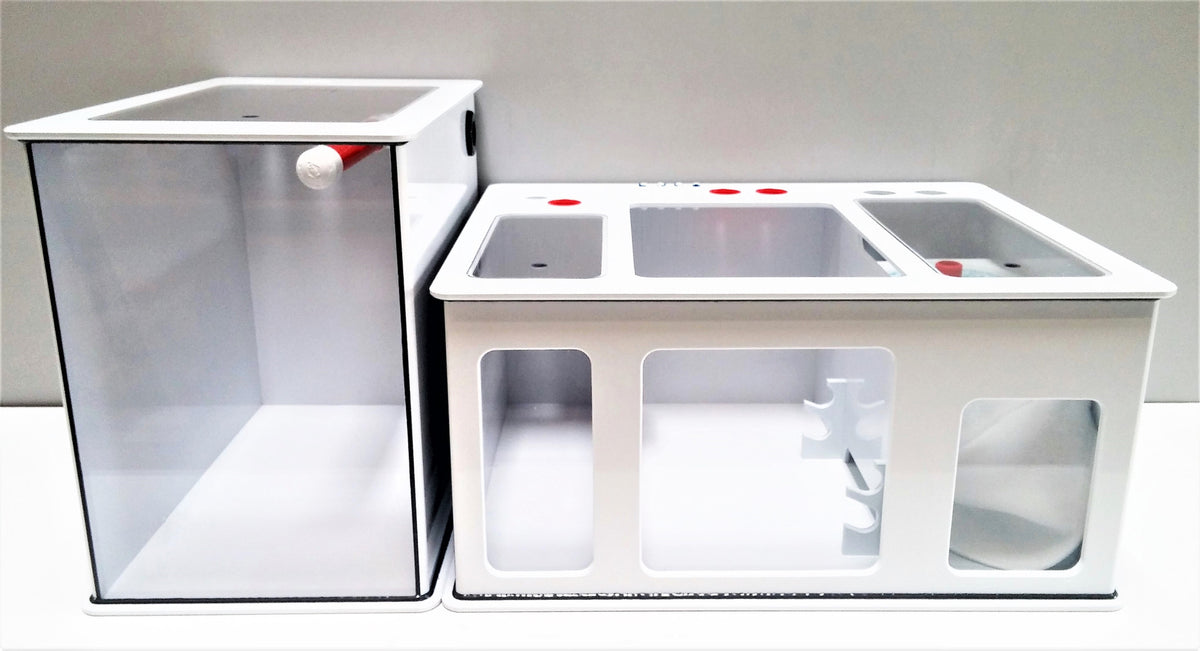
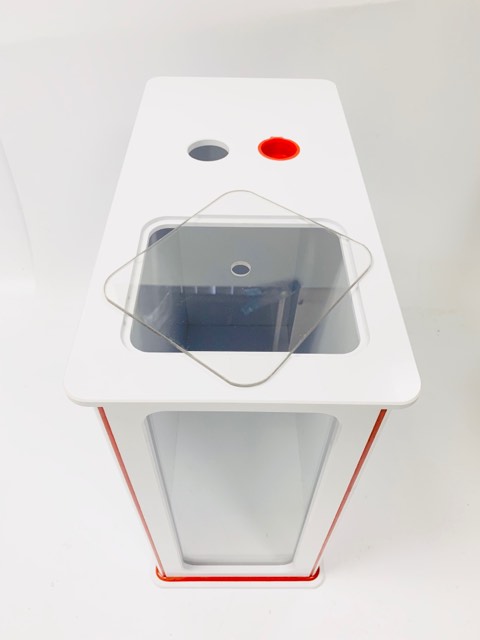
Next to plan is the sump/refugium/ATO.
 
Last edited:
OP
OP
N

Nuuze

Active Member
View Badges
Joined
Oct 1, 2007
Messages
153
Reaction score
150
Location
Bay Area, California
Rating - 0%
0   0   0
It's been 5'ish months and it looks like the system is nearing completion. Who would have thought there would be a global shortage of Starboard right?

I decided to go with Advanced Acrylics for sump/refugium/ato. John @ Advanced Acrylics was very helpful along the way and the three were shipped directly to Crystal Dynamic Aquarium.

I also spoke to Trent today about the layout to have the ato outside of stand so we'll be shifting the sump/refugium to left and leaving the right side for calcium reactor, c02 and electrical panel.

Some progress pics from CDA!
20210710_092009.jpg
20210710_084934.jpg
 
OP
OP
N

Nuuze

Active Member
View Badges
Joined
Oct 1, 2007
Messages
153
Reaction score
150
Location
Bay Area, California
Rating - 0%
0   0   0
Progress through the weekend. Broke down a small 54G display/frag tank and added the rocks (and some dry rock) to display with some added gluing. BK DC200 kimmer from my 140G I will use for now depending on bio-load. Decided to try out a floating light box this time to reduce the amount of glare mounted to existing Ecotech 60.5 light bar. 4 out of 6 Vortech MP40 until I break down the 140G for other two. Lighting is 3 Radion G5 XR30 and 2 Kessil 360X for added shimmer and Lifeguard Aquatics UV. Wires!!! Enjoy!
9E3BDD12-0CBC-445C-A740-712EDFD07B11.jpeg
4762A4B7-E4AD-44FF-AE25-321DFBF1EFBD.jpeg
16DCE96B-55AD-496F-AB7C-58BE1FB84014.jpeg
1C63FCA5-1895-45BD-97DF-6F43D9C120F3.jpeg
068971D3-2DB8-4D7B-A5E5-0487BF2337AE.jpeg
 
Last edited:
OP
OP
N

Nuuze

Active Member
View Badges
Joined
Oct 1, 2007
Messages
153
Reaction score
150
Location
Bay Area, California
Rating - 0%
0   0   0
How do you like the CDA tank?
I really liked how my CDA tank came out. My first eurobraced tank coming from years of rimless tanks. It's built very nice in detail from glass to silicone that I can see. One thing to point out is when installing the Modular Marine overflow, you have to wrench the bulkheads on tight. I was afraid I might crack the tank so I tightened 1/8th turns at a time until the drips stopped.

Some wiring cleanup tonight under the stand. Enjoy!
image4.jpeg


I need better lids as I suck at cutting at cutting acrylic. The thin ones warp after a few days. Still need to clean up more wiring once everything is wired up.
image5.jpeg


Perfect place for Kamoer, if the tubing breaks water goes into refugium. :)
image6.jpeg


Electrical panel on right side of tank. This took up more room than anticipated so my Geo 618 didn't fit next to refugium. Luckily I left enough room between tank and wall to fit behind as well as calcium reactor for now.
image7.jpeg
 
Last edited:

Operator Wrasse

Active Member
View Badges
Joined
Jan 20, 2021
Messages
257
Reaction score
400
Location
Indiana
Rating - 0%
0   0   0
Love the build so far! I'm hoping to put a down payment on the same tank in a year or two! Could you answer a few questions? One is simple but I've never thought about it before:

How do you stop your ATO from forming a siphon when the output of the tube will be lower than the water level in the ATO? Your ATO is pretty tall.

What is the interior dimensions of your stand from the left side to the electrical panel? I might be doing a custom sump and I'd like to be able to map it all out.

Thanks and I can't wait to see more :)
 
OP
OP
N

Nuuze

Active Member
View Badges
Joined
Oct 1, 2007
Messages
153
Reaction score
150
Location
Bay Area, California
Rating - 0%
0   0   0
Love the build so far! I'm hoping to put a down payment on the same tank in a year or two! Could you answer a few questions? One is simple but I've never thought about it before:

How do you stop your ATO from forming a siphon when the output of the tube will be lower than the water level in the ATO? Your ATO is pretty tall.

What is the interior dimensions of your stand from the left side to the electrical panel? I might be doing a custom sump and I'd like to be able to map it all out.

Thanks and I can't wait to see more :)

Sure, no problem at all!

I'm using the Neptune Apex with ATK/ATO top off. One unique feature it includes is a 1/4" x 1/4" Straight Union Push Connect with a pin hole in center so a stream comes out then the pump turns on. Once it turns off is when it creates a siphon break sucking in air.
image0.jpeg


I went with steel stand with magnetic panels. From inside it measures 65 5/8", 1/2" for the panel supports and 1 1/2" for legs.
image1.jpeg
image2.jpeg


Front to back is 30". Minus 3" for center legs making 27". I went with this config for sump/refugium/ato in gray pvc.
image6 (1).jpeg
image4 (1).jpeg
image6 (1).jpeg


Electrical panel side is approximately 6 1/2".
image3.jpeg
 

Operator Wrasse

Active Member
View Badges
Joined
Jan 20, 2021
Messages
257
Reaction score
400
Location
Indiana
Rating - 0%
0   0   0
Thank you so much! That is a huge help and I'm sure plenty more people will appreciate your build thread for years to come.
 

carlosec83

Community Member
View Badges
Joined
Dec 30, 2014
Messages
71
Reaction score
60
Location
San Diego, CA
Rating - 0%
0   0   0
I really liked how my CDA tank came out. My first eurobraced tank coming from years of rimless tanks. It's built very nice in detail from glass to silicone that I can see. One thing to point out is when installing the Modular Marine overflow, you have to wrench the bulkheads on tight. I was afraid I might crack the tank so I tightened 1/8th turns at a time until the drips stopped.

Some wiring cleanup tonight under the stand. Enjoy!
image4.jpeg


I need better lids as I suck at cutting at cutting acrylic. The thin ones warp after a few days. Still need to clean up more wiring once everything is wired up.
image5.jpeg


Perfect place for Kamoer, if the tubing breaks water goes into refugium. :)
image6.jpeg


Electrical panel on right side of tank. This took up more room than anticipated so my Geo 618 didn't fit next to refugium. Luckily I left enough room between tank and wall to fit behind as well as calcium reactor for now.
image7.jpeg
Beautiful tank. I also received my CDA tank in July/August and just started my build. Question... for the Modular Marine Overflow, you mentioned you tightened until the leak stopped. Did you receive additional gaskets? Or did you just use the ones with the bulkheads? Mine only came with the ones attached to bulkhead and leaked. Tightened and all still leaked ... from in between the tank and overflow.
 

Operator Wrasse

Active Member
View Badges
Joined
Jan 20, 2021
Messages
257
Reaction score
400
Location
Indiana
Rating - 0%
0   0   0
Beautiful tank. I also received my CDA tank in July/August and just started my build. Question... for the Modular Marine Overflow, you mentioned you tightened until the leak stopped. Did you receive additional gaskets? Or did you just use the ones with the bulkheads? Mine only came with the ones attached to bulkhead and leaked. Tightened and all still leaked ... from in between the tank and overflow.
How do you guys like the modular marine overflow? Do you think the upgrade to the shadow would be better?
 

carlosec83

Community Member
View Badges
Joined
Dec 30, 2014
Messages
71
Reaction score
60
Location
San Diego, CA
Rating - 0%
0   0   0
How do you guys like the modular marine overflow? Do you think the upgrade to the shadow would be

How do you guys like the modular marine overflow? Do you think the upgrade to the shadow would be better?
I like it. I just had to add a gasket between the overflow and tank. Works perfectly now no leaks. Very sleek.
 
OP
OP
N

Nuuze

Active Member
View Badges
Joined
Oct 1, 2007
Messages
153
Reaction score
150
Location
Bay Area, California
Rating - 0%
0   0   0
Beautiful tank. I also received my CDA tank in July/August and just started my build. Question... for the Modular Marine Overflow, you mentioned you tightened until the leak stopped. Did you receive additional gaskets? Or did you just use the ones with the bulkheads? Mine only came with the ones attached to bulkhead and leaked. Tightened and all still leaked ... from in between the tank and overflow.

How do you guys like the modular marine overflow? Do you think the upgrade to the shadow would be better?
Thanks all! I’m glad you’re enjoying the build.

Im pretty impressed with the MM overflow box. I’m only using straight pipe standpipes and it’s completely silent. The 36” overflow keeps the surface clear free of debris. Make sure the rubber oring is between the tank/box.

I had to get the largest channel locks at Lowe’s to tighten the bulkheads. Make sure you wrap blue tape on them so they

3FCD9770-7407-4ABC-BF5C-62A6E8EBC62B.jpeg


Also scored a new QT frag tank this weekend. The IM 25 Ext Lagoon was discontinued but found one in stock at a nearby LFS. Maybe I’ll try and make a mini version of this tank.
F27C5D6C-8759-426F-B788-BA373C391F68.jpeg
 
OP
OP
N

Nuuze

Active Member
View Badges
Joined
Oct 1, 2007
Messages
153
Reaction score
150
Location
Bay Area, California
Rating - 0%
0   0   0
I've always used a MJ1200 or siphon hose for water changes. Since this tank is 200+ a MJ1200 would take forever to pump out of the sump. Today I tried out a Sicce I just got and wow! My water changes took maybe a 1/3 of the time as usual. This thing pumps out water like a water hose outside! ;Woot The head pressure is great on thin pump, I just need to get enough hose to reach the sink now.

image0 (4).jpeg
 

A worm with high fashion and practical utility: Have you ever kept feather dusters in your reef aquarium?

  • I currently have feather dusters in my tank.

    Votes: 73 37.6%
  • Not currently, but I have had feather dusters in my tank in the past.

    Votes: 66 34.0%
  • I have not had feather dusters, but I hope to in the future.

    Votes: 25 12.9%
  • I have no plans to have feather dusters in my tank.

    Votes: 28 14.4%
  • Other.

    Votes: 2 1.0%
Back
Top