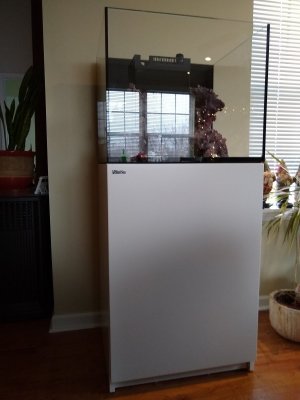
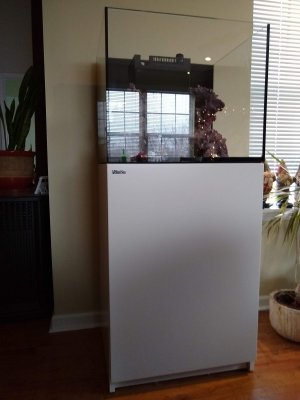
Quietman's RSR 170 Mostly Softie - ATS/UV Only

Quietman

2500 Club Member
View Badges
Joined
May 14, 2017
Messages
3,242
Reaction score
10,841
Location
Indiana - born and bred
Rating - 0%
0   0   0
Formal updates will be indicated by this font at the beginning

Quick informal updates will be italicized.

Adding a link to a couple routinely updated status where I don't create new posts, just edit existing. Should be easier to track an ongoing effort.

ATS Start Up Start June 11, 2021 - End January 22, 2022

ICP Testing Start June 12, 2021- End January 22, 2022

Links to Various Sections - Reverse order for ease of reading newest posts

My First Tang - March 20, 2022

Algae Turf Scrubber - Results February 8, 2022

Frag/Rock Dipping in H2O2 July 13,2021

Few Notes on Temp Control with the ATS June 17, 2021

Santa-Monica RAIN2 IN - Skimmer OUT June 11, 2021

Power Distribution Redux February15, 2021

Reefbrite XHO Add-On Kit for XR-15 February 13, 2021

One Year+ Update December 24, 2020

Dino Armistice of 2020 and Bringing on UV Jul 25, 2020

Algae Battle Feb 19, 2020

ApexEL Monitoring Only Purchase Feb 8, 2020

Upgrade Return Pump - Tunze 1073.05 DC Feb 1, 2020

Additional (but not final) Thoughts on Controllers Jan 25, 2020

Quarantine Practice Jan 20, 2020

Coral Shipment Loss (11/06/19) Jan 18, 2020

Swapped Out MP10 For Tunze 6055 Dec 27, 2019

Cleaner Shrimp Parasite Dec 15, 2019

Diatom Bloom Nov 9, 2019

Dual Redundancy Temp Control Sept 29, 2019

Palythoa Panic Sept 12, 2019

NoPoX, Diatoms, New Fish, Revised RODI Opinion Sept 7, 2019

FIrst Corals and QT Aug 12, 2019

Power and Wiring and Coral QT Aug 8, 2019

CUC, RSR Screen Top, Inkbird Temp Controller July 28, 2019

First Fish! July 21, 2019

Cycling Complete with Graph - Ready for Fish July 20, 2019

Water Station, Cycling, Radion XR-15 June 16, 2019

Aquascaping June 9, 2019

Heaters and Temp Response Tests June 2, 2019

Leak and Wet Tests May 12, 2019

Putting the stand on Wheels February 9, 2019

Building the Red Sea stand December 8, 2018

Equipment and CaribSea LifeRock Shapes December 2, 2018


After many years of dreaming and planning and reef forums and YouTube vids and visits to my LFS, I've finally pulled the trigger on my reef tank. I ordered a Red Sea Reefer 170 from BRS during this past big sale Black Friday weekend. Even got a chance to enter their last live drawing. By the way, did anyone else think that was more fun than they thought it was going to be? BRS may become a routine part of my Thanksgiving weekends. Lots better than overdosing on family (you know what I mean), turkey and football.

Anyway, back to my reef tank plans. Before I decided on the tank and equipment I had to decide what my expectations were from this hobby and what kind of tank and 'reefer' style best suited me. Since I never like to be "owned" by my hobbies and want to enjoy them rather than live for them, I'm going to keep this as easily manageable as possible. That doesn't mean cheap, it doesn't mean simple or necessarily ultra low maintenance, nor does it mean heavily automated. It just means my decisions are based on keeping this fun and enjoyable for me, keeping a healthy system and inhabitants and making sure that any additional work I sign off on involves things I really enjoy doing and will for years.

I've kept freshwater, including technical planted systems so I do have some frame of reference and experience. I would like to thank the community on Reef2Reef specifically for all the information and in particular the experiences, good and bad - you've all had. It's been a big help and I'm sure saved me thousands of dollars and countless hours before I've even started. This is an exceptionally "nice" forum with pleasant, helpful, patient members and is my primary 'go to' for information.
 
Last edited:

SPR1968

No, it wasn’t expensive dear....
View Badges
Joined
Feb 21, 2017
Messages
20,026
Reaction score
124,566
Location
Nottinghamshire England
Rating - 0%
0   0   0
Sounds like a great build thread and also welcome to R2R it’s great to have you with us!

And we need lots of pictures on here so keep them coming!
 

btmedic04

Well-Known Member
View Badges
Joined
Oct 7, 2018
Messages
745
Reaction score
925
Location
Cleveland OH
Rating - 0%
0   0   0
Welcome to R2R! Im looking forward to seeing your build progress! Also, you are going to love that diffuser. I have one on my nuvo 20 and the effect is quite pronounced. Heres a picture of it with the diffuser off and with it on. These were taking with a Samsung Galaxy S8+ on automatic settings

20181201_193720.thumb.jpg.c09ddfb161fb7cfe7ca7e859552cdc28.jpg


20181201_193651.thumb.jpg.cbbe3dfe30ee71c29eec8b2d3aa079b9.jpg
 
OP
OP
Quietman

Quietman

2500 Club Member
View Badges
Joined
May 14, 2017
Messages
3,242
Reaction score
10,841
Location
Indiana - born and bred
Rating - 0%
0   0   0
Equipment

Red Sea Reefer 170 - in shipping for a week now but I'm being patient as possible. This was my toughest decision. Every forum said start bigger and I could've and at times was planning to, but in the end it just simply wasn't what I wanted as I was very concerned with biting off more than I wanted to chew for years. I'd rather upgrade than burn out.

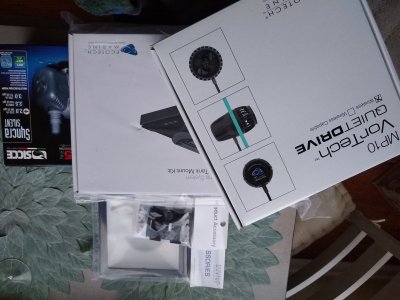
MP10WQD - Another tough call. So many power heads, so little time and so much money. This was purely an unofficial tally of all the forum advice. I was leaning (and still do to be honest) towards Tunze's controllable PHs - but almost everyone preferred Vor Techs for looks (this is in my living room) and ease of control that I just went with it. It arrived and well....it's gorgeous. So far so good...

Tunze 6055 (pair) - Updated 12/28/19 - See the post on 12/27/19 for details. I should've gone with my first instinct and preference over the consensus of the forums. Quite simply I just never used all the flow modes and without those, the lack of directional flow control became limiting in my tank.

Radion XR15W G4 Pro - On back-order. Up until the BRS video on the diffuser I was going with the T5 or T5/LED. I love the shimmer, but my eyes don't handle even a mild "disco ball" well, plus there's definitely and aesthetics component where LED fixtures simply excel IMO. I'm wanting Softie/LPS primarily - love the movement - so didn't think the expense of the XR30 was warranted. Also got reports that the XR15 on the 170 will minimize light bleed.

Sicce Silent 2.0 - Return pump. No brainer! Solid pump. What's to say? Should've bought two now that I'm typing this...like having backups on hand. Next order and I'll correct that oversight.

Tunze 1073.05 - Updated 2/1/2020. Return pump upgrade. Still like the Sicce and am keeping it as a back up. Like the variable flow, plus really wanted a controller outside the cabinet to turn off pump instead of using the power power switch. Reasonable cost, very quiet (although at lower flows, it's no different than Sicce outside the cabinet).

Skimmer - none. Yeah, I know. But I actually like changing water in my freshwater tanks and this is basically a nano tank so not uncommon to skip the skimmer. I'm also thinking I may put macro in the sump. Nothing's locked in yet and this is one of those things I can change easily.

RO/DI - bought months ago. Found a great price on a 6 stage, high capacity system but did supplement with BRS DI mixed resin filter on last order.

IMG_20181202_080348423.jpg


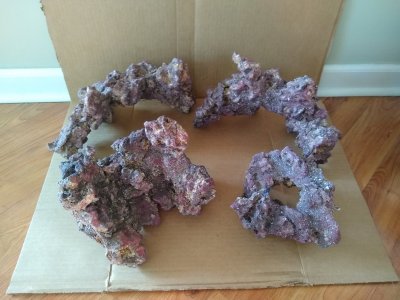
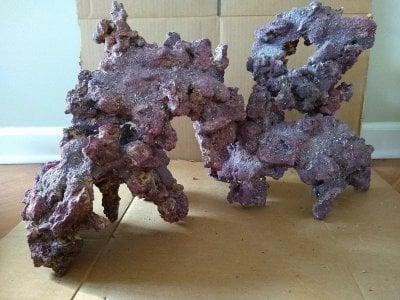
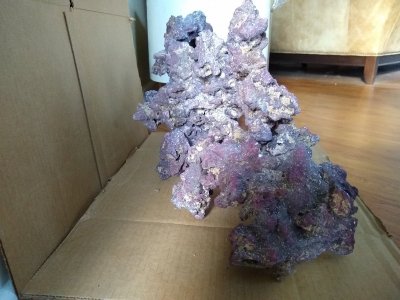
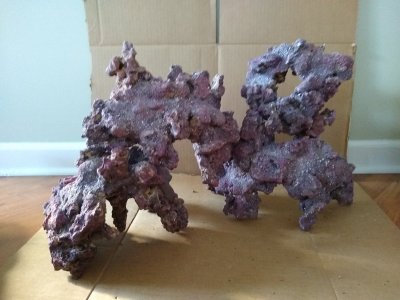
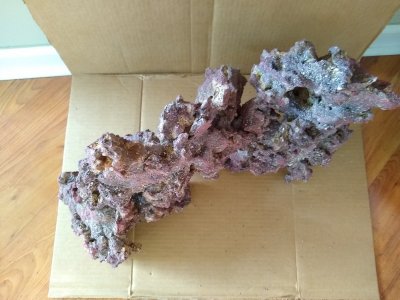
CaribSea LifeRock Shapes - I can't speak to cooking or curing the rock yet (or the lack of it needing to be done according to the package) so this is purely appearance and potential, but what I got in this box was more than I was hoping to receive. I really wanted a fairly open structure for maximizing flow (even relatively low flow for Softie/LPS) to help in keeping detritus suspended and minimize settling. Naturally it should also allow for many locations for mounting corals but in particular I wanted it to be structured in such a way to present a forward facing "slope" to also display the corals instead of simply mounting them. However, I did not want to spend hours (let alone days or weeks) chipping, hammering and gluing rock. I know me, and I'm not that guy. I want to be able to mostly rely on stacking to give me a solid structure that does all I want. Seems easier to change or move (life happens) if it's not a large one piece sculptured piece of art as well. Don't get me wrong...I find a lot of those 'designed' scapes to be absolute masterpieces. Just not something I want to do for myself. I may drill for rods to support (no or minimal gluing) or to elevate...I may not.
I was very much attracted to branch rock as some of those scapes do all of this and can be amazing in a larger tank. Deciding on a nano though led me to try the LifeRock Shapes for what I hoped could be an appropriately scaled aquascape that could accomplish my goals.

So here's what I got in the 20lb box.
CaribSea LifeRock Shapes 20lb Box_011218.jpg

Not one broken piece, not even a chip. Some really incredible pieces and I was able to use all of them to give me what I was looking for in pretty short order. Honestly....15 minutes was all this took. I'm sure I'll be tweaking but I'm very confident I have a great foundation here. It's open, light, sloping with plenty of mounting locations. It's also solid as a...well, rock. Sorry, couldn't resist. But seriously, not a wiggle or wobble with considerable pressure. My only concern is the bottom openness getting covered by couple inches of sand. So may use rods/pipe pieces or something to elevate a tad without losing that stability.

More to come...jonesing for that brown truck.

Dry Scape 1_021218.jpg Dry Scape 3_021218.jpg Dry Scape 2_021218.jpg Dry Scape 4_021208.jpg
IMG_20181202_080239801.jpg
 
Last edited:

Waynerock

2500 Club Member
View Badges
Joined
Jul 4, 2018
Messages
2,619
Reaction score
5,307
Rating - 0%
0   0   0
After many years of dreaming and planning and reef forums and YouTube vids and visits to my LFS, I've finally pulled the trigger on my reef tank. I ordered a Red Sea Reefer 170 from BRS during this past big sale Black Friday weekend. Even got a chance to enter their last live drawing. By the way, did anyone else think that was more fun than they thought it was going to be? BRS may become a routine part of my Thanksgiving weekends. Lots better than overdosing on family (you know what I mean), turkey and football.

Anyway, back to my reef tank plans. Before I decided on the tank and equipment I had to decide what my expectations were from this hobby and what kind of tank and 'reefer' style best suited me. Since I never like to be "owned" by my hobbies and want to enjoy them rather than live for them, I'm going to keep this as easily manageable as possible. That doesn't mean cheap, it doesn't mean simple or necessarily ultra low maintenance, nor does it mean heavily automated. It just means my decisions are based on keeping this fun and enjoyable for me, keeping a healthy system and inhabitants and making sure that any additional work I sign off on involves things I really enjoy doing and will for years.

I've kept freshwater, including technical planted systems so I do have some frame of reference and experience. I would like to thank the community on Reef2Reef specifically for all the information and in particular the experiences, good and bad - you've all had. It's been a big help and I'm sure saved me thousands of dollars and countless hours before I've even started. This is an exceptionally "nice" forum with pleasant, helpful, patient members and is my primary 'go to' for information.

To the specifics to date with some reasoning - hoping it helps others work through these decisions.

Red Sea Reefer 170 - in shipping for a week now but I'm being patient as possible. This was my toughest decision. Every forum said start bigger and I could've and at times was planning to, but in the end it just simply wasn't what I wanted as I was very concerned with biting off more than I wanted to chew for years. I'd rather upgrade than burn out.

MP10WQD - Another tough call. So many power heads, so little time and so much money. This was purely an unofficial tally of all the forum advice. I was leaning (and still do to be honest) towards Tunze's controllable PHs - but almost everyone preferred Vor Techs for looks (this is in my living room) and ease of control that I just went with it. It arrived and well....it's gorgeous. So far so good...

Radion XR15W G4 Pro - On back-order. Up until the BRS video on the diffuser I was going with the T5 or T5/LED. I love the shimmer, but my eyes don't handle even a mild "disco ball" well, plus there's definitely and aesthetics component where LED fixtures simply excel IMO. I'm wanting Softie/LPS primarily - love the movement - so didn't think the expense of the XR30 was warranted. Also got reports that the XR15 on the 170 will minimize light bleed.

Sicce Silent 2.0 - Return pump. No brainer! Solid pump. What's to say? Should've bought two now that I'm typing this...like having backups on hand. Next order and I'll correct that oversight.

Skimmer - none. Yeah, I know. But I actually like changing water in my freshwater tanks and this is basically a nano tank so not uncommon to skip the skimmer. I'm also thinking I may put macro in the sump. Nothing's locked in yet and this is one of those things I can change easily.

RO/DI - bought months ago. Found a great price on a 6 stage, high capacity system but did supplement with BRS DI mixed resin filter on last order.

I know for a guy with my handle, I can be a bit verbose when I start typing. You're not the first to notice that. I'll save the rocks and sand for next post and livestock when I get to that point.

Here's my first partial shipment arrival. More to come.


Congrats on the reefer!! I upgraded from a biocube 32 to the 170 about a month ago and let me say you will not be disappointed. All my corals from my biocube are super happy!
IMG_2511.JPG
 

Waynerock

2500 Club Member
View Badges
Joined
Jul 4, 2018
Messages
2,619
Reaction score
5,307
Rating - 0%
0   0   0
Just got the call on delivery. Tank should be here tomorrow!

Congrats!!! Just check it very well for cracks! Usually if the box is good the tank will be as well. Once the truck driver leaves and then you find a problem it is a PITA to get it fixed. Make them wait for you they might huff and puff but it’s their job and if it’s broke send it on with the truck. You are gonna love it. Prepare yourself the stand is no joke many many screws. It’s built like a tank though
 
OP
OP
Quietman

Quietman

2500 Club Member
View Badges
Joined
May 14, 2017
Messages
3,242
Reaction score
10,841
Location
Indiana - born and bred
Rating - 0%
0   0   0
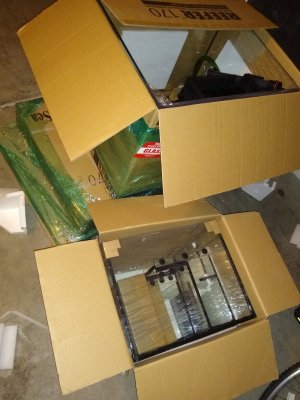
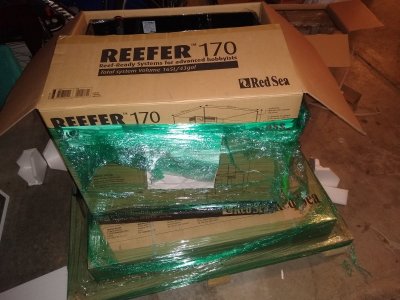
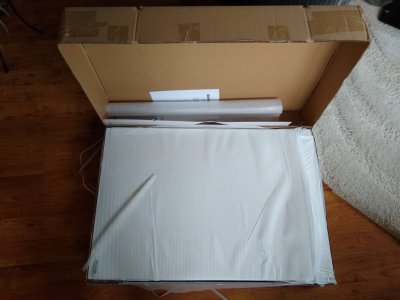
The RSR170 arrived yesterday. Delivery guy put it my garage and patiently waited while I opened and inspected. I think he was curious as I was to see how it was all packed. All seems to have arrived in excellent condition. Haven't checked the stand so I could be tempting fate saying that. But the boxes were all undamaged and as you can see well away from edge of pallet. Hoping to put this together Friday or Saturday.

IMG_20181205_101701062.jpg IMG_20181205_101633375.jpg
 
OP
OP
Quietman

Quietman

2500 Club Member
View Badges
Joined
May 14, 2017
Messages
3,242
Reaction score
10,841
Location
Indiana - born and bred
Rating - 0%
0   0   0
So you know how some things just fit together? Baseball and hot dogs, movies and popcorn, county fairs and cotton candy. Well I have now discovered...Cabinet assembly and Irish Whiskey. To be honest, it started with only a bit o' cheer in my coffee while admiring the box and thinking about how great this was going to look. Plus I need to move my planted tank out of the prime location for the reef tank. And of course, you can't move the tank without completely redesigning the layout and well...two and half hours later finally ready to start on my reef tank cabinet assembly. Got the Dean Martin Christmas music on and got to work.
The Red Sea Reefer cabinet is designed very well and as far as self-assembly furniture using cam fittings, I'm impressed. Silicone seats for the cam dowel is a very nice touch as I didn't feel the need to use any glue to back up the joinery as I usually do. I do recommend taking your time and making sure you have the proper tools (decent screwdriver, small mallet for some persuasion) and appropriate leverage when screwing those dowel pins in. They are not made of the best material and the heads will strip if you're not careful about applying sufficient pressure when turning. I'd also recommend reviewing all the directions and identifying panel and orientation before beginning.
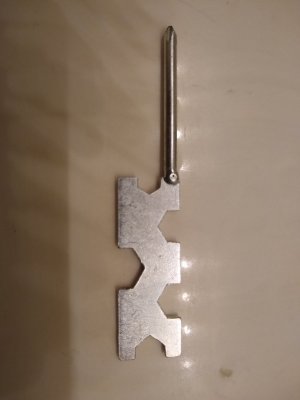
I'd love to tell you how easy this was for me following my own good advice, alas...twas not so. First, I couldn't find my good screwdriver....nor could I find my decent screwdriver...but I did manage to find the little combo tool that came with my treadmill for 'easy' assembly. It worked but it did add a challenge to the endeavor. I did manage to get those dowels screwed in, but a couple are never going to come out with that smooth head I left. It also forced many breaks (31 or 32 dowel pins/cams) as that little tool's handle was just a bit too much on my hands. Another recommendation as I sit here typing...if you're going to use a torture device to screw in those dowels put on the nice work gloves sitting on the shelf in the garage dummy. Lucky for me, I had some pain killer in my cup.
Every cloud has a silver lining...the frequent breaks I was forced to take to get feeling back in my fingers allowed me to review my progress often...and give me a chance to make some necessary corrections (only twice involved disassembly and flipping the panel the right way round). I remember looking at it once and saw half the opening for the piping at the top, and the other half of the opening at the bottom. So word of warning...the design will allow you to put it together all kinds of interesting yet utterly dysfunctional ways. I wish I could tell you the whiskey was the source of all my woes, but I was still on my first coffee.
I did manage to finally finish it and it is everything I'd hoped. To my great fortune, my wife was out running errands this whole time and she returned impressed instead of being sore from laughing. As we all know it's not how you get there, it's how you arrive. So Dino and I are now enjoying another wee bit of the good stuff and basking in the glow of a job well done.

The view starting out.

IMG_20181208_142101168.jpg

The Torquemada Screwdriver

IMG_20181208_174758246.jpg

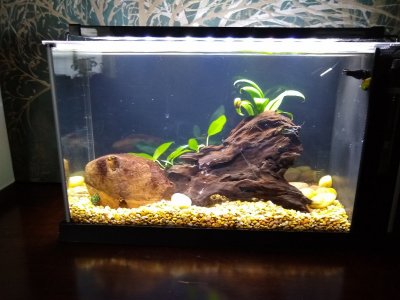
Planted tank moved to new location. Even though only a Fluval Spec V, this was lush and full of variety but required constant trimming and maintenance. Decided to clean it out, remove the hi-tech to focus next several months on reef tank.

IMG_20181208_142116295.jpg

And finally...

IMG_20181208_162041690.jpg IMG_20181208_162108869.jpg IMG_20181208_162215676.jpg

I don't have the sump in there yet, figured best not to push my luck any further than I had. More to come...got another BRS shipment today. Cheers!
 

NY_Caveman

likes words, fish and arbitrary statistics
View Badges
Joined
Sep 8, 2017
Messages
17,008
Reaction score
108,389
Location
New York
Rating - 0%
0   0   0
So you know how some things just fit together? Baseball and hot dogs, movies and popcorn, county fairs and cotton candy. Well I have now discovered...Cabinet assembly and Irish Whiskey. To be honest, it started with only a bit o' cheer in my coffee while admiring the box and thinking about how great this was going to look. Plus I need to move my planted tank out of the prime location for the reef tank. And of course, you can't move the tank without completely redesigning the layout and well...two and half hours later finally ready to start on my reef tank cabinet assembly. Got the Dean Martin Christmas music on and got to work.
The Red Sea Reefer cabinet is designed very well and as far as self-assembly furniture using cam fittings, I'm impressed. Silicone seats for the cam dowel is a very nice touch as I didn't feel the need to use any glue to back up the joinery as I usually do. I do recommend taking your time and making sure you have the proper tools (decent screwdriver, small mallet for some persuasion) and appropriate leverage when screwing those dowel pins in. They are not made of the best material and the heads will strip if you're not careful about applying sufficient pressure when turning. I'd also recommend reviewing all the directions and identifying panel and orientation before beginning.
I'd love to tell you how easy this was for me following my own good advice, alas...twas not so. First, I couldn't find my good screwdriver....nor could I find my decent screwdriver...but I did manage to find the little combo tool that came with my treadmill for 'easy' assembly. It worked but it did add a challenge to the endeavor. I did manage to get those dowels screwed in, but a couple are never going to come out with that smooth head I left. It also forced many breaks (31 or 32 dowel pins/cams) as that little tool's handle was just a bit too much on my hands. Another recommendation as I sit here typing...if you're going to use a torture device to screw in those dowels put on the nice work gloves sitting on the shelf in the garage dummy. Lucky for me, I had some pain killer in my cup.
Every cloud has a silver lining...the frequent breaks I was forced to take to get feeling back in my fingers allowed me to review my progress often...and give me a chance to make some necessary corrections (only twice involved disassembly and flipping the panel the right way round). I remember looking at it once and saw half the opening for the piping at the top, and the other half of the opening at the bottom. So word of warning...the design will allow you to put it together all kinds of interesting yet utterly dysfunctional ways. I wish I could tell you the whiskey was the source of all my woes, but I was still on my first coffee.
I did manage to finally finish it and it is everything I'd hoped. To my great fortune, my wife was out running errands this whole time and she returned impressed instead of being sore from laughing. As we all know it's not how you get there, it's how you arrive. So Dino and I are now enjoying another wee bit of the good stuff and basking in the glow of a job well done.

The view starting out.

IMG_20181208_142101168.jpg

The Torquemada Screwdriver

IMG_20181208_174758246.jpg

Planted tank moved to new location. Even though only a Fluval Spec V, this was lush and full of variety but required constant trimming and maintenance. Decided to clean it out, remove the hi-tech to focus next several months on reef tank.

IMG_20181208_142116295.jpg

And finally...

IMG_20181208_162041690.jpg IMG_20181208_162108869.jpg IMG_20181208_162215676.jpg

I don't have the sump in there yet, figured best not to push my luck any further than I had. More to come...got another BRS shipment today. Cheers!

Excellent update! “Torquemada Screwdriver” is perfect.


Waynerock

2500 Club Member
View Badges
Joined
Jul 4, 2018
Messages
2,619
Reaction score
5,307
Rating - 0%
0   0   0
Ouch makin my hands hurt looking at the screwdriver you used. I could not find a good one either and used the one that came with my nest thermo and that hurt. You have hands of steel!
 
OP
OP
Quietman

Quietman

2500 Club Member
View Badges
Joined
May 14, 2017
Messages
3,242
Reaction score
10,841
Location
Indiana - born and bred
Rating - 0%
0   0   0
Happy New Year! Still here....the holidays took up quite a bit of time and I had to wait on some equipment and buy some tools to progress on the tank as I want. The two big items for me now are modifying the Reefer 170 stand a bit and deciding on nutrient removal plan.

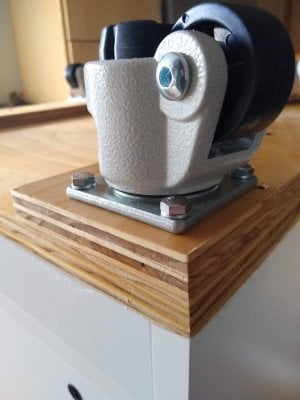
So my intentions (and purchases) on the stand are to put it on floor leveling casters. So for experienced aquarists, this is a red flag. "You can't put aquariums on wheels!" is a common refrain on all aquarium forums for very good reasons. For the non-experienced reading this...be warned that moving water tanks creates stresses the aquarium is not in anyway designed to support. Forces created by mass at rest does not equal the forces created mass in motion and you can easily cause catastrophic (in the engineering sense as well as the home insurance sense) failures. Do a search on water tanks designed for transport and you'll find there are no glass tanks, they're heavy duty plastic usually with ribs and banding. So why am I proceeding...well, one we like to remodel and floors are next spring/summer with some number of other unknown projects that will require me to move the tank every couple years. And two, I really don't like the idea of having a water tank that I'm likely to have spills from (hopefully the small contained kind) when I can't get under the stand to dry/clean especially with the aforementioned new flooring.

That decided we get into risk mitigation. If you define safety as the absolute minimum risk of danger, then you cannot safely move an aquarium with any amount of water in it. It's a personal decision on how much risk you can take versus what you need to accomplish. If you are lower risk tolerant then moving an aquarium would mean partial or full tear downs and draining and then moving the empty tank and stand (which I have less than happily done before)...and I would applaud that decision as it is without a doubt the safest way to proceed. That said, I think that because this is a nano tank (albeit borderline), the existence of modern leveling casters where the stand is normally supported by adjustable feet and not wheels, and some common sense and experience I can mitigate the risk of damage to acceptable levels and more importantly minimizing risk that my significant other (who would actually find the bright side in any catastrophic disaster as an opportunity to remodel) would be jovially unrelenting in pointing out to everyone that I'm too clever for my own good by half - true of course, but who wants to hear that all the time at family gatherings? Other than moving the benefits I hope to gain are easy access under the stand, being able to level easily without shims, some added height and perhaps some extra storage underneath (thinking EcoTech backup power units).

WoodRiver Leveling Caster.jpg


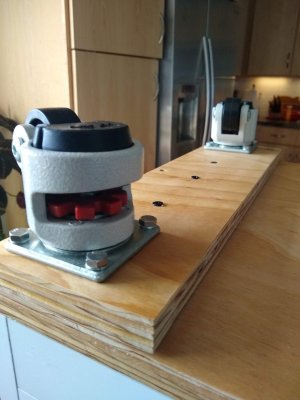
I've gotten these in and they are beefy. (Amazon - $75 for set of four) Rated for 600# per caster - 2400# for 4 (it's really not completely additive as it depends on support design but with this much overkill...that's not a concern). I wanted at a minimum a 100% safety factor, meaning the load of 4 casters should be double the expected weight of the system. I estimated total weight (including water, rock, sand) at approx. 550# so I slightly exceeded my requirements by 300% since one of these can support the total load. However, the next size down was either in the 200# per caster range which while probably sufficient was a little to close to the margins for me or was of a design I didn't think optimal.

Just so no one thinks I'm totally bonkers, I have no plans to move a tank full of water. What I would like to be able to do is drain anywhere up from 75% to 90% of the water into a holding tank (Brute baby!) relocate the aquarium elsewhere in my house and quickly replace the water with as little muss and fuss as possible. This is still significant weight - 200-250#, but it'll be much less water mass sloshing in the tank stressing out the seams.

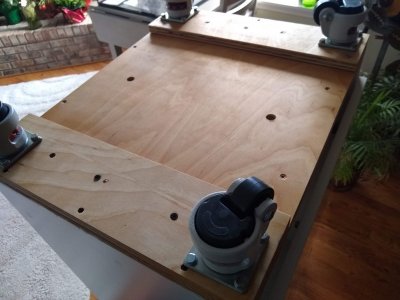
I'm currently putting together the support stand for the casters that the 170 stand will be attached out of 3/4" high grade plywood (the more layers the better). I will have removable skirts for access and ease of maintenance and cleanup. The existing stand will be solidly connected to the caster support. When moving heavy tall items, any weak point could cause trouble so creating this to function as one connected unit is critical. Debating whether to attach eye bolts to ease future moves, I'll probably do a dry run and decide later. My only remaining concern is balance. No, not my mental state of being, but the center of gravity kind (although I am, all things considered, happy and well-adjusted, thanks for asking!). The higher a heavy load is from the ground, the wider the support needs to be to ensure stability. The casters will rest under the stand within the 23.5"x19" stand dimensions. If after I complete this and feel this is in anyway excessively top heavy and unstable, I'll remove the casters. Plenty of uses for them around the house, perhaps a car dolly or a seriously over-engineered plant stand.

I'll have pictures soon I have this built - probably finished by next weekend. Even if it's a failure - learning from my mistakes is better then learning from your own. Would rather you learn from my success though when all is said and done however.

Was going to talk nutrient removal now, but I've already imposed on your patience enough. Next time...

 
Last edited:
OP
OP
Quietman

Quietman

2500 Club Member
View Badges
Joined
May 14, 2017
Messages
3,242
Reaction score
10,841
Location
Indiana - born and bred
Rating - 0%
0   0   0
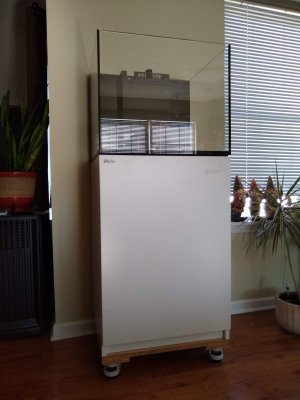
The stand is on casters now!

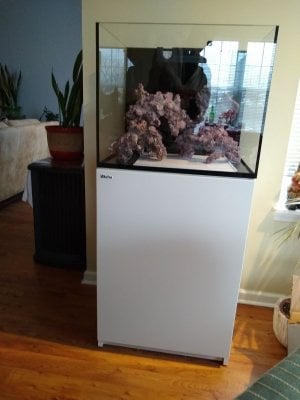
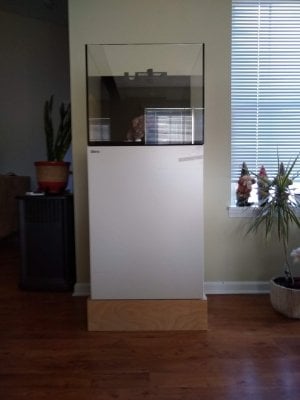
I couldn't be more pleased! The extra 5 inches takes the stand height up to 39". I have never liked bending over to see a tank particularly when the tank is located in a place where that's going to be happening quite a bit. It's not so tall that I can't sit in front or look down on top and enjoy as well. Yes, I can reach inside the tank and touch the back bottom inside corner without any trouble at all but I am rather tall so this might not be everyone's ideal. I'm already happy with the sump area being that much higher as well. If you don't think working on something 8" off the floor is that much better than something 3" off the floor...just wait enough years and you will.

I also like what the added height has done to the appearance. Red Sea does have a beautiful product but it is designed for mass appeal, price and other common denominators focused on selling to largest population and not my particular desires. I do think however, that the added inches adds an elegance to the tank and stand it lacked before and removes any slight 'squatness' or 'top-heaviness'. Once I add the skirts (this weekend hopefully if the garage warms up a tad more) I think it's going to be quite the looker.

As far as the casters themselves...smooth and easy to operate the level mechanism. I do not expect any issues at when fully loaded. It is wonderful being able to move this cabinet and tank around to find the optimum location. Leveling is an absolute breeze. Now just to fill it and see if my design work translates well to the real world.

Before and After:

IMG_20181208_162215676.jpg IMG_20190209_113402363.jpg


So now a few notes on the build/design.

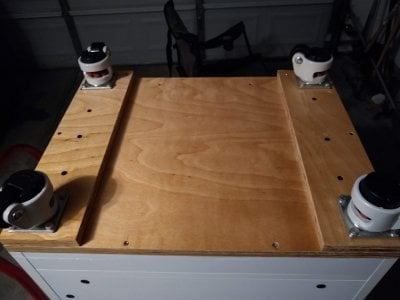
I've attached the materials and cut list for anyone wishing those details. Also included cost for materials but did not include tools in that. I used a cordless circular saw and drill (got a great deal on a Kobalt set from Lowe's for $130.00) but I did buy a quality finishing blade and a rip guide. I'm not a woodworking expert by any means but any search online will give you vast amounts of how to use tools to their best advantage.

IMG_20190209_113341766.jpg

Hint: find something to put the stand on upside down. I used a cheap dolly we have as it can move where i needed it.

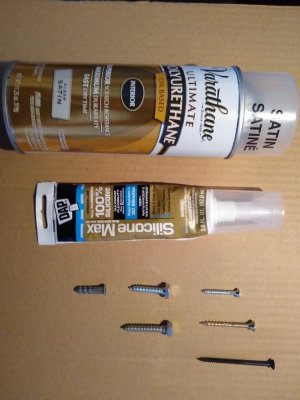
So the first thing I did after measuring and cutting the main base plate was to figure out how to drill the holes to attach the stand to the plate. I knew I was going to use screw anchors in the stand MDF (it may not technically be MDF, but it is an engineered wood product so I'm using MDF for convenience) as wood screws will not hold in MDF well. Also went fairly low gauge #8 on the screws because adding in width of anchors I was concerned with splitting the MDF.

By the way - I had zero splitting in any of this work. The key? Pre-drill, pre-drill, pre-drill and go from small tiny bits up to final size in steps. Also, make sure in MDF you drill the hole a bit longer than needed for the screw (I used tape on the drill bit as a guide).

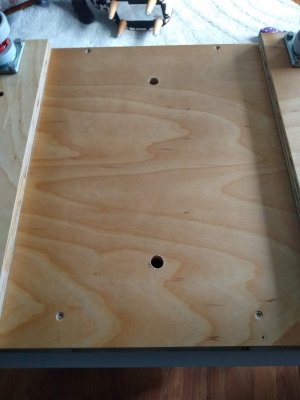
As far as lining up the holes....well luckily, Red Sea put in pre-drilled nail holes for the plastic feet: 3 on each side, 2 front and back. Take the cut base plate, line it up and use a square to mark up wood. Then just measure and transfer the outside to hole distance to the top of the plate. So what I did was mark all my drill points in the plate before doing any drilling. Then I placed it on top of the stand (on top of the bottom if you will). After lining up the position and taping it in place, I drilled my pilot holes through both the plate and into the nail hole in the MDF. Check it after each drill to make sure you're still all lined up, but this worked very well. Then remove the plate and drill the size hole you need for the screw anchor in the MDF (in steps again).

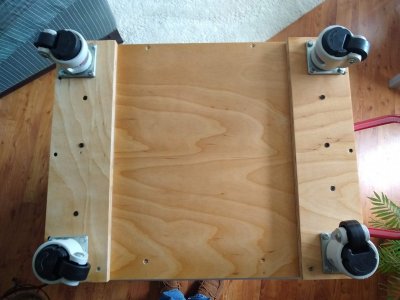
For the caster plates - I decided I wanted an additional board just to support casters and spread the load more evenly - I took my base plate and drilled pilot holes again (turn the base plate over) into the caster plates.

I then temporarily attached the caster plates to the base plates with a few screws (only part way in) so I could drill the lag screw holes through both plates. Be careful here, it's going to be close to the edge so you definitely want to drill smaller holes slowly and work up to size gradually.

Now with all holes pre-drilled comes the assembly and painting. I chose not to use glue, going to trust gravity and steel. I used the #8 1 1/4" wood screws and attached the caster plates to the base plate. No pre-drilling this time, just stayed away from edge and away from any other pre-drilled holes and screwed them in.

Did a quick putty (few tiny gaps in the plywood) and sanding job with 60 grit to knock off any rough edges. This is under the stand so I don't need to go 'cabinet grade on the finish'. Used a spray polyurethane and the remnants of my RSR170 box as curtain to apply several coats. I essentially just used most of the can which gave me about 8 light coats everywhere. Dried completely in a few days even in the cold garage.

To attach the caster assembly to the stand, basically line it up and screw in the holes (the beauty of pre-drilling everything is that this goes really quick and easy). I did put a nice bead of silicone around the stand bottom before setting the caster assembly on it. I did this for the obvious reason that if water runs down the stand I didn't want it weeping into the joint between stand and plate. Don't need to spread it out, just run a good pencil thickness bead and it'll squeeze out when you screw it together. Grab a putty knife and scrape of the excess when done. I took the opportunity to also run a bead in the stand joints that'll be hidden now to prevent any water from sump area from getting in that space. I'll also do the same from the top in the sump area itself.

Just remember with my design (see pictures), you have to use the #8 1 3/4" wood screws on the back and front as there's only one layer of 3/4 plywood. The sides use the #8 2 1/2".

Finally (other than flipping it back over) is attaching the casters with the lag screws. I used one short lag screw on each caster because in each case there was one of the screws attaching to stand very close to where the lag screw was going. You can see this is in the pics below. Erred on the side of caution and used the shorter lag screw to prevent any splitting. Used the longer lag screws everywhere else.

One last thing...after putting it all together, I realized I forgot drain holes in the bottom just in case the worst happens and I have some water leak from the sump or moisture build up. So flipped it back over and quickly drilled two drain holes. You can see the before and after in the pics, too.

IMG_20190208_150123492.jpg
IMG_20190208_150427943.jpg IMG_20190208_150440817.jpg IMG_20190208_150450727.jpg IMG_20190208_150835728.jpg IMG_20190208_150841975.jpg

And that's how I did that.

Other hints and things I'd do different:

1) I probably would've used primer and white paint instead of clear poly. Once I had the stand in place I was thinking, "you know...that looks pretty decent 'as is' if I had just painted it and used the black casters (you can find same brand in black)". Who knew? So give yourself an option and buy black casters or paint them to some desired color and then match the wood finish. You might like it enough to leave alone...or at least it'll look nice enough so your significant other doesn't complain about the skirts taking so long.

2) Wrap your stand in some protective paper. I didn't damage it but I do have some cleaning up to do I could've avoided. Car bumper rubber strips leave a rather unattractive black mark on the white stand.

3) If you own a smaller vehicle have your home store cut the plywood sheet in 3 equal pieces, works out perfect and you'll have enough left over for the water filter stand and perhaps the ATO water container - I'll let you know.

4) I had initially planned to counter sink the screw anchors in the stand MDF as I didn't want a gap there so water wouldn't weep in if it spilled down the sides of the tank and stand (which it surely will and likely pretty often). However, I realized that this 1-2mm gap created by the lip of the plastic anchors would be perfect to allow a bead of silicone which would be much more effective at preventing water seep. Silicone will expand/contract with temp and moisture much better. That idea turned out perfectly. There is just a 1mm or less gap with silicone all around the caster plaster plate and the stand joint. You can see it in some of the pics - before I cleaned up the edge a bit. Recommend not counter sinking the screw anchor lip.

5) If you have one in your area, go to your local hardware store. You know, the kind you used to go to with your dad that had all the bins of screws and bolts and such. If you don't know what I'm talking about...that's kind of sad, but watch Gran Torino and you'll see why these places are awesome. You'll pay cents for exactly the parts you need, get all kinds of help and advice, help the local economy and enjoy a sample of the homemade pepper relish from the store owner's wife (I kid you not, and it was delicious). There's just something that feels right about the world when you walk out of a place like that. Especially the second (or third) time in the same day when you forgot something and they greet you by name...and yes, the relish was just a good the second (and third) time.

Now for the plumbing and water. Might not post much on that as it's straightforward and a lot of posts and videos are already out there for that. I don't plan on anything other than standard as supplied build for now. We'll see though....until next time.


Attachments

  • Material List.pdf
    178.3 KB · Views: 344
Last edited:
OP
OP
Quietman

Quietman

2500 Club Member
View Badges
Joined
May 14, 2017
Messages
3,242
Reaction score
10,841
Location
Indiana - born and bred
Rating - 0%
0   0   0
Been awhile since I've done anything to the tank. Life got in the way as it will....

Last weekend I setup and ran the KoolerMax 100GPD RO/DI unit I got from from Amazon. Future parts/cartridges will have to come from KoolerMax though. I checked the site availability and shipping before buying - only downside there, and it's a minor one to me, is it's not free shipping unless you order a min. amount. Since I like to have backups and shelf life is high, it's not a problem for me. The future DI resin I'll likely get from BRS. Used my first batch to change out water in my freshwater tank. My local water supply runs about 550 TDS and 8.4+ pH and the plants just were never healthy looking. It's only been a week but things seem better (first change dropped TDS to 170 in tank). But with that high of TDS/pH locally, I was worried whether the TDS/pH would be 0 and neutral range after 6 stages. It handled it just fine, but I'm assuming I'm going to have short life span on media and cartridges so I ordered the flush valve flow restrictor and a 3-way valve to flush to prevent TDS creep. They arrived Friday and I'll install before next run.

Yesterday I got the tank wet for a leak test and operational check. No pictures this time, it looks just like the above but with a water line now. Plus video evidence could have been matrimonially damaging...

I strongly recommend installing hose clamps BEFORE you start on operational check. I thought..."yeah, it's not clamped but I have them ordered and no way that that hose is popping off just in a few hours of running". The zero head loss flow rate of a Sicce Silent 2.0 is 568 GPH....and just so you good folks do not have to test this yourself, yes the water will hit the top of the stand and spray out to the wall behind. I even had to take an extra second before hitting the switch to admire the deluge. It was that impressive! Restarted after I heated up the hose with hot water and pushed that sucker on as far as I could. It was fine for hours and probably days and maybe forever, but this guy won't be running it anymore until the order with the clamps arrive. Wife was out at the time and I probably wouldn't get that lucky again. There's a big difference in responding to her sweetly intoned but somewhat veiled, "Honey, why are there so many wet towels in the laundry room?" with a 'Oh, I had a little leak, nothing to worry about"...than dealing with her reaction to water being sprayed on the wall, the floor and the leather sectional 4 feet away!..like I said, impressive!

I did have a few other minor issues, the pipes (particularly the back up overflow) weren't screwed in tight enough to prevent some minor leaking. Which brings up my first self-congratulatory comment (salvaging some of my bruised ego from the above) - the casters were a great idea! The tank had a little leak with 2-3" of water. It was nothing to swing out the tank, tighten the fittings, wipe up the water and roll the tank back in place. These high end casters (see above) are a dream, smooth rolling and they change directions without getting hung up as some do. I won't say that I moved it 90% full when a leak popped back up after I pushed the ATO reservoir back against the drain line, because I said I wouldn't do that and it's really stressful on the seams and I'm supposed to drain it to less than half or more before moving but....worked like a charm! These rollers are so smooth that the water barely moved and I was able to push ever so gently and keep that motion going (slow and steady doesn't move water). I still have the rollers engaged (do not have the feet down), just because I wanted to react quickly if leak test failed overnight, and it's just as level and solid as you could want. Remember, this is only 40 gallon system, and I'm still not sure I'd do the same for a 120, but I would have to consider it now. But I would absolutely recommend beefing up the stand a bit and going high end on the caster design and I'm very happy I went 4x greater than expected load.

It seems I have a minor rattle in the Sicce (it happens and I'm not holding Sicce to any unrealistic standards here). The pump puts out exactly what I need for flow without outlet valve but it does have that little rattle over the normal expected and minimal hum. Seems to be the end cap that holds the bushing assembly in place. I'm sure a week or two run in saltwater will quiet it down as wear breaks in and deposits build up, but now I'm thinking I may go with the Vectra S2 (since they've just come out and seems to be a better pump) and use the Sicce as my backup/emergency. Plus, I really do the like control EcoTech offers and having all my major elements with the same manufacturer seems solid idea too (interconnect feature - ReefLink and controllers and backup power). Remember I also have MP10 and Radion. I'll decide in next couple days and let you all know. Who knew a reef tank would lead to expensive upgrades before it even sees saltwater, no one ever commented about that anywhere, right? Last sentence was in case my wife reads this.

Was also able to easily adjust the drain valve for silent operation at different flows which I've read can be an issue - just have to be a little patient. I found sipping a Corona with lime allowed sufficient time for everything to stabilize before readjusting. Got it dialed in quick enough that I didn't get to finish my beverage before I was satisfied. (I did finish it of course, I didn't want that lime giving its all for nothing and really don't was to get sideways with the lime police - I like my Daiquiris, Mojitos and Corona in the summer to jeopardize that relationship).

I think that's it for the leak test part anyway - I do have a minor issue with the ATO being blocked up. I am really trying to use the darn thing even though it's undersized and not really fined tuned as far as level. I'll work on that more later on, I'm sure it's something I haven't done correctly in attaching the hoses.

I want to run some tests with the freshwater in the tank over the next week or two...heater capacity will be the main one, but evaporation rate (even though slightly different with saltwater) will be one as well. I want to see if my dual heater selection will allow one to fail on and not exceed 83 F, and the house temperature impact on that. Spring is great time as we see swings low to high that'll allow me solid testing with cycling my heating and AC too much. More on that later...goal here is no heater controller - I know, sacrilege - but I think it's an achievable goal without too much risk. I'll still have a protective power feature on high temp, but I want the inherent design of heating system to not require a controller for stability. Let me know if you have any thoughts on that..I do appreciate the feedback.

Until next time...

 
Last edited:
OP
OP
Quietman

Quietman

2500 Club Member
View Badges
Joined
May 14, 2017
Messages
3,242
Reaction score
10,841
Location
Indiana - born and bred
Rating - 0%
0   0   0
Heaters and Temperature Operational Testing

Note: 9/29/19: My method of temp control has been updated on subsequent posts with temperature controllers, day/night temp control and diagrams.

The last couple weeks has seen me running heaters at different house ambient temperatures to see what is optimum on the RSR170. Heaters are all Eheim Jagers.

The Goal and Limits:
The goal is to find the right heater size at various ambient temperatures that will provide sufficient heating for the livestock health (although likely not maximum growth rate) and prevent any single heater on/off failure from cooking (>83F) the tank or letting it get too cold. Limits on reef tank I'll want to avoid 72F low - 83F high. Normal range I'm expecting to maintain 74F low to 80F daily/seasonal - actual range will likely be tighter over the short term (months). I do plan on maintaining different day time and night time temperatures to increase livestock acclimation to temperature changes as a safety measure and for overall health (yes, I know this is very debatable and I'll be happy to discuss on other parts of the R2R forum). Since it is Spring in the Midwest now I am able to easily establish maximum and minimum house ambient temperatures that I've seen over the last 6 years. Normal is 68F at night (66F lowest), 74F max daytime (76 highest).

I'm not testing a loss of home power or heating/cooling - we'll call that "disaster planning" to be discussed later on.

Used normal equipment running during my testing below - lights during day (Radion XR15W G4 - about 50%), return pump (Sicce 2.0), flow pump (Tunze 6015), skimmer (Tunze 9410 DC - low setting - DC pump though so really no heat input)).


Results found at different ambient temperatures.

House Amb. Temp of 66F (lowest temp) - 75W heater maintained >72F.

House Amb. Temp of 68F (normal night time)


75W
Max tank temp. heater reached - 77F
Impossible to overheat on failure
100W
Max tank temp. 79F
Impossible to overheat due to "ON" failure

House Amb. Temp of 74F (normal day time)
75W
Max tank temp. reached - 80F - reached several hours from start of 77F
Impossible to overheat due to "ON" failure
100W
Max tank temp. reached - 82F - reached several hours from start of 77F
Impossible to overheat due to "ON" failure

House Amb. Temp of 76F (highest day time)
75W
Max tank temp. reached - 81F - reached several hours from start of 77F
Impossible to overheat due to "ON" failure
100W
Max tank temp. reached - 83F - reached a few hours from start of 77F (likely would have been higher but my wife made me turn the AC back on - so let's call this one 85F max based on what I'd expect after several hours).

Summary:
The system would likely be fine with either a 75W, a 100W or even a 125W Eheim Jager but the higher wattage does run risk if failures occur on the hottest days. I didn't test other heaters and will not make any guesses on their performance since heat transfer characteristics are likely different.

The only "ON" failure risk would be 100W or greater at the maximum house temperature. The ambient temp does reach 76F on the hottest days maybe a dozen times a year for a couple hours a day. I think that risk is acceptable. So with minimal danger of any one heater failure (I will have a backup heater for cold protection) causing the system to be in either hot or cold danger zones my decision can be based more on how I would like to see the system respond to normal temps throughout the year.

75 Watt
Great for night time normal operations and sufficient for lowest temps. Also feel this will be best option on an installed backup heater for the coldest nights (or failure of normal night time heater)

100 Watt
Not needed for night time temperatures and strictly not needed for day time if in summer or warm spring/fall days. However, the tank did take several hours to reach the desired temperature and that would be even longer in cooler weather. Going to with the 100W for day time to speed up time to reach desired temp and to give a bit more heating oomph on the colder days.

Final Setup:

1 75W for night time control temp of approx 75-77F
1 100W for day time control temp of approx 78-80F
1 75W for back up control temp of approx 73-74F

The daytime heater will be on timer (still going with no controller for now) and I'll have an emergency shut off protection with the AutoAqua Smart Temp Security (shut-off 84F, haven't bought or tested this yet) on the 100W heater only.

I'm mounting these horizontally in the front of the sump with the indicator lights facing outward to easily view operation status.

Other Notes:
I did test using a 25W heater with the 75W to run at same time to allow even greater protection against one failure cooking the tank.


1) This was extremely touchy to set up so they both would come on and I was only marginally successful.
2) Put one heater in display which I liked in case of return pump failure and as temp indicator in display (was even thinking to go with more attractive neotherm). No impact to performance was noted though.
So at the end of the day, it did not seem worth the time to setup and maintain nor the expense to use 2 heaters when one could do the job without incurring additional risk. I will still likely put a backup heater in the display if away from tank for days/weeks on vacation.


Please let me know if I've overlooked some key factors or situations.
 
Last edited:
OP
OP
Quietman

Quietman

2500 Club Member
View Badges
Joined
May 14, 2017
Messages
3,242
Reaction score
10,841
Location
Indiana - born and bred
Rating - 0%
0   0   0
Aquascaping

Finished up my aquascape yesterday. I use the term "aquascape" loosely as my only intention was to put some PVC stands under the CaribSea LifeRock shapes (see earlier posts on this product). I've had the rocks in and out of the aquarium a few times now and I've never changed the basic design above other than to remove the right side arch to reduce overall height allowing for more flow and more vertical coral growth.

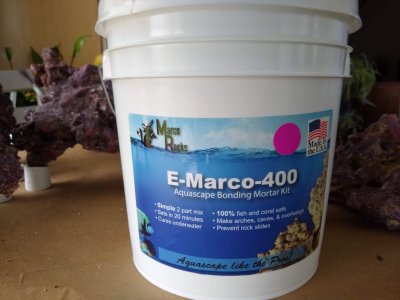
I used the E-Marco-400 Pink Mortar to attach my PVC footings to my three main pieces that will be in contact with the tank bottom. I was wary of having sharp points of the rock directly against the glass as well as wanting increased stability and to raise the rock I paid money for out of the sand as much as possible and still maintain the aesthetics I desired. With a pair of PVC cutters and the E-Marco mortar kit I was done in about 2 hours including an 30 minutes cure time in-between the first application to fill the PVC (didn't want any stagnant water gaps) and attach it to the rock and the second application to make it pretty and strong.

I was originally going to attach the assembly to the bottom of the tank using aquarium grade silicone sealant but after getting it all put together I found the PVC filled with mortar on the bottom of the tank was more than sufficient to spread out the stress from the weight very evenly. Plus I wanted to be able to move pieces around if needed.

Lastly I didn't attach the top piece (there are three pieces to my main structure - two bottom, one top) with mortar. It locked in very solidly to the bottom two pieces and again, if i wanted or needed to remove or breakdown the tank for maintenance or upgrading, it's much easier not to have it all in one piece. I'm told the mortar, once it cures, is stronger than rock - haven't done testing but everything is in water now and fully set it seems very rocklike and was invisible to my wife until I pointed it out.

Overall - great product for this use. Highly recommended.

IMG_20190608_152848210.jpg

I don't really have any tips to pass on other than you may want to review the existing YouTube videos and a little of the liquid really does go a long way. I didn't do any pre-wetting of the rock with the liquid (advice on the instructions) and everything seems fine, but I didn't use this for any structurally creative shapes in which case, I likely would have.


First was cutting the PVC to various size and angles and checking stability. If that sounds like I measured and calculated each cut you're reading way too much into that statement. I just whacked off 9 pieces estimating how long I would need them and it all worked out fine with some switching around and twice had to trim a bit. I wanted the structure inherently stable before I added the mortar to increase strength and decrease reliance on bonding of the PVC to mortar. Due to this I removed one of the PVC footings from the left piece, front right leg as it wasn't needed and added no stability. Should make it somewhat easier to clean under this piece.

IMG_20190608_152629877.jpg
IMG_20190608_152611611.jpg
IMG_20190608_152624680.jpg


Then came mortaring the PVC footings onto the rock. This wasn't meant to be pretty just effectively attaching as I knew I would use another application to tidy up the look and fill any gaps and add strength. First thing I filled up the PVC with mortar plus a rounded top to allow the rock to settle into the pipe and force out mortar. Worked like a charm although a tad messy (put paper on your dining room table). Then I added a bit more to fill the obvious gaps. Never intended for mortar to cover the entire pipe, just the top half although I doubt there's any difference, just what I had in my mind to do. I am intending to have a 2" sand bed so no issues with pipe showing on bottom.

I then let those setup for about 20-30 min with the rocks on the footings resting on the table just like they would be in the tank. This worked like a charm and all the feet came out very level with no wobble at all. Once set, I was able to flip them over for more detailed work and clean up. Filling in gaps, smoothing out the PVC to mortar to rock joints and taking off the excess mortar from the bottom of the PVC.


IMG_20190608_171350754.jpg
IMG_20190608_171400503.jpg


And finally the entire setup after the second and last application has set up.

IMG_20190608_172345706.jpg


I did get the tank wet with the rock and sand so I could start cycling today. I'll post that next time.


Until then...
 
Last edited:
OP
OP
Quietman

Quietman

2500 Club Member
View Badges
Joined
May 14, 2017
Messages
3,242
Reaction score
10,841
Location
Indiana - born and bred
Rating - 0%
0   0   0
Quick update: Got the water in the tank with the hard scape. Wanted to post a few pics and my first video of the tank. Used 30 lbs CaribSea Special Grade Arag-Alive! Reef Sand and the tank was still a bit cloudy this morning even after adding the clarifier last night. As I type this though at 2 pm, the tank is almost crystal clear. I have started cycling but I want to go into detail on that so will save for next post. I'll have the time.

IMG_20190609_111433647.jpg
IMG_20190609_111428757.jpg
 

Aquatic acrobat in your aquarium: Have you ever kept an eel?

  • I currently keep an eel in my tank.

    Votes: 26 14.3%
  • I have kept an eel in my tank in the past.

    Votes: 31 17.0%
  • I have not kept an eel in my tank, but I hope to in the future.

    Votes: 28 15.4%
  • I have no plans to keep an eel.

    Votes: 94 51.6%
  • Other.

    Votes: 3 1.6%
Back
Top