Navigation
Install the app
How to install the app on iOS
Follow along with the video below to see how to install our site as a web app on your home screen.
Note: This feature may not be available in some browsers.
More options
You are using an out of date browser. It may not display this or other websites correctly.
You should upgrade or use an alternative browser.
You should upgrade or use an alternative browser.
RamsReef Almost 400g plywood build
- Large Build
- Thread starter RamsReef
- Start date
- Tagged users None
- Joined
- Aug 18, 2016
- Messages
- 1,754
- Reaction score
- 1,493
Hello All,
My stream is located at twitch.tv/ramsreef for those interested.
Welcome to my almost 400 build, feedback welcome.
Big thank you to reef2reef for providing me years of knowledge.
Shoutout to @AlexG for inspiration and advise.
The tank will be 7' x 36" deep x 30" tall, I thought about going to 31" to get that sweet 400 gallon mark, we shall see.
I'll start out by posting my sketchup plans and I welcome any critique. The tank will be a plywood / pond armor tank. I will be using 3/4 plywood with 2x on flats for support. My front beam will be 5" to ensure no stress on my glass seal as I imagine I will have to lay on top of the tank to aquascape anything.
Here is my near final design:

Here are some iterations I went through.

Stand Design:

Overall Concept:

Sump Ideas:
Standard plywood sump with maybe two extra tanks on the side. One for heat loop (Pex heat from water tank), one for water change buffer (When doing water change, isolate that tank, empty, fill, re add to system). I work out of town so I would really like some sort of auto change.

We shall see.
My stream is located at twitch.tv/ramsreef for those interested.
Welcome to my almost 400 build, feedback welcome.
Big thank you to reef2reef for providing me years of knowledge.
Shoutout to @AlexG for inspiration and advise.
The tank will be 7' x 36" deep x 30" tall, I thought about going to 31" to get that sweet 400 gallon mark, we shall see.
I'll start out by posting my sketchup plans and I welcome any critique. The tank will be a plywood / pond armor tank. I will be using 3/4 plywood with 2x on flats for support. My front beam will be 5" to ensure no stress on my glass seal as I imagine I will have to lay on top of the tank to aquascape anything.
Here is my near final design:
Here are some iterations I went through.
Stand Design:
Overall Concept:
Sump Ideas:
Standard plywood sump with maybe two extra tanks on the side. One for heat loop (Pex heat from water tank), one for water change buffer (When doing water change, isolate that tank, empty, fill, re add to system). I work out of town so I would really like some sort of auto change.
We shall see.
Last edited:
- Joined
- Aug 18, 2016
- Messages
- 1,754
- Reaction score
- 1,493
Apparently the wife likes when I sand? Painting behind the tank with some Kilz primer to help with any stray moisture.

Boss inspecting my progress.

Admiring my work.

Makes a good fort. Son is below haha.

Tape on the left is to repair an edge. Got lazy didnt clamp the top during edge routing, top moved, router said I'll gladly eat that.

Boss inspecting my progress.
Admiring my work.
Makes a good fort. Son is below haha.
Tape on the left is to repair an edge. Got lazy didnt clamp the top during edge routing, top moved, router said I'll gladly eat that.
Last edited:
- Joined
- Aug 18, 2016
- Messages
- 1,754
- Reaction score
- 1,493
Some more pictures. Aluminum is for counter insert. 3/4 1/8 tube into 1 inch.
I hand cut these mortises, not bad, should have used the router and saved my sanity though.

Idea is to slide 3/4 square into the 1 inch. Got the idea from melevsreef video one time.

Showing some leg detail here.
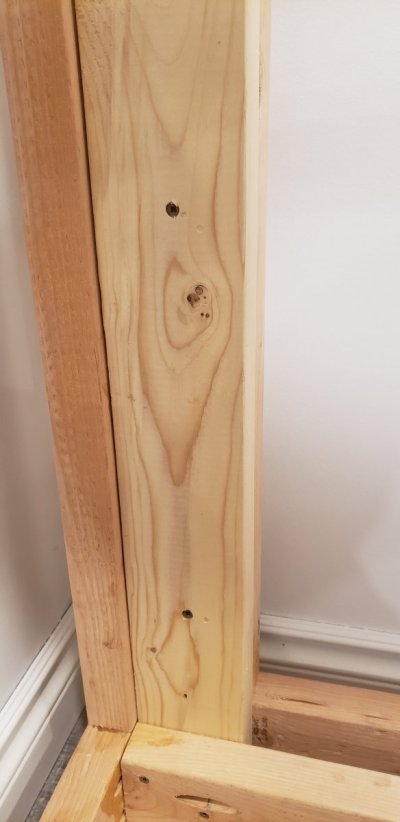
2x4s kreg hd joined and glued into each other and top and bottom rails. I used J grade fir for this. I capped it with the homedepot spruce I used to level the table during assembly. These are screwed into top and bottom rails for stability (anti racking) and are wedged with a taper on the bottom and glued.


Bottom detail, also showing a sub sump area. I want to catch any water as everything is wood.

Nice and level.

I hand cut these mortises, not bad, should have used the router and saved my sanity though.
Idea is to slide 3/4 square into the 1 inch. Got the idea from melevsreef video one time.
Showing some leg detail here.
2x4s kreg hd joined and glued into each other and top and bottom rails. I used J grade fir for this. I capped it with the homedepot spruce I used to level the table during assembly. These are screwed into top and bottom rails for stability (anti racking) and are wedged with a taper on the bottom and glued.

Bottom detail, also showing a sub sump
Nice and level.
Last edited:
This is going to be one awesome build!
Similar threads
- Replies
- 4
- Views
- 199
- Replies
- 4
- Views
- 215
- Replies
- 6
- Views
- 67
- Replies
- 7
- Views
- 250


