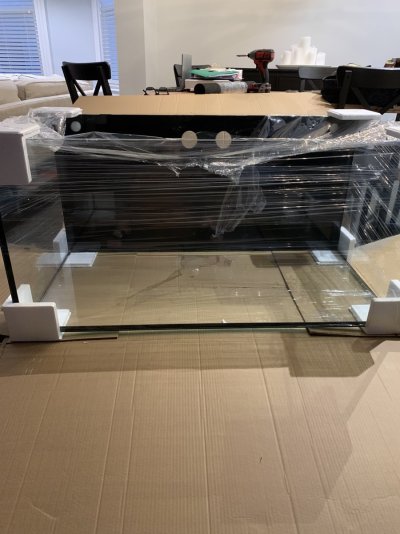
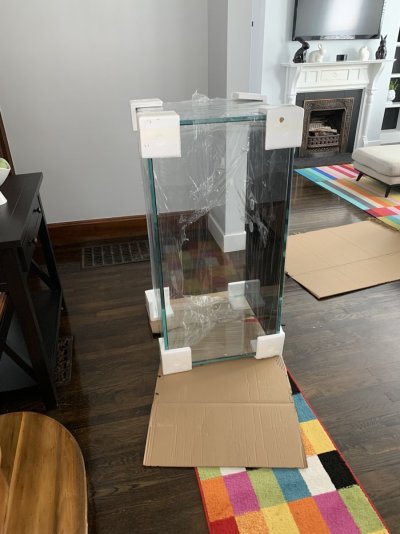
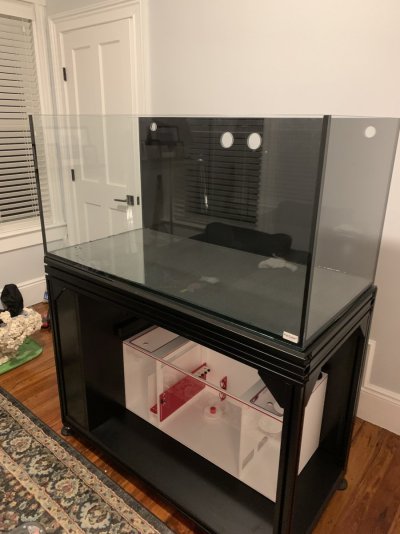
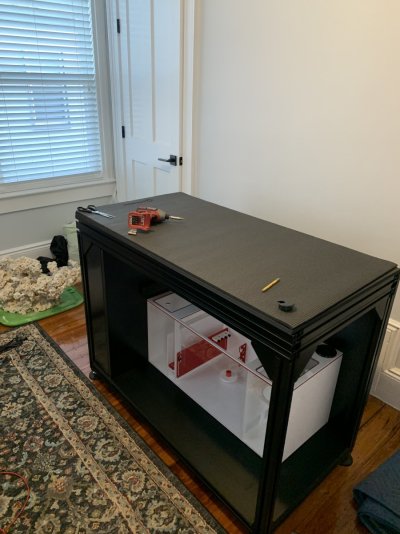
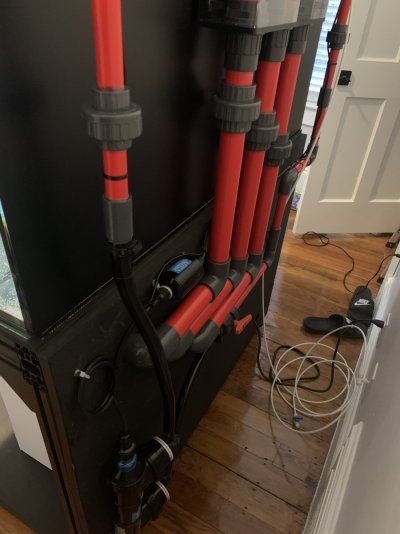
Rectangular Fiji Cube

OP
OP
R

REEFRIED!

Active Member
View Badges
Joined
Nov 30, 2022
Messages
271
Reaction score
186
Location
Boston
Rating - 0%
0   0   0
think that will be perfect. The issue with led is coverage and t5 hybrid fixtures fix all of that!
Yes, I do not think coverage will be an issue!! I am slowly building up a supply of lamps just in case the ban thing comes to fruition any time soon!!!
 
OP
OP
R

REEFRIED!

Active Member
View Badges
Joined
Nov 30, 2022
Messages
271
Reaction score
186
Location
Boston
Rating - 0%
0   0   0
Like I mentioned, I wanted to go T5 for this set up. With some type of blue LED bar for color pop. Fully knowing that a possible ban may come into effect at some point. (I guess then I will switch to LEDs). I knew I wanted an ATI 8 bulb fixture. Worst case I would purchase a new Sunpower or new Powermodule with the LEDs. However I found on here someone selling a used Powermodule for a decent price. I bought it. I also purchased a broken (one ballast) and in rough shape 8 bulb Sunpower from my local reef club, to use as parts. 54w non dimmable ballasts are no longer available from ATI as they seem to develop some sort of “buzzing noise”.

At this point in the build I was not sure if I was going to go with a canopy or not, and was not even sure how I would mount/hang the lights. Either way I definitely wanted to paint the light black. So I started taking the light apart, inspecting and getting it ready to paint. I ordered 8 new reflectors, 4 new fans, and a new fan power supply.

I sanded the frame of the light with 300 grit sandpaper, and applied 3 coats of direct to metal heat resistant paint. It came out great.
 

Attachments

  • 1B01E143-2041-40F9-AFFB-A4B11C81C2C0.jpeg
    1B01E143-2041-40F9-AFFB-A4B11C81C2C0.jpeg
    129.8 KB · Views: 60
  • DA138B43-07C8-416D-9EA9-FC87DF61B0B2.jpeg
    DA138B43-07C8-416D-9EA9-FC87DF61B0B2.jpeg
    165.4 KB · Views: 43
  • BBA8AAC2-0B92-4284-AB0B-1EA610B435B4.jpeg
    BBA8AAC2-0B92-4284-AB0B-1EA610B435B4.jpeg
    89.1 KB · Views: 42
  • 896E8A12-166F-423C-9E9A-A60274F94FCE.jpeg
    896E8A12-166F-423C-9E9A-A60274F94FCE.jpeg
    93.4 KB · Views: 47
OP
OP
R

REEFRIED!

Active Member
View Badges
Joined
Nov 30, 2022
Messages
271
Reaction score
186
Location
Boston
Rating - 0%
0   0   0
My tank arrived. (The second one!). Shipment went smooth. Waiting for a buddy to come help me lug it to the second floor! Quality is great, low iron glass is perfectly clear, silicone is great.
 

Attachments

  • 57205562-9405-44EC-9332-4F11535F22D0.jpeg
    57205562-9405-44EC-9332-4F11535F22D0.jpeg
    167 KB · Views: 44
  • 399BD166-59D1-4826-B0FC-86D275FB0E58.jpeg
    399BD166-59D1-4826-B0FC-86D275FB0E58.jpeg
    151.9 KB · Views: 43
OP
OP
R

REEFRIED!

Active Member
View Badges
Joined
Nov 30, 2022
Messages
271
Reaction score
186
Location
Boston
Rating - 0%
0   0   0
Got the tank upstairs and into place. I believe the tank was about 300-350 pounds but two of us managed it. RO is installed and ready to make water. Plumbing next. Tank came with a small cheesy mat for underneath, I decided to use a 1/4” yoga mat that I bought on Amazon. I will put the small one under the sump.
 

Attachments

  • A5747EF7-C4D8-442F-B5B9-DC89F3FEA420.jpeg
    A5747EF7-C4D8-442F-B5B9-DC89F3FEA420.jpeg
    162.9 KB · Views: 45
  • D9C3D06C-4E7E-45C9-AF8F-5D89F393C602.jpeg
    D9C3D06C-4E7E-45C9-AF8F-5D89F393C602.jpeg
    149 KB · Views: 45
OP
OP
R

REEFRIED!

Active Member
View Badges
Joined
Nov 30, 2022
Messages
271
Reaction score
186
Location
Boston
Rating - 0%
0   0   0
It is time for plumbing! I am taking a chance and not using two unions on each of the 1 1/2” drains. I went over a few different options and the cleanest look is to come up from the sump and 90 right out the back of the stand. This will not allow a union to be placed and will require cutting the pipe to remove the sump. If I get to the point where I change the sump out, I will likely be cutting the pipe anyways. I am really just hoping nothing leaks as I am putting myself in a vulnerable position by doing it this way!
 

Attachments

  • IMG_6515.jpeg
    IMG_6515.jpeg
    204 KB · Views: 36
OP
OP
R

REEFRIED!

Active Member
View Badges
Joined
Nov 30, 2022
Messages
271
Reaction score
186
Location
Boston
Rating - 0%
0   0   0
I got the tank plumbed on a Saturday in about 5 hours. Felt good about everything. I used a portable band saw, and a file on every cut. Took time to measure accounting for the extra 1/4” the pipe slides into fittings once glued. Everything came out nice. Now it’s time to leak test. I have decided to fill with rodi, use that to leak test and pump it out to trash barrels to mix. I don’t want to run tap water through the system for leak test and I also don’t want to mix salt in tank
 

Attachments

  • IMG_6521.jpeg
    IMG_6521.jpeg
    132.8 KB · Views: 44
  • IMG_6531.jpeg
    IMG_6531.jpeg
    130 KB · Views: 36
OP
OP
R

REEFRIED!

Active Member
View Badges
Joined
Nov 30, 2022
Messages
271
Reaction score
186
Location
Boston
Rating - 0%
0   0   0
I installed a UV sterilizer. I did not want to do a manifold, and I also did not want to mount it under the tank. It is plumbed directly into my return line and mounted on the back of the stand. I can easily remove the lamp when needed. It has a ball valve which I know is not perfect for dialing in flow rates, but I can attach tubing to that loc line return and time the filling of a bucket for precise flow rates if needed. I also did not buy those overpriced UV mounts. It came out nice.
 

Attachments

  • IMG_6528.jpeg
    IMG_6528.jpeg
    135.8 KB · Views: 35
  • IMG_6383.jpeg
    IMG_6383.jpeg
    140.8 KB · Views: 43
OP
OP
R

REEFRIED!

Active Member
View Badges
Joined
Nov 30, 2022
Messages
271
Reaction score
186
Location
Boston
Rating - 0%
0   0   0
The plumbing leak test was successful. I ran the tank for 3 days with just RODI. I ran a couple bags of carbon to hopefully remove any residual manufacturing oils or anything like that in the pumps or plumbing. Then I pumped the water out into 3 trash barrels to mix salt.

I pushed the tank back against the wall. Not all the way as my ATO reservoir will be behind the tank. I put the rock in and set up the MP40’s. Started to route and organize wires into the controller cabinet portion of the stand. I am using 40 pounds of dry sand that I rinsed in RO, and two bags of Carib Sea live sand.
 

Attachments

  • IMG_6543.jpeg
    IMG_6543.jpeg
    174 KB · Views: 42
  • IMG_6545.jpeg
    IMG_6545.jpeg
    168.8 KB · Views: 42
OP
OP
R

REEFRIED!

Active Member
View Badges
Joined
Nov 30, 2022
Messages
271
Reaction score
186
Location
Boston
Rating - 0%
0   0   0
So the tank is running. It is cycled and has a few fish. Time for the ATO.

I did not want to put a reservoir under the tank. So I left 7 inches between the wall and the tank to tuck the reservoir back there. The tank has to be about 4” off the wall anyways, and being the 7” off doesn’t look bad, and allows some access back there to get to exterior overflow box, ball valve for UV etc.

I had a custom reservoir made by Tenecor. It is 24” long, 20” high, and 6” wide. 12 gallons total but will end up being a little less. I wanted to employ a system using a solenoid valve and float switches to fill the reservoir automatically. I looked online and found the proper relay, and floats. However after talking to the guys at Auto Top off.com they told me they could provide everything I was looking for. The whole set up from them was $75. It has a high float switch, a low float switch, a 12v normally closed solenoid valve, and a power supply. Obviously I had to purchase the reservoir, and whatever method I wanted to use to fill the sump. I went with an Avast Marine pressure switch.
 

Attachments

  • IMG_6629.jpeg
    IMG_6629.jpeg
    174.9 KB · Views: 11
  • IMG_6755.jpeg
    IMG_6755.jpeg
    271.8 KB · Views: 12
  • IMG_6754.jpeg
    IMG_6754.jpeg
    127.9 KB · Views: 14
OP
OP
R

REEFRIED!

Active Member
View Badges
Joined
Nov 30, 2022
Messages
271
Reaction score
186
Location
Boston
Rating - 0%
0   0   0
The reservoir came with a 3/4 bulkhead. I put a pipe inside of it down to the bottom of the reservoir. I drilled holes in it to route the float switch wires through and attached the switches with zip ties. I ended up ditching the maxi-jet for a Sicce micra pump. The MJ I use for water changes has stopped working twice in a month. They use to be so reliable. I had one for ten years with no issues. However the new ones are not. Like I mentioned before I am using a Avast Marine pressure switch for top off. It is great. The magnet is strong and it keeps the level in rerun section of sump perfectly. I also installed a mechanical float where the water enters the reservoir in case the 12v floats fail.
 

Attachments

  • IMG_6781.jpeg
    IMG_6781.jpeg
    181.6 KB · Views: 13
  • IMG_6780.jpeg
    IMG_6780.jpeg
    79.7 KB · Views: 12
  • IMG_6783.jpeg
    IMG_6783.jpeg
    153.7 KB · Views: 16
OP
OP
R

REEFRIED!

Active Member
View Badges
Joined
Nov 30, 2022
Messages
271
Reaction score
186
Location
Boston
Rating - 0%
0   0   0
The ato reservoir came out nicely. It works properly and fits behind the stand.

Also my skimmer came. I went with a Reef Octo 150 Elite. It is built solidly. I put it together quickly and installed it. I cut some pvc pipe to raise it up 1 1/4” in my sump. I routed all wires in sump through cable management trays, it will be a pain to remove and clean skimmer every six months or so, but looks nice in the meantime. I will be able to remove and clean the body, but cleaning the pump will require some effort! I won’t turn the skimmer on for awhile, but it works!
 

Attachments

  • IMG_6604.jpeg
    IMG_6604.jpeg
    174.8 KB · Views: 13
  • IMG_6608.jpeg
    IMG_6608.jpeg
    138.6 KB · Views: 12
OP
OP
R

REEFRIED!

Active Member
View Badges
Joined
Nov 30, 2022
Messages
271
Reaction score
186
Location
Boston
Rating - 0%
0   0   0
I bought a screen top. I went with the D&D jump guard. I was going to do a custom screen lid, however they are expensive!! I figured this would keep my wrasses in the tank for now. It was easy to assemble and I am happy with the quality.
 

Attachments

  • IMG_6684.jpeg
    IMG_6684.jpeg
    220.7 KB · Views: 17
  • IMG_6683.jpeg
    IMG_6683.jpeg
    219 KB · Views: 13
  • IMG_6682.jpeg
    IMG_6682.jpeg
    169.2 KB · Views: 17

Gumbies R Us

Certified Noob
View Badges
Joined
Nov 10, 2022
Messages
10,062
Reaction score
19,473
Location
North Georgia
Rating - 0%
0   0   0
I bought a screen top. I went with the D&D jump guard. I was going to do a custom screen lid, however they are expensive!! I figured this would keep my wrasses in the tank for now. It was easy to assemble and I am happy with the quality.
Nice looking top!
 
OP
OP
R

REEFRIED!

Active Member
View Badges
Joined
Nov 30, 2022
Messages
271
Reaction score
186
Location
Boston
Rating - 0%
0   0   0
So this build thread is a few mo the behind where the tank is today. Some things have changed. First I started with an 8 build ATI T5 setup and I loved the color. Loved the light. I replaced all fans, all ballasts and painted it black. So a lot of people know about the ATI 48” ballast issue. After awhile they start to make a nadir. It’s like a buzzing noise. When I bought the fixture one ballast made this noise. When you go to the ATI website they show that the 48” ballast are out of stock. They have never said when they will return and that they know about this issue. So I contacted them. They told me that they do have new ballasts but they are the same as the old. That they can sell them to me but that they might eventually go bad. So I bought four. Installed them and a month later one of the new ones started making the same buzzing noise.

I got fed up and ordered LEDs. I went with two Orphek Atlantis icons. I already had their OR3 bars and loved them. I am happy with the lights. They look amazing, the app is easy and user friendly and they provide way more par than I will ever need.
 

Looking back to your reefing roots: Did you start with Instant Ocean salt?

  • I started with Instant Ocean salt.

    Votes: 172 72.9%
  • I did not start with Instant Ocean salt, but I have used it at some point.

    Votes: 17 7.2%
  • I did not start with Instant Ocean salt and have not used it.

    Votes: 42 17.8%
  • Other.

    Votes: 5 2.1%
Back
Top