Scott26's 90 Gallon Wave Front Build

OP
OP
scott26

scott26

Active Member
View Badges
Joined
Oct 27, 2009
Messages
202
Reaction score
51
Location
Nevada
Rating - 0%
0   0   0
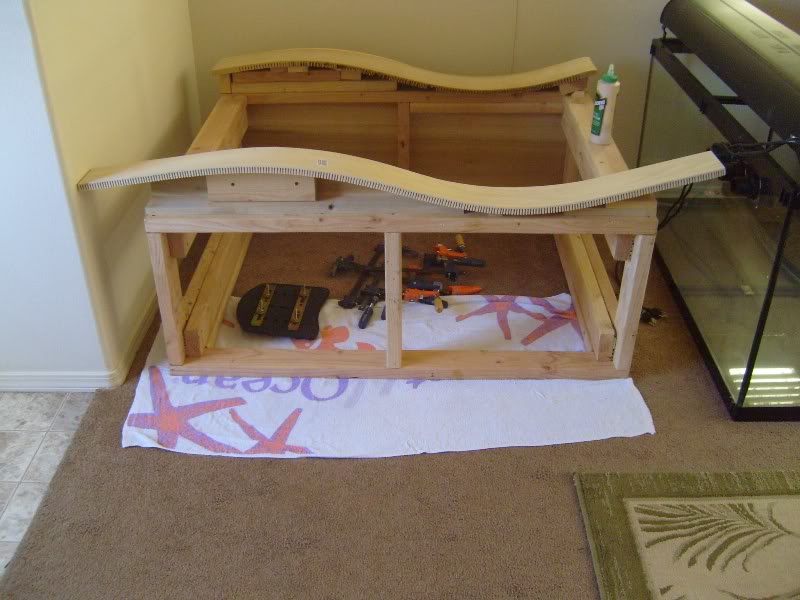
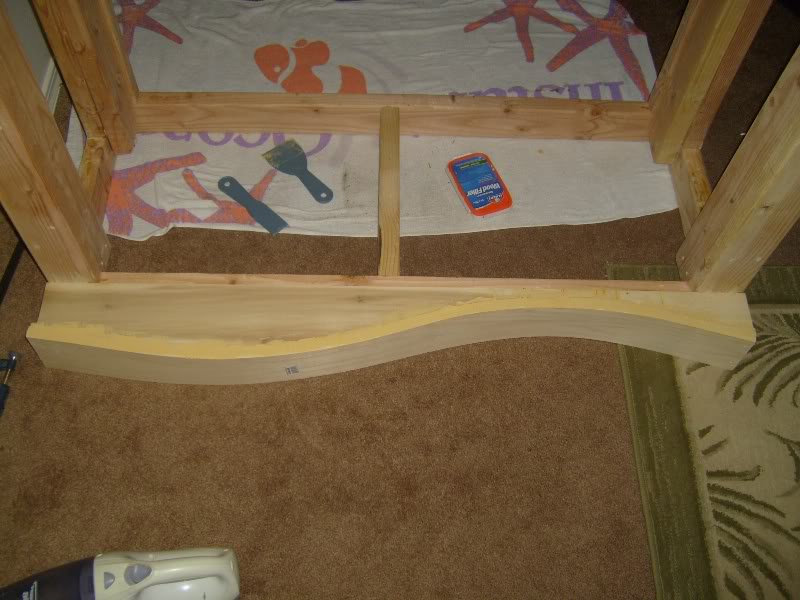
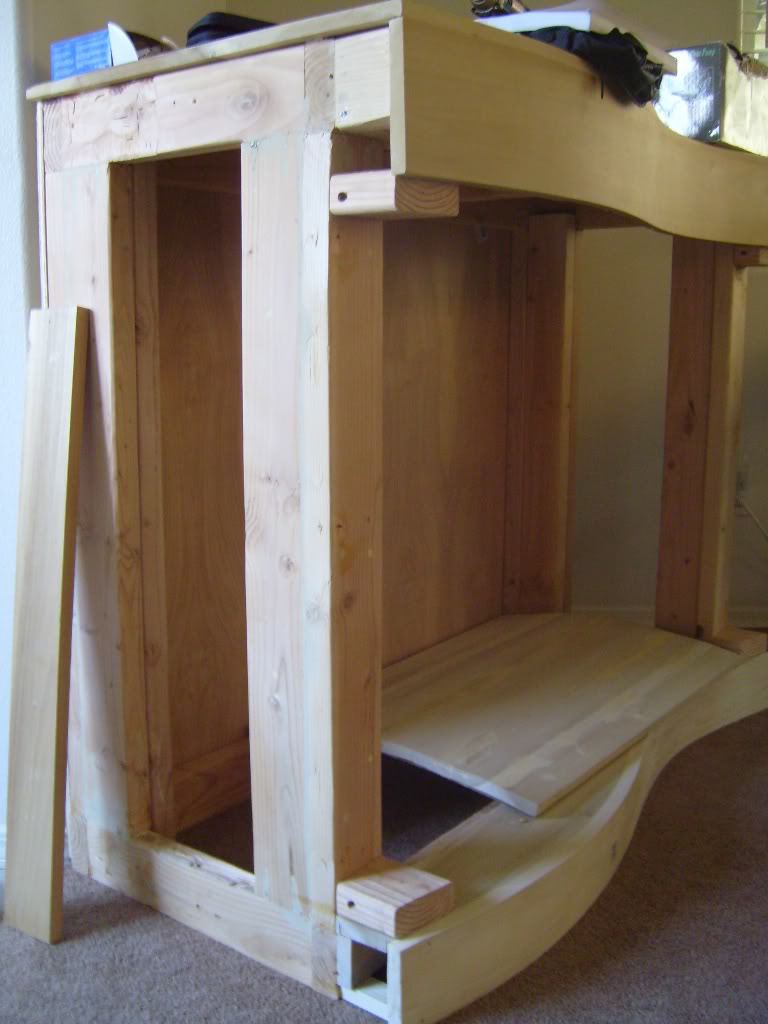
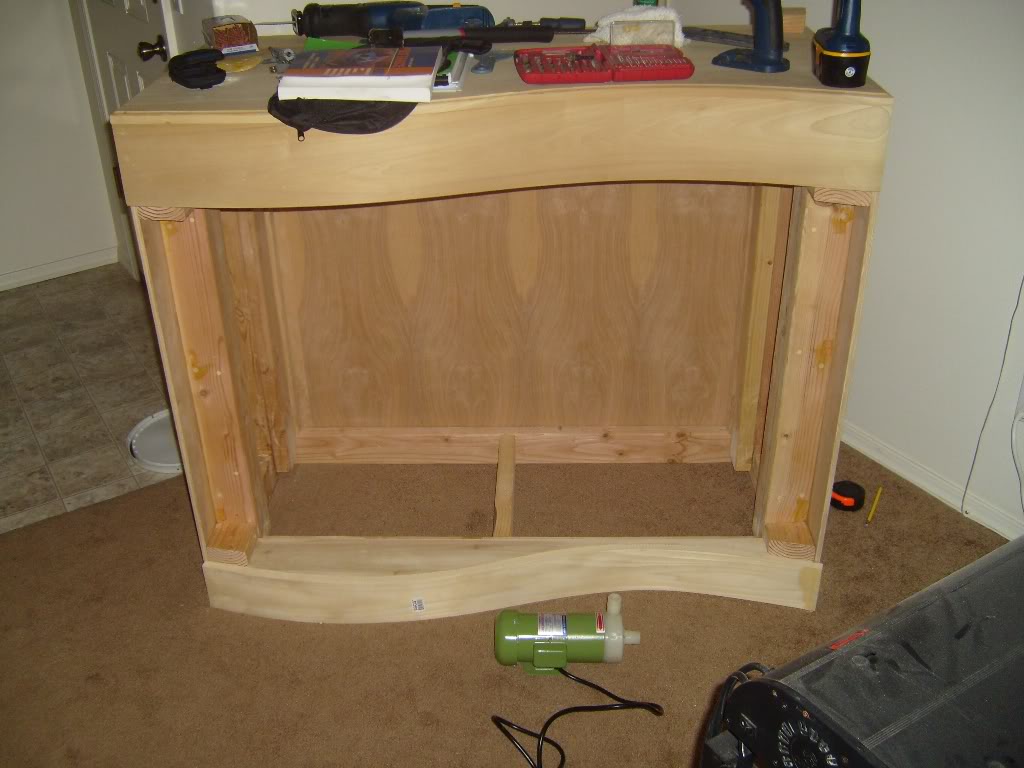
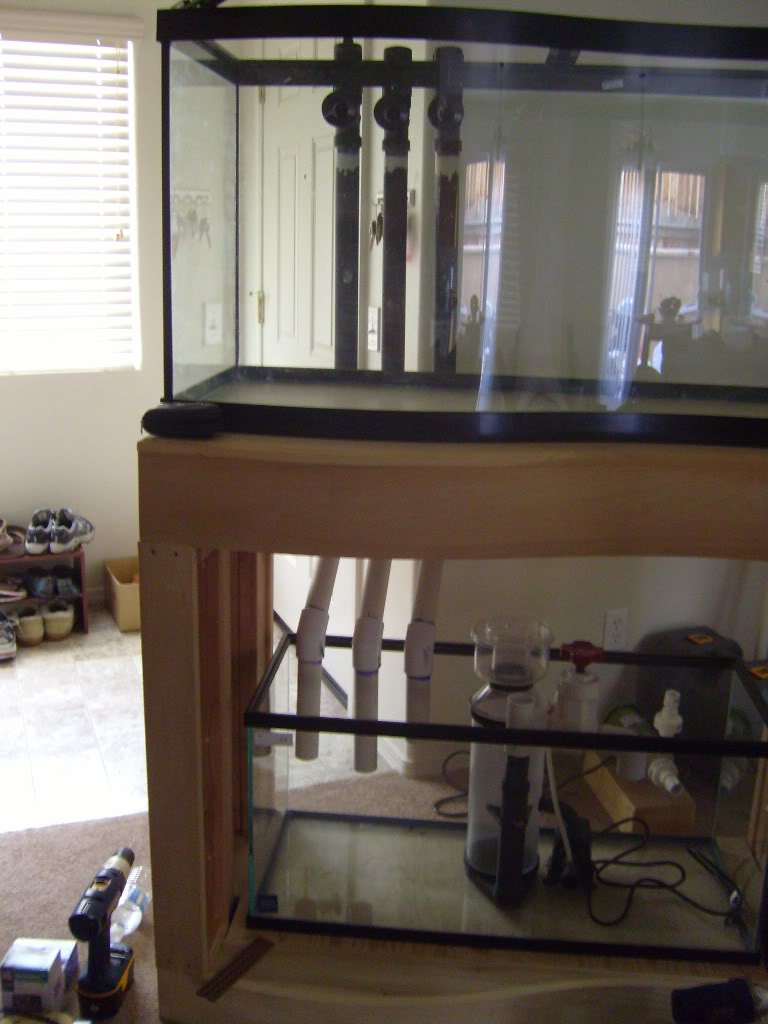
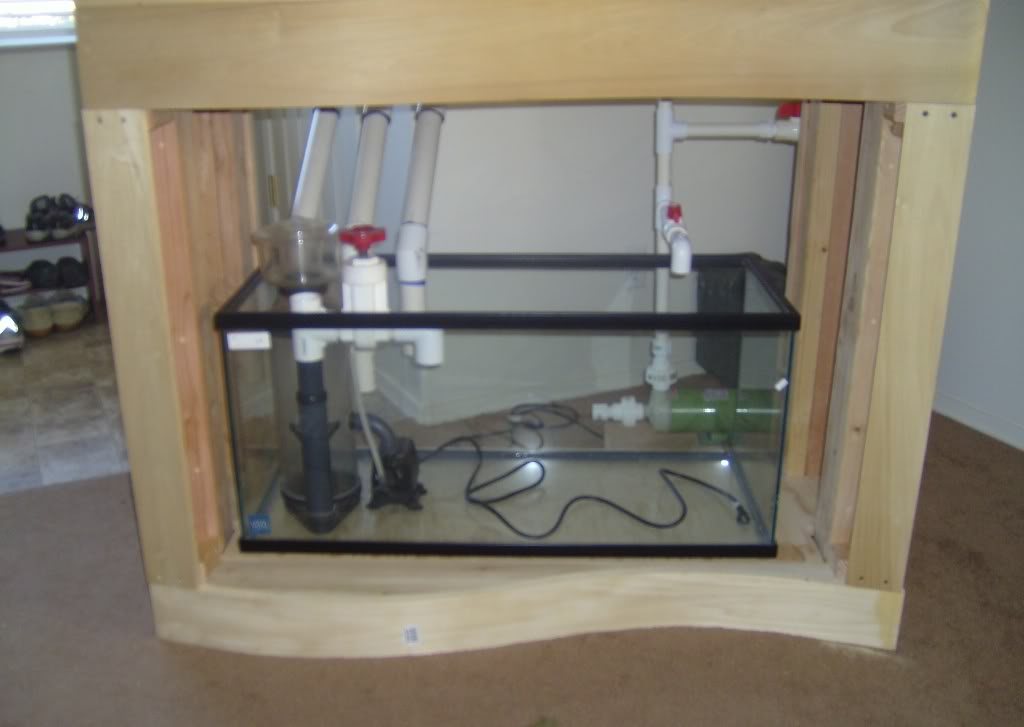
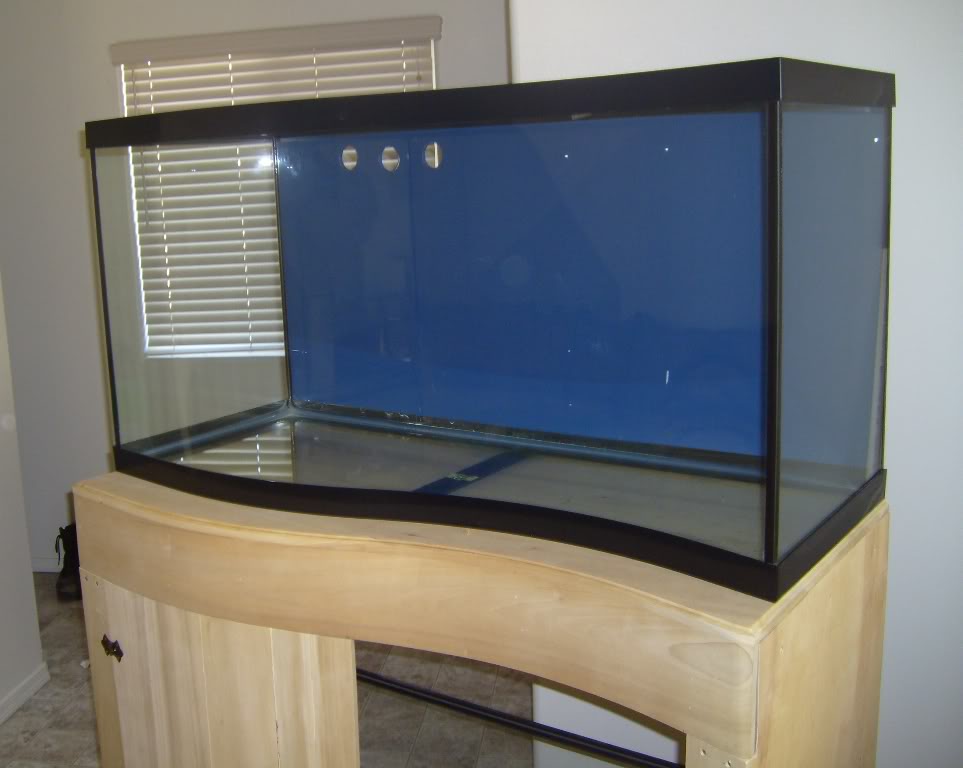
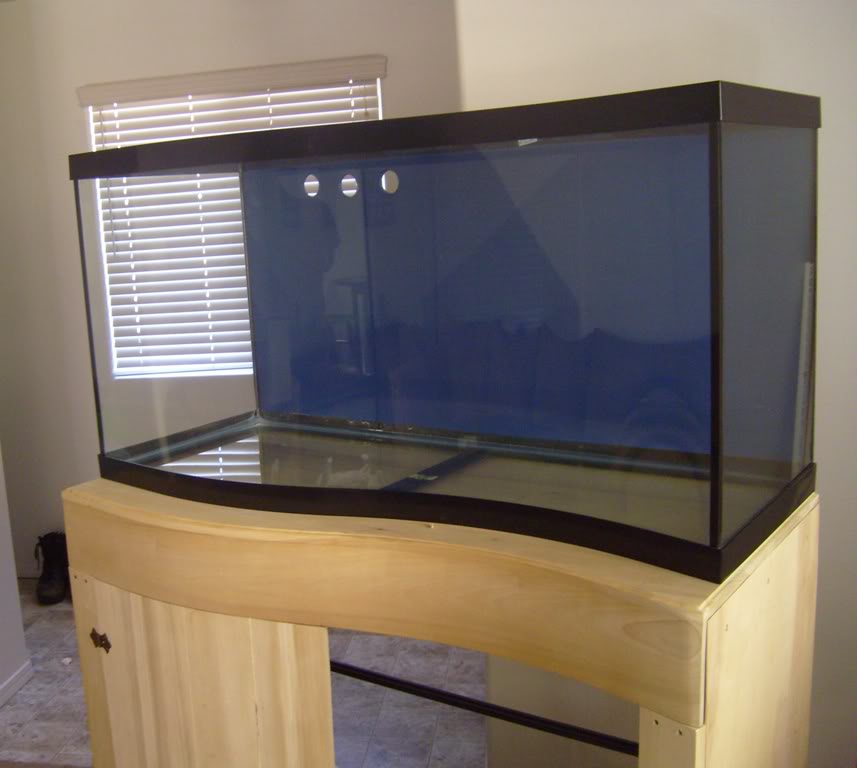
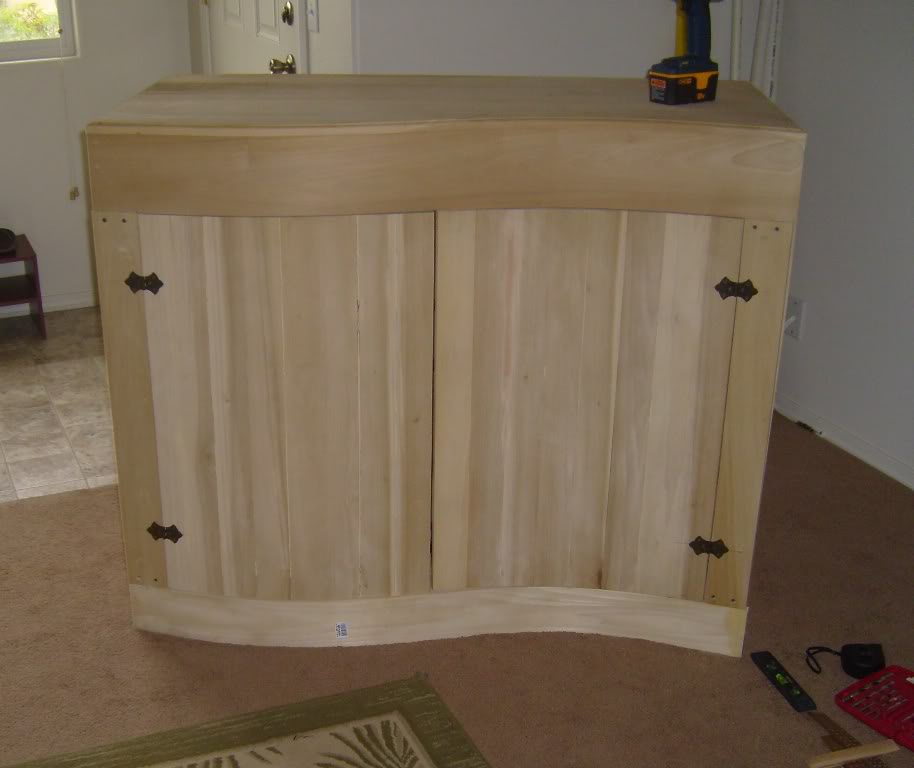
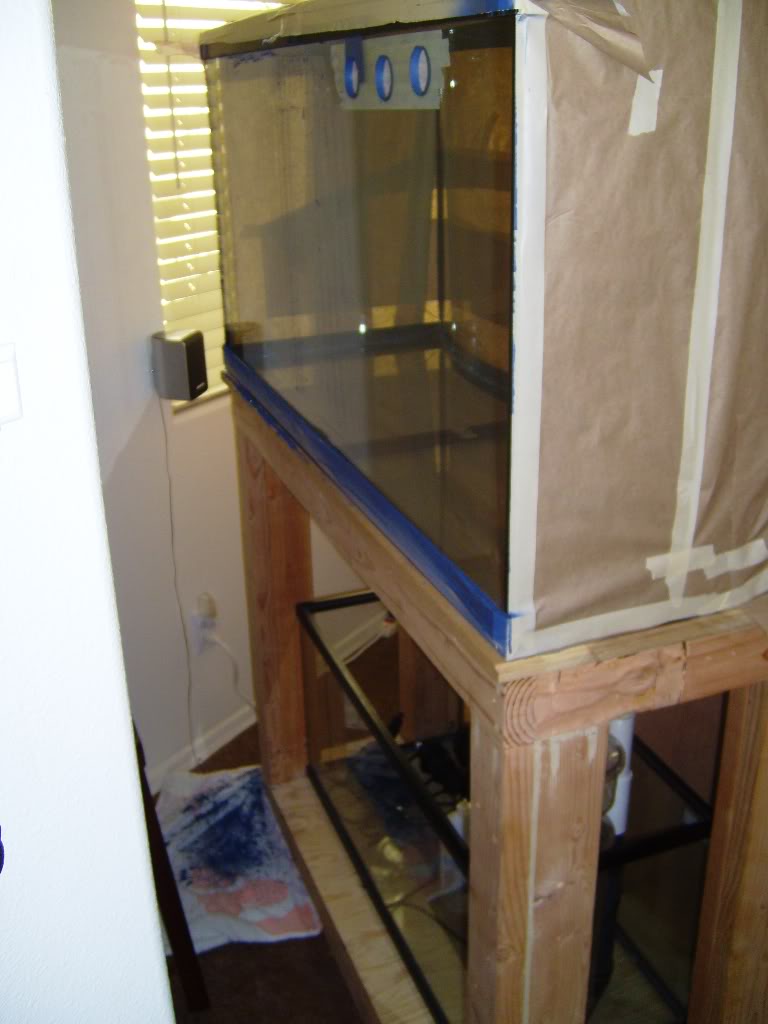
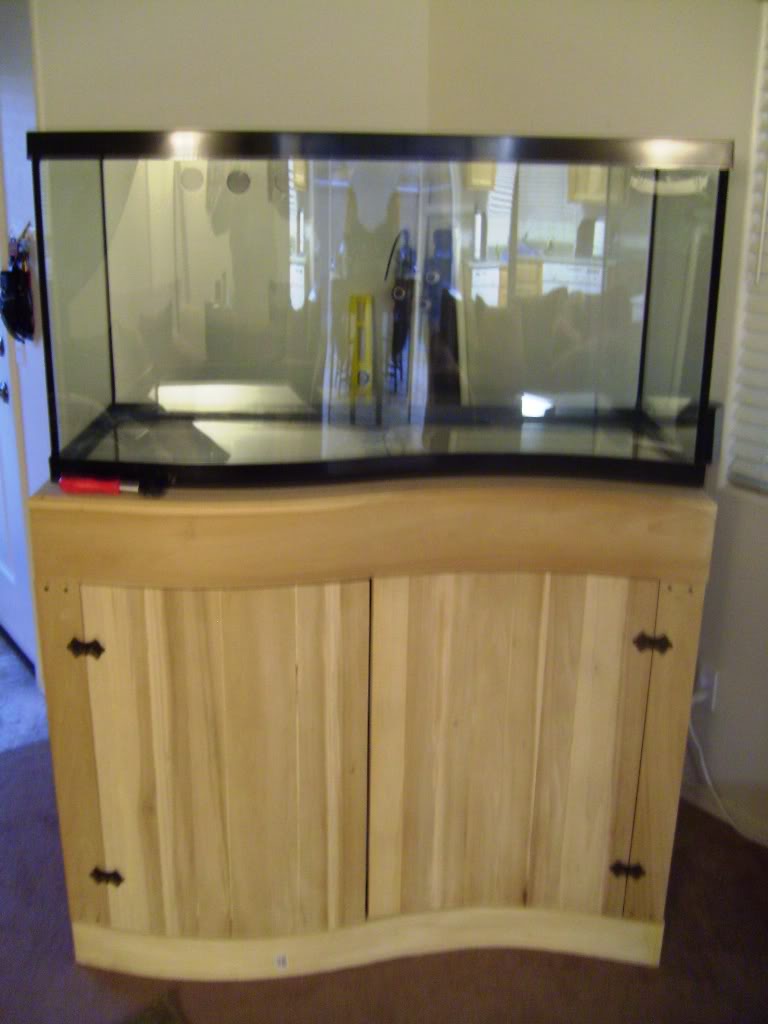
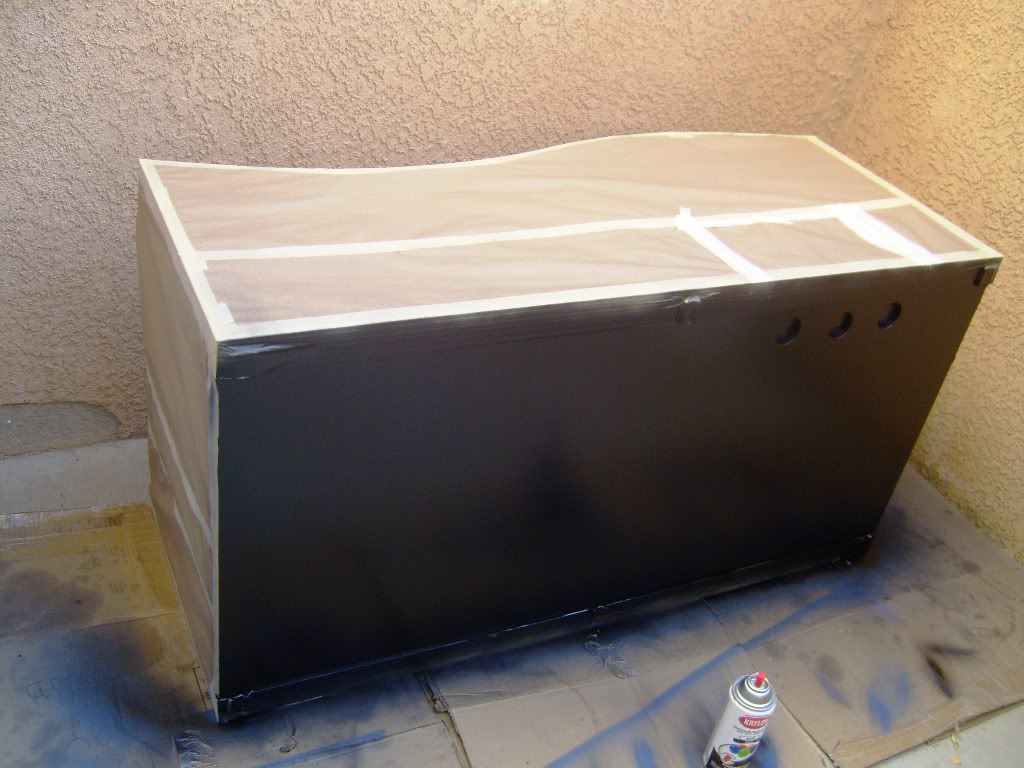
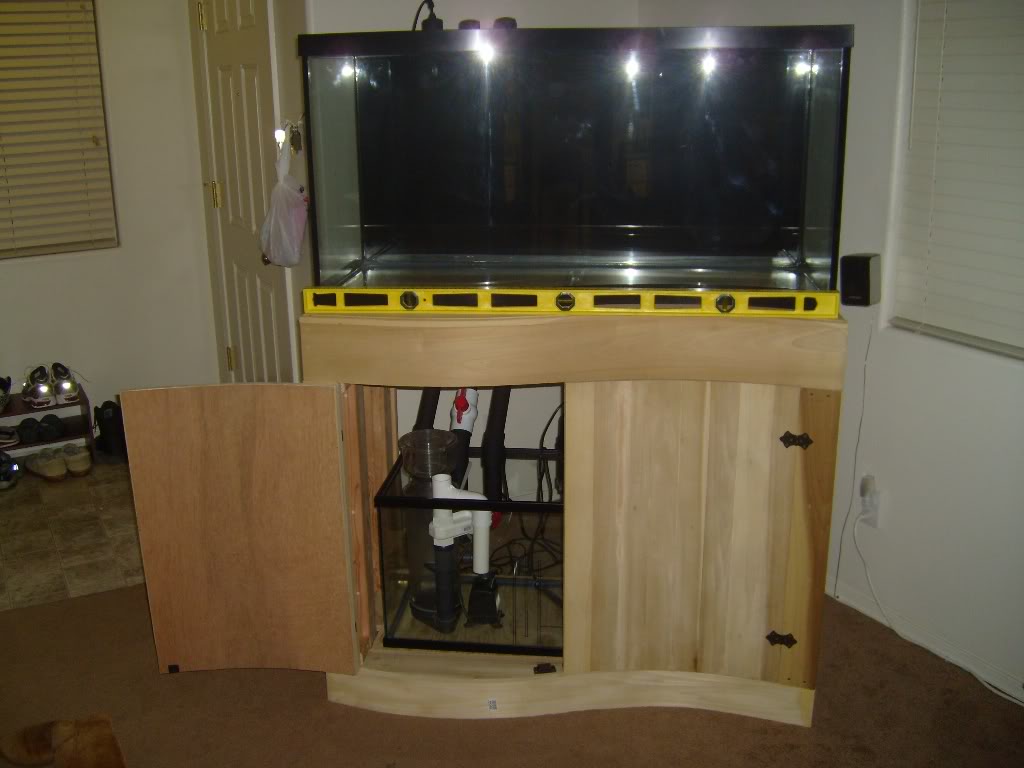
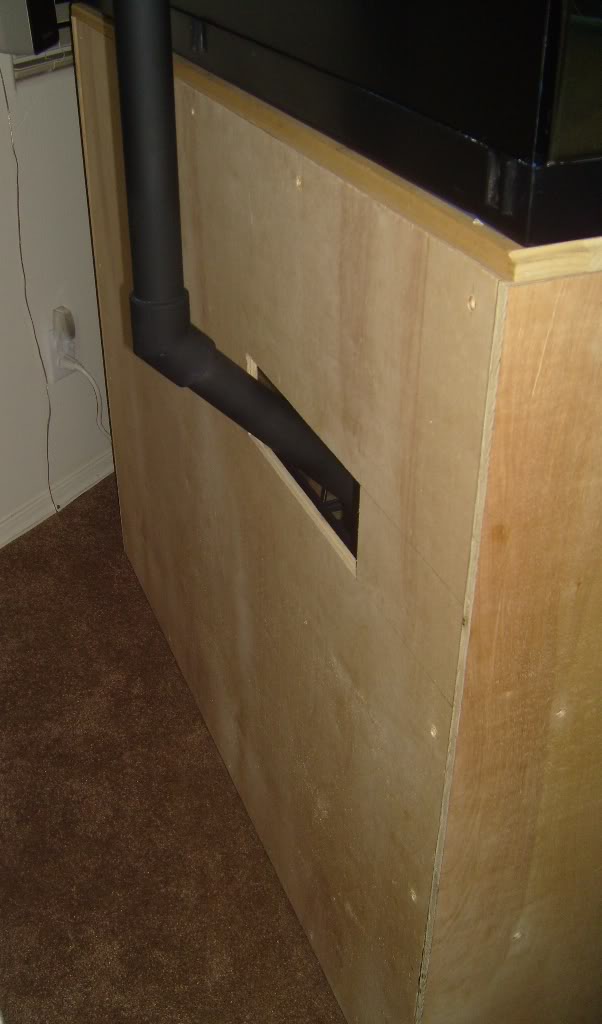
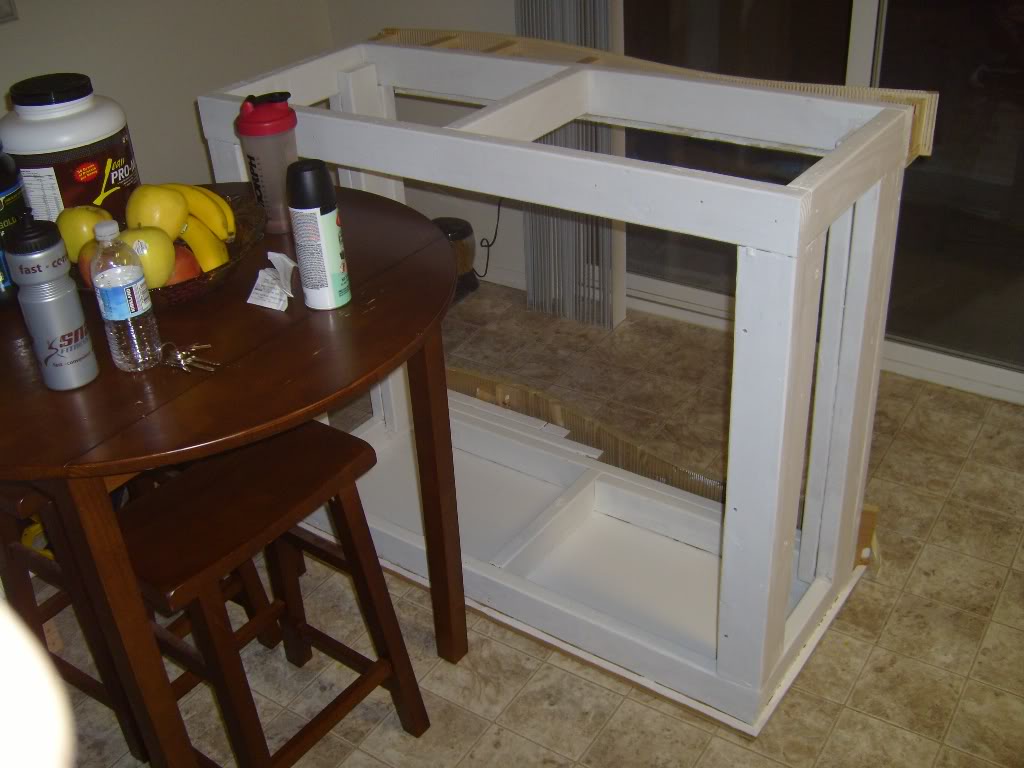
Well I was able to get some more done on the stand over the past few days and it has turned out pretty well. When I was putting the siding on the stand I noticed that the bottom piece of wood that the doors would rest on would not be wide enough for them seems like I missed a calculation somewhere. So Since I still needed to come up with an idea on how to cover up the bottom to make it look good I brought the kerfing technique back into the picture to get the job done. This way I am able to extended the bottom piece of wood far enough out for the doors and make it look good all at the same time.

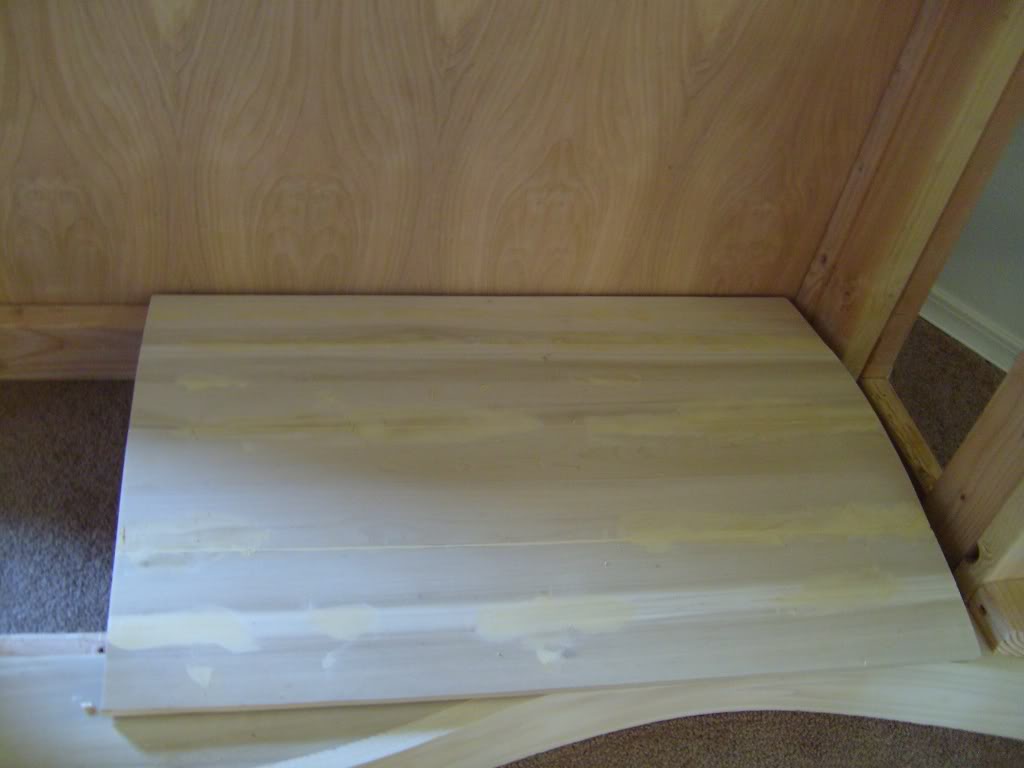
So I went out and got a piece of poplar wood to get started I got a 1x4 from ace hardware.

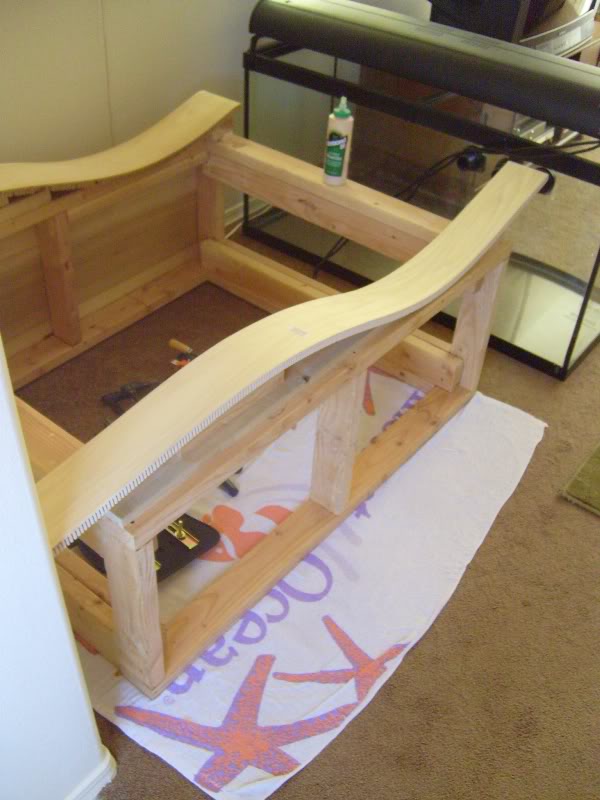
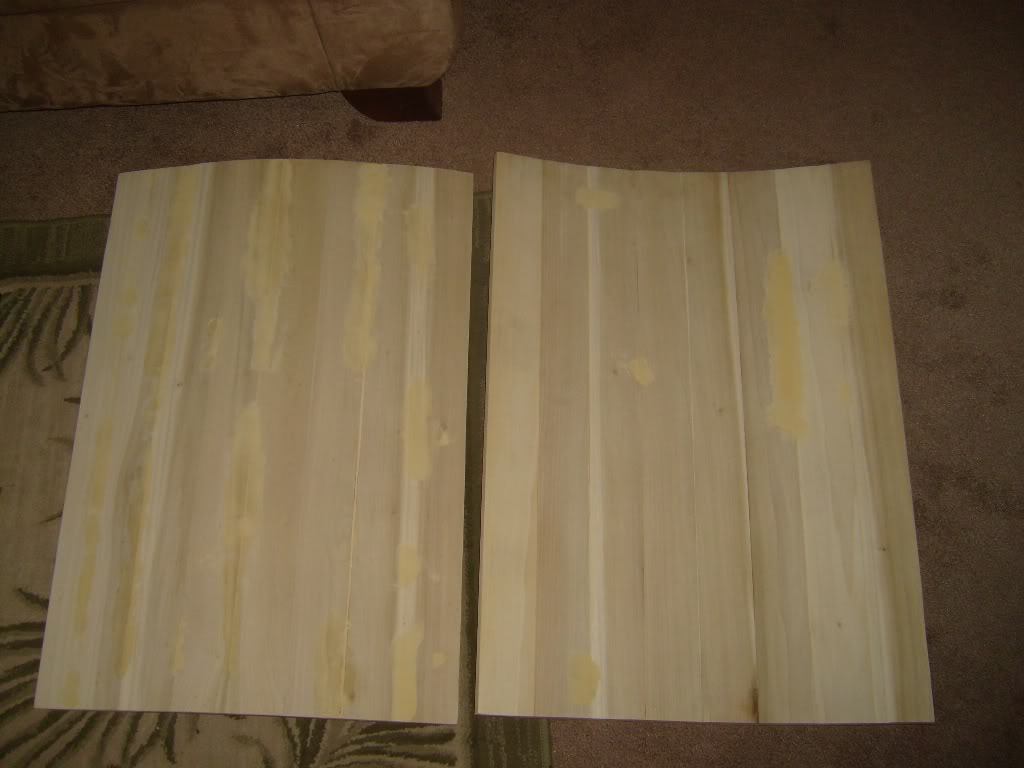
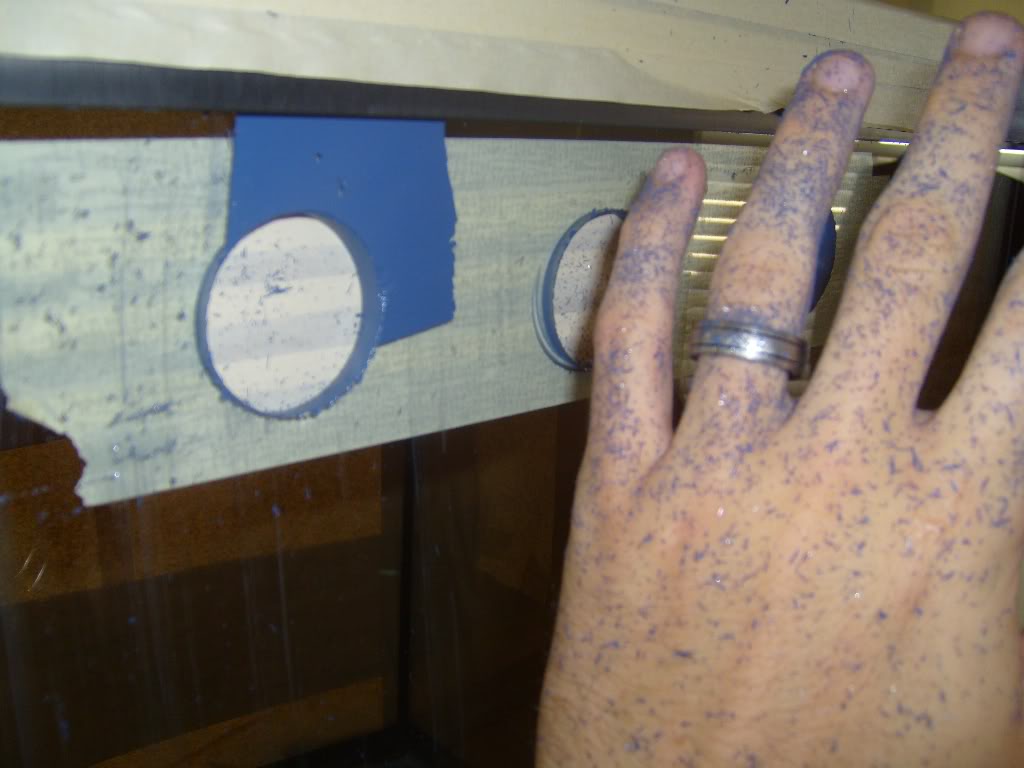
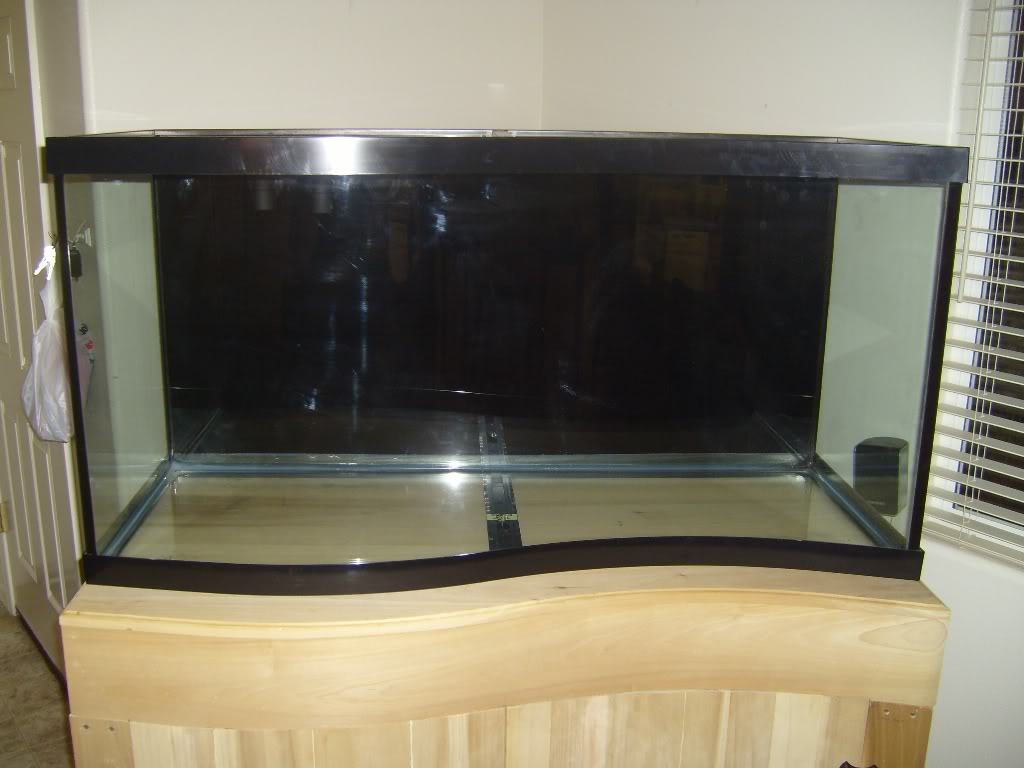
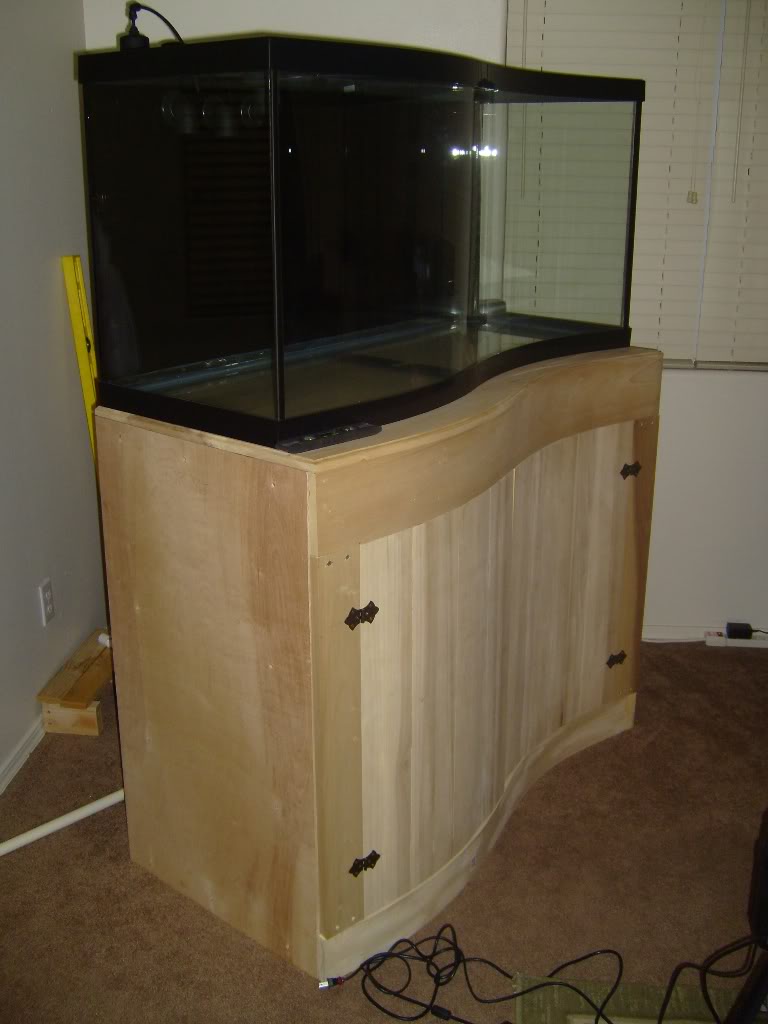
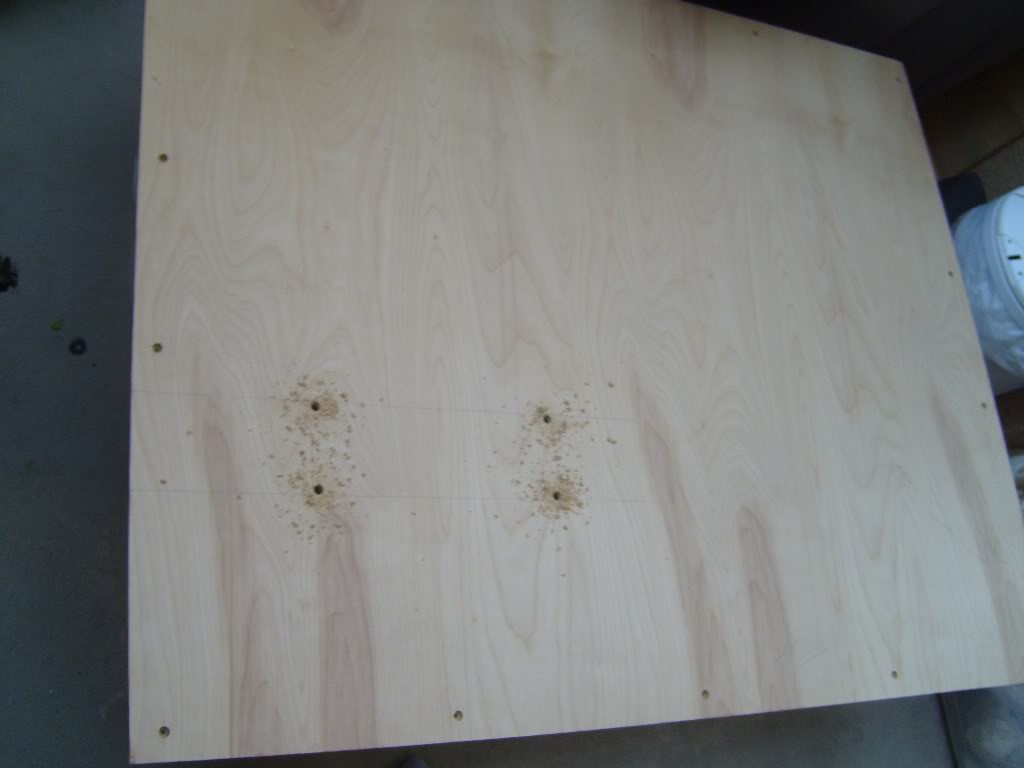
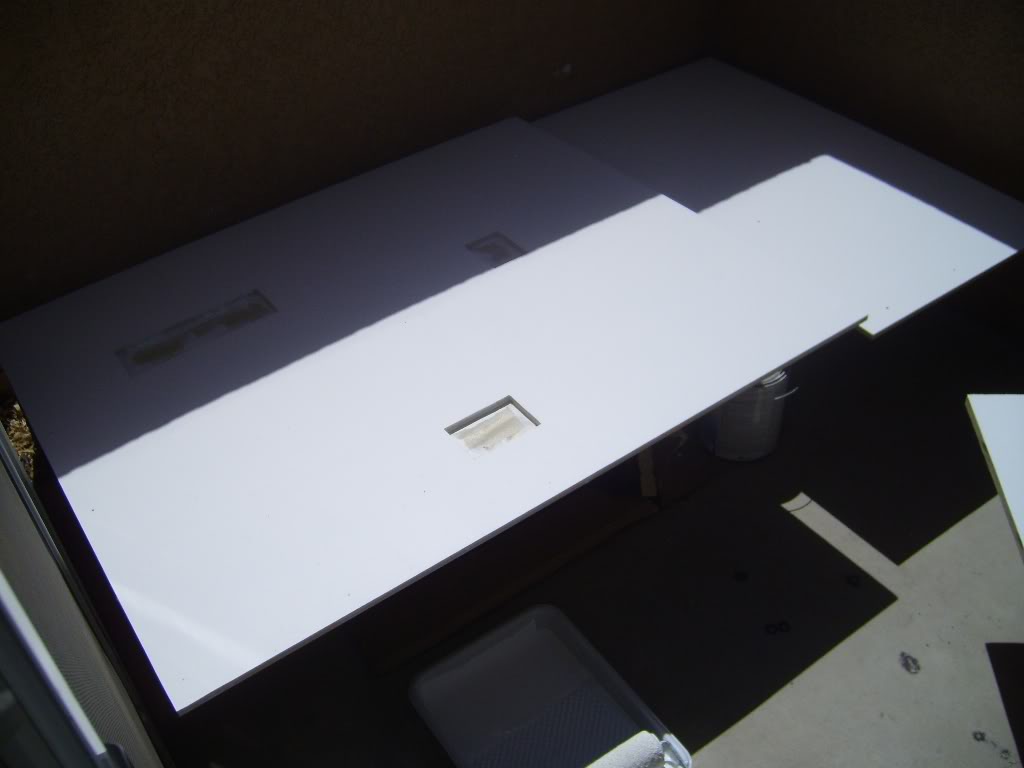
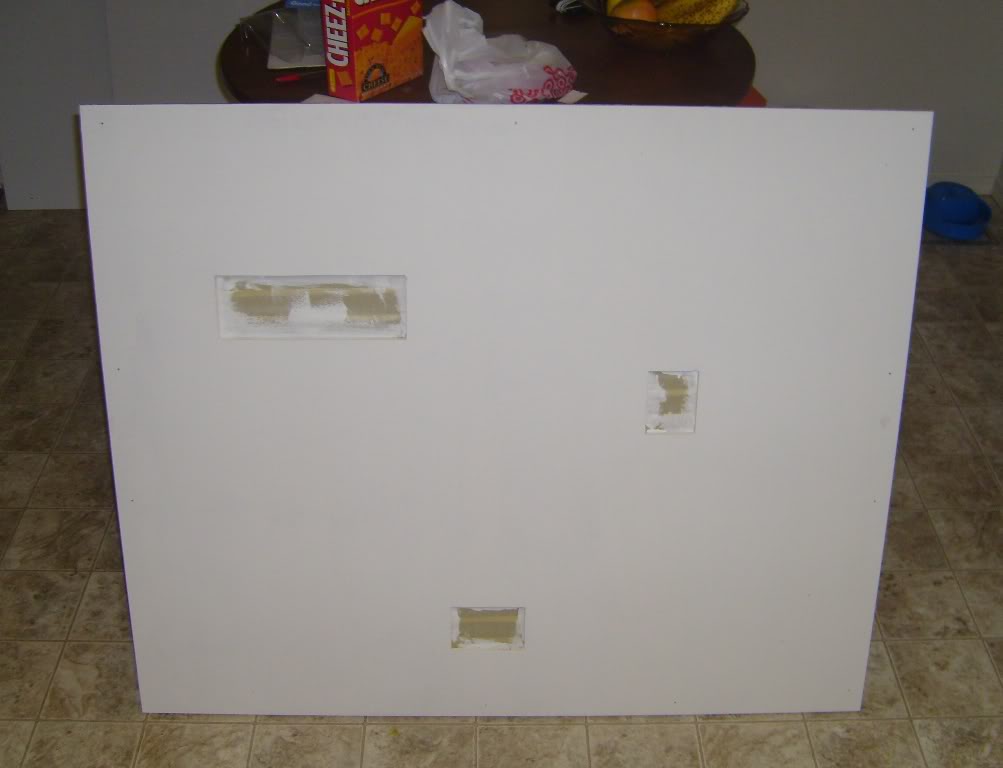
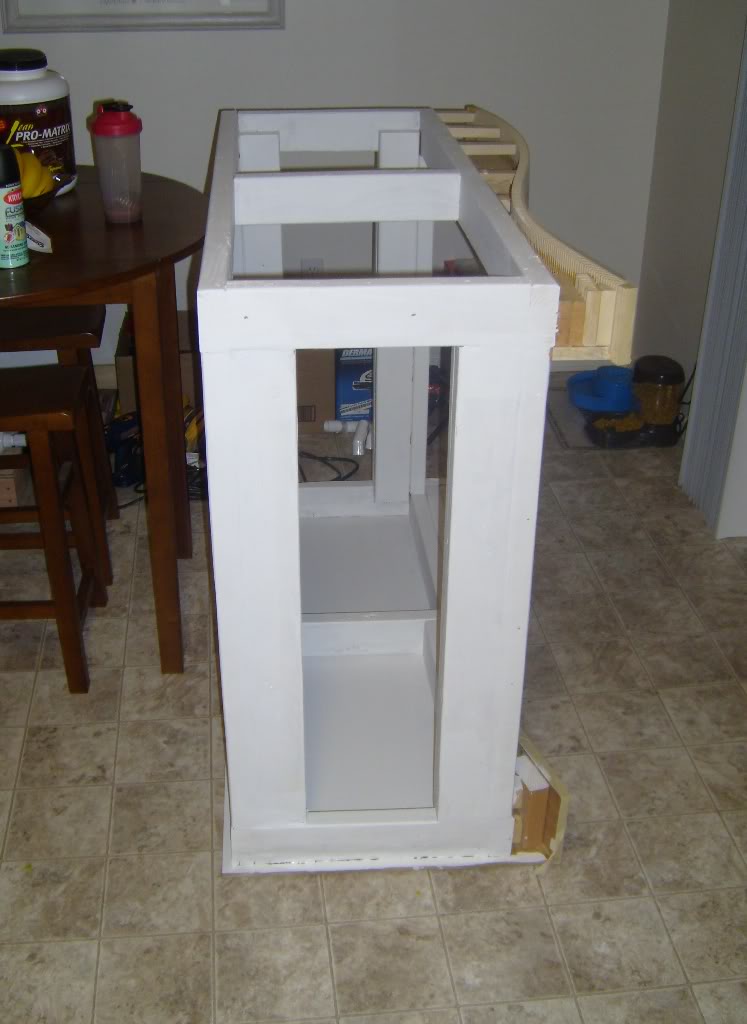
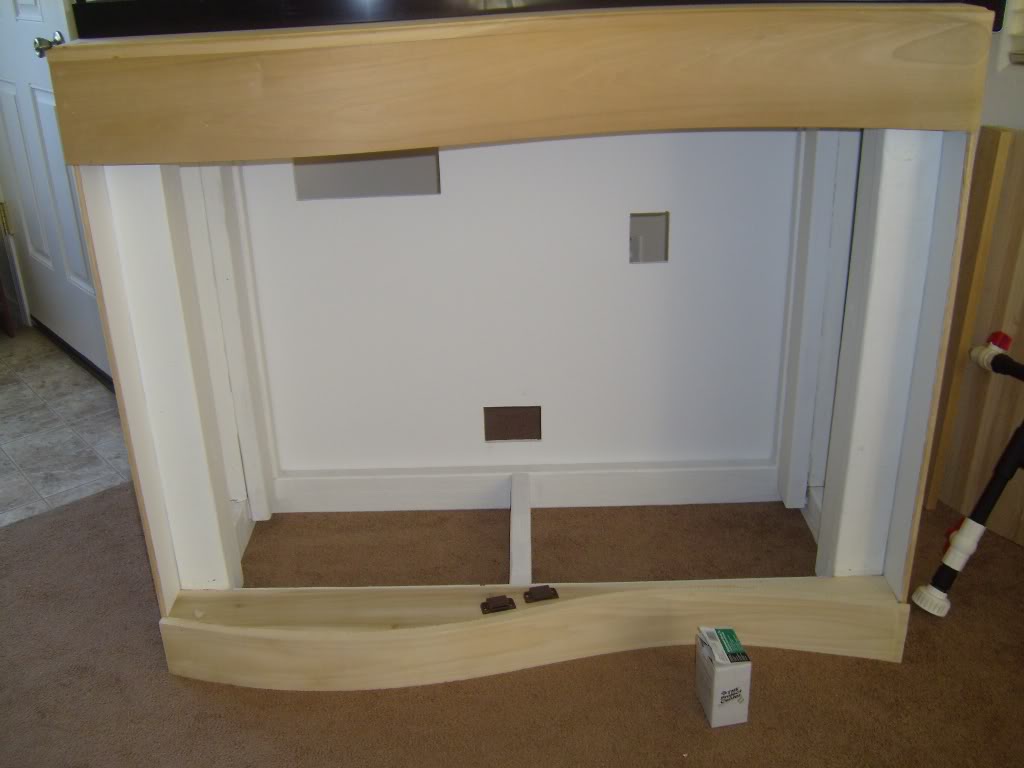
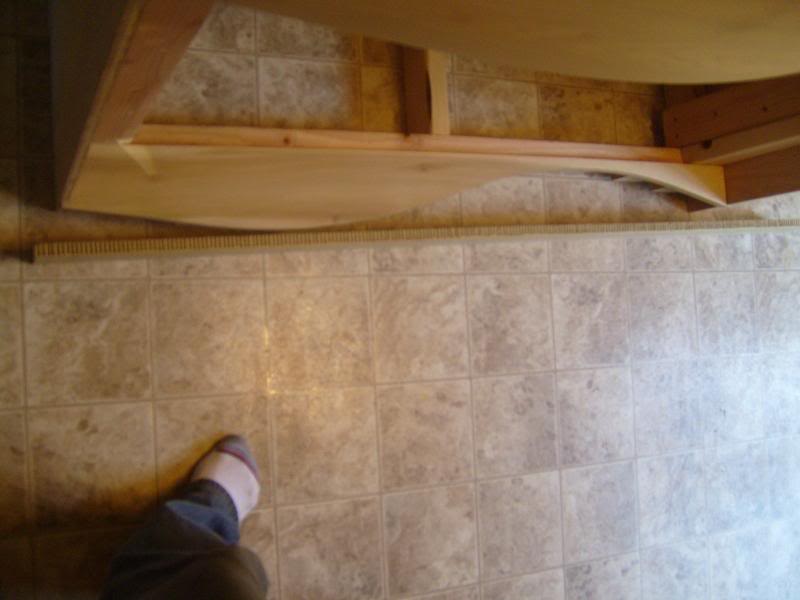
The panel up front for the wood to be added too.

S7001507.jpg


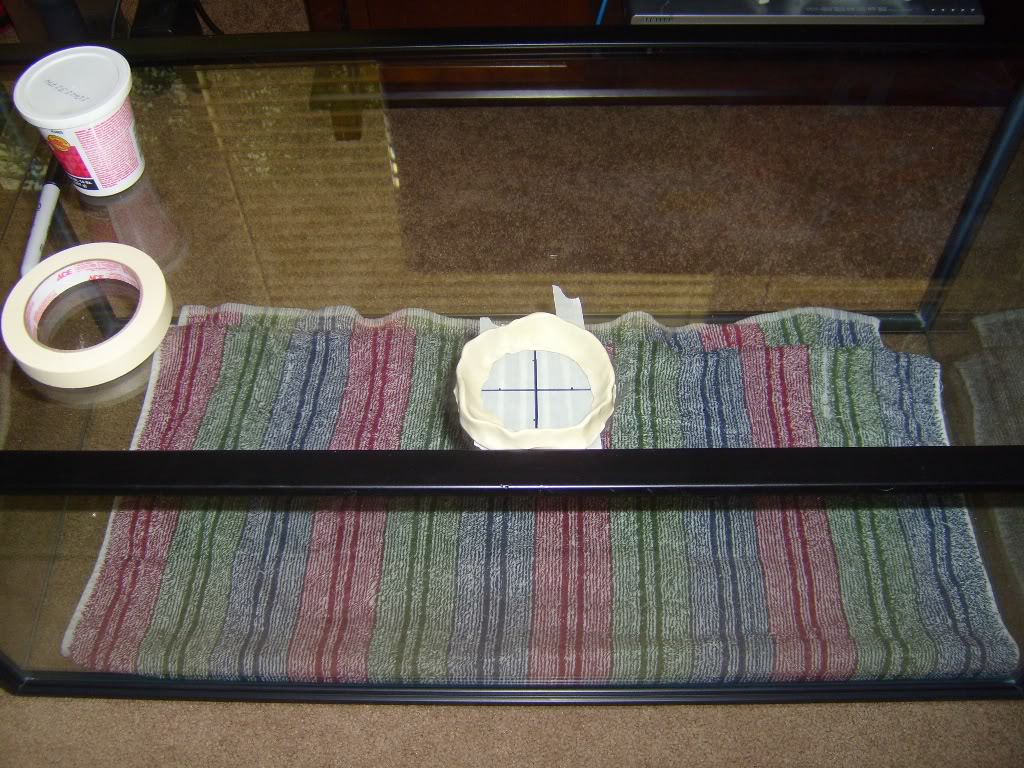
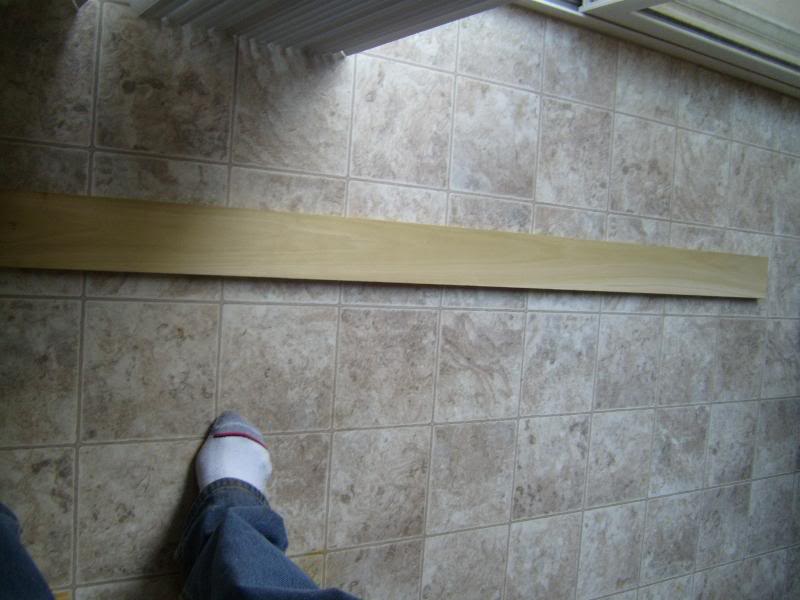
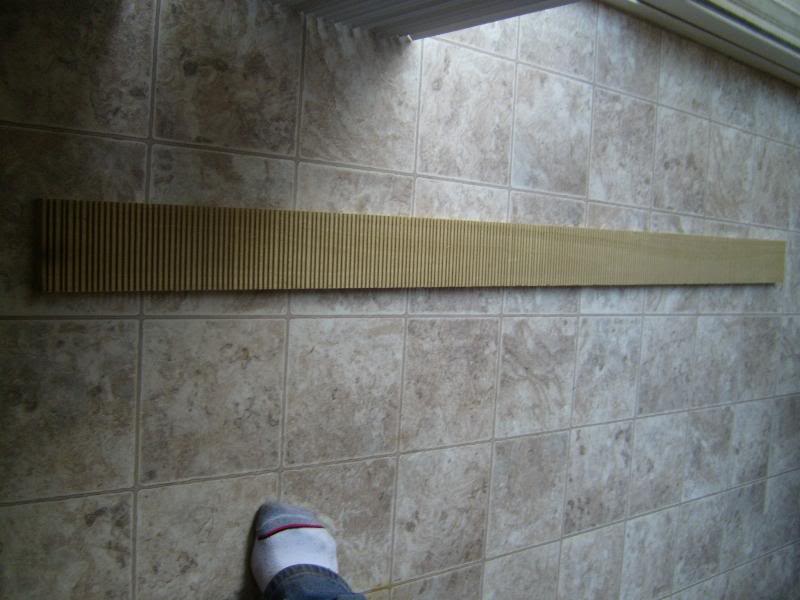
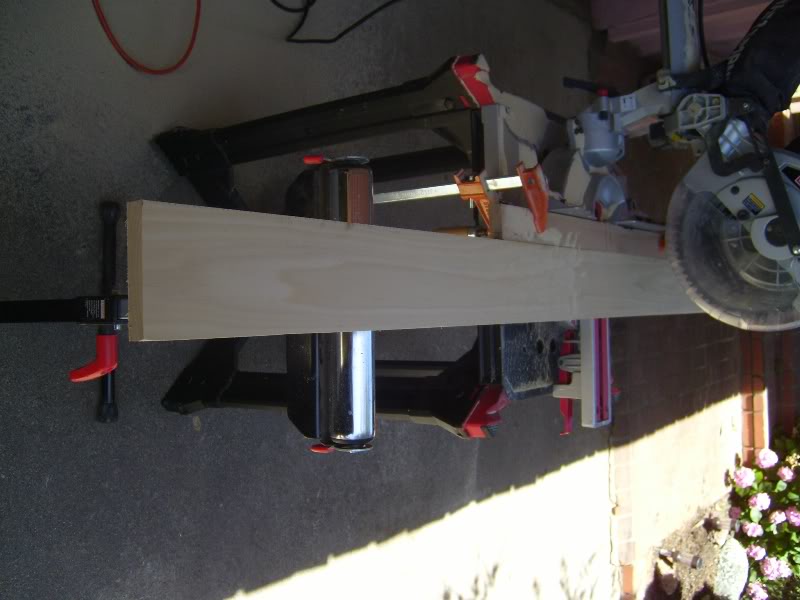
This is what it looked like before the cutting began.

S7001504.jpg


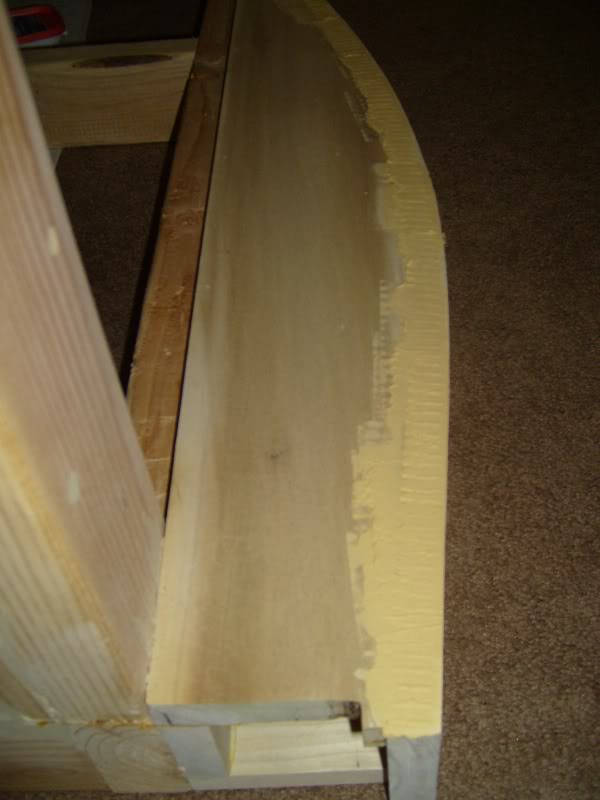
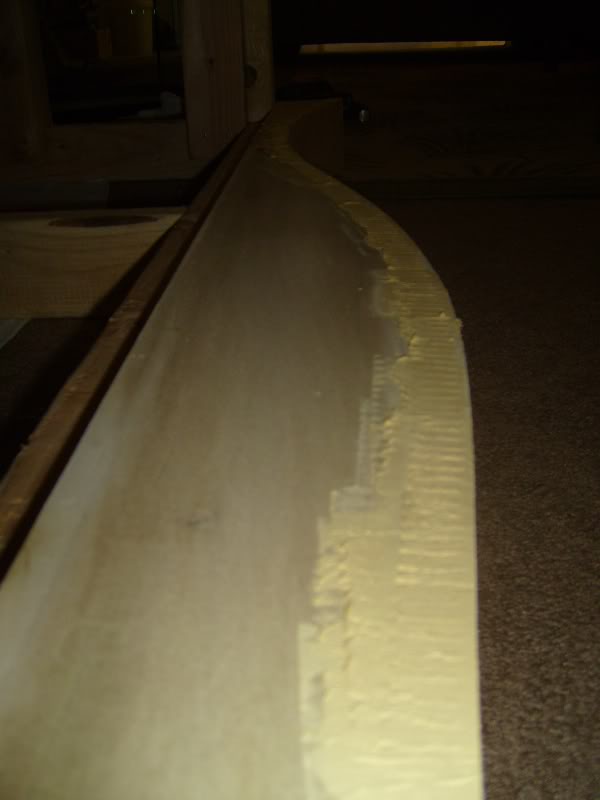
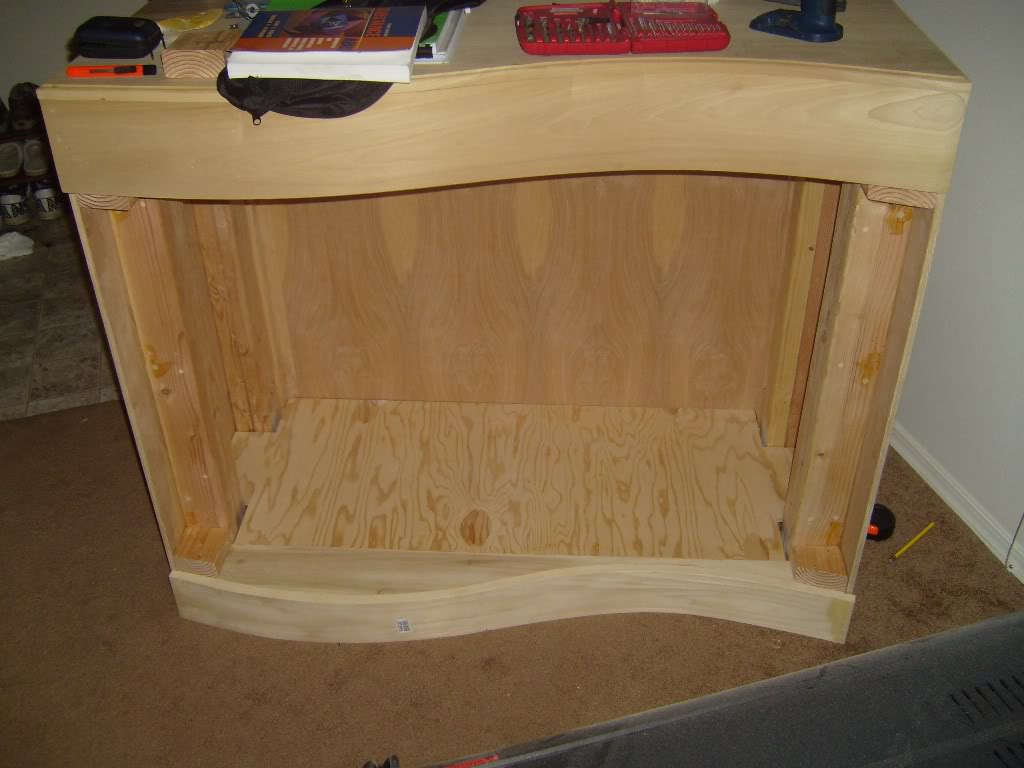
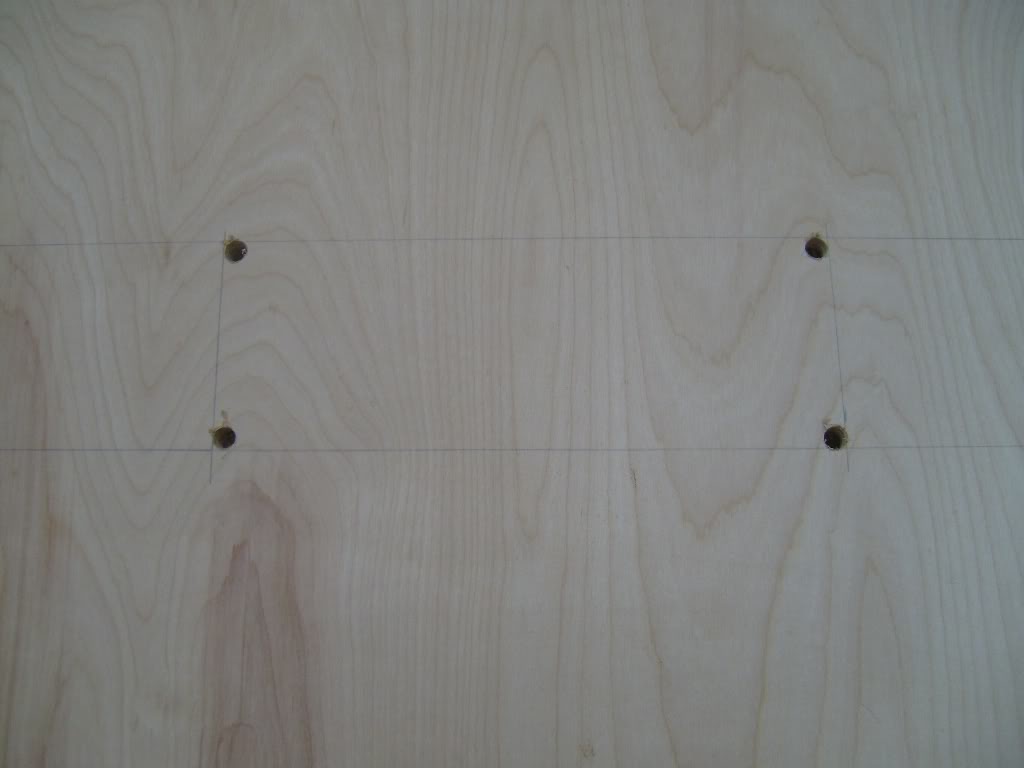
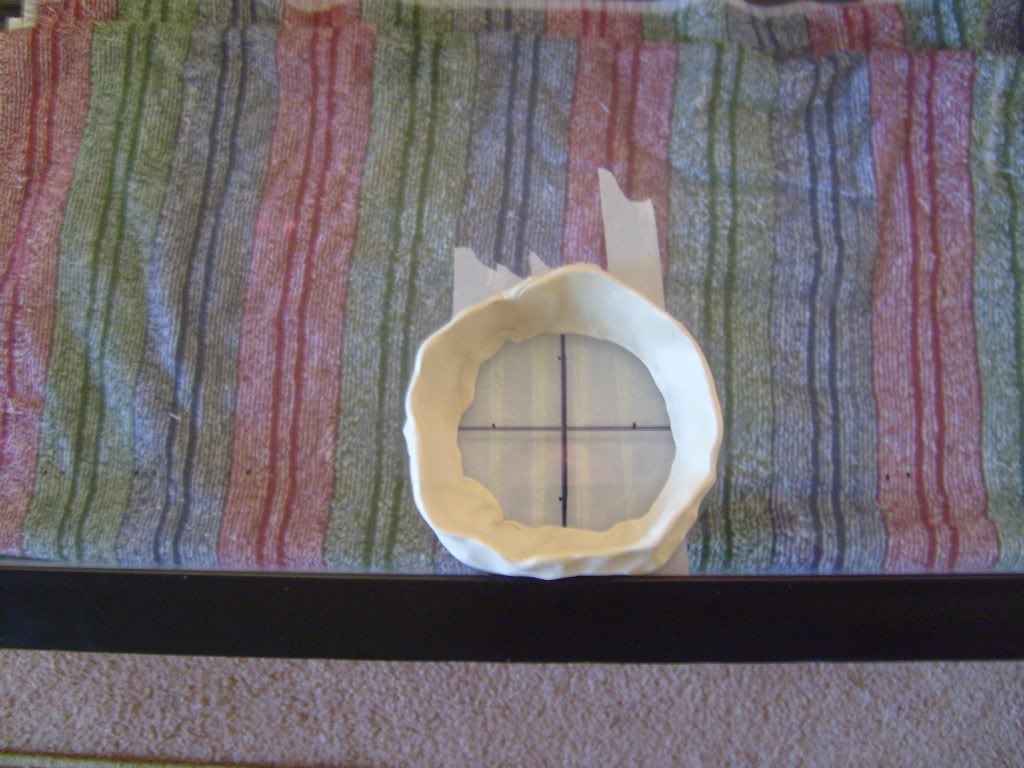
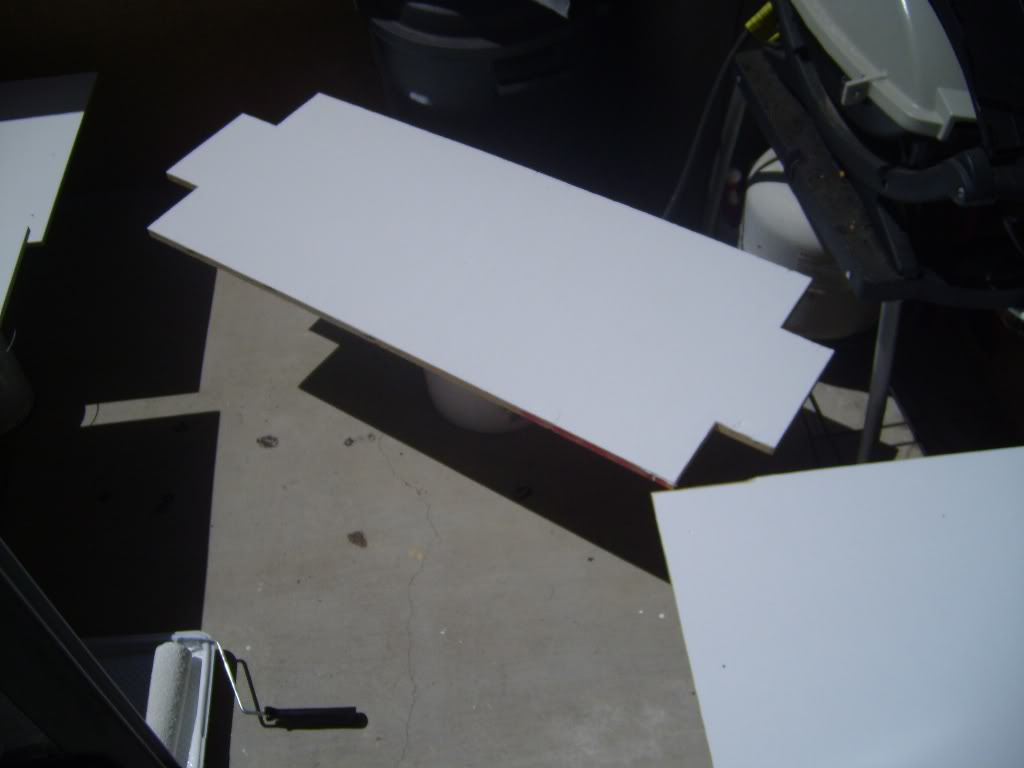
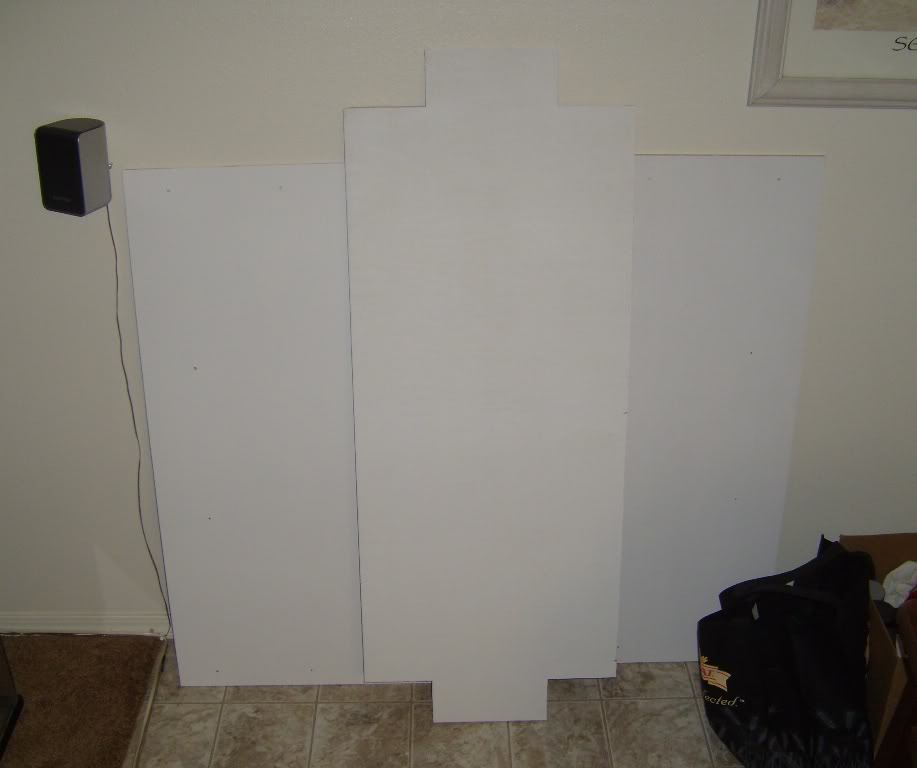
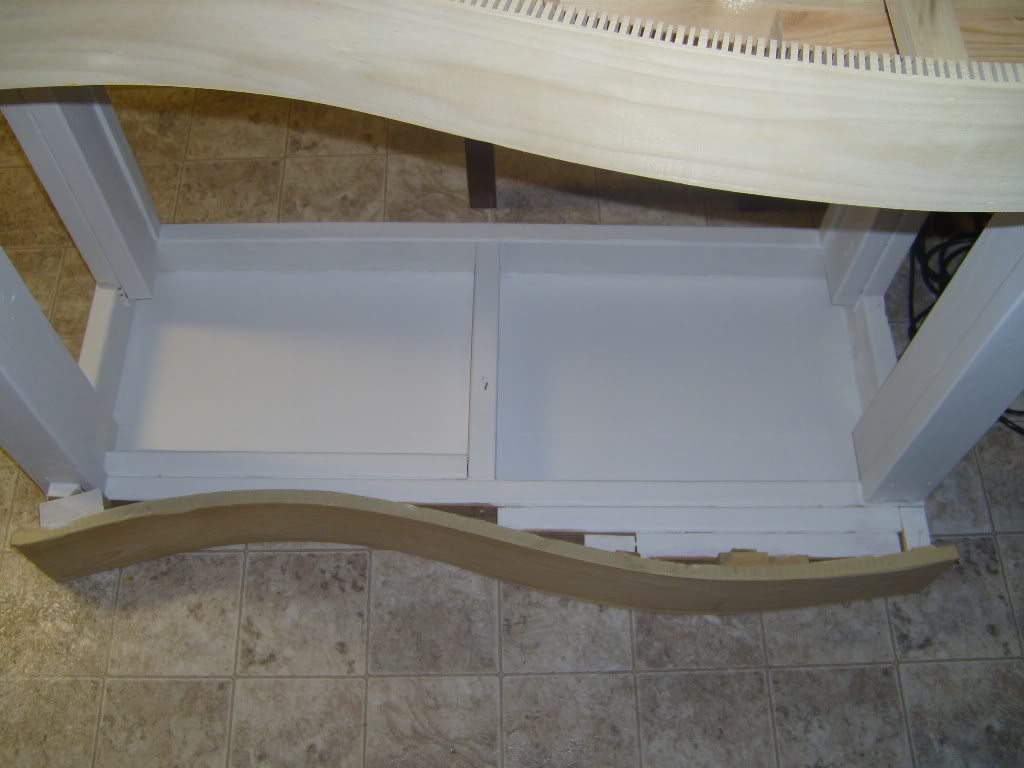
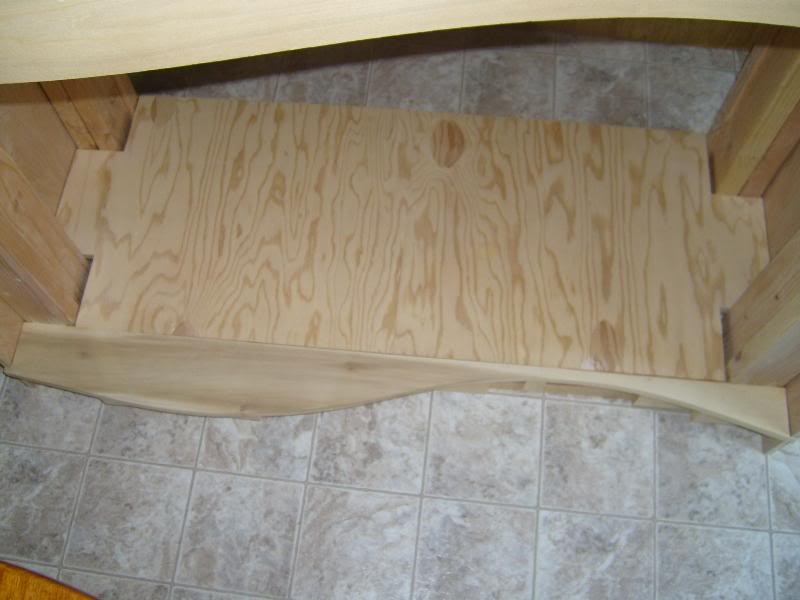
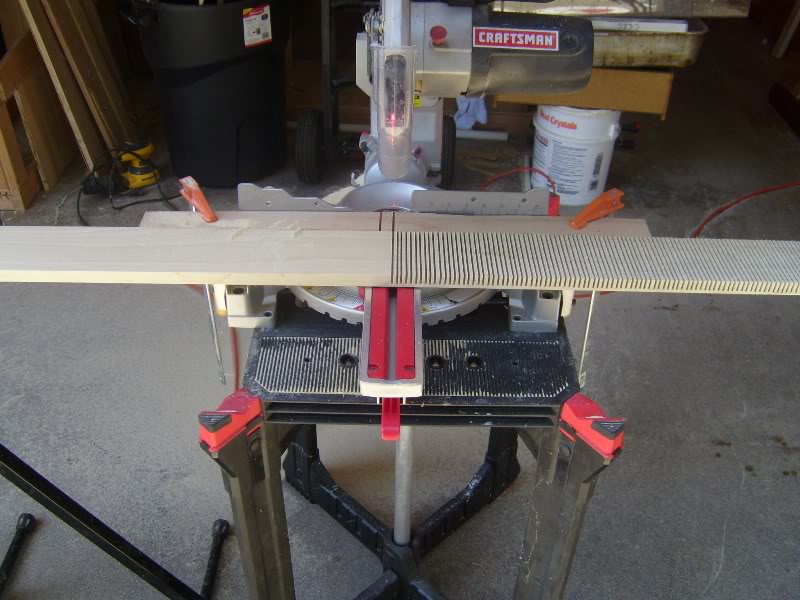
And this is what it looked like after the kerfing technique.

S7001505.jpg


S7001506.jpg


I have gotten pretty good at this technique and can now say I am a kerfing expert!

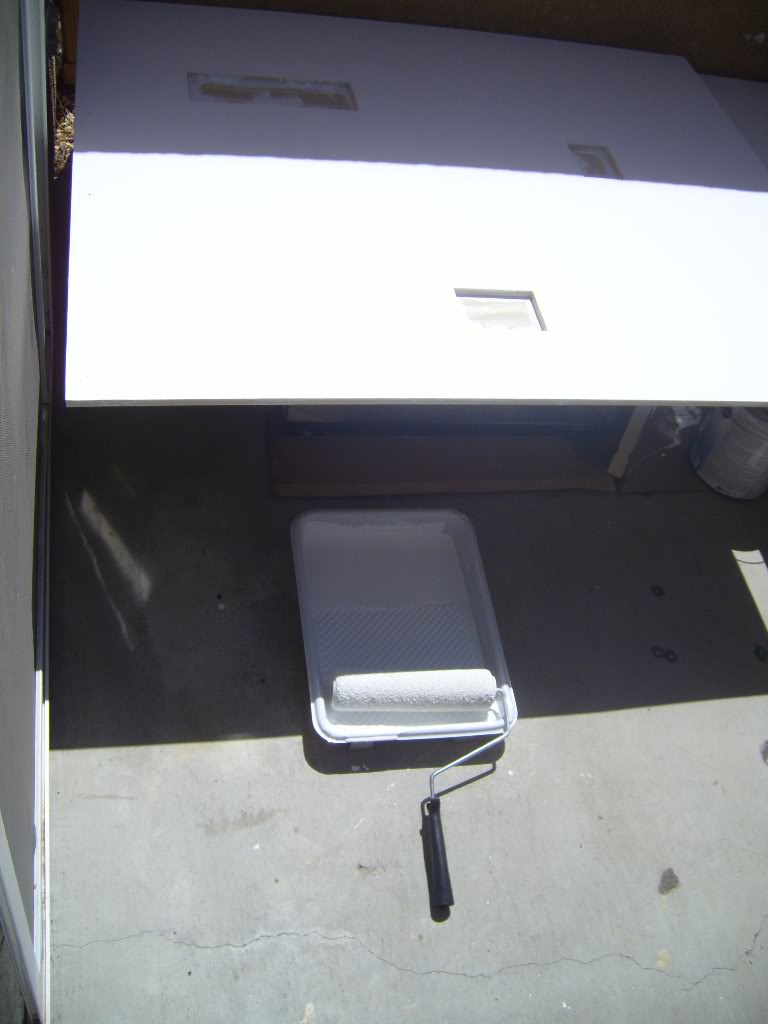
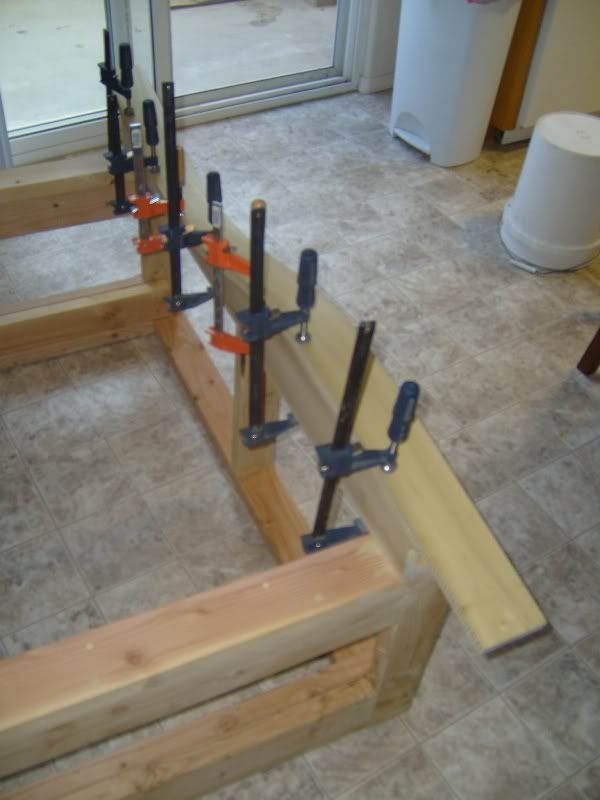
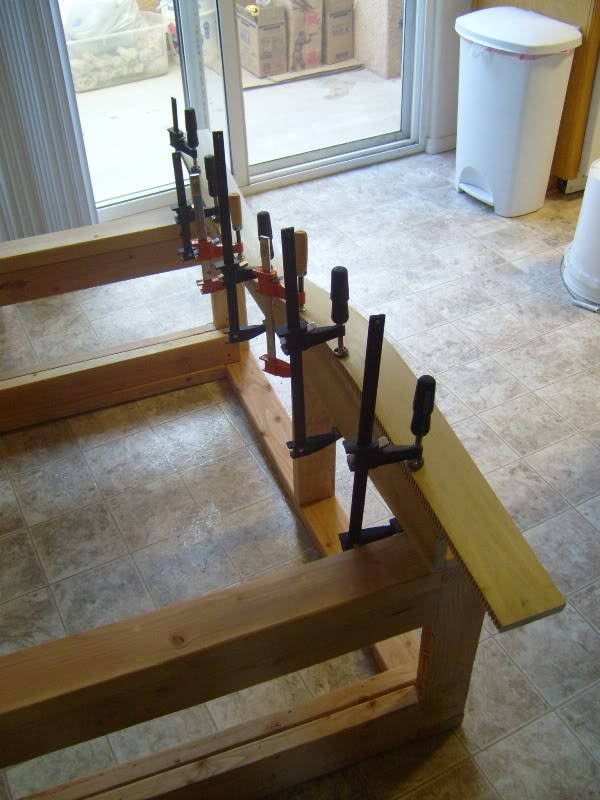
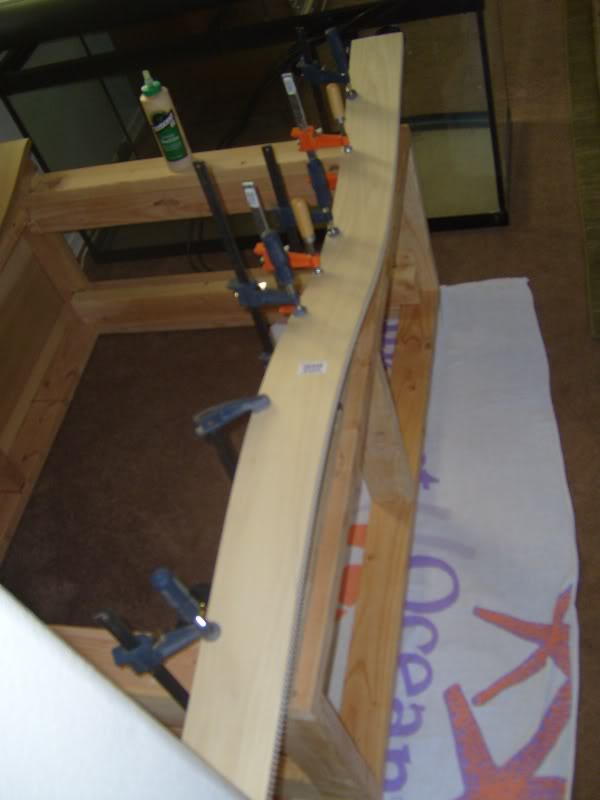
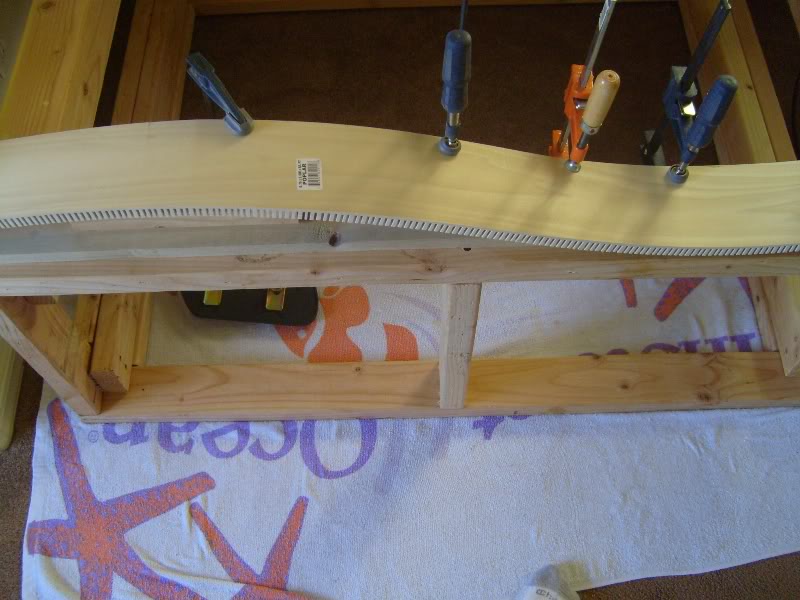
So after that I got the piece set up to be glued to the bottom panel. Supplies were needed I need lots of glue and lots of wood clamps ranging in size, as you can see it set up.

Poplar set up and ready to go.

S7001508.jpg


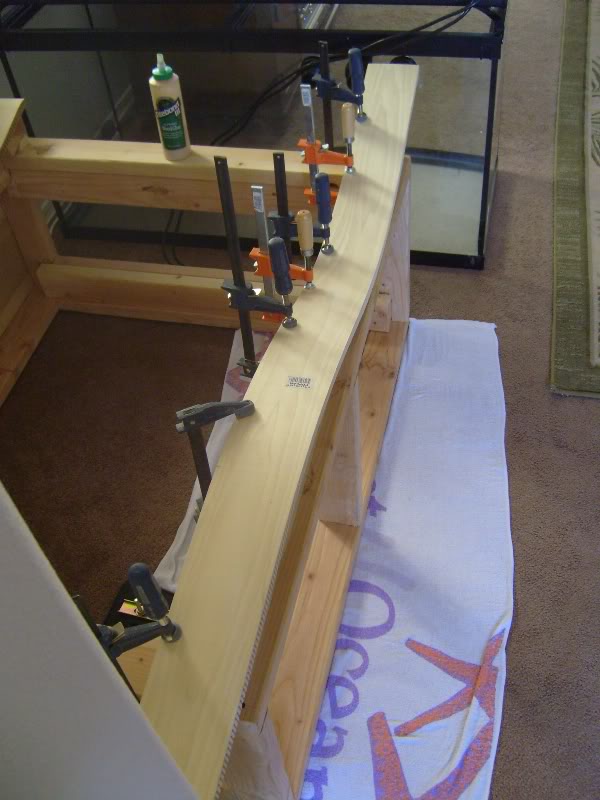
Glue added and clamps on!

S7001509.jpg


S7001510.jpg


S7001511.jpg


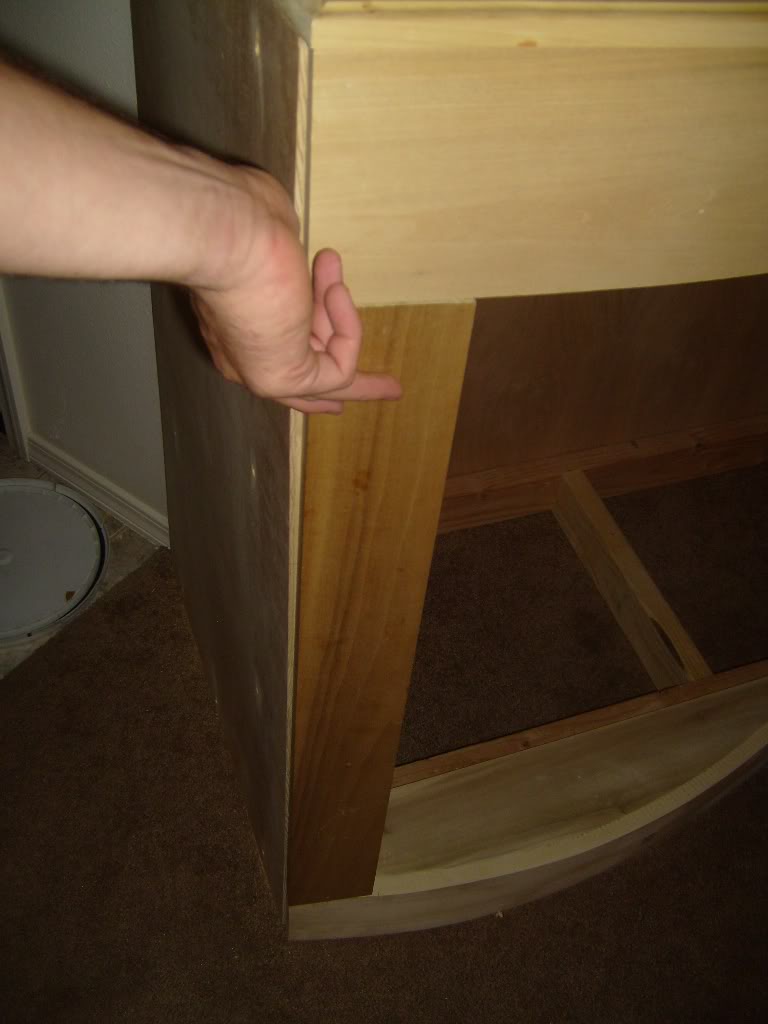
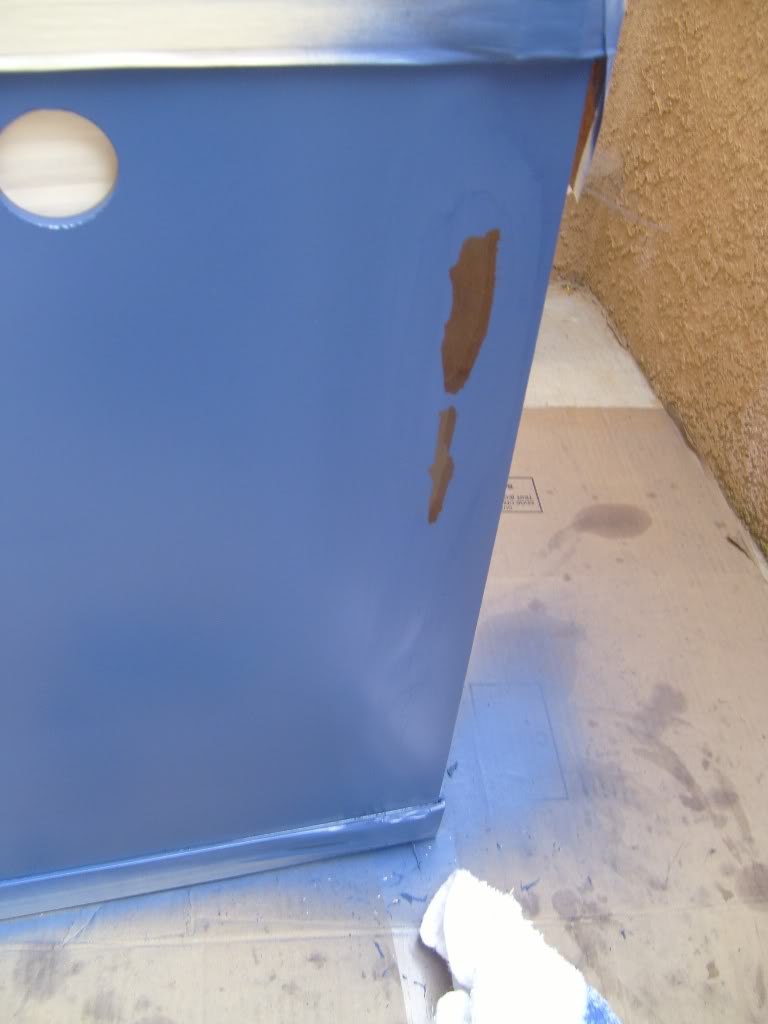
Looks good doesn’t it well here is some bad new remember how I said that I had gotten 1x4 wood well my thinking was that I need to get a piece that was 4 1/4†in order to make it fit perfect but I thought that a 4†would be enough and we wouldn’t be able to tell the difference. Well since I didn’t measure the piece of wood I later found out that at ace they go by another method of measuring wood so it is only a 3 1/2†piece of wood. Since it is that small it won’t work so after I realized this I took all the clamps off and got the wood off before the glue dried. So I went back out to Home Depot this time with a measuring tape to be sure to get the right piece of wood. When I got there I look at their way of measuring and it is accurate (why can’t they all be on the same page) well I got a 5 1/2†piece and I will trim it the size on a table saw.

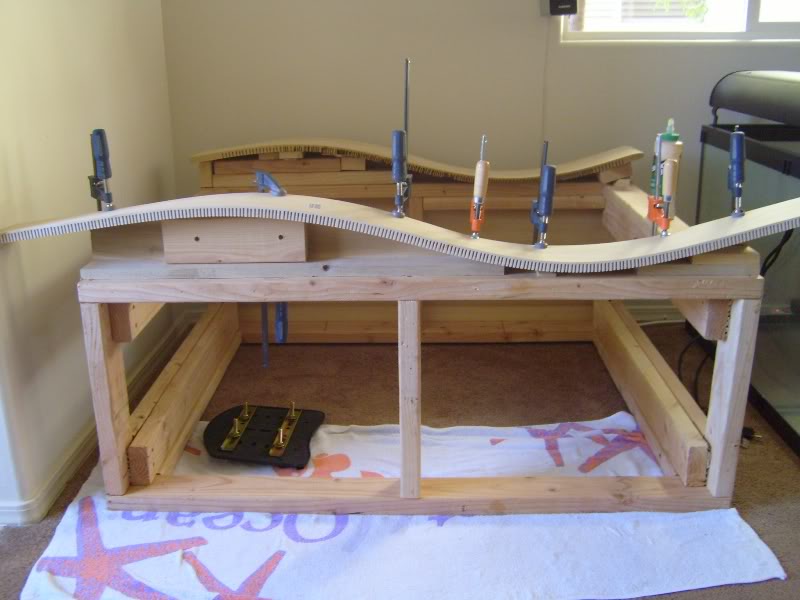
All trimmed the process begins again.

S7001513.jpg


Half way done.

S7001512.jpg


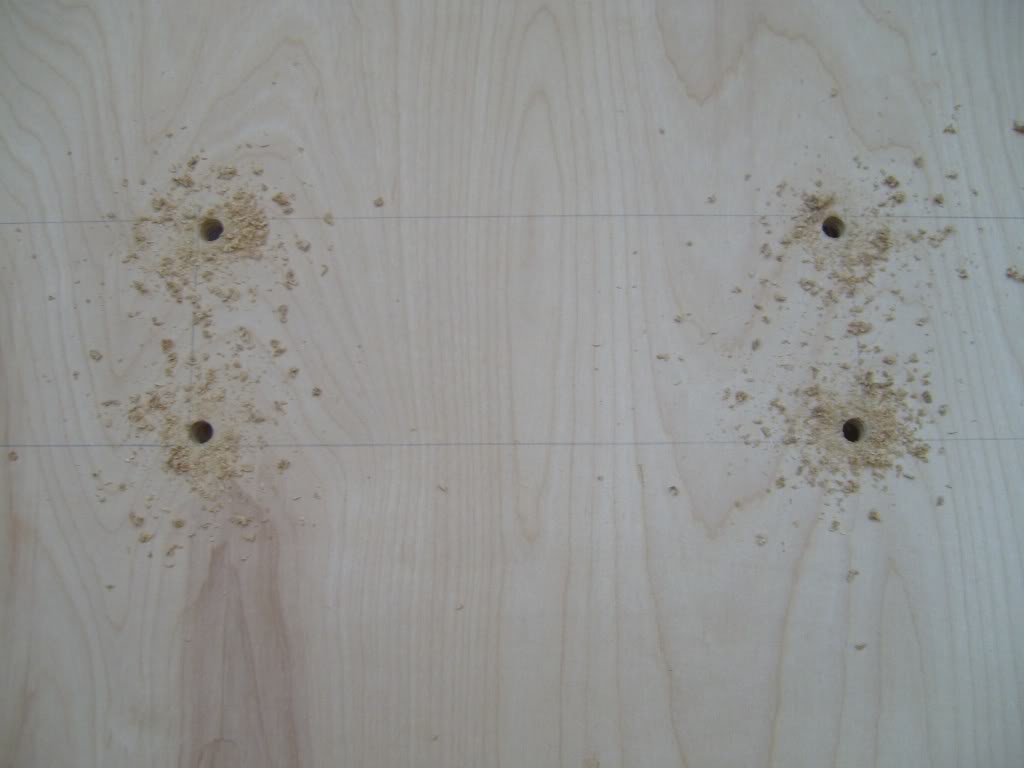
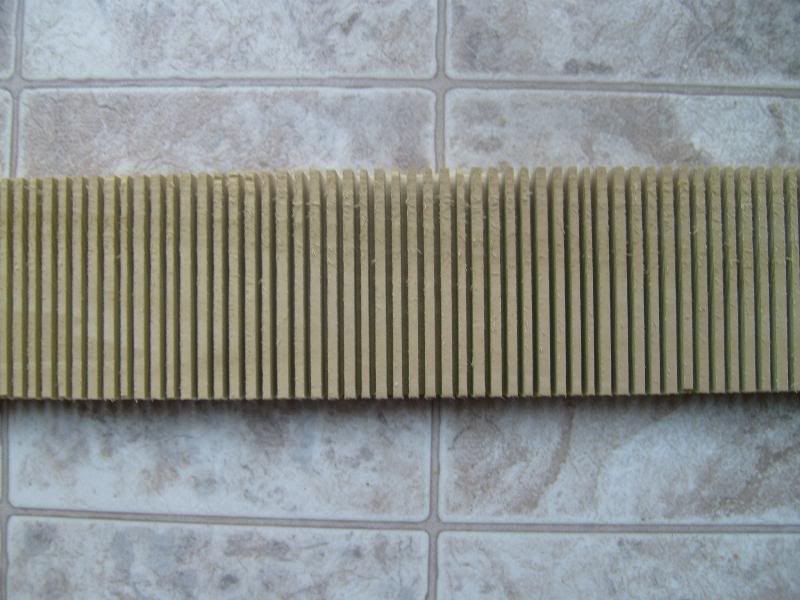
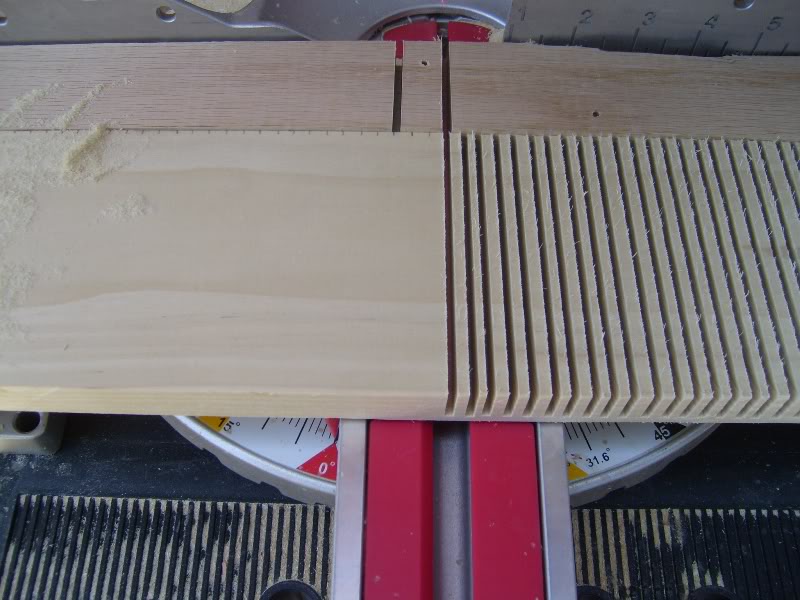
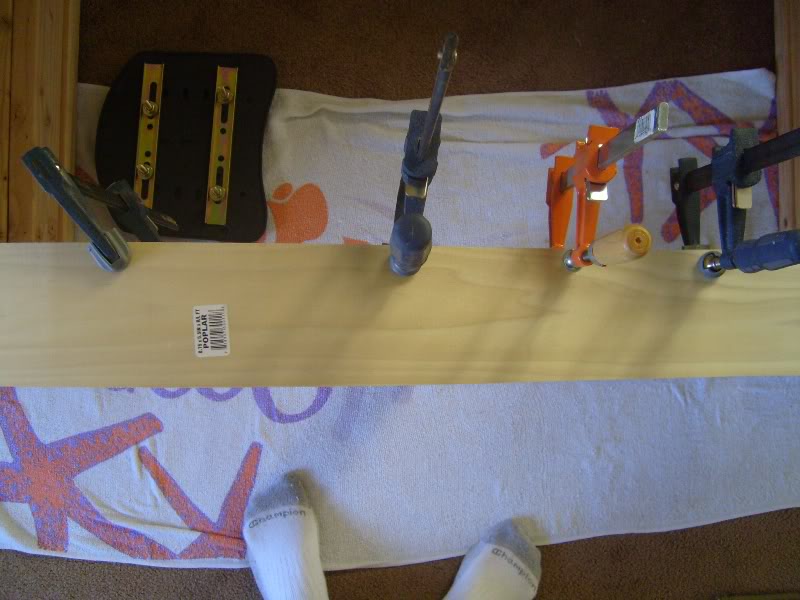
Close up shot every 1/4â€

S7001514.jpg


Clamped on!

S7001515.jpg


S7001516.jpg


S7001517.jpg


S7001518.jpg
 
OP
OP
scott26

scott26

Active Member
View Badges
Joined
Oct 27, 2009
Messages
202
Reaction score
51
Location
Nevada
Rating - 0%
0   0   0
S7001519.jpg


Okay while that was drying me and my wife were able to rearrange the living room to get the aquarium to really fit in. I have been spending all this money on the system and want to be able to enjoy one of the main reasons we moved was to have a larger living room. So we are going to set it up in the corner next to the TV I will be angled so that we can see it from both couches and even the kitchen. I am going to leave enough room on the right side of it to be able to get the back of the aquarium just in case anything springs a leak in the rear plumbing.

New living room set up.

S7001520.jpg


Now that we got that all done 3 hours later. I guess moving all the electrical was a little more involved then my wife thought :D 
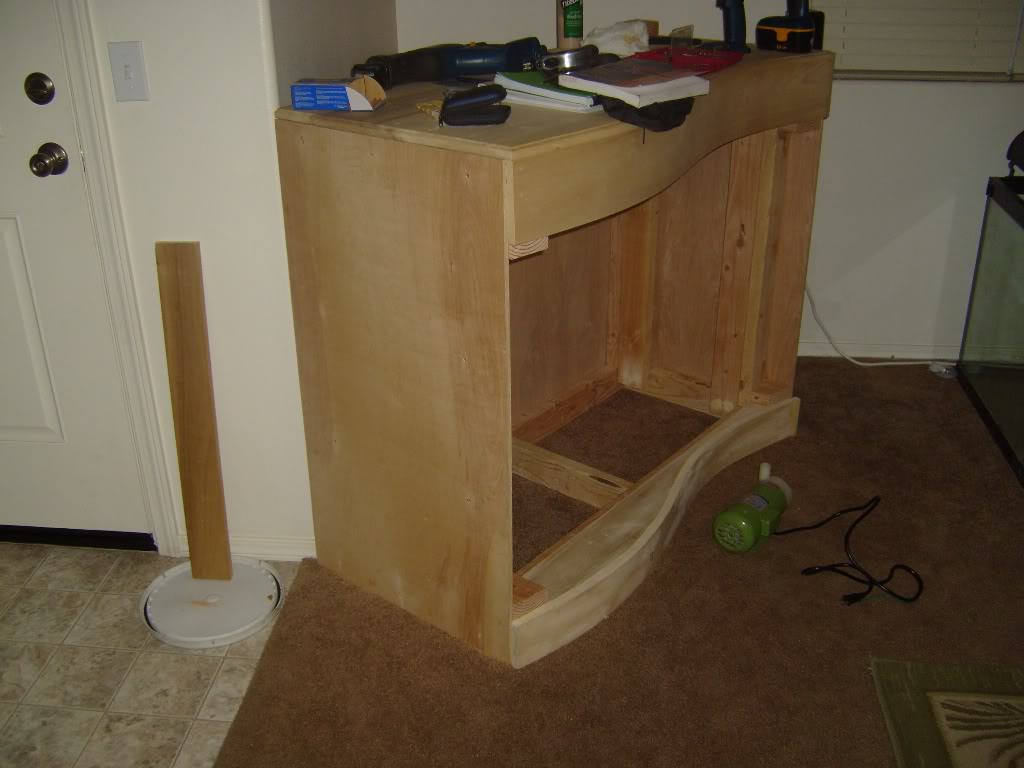
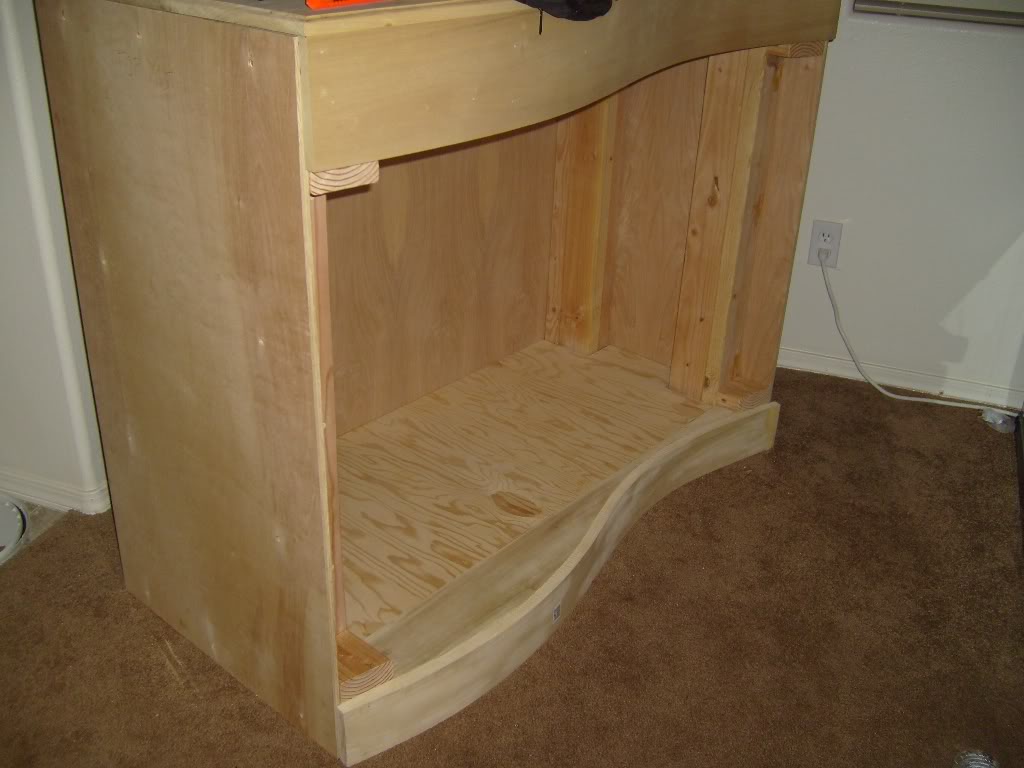
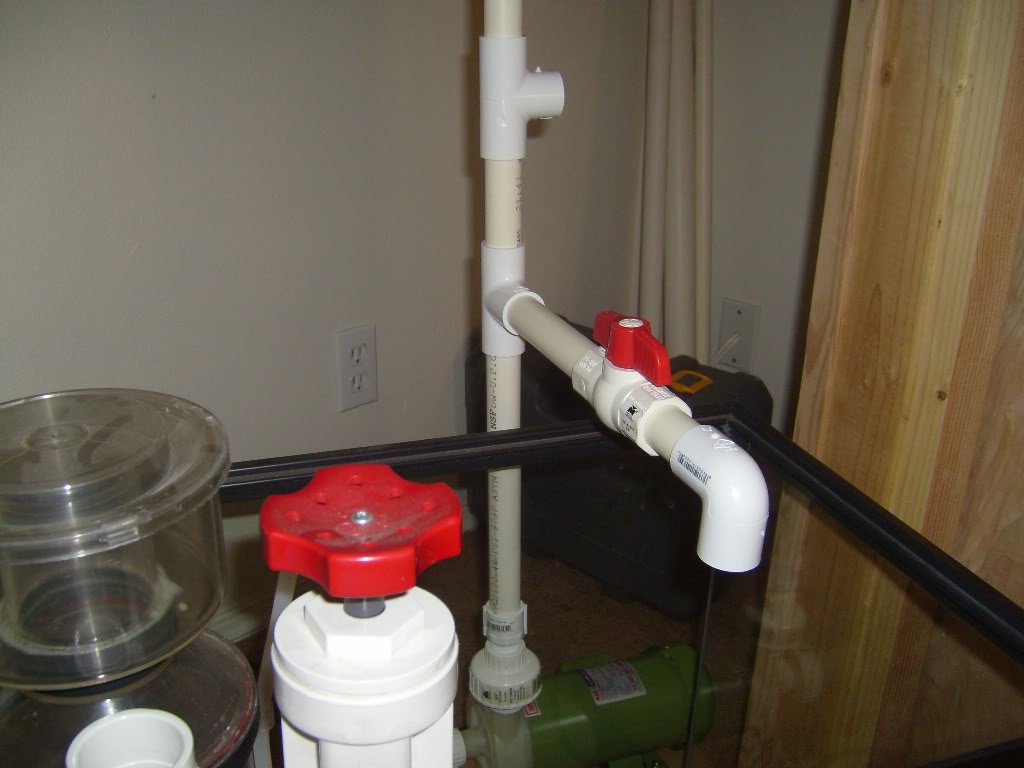
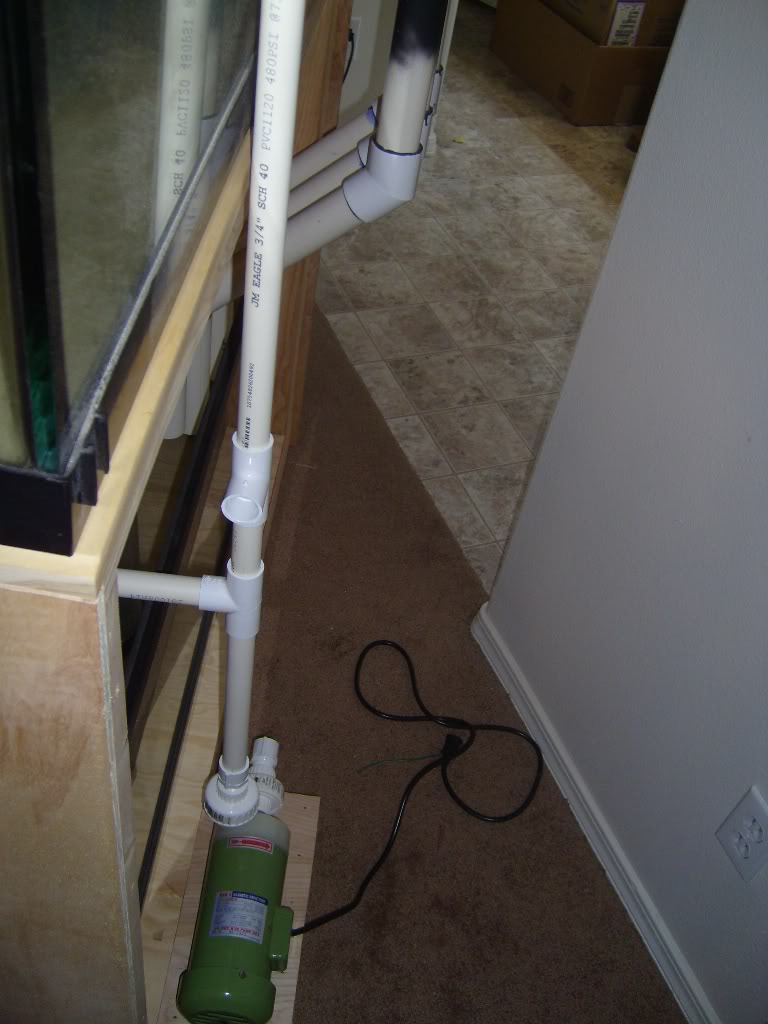
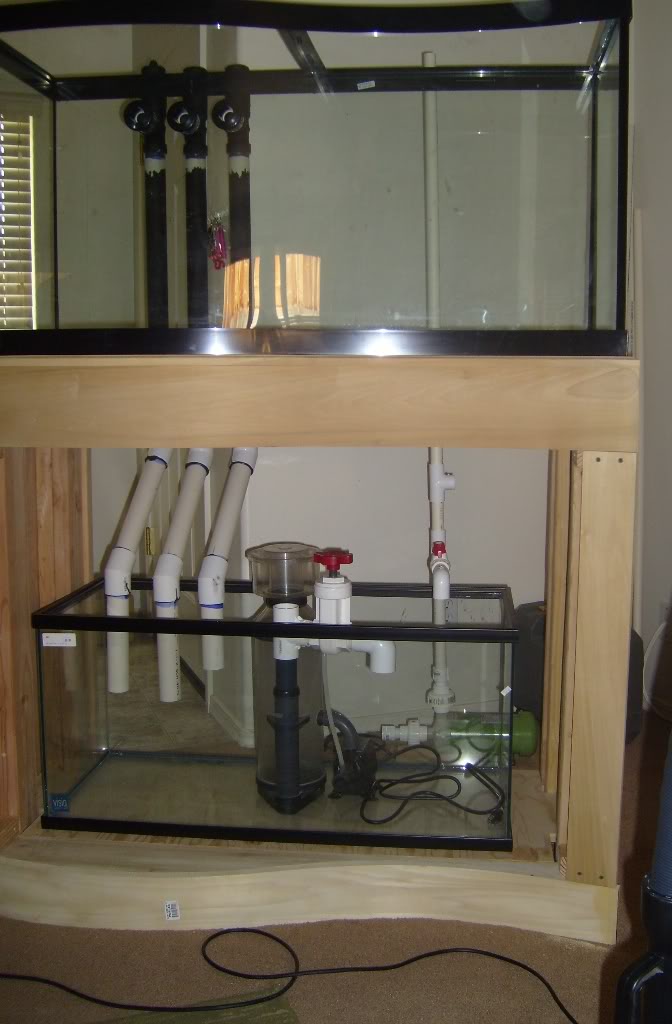
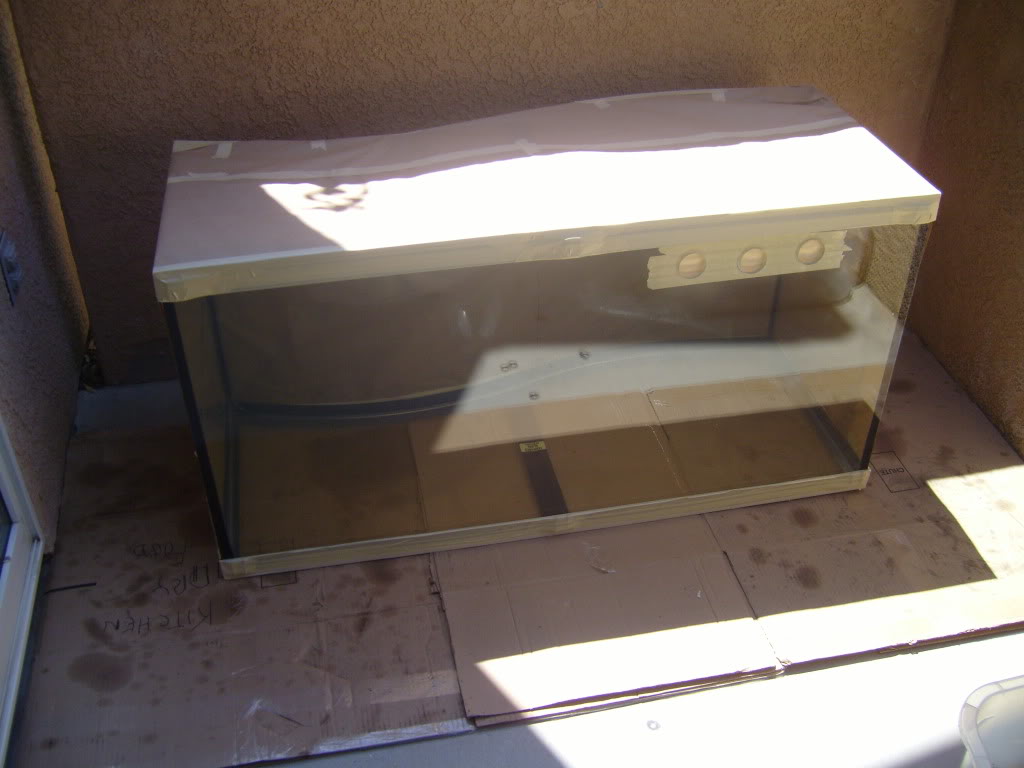
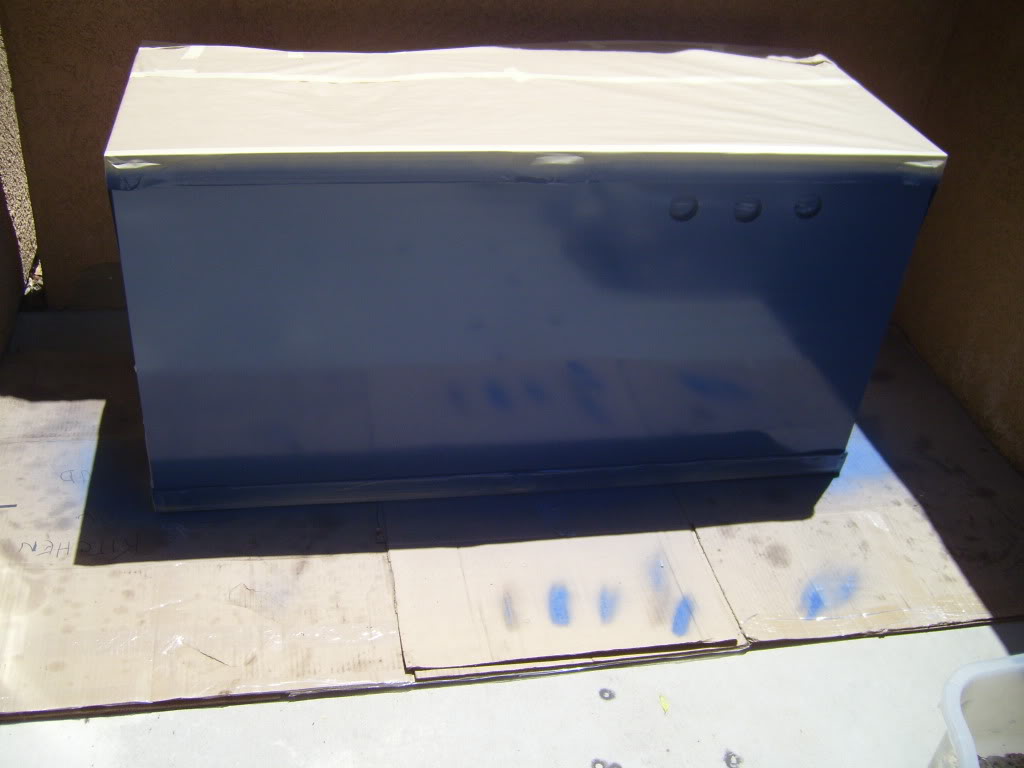
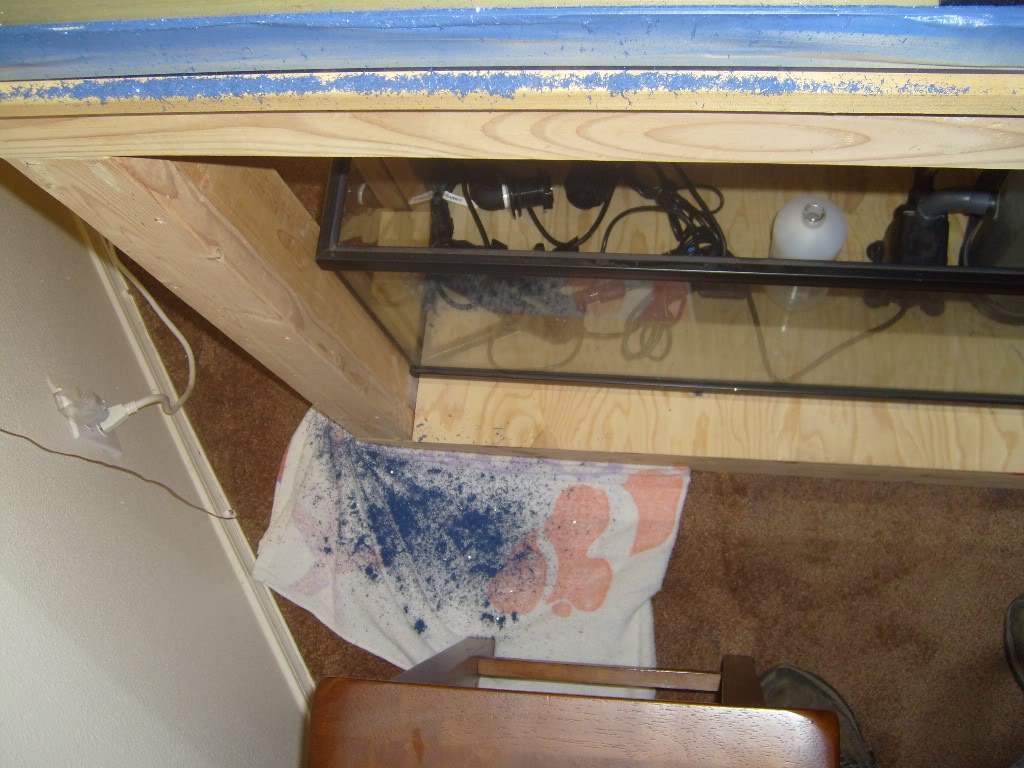
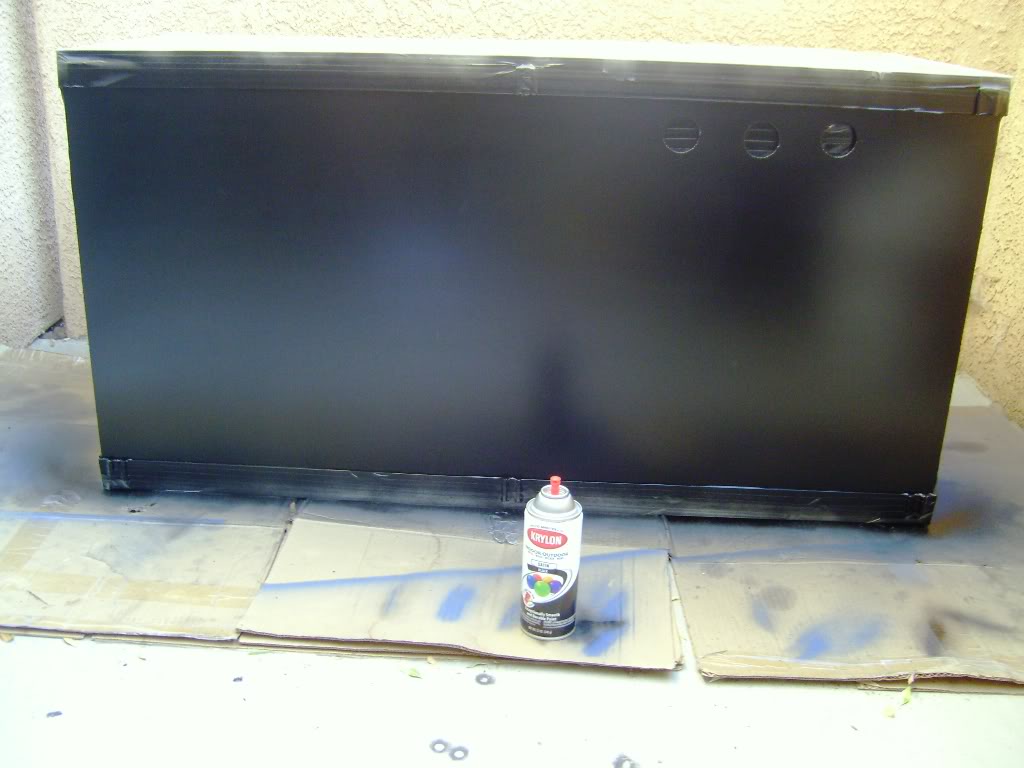
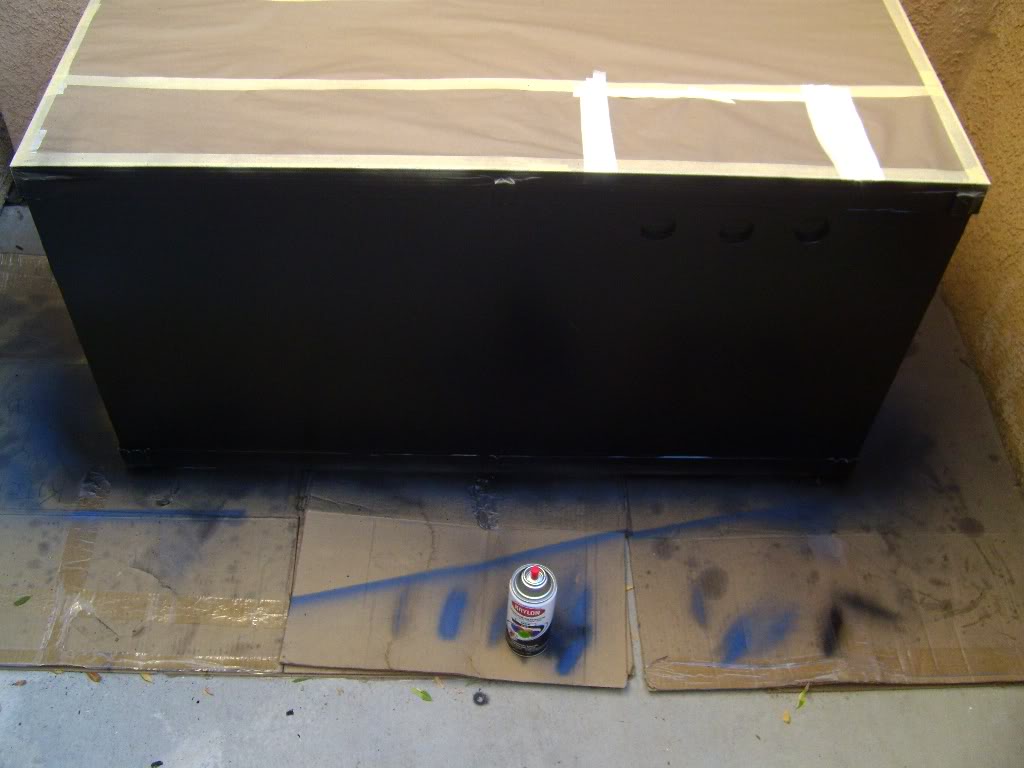
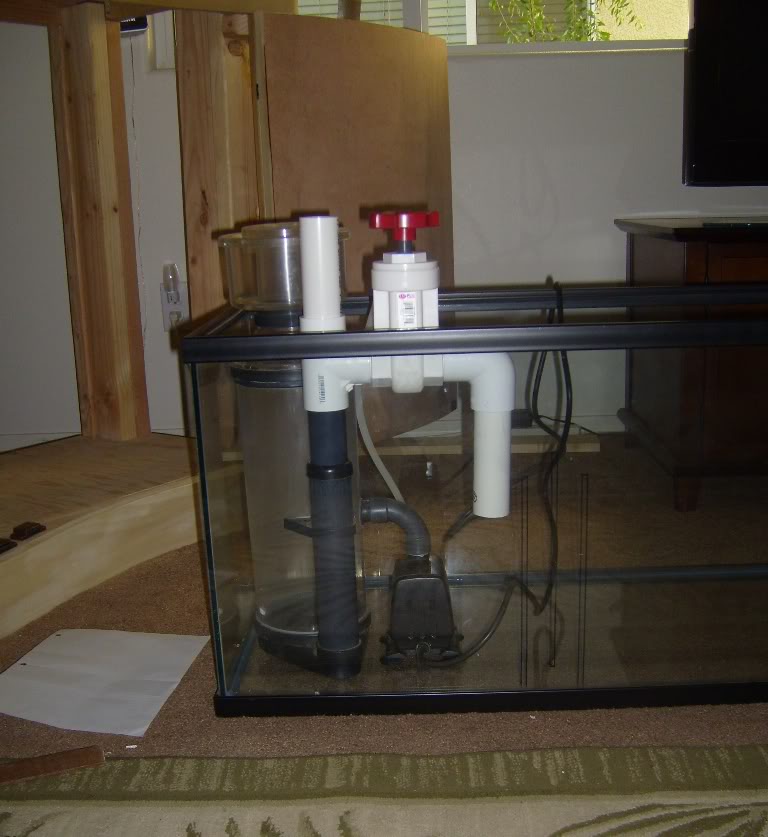
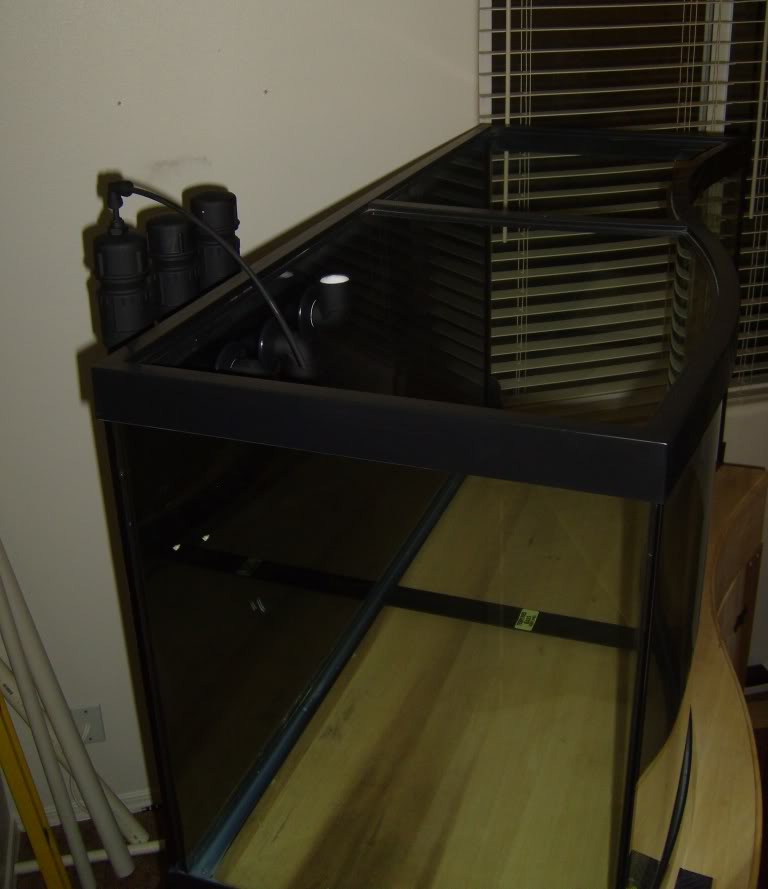
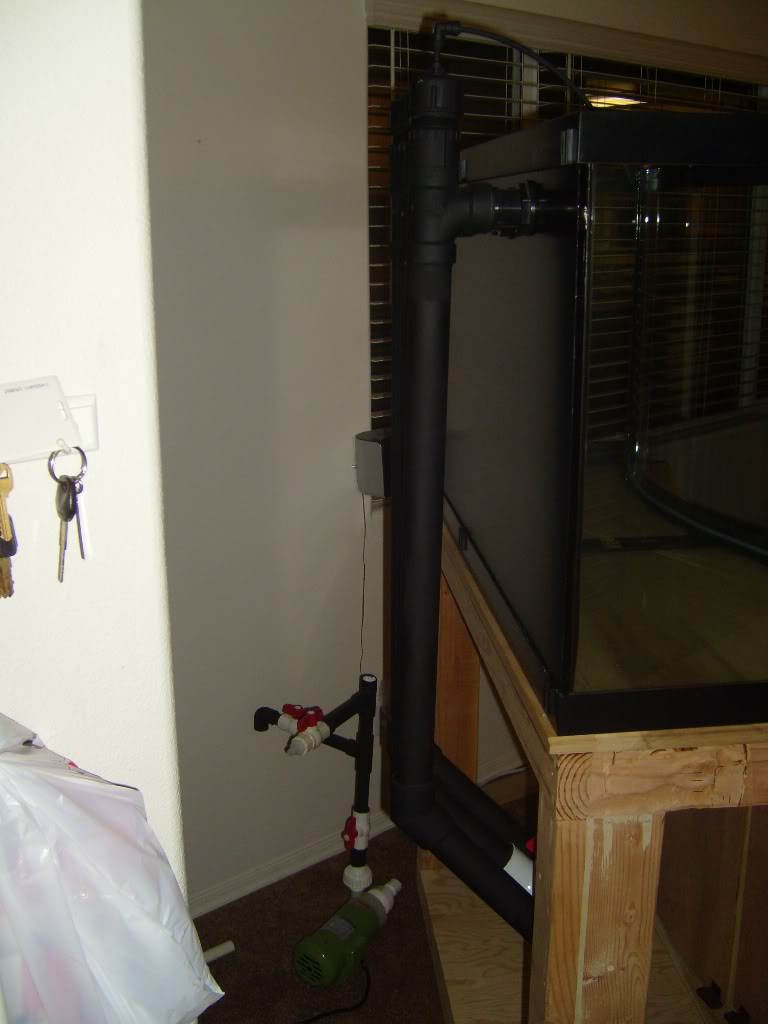
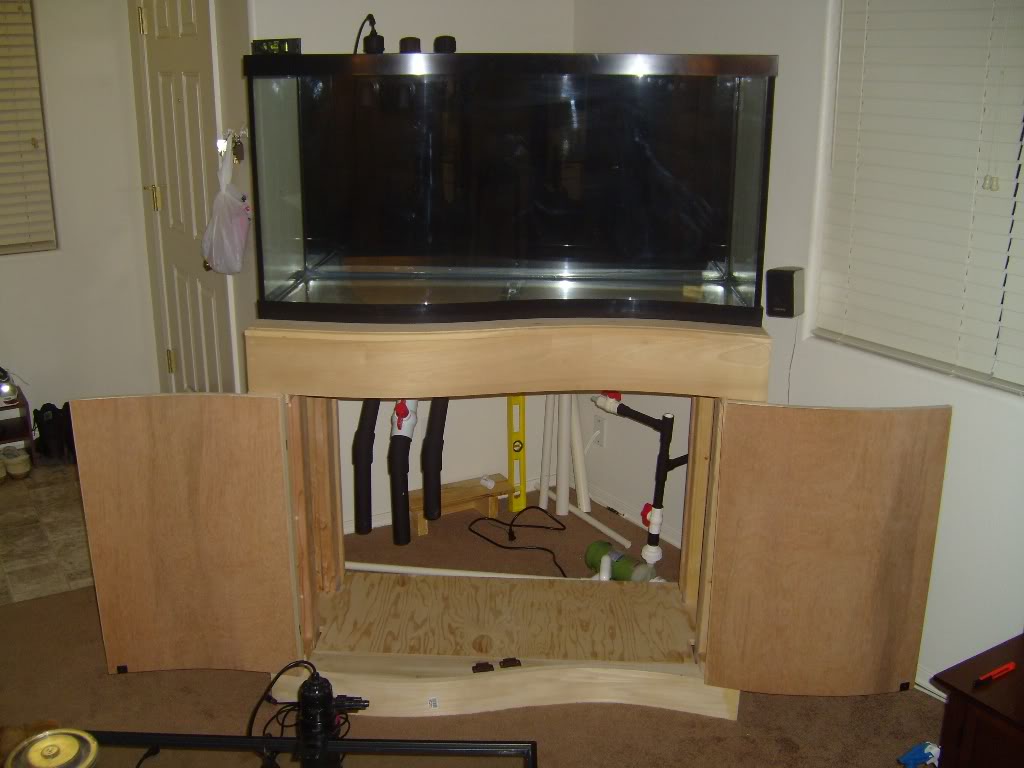
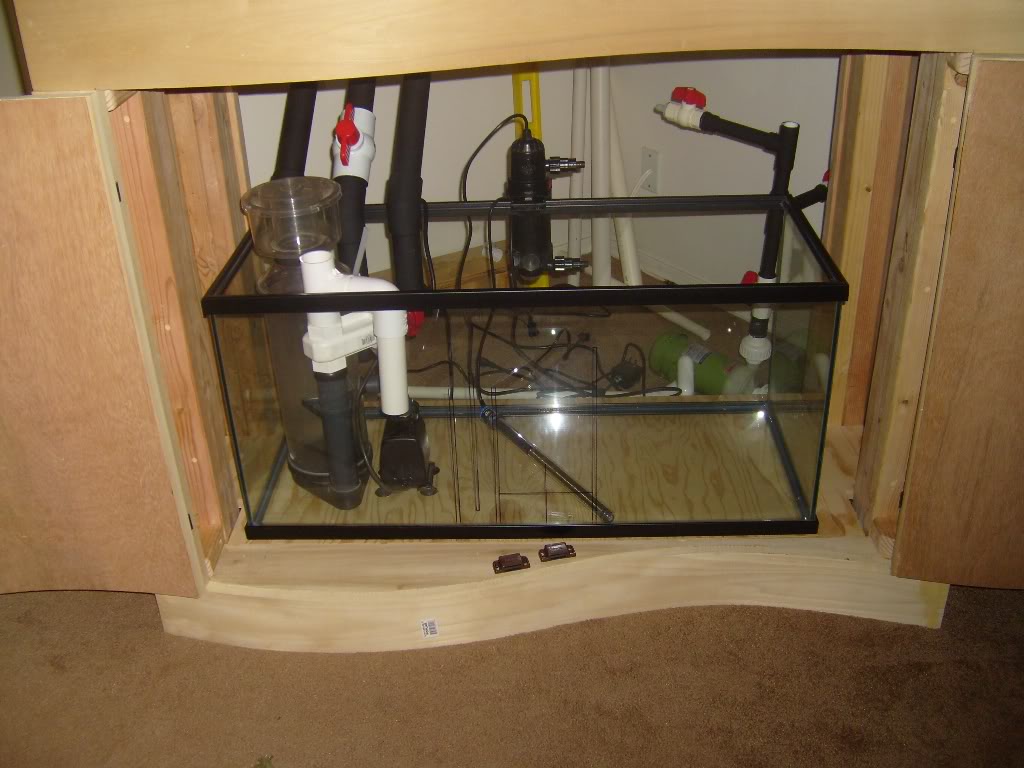
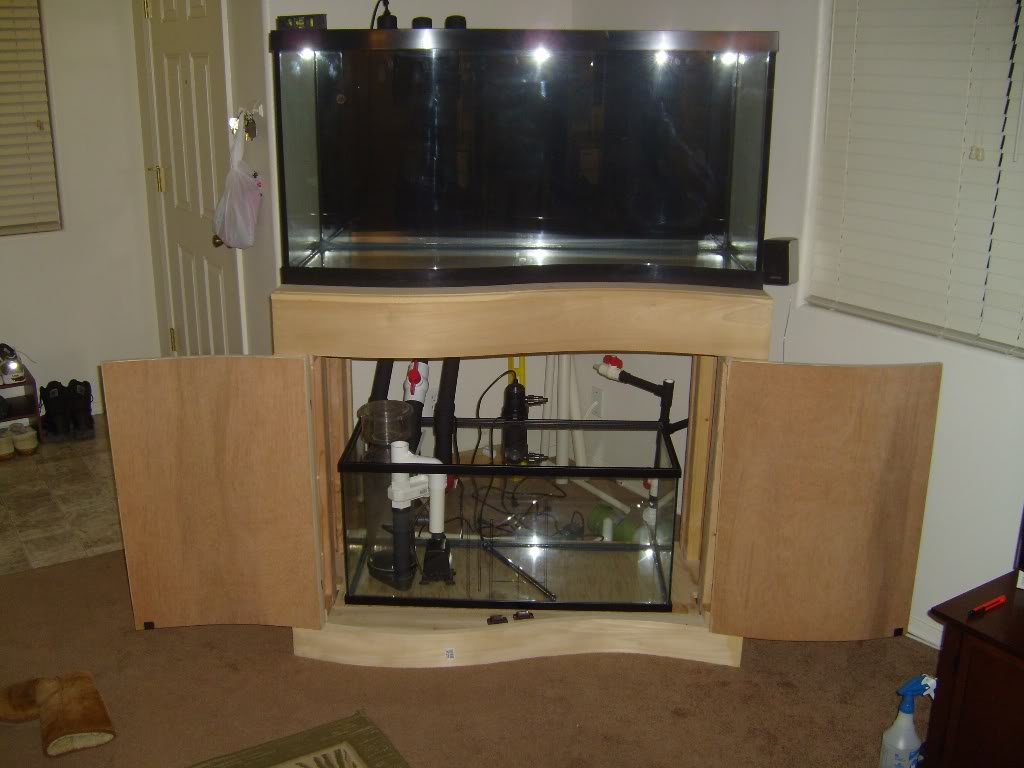
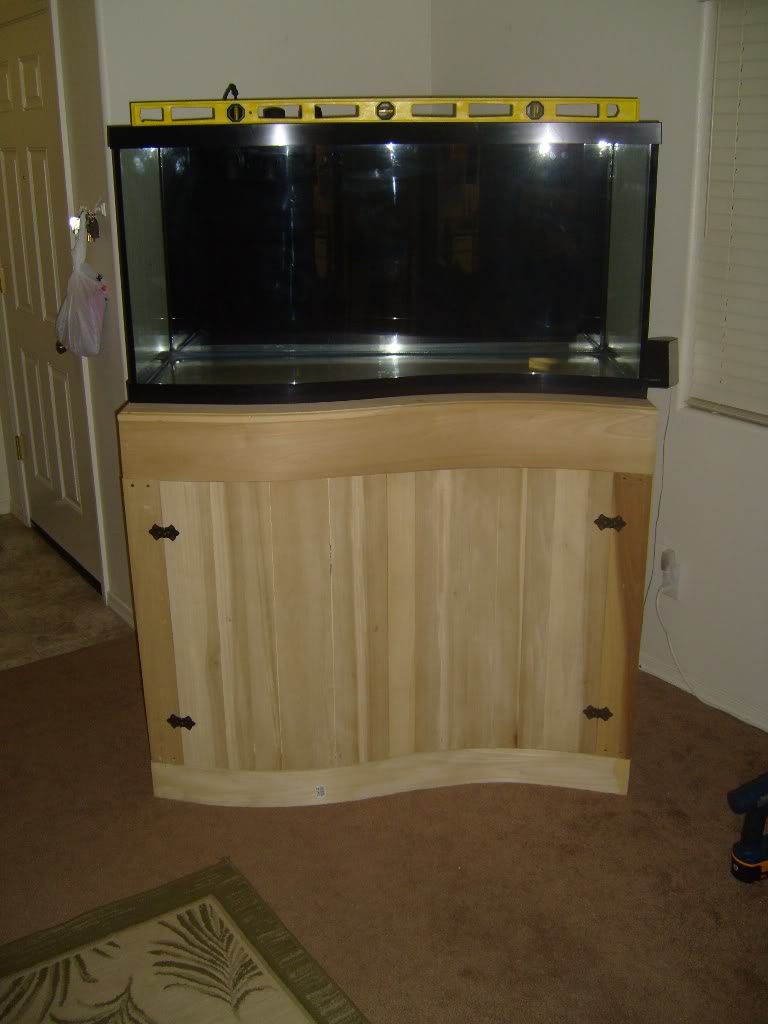
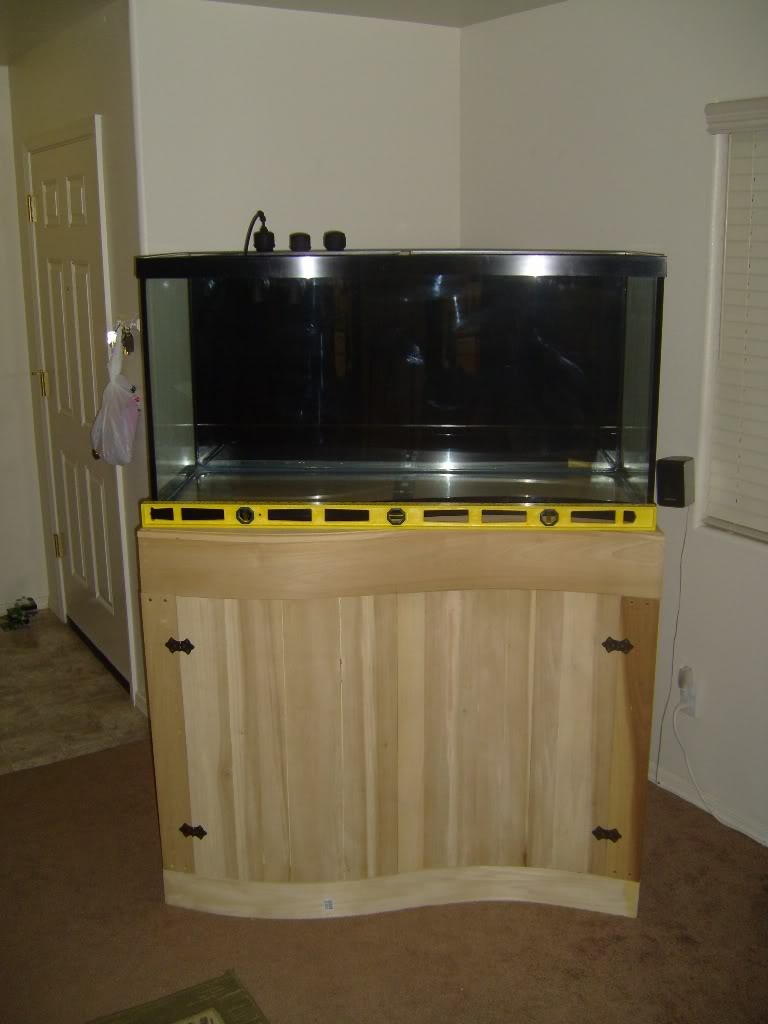
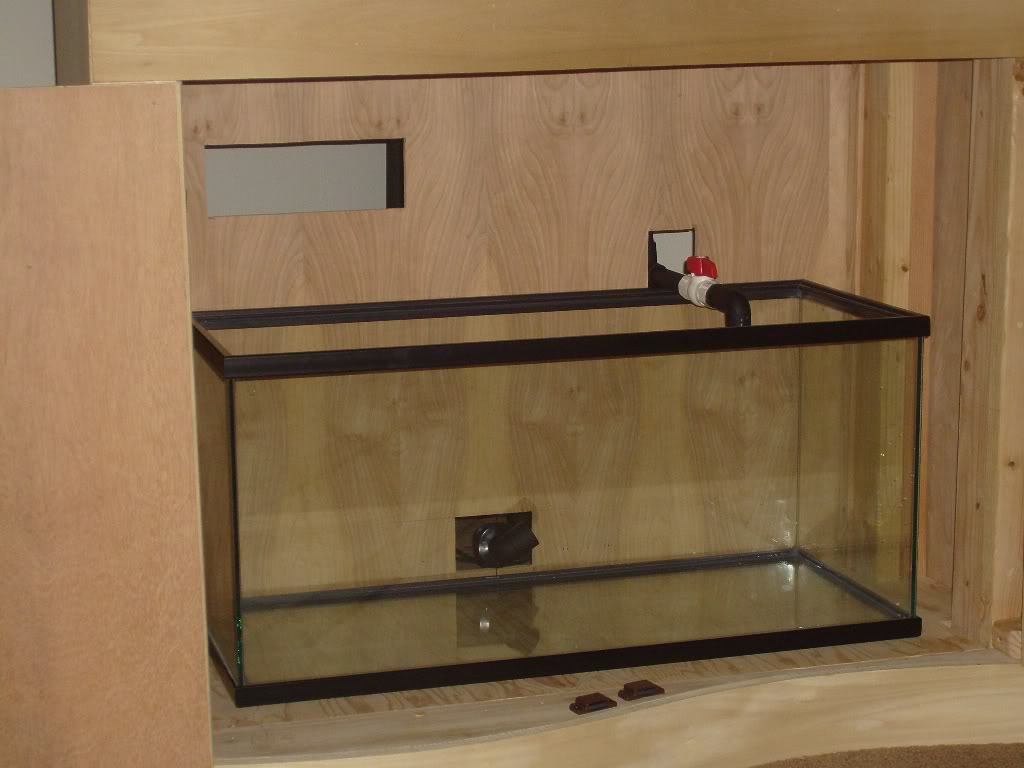
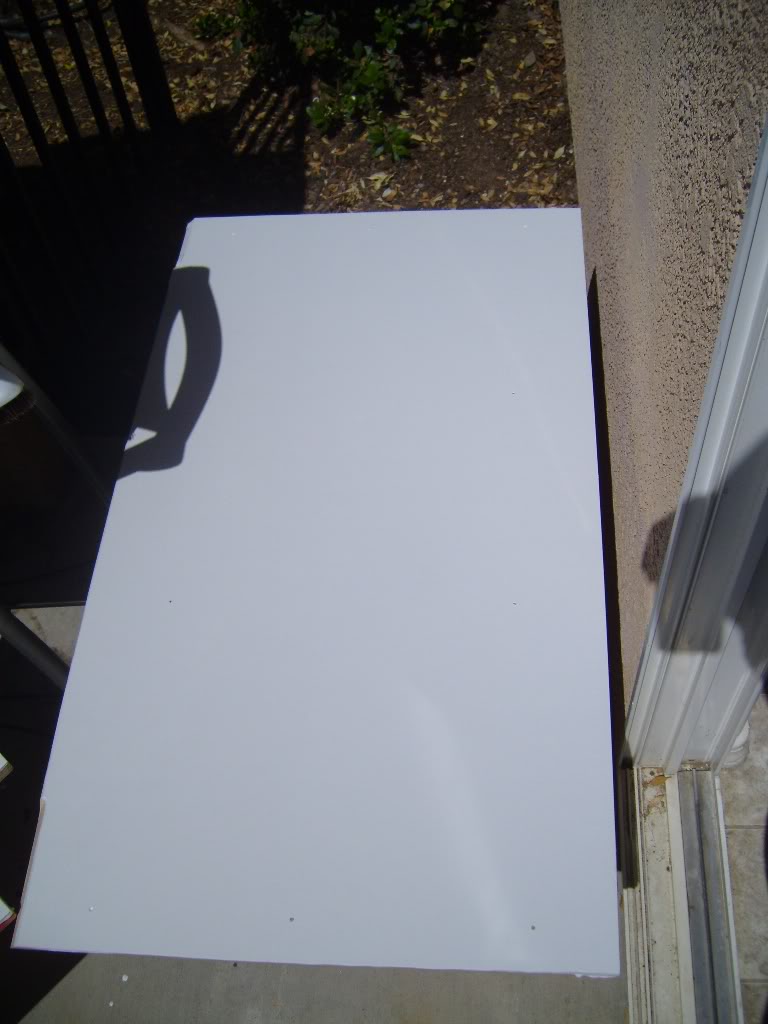
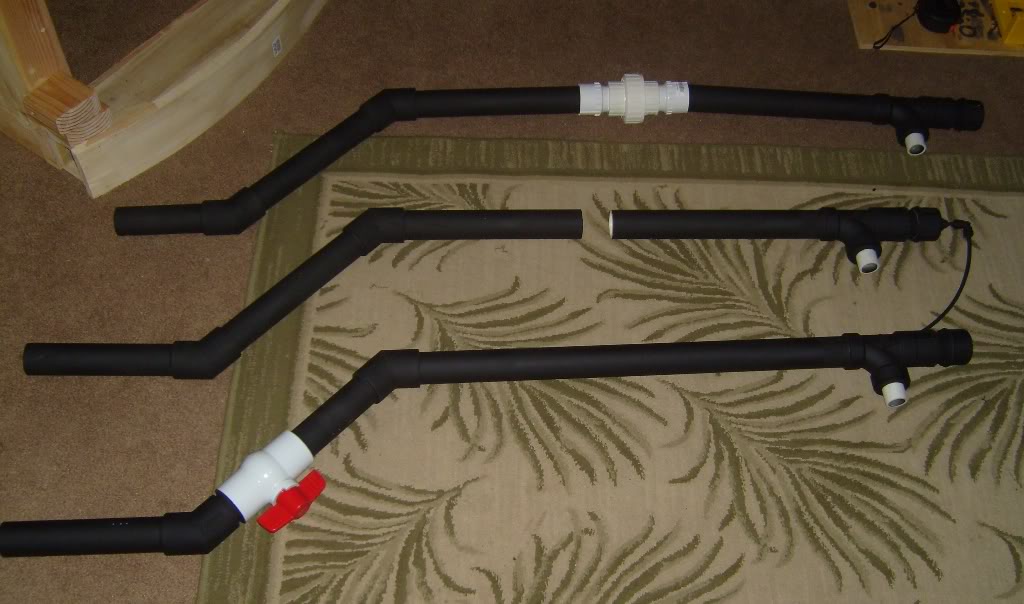
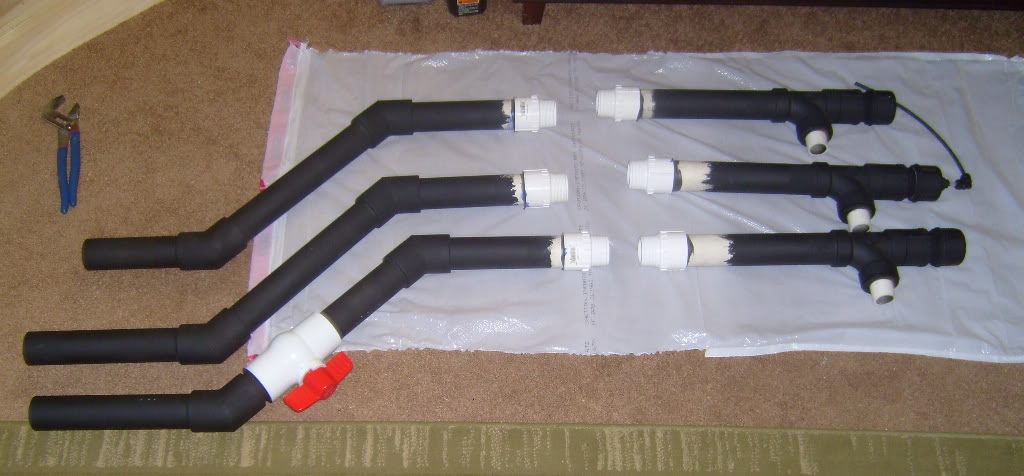
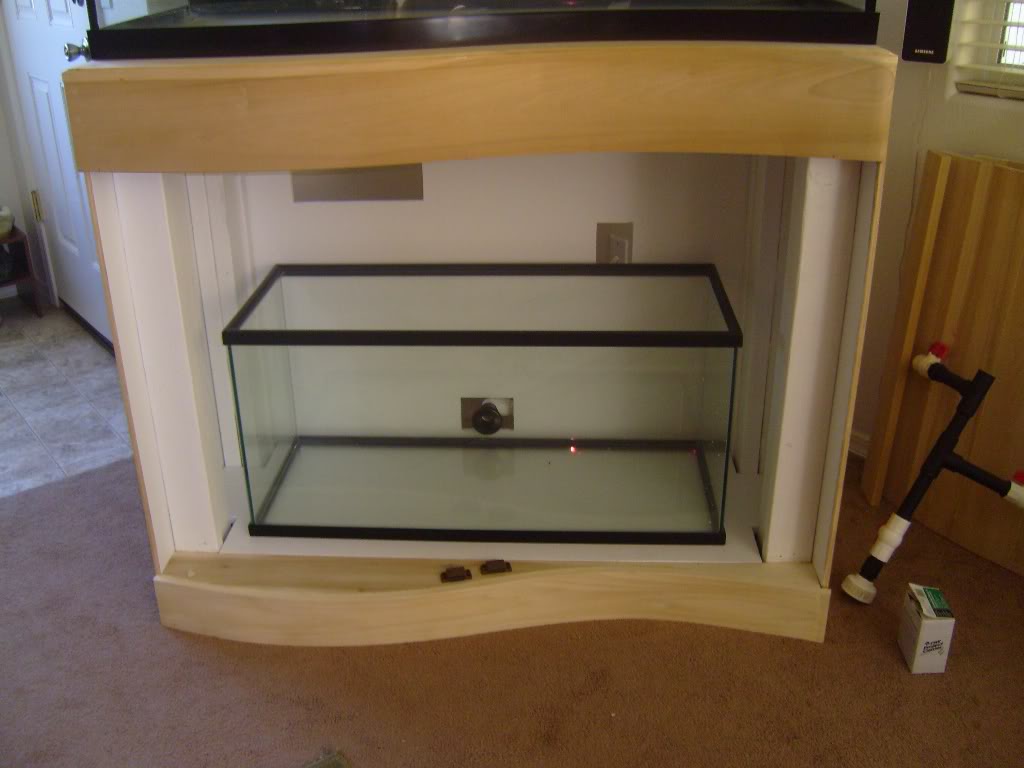
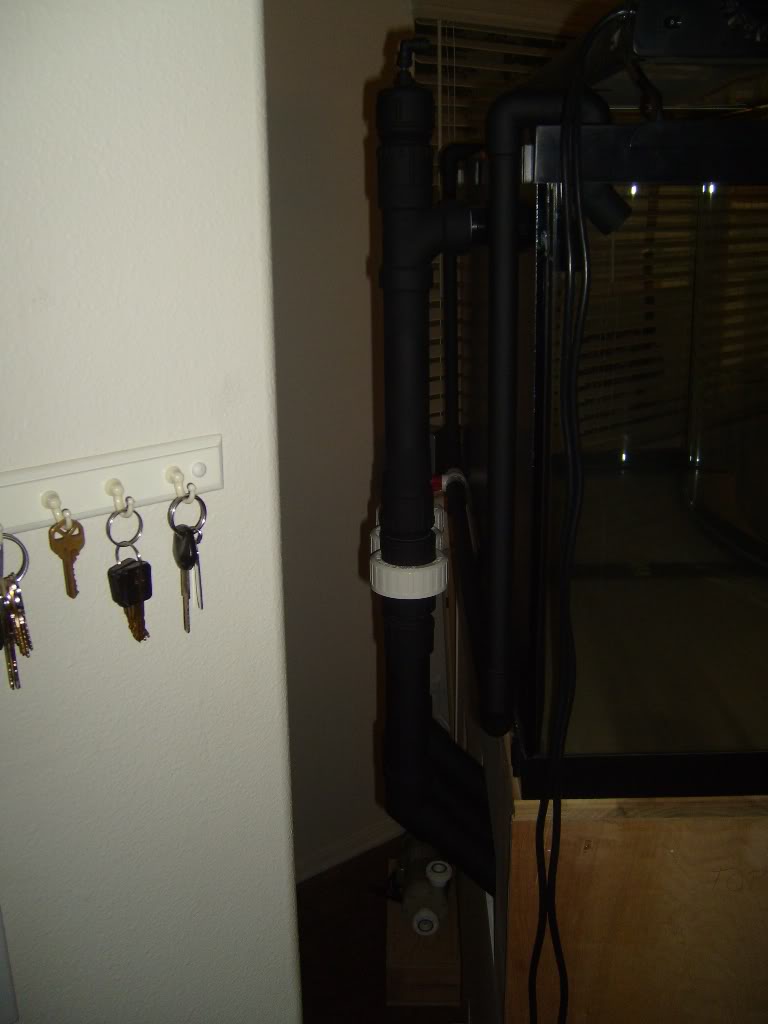
I like it to be tidy so zip ties and wire hold downs are a must for me. So after the stand got to dry overnight to really let it dry here are some pics without the clamps.

Front Shot.

S7001522.jpg


Side Shot.

S7001523.jpg


You can see the each side of the wave is hanging over by about 6” I left it that way so that I can just dermal it off to be a perfect fit instead of trying to figure out the exact measurement.
After that was all done I got some nails out and reinforced the bottom wave piece. Unfortunately pictures are lacking in this process I will get some up later today probably. I did how ever get out the wood filler and filled all the notches left behind from the kerfing process. Lot of wood filler, with more sanding to come.

Filler!

S7001525.jpg


More Filler!

S7001526.jpg


Final shot you can see how I trimmed the sides off with the dermal here to make it fit really well.

S7001524.jpg


Well that is all that I have been up this is quite an update hope you enjoy!
 
OP
OP
scott26

scott26

Active Member
View Badges
Joined
Oct 27, 2009
Messages
202
Reaction score
51
Location
Nevada
Rating - 0%
0   0   0
I got my newish return pump I got it from another local aquarist. It is a MAK4 rated for around 1150 gph which should be just about perfect after head loss. I am going to have to mount this on the outside of the stand out the back since I will not have room for it underneath.

S7001542.jpg


S7001543.jpg


I had to do some more work on the door since I filled each panel with glue to reinforce them to prevent them from cracking when I get them installed. Anyway since the glue was put in you would be able to see the dark color of the glue on the front which I did not like so I took a dremel to the hard glue to make it so wood filler could fit in there and not be so noticeable.

Here is the first door all filled up and ready to be sanded again! I think I have done sanding on these doors about 3 times now!

S7001541.jpg


Here is the two of them all filled up and ready to be sanded!

S7001550.jpg


Here is a pic with both of the doors on ready to be sanded the middle gap will be filled in with the side upright that I still have to finish mounting.

S7001551.jpg


I was then able to get the side supports on these will have two uprights mounted to them and then the doors will be mounted to these uprights.

S7001540.jpg


Here is a pic with one of the uprights on the support.

S7001547.jpg


I also got the side on the aquarium I used a 1/2 “ birch plywood since I didn’t want to have to biscuit each piece of poplar together and it is a very similar grain.

S7001546.jpg


S7001545.jpg


And now with the bottom panel back in.

S7001549.jpg


S7001548.jpg


That is it for now I have some finishing touches to do on the stand like MORE SANDING and the doors, then I can get ready for paint/stain.
 
OP
OP
scott26

scott26

Active Member
View Badges
Joined
Oct 27, 2009
Messages
202
Reaction score
51
Location
Nevada
Rating - 0%
0   0   0
Okay here is a rendering from goggle sketch up for what my sump will look like. This is a to scale model with everything exact to my sumps dimensions.

SumpDesignFront2.png


Here is how many gallons each compartment will hold.

SumpDesignTopGalSize.png
 
OP
OP
scott26

scott26

Active Member
View Badges
Joined
Oct 27, 2009
Messages
202
Reaction score
51
Location
Nevada
Rating - 0%
0   0   0
[FONT=&quot]Well I was able to get a good amount done at least to me slow and steady wins the race.[/FONT]
[FONT=&quot] [/FONT]
[FONT=&quot]Since I got my new pump I needed to make a stand for it to bring it up to the same level as the stand since the sump is going to be drilled in the back and the pump will be feed through a bulkhead.[/FONT]
[FONT=&quot] [/FONT]
[FONT=&quot]So here is the backside of the pump on the stand.[/FONT]
[FONT=&quot] [/FONT]
[FONT=&quot]
S7001552.jpg
[/FONT]

[FONT=&quot] [/FONT]
[FONT=&quot]Here is a close up of the stainless steel hardware holding it down with a rubber mat that I cut out to hopefully keep the vibration noise down but I think it is a little to hard and might have to change it out for softer mat later.[/FONT]
[FONT=&quot] [/FONT]
[FONT=&quot]
S7001553.jpg
[/FONT]

[FONT=&quot] [/FONT]
[FONT=&quot]Here is a shot of the pump from the front all ready to be mounted.[/FONT]
[FONT=&quot] [/FONT]
[FONT=&quot]
S7001554.jpg
[/FONT]

[FONT=&quot] [/FONT]
[FONT=&quot]I still have to pocket jig the pump stand to the aquarium stand I am not sure if I am going to mount it directly to the back board or cut a notch out for it and mount it to the stands 2x4.[/FONT]
[FONT=&quot] [/FONT]
[FONT=&quot]Next I was able to get the side panels on for the doors to attach to. I wanted them to be on there tight so I used two screws on top and bottom I will fill them later with some wood filler. I also have to sand them down some to get them to curve just right.[/FONT]
[FONT=&quot] [/FONT]
[FONT=&quot]Here is the right side.[/FONT]
[FONT=&quot] [/FONT]
[FONT=&quot]
S7001555.jpg
[/FONT]

[FONT=&quot] [/FONT]
[FONT=&quot]Here is the left side.[/FONT]
[FONT=&quot] [/FONT]
[FONT=&quot]
S7001556.jpg
[/FONT]

[FONT=&quot] [/FONT]
[FONT=&quot]Next I started to work on the plumbing for the aquarium, this is a first for me so the PVC has been fun to work with all the glue and mess. I bought a miter saw box from harbor freight to help make really clean and square cuts since I do not have a chop saw.[/FONT]
[FONT=&quot] [/FONT]
[FONT=&quot]Here is a shot of the down pipes attached to the sanitary tees and a 45 attached letting it go into the sump area.[/FONT]
[FONT=&quot] [/FONT]
[FONT=&quot]
S7001557.jpg
[/FONT]

[FONT=&quot] [/FONT]
[FONT=&quot]Next I measured out the distance needed and cut the last pipe to terminate at the right length to allow another 45 on to get it to down turn right into the sump.[/FONT]
[FONT=&quot] [/FONT]
[FONT=&quot]
S7001558.jpg
[/FONT]

[FONT=&quot] [/FONT]
[FONT=&quot]Here it is everything is glued except the pipe into the bulkhead since I still have to paint the piping and the back of the aquarium.[/FONT]
[FONT=&quot] [/FONT]
[FONT=&quot]
S7001560.jpg
[/FONT]

[FONT=&quot] [/FONT]
[FONT=&quot]Next I got started on the piping coming out of the return pump it is all 3/4" piping I started off with a tee for the fuge to be feed off of, and a ball valve to adjust the flow right.[/FONT]
[FONT=&quot] [/FONT]
[FONT=&quot]
S7001561.jpg
[/FONT]

[FONT=&quot] [/FONT]
[FONT=&quot]Next I put another tee in for a ball valve with a barbed fitting on the end to be added to in a later picture. This will be used for a hose to be attached to for blowing off rocks and water changes.[/FONT]
[FONT=&quot] [/FONT]
[FONT=&quot]
S7001563.jpg
[/FONT]

[FONT=&quot] [/FONT]
[FONT=&quot]I think I am still going to need to add another tee to the return with a ball valve and a drop back tube to be able to keep control of the returns flow rate in case there is a situation that I might need to. Even though with a bean the flow is controlled from the siphon down tube.[/FONT]
[FONT=&quot] [/FONT]
[FONT=&quot]Okay here are some final glamour shots. I still need to finish up the returns to go up and over into the tank, and glue it all together since it is all just dry fitted right now (on the return side). I will also need to be adding some wood support to keep the piping from flexing and putting stress on the bulkheads.[/FONT]
[FONT=&quot] [/FONT]
[FONT=&quot]FTS.[/FONT]
[FONT=&quot] [/FONT]
[FONT=&quot]
S7001564.jpg
[/FONT]

[FONT=&quot] [/FONT]
[FONT=&quot]Sump Shot.[/FONT]
[FONT=&quot] [/FONT]
[FONT=&quot]
S7001565.jpg
[/FONT]

[FONT=&quot] [/FONT]
[FONT=&quot]Thanks for looking![/FONT]
[FONT=&quot] [/FONT]
 

swannyson7

Moderator/Acro Aficianado
View Badges
Joined
Jan 17, 2010
Messages
6,715
Reaction score
296
Location
Bantam, Connecticut
Rating - 0%
0   0   0
That stand looks great! How deep do the kerfs have to be to get that bend to it? Are certain woods best to use in an application like this, or does it not matter? I've heard of people soaking wood with water and using clamps to control the warping as a means of bending boards, but this looks like it would be much simpler. Tagging along!
 
OP
OP
scott26

scott26

Active Member
View Badges
Joined
Oct 27, 2009
Messages
202
Reaction score
51
Location
Nevada
Rating - 0%
0   0   0
That stand looks great! How deep do the kerfs have to be to get that bend to it? Are certain woods best to use in an application like this, or does it not matter? I've heard of people soaking wood with water and using clamps to control the warping as a means of bending boards, but this looks like it would be much simpler. Tagging along!

I used poplar and my friend used oak I think it would work with just about any wood.... when I cut the wood I leave about 1/8" of board and space them 1/4" apart this comes out to be perfect for the bending.
 
OP
OP
scott26

scott26

Active Member
View Badges
Joined
Oct 27, 2009
Messages
202
Reaction score
51
Location
Nevada
Rating - 0%
0   0   0
[FONT=&quot]Well I was able to get some more work done this weekend and some setbacks happened as well. [/FONT]
[FONT=&quot] [/FONT]
[FONT=&quot]Now to the pictures.[/FONT]
[FONT=&quot] [/FONT]
[FONT=&quot]I started off the weekend by picking up some paint from wal-mart it is a Oxford Blue in a satin finish I wanted to get a dark blue to stay away from the light blue because I think it washes out the colors of the fish and coral.[/FONT]
[FONT=&quot] [/FONT]
[FONT=&quot]The Paint[/FONT]
[FONT=&quot] [/FONT]
[FONT=&quot][/FONT][/COLOR][FONT=&quot][URL="http://i947.photobucket.com/albums/ad311/scottie92688/90%20Gallon%20Aquarium/S7001566.jpg%5b/IMG"][COLOR=windowtext]http://i947.photobucket.com/albums/ad311/scottie92688/90%20Gallon%20Aquarium/S7001566.jpg[/IMG[/COLOR][/URL]][/FONT]
[FONT=&quot] [/FONT]
[COLOR=black][FONT=&quot]So here it is all prepped and ready for paint.[/FONT][/COLOR]
[COLOR=black][FONT=&quot] [/FONT][/COLOR]
[COLOR=black][FONT=&quot][IMG]http://i947.photobucket.com/albums/ad311/scottie92688/90%20Gallon%20Aquarium/S7001569.jpg[/FONT]

[FONT=&quot] [/FONT]
[FONT=&quot]
S7001567.jpg
[/FONT]

[FONT=&quot] [/FONT]
[FONT=&quot]And here it is after some coats and you can't really see through it anymore. It is looking pretty good.[/FONT]
[FONT=&quot] [/FONT]
[FONT=&quot]
S7001570.jpg
[/FONT]

[FONT=&quot] [/FONT]
[FONT=&quot]While that was out drying for the day on my back porch I had the opportunity to get some more plumbing done on my return side of the aquarium. I went off the return pump with a couple and a ball valve for maintenance if ever needed. Then a tee and valve for the fuge return, followed by another tee and valve with a barbed fitting for water changes and to blow off rocks if I wanted to.[/FONT]
[FONT=&quot] [/FONT]
[FONT=&quot]
S7001571.jpg
[/FONT]

[FONT=&quot] [/FONT]
[FONT=&quot]Then I got the aquarium back into the house and back on the stand and got to taking all the tape and paper off and this is the outcome.[/FONT]
[FONT=&quot] [/FONT]
[FONT=&quot]
S7001572.jpg
[/FONT]

[FONT=&quot] [/FONT]
[FONT=&quot]
S7001573.jpg
[/FONT]

[FONT=&quot] [/FONT]
[FONT=&quot]
S7001574.jpg
[/FONT]

[FONT=&quot] [/FONT]
[FONT=&quot]
S7001576.jpg
[/FONT]

[FONT=&quot] [/FONT]
[FONT=&quot]I did like the outcome of the paint but it is a not quite as dark on the bottom and one side so you can see light penetrate through and it doesn't look good to me at all. I know it would probably not to be seen by anyone since it is small detail.[/FONT]
[FONT=&quot] [/FONT]
[FONT=&quot]I was also able to paint my down pipes from the bean with some black paint and got that all squared away I decided to leave the ball valves all white to make it easy to spot in case someone needs to when I am not around.[/FONT]
[FONT=&quot] [/FONT]
[FONT=&quot]
S7001578.jpg
[/FONT]

[FONT=&quot] [/FONT]
[FONT=&quot]
S7001579.jpg
[/FONT]

[FONT=&quot] [/FONT]
[FONT=&quot]Some more of the return section.[/FONT]
[FONT=&quot] [/FONT]
[FONT=&quot]
S7001580.jpg
[/FONT]

[FONT=&quot] [/FONT]
[FONT=&quot]
S7001582.jpg
[/FONT]

[FONT=&quot] [/FONT]
[FONT=&quot]I was also able to finally get the other door put on since I need to rip 1/8" off the side mount since the two doors would not shut otherwise.[/FONT]
[FONT=&quot] [/FONT]
[FONT=&quot]
S7001583.jpg
[/FONT]

[FONT=&quot] [/FONT]
[FONT=&quot]
S7001584.jpg
[/FONT]

[FONT=&quot] [/FONT]
[FONT=&quot]As you may be able to see the doors do not line up perfectly with the top and bottom wave the right side door is off by almost 3/8" which I do not like but I don't think that there is any way of fixing it at this point. Surprisingly the door on the left is better off and that is the one that I was having the most trouble with making.[/FONT]
[FONT=&quot] [/FONT]
[FONT=&quot]Now for the step back. In my never ending quest to make this the perfect aquarium I wanted to put some more coats on the bottom and side that were not completely covered and light was coming through. So I rewrapped the tank and took it outside sprayed my first coat and the areas that I sprayed all started to bubble up and crack/flake off!!!!! To say the least I was disappointed. So looks like I am going to have to start from square one with the paint on the back and do it over again since I can just scrape off one side as it will look different in contrast to the other side.[/FONT]
[FONT=&quot] [/FONT]
[FONT=&quot]
S7001585.jpg
[/FONT]

[FONT=&quot] [/FONT]
[FONT=&quot]Now for some voting I like the blue concept but I still think that this blue was still to light of a color what do you all think I do not want to go with black since I want to keep it somewhat of a deep ocean effect. Do you think this blue is dark enough or go darker?[/FONT]
 
OP
OP
scott26

scott26

Active Member
View Badges
Joined
Oct 27, 2009
Messages
202
Reaction score
51
Location
Nevada
Rating - 0%
0   0   0
[FONT=&quot]Well I have something to update about not too much though since the blue backing didn't turn out as well as I had hoped I started the process of getting the old blue paint of and ready for the new black paint.[/FONT]
[FONT=&quot] [/FONT]
[FONT=&quot]I started by trying to just use some paint remover but since I did about 10 coats lets just say it swirled the paint around. So to get the majority of the paint off I went with using a scrapper and a razor blade and being carful throughout.[/FONT]
[FONT=&quot] [/FONT]
[FONT=&quot]Here is the starting of the work.[/FONT]
[FONT=&quot] [/FONT]
[FONT=&quot]
S7001589.jpg
[/FONT]

[FONT=&quot] [/FONT]
[FONT=&quot]Here is some of the left over mess that I vacuumed most of it up.[/FONT]
[FONT=&quot] [/FONT]
[FONT=&quot]
S7001588.jpg
[/FONT]

[FONT=&quot] [/FONT]
[FONT=&quot]
S7001587.jpg
[/FONT]

[FONT=&quot] [/FONT]
[FONT=&quot]Here are some shots of it all clean and ready to go I used to alcohol to get any paint residue off.[/FONT]
[FONT=&quot] [/FONT]
[FONT=&quot]
S7001591.jpg
[/FONT]

[FONT=&quot] [/FONT]
[FONT=&quot]
S7001590.jpg
[/FONT]

[FONT=&quot] [/FONT]
[FONT=&quot]I then started the process of getting the back taped up and ready to go for round two this time with a satin black paint below.[/FONT]
[FONT=&quot] [/FONT]
[FONT=&quot]
S7001604.jpg
[/FONT]

[FONT=&quot] [/FONT]
[FONT=&quot]Here are some shots of the area where I painted it on my back porch lots of ventilation people. You can see the top where the paper is cut out into a rectangle I forgot to tape the holes for the pipe and almost started to spray the back before my wife told me so good think otherwise I would have an aquarium filled with black paint particles.[/FONT]
[FONT=&quot] [/FONT]
[FONT=&quot]
S7001605.jpg
[/FONT]

[FONT=&quot] [/FONT]
[FONT=&quot]
S7001606.jpg
[/FONT]

[FONT=&quot] [/FONT]
[FONT=&quot]
S7001607.jpg
[/FONT]

[FONT=&quot] [/FONT]
[FONT=&quot]
S7001608.jpg
[/FONT]

[FONT=&quot] [/FONT]
[FONT=&quot]After this I wanted to get my sump ready for some glass baffles so I outlined where all the baffles will be to make sure everything would fit and of course I wouldn't have good thing I did this. Since I added to the gate valve mod on the protein skimmer it makes it about 2" wider and there for the output would be resting on top of the first baffle if I had left the baffles in the original places so I moved them over to make it all fit nicely without being cramped.[/FONT]
[FONT=&quot] [/FONT]
[FONT=&quot]So with the new changes made to the sump it will give me 13.25" in the skimmer section and in the fuge section leaving about 6" in the return section. I will have to do the math later to figure out the gallons in each compartment.[/FONT]
[FONT=&quot] [/FONT]
[FONT=&quot]
S7001601.jpg
[/FONT]

[FONT=&quot] [/FONT]
[FONT=&quot]
S7001602.jpg
[/FONT]

[FONT=&quot] [/FONT]
[FONT=&quot] [/FONT]
 
OP
OP
scott26

scott26

Active Member
View Badges
Joined
Oct 27, 2009
Messages
202
Reaction score
51
Location
Nevada
Rating - 0%
0   0   0
[FONT=&quot]Well I got sick of it laying around in pieces so I put it together as much as I could and this is what I got.[/FONT]
[FONT=&quot] [/FONT]
[FONT=&quot]Here are some shots of the plumbing with the new black background.[/FONT]
[FONT=&quot] [/FONT]
[FONT=&quot]
S7001609.jpg
[/FONT]

[FONT=&quot] [/FONT]
[FONT=&quot]
S7001610.jpg
[/FONT]

[FONT=&quot] [/FONT]
[FONT=&quot]
S7001611.jpg
[/FONT]

[FONT=&quot] [/FONT]
[FONT=&quot]
S7001613.jpg
[/FONT]

[FONT=&quot] [/FONT]
[FONT=&quot]
S7001614.jpg
[/FONT]

[FONT=&quot] [/FONT]
[FONT=&quot]
S7001615.jpg
[/FONT]

[FONT=&quot] [/FONT]
[FONT=&quot]
S7001616.jpg
[/FONT]

[FONT=&quot] [/FONT]
[FONT=&quot]I re-did the protein skimmer piping to make it a little more compact.[/FONT]
[FONT=&quot] [/FONT]
[FONT=&quot]
S7001617.jpg
[/FONT]

[FONT=&quot] [/FONT]
[FONT=&quot]
S7001618.jpg
[/FONT]

[FONT=&quot] [/FONT]
[FONT=&quot]Here it is with the sump in place (skimmer / heater / UV)[/FONT]
[FONT=&quot] [/FONT]
[FONT=&quot]
S7001619.jpg
[/FONT]

[FONT=&quot] [/FONT]
[FONT=&quot]
S7001620.jpg
[/FONT]

[FONT=&quot] [/FONT]
[FONT=&quot]Full Frontal[/FONT]
[FONT=&quot] [/FONT]
[FONT=&quot]
S7001622.jpg
[/FONT]

[FONT=&quot] [/FONT]
[FONT=&quot]
S7001623.jpg
[/FONT]

[FONT=&quot] [/FONT]
[FONT=&quot]
S7001624.jpg
[/FONT]

[FONT=&quot] [/FONT]
[FONT=&quot]
S7001625.jpg
[/FONT]


Let me know what you think.
 
OP
OP
scott26

scott26

Active Member
View Badges
Joined
Oct 27, 2009
Messages
202
Reaction score
51
Location
Nevada
Rating - 0%
0   0   0
[FONT=&quot]I got a small update for you I was able to get the back board all fitted for all the pipes to run through.[/FONT]
[FONT=&quot] [/FONT]
[FONT=&quot]I started by drilling holes in the four corners that would connect the box I need to cut out with a jig saw and then had at it. This was for the three pipes for the bean system.[/FONT]
[FONT=&quot] [/FONT]
[FONT=&quot]
S7001638.jpg
[/FONT]

[FONT=&quot] [/FONT]
[FONT=&quot]
S7001639.jpg
[/FONT]

[FONT=&quot] [/FONT]
[FONT=&quot]
S7001640.jpg
[/FONT]

[FONT=&quot] [/FONT]
[FONT=&quot]
S7001641.jpg
[/FONT]

[FONT=&quot] [/FONT]
[FONT=&quot]I was also able to drill the sump for it to accept a 1" bulkhead for the return pump.[/FONT]
[FONT=&quot] [/FONT]
[FONT=&quot]
S7001642.jpg
[/FONT]

[FONT=&quot] [/FONT]
[FONT=&quot]
S7001643.jpg
[/FONT]

[FONT=&quot] [/FONT]
[FONT=&quot]I also did two other holes for the bulk head and the fuge feeder off the return pump.[/FONT]
[FONT=&quot] [/FONT]
[FONT=&quot]
S7001644.jpg
[/FONT]
 
OP
OP
scott26

scott26

Active Member
View Badges
Joined
Oct 27, 2009
Messages
202
Reaction score
51
Location
Nevada
Rating - 0%
0   0   0
[FONT=&quot]Well I was able to get some more stuff done this last weekend and still need to finish some stuff up starting tomm like finish painted the frame of the stand white. [/FONT]
[FONT=&quot] [/FONT]
[FONT=&quot]Here is what I got done last weekend I was able to get the siding and the back all painted on the side that is going to be facing inside the sump I used Kilz 2 primer to help resist mold and moisture issues.[/FONT]
[FONT=&quot] [/FONT]
[FONT=&quot]Pics of the painting process.[/FONT]
[FONT=&quot] [/FONT]
[FONT=&quot]
S7001682.jpg
[/FONT]

[FONT=&quot] [/FONT]
[FONT=&quot]
S7001679.jpg
[/FONT]

[FONT=&quot] [/FONT]
[FONT=&quot]
S7001680.jpg
[/FONT]

[FONT=&quot] [/FONT]
[FONT=&quot]
S7001681.jpg
[/FONT]

[FONT=&quot] [/FONT]
[FONT=&quot]Inside and drying.[/FONT]
[FONT=&quot] [/FONT]
[FONT=&quot]
S7001678.jpg
[/FONT]

[FONT=&quot] [/FONT]
[FONT=&quot]
S7001677.jpg
[/FONT]

[FONT=&quot] [/FONT]
[FONT=&quot]I was also able to return some stuff I wasn't using to home depot got $20 bucks back so I could buy some fittings to make a union connection on the stand pipes. This way they can fit through the opening in back easier and they can be taken apart for a good cleaning if ever needed. Also this way I can twist the bottom portion of the standpipe to fit the sump just perfectly.[/FONT]
[FONT=&quot] [/FONT]
[FONT=&quot]
S7001683.jpg
[/FONT]

[FONT=&quot] [/FONT]
[FONT=&quot]All glued up.[/FONT]
[FONT=&quot] [/FONT]
[FONT=&quot]
S7001684.jpg
[/FONT]

[FONT=&quot] [/FONT]
[FONT=&quot]I still need to thread seal the fittings and attach the unions then the frame painting this weekend as well as hopefully finish up the return pipe plumbing.[/FONT]
 
OP
OP
scott26

scott26

Active Member
View Badges
Joined
Oct 27, 2009
Messages
202
Reaction score
51
Location
Nevada
Rating - 0%
0   0   0
[FONT=&quot]Well I had bought a light from Current a Nova Extreme Pro 6 bulb fixture and within the first six months of me having it I had to replace the same bulb 4 times. After this happened I had started my upgrade on my 90 gallon and put the 55 gallon out of commission and the light was waiting for water in the 90 to get started up again. [/FONT]
[FONT=&quot] [/FONT]
[FONT=&quot]I then started to think my warranty is almost over in October and I don't want to get my 90 gallon going and get stuck with bulbs going out all the time so I contacted Current and got some GREAT customer service. [/FONT]
[FONT=&quot] [/FONT]
[FONT=&quot]I explained the situation and said I didn't want to be stuck with a light that is defective after I get my set up back running again they assured me it was not a ballast issue since it is only one bulb going out and said it seemed to be a freak situation I said I would like to see if you could extend my warranty to cover me in case the problem persists after I get my system running after October they said they could not do that because their parts are supplied by many different manufactures so yea.[/FONT]
[FONT=&quot] [/FONT]
[FONT=&quot]But they did do the next best thing which is they offered me free bulb just in case the same issue came up again. Which is nice and since they are different brands that should have a better quality to them. I got a 420nm bulb it is like a purple/blue and a 12k for free from them! [/FONT]
[FONT=&quot] [/FONT]
[FONT=&quot]I also asked them if they thought it might be the light sockets and they said maybe so I asked for them to send me some light sockets and they sent me the whole light socket rail with brackets very generous all for free.[/FONT]
[FONT=&quot] [/FONT]
[FONT=&quot]I must say Current is doing a great job with customer service and I am very happy with them.[/FONT]
[FONT=&quot] [/FONT]
[FONT=&quot]Onto the good stuff though here are some pics of the old bulb set up. I am going to change out the two center bulbs.[/FONT]
[FONT=&quot] [/FONT]
[FONT=&quot]
S7001686.jpg
[/FONT]

[FONT=&quot] [/FONT]
[FONT=&quot]
S7001687.jpg
[/FONT]

[FONT=&quot] [/FONT]
[FONT=&quot]Here are the new bulbs installed for some reason the purple came out kind of funky in the picture but looks great in person.[/FONT]
[FONT=&quot] [/FONT]
[FONT=&quot]
S7001688.jpg
[/FONT]

[FONT=&quot] [/FONT]
[FONT=&quot]
S7001689.jpg
[/FONT]

[FONT=&quot] [/FONT]
[FONT=&quot]And back to the stand I was also able to get the frame painted this weekend and what a pain I had to wait till Sunday afternoon to do it since it was cloudy for most of the start of the day. And it took about 2 hours to do so many nooks and crannies pain in the butt.[/FONT]
[FONT=&quot] [/FONT]
[FONT=&quot]Here is the end result.[/FONT]
[FONT=&quot] [/FONT]
[FONT=&quot]
S7001690.jpg
[/FONT]

[FONT=&quot] [/FONT]
[FONT=&quot]
S7001691.jpg
[/FONT]

[FONT=&quot] [/FONT]
[FONT=&quot]
S7001692.jpg
[/FONT]

[FONT=&quot] [/FONT]
[FONT=&quot]I will get some pics of the side panels on as well next step is to do staining but yet again I have run out of money so that will have to be put off until a later date.[/FONT]
[FONT=&quot] [/FONT]
[FONT=&quot]Maybe when my birthday comes around on the 26th of September you guys can all chip in for a nice birthday present for me?!? :D[/FONT]
 
OP
OP
scott26

scott26

Active Member
View Badges
Joined
Oct 27, 2009
Messages
202
Reaction score
51
Location
Nevada
Rating - 0%
0   0   0
[FONT=&quot]Well I have yet again been able to get a few more things done on the aquarium.[/FONT]
[FONT=&quot] [/FONT]
[FONT=&quot]I started off by getting all the siding back on so I can see what the white paint looks like on the inside and I have to say it looks really good since my wife seems to think I have a small case of OCD the nice clean and kept up look of the white really finishes off the inside.[/FONT]
[FONT=&quot] [/FONT]
[FONT=&quot]Pictures without the bottom board.[/FONT]
[FONT=&quot] [/FONT]
[FONT=&quot]
S7001693.jpg
[/FONT]

[FONT=&quot] [/FONT]
[FONT=&quot]With the bottom board and sump in place[/FONT]
[FONT=&quot] [/FONT]
[FONT=&quot]
S7001694.jpg
[/FONT]

[FONT=&quot] [/FONT]
[FONT=&quot]I was also able to finish up painting the stand pipes since for some reason the flat black Krylon fusion is being taken off the shelves at least that is what it seems like I must have tired 6 different stores that normally stock it with no luck so I special ordered it from my work at Napa Auto Parts. I got two cans and was able to finish painting the new unions and redid some touch up on the old paint.[/FONT]
[FONT=&quot] [/FONT]
[FONT=&quot]
S7001695.jpg
[/FONT]

[FONT=&quot] [/FONT]
[FONT=&quot]
S7001696.jpg
[/FONT]

[FONT=&quot] [/FONT]
[FONT=&quot]I had to re-work some of the back board since the holes were not large enough for the stand pipes I somehow cut them about 1" to short and they were rubbing the top of the opening in back so I used the jig saw again and opened it up some more. No worries on the stand pipes being to short I made them longer when I first glued them together just for this kind of problem. I also had to open up the hole for the fuge pipe to come through since I had to move the pump over from where I thought it was going to sit in the back of the tank the pipe would have hit the board so a little more jig sawing and the pipe fits through easy now.[/FONT]
[FONT=&quot] [/FONT]
[FONT=&quot]All fitted up.[/FONT]
[FONT=&quot] [/FONT]
[FONT=&quot]
S7001698.jpg
[/FONT]

[FONT=&quot] [/FONT]
[FONT=&quot]Stand pipes on and unions connected.[/FONT]
[FONT=&quot] [/FONT]
[FONT=&quot]
S7001700.jpg
[/FONT]

[FONT=&quot] [/FONT]
[FONT=&quot]I was trying to get the return plumbing done since I now have the pipes going through the back board again I am using spa flex tubing to make the connection from the sump to the return pump. I only have about 7" of space so the spa flex isn't to much of a help I have had to create a PVC fitting to bring the street elbow out enough to line up with the return pump inlet I got it all fitted up here.[/FONT]
[FONT=&quot] [/FONT]
[FONT=&quot]
S7001701.jpg
[/FONT]

[FONT=&quot] [/FONT]
[FONT=&quot]
S7001703.jpg
[/FONT]

[FONT=&quot] [/FONT]
[FONT=&quot]It didn't quite fit right it was sitting to low so I grabbed a piece of scrap wood I had been using for PVC gluing and cut it to size with the jig saw and sanded off all the PVC glue and screwed it on.[/FONT]
[FONT=&quot]With new wood.[/FONT]
[FONT=&quot] [/FONT]
[FONT=&quot]
S7001704.jpg
[/FONT]

[FONT=&quot] [/FONT]
[FONT=&quot]
S7001705.jpg
[/FONT]

[FONT=&quot] [/FONT]
[FONT=&quot]I got it to line up pretty good and will finish up the return this weekend maybe if I can find time between family visiting and my birthday party.[/FONT]
 
OP
OP
scott26

scott26

Active Member
View Badges
Joined
Oct 27, 2009
Messages
202
Reaction score
51
Location
Nevada
Rating - 0%
0   0   0
[FONT=&quot]Well I have been able to get some more stuff done. I had some time over the weekend to get some more work on the return plumbing done. I started off by cutting down the tube that is teed off the return for maintenance so that it wouldn't stick out farther than the stand anymore. I was also able to get the unions off the return pump so that I could paint them some more to match the unions on the stand pipes.

S7001706.jpg


I was also able to mock up my piping coming out of the 40 gallon sump and to the return pump.

S7001707.jpg


I used spa flex to help with vibration on the pump but it is so short I doubt it will have any effect.

I then started to get going on the return plumbing going back to the tank and after a few cuts and a few more I got it all dry fitted and started to glue it together.

Trial runs.

S7001708.jpg


All glued together.

S7001709.jpg


S7001711.jpg


I put a ball valve on the shorter side of the pipe so that I can control flow to both sides so that the left side does not get to much or too little flow since it is not divided equally.

I was also able to glue a new adapter on for the maintenance ball valve.

S7001710.jpg


In case some of you were wondering I keep all my tools in the dining room on the floor in two large boxes. Enclosed is just about all you need to build what I have done. :D

S7001713.jpg


I can't believe I have used up just about all this PVC glue granted most of it is on the cardboard box.

S7001712.jpg


Kind of hard to see in this picture but got the return plumbing up and painted it is fed through the standpipes I have to disconnect the standpipes to get them to fit.

S7001714.jpg


Here is the left side from the back of the tank you can see the small ball valve in the corner.

S7001715.jpg


Ball Valve

S7001717.jpg


Corner return U-tube.

S7001718.jpg


S7001719.jpg


S7001720.jpg
[/FONT]
 
OP
OP
scott26

scott26

Active Member
View Badges
Joined
Oct 27, 2009
Messages
202
Reaction score
51
Location
Nevada
Rating - 0%
0   0   0
Here is a full shot of the piping from the return pump.

S7001721.jpg


I still need to glue that final piece in and paint it but I think I am going to switch it out for spa flex.

Do I have another shot of the ball valve and U-tube I sure do.

S7001723.jpg


I am very excited about this though, I was able to put my order through with Big Al's Online and got a killer deal on some Koralia Evolution 1400's only $36 each I also got a mag float and thermometer to get free shipping on the order.

Now the unboxing pictures.

S7001731.jpg


S7001732.jpg


For size reference.

S7001733.jpg


Inside of it.

S7001734.jpg


and the mag float and thermometer.

S7001735.jpg
 
OP
OP
scott26

scott26

Active Member
View Badges
Joined
Oct 27, 2009
Messages
202
Reaction score
51
Location
Nevada
Rating - 0%
0   0   0
I was able to get some more stuff done I went by a local glass shop yesterday and got some glass made and was able to pick it up later on. I have all the pieces needed now for the overflow box and for the sump baffles. I got a pretty good deal I got quotes from other store at $120 for all my glass but these guys were only $37 way cheaper.

There were two errors though he cut the sides for the overflow to large so I am going to have to take those back.

Almost forgot to mention I also got some plastic screens for a ATS that I am going to attach to the baffle of my Fuge.

S7001737.jpg


The only thing that I think I am going to change is I want the front and side pieces of the overflow box to be tinted glass which they sell at the glass shop.

I was also greeted with a great present when I got home a RO/DI unit from Spectrapure a 90 GPD unit I am going to set it up to use it for the aquarium and for my drinking water with a little modification to make the drinking water taste better. Also this unit was only $145 with the sale!

Now the pictures.

S7001739.jpg


S7001738.jpg


It came with its own dual TDS meter to measure the water before and after the DI stage of the system.

S7001740.jpg


Up close.

S7001741.jpg
 

Neon Reef

unregistered
View Badges
Joined
Nov 4, 2008
Messages
571
Reaction score
6
Rating - 0%
0   0   0
very impressive build..
I really liked how you built that back wall on the stand to keep noise in. I hava a 90g as well and the return pump is silent, the overflow is silent, but the water coming down to the sump makes noise even with a filter sock so that back wood wall is a great idea.
 
OP
OP
scott26

scott26

Active Member
View Badges
Joined
Oct 27, 2009
Messages
202
Reaction score
51
Location
Nevada
Rating - 0%
0   0   0
Well with how crappy the weather has been and how much the golf course was tempting on the only good days this last weekend I still need to stain my stand but I did get a shipment in.

I order a drinking water kit to attach to my RO/DI unit might as well get the most for my money right?!?

I also got a float valve kit to attach to whatever water reservoir I decide on.

Here are some pics.

FullShot.jpg


Plumbing.jpg
 

Looking for the spotlight: Do your fish notice the lighting in your reef tank?

  • My fish seem to regularly respond to the lighting in my reef tank.

    Votes: 113 74.3%
  • My fish seem to occasionally respond to the lighting in my tank.

    Votes: 15 9.9%
  • My fish seem to rarely respond to the lighting in my tank.

    Votes: 10 6.6%
  • My fish seem to never respond to the lighting in my tank.

    Votes: 3 2.0%
  • I don’t pay enough attention to my fish to notice if they respond to the lighting.

    Votes: 5 3.3%
  • I don’t have any fish in my tank.

    Votes: 4 2.6%
  • Other.

    Votes: 2 1.3%
Back
Top