Rock Tutorial (v2)
Man-made Rock Tutorial/Info
Since making rock is my business (
Home), I'd like to think of myself as somewhat well-knowing of the subject. I've definitely tried many methods, ingredients, and have failed many, many times before I got to where I am today. I am constantly learning new things and am always open minded to new ideas.
Making rock takes a lot of time (Major patience), learning, skill, sometimes luck, and much more if you want it done right. Most people (My clients' customers... I am a wholesaler) would rather just buy the rock than make it themselves... and it makes sense for most people. Some people have an advantage of having certain equipment, a lot of time, and/or the background to make rock well and at a low cost... most others do not.
This written piece is a tutorial but also a basic blogging of my opinions on the subject, myths, and many other things involving man-made rock.
Here are the chapters in this piece:
1. Materials, ingredients, and tools
2. Recipes and casting material
3. Temperature requirements, mixing methods and requirements, water amounts, and hydration
4. "Curing"
5. "Kuring"
6. Results
I should also mention I will be talking strictly about man-made rock... I have no hands-on training or experience in things like foam projects.
Chapter 1
Materials, ingredients, and tools
Being prepared: Being prepared is the best thing anyone can do before undergoing a project… especially when it comes to something time-based like rock making. Before starting you have to make sure everything is ready to go, and is reachable. Once you start making rocks it sucks when your hands are goopy and you need to reach for a forgotten tool in a delicate part of the house!
Materials, ingredients, and tools:
Let's start with tools:
- Rubber gloves: I am not talking about medical gloves here, no no. We're talking about dishwashing gloves, thick but not thick enough to make you feel like a 50's robot motion-wise. This may be the best buy in the whole project… you use your hands everyday and it's a very nerve-rich part of the body. Cement will eat your hands away and the pain from those "burns" are excruciating. I used the "dipped" gloves for extra protection. I advise this especially if you ARE NOT using perlite but something gravel-like (Dolomite comes to mind)! More on this later.
- 5G Bucket: Just about every reefer's favorite friend. This is great to use for dry mixing the ingredients together before the water addition.
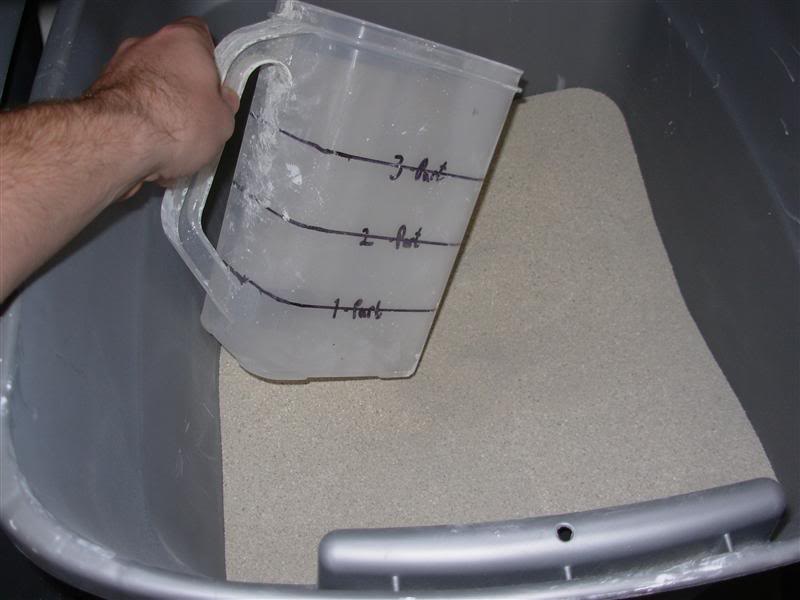
- Handheld Dispenser: Something to keep your ingredients measured as you prepare your dry mix. (Picture #2)
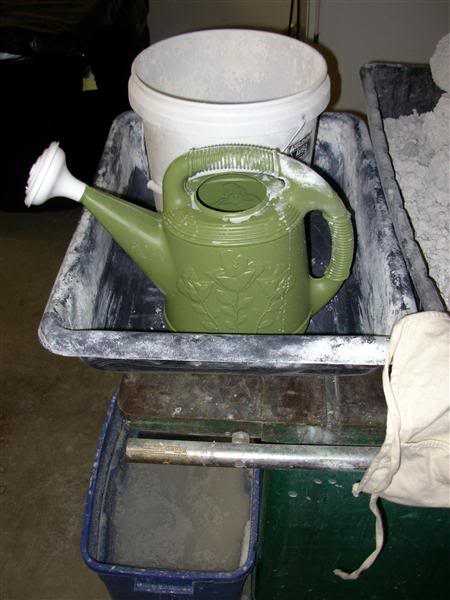
- Cement Bin: These are common and found at places like Home Depot and/or Lowes, and are pretty cheap. I promise you this is a worthwhile buy! It makes mixing a ton easier by keeping the mess inside the shallow bin, plus the rounded bottom makes it easier to scrape out ALL usable mix.
- Plastic watering can: This is a surprise to the uninitiated. Why not use a hose? Well you can, but I highly recommend using one that has a shower-type head. You want major control over the water, but it really helps if the water is spread out instead of a forceful beam. A watering can is helpful in that is gives you both the control and spread of water especially is a hose is too far from reach.
- Water: This is a "no, duh" component in the cement creation world, but people have asked about what type of water. I just want to say it, tap water is just fine to use. In fact, I recommend it.
- Casting box: Depending on how you plan on casting, the needs change. For example, a lot of people use sand as a casting material... so you would want a semi-sturdy box filled with sand, and some water nearby to form it with.
There are other methods used in casting rock, but realistically most involve far more material, time, storage, and money to actually be used unless you are like me who does it for a living. For example I cast rock on other rock, which means that I made rock to make more rock. It involves more time, money, and material to perform and store for later reuse. For the typical DIYer, they only need to make rock once.
- Suit of armor: I keed, I keed. But remember that cement can eat your skin and the process of rock making isn’t exactly dainty. Either wear an apron (Lowes/HD has them for like 3 bucks) or wear your "work clothes" that you don't care about. Last thing you need is to bleach out your favorite weekend shirt and/or pants!
- Mask and Eyewear: This is one of those that people get warned about but don't actually follow. If you want a good reason to wear this stuff, think of the cement like kalkwasser. The cement dust that flies into the air will enter your eyes and lungs.
Getting cement-lung absolutely sucks. You cough a bunch, and everything tastes like cement. Y'all probably know what eye irritation feels like… it isn't fun either. When I say think of cement like kalkwasser… it’s because both contain lime with a pH of about 12-14!
- Washing bin: This is another overlooked tool. Take any ol' bin and fill it partially with water. After you finish casting whichever piece of rock you are doing, you use the bin to get the residual mix off of your gloves. It's helpful because when you go to dry mix a new batch of mix, having wet mix already on your hands just messes things up. Also, have a towel to dry your hands off if need be.
Ingredients:
- Cement: There are many types of cement out there. I personally use good ol' portland (Type l/ll). The normal grey stuff is widely available. The white is not so easily found, but it's my choice of cement as most reefers who buy rock want it to look like the base rock that's typically sold out there in the retail market. I make what the customers tell me they want… y’all have the luxury to use just about whatever you like.
If you're making rocks for yourself and don't mind the grey, especially if you plan on having a full reef to cover up the grey (Corals, corraline, etc.), I would definitely use it as it's cheaper... waaaaay cheaper.
(Aggregates): An aggregate is something you mix into cement to create concrete/mortar. It ranges to many, many things like sand, pebbles, etc. The role of the aggregate is to give a surface for the cement to bind to. The cement is just the glue, and you’ve got have something to glue together!
- Sand: This aggregate is pretty crucial in the making of rocks. This isn't to say you can't make rock without it, I just wouldn't suggest it. Sand is easy to get and isn't very expensive (Depends on which you use). It's a great "fine" aggregate that goes along well with "coarse" aggregate. Because of its size it provides a lot of surface for the cement to bind to.
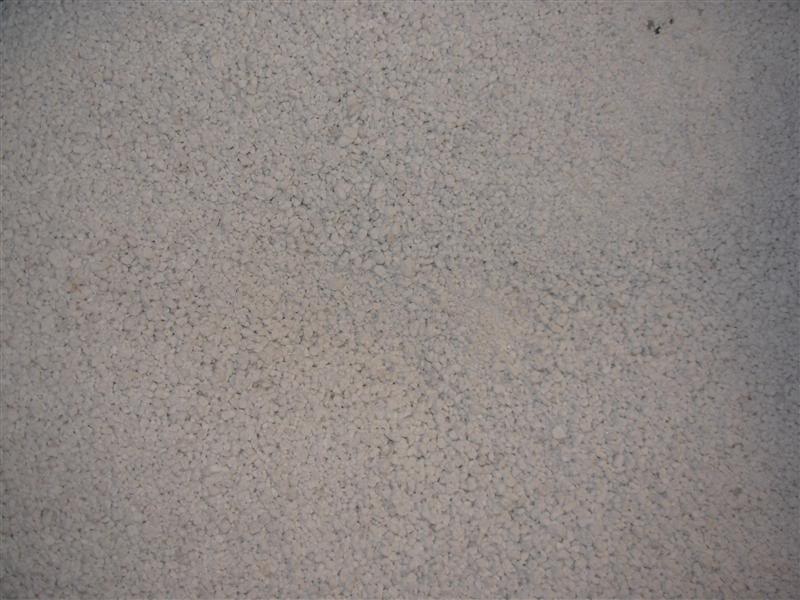
- Aragonite Sand: This is the most expensive of the sands and it is also the most favored by reefers. It comes in many names like calcium sand, bone sand, etc but is not widely used outside of this hobby. I use this but as a business I can get it at a decent price because I buy it in bulk (Many tons!). Obviously this is not possible for most hobbyists, and they are given the choice between buying retail aragonite or choosing another type of sand (Quartz) at a much cheaper price.
(Picture #2)
- Quartz Sand: If anything in the DIY rock world gets a lot of attention it's the debate about using quartz sand. It is one of the most misunderstood things out there because of its relation to silica (This sand is also called Silica sand). You can judge for yourself, but in my honest opinion I see no problems using this sand. If you want some proof look no further than one of reefing’s authority on reef chemistry: Randy Holmes-Farley. Craig Bingman also wrote on this subject as well. Do a search for Silica Sand and the author in Google and you’ll spot the articles regarding this topic.
The real issue with quartz sand is not the silicates it supposedly releases into the water (Again please read the articles regarding this), it's the "other" stuff that comprises of the sand. You see, most quartz sand bags will typically be about 98% pure quartz, while the other 2% is unknown. A good way of thinking about this is the fact that quartz is white in nature, the bags you get from HD/Lowes is more brownish. The brownish tint is caused by that “other†2%. So should you choose to use quartz sand, try to find the whitest bag possible and give it a washout, to try and rid of that 2% (Most cases it mostly comprised of dust). You may not get the minor benefits of buffering or calcium additions that you would from Aragonite sand, but you also won’t suffer any ill effects as purported by the myths.
- Crushed Coral: This is another aragonite type situation. It is fantastic to use but is expensive. It helps with making the rock look more natural, but there are other cheaper ways of doing so. Still if you happen to have a bunch or can get it cheap, it's a great aggregate to use.