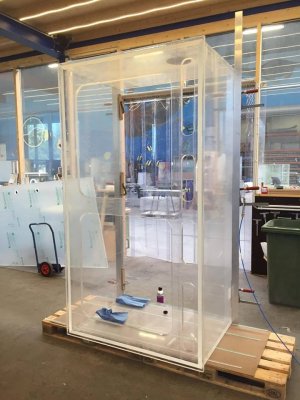
1000G Puffer Display

fab

Active Member
View Badges
Joined
Sep 19, 2015
Messages
468
Reaction score
241
Location
Alexandria, Virginia
Rating - 0%
0   0   0
x_burt,
You are well on your way to a great aquarium system and a beautiful home. I am glad that some of my suggestions interested you.

I wish you the best in all of this, good luck and great times to you and your wife,
fab
 
OP
OP
x_burt

x_burt

Smells like fish...
View Badges
Joined
Nov 27, 2014
Messages
392
Reaction score
727
Location
Norway
Rating - 0%
0   0   0
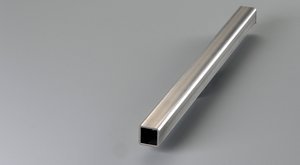
Square-Tube.jpg
have to say thanks to Fab for volunteering some great help and advice, way too much time on your hands, you really need to get a hobby! haha

I decided to use 3mm wall thickness 316 alloy for the tank stand. The metal is ordered and should be here soon and will then be tig welded on site. Also heard from Schuran today that they will be sending photos of the tank construction next week which i am excited to see.
 
OP
OP
x_burt

x_burt

Smells like fish...
View Badges
Joined
Nov 27, 2014
Messages
392
Reaction score
727
Location
Norway
Rating - 0%
0   0   0
Have you considered putting a small ledge in front of your tank? Like a tiny counter 10-15 cm protrusion running the length of the tank ...to rest an elbow, set down a drink or a container of fish food?

Mine is a 5 inch ledge in granite. It mounts to the plywood sheet which extends out 3 inches from under my tank.

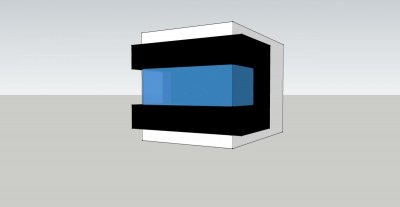
Fully agree a ledge is nice to have. i am going to incorporate it into the black surround in the drawing below. havent decided on the thickness yet, have to see how it develops but it should be wide enough as you say.

aquarium_250x135x90.jpg
 
OP
OP
x_burt

x_burt

Smells like fish...
View Badges
Joined
Nov 27, 2014
Messages
392
Reaction score
727
Location
Norway
Rating - 0%
0   0   0
I'll keep the thread updated as much as I can with any progress but things on the tank build will slow down the next few weeks while I get the house finished, we have sold our current house so the main priority now is to get it to a move in ready state.

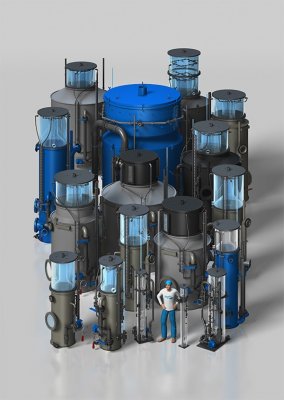
Until then here's a sneak at the skimmer I got for this system. I went with an Aqua-Sander Helgoland 300 from Germany. I'll put up more when I move it in.

05_1232459400.jpg
 

fab

Active Member
View Badges
Joined
Sep 19, 2015
Messages
468
Reaction score
241
Location
Alexandria, Virginia
Rating - 0%
0   0   0
Here are a few design notes from my ledge that may save you some head scratching on what you might want to do.

My ledge is made from the minimum thickness required to allow a bullnose front in granite while having a section cut to thinner dimension to accomodate insertion of the mounting surface. I have 3"of the 3/4" plywood underlayment board embedded in the granite. So the granite level area is fairly thin where 3 inches of it have been milled out to embed the plywood. The ledge face is the bullnose curve and is the original thickness of the granite piece. I do have a seam joining two 4' lengths to make my 8' total length. I could have had it be one piece, but I was concerned about such a long and narrow and thin piece getting broken during transport and installation. The seam is quite unnoticeable.

As I recall, the original granite is about 5" wide (front-to-back) and 1.25 inches thick. The 3" wide section that is milled out to remove 3/4" of granite thickness for the plywood ended up being 1/2" thick granite. The total dimension from the tank to the tip of the rounded bullnose is 5" The radius of the bullnose is 0.625". The cross-section of the granite piece ended up looking like the letter "P" with a fat vertical leg and a fully rounded top which is the bullnose. The plywood fits against the leg of the "P" and butts against the flat end of the milled out section.

The flat and useable dimension of the ledge is 4.25" which is visually subtle, yet functional and really discourages items from being placed (and left) on the ledge. The plywood is not visible at all, unless you get down the floor and look up. You cannot see it even when sitting on the floor near the tank, unless you are about 2 ft high.

Anyone that small would not realize there is an aesthetic problem.

When it was transported, it was very well tied down to a 2x6 piece of lumber to keep it from bending and breaking. To install it, my 'granite guy' simple slid it in place onto the protruding plywood lip which already had glue applied. It mounts to the plywood by simply gluing it in place. It is dark granite with minimal flecking and streaking features to avoid competing with the aquarium visually.

It is very handy and it complements the entire Aquarium - room integration.

Frank
 
Last edited:

fab

Active Member
View Badges
Joined
Sep 19, 2015
Messages
468
Reaction score
241
Location
Alexandria, Virginia
Rating - 0%
0   0   0
I like your blue cap!!! ... but the house behind you looks a bit industrial. Too many round towers and high windows for my taste.
 

RJS

Community Member
View Badges
Joined
Mar 17, 2016
Messages
66
Reaction score
27
Location
So. Cal.
Rating - 0%
0   0   0
Very cool. Probably a crass question, but, well I'm a crass person I guess. What the budget for the display tank and supporting equipment for a 1,000 gal. tank? I ask because I'm very new to reef tanks and, while I like to buy the best stuff, I'm already well over $5k for my Reefer 350 and equipment. Just curious.
 
OP
OP
x_burt

x_burt

Smells like fish...
View Badges
Joined
Nov 27, 2014
Messages
392
Reaction score
727
Location
Norway
Rating - 0%
0   0   0
Very cool. Probably a crass question, but, well I'm a crass person I guess. What the budget for the display tank and supporting equipment for a 1,000 gal. tank? I ask because I'm very new to reef tanks and, while I like to buy the best stuff, I'm already well over $5k for my Reefer 350 and equipment. Just curious.

Depends, are you friends with my wife?!!
 
OP
OP
x_burt

x_burt

Smells like fish...
View Badges
Joined
Nov 27, 2014
Messages
392
Reaction score
727
Location
Norway
Rating - 0%
0   0   0
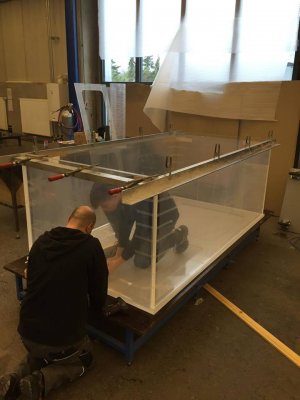
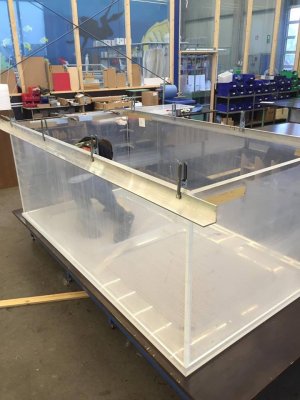
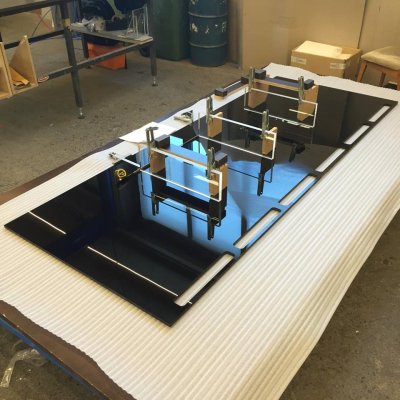
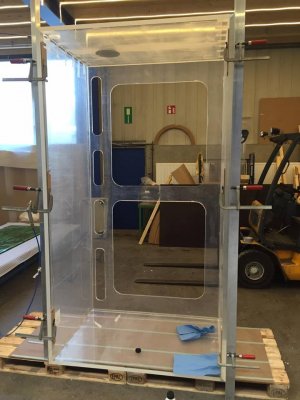
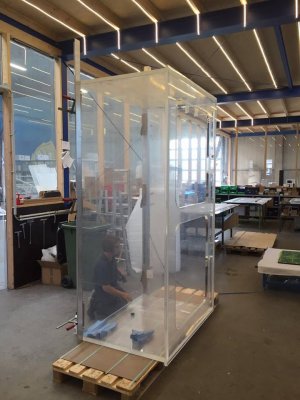
Got an email from Schuran today with a couple of photos of the tank.

12992118_10153488257905911_23017259_n.jpg

13023408_10153488257855911_841546784_n.jpg

Also got a couple of films of them machining the top piece of acrylic for the display. Had a bit of a problem uploading them here but have now set up a facebook page for the build to go along side this tank build thread. I have uploaded them there:
https://www.facebook.com/orneblikkaquarium/
 

dbl

It Takes Less Energy to be Nice
View Badges
Joined
Mar 13, 2014
Messages
15,945
Reaction score
90,199
Location
SW Florida
Rating - 0%
0   0   0
Starting to get exciting my friend. Looking good.
 

mmw64

Valuable Member
View Badges
Joined
Feb 5, 2016
Messages
1,307
Reaction score
1,291
Location
Modesto CA
Rating - 0%
0   0   0
awesome build. if you want some natural color that you don't have to worry about, you could always put in a bunch of different macro algaes. as you can see, there are a lot of colors and it will help maintain your levels in a tank that will likely have a high bioload. the puffers and such may nip at some of it, but most of it will grow as fast as they try to eat it. (not my tank, google image)
macroalgae-tank-2.jpg
Where did you find your macro algaes? They are gorgeous and add so much color. Any downsides?
 

jsker

Reefing is all about the adventure
View Badges
Joined
Apr 11, 2015
Messages
24,974
Reaction score
79,741
Location
Saint Louis
Rating - 0%
0   0   0
I have missed two weeks, it is interesting see a big tank go together. I would like to see the router they use to clean up the edges.
 

Form or function: Do you consider your rock work to be art or the platform for your coral?

  • Primarily art focused.

    Votes: 20 8.0%
  • Primarily a platform for coral.

    Votes: 44 17.7%
  • A bit of each - both art and a platform.

    Votes: 167 67.1%
  • Neither.

    Votes: 12 4.8%
  • Other.

    Votes: 6 2.4%
Back
Top