3D Printing thread

Rick Cavanaugh

Active Member
View Badges
Joined
Jul 10, 2017
Messages
135
Reaction score
257
Location
Greensboro, NC area
Rating - 0%
0   0   0
I print with it a lot. Currently on my 5th roll of it. It's easy once you get the hang of it and your extruder is set up for it.
TPU to TPE? TPU was a decent printing filament. TPE... it would print, but things had to be perfect. Still don't have alot of experience with TPE and I have printed a lot of filament. I printed the InMoov Robot this year.
www.inmoov.fr
 

morpheas

Well-Known Member
View Badges
Joined
Apr 3, 2016
Messages
532
Reaction score
450
Rating - 0%
0   0   0
Can't seem to get PETG to print well on my Prusa i3 clone. Hot end can't go over 230, and it ends up printing a mess. Skips, drags, etc. I think I need to upgrade to a new hot end.
Spool says print from 220-240, but 230 is not quite hot enough, even with a bed at 80c.
Another thing to consider is that the true temperature might not be what the thermocouple is reading or better yet what the controller is interpreting it to be. Is this a DIY kit? Custom firmware like marlin? Reason I'm asking is that if it's custom firmware the constants might be off and true temperature could be different.

Just a thought that came to mind...
 

Zephrant

Active Member
View Badges
Joined
Sep 14, 2017
Messages
111
Reaction score
75
Location
Spokane, WA
Rating - 0%
0   0   0
My printer is a Monoprice i3. Thanks for the tips, I'll double-check the temps with a heat gun tonight. Glad you can get it to work with a similar printer, gives me hope.
The firmware limts me to 230c. I can change that, but the PTFE tube is supposed to melt if I go higher.

I did buy a replacement hot end, but it's not plug and play. Either I did my research wrong, and got the wrong part, or I need some kind of an adapter to make it fit, as it won't fit or mount to the metal bracket that is stock.
https://www.amazon.com/gp/product/B01GDAZZ0A
 

vinny110

Active Member
View Badges
Joined
Sep 8, 2016
Messages
242
Reaction score
118
Location
Orlando, Fl
Rating - 0%
0   0   0
Here are some small Magnetic Frag racks meant to acclimate some of my frags into my LED lit system.
12494713_1828979937329200_8877682397882919227_n.jpg
cool, how much did it cost?
 

OnlyTono

Community Member
View Badges
Joined
Apr 18, 2017
Messages
64
Reaction score
126
Location
Glendale AZ
Rating - 0%
0   0   0
My printer is a Monoprice i3. Thanks for the tips, I'll double-check the temps with a heat gun tonight. Glad you can get it to work with a similar printer, gives me hope.
The firmware limts me to 230c. I can change that, but the PTFE tube is supposed to melt if I go higher.

I did buy a replacement hot end, but it's not plug and play. Either I did my research wrong, and got the wrong part, or I need some kind of an adapter to make it fit, as it won't fit or mount to the metal bracket that is stock.
https://www.amazon.com/gp/product/B01GDAZZ0A

That's a great hot end - i run that exact same one on 6 of the Monoprice MP Minis we are running - both V1 and V2 of hte MP Mini. It works really good for printing PETG. The stock hot end couldn't handle the PETG requrments both for temp and retraction settings.

I say get it installed :)
 

FranklinDattein

Active Member
View Badges
Joined
Nov 7, 2014
Messages
299
Reaction score
313
Location
Gold Coast, Australia
Rating - 0%
0   0   0
Inspired by PaulB's Mandarin Feeder design, I just made a 3D print version of it. It started almost 2 weeks ago from the drawing board, literally:

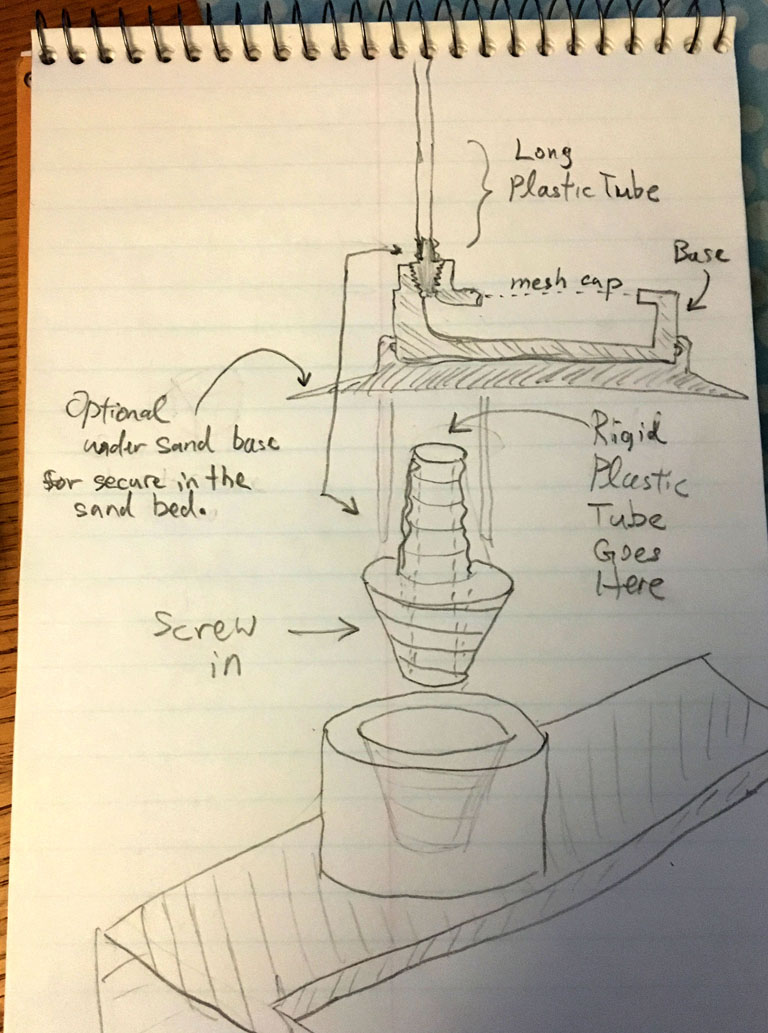
Sep 18th: I like to have the tube removable and leave the feeder on the sand bed and let the fish keep picking on it.

A small connector that always connected to the long plastic tube for pouring the shrimps in. It can then twist onto the base feeder that is sitting on the sand bed. The feeder could have an optional even bigger sand bed base that go under the sand so the feeder won't get blown around by the water current. There will be a cap for the feeder. Either just direct 3D print with tiny holes, or an open cap to allow using a normal mesh.

FeederDesign.jpg


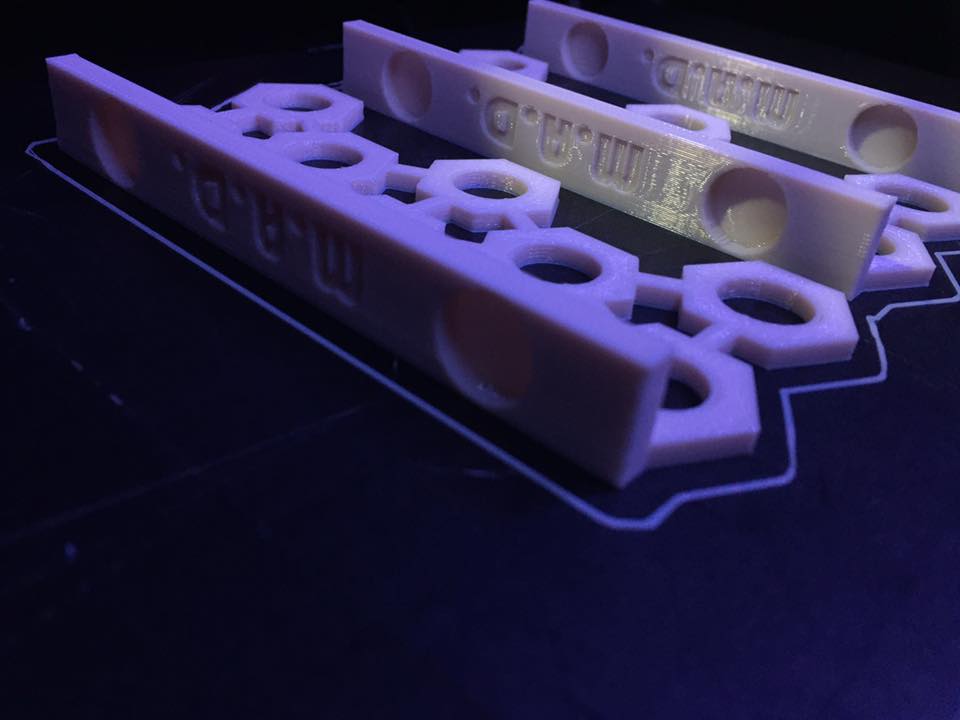
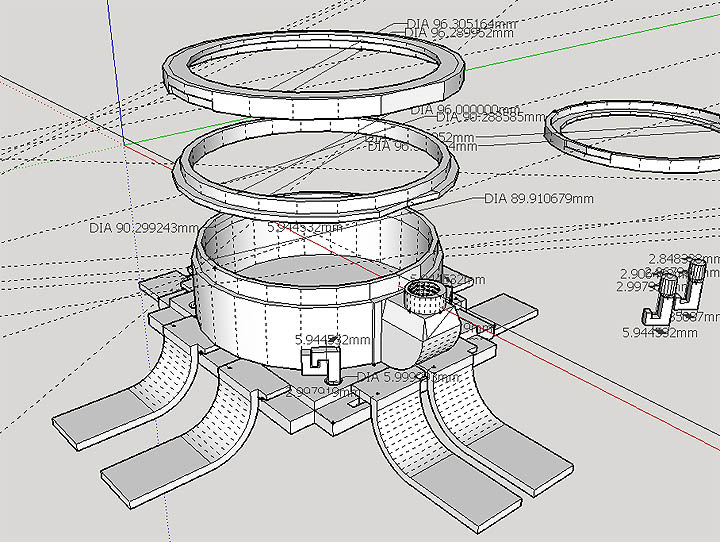
Sep 25th: After many days and many re-design for real world issues, here is the latest design:

Feeder1Design2.jpg


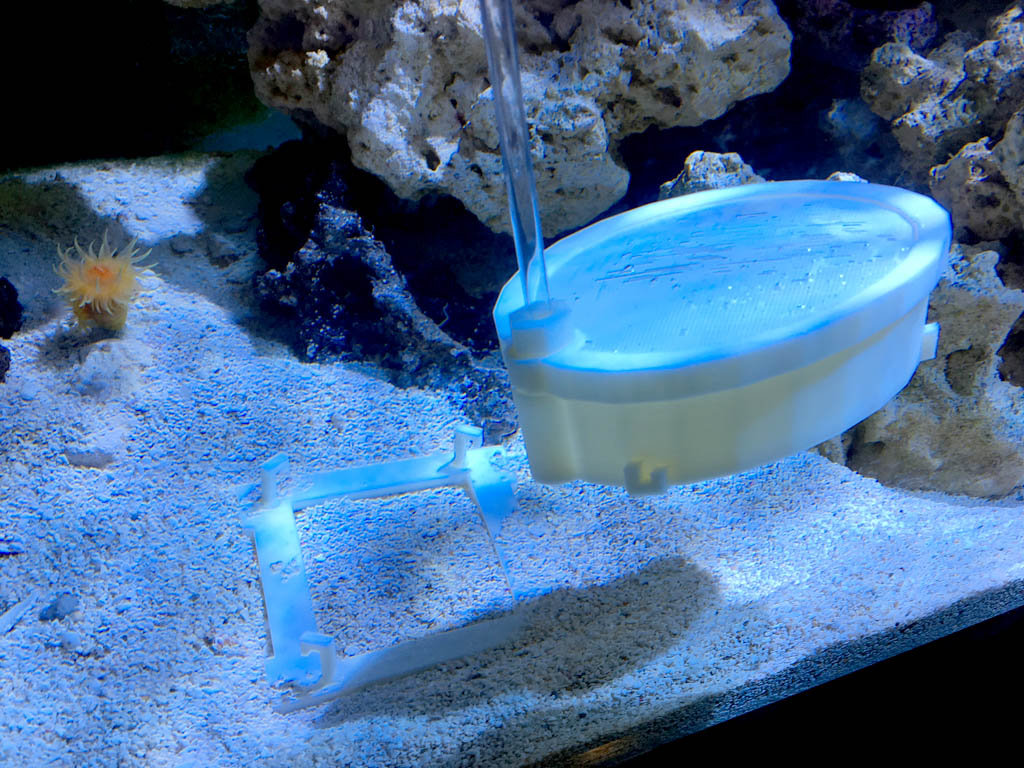
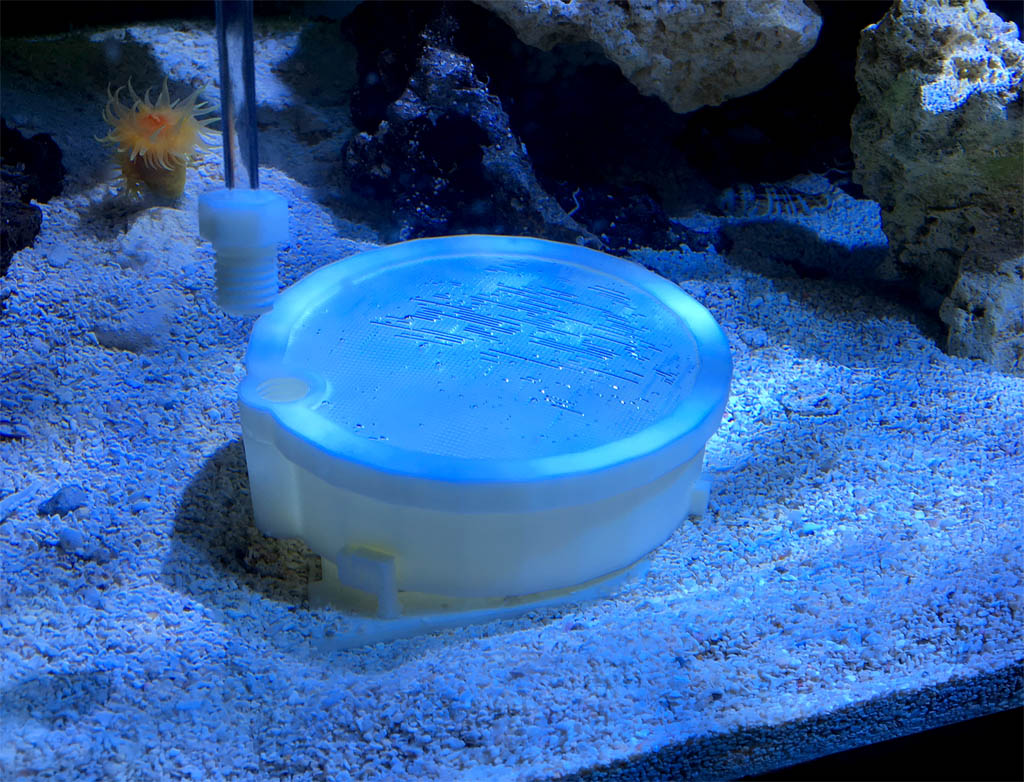
The feeder is anchored down by the base to avoid floating away or getting blown around by the reef tank water current. Just a push and a twist on the feeding tube, and the feeder can be removed from the under-sand-anchor:

Feeder1Removable.jpg


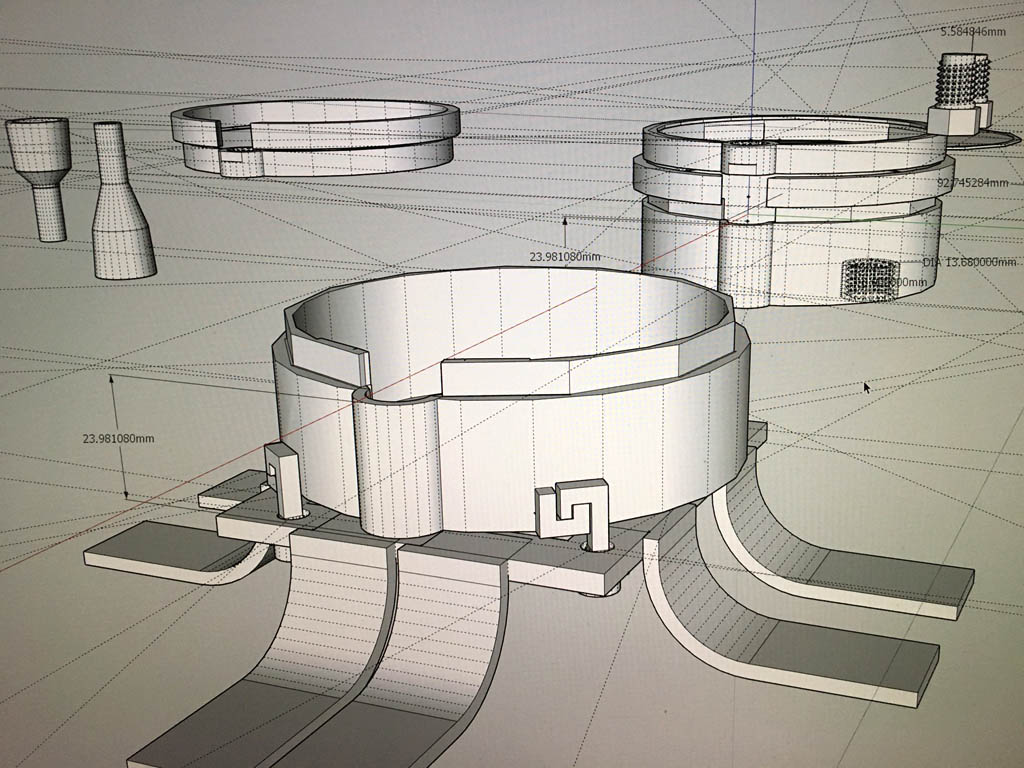
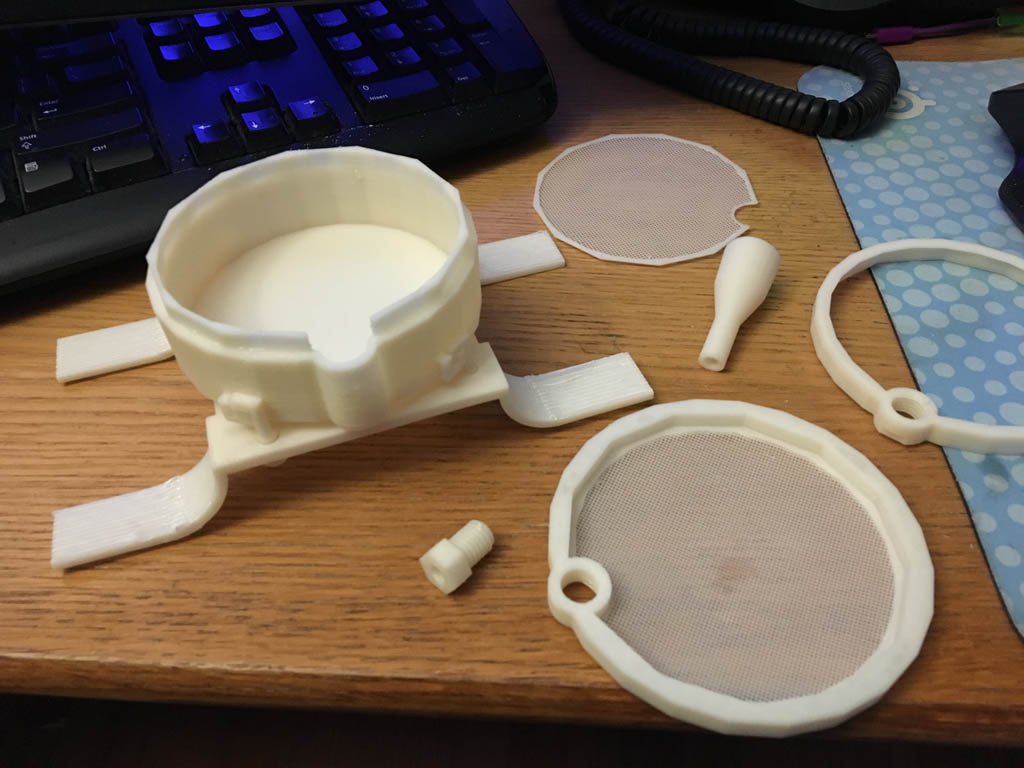
After pouring in the BBS, you can unscrew the feeding tube from the feeder. The rigid air tube is compression fitted to the screw-like connector. You can put in a blind-plug to close the hole without getting your hand wet. :) The screw-like connector is loosely fitted until the last turn.

Feeder1TubeRemove.jpg


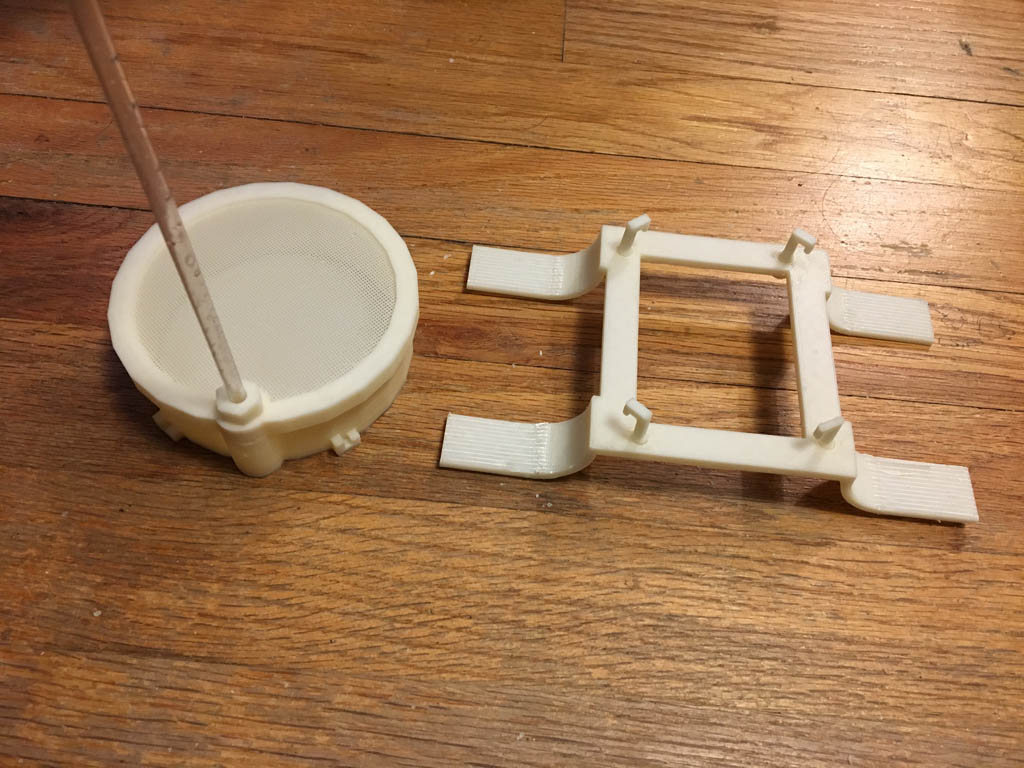
Here is the under-sand-base and the feeder:

Feeder1ModularBaseOnly.jpg


Everything is modular design. If you have a thinner/thicker air-tube, just need to re-print the screw-like compression connector. If you have a different size funnel, just re-print the funnel-airtube connector.

Feeder1Modular.jpg


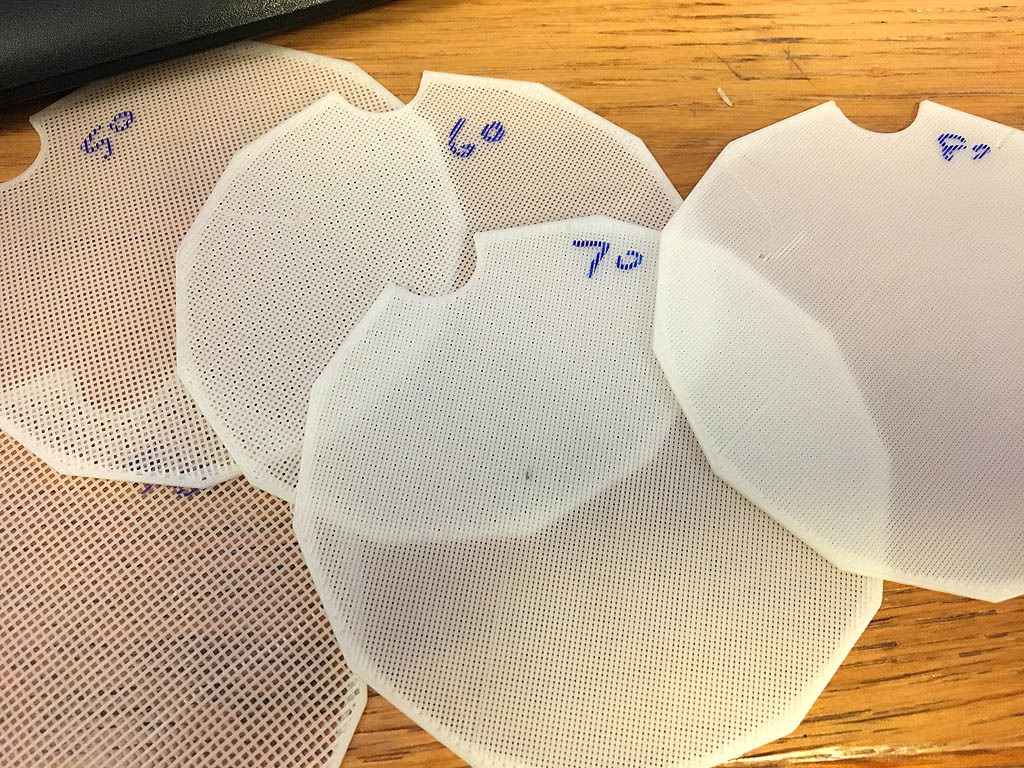
The screens are changeable as well.

ChangableScreen2.jpg


The next revision is work-in-progress to have interchangable under-sand mounting legs, so that it could be buried in various places and situations.

Very handy. Mind sharing the stl files?
 

WesleyC

Active Member
View Badges
Joined
Jul 4, 2017
Messages
204
Reaction score
207
Location
Huntington, NY
Rating - 0%
0   0   0
It is still not finalized. After trying it out in the reef tank, with the strong current and the floatiness of the 3D print, I need to make the legs dig deeper. Also I'm not too satisfy on how the feeder connecting to the under-sand-base. I want to change it to a twisting base. However, once my pair of dragonets moved to the main tank, they don't even care about the feeder any more. I have way too many pods and they've been hunting non-stop and they are fat like pigs! So now I don't have much incentive to improve the feeder further. Anyway, PM me and I'll send you the current version.
 
Last edited:

WesleyC

Active Member
View Badges
Joined
Jul 4, 2017
Messages
204
Reaction score
207
Location
Huntington, NY
Rating - 0%
0   0   0
Here is the current version:

FeederNew.jpg


The top cover now is two pieces. You can use the 3D printed mesh filter, or sandwich it with any filtering material.

The feeder container now connects to the feeding tube without interfering the top cover.

The hooks that hook onto the feeder and the under-sand-base is a plug that you print separately. That is the part that I'm not too happy about.

The legs are all separate as well. They are fiction fitted.
 

Engloid

Valuable Member
View Badges
Joined
Mar 26, 2010
Messages
2,082
Reaction score
315
Location
Tennessee
Rating - 0%
0   0   0
Wanted to share my printed bubble buster , printed on my original prusa, using simplify 3d, variable infill per layer
13d5aa8f4d7f51fcb21ba1e83d11fc03.jpg
95d81b96966f2e5ad56319b701164448.jpg
024ca315fb4df3c0d394d17ffdb00c58.jpg
2abf3dc4f9b652e6f5e70a53b2f63031.jpg
84fd455e2fd9f587b92b2054ad245423.jpg
I made a similar thing a year or so ago. I took several pieces of eggcrate, stacked them and tied with zip ties. My goal was to stop so much swirling and allow a steady vertical rise. I'm interested in hearing if that was your goal and how it's working? I also wonder if those holes are clogging up.
 

laverda

2500 Club Member
View Badges
Joined
Jun 6, 2008
Messages
2,893
Reaction score
2,165
Location
Anaheim
Rating - 0%
0   0   0
Wanted to share my printed bubble buster , printed on my original prusa, using simplify 3d, variable infill per layer
13d5aa8f4d7f51fcb21ba1e83d11fc03.jpg
95d81b96966f2e5ad56319b701164448.jpg
024ca315fb4df3c0d394d17ffdb00c58.jpg
2abf3dc4f9b652e6f5e70a53b2f63031.jpg
84fd455e2fd9f587b92b2054ad245423.jpg
Interesting idea. What skimmer are you using it on? Would you share your file on it? I want to try something a little different, but think it might make a good starting point.
 

Zephrant

Active Member
View Badges
Joined
Sep 14, 2017
Messages
111
Reaction score
75
Location
Spokane, WA
Rating - 0%
0   0   0
I've always hated trying to tighten a nut on a bulkhead that is down at the bottom of an overflow box. This is a simple tool that lets you get a good grip on the nut, without having
to use a pair of channel locks.


Printed in about four hours, but I'll throw it my bulkhead box and use it whenever I need it. If you'd like one that is a different size, drop me a message and I'll make a file for you to print.

Bulkhead-1.jpg


Bulkhead-2.jpg


Bulkhead-3.jpg


Bulkhead-4.jpg


Files if you'd like to print your own:

https://www.thingiverse.com/thing:2689111
 

laverda

2500 Club Member
View Badges
Joined
Jun 6, 2008
Messages
2,893
Reaction score
2,165
Location
Anaheim
Rating - 0%
0   0   0
I've always hated trying to tighten a nut on a bulkhead that is down at the bottom of an overflow box. This is a simple tool that lets you get a good grip on the nut, without having
to use a pair of channel locks.


Printed in about four hours, but I'll throw it my bulkhead box and use it whenever I need it. If you'd like one that is a different size, drop me a message and I'll make a file for you to print.


Bulkhead-2.jpg


Files if you'd like to print your own:

https://www.thingiverse.com/thing:2689111

Cool idea! Most people have the nut underneath the overflow, but still a great idea. It would be good to have a few different ones around. What size bulkhead was this one for? What is the distance across the flats as sadly not all bulkheads use the same size nuts or threads. I know I have 3 different nuts on different 1” bulkheads. I think all the ones on my tank are the same. I also have some 3/4” bulkheads on my current tank.
I made a wrench out of 3 layers of acrylic scrap years ago for some 3/4” bulkheads. It worked great, but would not get in to the tigh areas. I also made one like yours by heating the end of a price of PVC and stretching it over a nut. Then letting it cool..
 
Last edited:

Justfbilly

Active Member
View Badges
Joined
Dec 13, 2015
Messages
169
Reaction score
108
Location
St.Louis area
Rating - 0%
0   0   0
I have been away from R2R for a while and just came across this thread. Very cool. I have been in the process of designing a small "Gyre" like Wave Maker that will be driven by a Maxijet power head. Its still in the design / testing stage. I have been using Tinkercad to design it and the limitations of the program are making it a slow process. Glad to see that there are others using their 3D printers for their reef applications!
 

Fyveonit

Active Member
View Badges
Joined
Nov 28, 2016
Messages
290
Reaction score
193
Rating - 0%
0   0   0
I have been away from R2R for a while and just came across this thread. Very cool. I have been in the process of designing a small "Gyre" like Wave Maker that will be driven by a Maxijet power head. Its still in the design / testing stage. I have been using Tinkercad to design it and the limitations of the program are making it a slow process. Glad to see that there are others using their 3D printers for their reef applications!

I have a Bachelors in 3d and am more than happy to help you if you are stuck due to the limited software. I prefer to work in Maya / Zbrush. Don't want a cut or anything...maybe in on a beta test or a cool frag if I am helpful haha.

Mainly just down to help see something neat get made
 

Zephrant

Active Member
View Badges
Joined
Sep 14, 2017
Messages
111
Reaction score
75
Location
Spokane, WA
Rating - 0%
0   0   0
You are correct on the size- I made my first one 52mm, and that fit some of my 1" bulkheads, but not others. Oddly, it was a perfect fit for a 3/4" bulkhead too. I opened it up to 53mm, and it is working fine. But it's a parametric model, so I can change one dim and re-print to get another size.
 

Tentacled trailblazer in your tank: Have you ever kept a large starfish?

  • I currently have a starfish in my tank.

    Votes: 24 28.6%
  • Not currently, but I have kept a starfish in the past.

    Votes: 19 22.6%
  • I have never kept a starfish, but I hope to in the future.

    Votes: 22 26.2%
  • I have no plans to keep a starfish.

    Votes: 19 22.6%
  • Other.

    Votes: 0 0.0%
Back
Top