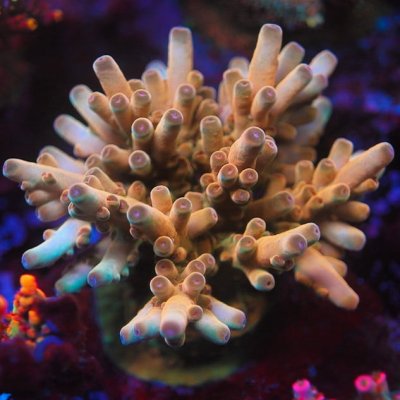
5AC's new 270 Peninsula display

JPergamo

Active Member
View Badges
Joined
Mar 7, 2016
Messages
433
Reaction score
484
Location
Babylon
Rating - 0%
0   0   0
Hey everyone. Hope all is well in your reefing world.

I'm James Pergamo from 5th Alarm Corals in Long Island NY. I've gotten to know so many of you over the years from shows and forums and social media, I felt this new project deserves a true catalog build thread.

I'll try to document the best I can, the steps along a much awaited project for me, a 270 peninsula build as a true display in the living space next to my shop that holds all of my work tanks and growouts.

IMG_20221231_185247_065.jpg


This new system will be replacing my 20 year old 180 that has had about 6 generations of acropora colonies grown out of it, along with 3 different systems it has housed Needless to say if any of you happen to follow me on Instagram, you know I am utterly and completely addicted to the tiny polyped guys. I have been for quite a very long time. So I will pepper in some stickhead drool pics through the build.

received_495129806119282.jpeg


So, on to the build. The first few posts over the next few days will get us up to speed because I finally got around to beginning work on it. The tank itself is a 270 eurobraced peninsula with dimensions of 72x36x24h. It was not the easiest tank move ive ever been a part of Needless to say.
IMG_20221102_152403_649.jpg
IMG_20221102_152403_820.jpg
IMG_20221102_152403_760.jpg
IMG_20221102_152403_897.jpg


The peninsula will be dividing and enclosing my office eventually. Can't hurt to have that view from an office chair.
Even as a Fireman here in NYC, I like to pretend i need an office occasionally like a real adult.
IMG_9721.jpg


2 great friends of mine, Ryan and Jay from Island fish & scale here on long island saved my behind by helping get the tank into place. We really do have one of the best old school reef communities around still. With many of us serious long-term hobbyist/ vendors that have ridden wave after wave of fly-by-night comings and goings. And that's such an awesome blessing to have around us all this time.

Solid intro, going forward in the next few days, I will get into detail about stand, sump, scape, plumbing, and overall layout of undercarriage, since that is what I'm physically up to at this point.

As always, Happy reefing
 

CasperOe

In it to win it!
View Badges
Joined
Feb 14, 2022
Messages
3,261
Reaction score
5,714
Location
Glasgow, United Kingdom
Rating - 0%
0   0   0
That is gonna be pretty spectacular! :star-struck:
 

Vermontreefer

Active Member
View Badges
Joined
Oct 6, 2016
Messages
180
Reaction score
267
Rating - 0%
0   0   0
Wow this thread spoke to me hahaha, I’m just breaking back into the acro game after a few years away at college and I can’t wait to see your tank progress especially since it has the dimensions of my dream tank, couldn’t be more perfect for an office or anywhere else for that matter! Also- thank you for being a firefighter, much respect
 
OP
OP
JPergamo

JPergamo

Active Member
View Badges
Joined
Mar 7, 2016
Messages
433
Reaction score
484
Location
Babylon
Rating - 0%
0   0   0
Wow this thread spoke to me hahaha, I’m just breaking back into the acro game after a few years away at college and I can’t wait to see your tank progress especially since it has the dimensions of my dream tank, couldn’t be more perfect for an office or anywhere else for that matter! Also- thank you for being a firefighter, much respect
Thanks for the kind words. I'm just about hitting 20 years in the hobby and have always wanted a peninsula display. I fell in love with these dimensions, tons of scape space for an acro nut and yet short enough to manage with flow and lighting.
 
OP
OP
JPergamo

JPergamo

Active Member
View Badges
Joined
Mar 7, 2016
Messages
433
Reaction score
484
Location
Babylon
Rating - 0%
0   0   0
This beautiful display was built by Patrick at Coast to Coast custom aquariums in Tom's River NJ.
image0.jpeg


Under his suggestion, I went with black silicone and the sleek looking tinted eurobracing on the top and bottom. From experience with many systems of all sizes, I can honestly say I never want a rimless aquarium again. Especially for a showy display tank. It's fine for my frag and growout systems but the constant water drips gets old fast.

Peace of mind with a well built eurobrace wasn't even really a debate for me for this one.
Screenshot_20230924_194334_Adobe Acrobat.jpg


The 3 viewing sides are low iron, the supper box has 3- 1 1/2 drains for a bean animal build and emergency drain. The 2 return holes are 1 inch and I will be utilizing dual return pumps.
 

dschuffert

Well-Known Member
View Badges
Joined
Aug 11, 2022
Messages
541
Reaction score
1,503
Location
USA
Rating - 0%
0   0   0
That is a great-looking setup, I look forward to seeing how the next project goes!
 
OP
OP
JPergamo

JPergamo

Active Member
View Badges
Joined
Mar 7, 2016
Messages
433
Reaction score
484
Location
Babylon
Rating - 0%
0   0   0
I went and sprung for an aluminum extrusion stand from Framingtech. For 2 decades I've built my own wooden stands, but figured why not try something new.
20220218_195602.jpg


Framingtech was a pleasure to deal with and the assembly of the stand was super simple.
20220218_224216.jpg


From experience, I find homasote board is great padding for directly under a glass tank. Sitting directly on top of whatever is used under the tank, be it plywood, hdpe, etc.
20221102_134656.jpg


The rest of the sump cabinet is outfitted with pvc sheeting such as azek used for exterior trim. Name of the game with this system is weatherproofing for a forever setup.
20230422_133508.jpg
 
OP
OP
JPergamo

JPergamo

Active Member
View Badges
Joined
Mar 7, 2016
Messages
433
Reaction score
484
Location
Babylon
Rating - 0%
0   0   0
I had my acrylic work custom made from poseidon's creations in Florida. The sump is 53x24x16 with 3x7" filter socks. I still like socks over a roller, 1 less thing to break or malfunction.
20230522_145607.jpg


I have always been a firm believer in the KISS method where less is more, and there are plenty of times I like to pull socks altogether, especially if I'm away from the systems for any length of time.

20230923_160928.jpg


My plumbing is pretty basic on most builds. I have built huge manifolds in the past only to utilize maybe one of them, so this time I just left one gate valve off of one of the return lines for possible future use.

The same return line will also have Another gate valve under the drains to TEE off to my UV and easily adjust flow. The return for the UV is Tee'd into the emergency drain.

20230923_160914.jpg


A nice 3 inch wire management channel is installed in the upper corner to keep things nice and tidy. I dont like insane wire management because I like access to remove pumps and such for maintenance, but these channels have always been a great tool to keep things looking good while still granting that access.
IMG_20230611_170220_497.jpg


Alongside the Sump is a 3 chamber dosing container with each compartment having a 5 gallon capacity. I plan on this thing using a ton of kalk and 2 part. 2 part is my choice here since the footprint for everything in this self contained system will be under the stand only, as opposed to the shop where equipment is all over with plenty of room.
20230923_162010.jpg


The 10 gallon RO container will be fed via float switch with a line ran throughout the finished room into the shop and fed by my main vat of RO. I hate constantly filling RO containers.

The first stages of working under the hood have come out pretty sharp. Looking forward to continuing little by little.
IMG_20230403_190014_751.jpg

IMG_20230327_205100_747.jpg
IMG_20230321_181438_437.jpg
 
OP
OP
JPergamo

JPergamo

Active Member
View Badges
Joined
Mar 7, 2016
Messages
433
Reaction score
484
Location
Babylon
Rating - 0%
0   0   0
Here is diy control board 1 of 2. This one will have main equipment such as returns, skimmer, heater, controller, ato etc. This one is located on the peninsula end of the tank facing out, a few inches into the stand to allow for stand skinning later on still. Allowed me to keep it 100% waterproof but still be contained underneath.
20231003_195909.jpg


Better example of the wire management channels I like to use.

The 2nd control board will be mounted up high on the wall and overflow side of peninsula for lighting and flow pumps as things progress. A single eb832 should suffice up there alongside the other controllers and power bricks.

-JP
 
OP
OP
JPergamo

JPergamo

Active Member
View Badges
Joined
Mar 7, 2016
Messages
433
Reaction score
484
Location
Babylon
Rating - 0%
0   0   0
beautiful . i am planning a similar sized upgrade .. only difference is i am going to make a shorter stand .
The shorter stand is definitely more convenient. I have 4 work tanks that are much shorter so in the spirit of making this truly a visual display I opted for it to be a little bit higher just for aesthetics.
 

Johno868

New Member
View Badges
Joined
Oct 22, 2023
Messages
9
Reaction score
6
Location
Trinidad and Tobago
Rating - 0%
0   0   0
yeh i realized that's what you were trying to achieve when i saw the other tanks .
i may do my stand 30" high .

how tall is yours ? seems to be 36" or so
 
OP
OP
JPergamo

JPergamo

Active Member
View Badges
Joined
Mar 7, 2016
Messages
433
Reaction score
484
Location
Babylon
Rating - 0%
0   0   0
yeh i realized that's what you were trying to achieve when i saw the other tanks .
i may do my stand 30" high .

how tall is yours ? seems to be 36" or so
Yea the stand itself without adjustment legs or boards under the tank sits at 36. It's about 38 from floor to bottom of actual tank.
 
OP
OP
JPergamo

JPergamo

Active Member
View Badges
Joined
Mar 7, 2016
Messages
433
Reaction score
484
Location
Babylon
Rating - 0%
0   0   0
I need to do some major updating on this build as I have made some great progress in the last few weeks. Will have a few posts over the next few days. Onto my aquascape....

For the first time in my 20 year reefing career I decided to have my aqauscape built to my vision by David Chander at Chandlerrocks. I got to know Dave and his wife from vendoring shows and swaps around the northeast. I could tell it was a passion project for them turned into full blown business, and it's always awesome to see their beautiful smaller structures they have on display at their booths.

I gave Dave some guidelines of my vision and he knocked it out of the park.


Let me know what you think

What an acro playground this will be soon. Stay tuned.

-James P
20231019213345_IMG_9936 (1).jpg
 

Bakedpwn

Active Member
View Badges
Joined
Oct 17, 2016
Messages
417
Reaction score
193
Location
south MI
Rating - 0%
0   0   0
I went and sprung for an aluminum extrusion stand from Framingtech. For 2 decades I've built my own wooden stands, but figured why not try something new.
20220218_195602.jpg


Framingtech was a pleasure to deal with and the assembly of the stand was super simple.
20220218_224216.jpg


From experience, I find homasote board is great padding for directly under a glass tank. Sitting directly on top of whatever is used under the tank, be it plywood, hdpe, etc.
20221102_134656.jpg


The rest of the sump cabinet is outfitted with pvc sheeting such as azek used for exterior trim. Name of the game with this system is weatherproofing for a forever setup.

Do they cut the metal poles to size?
 

Reefing threads: Do you wear gear from reef brands?

  • I wear reef gear everywhere.

    Votes: 20 13.4%
  • I wear reef gear primarily at fish events and my LFS.

    Votes: 10 6.7%
  • I wear reef gear primarily for water changes and tank maintenance.

    Votes: 1 0.7%
  • I wear reef gear primarily to relax where I live.

    Votes: 23 15.4%
  • I don’t wear gear from reef brands.

    Votes: 84 56.4%
  • Other.

    Votes: 11 7.4%
Back
Top