Hi all
So here we go! I've kept freshwater planted tanks for 20 plus years. I'm familiar with some stuff to a point, but for the sake of salt I'm trying to start completely over with learning the hobby. I dove into the 5 minute reef guide BRS thing, which was amazing and super helpful, and just absorbing a ton of BRS videos as I go. And if you thought this thread wasn't going to be filled with water puns, boy are you gonna end up... drained.
So via 2 local online sales I have picked up a truckload of gear and a nice tank and sump. And barrels full of dry rock! 3 total now. Not even sure if I'm going to use it though. Let me try to explain what I have so far, and where I'm thinking about going with things.
The goal is a nice mixed tank I can start out with fish and live rock, appropriate depth sandbed as well - I really want a goby! Then eventually start adding corals, anemone for clownfish, the usual stuff. I hope to start the tank with the basics and as I learn, progress into more advanced stuff as well.
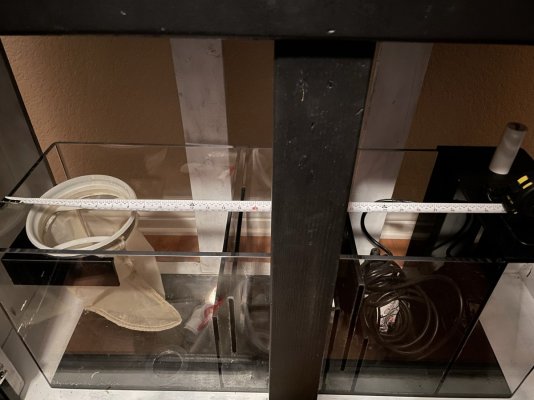
I don't know the make or model of the tank or sump, but they seem really nice. The sump also has an attached auto topoff reservoir on the right there, which I definitely plan to employ. The tank is drilled, and has 2 returns on it which are currently plumbed together - and while it did come with a single pump I am strongly considering replacing the single pump with 2 that push half the rate, that way I have some redundancy. My background is IT so monitoring and redundancy - mandatory.
Not shown is a seaclone protein skimmer that will get plumbed into the sump. Online reviews seem mixed on it, but it should provide a good start. That one was in a 175 gallon previously, not sure if it was enough for that though. I have a literal hefty bag full of bio balls as well.
The lights on the sump are popbloom turing 30s, which while older should still suffice. I read about people soldering and replacing the LEDS, that's in my wheelhouse to do if needed. I have 4 of those lights in total, I'm guessing 2 will do the tank nicely. I ordered a couple of arms to sit them above the tank, for now. I may make a pendant style hangar for them later, I also have a shop to do custom woodwork in, also handy for doing acrylic work so I could even make myself a better skimmer when the time comes.
My gear theory that I'm playing around with for now, not yet ordered so I'm just getting my ideas together here first- so stuff I am considering for this build-
Dual return pumps from the sump.
Dual heaters, on controllers.
Just a good power strip for now, 2 if necessary. No controller just yet.
Return nozzles. I have a pair from the first used tank I picked up, they arent the same size as what is drilled in the 75 so either I make some adapters or get better ones, leaning towards the latter. Saw some "random flow" nozzles that piqued my interest.
Powerheads... I have a box full. Might be good - might be junk. I'll add a pic of those later.
Sticking with the filter socks for now, in the future the auto roller filters are a really neat idea. Not cheap though, so I'm waiting for future upgrades on that purchase.
UV sterilizer - these seem like a really solid upgrade that isn't all that expensive to add.
Some auto topoff sensor/pump.
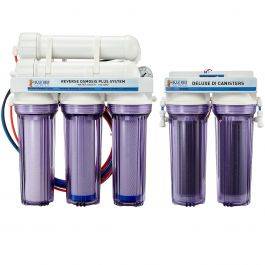
A new water filter so I can cook up RODI. I'll ask more about that below.
The main area of the sump seems like a great place to shove some of the macroalgae for a refugium. I could put in one of my extra popbloom 40 leds and program it accordingly - that might be overkill though, might be smarter to buy a refugium specific light, slap on a timer etc etc. I'm unsure when that should happen in the build process though, maybe not right away?
I really like the seneye monitoring system. Cheap enough to be in my budget, and can also be used as a par meter. I'm big on multi use gear, that seems like a great way to go.
Some sort of battery backup that can hold all of this up. Or at least the critical stuff, in a power outage the UV sterilizer can chill out I think, etc.
I'm working with krakenreef for a nice mesh lid up top. But if anyone thinks they know the tank manufacturer let me know, that could help!
As you can see the tank is empty and confusing the oversized cat below. That.. doesn't take much to do accomplish. So to get going I need to be able to cook up some saltwater, here comes some questions on that! And feel free to point me to resources instead of explaining, like I said earlier I am trying to start my learning over from scratch on this.
We have a water filter that is under the kitchen sink that is old and I would like to replace in full. So a nice filter would be good. I'm considering adding some sort of feed line of a valve that can reach a 55 gallon bucket on wheels that I can cook salt water in, as opposed to say hooking this all up in my laundry room where its good for making salt water but not much else. Say have it run the first few stages, tee off into the drinking water system, but then be valve switchable into the remaining DI stages for making saltwater.
Here's a fun question though - 75 gall plus 20gallon sump, I need to cook up about 100 gallons of water. How do I uhhhhh start the tank if I'm only making 50 gallons at a time? Is it okay to just chill out in the tank? I can drop a powerhead in there and a heater I suppose. I'm not really sure.
My next big question, what should if anything be reused. I have a 5 gallon bucket of sand from the old tank. Should I rinse it and cut it 50/50 with new caribsea live sand? Or is that risky and dumb? Additionally I have a huge amount of dry rock. 3x55 gallon buckets of it. I don't think I want to cycle with only dry rock, I would rather get some live rock just to get things moving sooner. But again, should I plan for 50/50 with the dry rock to save on costs?
This is an expensive hobby and I would rather have the money for critters than gear, but I also want to give them a good safe home. So I'm looking to only cut costs where it's smart to do so. I'm also trying to set things up the right way first, so I don't mind taking my time with it. Flip side of that coin - that's an empty tank in my living room. I'm looking forward to progressing that into at least having some water in it!
Thanks for looking, that's quite the brain dump there. Feel free to point me to any resources you feel appropriate, ask me any questions you like etc. Take care!


So here we go! I've kept freshwater planted tanks for 20 plus years. I'm familiar with some stuff to a point, but for the sake of salt I'm trying to start completely over with learning the hobby. I dove into the 5 minute reef guide BRS thing, which was amazing and super helpful, and just absorbing a ton of BRS videos as I go. And if you thought this thread wasn't going to be filled with water puns, boy are you gonna end up... drained.
So via 2 local online sales I have picked up a truckload of gear and a nice tank and sump. And barrels full of dry rock! 3 total now. Not even sure if I'm going to use it though. Let me try to explain what I have so far, and where I'm thinking about going with things.
The goal is a nice mixed tank I can start out with fish and live rock, appropriate depth sandbed as well - I really want a goby! Then eventually start adding corals, anemone for clownfish, the usual stuff. I hope to start the tank with the basics and as I learn, progress into more advanced stuff as well.
I don't know the make or model of the tank or sump, but they seem really nice. The sump also has an attached auto topoff reservoir on the right there, which I definitely plan to employ. The tank is drilled, and has 2 returns on it which are currently plumbed together - and while it did come with a single pump I am strongly considering replacing the single pump with 2 that push half the rate, that way I have some redundancy. My background is IT so monitoring and redundancy - mandatory.
Not shown is a seaclone protein skimmer that will get plumbed into the sump. Online reviews seem mixed on it, but it should provide a good start. That one was in a 175 gallon previously, not sure if it was enough for that though. I have a literal hefty bag full of bio balls as well.
The lights on the sump are popbloom turing 30s, which while older should still suffice. I read about people soldering and replacing the LEDS, that's in my wheelhouse to do if needed. I have 4 of those lights in total, I'm guessing 2 will do the tank nicely. I ordered a couple of arms to sit them above the tank, for now. I may make a pendant style hangar for them later, I also have a shop to do custom woodwork in, also handy for doing acrylic work so I could even make myself a better skimmer when the time comes.
My gear theory that I'm playing around with for now, not yet ordered so I'm just getting my ideas together here first- so stuff I am considering for this build-
Dual return pumps from the sump.
Dual heaters, on controllers.
Just a good power strip for now, 2 if necessary. No controller just yet.
Return nozzles. I have a pair from the first used tank I picked up, they arent the same size as what is drilled in the 75 so either I make some adapters or get better ones, leaning towards the latter. Saw some "random flow" nozzles that piqued my interest.
Powerheads... I have a box full. Might be good - might be junk. I'll add a pic of those later.
Sticking with the filter socks for now, in the future the auto roller filters are a really neat idea. Not cheap though, so I'm waiting for future upgrades on that purchase.
UV sterilizer - these seem like a really solid upgrade that isn't all that expensive to add.
Some auto topoff sensor/pump.
A new water filter so I can cook up RODI. I'll ask more about that below.
The main area of the sump seems like a great place to shove some of the macroalgae for a refugium. I could put in one of my extra popbloom 40 leds and program it accordingly - that might be overkill though, might be smarter to buy a refugium specific light, slap on a timer etc etc. I'm unsure when that should happen in the build process though, maybe not right away?
I really like the seneye monitoring system. Cheap enough to be in my budget, and can also be used as a par meter. I'm big on multi use gear, that seems like a great way to go.
Some sort of battery backup that can hold all of this up. Or at least the critical stuff, in a power outage the UV sterilizer can chill out I think, etc.
I'm working with krakenreef for a nice mesh lid up top. But if anyone thinks they know the tank manufacturer let me know, that could help!
As you can see the tank is empty and confusing the oversized cat below. That.. doesn't take much to do accomplish. So to get going I need to be able to cook up some saltwater, here comes some questions on that! And feel free to point me to resources instead of explaining, like I said earlier I am trying to start my learning over from scratch on this.
We have a water filter that is under the kitchen sink that is old and I would like to replace in full. So a nice filter would be good. I'm considering adding some sort of feed line of a valve that can reach a 55 gallon bucket on wheels that I can cook salt water in, as opposed to say hooking this all up in my laundry room where its good for making salt water but not much else. Say have it run the first few stages, tee off into the drinking water system, but then be valve switchable into the remaining DI stages for making saltwater.
Here's a fun question though - 75 gall plus 20gallon sump, I need to cook up about 100 gallons of water. How do I uhhhhh start the tank if I'm only making 50 gallons at a time? Is it okay to just chill out in the tank? I can drop a powerhead in there and a heater I suppose. I'm not really sure.
My next big question, what should if anything be reused. I have a 5 gallon bucket of sand from the old tank. Should I rinse it and cut it 50/50 with new caribsea live sand? Or is that risky and dumb? Additionally I have a huge amount of dry rock. 3x55 gallon buckets of it. I don't think I want to cycle with only dry rock, I would rather get some live rock just to get things moving sooner. But again, should I plan for 50/50 with the dry rock to save on costs?
This is an expensive hobby and I would rather have the money for critters than gear, but I also want to give them a good safe home. So I'm looking to only cut costs where it's smart to do so. I'm also trying to set things up the right way first, so I don't mind taking my time with it. Flip side of that coin - that's an empty tank in my living room. I'm looking forward to progressing that into at least having some water in it!
Thanks for looking, that's quite the brain dump there. Feel free to point me to any resources you feel appropriate, ask me any questions you like etc. Take care!


")