Hey reefers!
Decided to come here to do a build thread and introduce myself.
My name is Nick Babin I have been in this hobby for about 3 years. I started with a standard 20 gallon and hang on the back filters.
I now have a successful mixed 20 gallon drop off tank and a 65 gallon LPS/Softies tank. This will be a mixed tank dominated by SPS.
This build begain with almost all used items.
Items that were second hand used in this build.
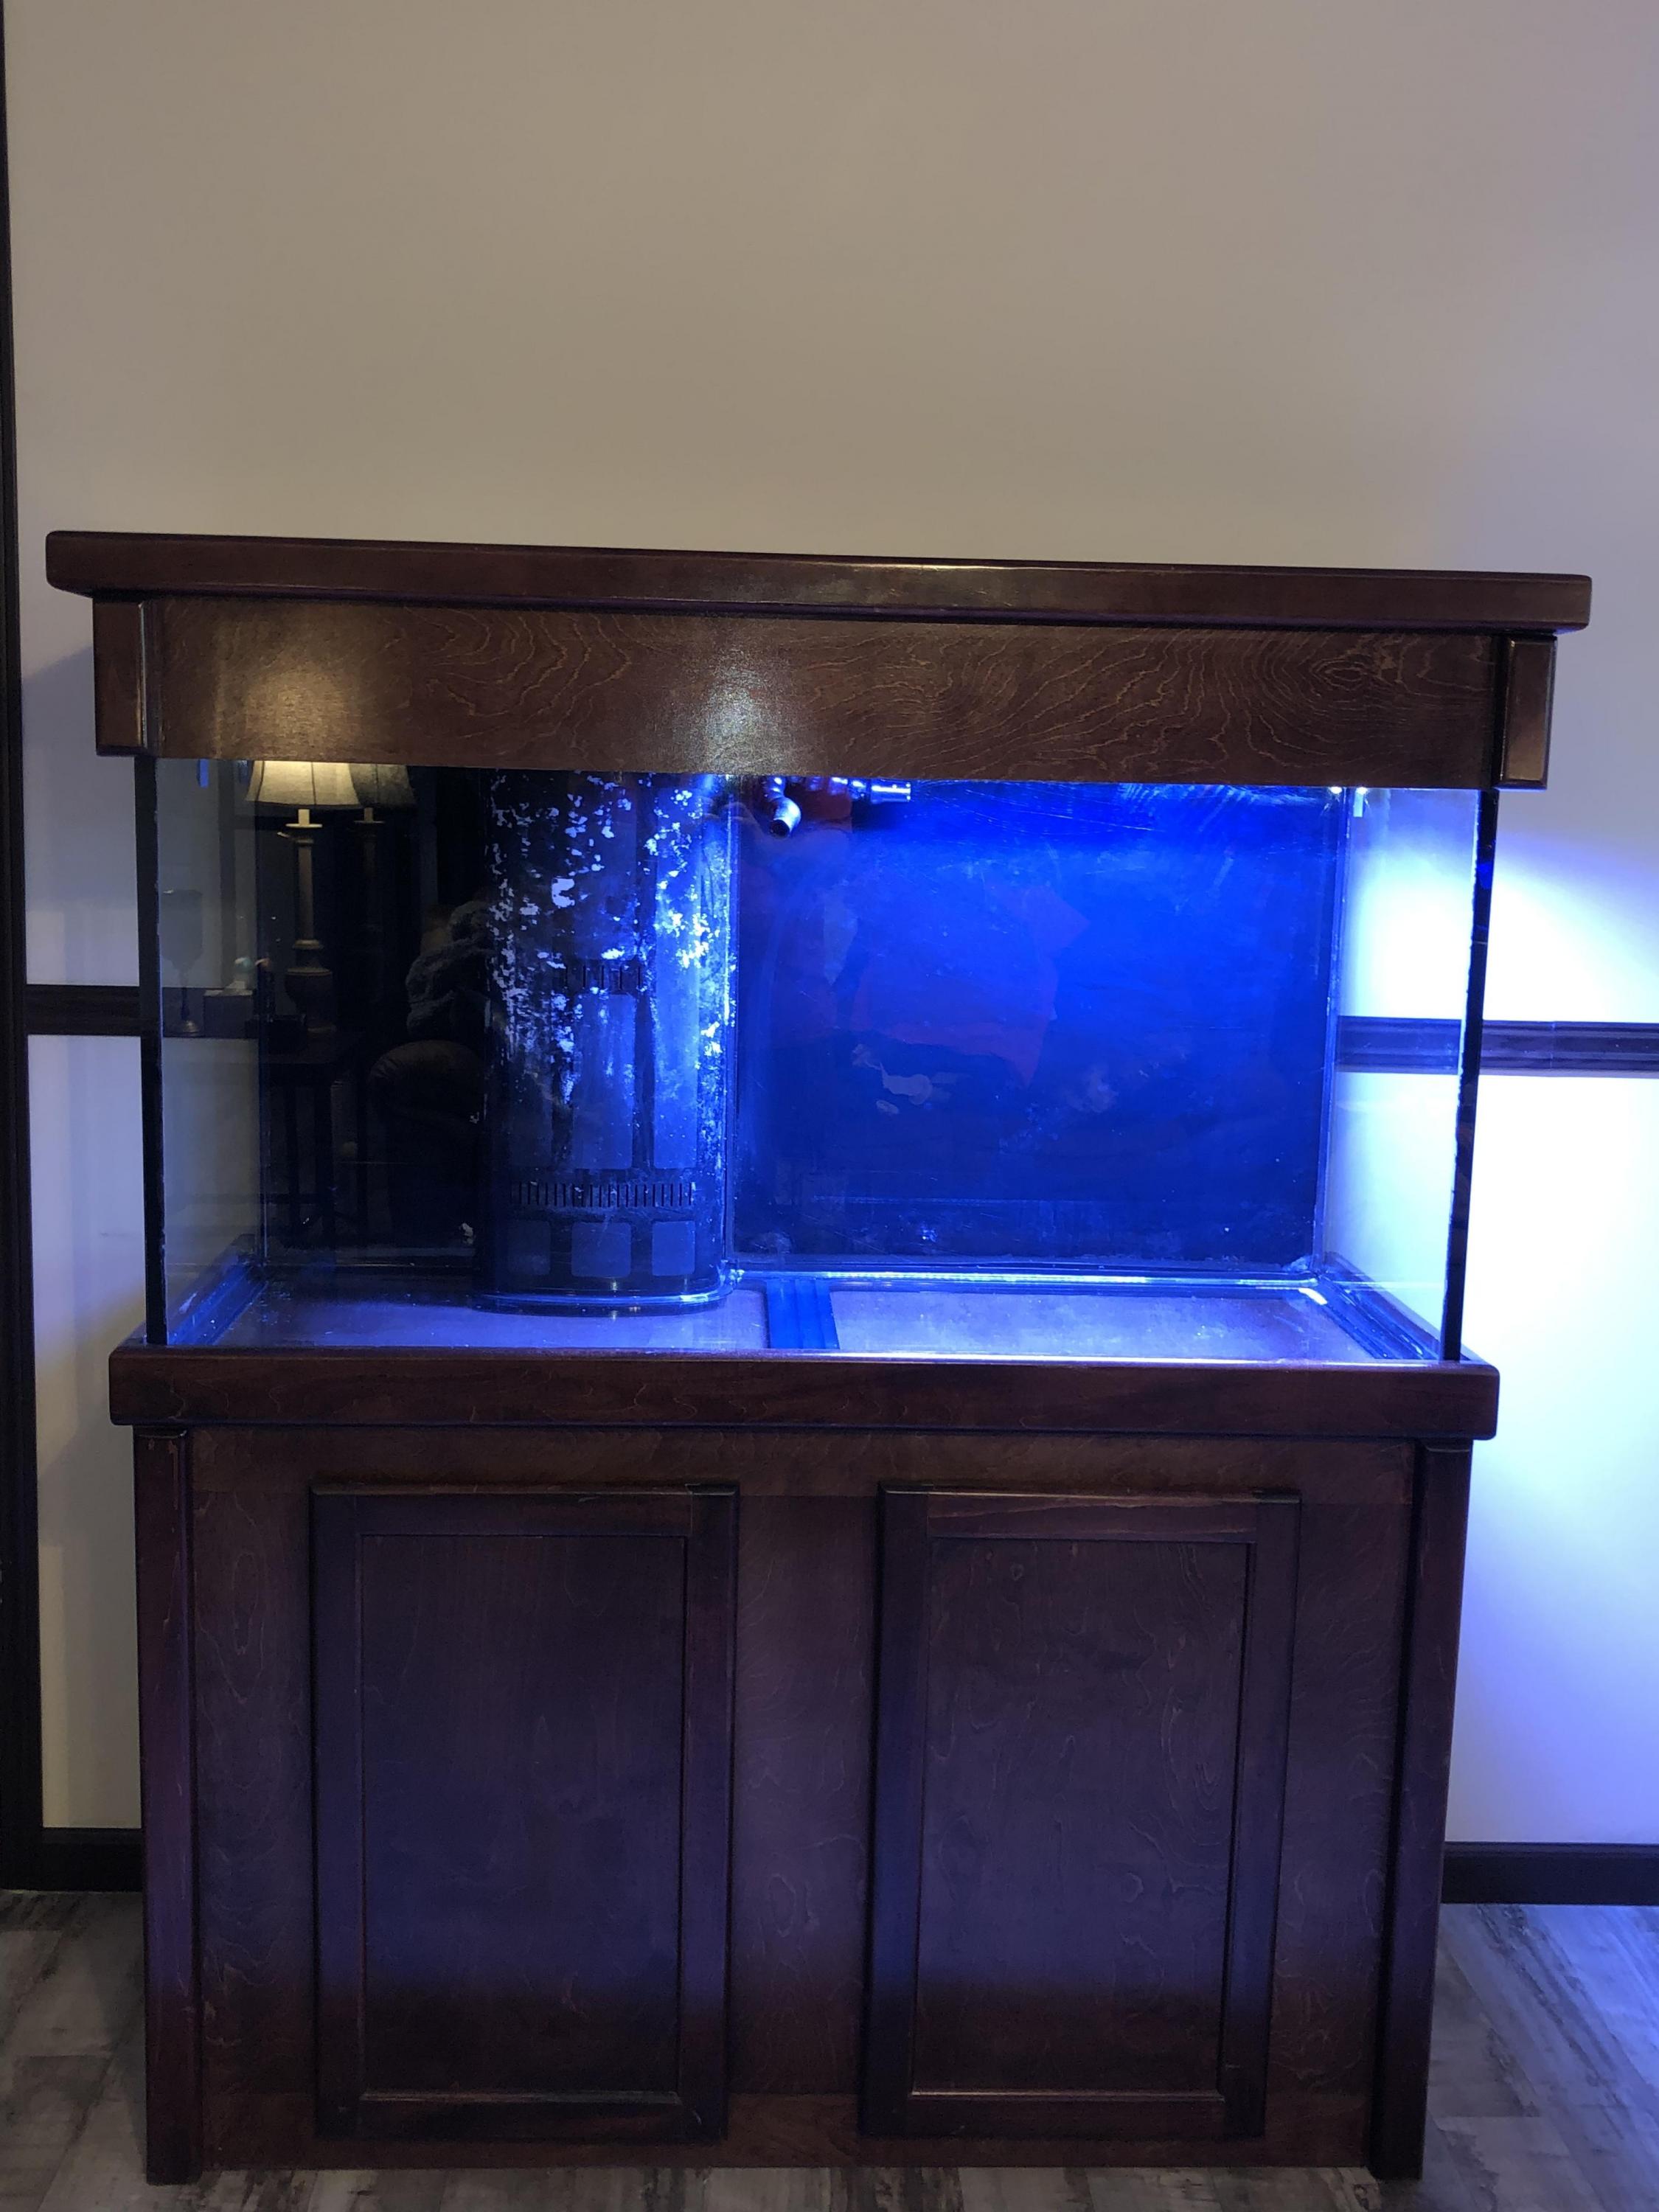
90 gallon aqueon tank
stand and canopy
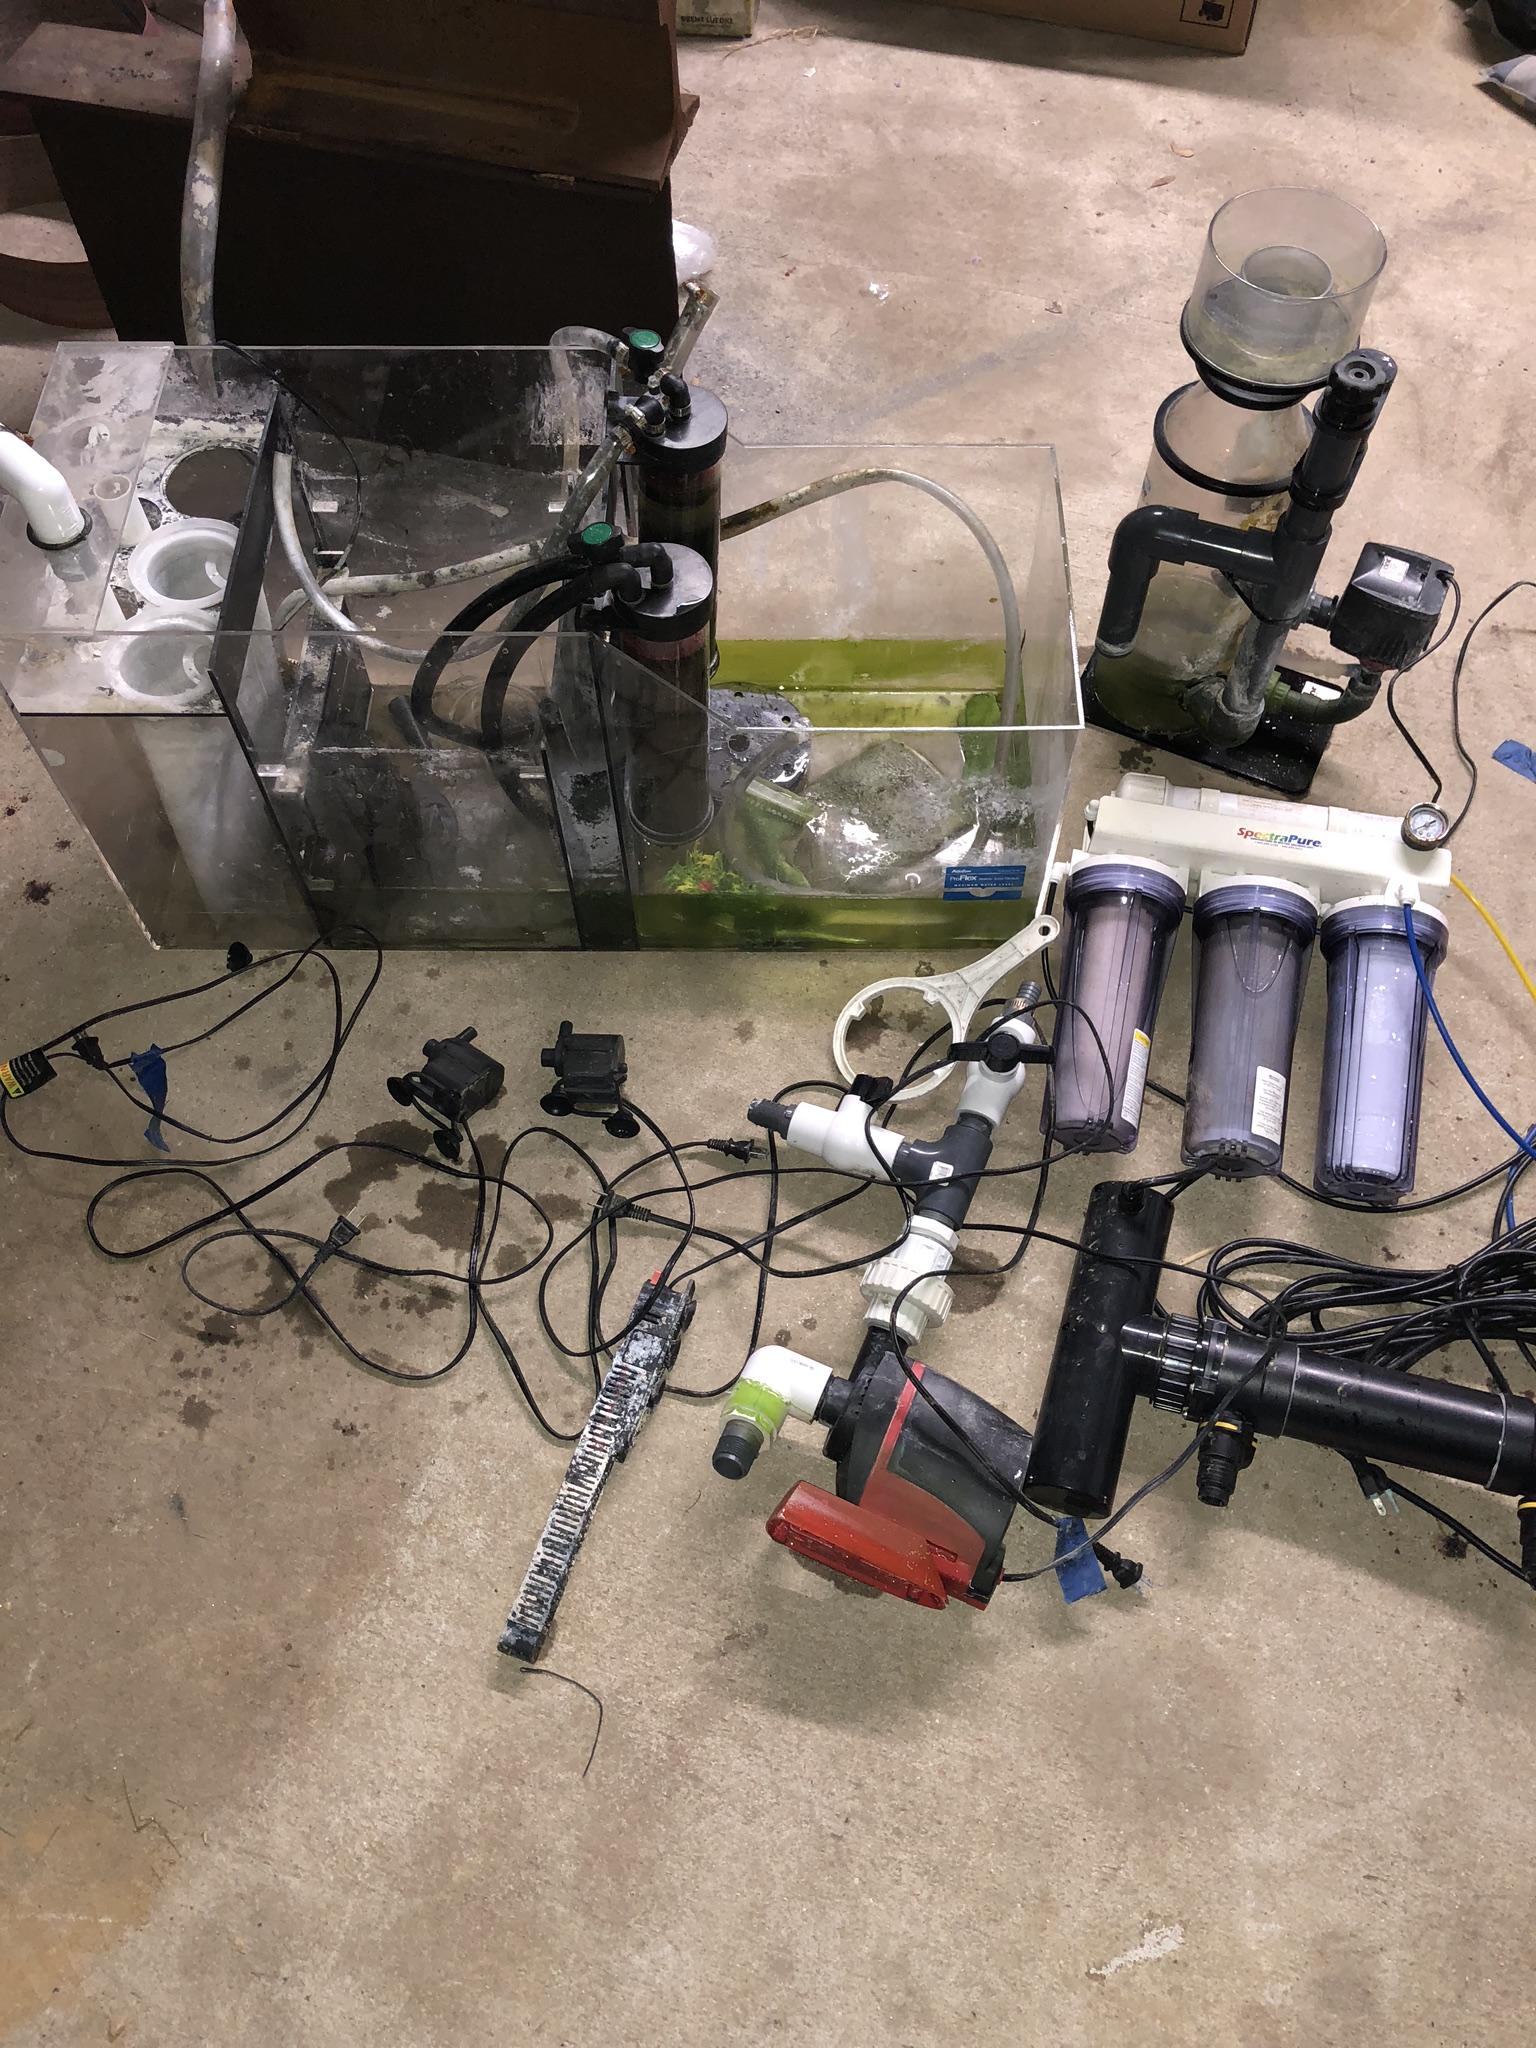
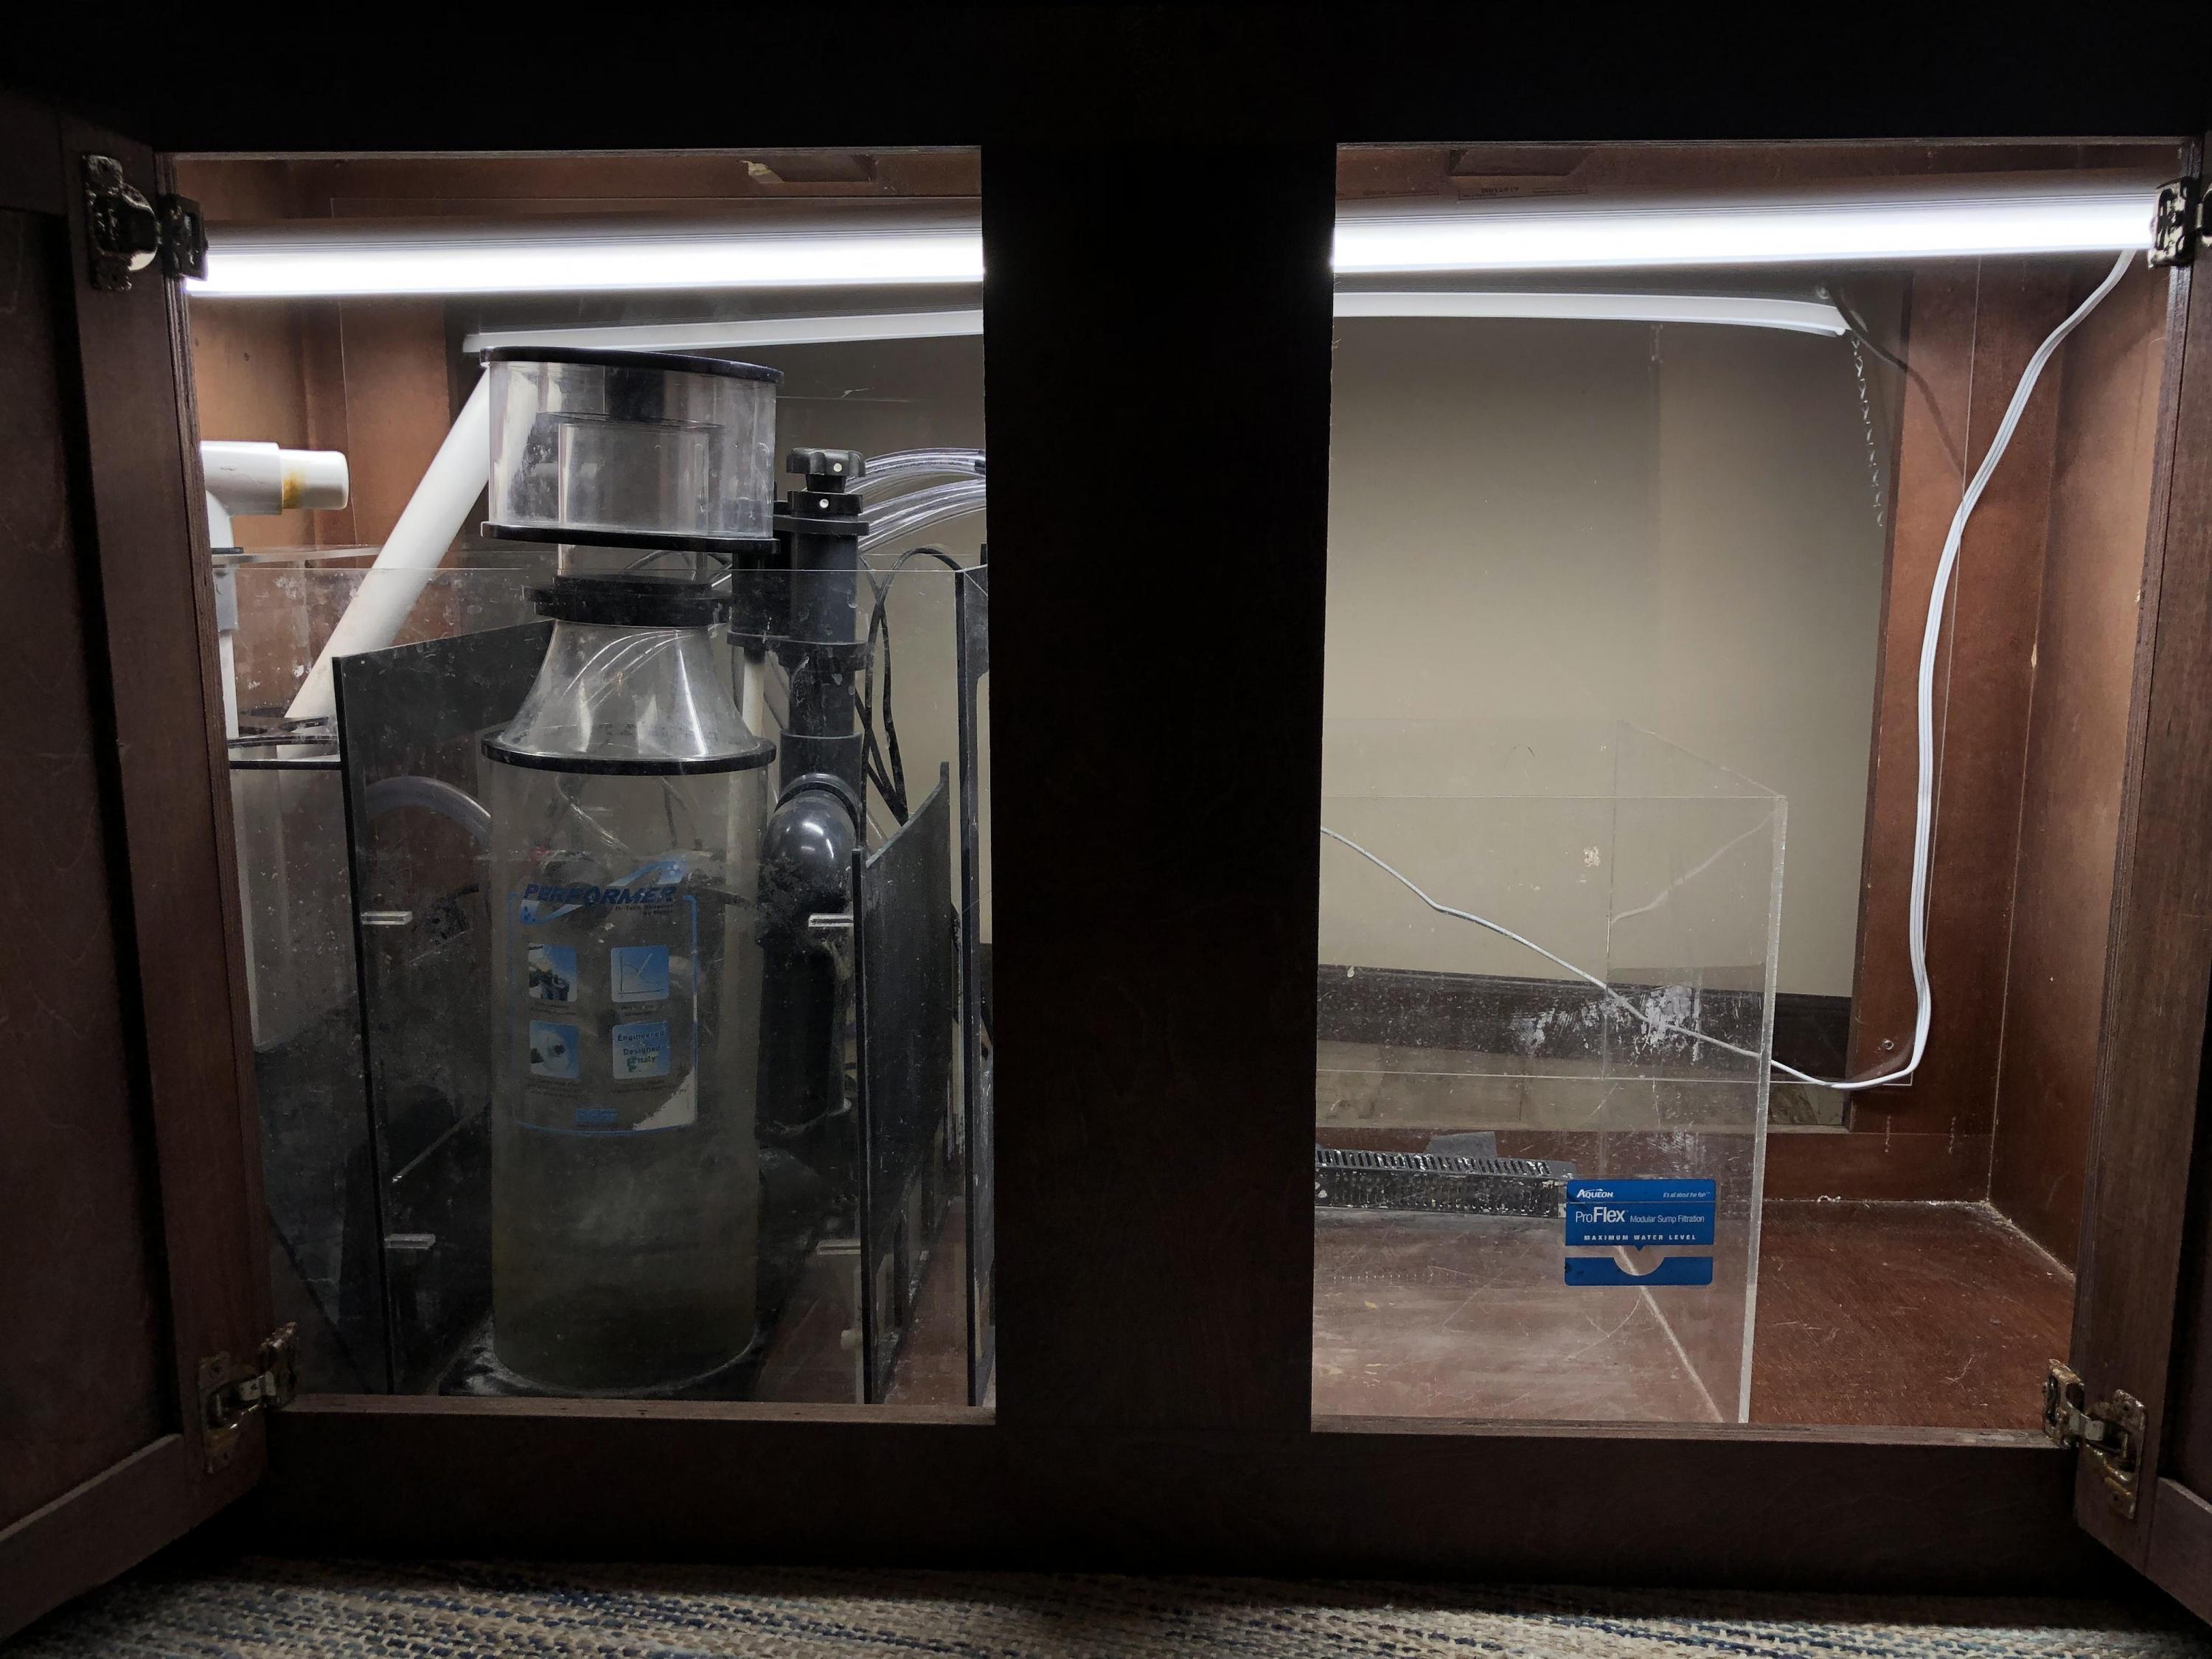
Aqueon ProFlex model 4
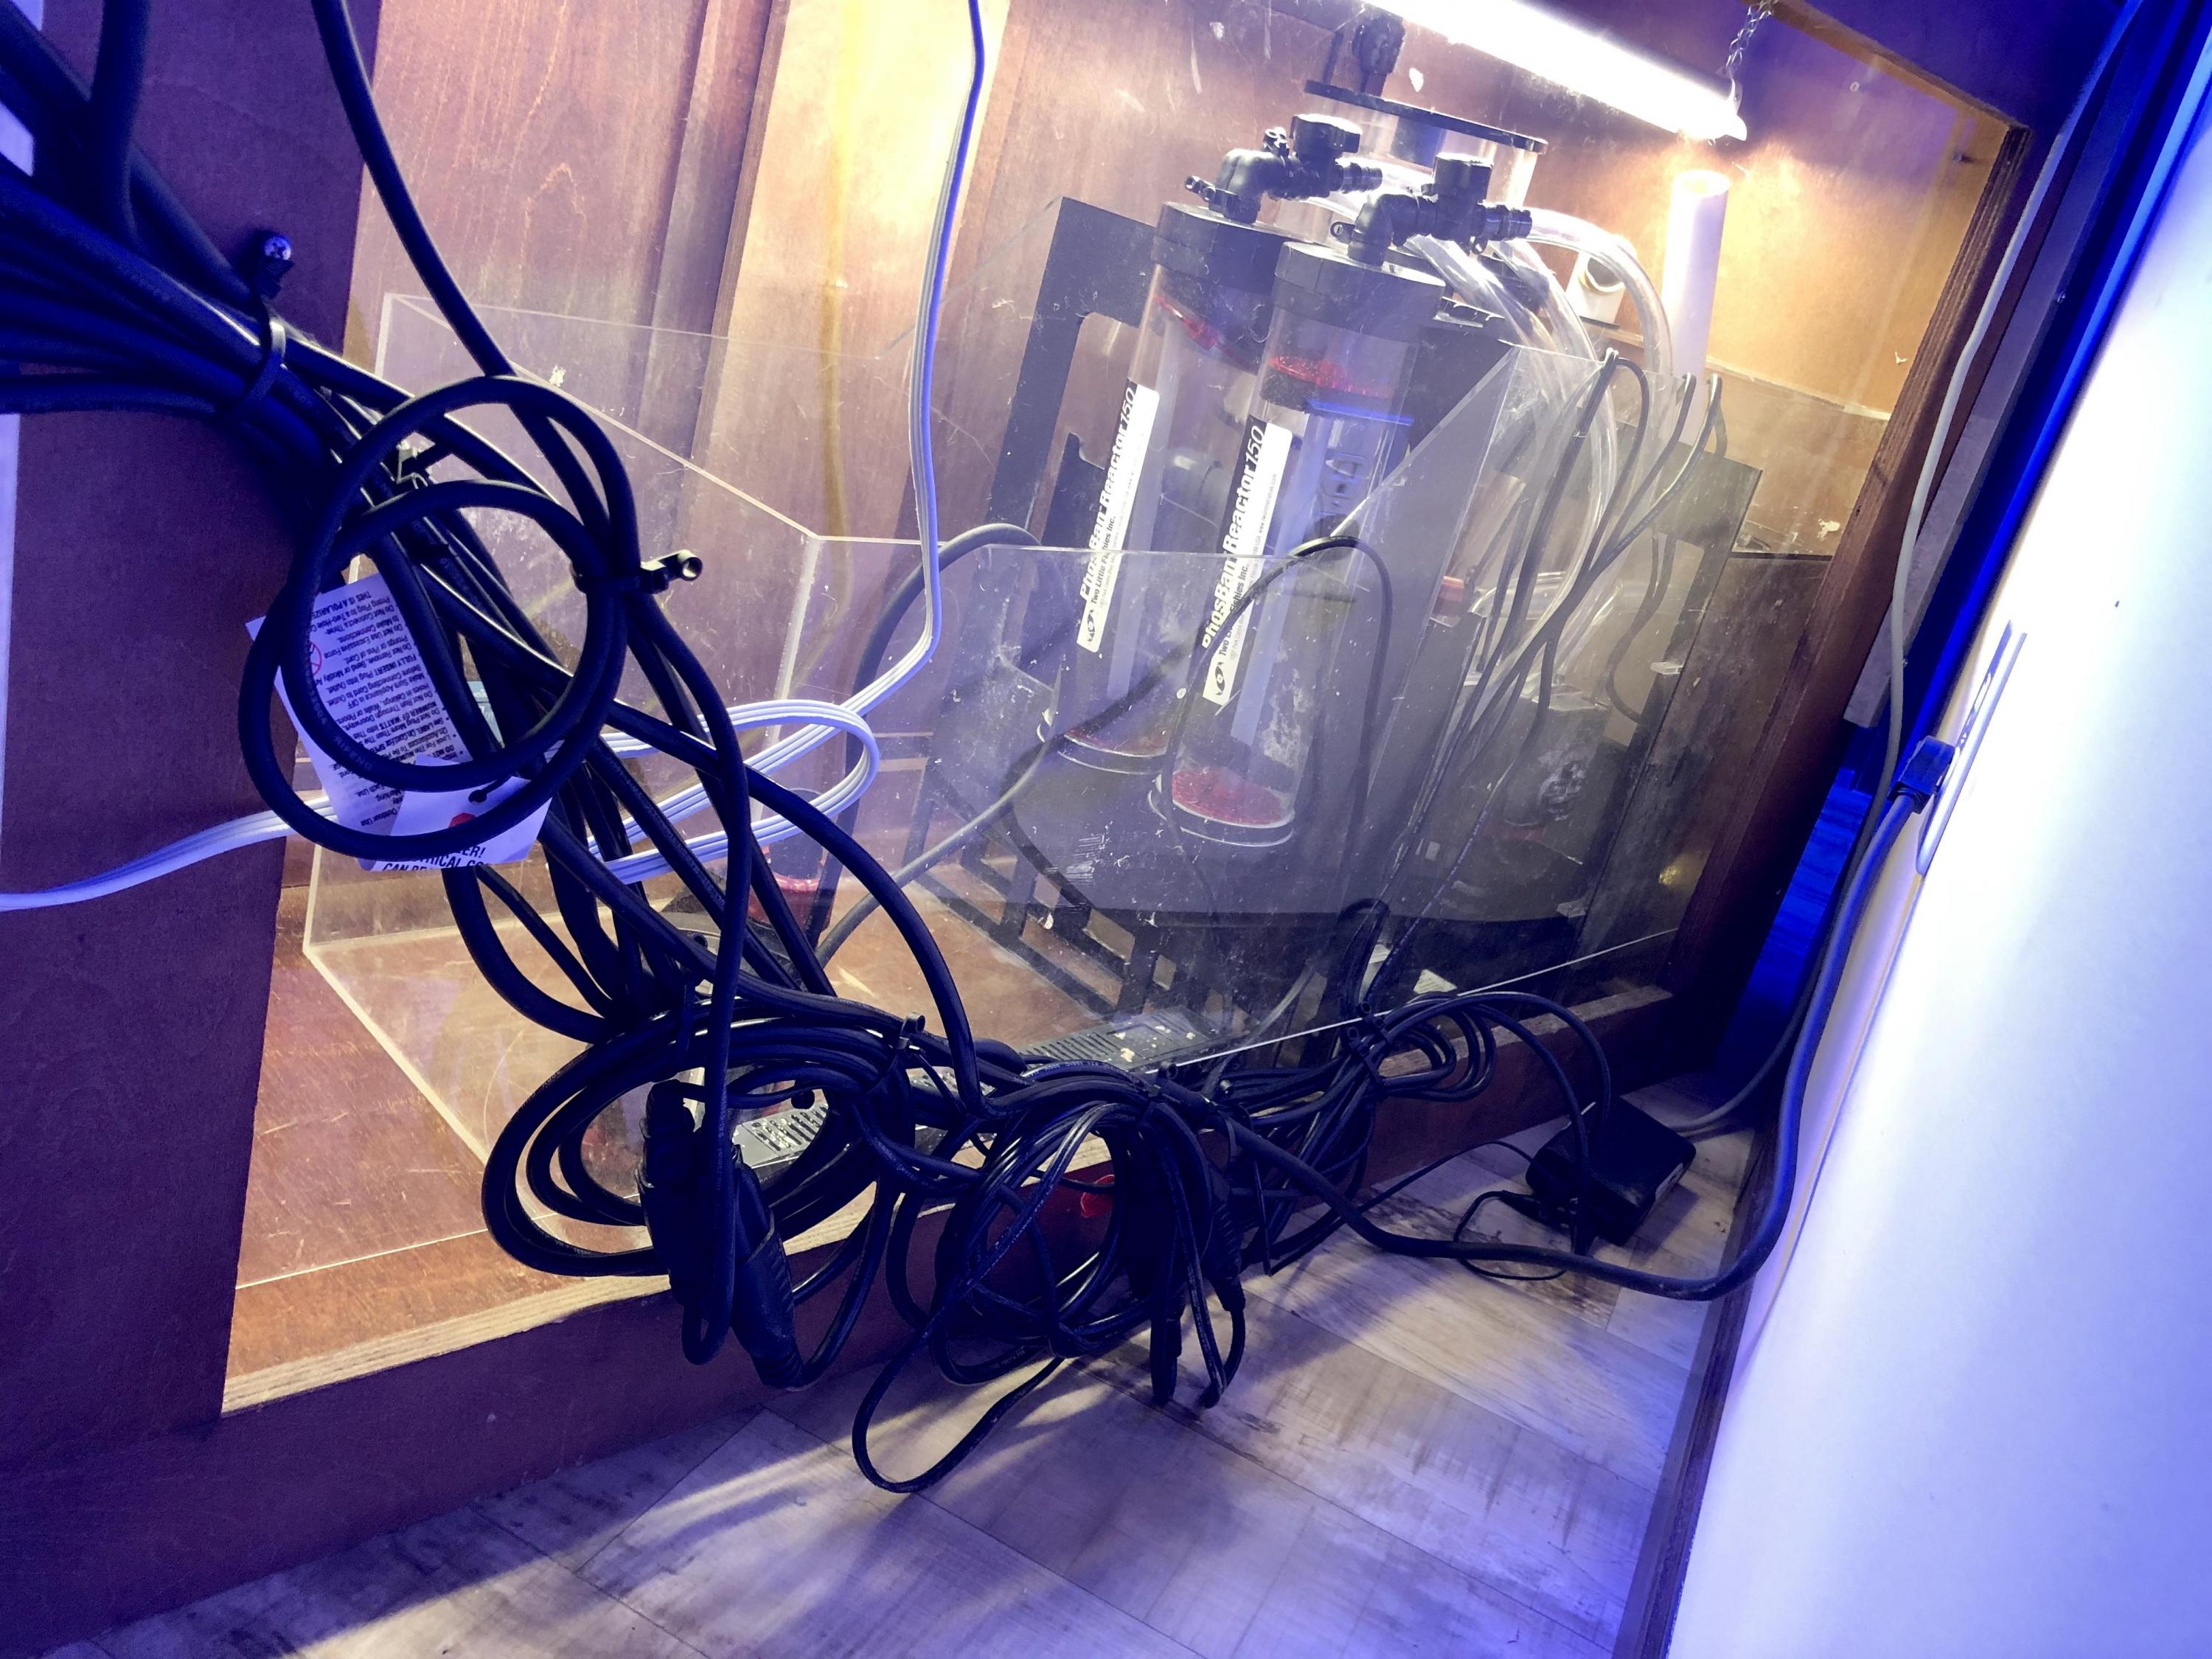
2- Phosban 150 reactors
2- cobalt pumps
Hydor 705 skimmer
Fluval E300 heater
4 bulb ATI sunpower t5 fixture
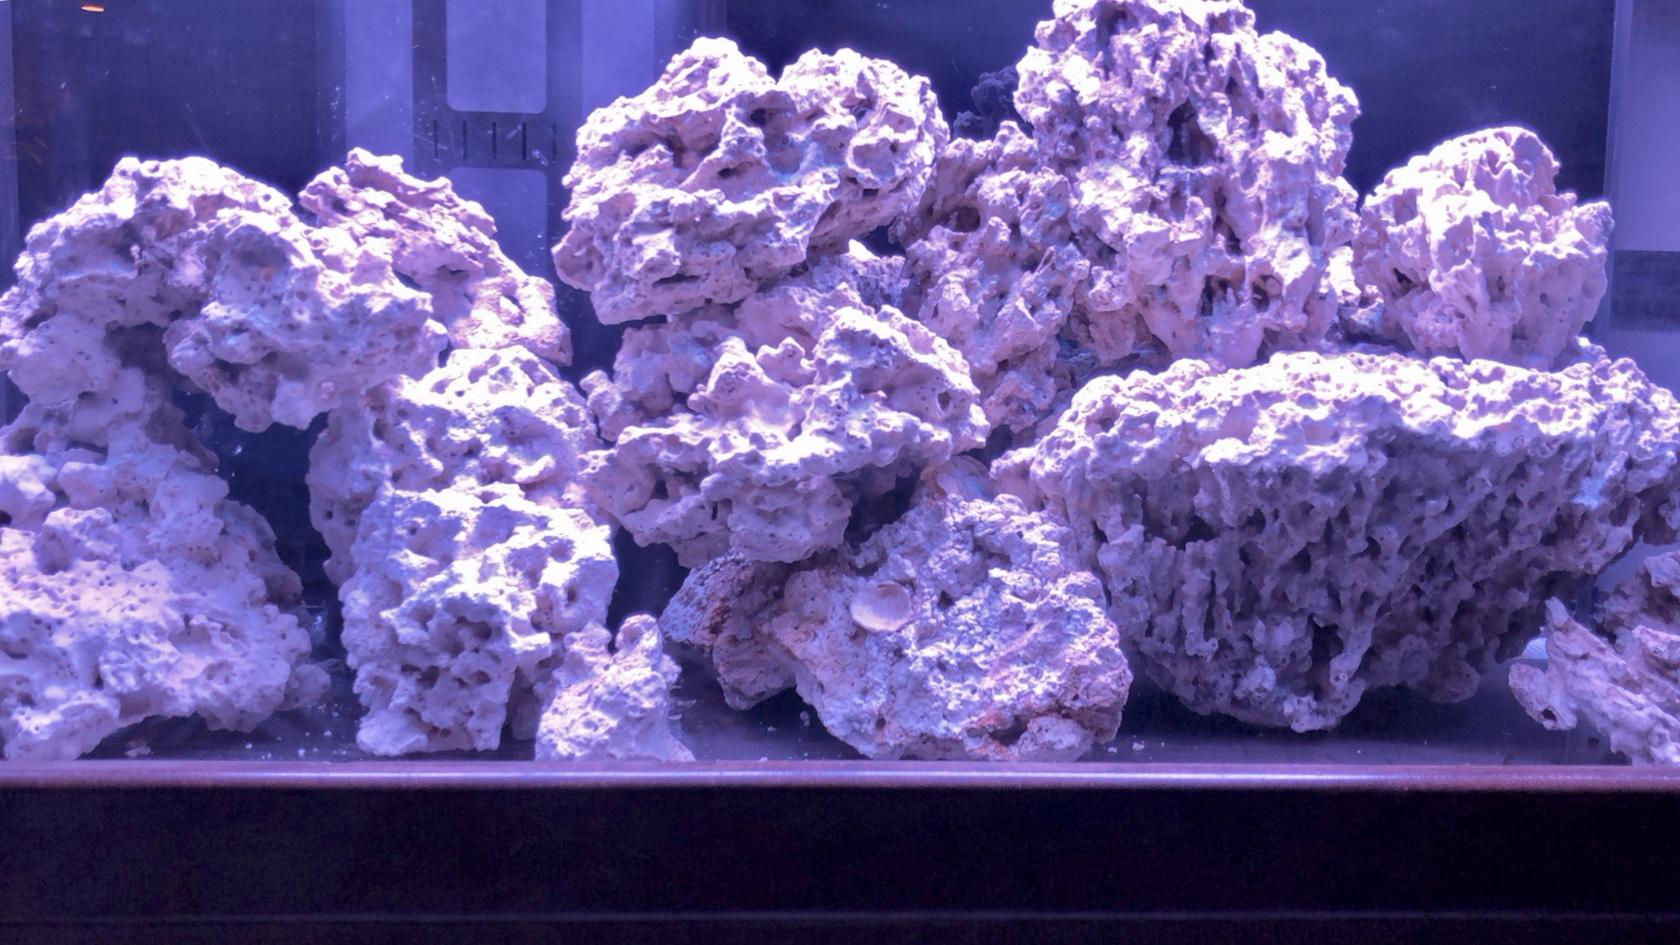
90lbs pukani dry rock
items purchased new
hydor seltz-D return pump
icecap 3k gyre
48” LED t5 fixture
RB lumenbar- high octane UV
2- APC surge protectors
4- smart life 1-2 WiFi switches
CA 1400 pump for skimmer
3/4 aluminum tubing
3/4” x 3” L brackets
misc screws and hooks
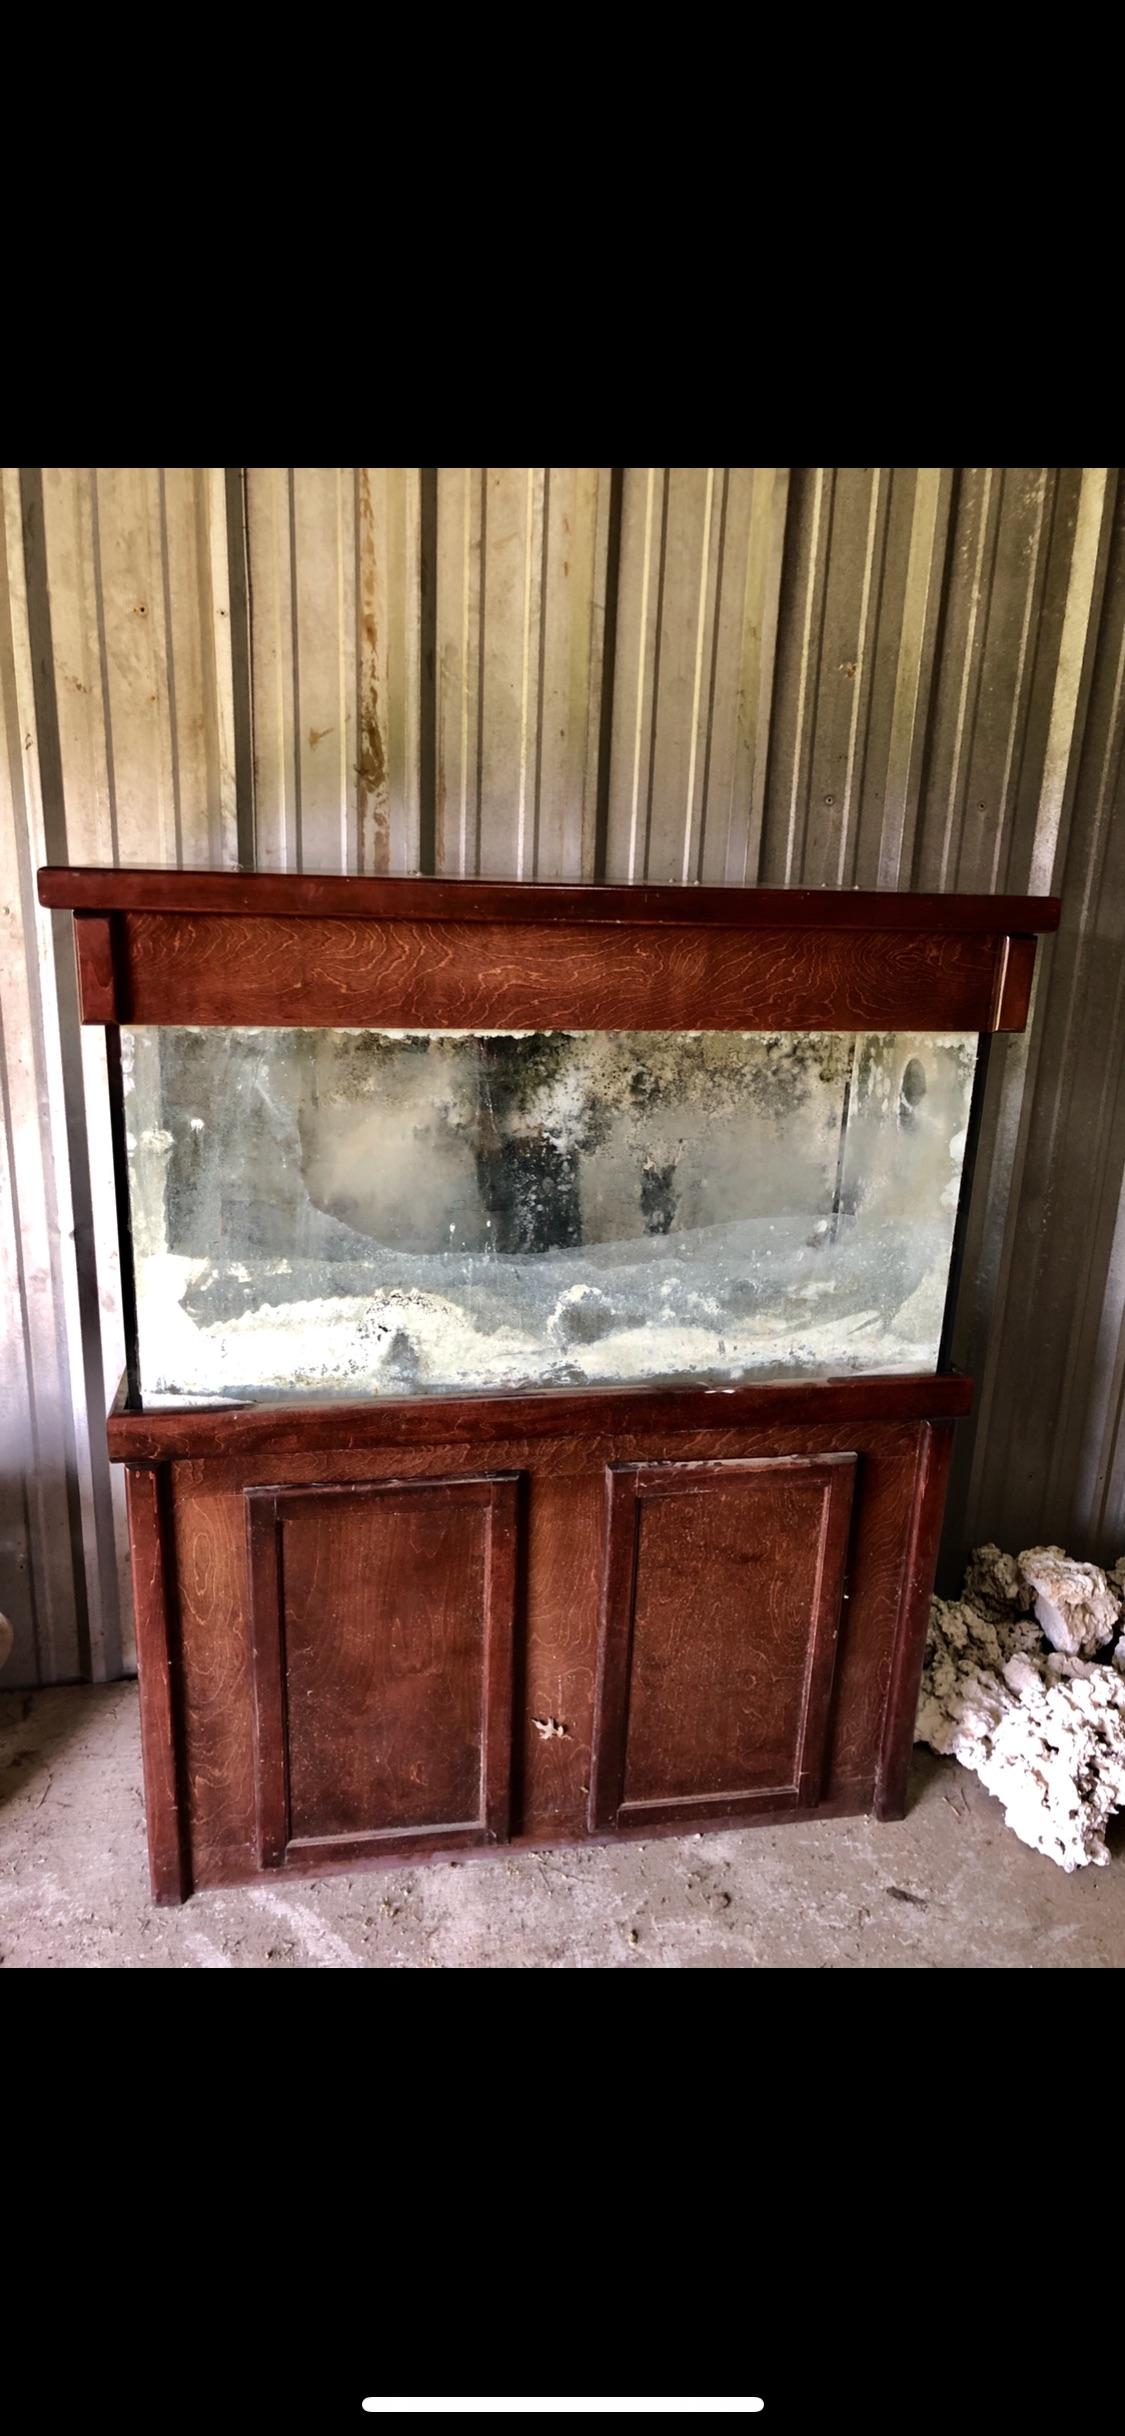
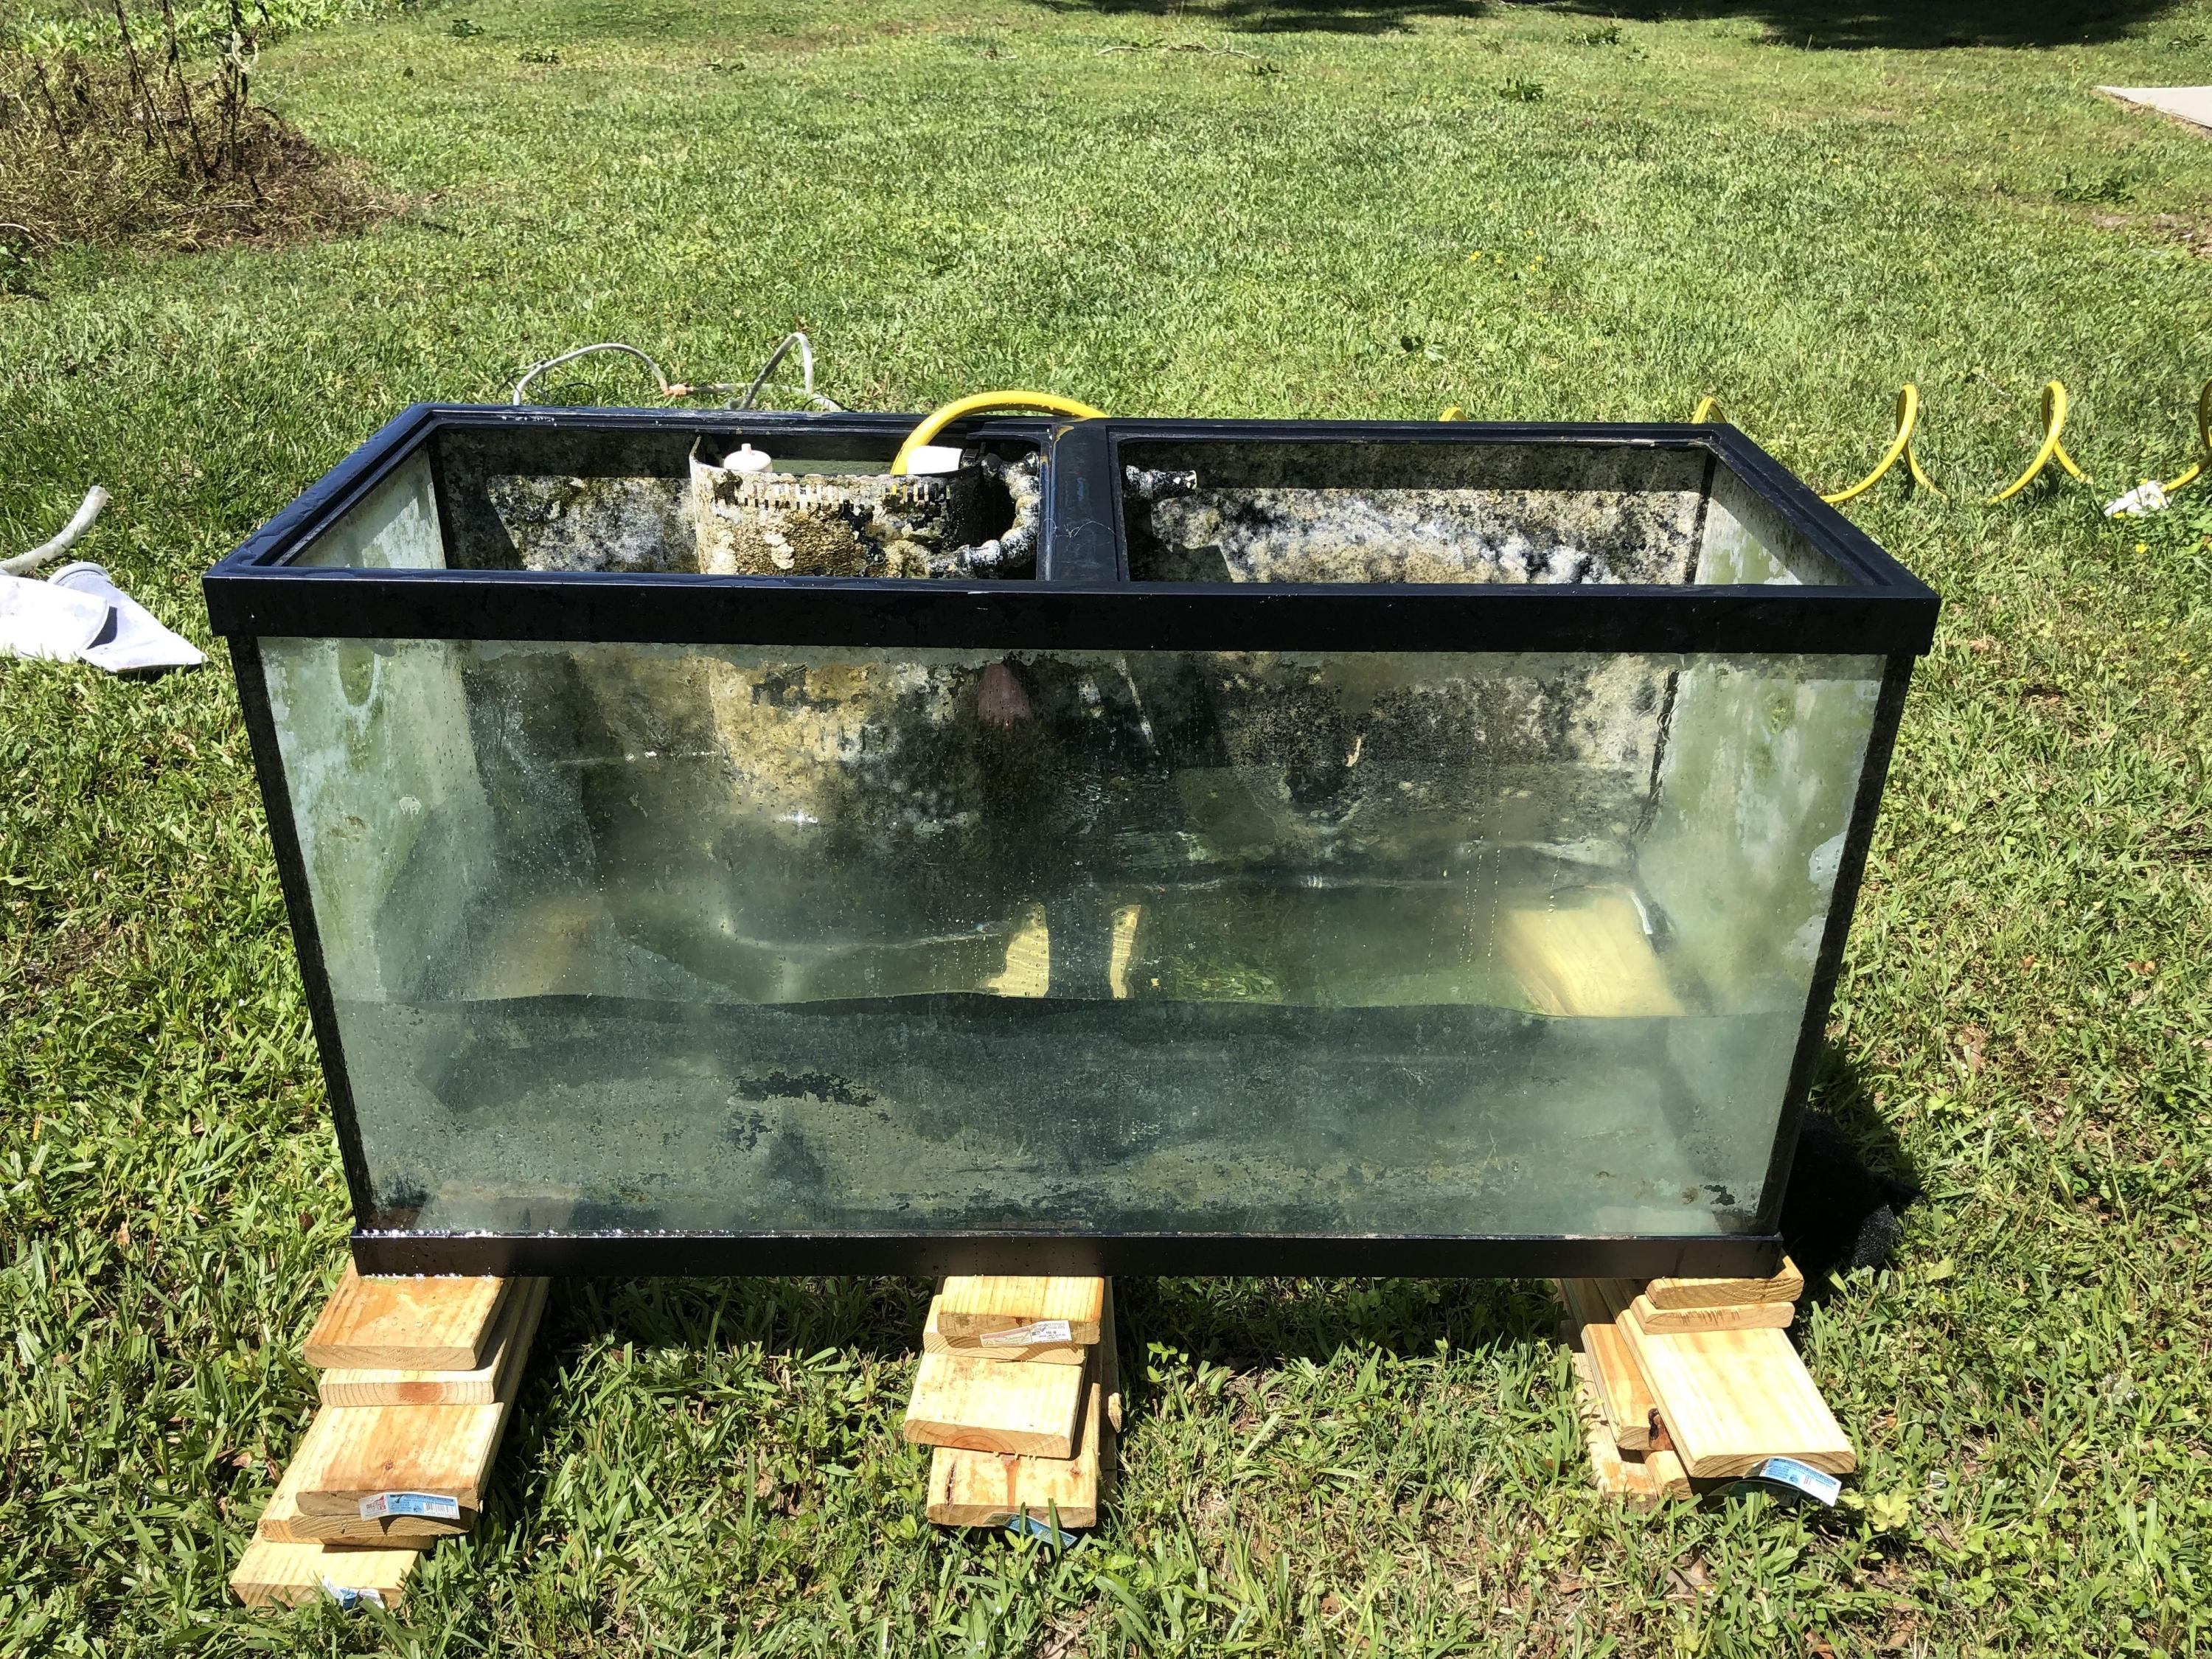
The next step was to get all of this cleaned up. It took me about 6 hours start to finish. I ran the entire system in a water and vinegar mix while scrubbing off the deposits and cleaning the glass. I also wiped down the stand and canopy. I didn’t take any pics while it was full, I apologize. The sump was behind the tank with the skimmer and reactors running as well as a return pump I was going to use (SP6)

after settinf the tank up inside the house I noticed a haze that I just couldn’t get to go away, so at this point I decided to get a new one.
While waiting for its arrival I decided to purchase all new tubing for the reactors and skimmer. I got all this into the sump and organized. I also added the 48” led t5 light to illuminate the sump during maintenance. I also bought a piece of lexan cut to size to cover the opening on the backside of the stand, to eliminate salt creep or splatter on my walls. I left a gap at the bottom for some airflow and to route power cables out of.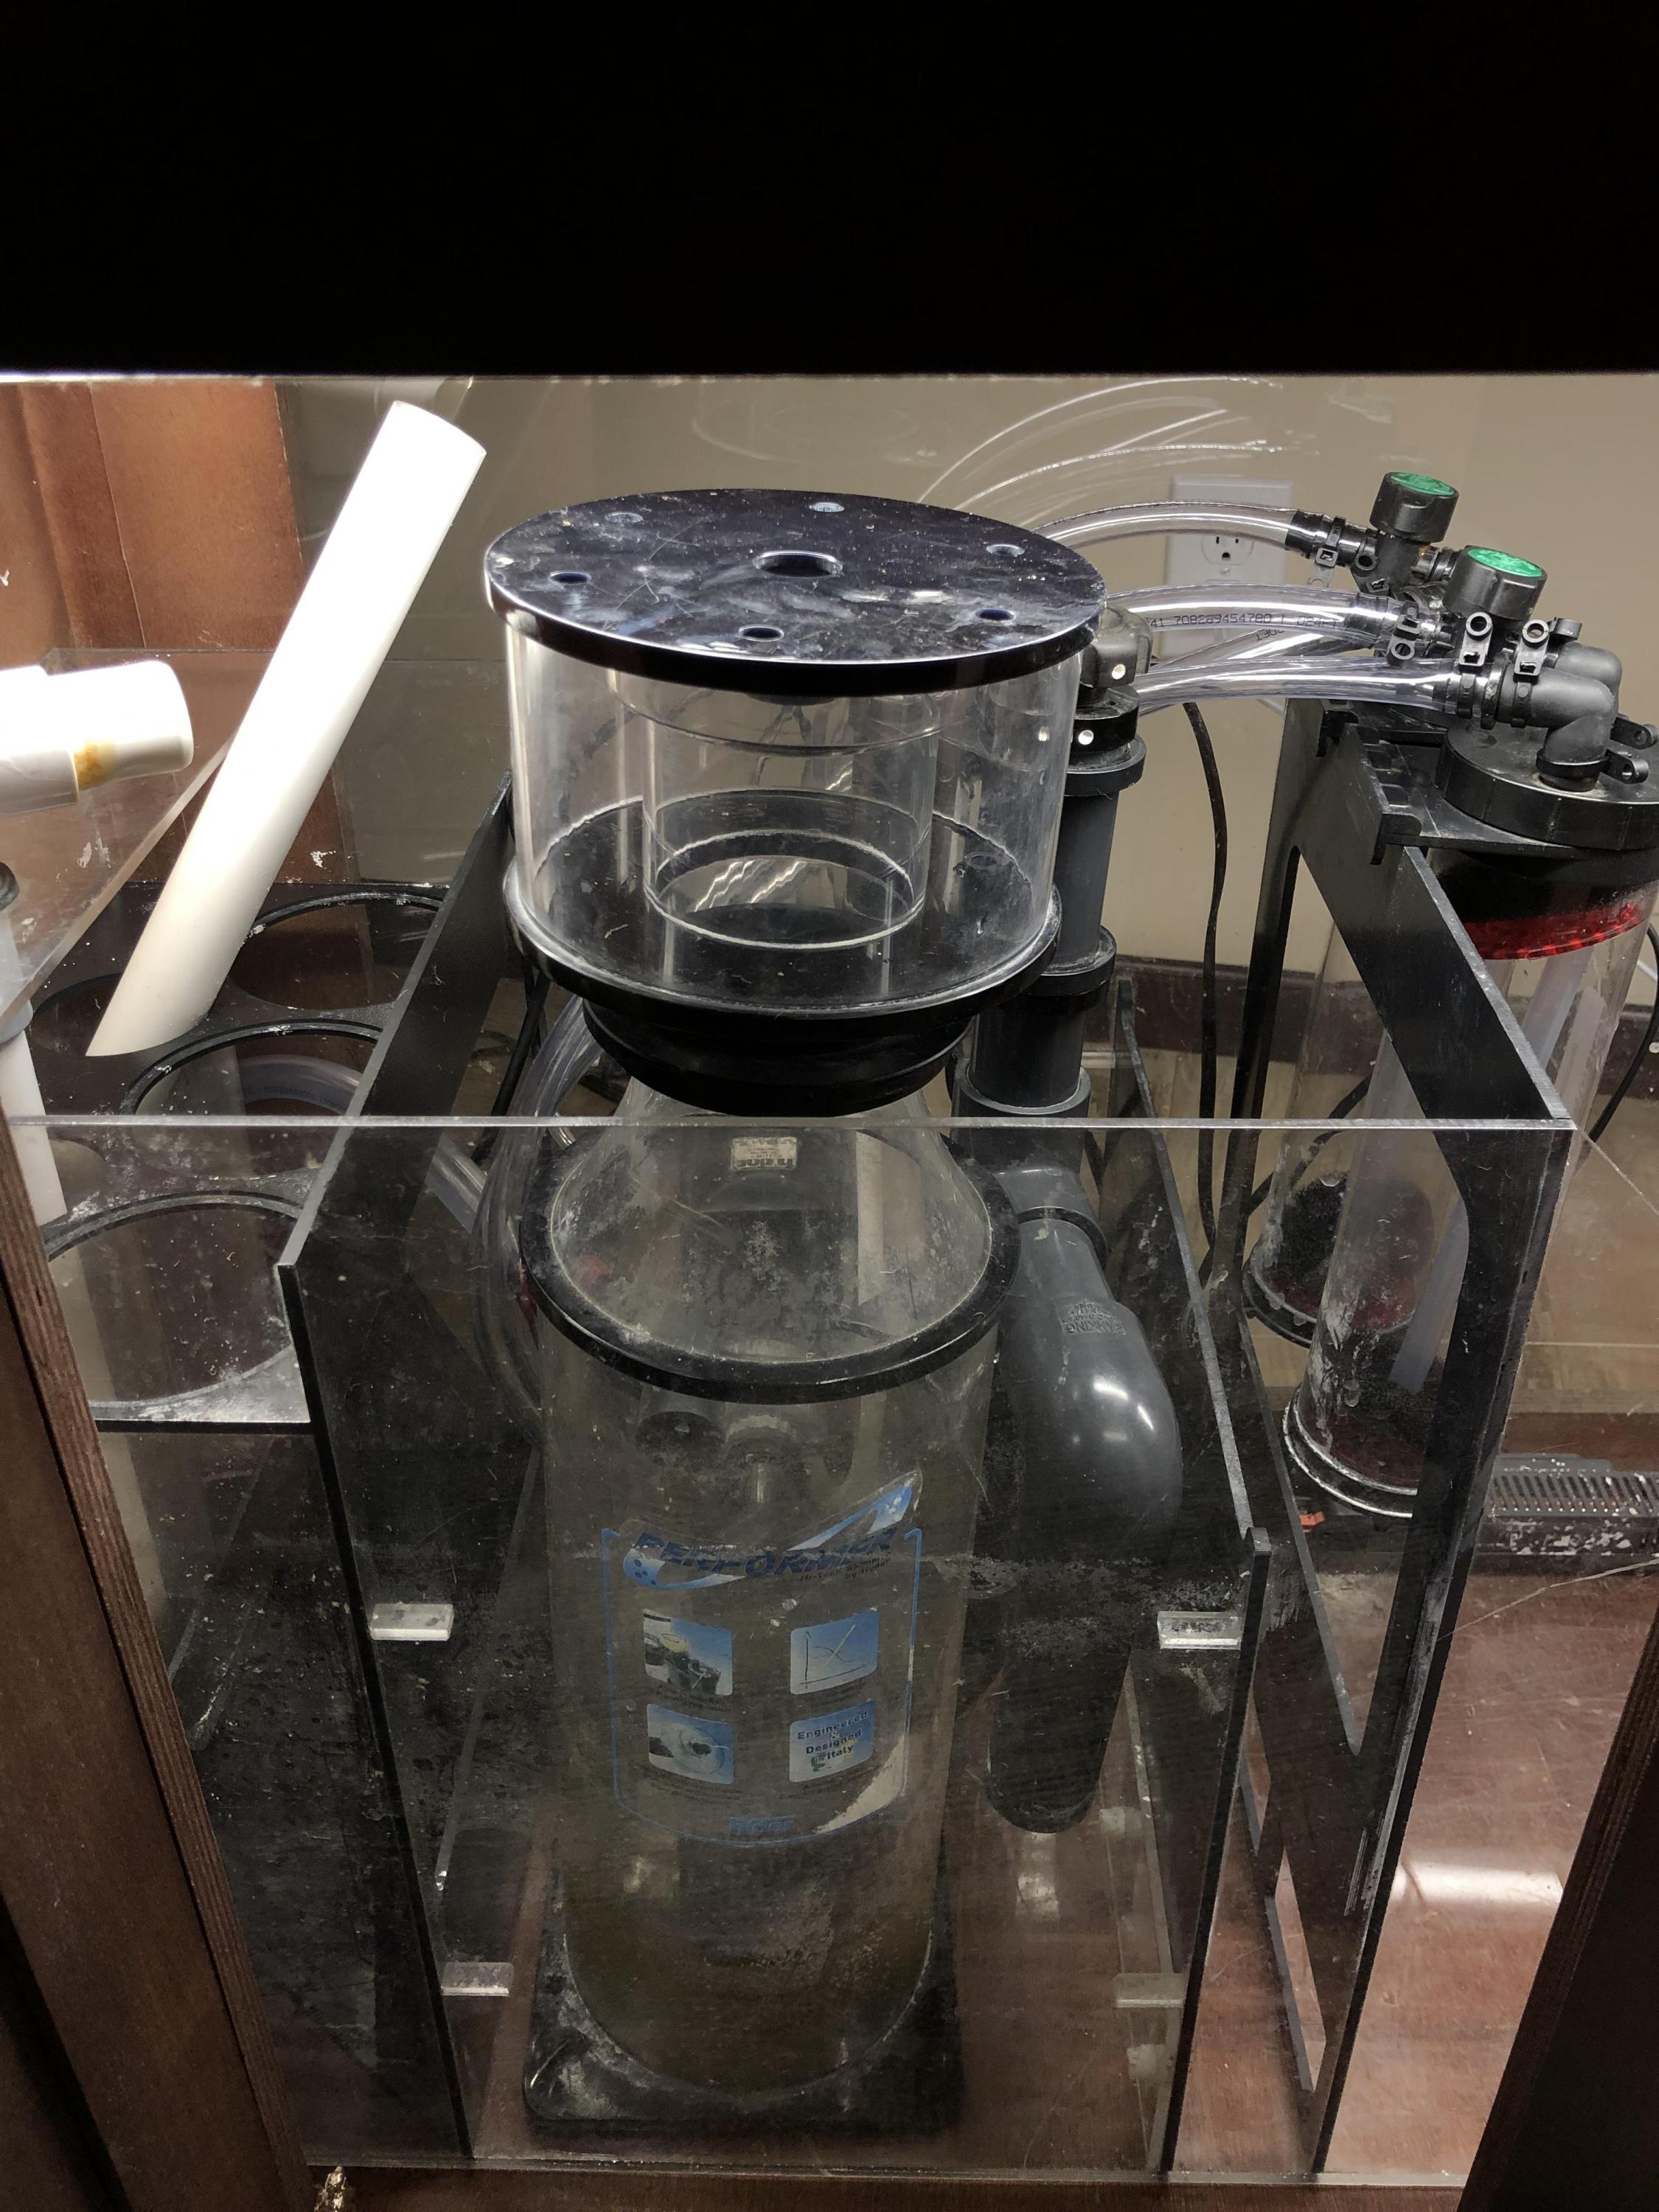
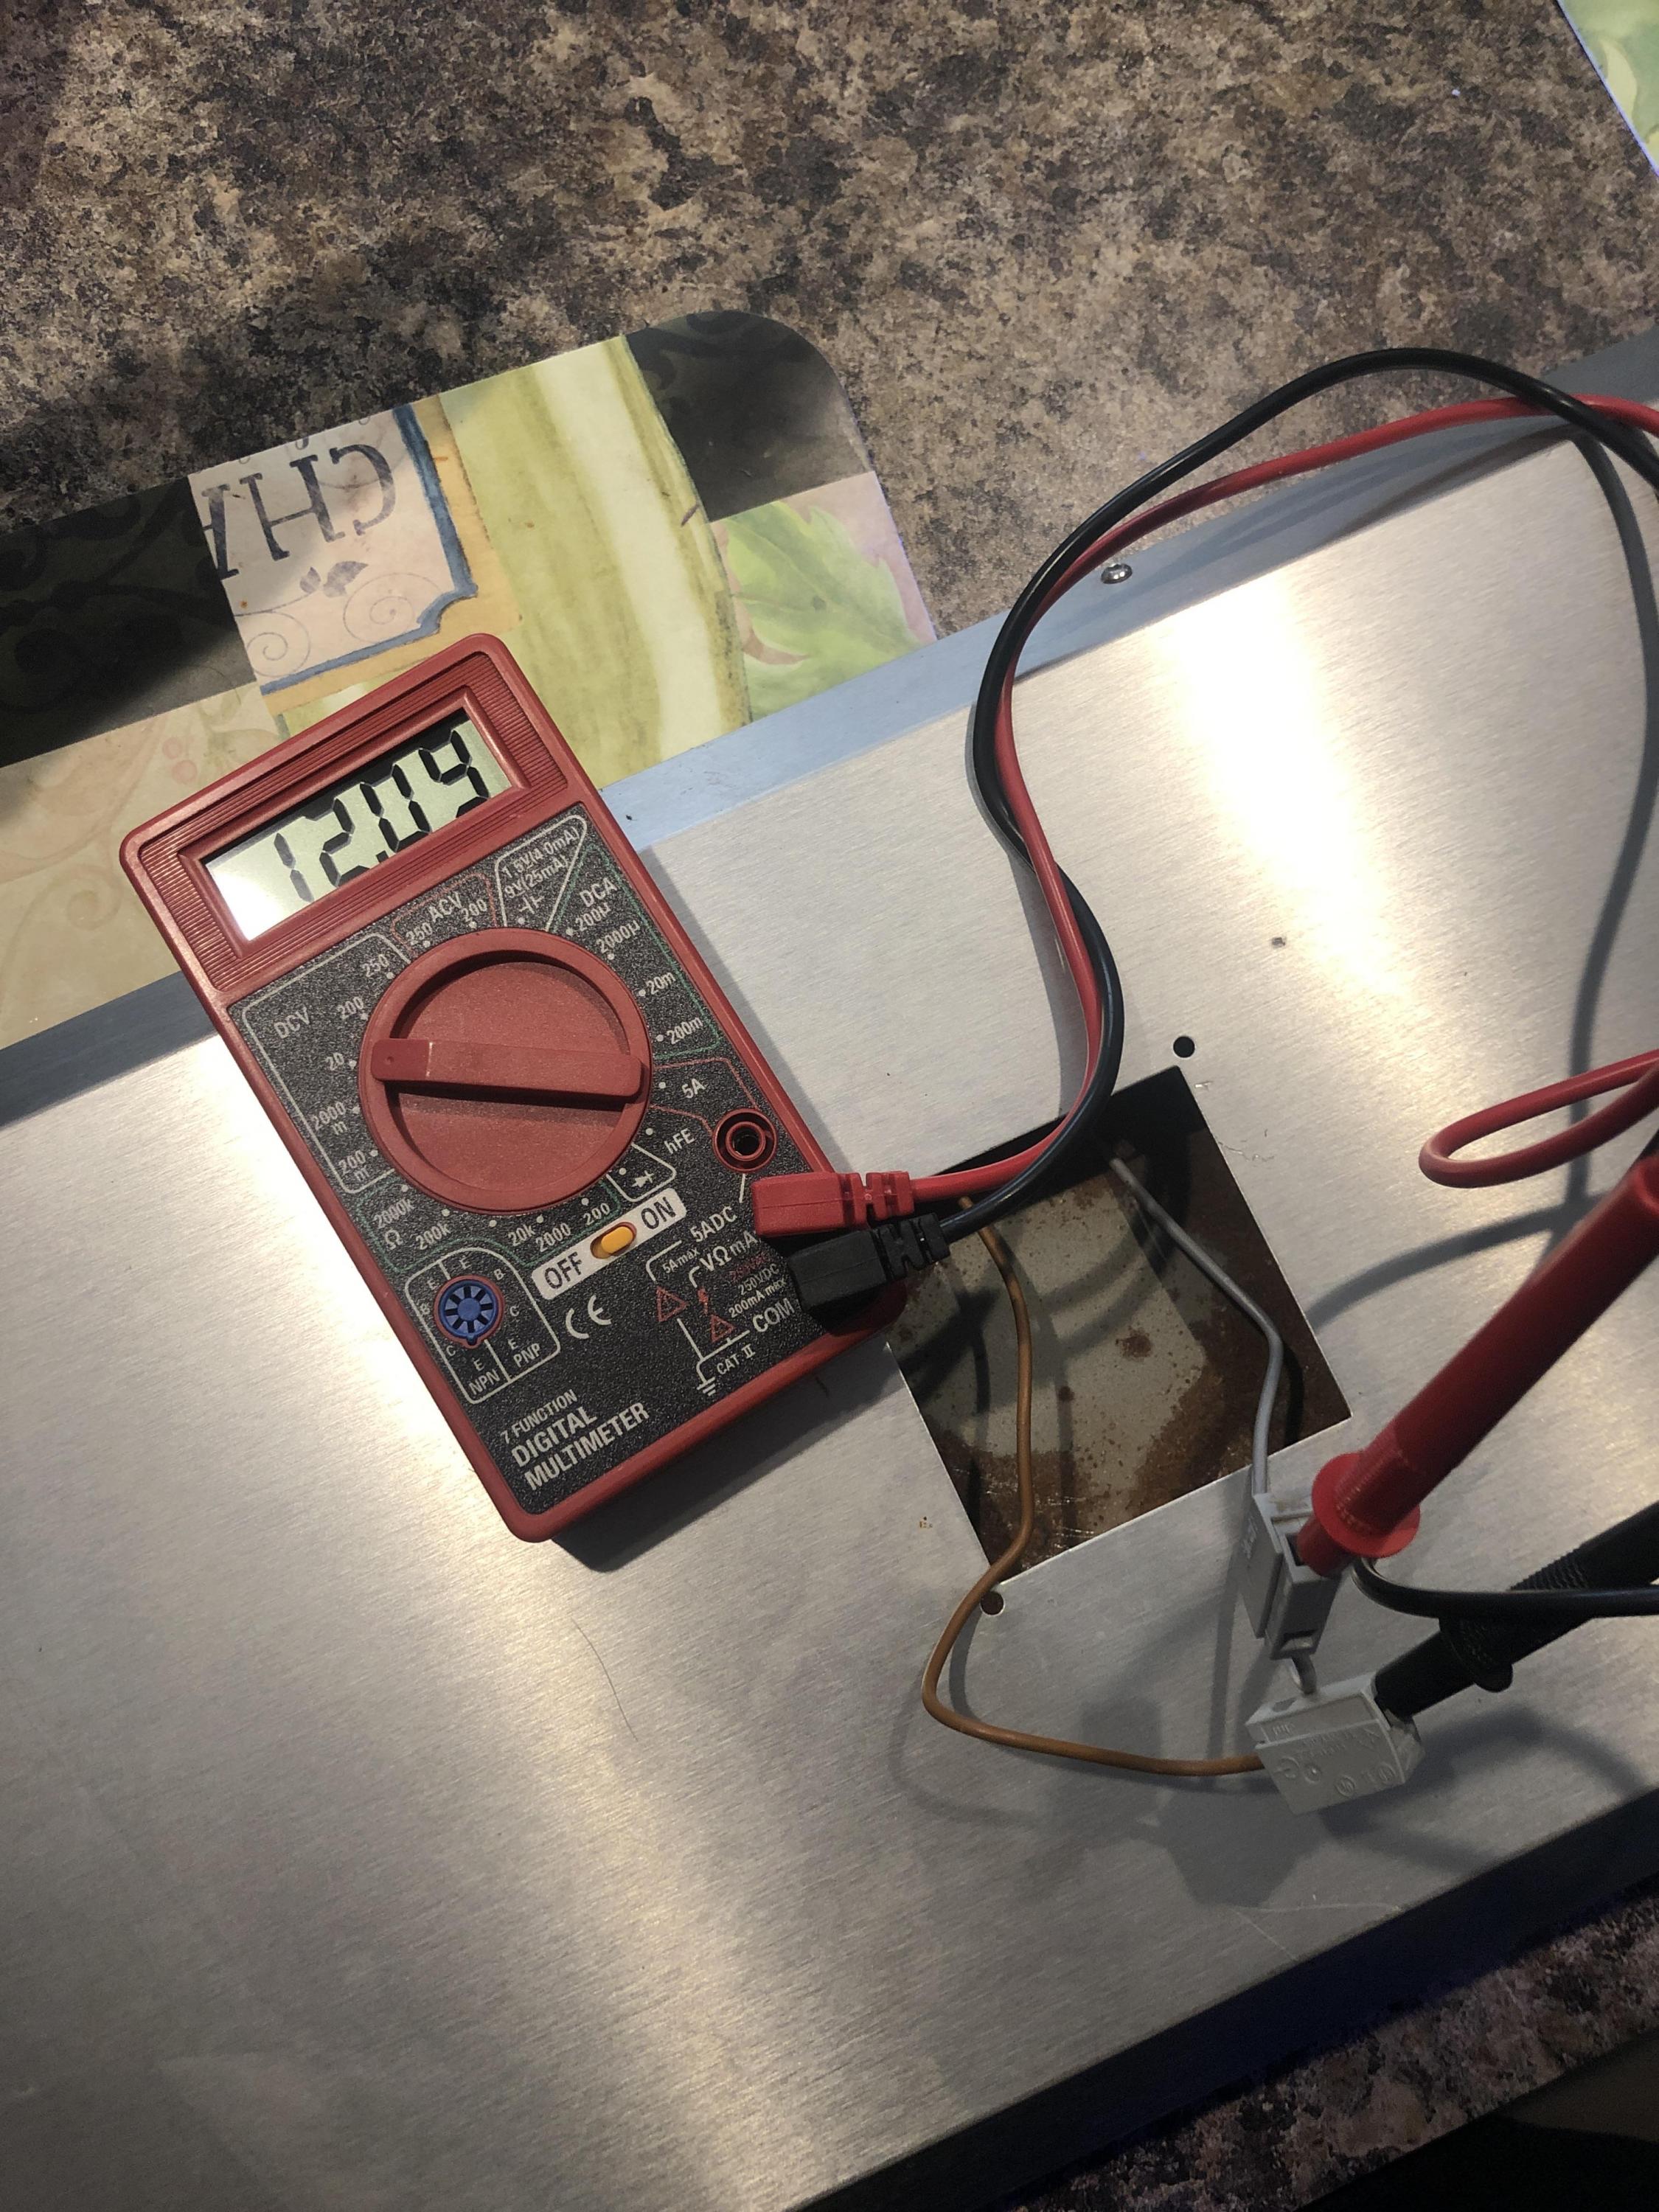
just before purchasing a new ati fixture the exact one I was looking at was offered for sale in a local reef group on FB. The fan wasn’t working though. I thought I can fix that no problem. I got it home and began troubleshooting the fixture. The fan functioned and I checked it using a dc drill battery. Which meant the ac to dc power supply had to be bad. I took the 12v one from my router and swapped it out. Instantly the fan began to buzz. Ordered a variable 3v-12v ac to dc converter from amazon and it was running as new when it came in 3 days later. This picture shows the voltage after using my other 12v adapter in the old ones place.
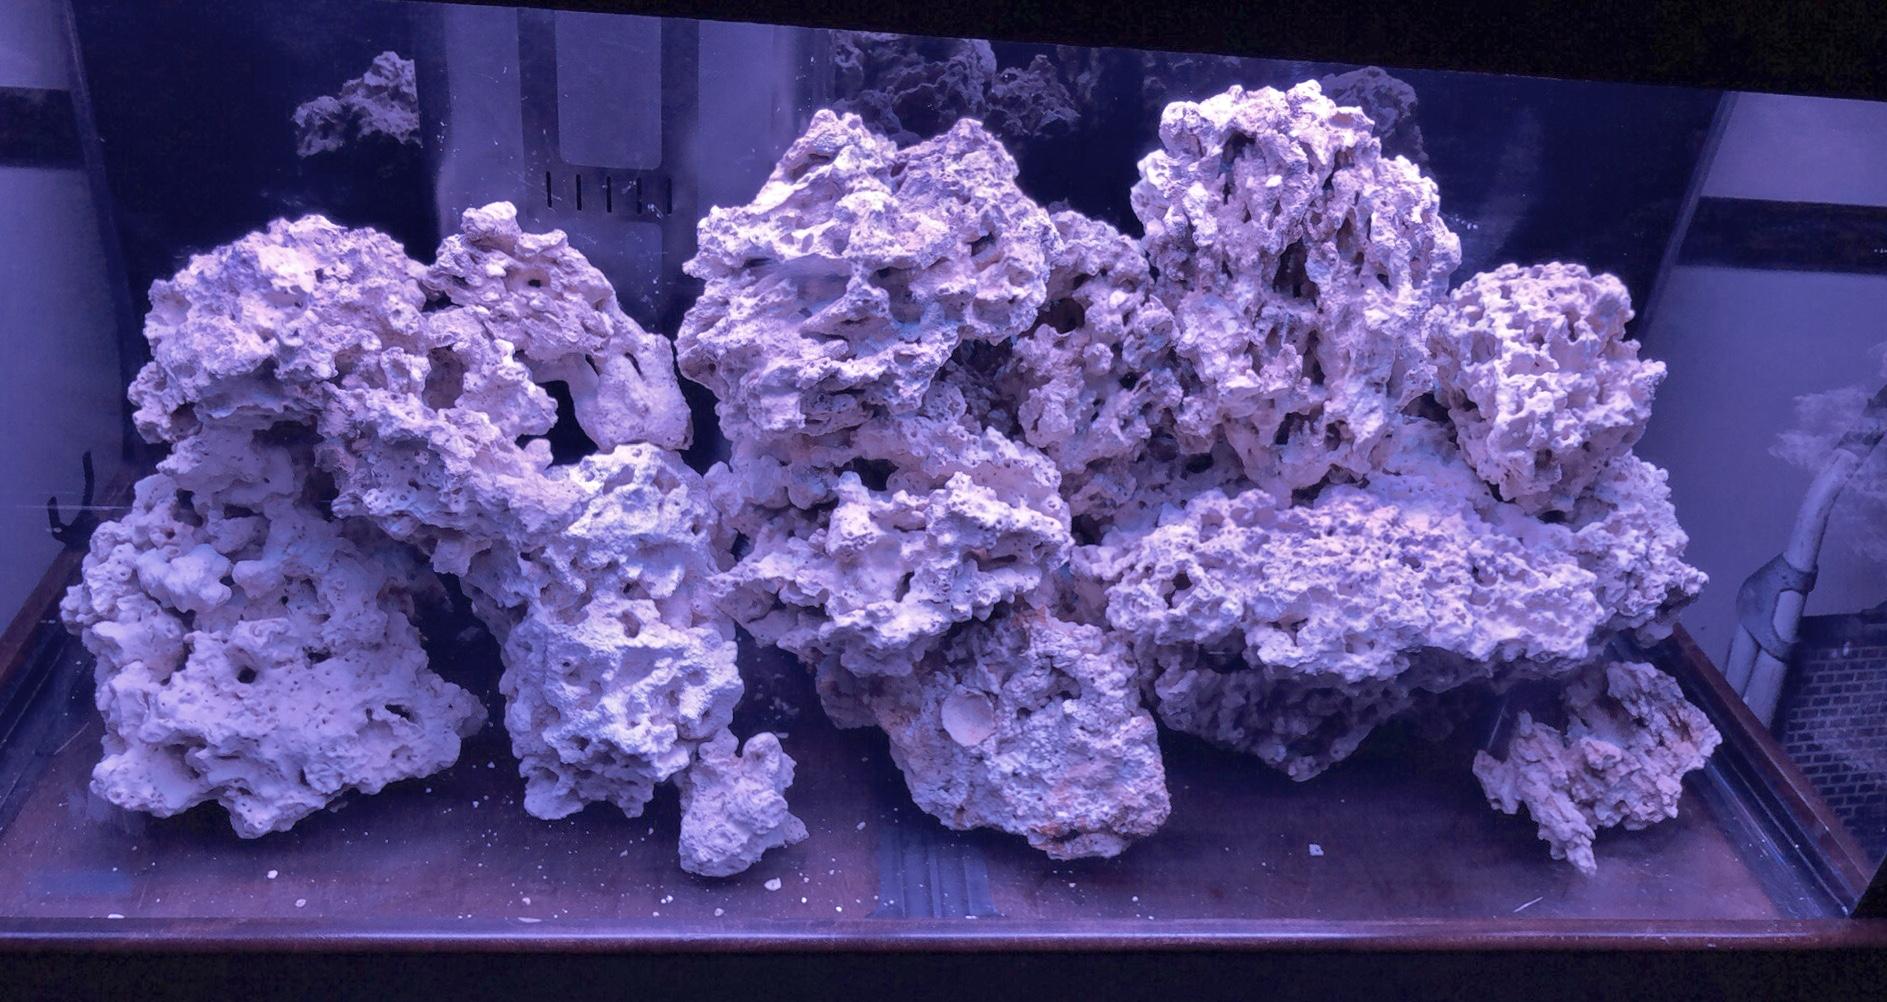
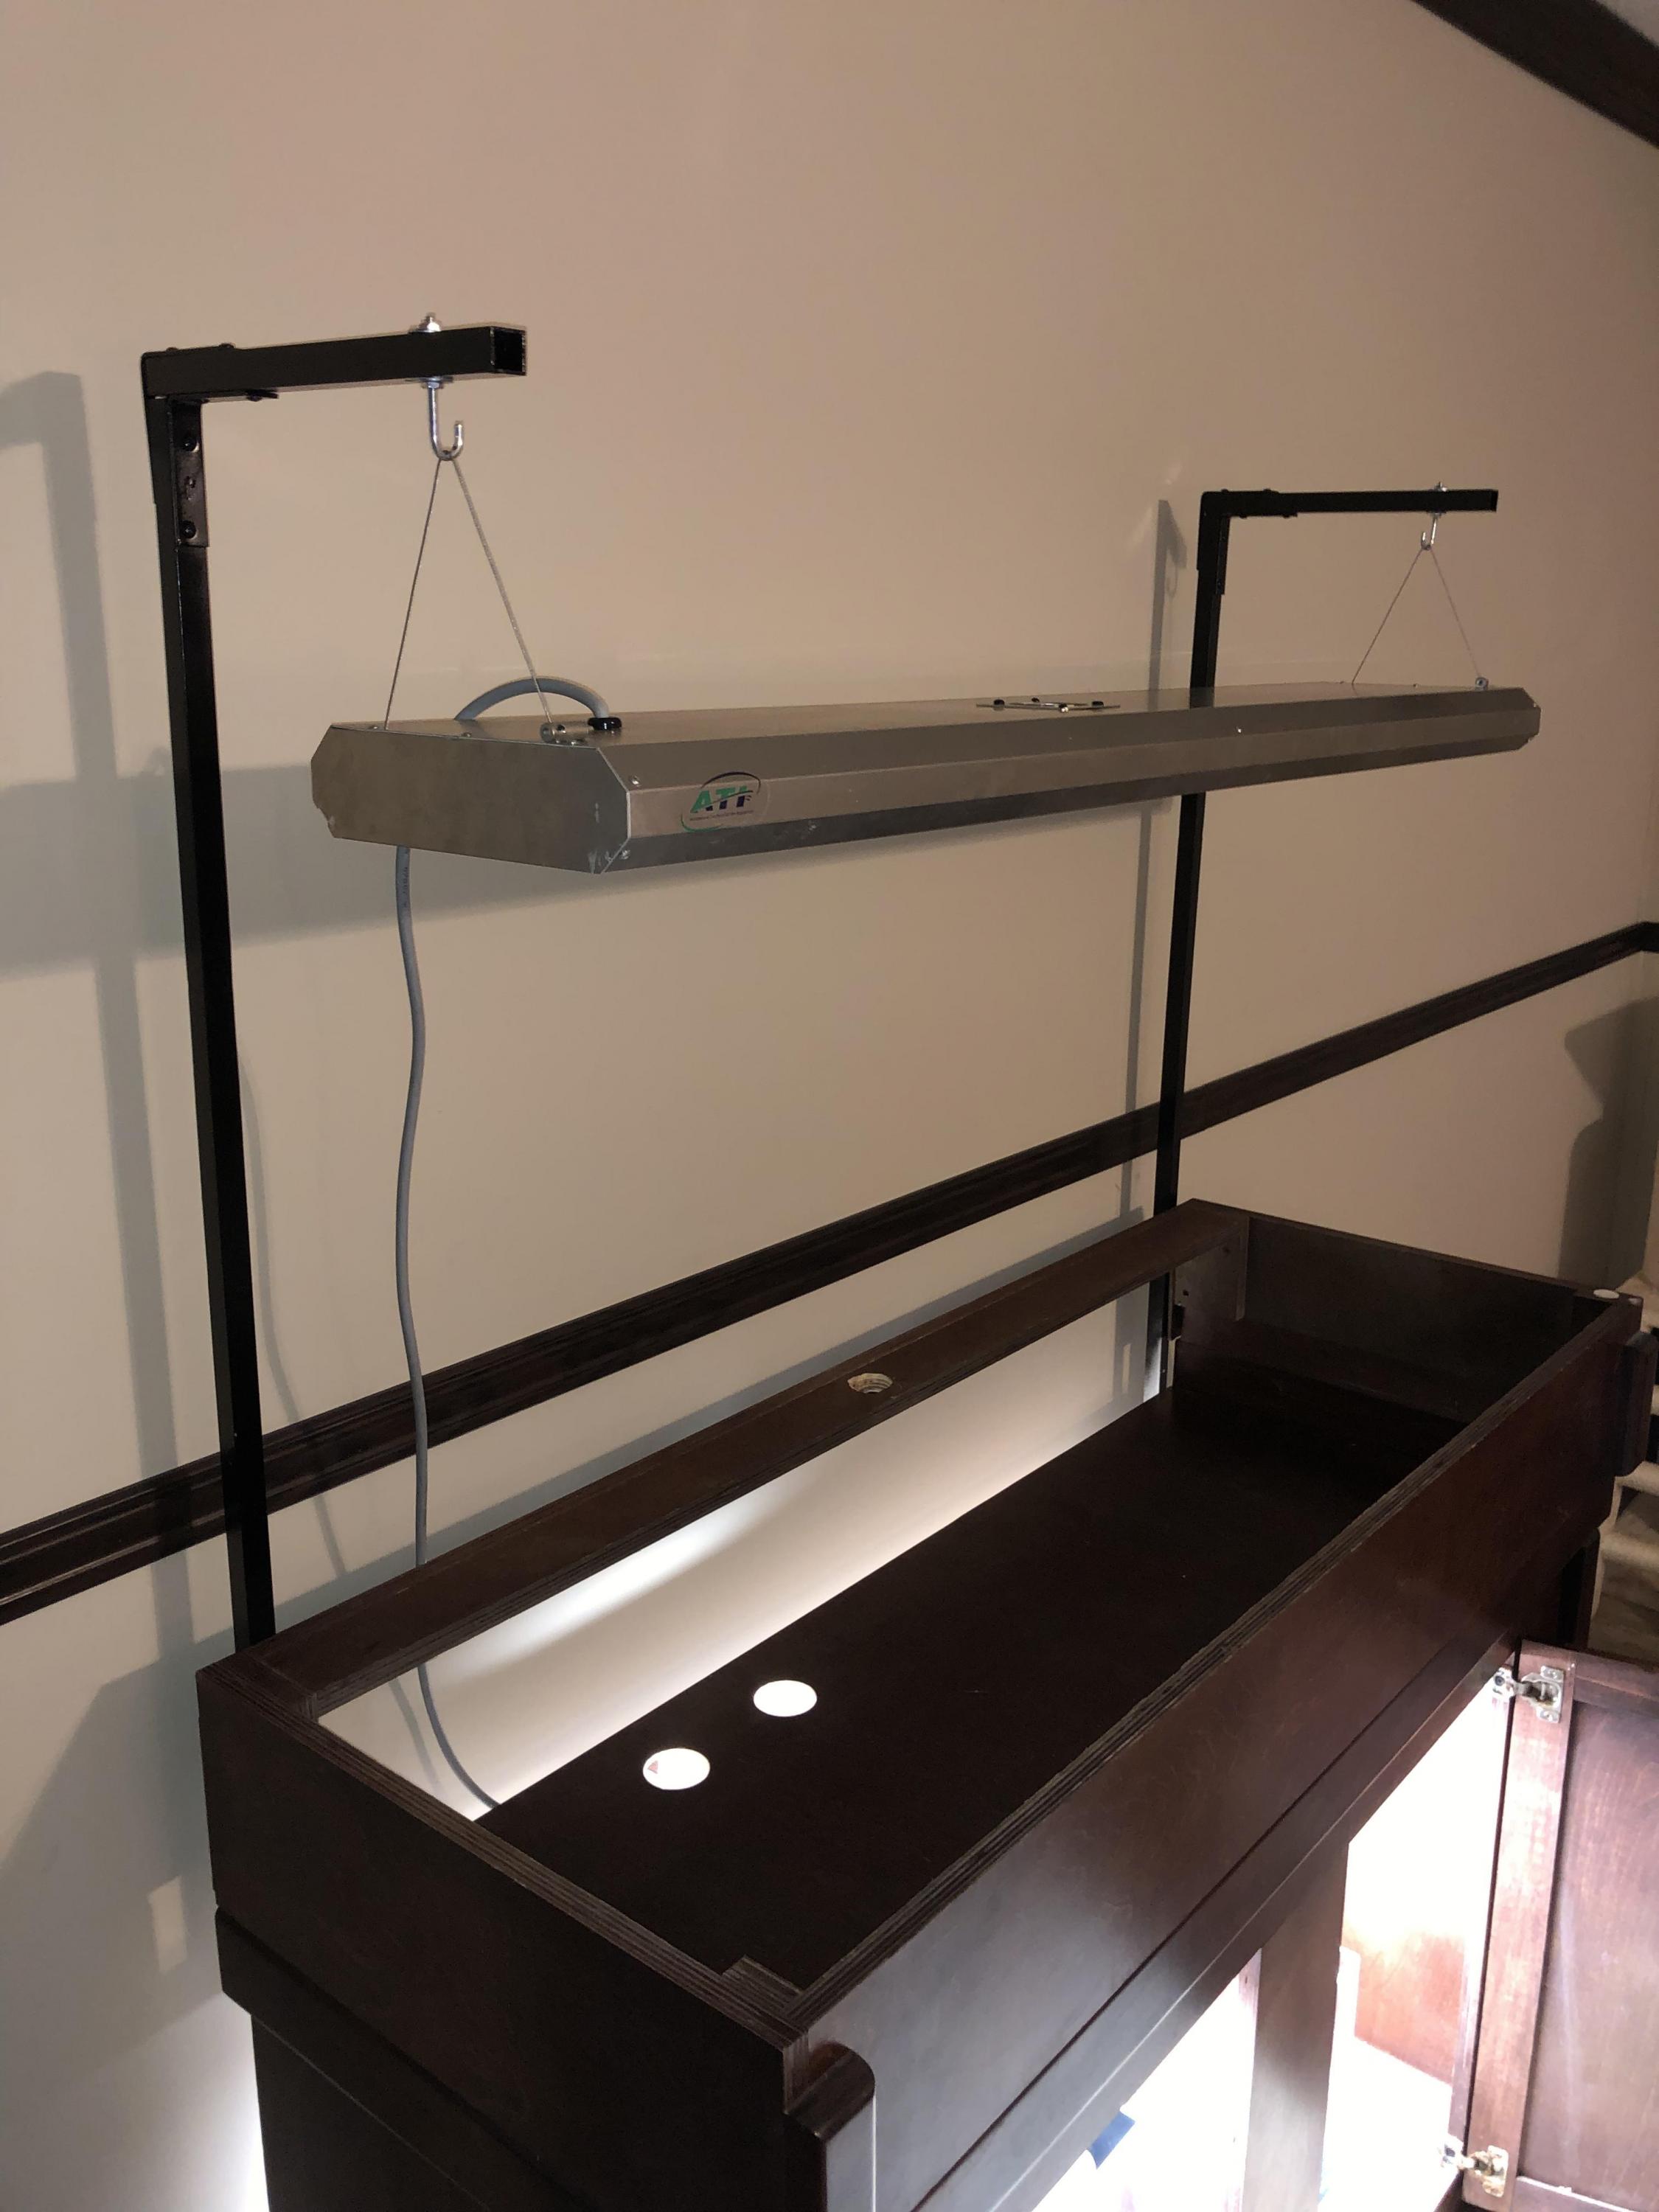
the next steps were to get started on my aquascape and start on my do-it yourself arms to hang the t5 fixture. I needed arms as I decided I did not want to mount the lights inside the canopy. Not to my surprise the aquascape was the much more difficult task..
the material for the arms were purchased all from Lowe’s.
3/4” alum tubing, L-brackets, wood screws, self tapping screws and 3/16” j-hooks.
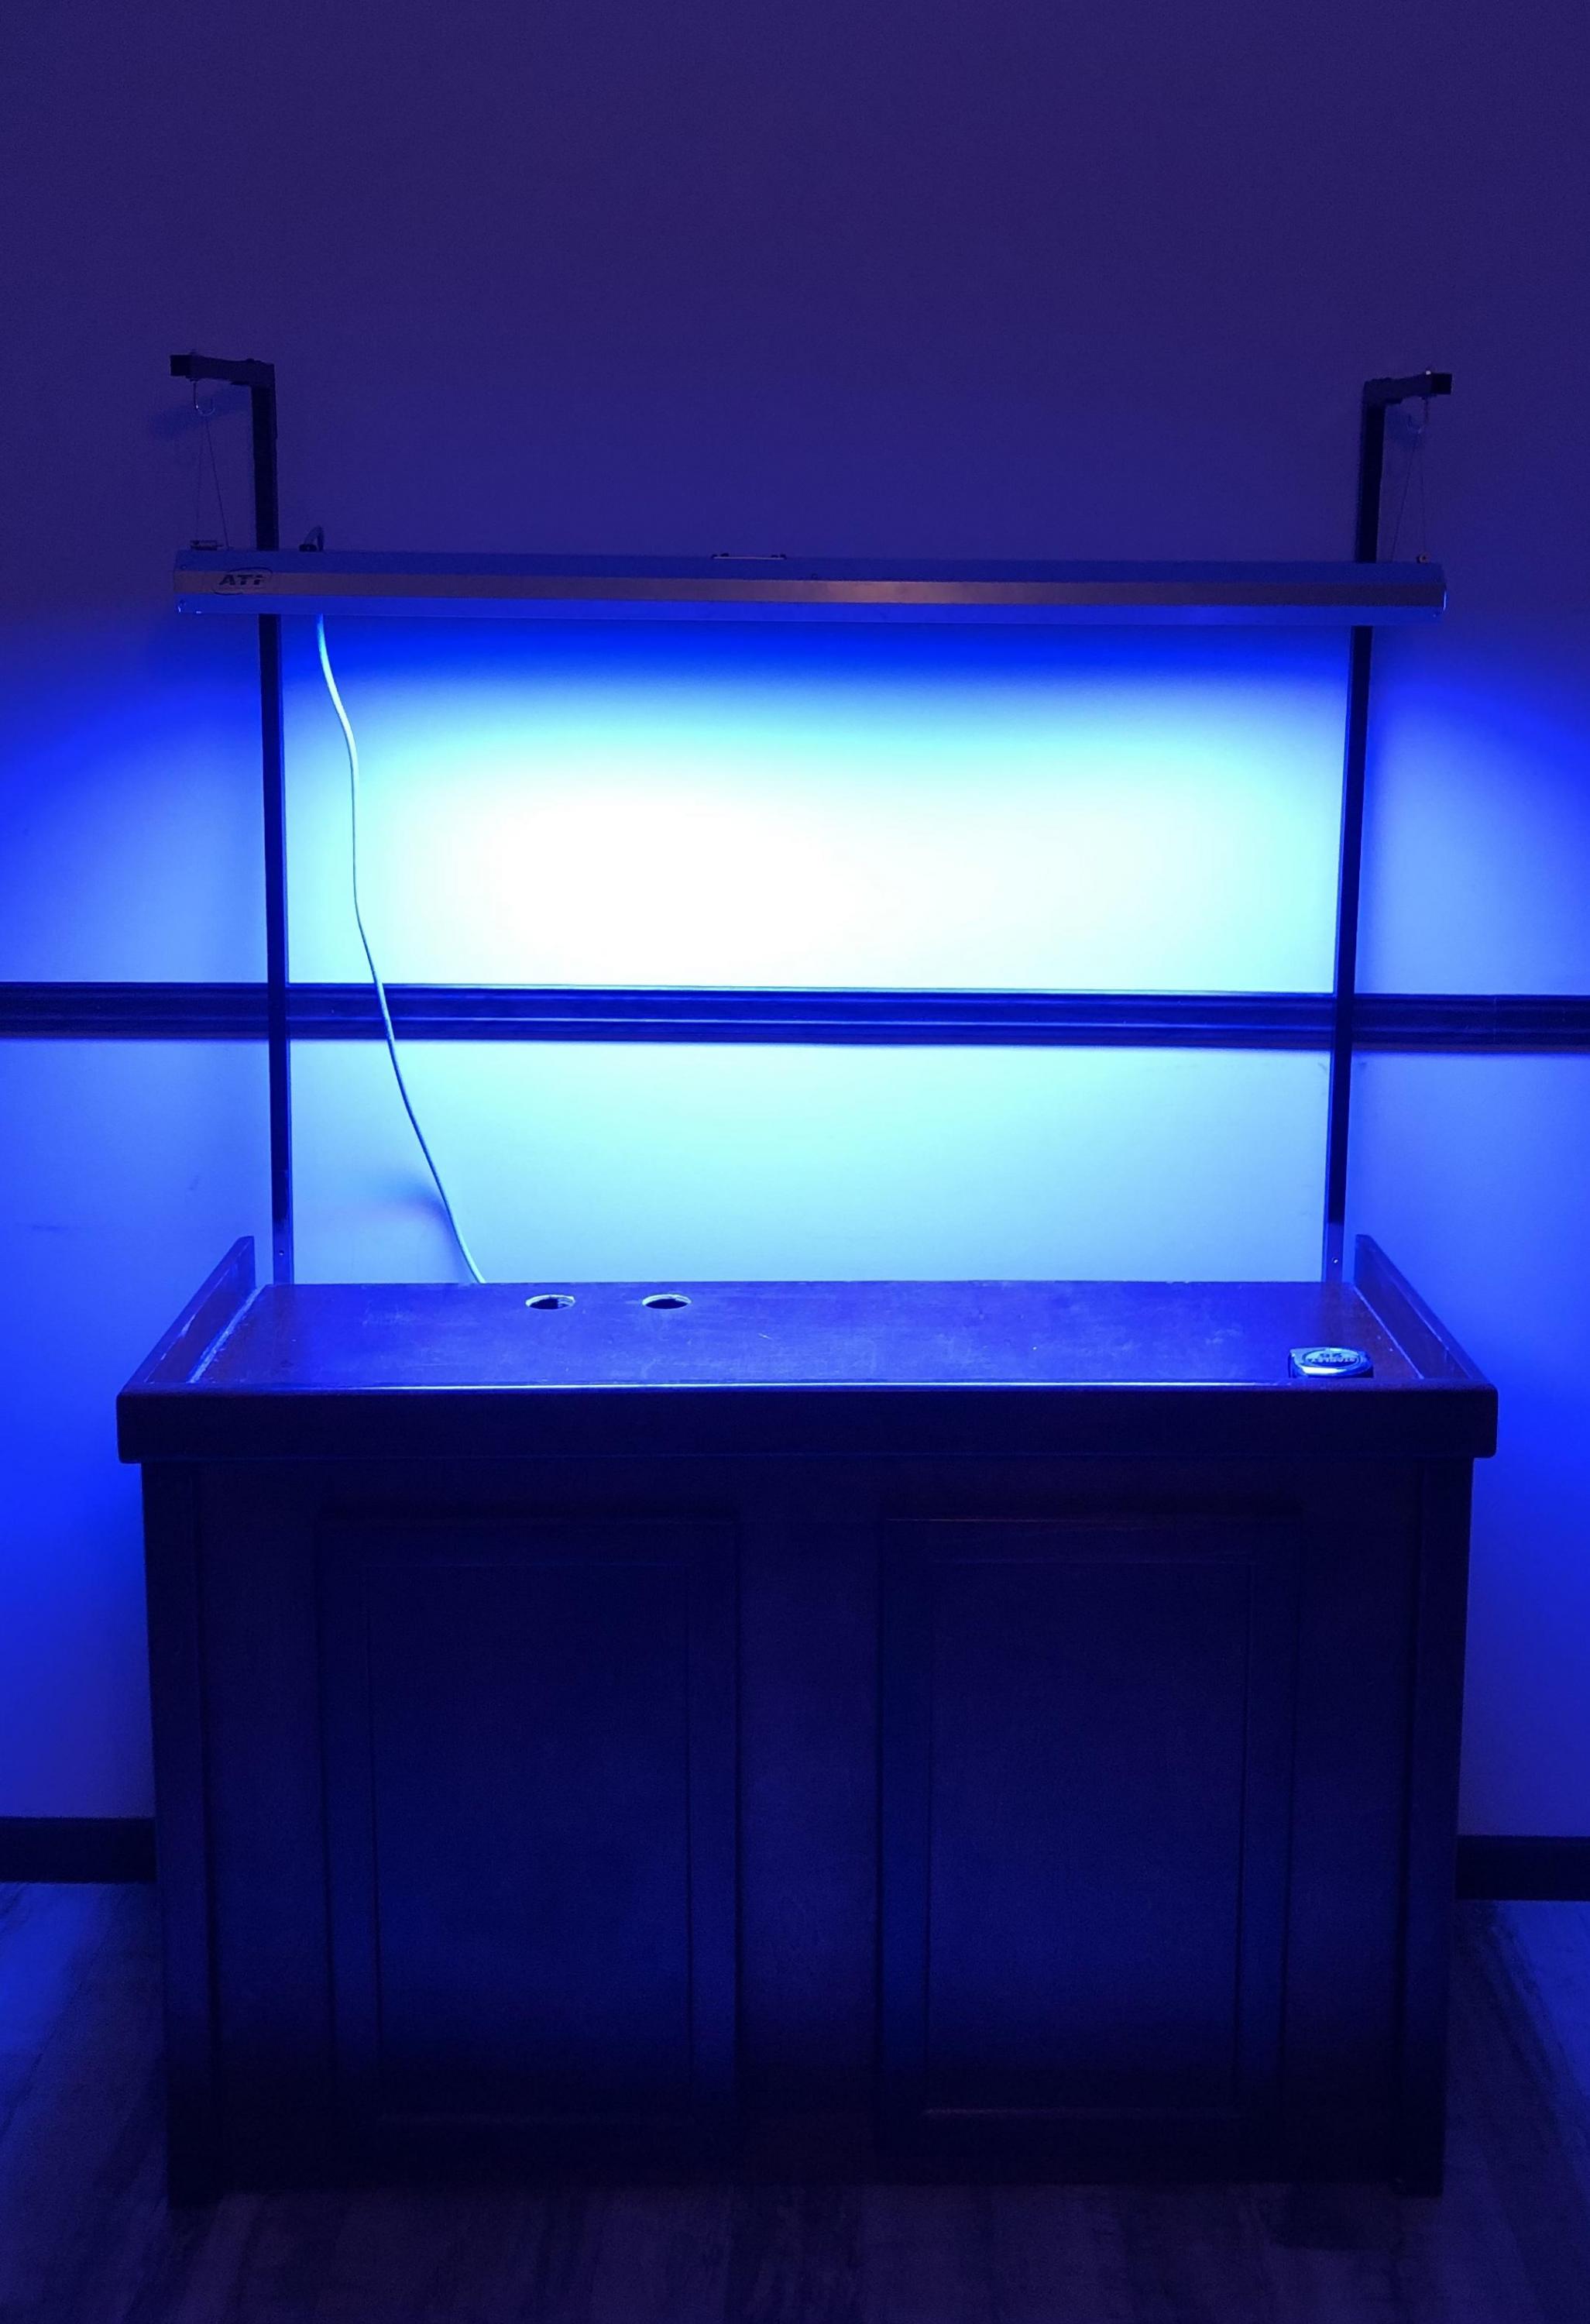
It took a little math to figure out the overall height I needed for the fixture to hang just above the top of the canopy with the lid removed. This allows much better airflow for the light, hides the rim of the tank, helps with light spill and also allows me to remove the canopy for working in the tank but keep my lights on so I can see.
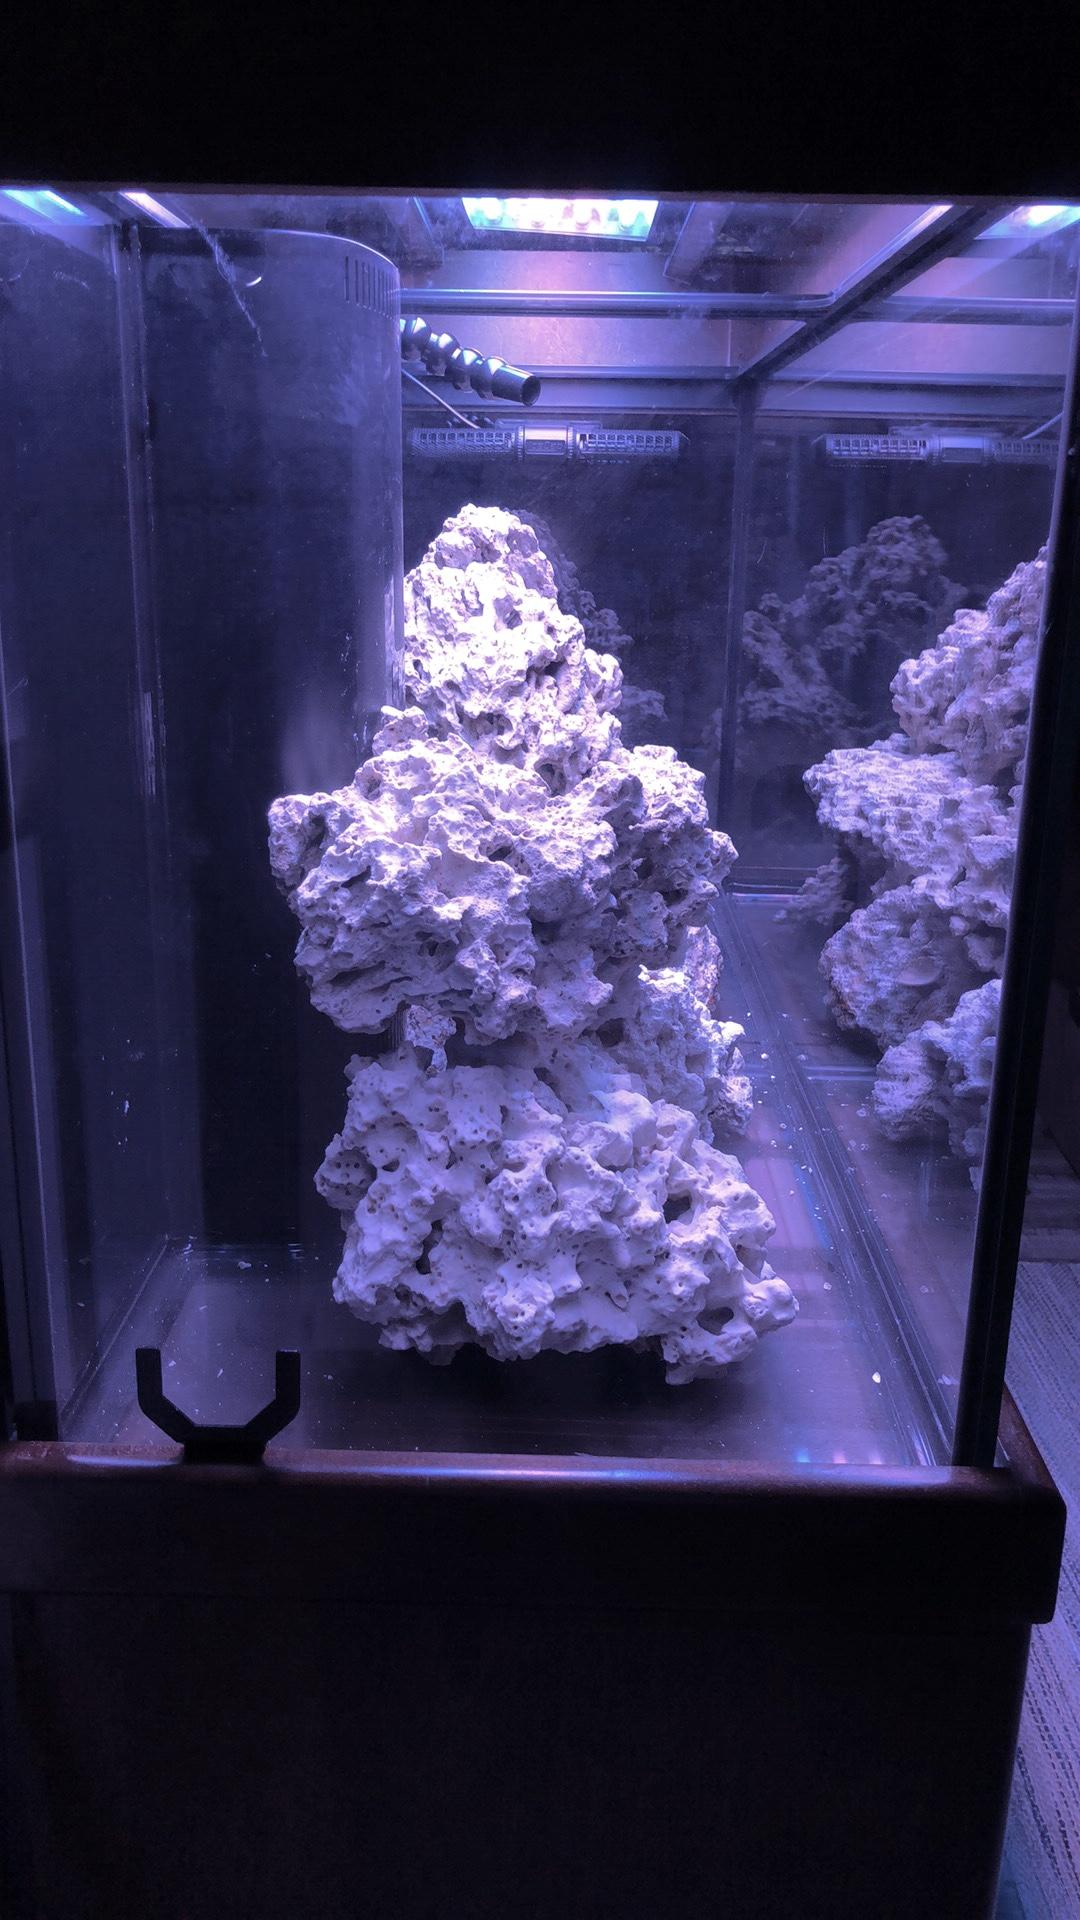
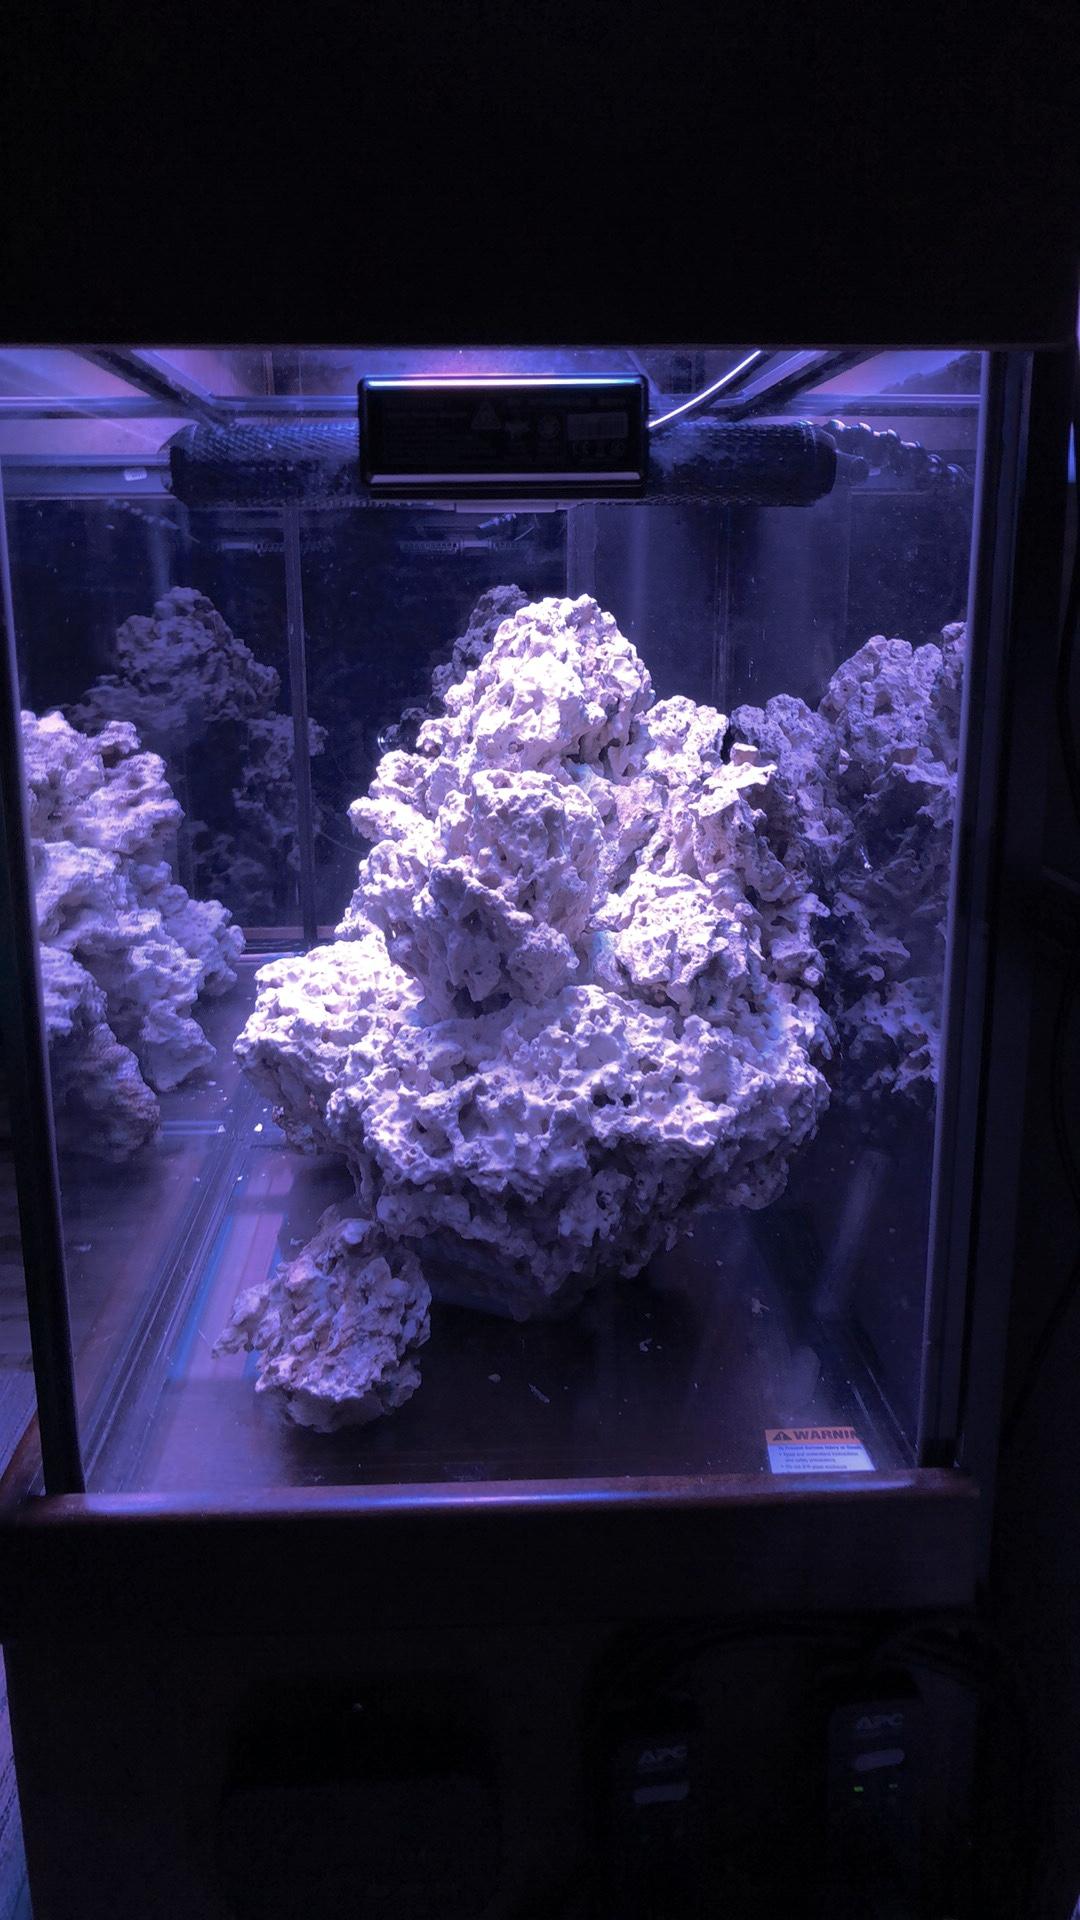
The scape I used a chisel and hand saw to cut and shape the rocks to stack best and to be solid.

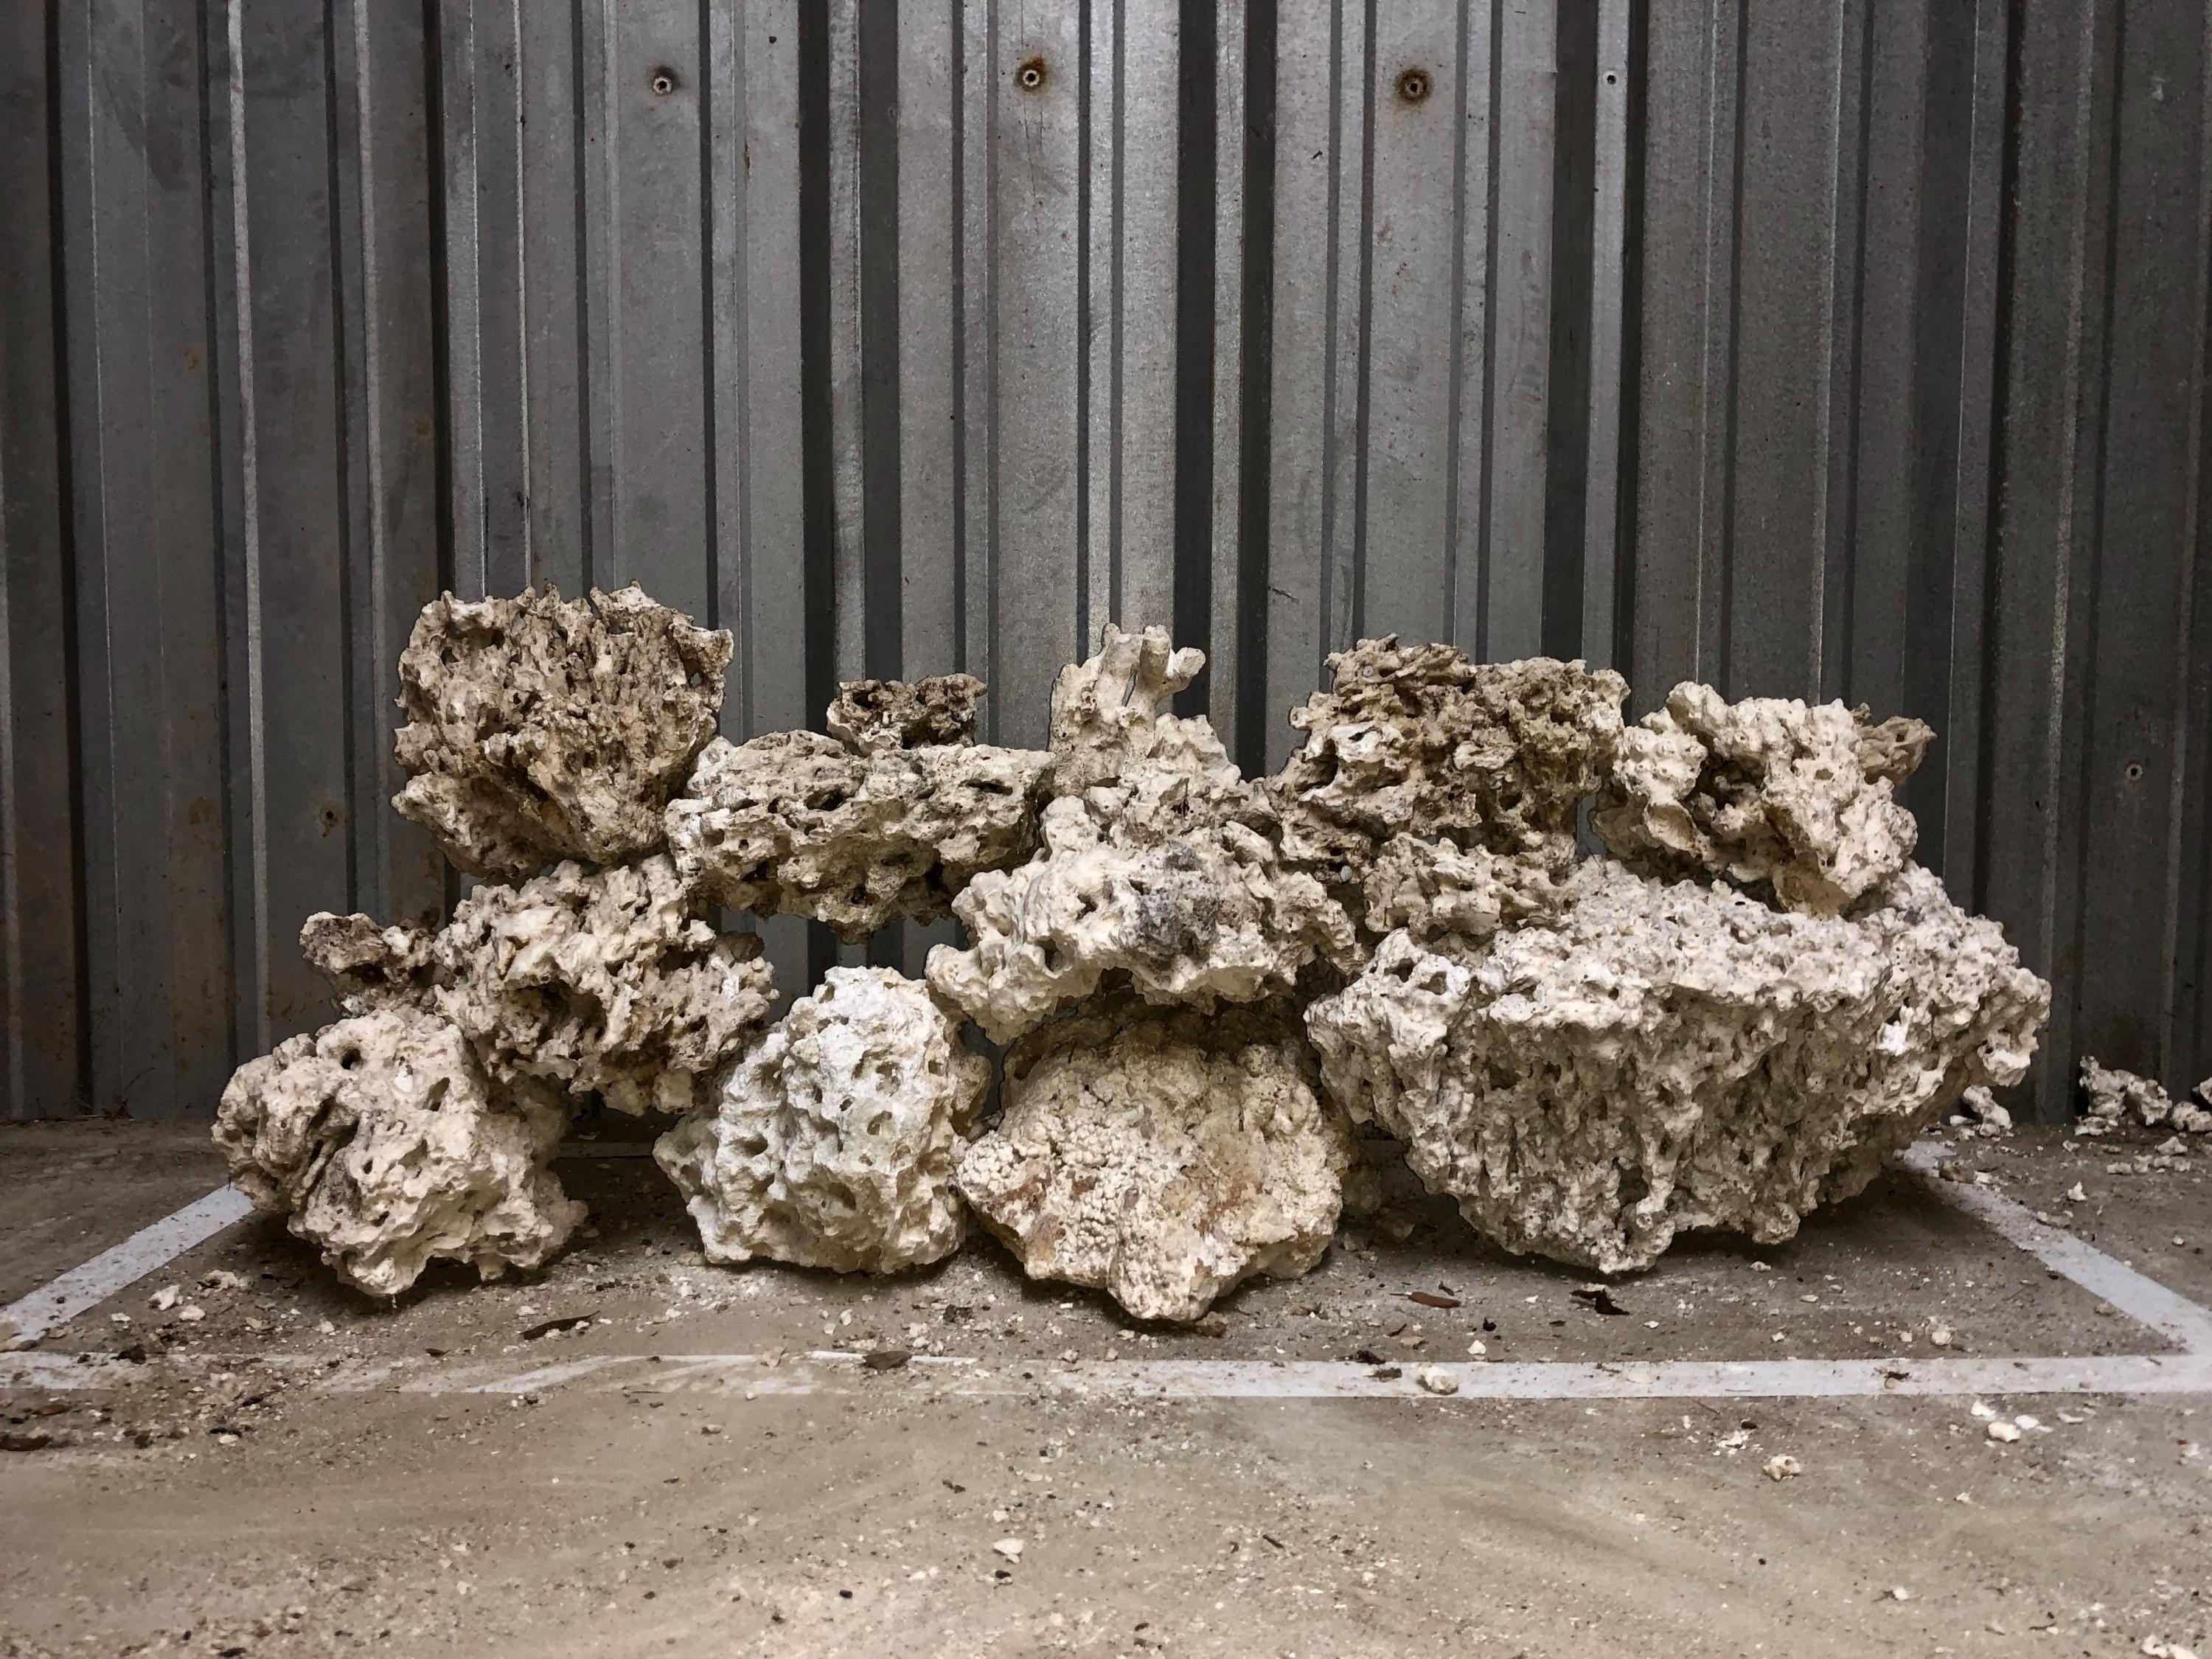
The tank had arrived by this time. The day before now, I had began to cure the rock in a trash can to help breakdown anything that would cause a problem later on with the tanks success.
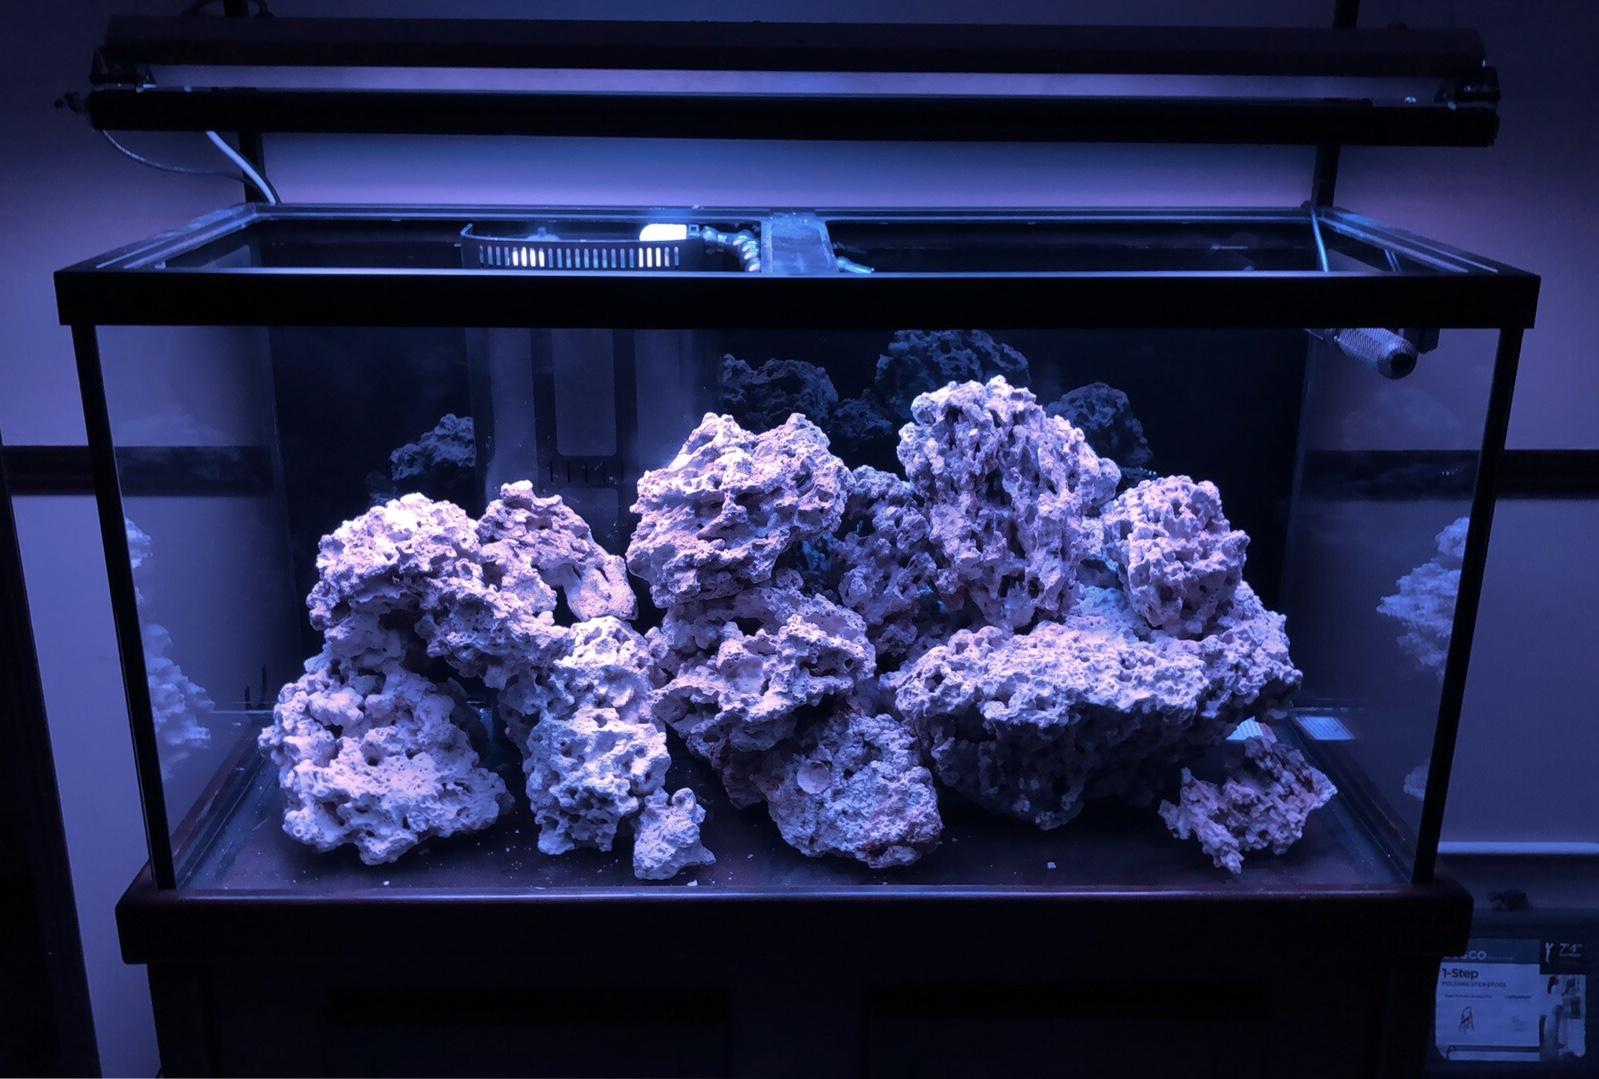
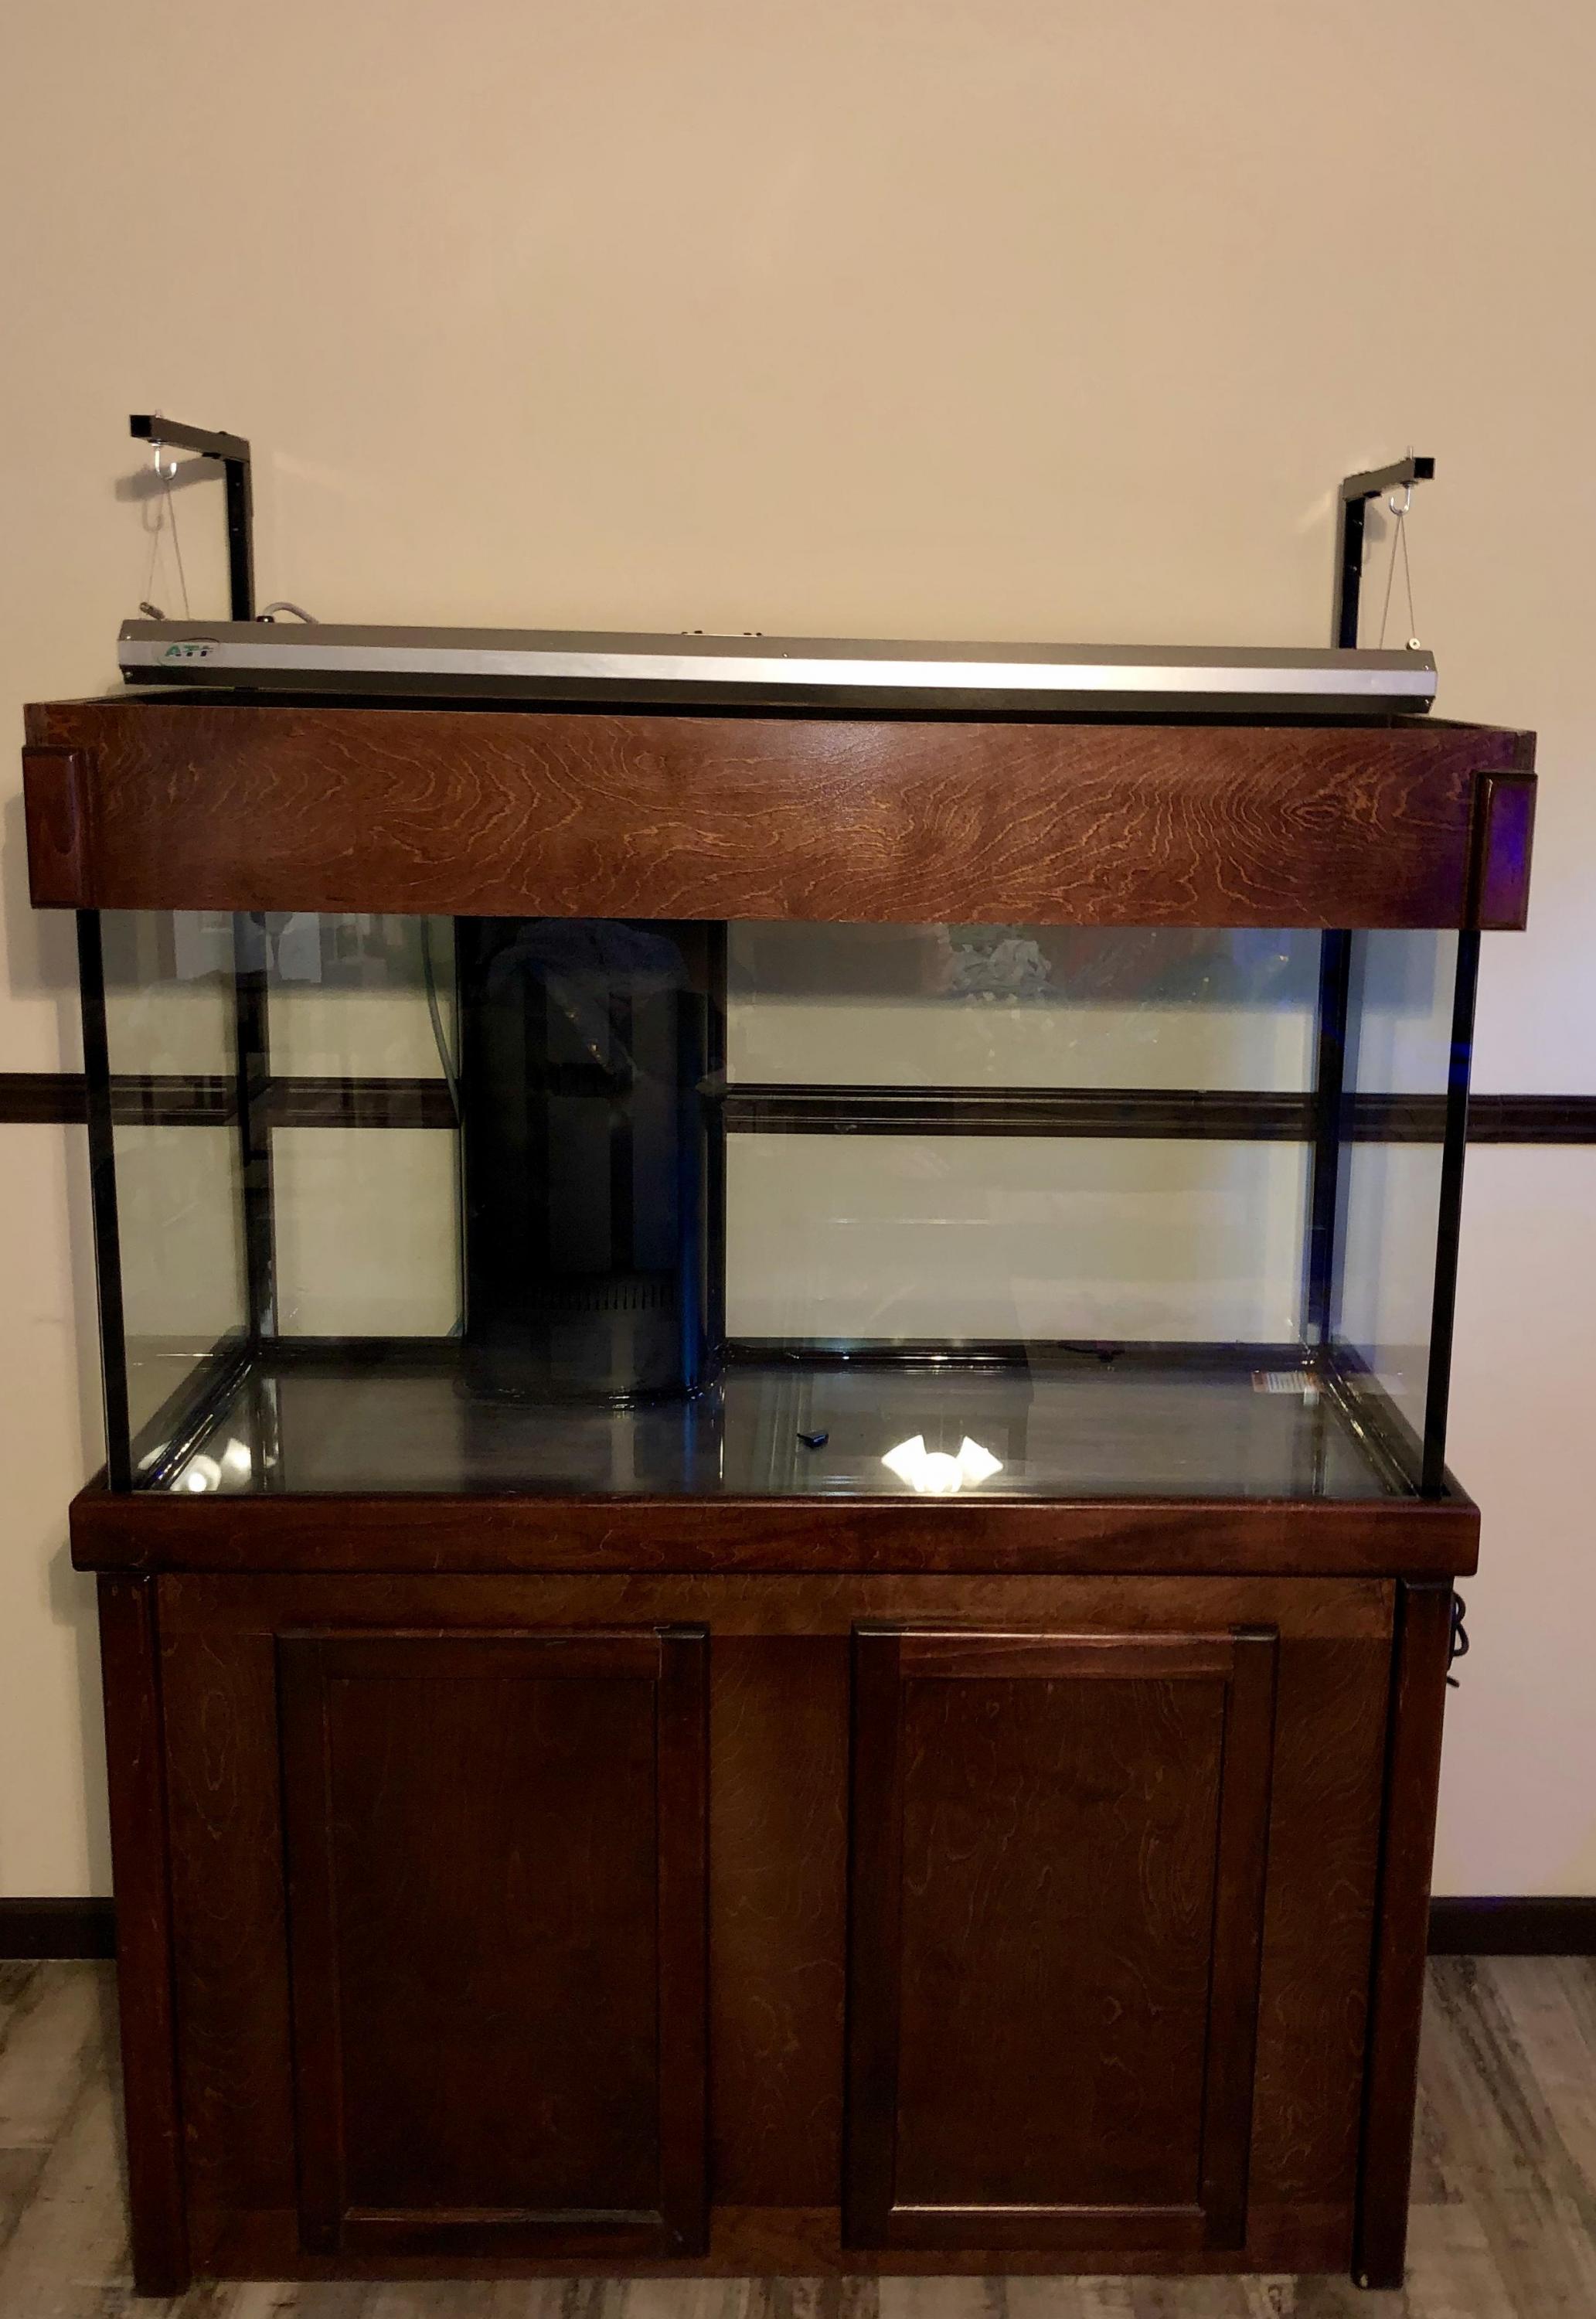
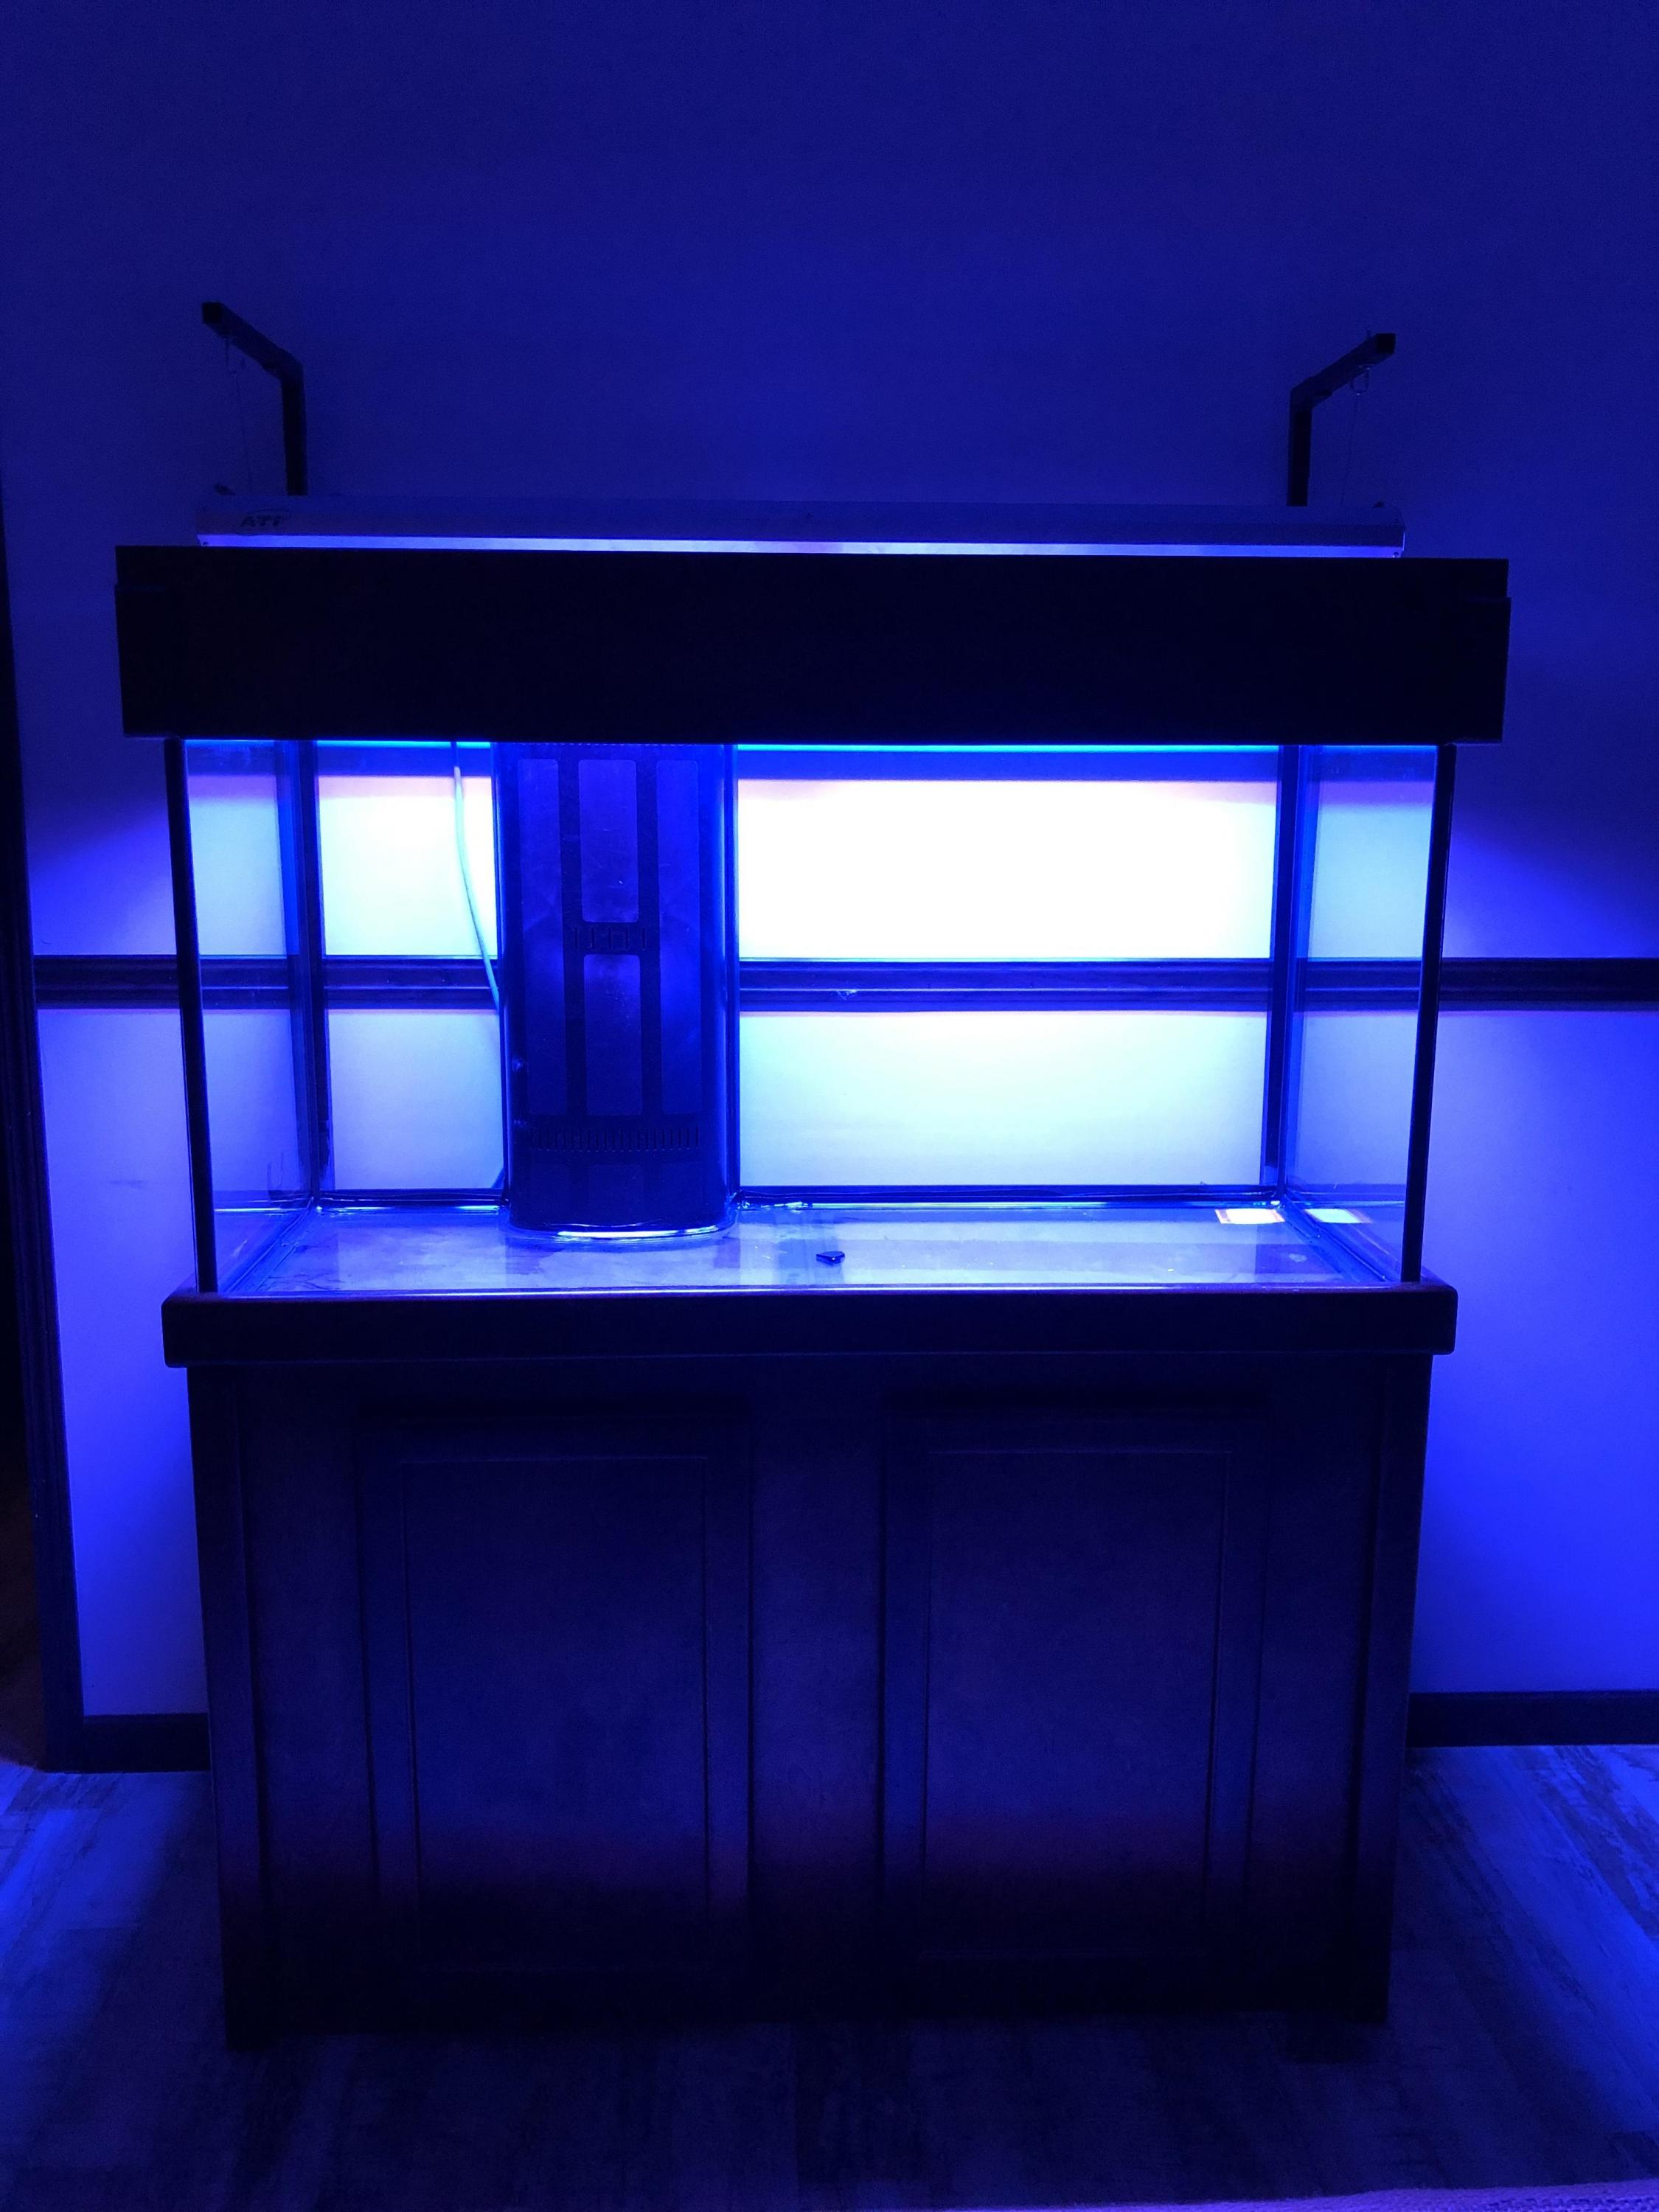
I was able to get the tank on the stand and finally see how it would look with the fixture hanging.
all of my cable management supplies, timers and power strips had also come in today. Along with my hydor seltz-d controllable return pump.
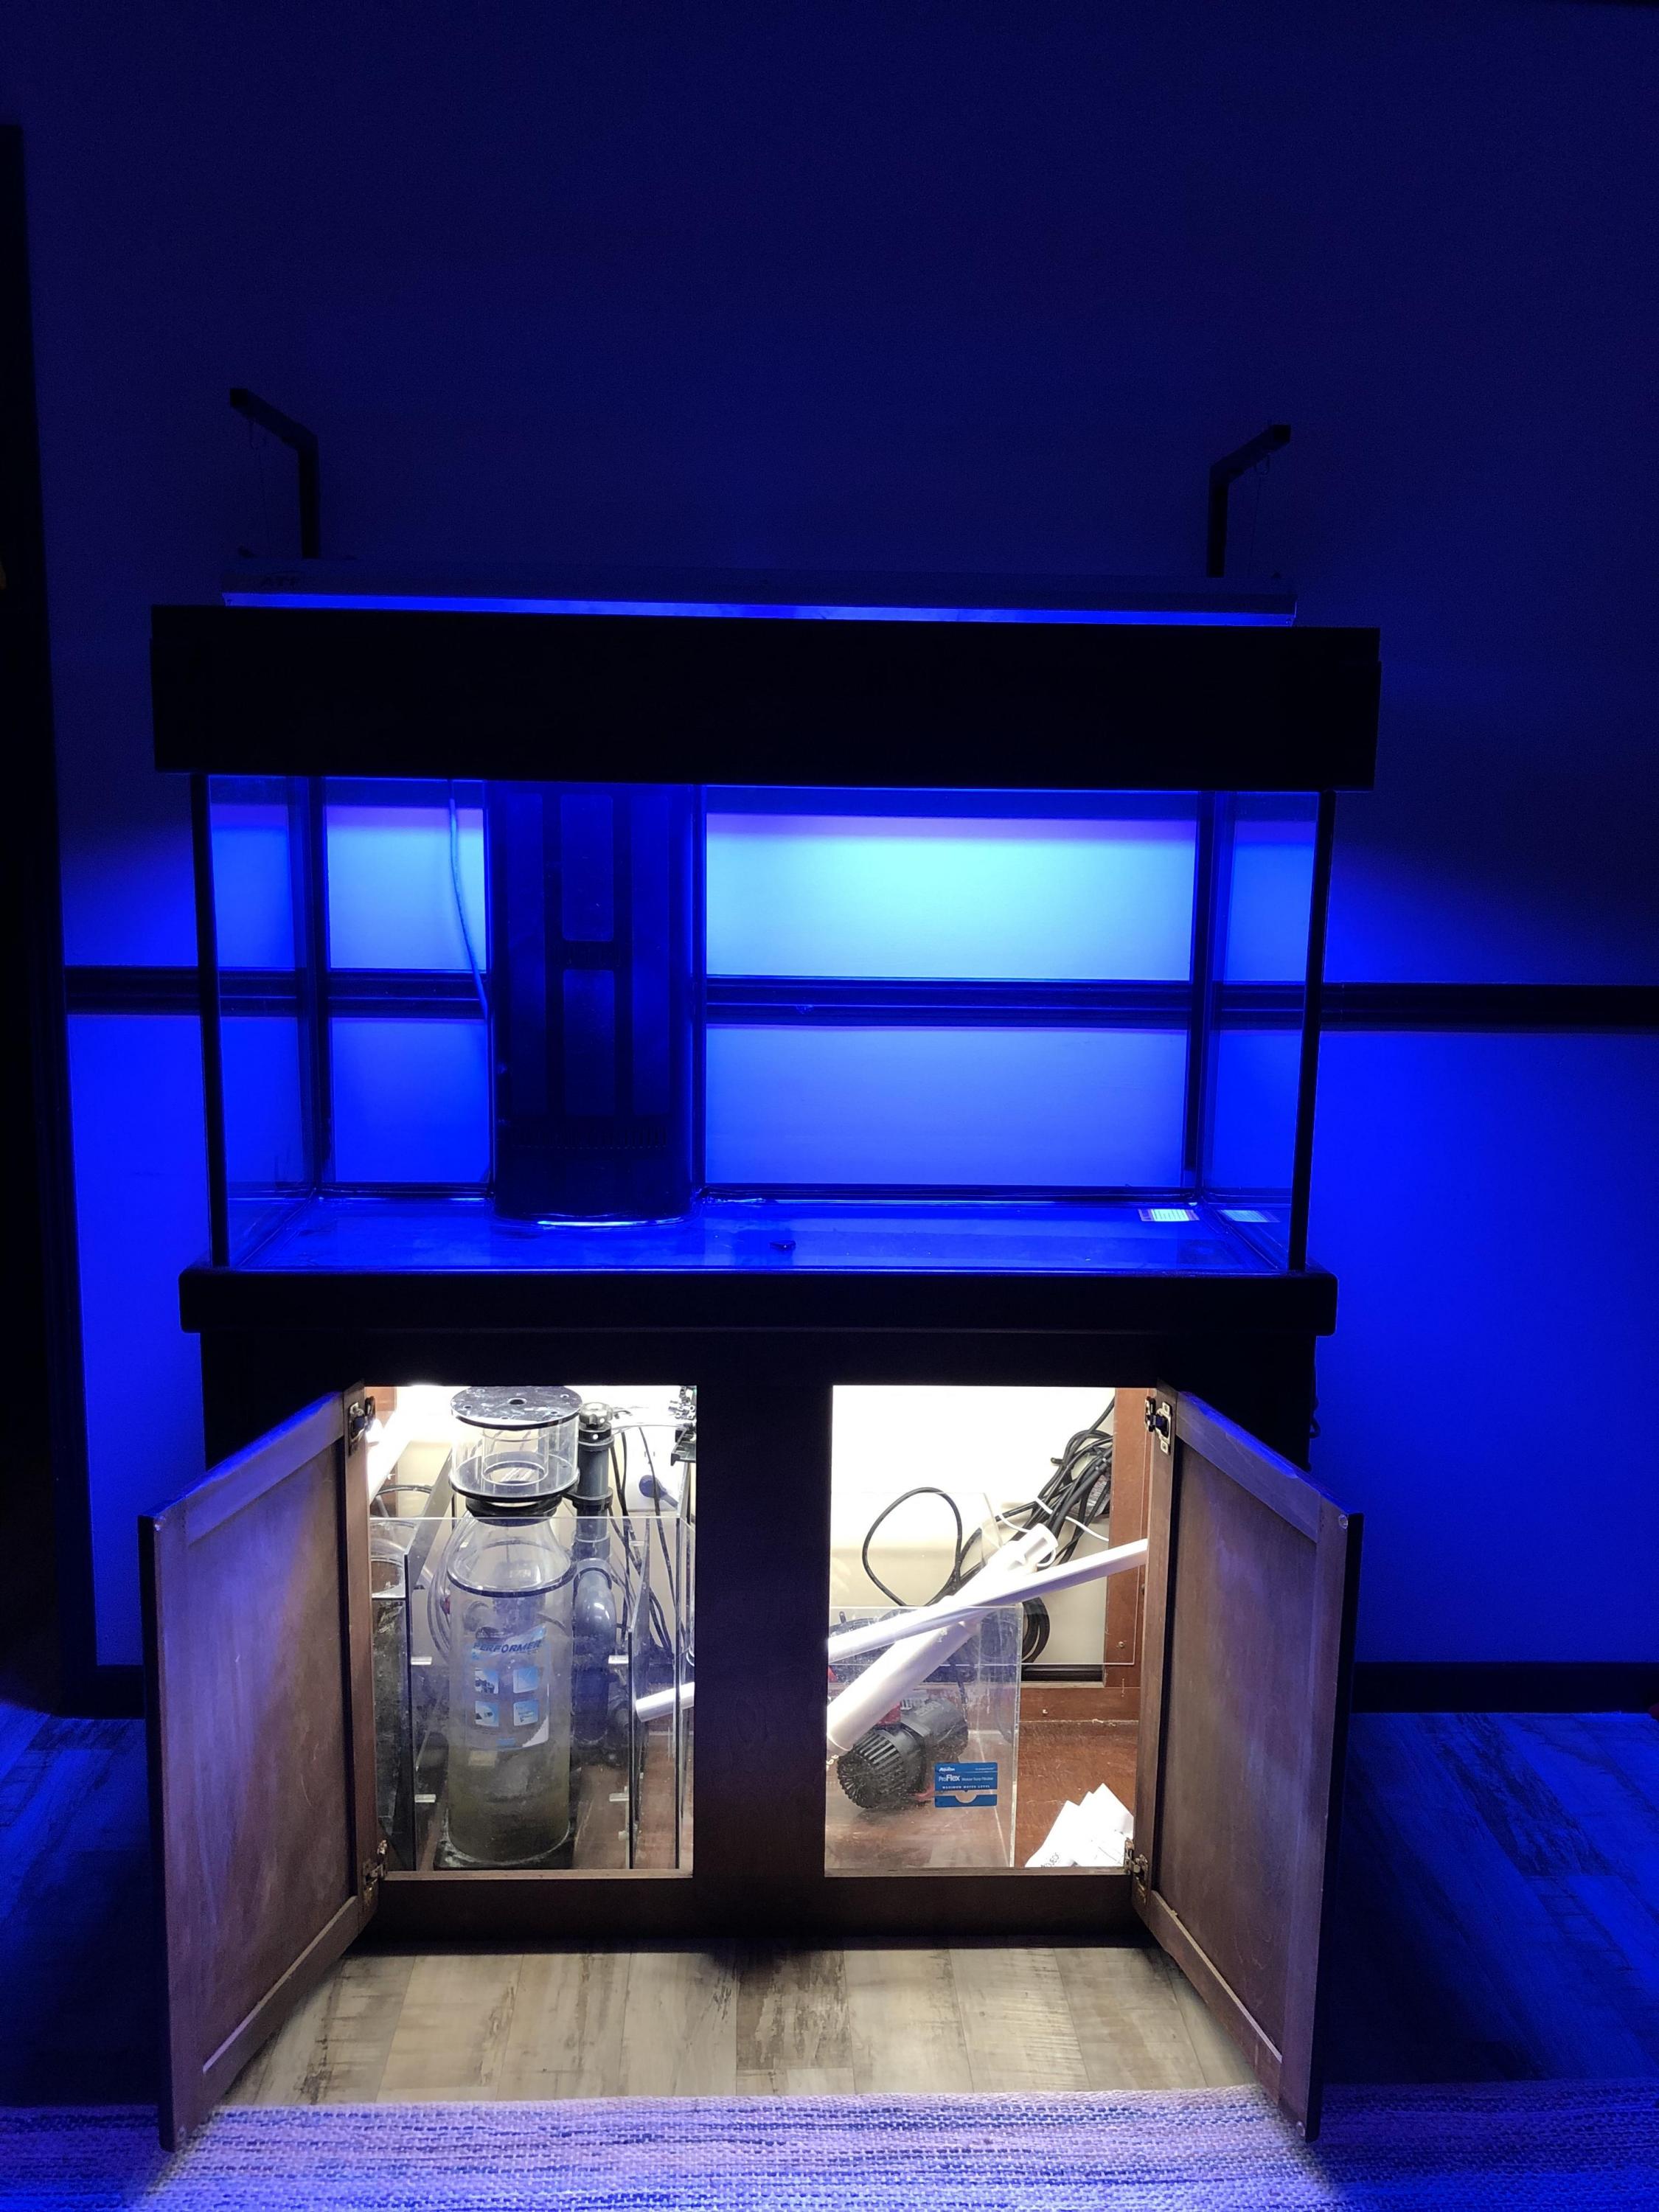
This means it was time for me to tackle what most of us don’t like to do. Organize the cords and keep the power strips safe and out of a corrosive environment.
I decided to attach it to the side for now until I build my cabinet to hold them inside along with some supplies.
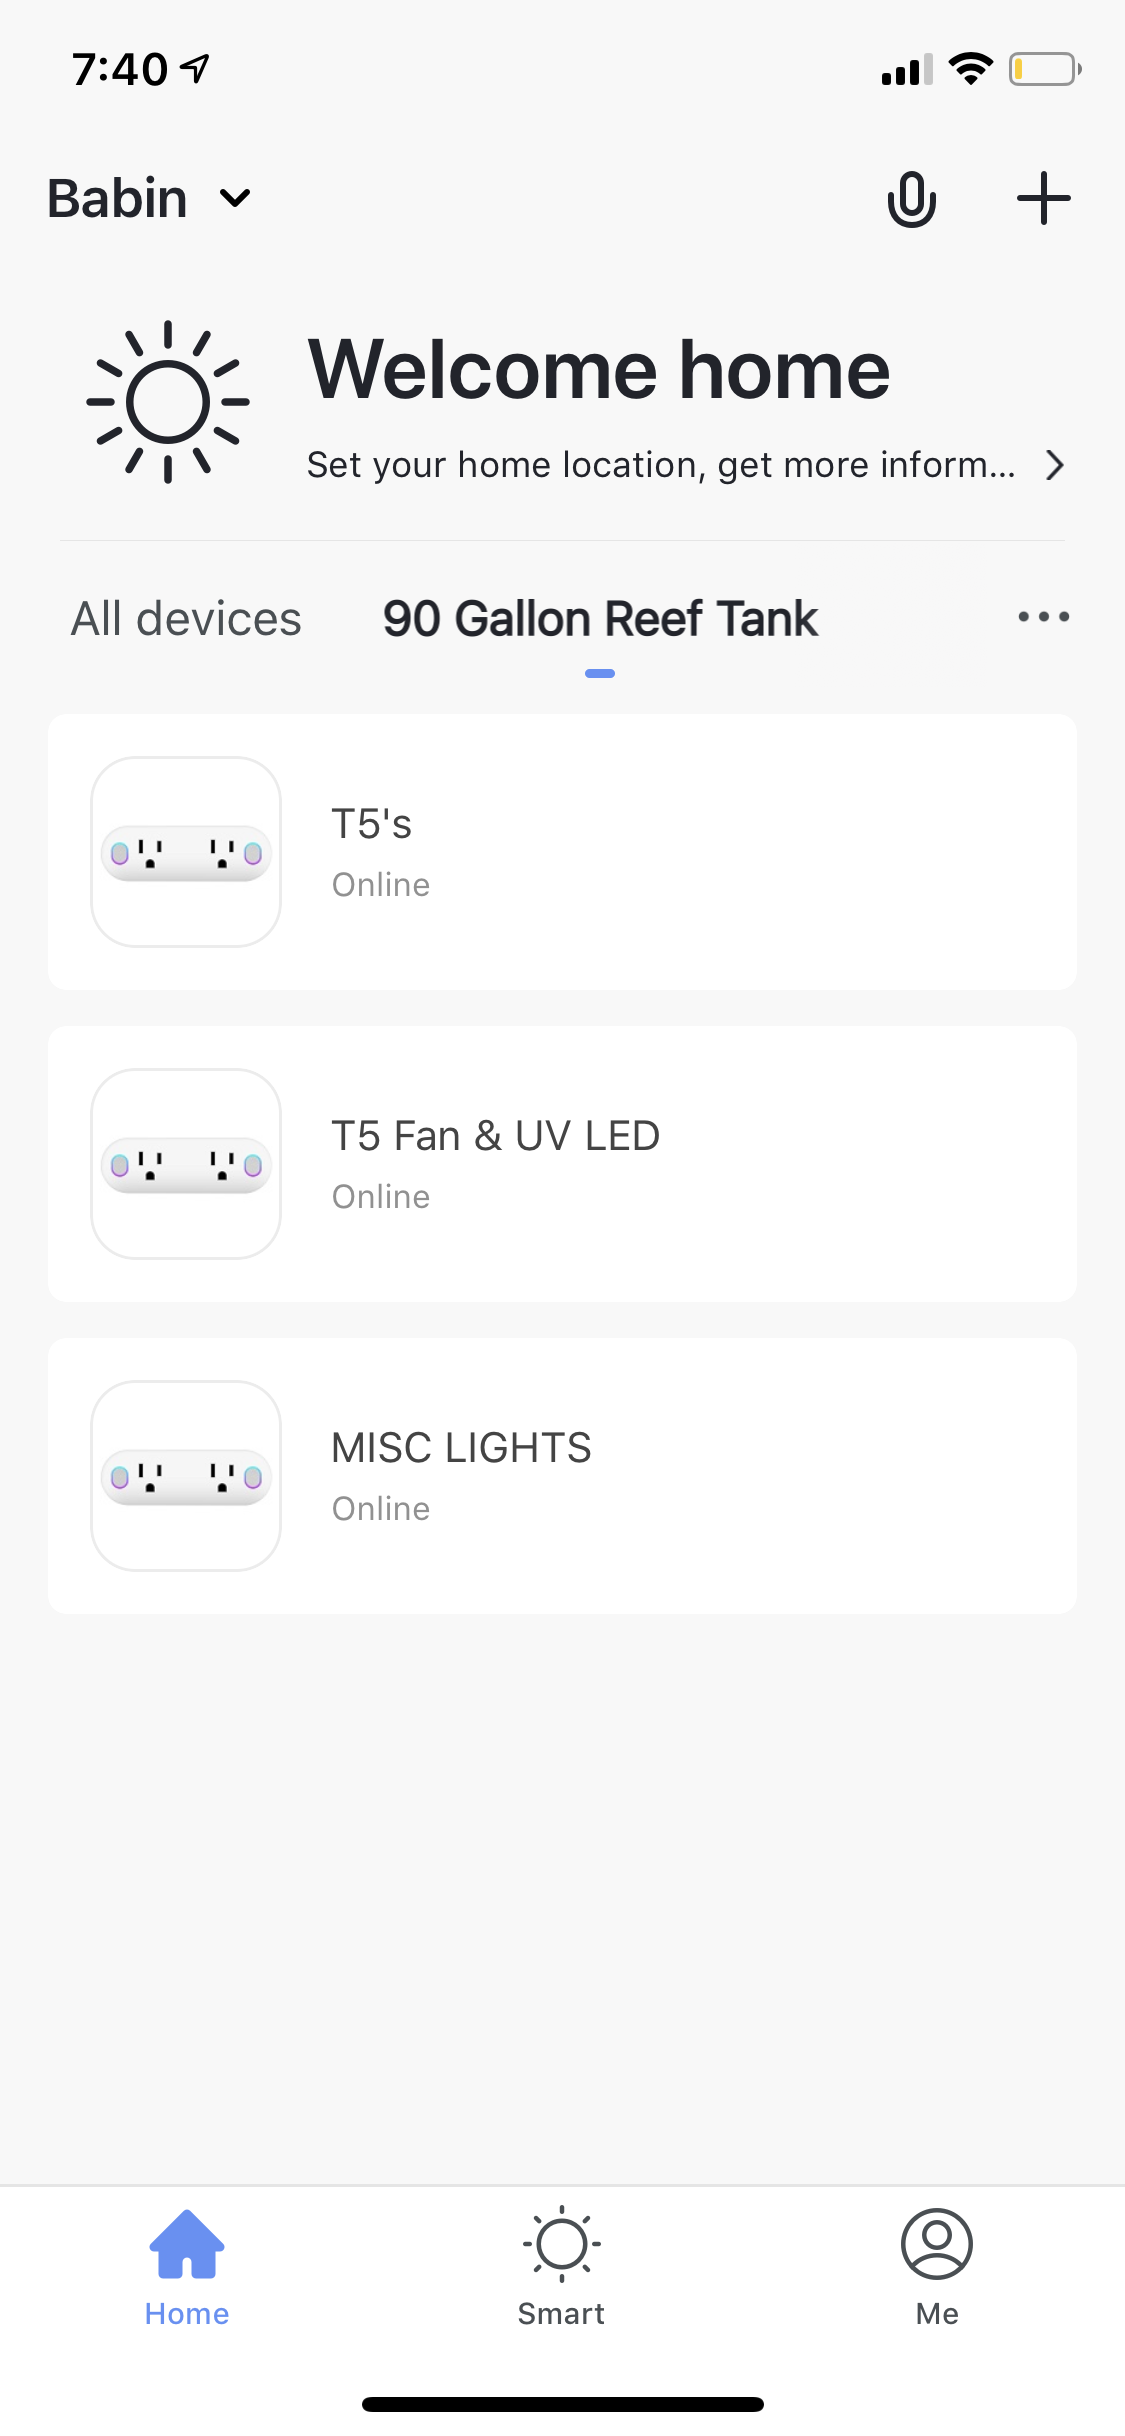
Each outlet on the 1 to 2 WiFi timers can be separately controlled.
I have timers for the first set of T5’s, the second set (peak), the fan, the reef breeder led that will be added when it comes in and also had an extra so put my sump light on the last one. The second surge protector is powering all of the pumps and heater.
The 3 box in the picture of the power supplys is used to control the return pump. Flow control and feed mode.
The outlets use the smart life app, which allows them to be organized and adjustments made even when I’m not at home via the cloud.
This is where the build is at so far. I will be updating this thread as I make more progress. Any comments or concerns are welcomed! Happy reefing everyone!


Decided to come here to do a build thread and introduce myself.
My name is Nick Babin I have been in this hobby for about 3 years. I started with a standard 20 gallon and hang on the back filters.
I now have a successful mixed 20 gallon drop off tank and a 65 gallon LPS/Softies tank. This will be a mixed tank dominated by SPS.
This build begain with almost all used items.
Items that were second hand used in this build.
90 gallon aqueon tank
stand and canopy
Aqueon ProFlex model 4
2- Phosban 150 reactors
2- cobalt pumps
Hydor 705 skimmer
Fluval E300 heater
4 bulb ATI sunpower t5 fixture
90lbs pukani dry rock
items purchased new
hydor seltz-D return pump
icecap 3k gyre
48” LED t5 fixture
RB lumenbar- high octane UV
2- APC surge protectors
4- smart life 1-2 WiFi switches
CA 1400 pump for skimmer
3/4 aluminum tubing
3/4” x 3” L brackets
misc screws and hooks
The next step was to get all of this cleaned up. It took me about 6 hours start to finish. I ran the entire system in a water and vinegar mix while scrubbing off the deposits and cleaning the glass. I also wiped down the stand and canopy. I didn’t take any pics while it was full, I apologize. The sump was behind the tank with the skimmer and reactors running as well as a return pump I was going to use (SP6)


after settinf the tank up inside the house I noticed a haze that I just couldn’t get to go away, so at this point I decided to get a new one.
While waiting for its arrival I decided to purchase all new tubing for the reactors and skimmer. I got all this into the sump and organized. I also added the 48” led t5 light to illuminate the sump during maintenance. I also bought a piece of lexan cut to size to cover the opening on the backside of the stand, to eliminate salt creep or splatter on my walls. I left a gap at the bottom for some airflow and to route power cables out of.


just before purchasing a new ati fixture the exact one I was looking at was offered for sale in a local reef group on FB. The fan wasn’t working though. I thought I can fix that no problem. I got it home and began troubleshooting the fixture. The fan functioned and I checked it using a dc drill battery. Which meant the ac to dc power supply had to be bad. I took the 12v one from my router and swapped it out. Instantly the fan began to buzz. Ordered a variable 3v-12v ac to dc converter from amazon and it was running as new when it came in 3 days later. This picture shows the voltage after using my other 12v adapter in the old ones place.

the next steps were to get started on my aquascape and start on my do-it yourself arms to hang the t5 fixture. I needed arms as I decided I did not want to mount the lights inside the canopy. Not to my surprise the aquascape was the much more difficult task..
the material for the arms were purchased all from Lowe’s.
3/4” alum tubing, L-brackets, wood screws, self tapping screws and 3/16” j-hooks.
It took a little math to figure out the overall height I needed for the fixture to hang just above the top of the canopy with the lid removed. This allows much better airflow for the light, hides the rim of the tank, helps with light spill and also allows me to remove the canopy for working in the tank but keep my lights on so I can see.
The scape I used a chisel and hand saw to cut and shape the rocks to stack best and to be solid.


The tank had arrived by this time. The day before now, I had began to cure the rock in a trash can to help breakdown anything that would cause a problem later on with the tanks success.
I was able to get the tank on the stand and finally see how it would look with the fixture hanging.


all of my cable management supplies, timers and power strips had also come in today. Along with my hydor seltz-d controllable return pump.
This means it was time for me to tackle what most of us don’t like to do. Organize the cords and keep the power strips safe and out of a corrosive environment.
I decided to attach it to the side for now until I build my cabinet to hold them inside along with some supplies.
Each outlet on the 1 to 2 WiFi timers can be separately controlled.
I have timers for the first set of T5’s, the second set (peak), the fan, the reef breeder led that will be added when it comes in and also had an extra so put my sump light on the last one. The second surge protector is powering all of the pumps and heater.
The 3 box in the picture of the power supplys is used to control the return pump. Flow control and feed mode.
The outlets use the smart life app, which allows them to be organized and adjustments made even when I’m not at home via the cloud.
This is where the build is at so far. I will be updating this thread as I make more progress. Any comments or concerns are welcomed! Happy reefing everyone!