Acrylic Fabrication Q & A

lapin

10K Club member
View Badges
Joined
Dec 16, 2017
Messages
10,790
Reaction score
17,953
Location
Austin
Rating - 0%
0   0   0
Thanks. All wet sanding?

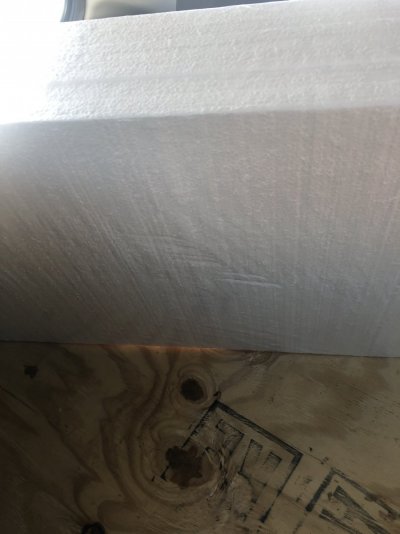
What about storing a new acrylic tank in an unheated garage for a month? Temps here are usually above freezing. Had to convert from Celsius to Farenheit... average temp right now it about 46 in the day and then down to about 35 at night. I assume this is fine.

Its fine.
I would avoid the extremes:

Acrylic can be used in temperatures up to 80 degree Celsius. Higher temperatures for longer periods will cause the acrylic to melt. Temperatures down to -40 degree Celsius is not a problem.
 

biecacka

Valuable Member
View Badges
Joined
Jan 1, 2012
Messages
2,305
Reaction score
2,116
Location
columbus ohio
Rating - 0%
0   0   0
Quick question - moving my tank suck is acrylic. It had 1/4 inch insulation foam under it. That got tossed and I can't remember if I need foam under the tank or not. So many say yes and others say no. Then also how thick? These are 3/4 inch thick pieces, will they work. It's basically Styrofoam.

Thanks
Corey
 

Attachments

  • image.jpg
    image.jpg
    111.8 KB · Views: 72
OP
OP
Turbo's Aquatics

Turbo's Aquatics

Super Duper Member
View Badges
Joined
Jun 7, 2011
Messages
2,805
Reaction score
4,032
Location
West Des Moines, IA
Rating - 0%
0   0   0
You do not want soft permanently compressible foam under an acrylic tank - or any at all really. The only tank you want beaded styrofoam under is a rimless glass tank.

You do need a firm, flat surface upon which to place an acrylic tank. The recommendation is 2 sheets of 3/4" plywood, glued together and screwed to a frame that has proper crossbraces/etc (or just set on top of a metal square tube frame stand)

You may however set an acrylic tank on neoprene, that can get expensive though. BRS sells sheets of neoprene for this purpose. You can use neoprene because it is thin, it compresses, but the compression is not permanent. Styrofoam compression is permanent and that is a problem under acrylic tanks

The blue or pink insulation board from Lowes or Home Depot is much more rigid than white beaded styrofoam, and you maybe could use that under an acrylic tank, the thinner the better.

However: there is a caveat to this, and it is another reason not to use foam under an acrylic tank. Most people cut the foam to the exact footprint of the tank. If you think about it though, the weight of the tank gets transmitted to the stand across the entire footprint. If there is a soft material under it, and the edge of that material is right at the edge of the footprint (versus extending out maybe 1/4 or so all around) then you end up with an "edge effect" where the weight isn't supported as well. The result is that the foam will compress more around the edge, and less in the middle (where the tank is not as rigid) resulting in upward pressure on the middle of the bottom panel. Acrylic can take that, but it places stress on joints and such that are completely avoidable by simply not placing the tank on foam.

Foam isn't needed under acrylic vs glass because glass can't take any inflection (like a grain of sand, or an imperfection in the wood surface) while acrylic is more resilient to this type of imperfection.

Also for the record, a glass tank with a full trim (like one from AGA or another big manufacturer) should never ever ever be placed on foam ever ever.

Also also: custom glass tanks that come with a thin plastic "L" strip around the bottom are not "rimmed" - that trim piece is just for fashion, not function.
 

biecacka

Valuable Member
View Badges
Joined
Jan 1, 2012
Messages
2,305
Reaction score
2,116
Location
columbus ohio
Rating - 0%
0   0   0
Thanks man. I used the small pink insulation(1/4in) on the tank before I moved. It got thrown away somehow on accident. I went to go buy some today it they only sell it in 50ft sections. Way too much for my 48x48 eurobraced cube. So it’s safe to just put it on plywood? There will be 4 cross bases on the stand. it is basically the same stand before. 4 cross bases, plywood top but minus the styrofoam...
is this basically what you are saying?

corey
 
OP
OP
Turbo's Aquatics

Turbo's Aquatics

Super Duper Member
View Badges
Joined
Jun 7, 2011
Messages
2,805
Reaction score
4,032
Location
West Des Moines, IA
Rating - 0%
0   0   0
Check the top of the plywood for imperfections and such, sand if needed. Wouldn't hurt to add another sheet if it's only one sheet, and especially if it's thin (less than 1/2" thick). I default to a brand called "Aruco" which is a good quality plywood.
 

biecacka

Valuable Member
View Badges
Joined
Jan 1, 2012
Messages
2,305
Reaction score
2,116
Location
columbus ohio
Rating - 0%
0   0   0
Check the top of the plywood for imperfections and such, sand if needed. Wouldn't hurt to add another sheet if it's only one sheet, and especially if it's thin (less than 1/2" thick). I default to a brand called "Aruco" which is a good quality plywood.
Will do is 3/4 inch I'm going to attach it then sand it.
Thanks
Corey
 

Attachments

  • 100B931C-F920-433A-8D7A-D19ACD3DD67D.jpeg
    100B931C-F920-433A-8D7A-D19ACD3DD67D.jpeg
    133.8 KB · Views: 79

biecacka

Valuable Member
View Badges
Joined
Jan 1, 2012
Messages
2,305
Reaction score
2,116
Location
columbus ohio
Rating - 0%
0   0   0
Sorry. Wrong picture. That was my old stand built as 2 to get but bolted together.
Here is progress of my new one. Not finished but close

Corey
 

Attachments

  • C04DA368-1B72-4AC6-B77A-CA9653AC2AA0.jpeg
    C04DA368-1B72-4AC6-B77A-CA9653AC2AA0.jpeg
    113.1 KB · Views: 60

reeferals

New Member
View Badges
Joined
Sep 4, 2018
Messages
13
Reaction score
8
Rating - 0%
0   0   0
Hey everyone I've read through most of this thread and really appreciate all of the knowledge share.

I see that a lot of the advice being given has been for larger tanks. I've been thinking of putting together a small tank myself and was curious as to how "good" one would have to be constructing smaller tanks (<20gal). For example, on larger tanks there is too much water pressure to even consider capillary method for seam welding. Is there a crossover point/tank size that would allow for a less professional building approach (i.e. capillary vs. pin method, perfectly routed edges vs. hand sanded edges, etc.) on the smaller tank size?
 
OP
OP
Turbo's Aquatics

Turbo's Aquatics

Super Duper Member
View Badges
Joined
Jun 7, 2011
Messages
2,805
Reaction score
4,032
Location
West Des Moines, IA
Rating - 0%
0   0   0
Sorry. Wrong picture. That was my old stand built as 2 to get but bolted together.
Here is progress of my new one. Not finished but close

Corey
Assuming you are adding a bunch of crossbraces? Looks like 2x4 top frame instead of 2x6? Should be OK generally but if using 2x4s for crossbraces, double them up IMO.

Also just a comment regarding the vertical 2x4s in the inside corners - these are specifically not supposed to extend all the way, they are supposed to be short of the floor and top planes. The reason is that these are not load bearing, they are bracing. The other reason is that if for any reason you need to plane the top or bottom members to get them fully flat (and you will likely have to) then the butt end of these brace pieces becomes a huge huge problem.

Try planing or sanding the end of a board versus the edge. I had a stand built by someone once and I specifically noted to not extend this piece all the way - of course they did, and I had to plane down the top of the stand and those butt ends took way longer than I thought they would to get out of the way of the stand topper.
 
OP
OP
Turbo's Aquatics

Turbo's Aquatics

Super Duper Member
View Badges
Joined
Jun 7, 2011
Messages
2,805
Reaction score
4,032
Location
West Des Moines, IA
Rating - 0%
0   0   0
Hey everyone I've read through most of this thread and really appreciate all of the knowledge share.

I see that a lot of the advice being given has been for larger tanks. I've been thinking of putting together a small tank myself and was curious as to how "good" one would have to be constructing smaller tanks (<20gal). For example, on larger tanks there is too much water pressure to even consider capillary method for seam welding. Is there a crossover point/tank size that would allow for a less professional building approach (i.e. capillary vs. pin method, perfectly routed edges vs. hand sanded edges, etc.) on the smaller tank size?
Not really, it's just a bit easier to work with smaller parts. The Capillary method, IMO, should never be used for a weld that is going to be structural (i.e. and outside joint of a tank). 20g of water on the floor will do a ton of damage
 

biecacka

Valuable Member
View Badges
Joined
Jan 1, 2012
Messages
2,305
Reaction score
2,116
Location
columbus ohio
Rating - 0%
0   0   0
There will be 2 additional cross braces. So one every foot. Here they are before with the top on for measuring etc. I also am now aware of the issue you pointed out with the need for planing the corner pieces to level it out. I was trying to put a few shims under the top brace to see where I was out of level out. I wish I had all the tools needed to do this easily.
could turn this into a good fire this afternoon and enjoy a bourbon and cigar instead. Then have someone else build the stand for me.......:confused:

thanks for your help

corey

5F5A973A-22BC-4910-A0EF-7E087C377B8D.jpeg
 
Last edited:

reeferals

New Member
View Badges
Joined
Sep 4, 2018
Messages
13
Reaction score
8
Rating - 0%
0   0   0
Not really, it's just a bit easier to work with smaller parts. The Capillary method, IMO, should never be used for a weld that is going to be structural (i.e. and outside joint of a tank). 20g of water on the floor will do a ton of damage
Thanks Turbo, that’s what I was thinking. I suppose I was just hoping that a smaller tank would offer greater tolerances for novice craftsmanship!
 
OP
OP
Turbo's Aquatics

Turbo's Aquatics

Super Duper Member
View Badges
Joined
Jun 7, 2011
Messages
2,805
Reaction score
4,032
Location
West Des Moines, IA
Rating - 0%
0   0   0
You will still need the basics of square ends, the height dims for all 4 walls will need to be the same, bonding edges will need to be square/sharp (not rounded or angled), etc. A smaller tank might make you think that you don't have to be quite as precise with these things, but the opposite is actually true - smaller builds tend to magnify discrepancies. If you think about it, a large assembly has a little bit more "give" to it, while a smaller one is more rigid. You might find that when you get to the point of putting on the top & bottom, you have to use more weight on a smaller build than you would expect to ensure you have a snug joint before applying solvent; more shims, etc. That is actually the exact case when I'm building the CWT 25 sump versus the 35/50/55 sumps - I have to use more pins (shorter distance between pins) and shim under nearly every one of them, and put about 10-20 lbs of weights all over the top prior to pinning, then another 10 after pulling. In comparison to the larger models, it's usually a 5lb weight on each corner (prior to pinning) then a 10 across the middle after pulling, and usually that's all. You would think the smaller tank would need less weight to so the same thing but it takes the same amount if not more. The smaller footprint tanks actually take more prep time. But also, that's a sump with multiple baffles (very rigid) versus a tank (no baffles)
 

reeferals

New Member
View Badges
Joined
Sep 4, 2018
Messages
13
Reaction score
8
Rating - 0%
0   0   0
You will still need the basics of square ends, the height dims for all 4 walls will need to be the same, bonding edges will need to be square/sharp (not rounded or angled), etc. A smaller tank might make you think that you don't have to be quite as precise with these things, but the opposite is actually true - smaller builds tend to magnify discrepancies. If you think about it, a large assembly has a little bit more "give" to it, while a smaller one is more rigid. You might find that when you get to the point of putting on the top & bottom, you have to use more weight on a smaller build than you would expect to ensure you have a snug joint before applying solvent; more shims, etc. That is actually the exact case when I'm building the CWT 25 sump versus the 35/50/55 sumps - I have to use more pins (shorter distance between pins) and shim under nearly every one of them, and put about 10-20 lbs of weights all over the top prior to pinning, then another 10 after pulling. In comparison to the larger models, it's usually a 5lb weight on each corner (prior to pinning) then a 10 across the middle after pulling, and usually that's all. You would think the smaller tank would need less weight to so the same thing but it takes the same amount if not more. The smaller footprint tanks actually take more prep time. But also, that's a sump with multiple baffles (very rigid) versus a tank (no baffles)
Thanks for this; as you mentioned it's contrary to what I was originally thinking. But makes sense, especially if you are trying to snug up multiple baffles, etc.
 

KustomAquarium

Community Member
View Badges
Joined
Oct 1, 2019
Messages
57
Reaction score
23
Rating - 0%
0   0   0
Looking to build a rimless acrylic tank 24wide x 24deep x 30 high what's the recommendations on thickness?
 
OP
OP
Turbo's Aquatics

Turbo's Aquatics

Super Duper Member
View Badges
Joined
Jun 7, 2011
Messages
2,805
Reaction score
4,032
Location
West Des Moines, IA
Rating - 0%
0   0   0
Generally, when going rimless, you have to add a factor of about 2.5 to the wall thickness. The usual thickness for a eurobraced 30" tall tank is 3/4". So you're looking at 2" acrylic.
 

biecacka

Valuable Member
View Badges
Joined
Jan 1, 2012
Messages
2,305
Reaction score
2,116
Location
columbus ohio
Rating - 0%
0   0   0
Turbo, I am attaching 2 pictures. One is a slight gap I cannot seem to close in my plywood top. I'm open to suggestions on other shim methods because I shim it and it gets out of whack elsewhere. The second is 1/2in foam from Menard to see if it is acceptable under my acrylic tank? Or is the neoprene the only option for me?

Corey
 

Attachments

  • 2595E634-6334-42EB-AF57-CF11BFDF980E.jpeg
    2595E634-6334-42EB-AF57-CF11BFDF980E.jpeg
    449.7 KB · Views: 58
  • 9A23D9F6-0FD4-434B-B7D3-E955922046AD.jpeg
    9A23D9F6-0FD4-434B-B7D3-E955922046AD.jpeg
    113.1 KB · Views: 68
Back
Top