Apex DOS DIY level switch?

DeputyDog95

Active Member
View Badges
Joined
May 12, 2019
Messages
423
Reaction score
101
Rating - 0%
0   0   0
It does, but it is not entirely accurate. For example, with my refrigerated mysis dosing, I back flush the tubing with DOS (it runs backward), but the volume tracking doesn't add that volume back into the container volume. So it thinks the container is emptying very fast and that is what the graphic shows. The sensor lets you know if the container is actually empty.

Also, you can program things based on the sensor (e.g. if empty, set email alarm or turn off DOS, etc.), but you can't refer to the volume in the container in the Apex code.

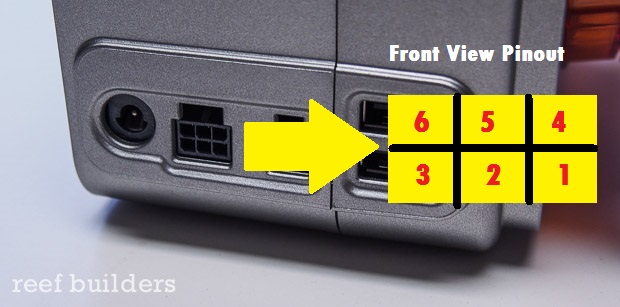
Lastly, the sensors can be used anywhere in your setup (e.g. ATO, sump overflow sensor, etc) and don't have to be tied into the DOS function even though they are using the port on the DOS. They basically provide two sensor ports as you would find on an FMM.


Interesting. That makes a lot of sense.

I've been using the Neptune magnetic optical sensor for my ATO reservoir, mixing station, etc, but I have no issue with submerging those.

The 5 liter Red Sea containers I dose out of have a "window", so I just visually take a peek at them on a regular basis to make sure they're on track with the "fake DDR" level reading.
 

Mickey

Well-Known Member
View Badges
Joined
Oct 9, 2016
Messages
605
Reaction score
329
Location
Cheshire, CT
Rating - 0%
0   0   0
Many thanks to all who contributed to this thread. It's been great.

I'm going to set up the DDR volume tile on my Apex without the level sensors.

Sorry if this is a stupid question but I'm not well versed in electronics. Couldn't I just use a 150 ohm resistor covered in shrink wrap to protect the wires except for 1/2" on each end and then insert those ends into the 4 and 6 pin sockets/ports rather than buying a cable and cutting it and discarding the ends?

Molex connector with sockets: Amazon product

Resistor: Amazon product
 
Last edited:

Mickey

Well-Known Member
View Badges
Joined
Oct 9, 2016
Messages
605
Reaction score
329
Location
Cheshire, CT
Rating - 0%
0   0   0
Not sure why my links aren't showing up, I've tried twice. If you search on Amazon for Molex Micro-Fit 3.0 Dual Row (6 circuits) you'll find it, or product B078Q5NL8H. Resistor is 150 ohm 1/4W 5%, product B00CVZ3WXE.
 

e-sully

Community Member
View Badges
Joined
Jul 17, 2015
Messages
31
Reaction score
13
Location
New York
Rating - 0%
0   0   0
You can really just use a jumper wire. You don't even need the resister. Many have done it without using one.
 

Mickey

Well-Known Member
View Badges
Joined
Oct 9, 2016
Messages
605
Reaction score
329
Location
Cheshire, CT
Rating - 0%
0   0   0
Yes, I've seen that. But I've also noted that many folks (who I assume are more knowlegeable than I) have recommended the resistor for safety and I'd rather be safe than sorry.
 

Psycho’Pat

New Member
View Badges
Joined
Jul 21, 2024
Messages
1
Reaction score
0
Location
Petite Ile
Rating - 0%
0   0   0
Also I think I have a way for you to enable fluid monitoring without the optical sensors too. So if you want to just enable the software feature but not have the low fluid sense switches its possible to do with just a resistor jumper between two pins to trick the DOS into thinking you have a DDR connected. Or a single optical sensor will do it too.
Hi, I would like to try this one. Could you please confirm the two pins to connect ?
 

Gotfrogs

Active Member
View Badges
Joined
Dec 26, 2015
Messages
387
Reaction score
232
Location
Dickinson, TX
Rating - 0%
0   0   0
I have a few custom boards that allows you to attach two optical sensors to your DOS. If you want one, PM me.
IMG_9744.jpeg
 

Adrift

Well-Known Member
View Badges
Joined
Apr 27, 2021
Messages
708
Reaction score
1,915
Location
Fort Worth
Rating - 0%
0   0   0
Ok here it is. This is what I got working tonight using 1 optical sensor but should work with 2 with no problems. Do this at your own risk.

DIY DOS DDR Optical Cable How To:

a9qrrn.jpg


Apex DOS detailed internal 6 pin DDR Pinout:
Pin 1 - +5V Supply
Pin 2 - 560 Ohm pullup to +5V (Switch 2 LED driver source)
Pin 3 - 4.7K Ohm pulldown to GND (Switch 2 input)
Pin 4 - 560 Ohm pullup to +5V (DDR Detect Pin*) (Switch 1 LED driver source)
Pin 5 - 4.7K Ohm pulldown to GND (Switch 1 input)
Pin 6 - GND
(If you have a multimeter, measure from pin 1 to 6 to verify 5V and verify pinout before proceeding)

Special note about pin 4: The DOS/Apex uses this pin to detect connection and enable the DDR software features in Apex Fusion. When connected to the LED port of an optical sensor this pin is pulled down to about 1.14V from 5V when nothing is connected. If you only want to connect 1 optical sensor up, it MUST be connected to this pin.

Cable Supplies:

- 2 Optical Sensors from eBay(http://www.ebay.com/itm/40093478080...&ssPageName=STRK:MEBIDX:IT&afsrc=1&rmvSB=true) This is the one I have used and tested to work. Other options may exist but I will refer to this part in this tutorial. If you use something else DO NOT use my pinout/color references.

Two options for the connector:
Option 1 - Crimp method (for the skilled only)
images

- 6-pin Molex Nano-fit receptical (http://www.digikey.com/scripts/DkSearch/dksus.dll?Detail&itemSeq=195971922&uq=635975683447627144)
- 6 crimp pins for Molex connector (http://www.digikey.com/product-detail/en/molex-llc/0462350001/WM7082CT-ND/3045001)

Option 2 - Premade assembly (easier)
http://data:image/jpeg;base64,/9j/4AAQSkZJRgABAQAAAQABAAD/2wCEAAkGBxEHEBUUEBMVFhITFhMXFRYYEhoZFhcTFhcWGBUaExYYHighGRslGxcWITEhJSkrLi4uFx8zODUsOjQuLisBCgoKDg0OGhAQGy0mICUtLS0rLS0tLS0tLS0vLS0tLS0tLS0tLS0tLS4uKy0tLS0tLS4tKy03LysvLS0tLS0tLf/AABEIAOEA4QMBEQACEQEDEQH/xAAcAAEAAQUBAQAAAAAAAAAAAAAABQIDBAYHAQj/xABDEAACAQMBBQUEBgYIBwAAAAAAAQIDBBEhBQYSMUEHIlFhkRMycYFCUnKhsdEUI2KCwfAVFiQzY5KiwkNEU4PS0+H/xAAaAQEAAwEBAQAAAAAAAAAAAAAAAQMEAgUG/8QANhEBAAEDAgIHBwMCBwAAAAAAAAECAxEEMRIhBRNBUXHR8BQyUmGBkcEiobFCUyMzQ5LS4eL/2gAMAwEAAhEDEQA/AO4gAAAAAAAAAAAAAAAAAAAAAAAAAAAAAAAAAAAAAAAAAAAAAAAAAAAAAAAAAAAAAAAAAAAAAAAAAAAAAAAAAAAAAAAAAAAAAAAAAAAAAAAAAAAAAAAAAAAAAAAAAAAAAAAAAAAAAAAAAAAAAAAAAAAAAAAAAAAAAAAAAAAAAAAAAAAAAAAAAAAAAAAAAAAAAAAAAAAAAAAAAAAAAAAAAAAAAAAAAAAAAAAAAAAAAAAAAAAAAAAAAAAAAAAAAAAAAAAAAAAAAAAAAAAAAAAAAAAAAAAAAAAAAAAAPG+HmRM43GPVv6dPnL0/PkZ7mss0RmallNqudoYlTbUF7sZS+C/LJir6Xsx7sTPgujS1dvJjVN4HHlRl6v8AIy19N1Rtan6zj8LI0cT/AFLMt5pR50X6v8iuOnqv7cf7v/Lr2GPiUf1wpw9+Eo/P80aKOmZne39qonyROgnsqZtrvNbXHKTT+GfwNFPS1mfeiqPGPLKqrSXISVC7p3HuTT8s6+httaqzd9yqJ/n7KKrdVO8L5e4AAAAAAAAAAAAAAAAAAAAAW69eNusyeF/PIru3aLVPFXOIdU0zVOIQl7vBwZ4FhfWfh4+C+88W90vMzi1H33+3rwa6NL21NJ2z2h2ttLDrOrJfRpri1+1nhXqimnT6vUc6uXjP4Wcdq3yhrV/2oey/u6LWes54fpj/AHGujoineurPgqq1XdDVdp9o17dPu1OBeEf/ALk1U9HWI3iZ8ZlX7TX2YRE96r6v/wAxU9cFkaHTxtRCJ1FzvWlty5qe9eVV+/P/AGlkaWz8EfaHPXXPilSts3dN5jc1fjxy19ROmszvRH2R1tffK/abduuLWs/m8kTprU8sO41FyO1s9lvbfWceKWKkFza1wl4yWVH1Rjv9FWbnNfRrJj3obnuz2rxqNRqP5S/hIo4NZpfdnip7p89/5d8Ni9tyl0/ZW26O1EuCWr6Z/B9TbptfbvTw7Vd0/jvZbunrt+CSNygAAAAAAAAAAAAAAAARG8G8lru9Diuaii37sFrOX2YrX58l1YGmWXaLcbw1XGyoKnRj79ar3ml4RhFpcT+LX8cmq1dNinM79i61Zmufkxd697v0Du8E69w+VOCb4V0dRpYgvI8Gmm5rK+OurFPf/wAW7lbjFMZlz+9rX+8Mv7S4Uaer4ZtyXlw0ovEn9v16Hq2PZNPH6N+/GZ+6iq3er3Ykd1LmvLgjWck+lOg+XwjomWxrYq50UzKPZMe9VEJC07Lbmu/7u4fxUaa/1YOutvztQdVYjepPWPY7OXv0Uvt3H/g2czGrnbEevCU500d8pq37IKUOdO3/AM05fjE46jWTvXEevA67TxtT6+7JfZLQfKnbr9x/kI02q/unX2fgeVOyam44XB/nqJeiHUauP9SPX3R11j4Ufc9jlP6MVnyrS/3IcOtjtpn14QRXp57J9fVEXfZLcWveoOpF+KlGWvkovIi9qqfft58Mef4JosVbVYaVvDuzdbMblc0XhN5qRXDL4zWPva+Zot6qiueGeU908lVViqmMxzj5Pdg7w3Ow2pQm6lFe8s6xXw6fh8CvU6G3ejunvd2tTVTynnDu+5W+tPblJNyz59V9oz2dXXZq6q/9J8/N1dsRVHHbbmnk9ZjAAAAAAAAAAAAA1XeXf2y2BmLn7Sqnjgg08S8JS5J/srMvIIy5tvJ2i7Qvp+zhCVBSxwwjpUalpHi/4ifh7jfhjUiZimMymImZxCMt9zZXss3Vdqcmm4Q79T9+byk/5R5N3pPfqqc/Odm2jSfFLou7e7XsKKp22Iwh9KeXmT5t9ZS/nwPPt2LuvrqmqcRG8/iF1dyizERCVo7jUpPNetUqPOcJqEfRa/eevb6OtU782erWVztGEra7sWVq8xt4N+Mlxy9Z5Zqo09qnamFNV65VvKVhBU1iKSXglhFypUAAAAAAABRWoxrrE4qSfNNJr0ZE0xMYlMTMbOIdrO40N32r2xjwUZSUa1KPuwk/dlBdIy5OPJNrHMG6J3ShGg1cW3dax7akn3JQ/wCpTX0Wuq5Y5Hk66nsq2nae75eTdppzt9fN3Ld+69tHhfRJx+y/y/id9GX5qibVXZt4f9KtTRieKEseoygAABSqkW8JrPhnUCoAAAARu3Nu2+wafHcTUU88Mec5tdIRWrf4dcAcs3g3n2pvVmFnSdC2f0pS4MrxnPnL7MNPFyMt/W2LPvVc+7tW0WK69oa5eWVHdqlxObqXEk4w4MpZ0z+sXeUV9WHAnomnzM1nVXdTV+iOGnvnf6Lq7VFqOfOW6bg9mH6NGNxfOSqyXEqMe7wKXSpJa8TXNRxjll653XLUXIxVt3KKLk0c43bXe20biqrehGMYQ1nwrHefNyxzwtPmzyNZm5cp0tnl3+vlH7tVqeGmbtbZLahG2ioxWi/nU9ezaptURRRtDHVVNU5ldLXIAAAAAAAAAAAIHfugrjZt0pcvZSkvtR70f9SREphxDcOfsKk480414peOM8K/gYekac2eXfH8tOln/EdOht2O70aE6nuznTpS8lJPL+WM/I8vo6qZ1U47p/C/Ux+hvvGvFep9G85UBancRgstrHr6ARt1fSq6R7sfvf5EZSwWQK4XE6fKTXz/AIMnKGRT2pUjzw/lj8BkZK2qsawefBNa+uBkQ73huK0nH2KpNtqK4vaVJeajFcMfWXng8zVdIzRX1Vqiaqmq3p4mniqnEMWhuxUu5urOMY1ZaOpV/WVOHmkkniK8k0l4FPsutv8A+bXwx3Q762zR7sZSMthW2z4Sq3U3UjTjKUnNpQUUsvuR0awuuTXZ6NsWpzjM/NVXqa6vk0TceylvztGe0a8MWtvLgtaTXd4o6wwuWI54n+3JfVwbohQ6ltS8/QaTl15RXjJ8ijU34s25rn6eLu1b46sMHdu2cIOctZSb18s6/f8Agef0TazFV+reqf2jzlfqqucUR2Jk9hkAAAAAAAAAAAAA0Ptc26tm2iop9+tq/FU4tP75YXmlIDn24Fp7SdSTXuUuH/u13w+qgqr+Rj1lyKLE1T6y0Wac3OTZO0jY7nY0q7bThXWI9HTlCUc48cpP4Z8TH0Vp5ot9bVvV/CzUXM1cMdiN/pe5+tL0Z67G65fXiw4x1fJvovzAjUwkcskDxpMDz2YHqp4AolPGiIynDylS9jJyi2pS5tN8ljTTppyOaaKaZmqI5zuTVMxhe/SqkeU5eufxLMoYW3LX+nqEqNeU/ZyaclFqLeHlJtLlnDx5AZGxYrYlCnQoQiqdOOIrXL6tyedZNttvxbGUInePZVfbNxTrK5lSVFLFOMcweuZOXeWXJYWvJIqv2abtE0VRu7t1zROYbvb0lRiorkkkTZtRat00R2RhFdXFVMrha5AAAAAAAAAAABDbz7y2+7VJzrS7zzwU0+9N+S6LxfQDiW8NxV2xF314+F1mla0esqa5zx0prRRf0pNvlq+aozydROG7bh7DlRp04S9+bdSp5SkksfuwwvtSmeHqq/bNRTYo92Oc+v28ZbbcdTbmqd5Xe024e17i22dQ95yUpY+jlNRz9mDnJ+TR7mI2jsYstz/q1bfUOnKJqScW/JnEulU7p04t4baTePHHQZMLNLaLnmTjimllybceSy8Rks4Xi8HMVSmaYXqd9TqPhTecZxwvRdM+HzOoqiUTTMM6KS1OnL2MlIgWlCMXoMJe6AecKAqUAKowAorvCJQ2CLyiR6AAAAAAAAAAaNvn2k2278nQotVrpLWKfcpv/FkvpfsrXxxoByKx312lY7QldKq6jqRcZwm/1aj9FRgtI8L1WPPnl5C9szblC+r1bjaSqXFaOHTpS/upv/E/Zjp3FheOdEcVzVyxDqnHaldmRqbw3kLi8eZyalCHD3VThywuUYp4wuurfjLzuktT1dmYpnm06azmeKY5Oi7a29R3Mt+OeJXNZfq6fl0cvCK5vxenws6P0kWLef6p5z5OL9zjq+UKOzrdyrQcr29y7q4y0pc4QlrqukpaadEktNUb4Z28kiKuNiqo24yay28NZWpGE5YVXZNWnySl8H+ZGE5R93byScZweHlPK0afM5mEsZUVThwx7vLXny5Zzz+ZGOScs62k4wSlJyazq8L7lodRyhzO67CeFl9eQCVzw9PvI4jC1U2jCnhP3n0TWenT5ocRhehcxl4r5ExJhcjWjjOcJc86E5RhfXIkXrO3VxLXlHp4vp8ghLEgAAAAAAABTOappttJJNtt4SS5tsDjXaH2tJ5obOniLyp3K5tdVb/+z06SA5JtCEZLKfezlSzltvVtvm2/ECq0qyryi5vu8ljk5+YEnToyvJKFGPFUz3Usc/Pyxn5HNddNFM1VbOqYmZxDfbjeNWMIUqNOFS8aUZezzKKm9MJpd5rpFdW/geLb0PW75inOee8+TdXqOHlvP7Ns3Q3HqVaqvNqS9pcNqUabw1Br3XPpldIrRY69PbiGCZdEJQAAAB6gY1WwpVecF8lh/cMCzT2TSg84bXg3oRhOWLtyjKTjwxbWMaLkRJCFqU2uaZzh1lYdCKlxqK42ks9cLkRjtTlXCTCHtxD9Kg4Sbw8csdHnqJ5kcknaPMF5afE6p2cyl9n28qOXLrjQ6hDMJAAAAAAAADTO1na15sfZ1SdnTjLOY1ZNcTp05aOSptYlzxrovB9A+aq1hW/R1cSpS9i5uKm04xdSK1UJPnpzX7L8wLLaqtxS7y0T/FeRIt0YTipcOX448SBK7PilSzTk1KSeZdc9csDtnYfsGrZ28613bRhUcl7GrLPtJUnHXuv3Vnro5ZfTBA6iSAAAAAAAAAABblQhPnGL+MUBalYUpfQj6Y/AYFp7Kov6OPmyMJyuW9hC3eVn5jCMsokAAAAAAAAAFNSmqsXGSTjJNNNZTT0aa6oDina/ujtPad5QVnSdSzjTjCnTptKnSkniXHB4UU01r4LyA5VtjZ0tiV6lKUqc50+7mD4o8SSzFTWOLHLx0ZIu7JlK+4adOEp1ZvhhThHMpv8AZX4vpqQO2dm3ZXHYn9ovlGdeTUo0U+KlSfTP15+fJdM6MDqIAAAAAAAAAAAAAAAAAAAAAAAAAAAAFu5pfpEJQy1xRlHK5rKxleYHCLLsNvIusp3FFRjF+wac3xzTbh7RYXs14tcT10z1Dp+4m4ltuhTzFKpcyWKldrvPq40/qQz0XPCzkDbAAAAAAAAAAAAAAAAAAAAAAAAAAAAAAAAAAAAAAAAAAAAAAAAAAAAAAAAAAAAAAAAAAAAAAAAAAAAAAAAAAAAAAAAAAAAAAAAAAAAAAAAAAAAAAAAAAAAAAAAAAAAAAAAAAAAAAAAAAAAAAAAAAAAAAAAAAAAAAAAAAAAAAAAAAAAAAAAAAAAAAAAAAAAAAAAAAAAAAAAAAAAAAAAAAAAAAAAAAAAAAAAAAAAAAAAAAAAAAAAAAAAAAAAAAAAAAAAAAAAAAAAAAAAAAAAAAAAAAAAAAAAAAAAAAAAAAAAAAAAAAAAAAAAAAH//2Q==
776133_vw_etz00_11855381

- 6 pin Molex PCI Express Power Cable (http://www.ebay.com/itm/4-Pin-Molex...508346?hash=item2edecd8c3a:g:n9kAAOSwNSxVAdh6)

Schematic:
Note: this uses the color/pinout for the optical sensor listed above. If you use a different sensor adjust accordingly.
nvnl9u.jpg


Disclaimer, try this on your own accord. I am not associated with Apex nor is this endorsed or supported by them. Do this mod at your own risk!
It appears your molex part number is perhaps obsolete or superseded. Do you have an updated part number?
 

woejillis

Community Member
View Badges
Joined
Jun 4, 2014
Messages
81
Reaction score
38
Location
United States
Rating - 0%
0   0   0
Thought I'd post a solution for anyone looking for a way to use a non-contact (contactless) fluid level sensor with the Neptune DOS 6-pin molex port. Refer to this post (https://www.reef2reef.com/threads/apex-dos-diy-level-switch.246352/post-2897212) for pin numbers on the DOS connector. The problem I and at least one other user @nunoml were having was that unlike the DIY optical sensor, the DIY non-contact sensor was not triggering the switch in the Apex.

First, why a non-contact switch? Perhaps you are using a disposable container or a solution that may not be suitable to leave an optical sensor submerged. I am using them for monitoring a Heinz vinegar (carbon dose) jug, a gallon hydrogen peroxide bottle, and a DIY frozen food dosing container (I can elaborate on this separately if anyone is interested). For the first two uses, the jugs can easily be replaced when empty and the sensor is just moved to the new bottle.

There are basically two types of sensors easily obtained from Amazon or similar (there are many sellers selling the same thing so just find the best price):
1. The XKC-Y25 version, good for flat surfaces: https://a.co/d/ficCrYb
2. The XKC-Y26 version, good for zip tying to curved surfaces/pipes: https://a.co/d/guN2t7b

The wiring is different than the optical sensors used in this thread. On the sensors, the brown wire is a 5V input (comes from pin 1 on the DOS plug). The yellow wire is switch output (goes to pin 3 or 5 on the DOS plug) and the blue wire is ground (goes to pin 6). The black wire can be ignored or if you connect it to the blue wire, will switch from normally-open (NO) to normally-closed (NC) (i.e. the behavior of the sensor when there is liquid present is reversed). Both sensors have built-in LEDs so there is no additional wiring needed for those.

The issue with using these (I least my best guess) is that the current is so low that when the built in relay in the sensor is switched, it is not enough to be detected by the DOS. The solution is to use an external, low current relay. I used this relay (https://a.co/d/0MwNw90) which allows for two inputs/outputs (2 channel) so one of these will be good for both sensors on the DOS. I have two DOS, so the two pack was perfect. You need to switch these to be low level triggers to make it work with the DOS. This is easily done by just shifting the jumpers on the board (they are yellow in the picture below). Then you just wire it up.

1. 5V out from the DOS (pin 1) goes to the following locations: brown wire from sensor, DC+, COM1, and COM2.
2. Ground from the DOS (pin 6) should be connected to pin 4 in order to get the tiles in Apex Fusion (I didn't use a resister as discussed in this thread) and connects to the following: blue wire from sensor, DC-
3. Input 1 wire from DOS (pin 3) connects to NC1 (if it doesn't work, try NO1)
4. Input 2 wire from DOS (pin 5) connects to NC2 (if it doesn't work, try NO2)
5. Yellow wire from the sensor connects to IN1 or IN2 (one of each sensor if you use two sensors)

A few things to make it all look pretty:

1. A watertight box to hold the board and contain the wires: https://a.co/d/fo8FptV. I used a drill to cut out openings in the lid for female molex connects I made (see pics).
2. A XH2.54 no-crimp molex connector kit. The sensors have XH2.54 molex plugs so you can just make some female plugs for the box to connect to: https://a.co/d/drKX1W8
3. 4 pin, XH2.54 molex extension cables so you are not limited by the length of the sensor wire: https://a.co/d/9Rmkvct
4. 6 pin micro-fit 3.0 to free wire connectors for easy wiring to the DOS port. I then connected these to a male XH2.54 6-pin plug which plugs into the female 6-pin plug on the box (see pics). Makes it easy to disconnect everything: https://www.newark.com/molex/214756-1061/wtb-cord-micro-fit-rcpt-free-end/dp/65AH2747?ost=65ah2747

I don't mind soldering, but the relay board doesn't require it as all connections are screw terminals. The terminals really only hold two wires each, so you have to get creative to get all the 5V wires connected together. You will need to crimp or solder the XH2.54 connector to the connector going into the DOS.

Here are some photos of the relay, the wire between the DOS and the relay box, and the box itself with female plugs (the two on the left are for the sensors and the 6pin on the right is for the wire to the DOS). I was sloppy, but it gets the job done. I tried using one of these on a skimmer cup, but even after adjusting sensitivity (via the screw on the side of the sensor), the fluid in the neck of the skimmer often triggered the sensor.

Happy to provide more details to anyone interested.
Thought I'd drop a note that I just followed this and was successful in getting a non-contact sensor to work.

I used the model numbers in the post and found all of the items on aliexpress.

The one thing that I got hung up on is the order of the pins on the DDR connector and AI was confidently wrong. Pin #1 is the bottom right pin when looking at the connector as located on the DOS unit. Pin #6 is the top left pin. Once I got that sorted out, everything immediately started working.
 

TOP 10 Trending Threads

HOW DO YOU ADJUST YOUR CUC AS ALGAE DISAPPEARS?

  • Capture and re-home CUC

    Votes: 6 6.3%
  • Increase white light/hours in tank to spur algae growth to feed CUC

    Votes: 6 6.3%
  • Feed nori to support CUC

    Votes: 34 35.8%
  • Feed herbivore pellets to support CUC

    Votes: 31 32.6%
  • Allow attrition to balance CUC and algae

    Votes: 40 42.1%
  • Provide macro algae to feed CUC

    Votes: 6 6.3%
  • Introduce CUC predators

    Votes: 1 1.1%
  • Other (please explain)

    Votes: 11 11.6%
Back
Top