Navigation
Install the app
How to install the app on iOS
Follow along with the video below to see how to install our site as a web app on your home screen.
Note: This feature may not be available in some browsers.
More options
You are using an out of date browser. It may not display this or other websites correctly.
You should upgrade or use an alternative browser.
You should upgrade or use an alternative browser.
Artistic Reef - Red Sea Peninsula 650
- Build Thread
- Thread starter ArtisticReef
- Start date
- Tagged users None
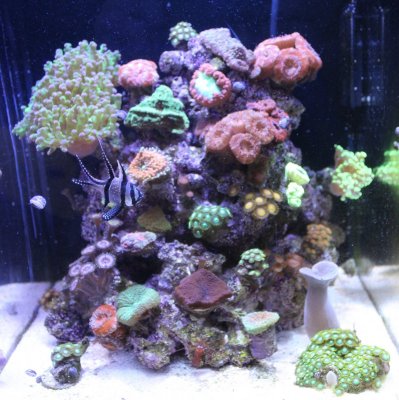
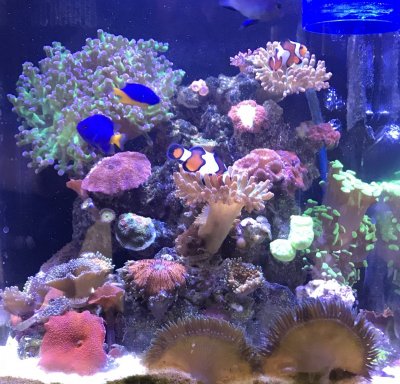
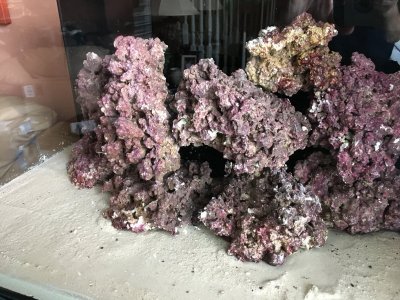
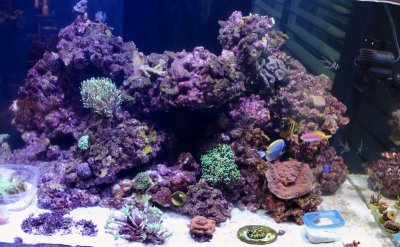
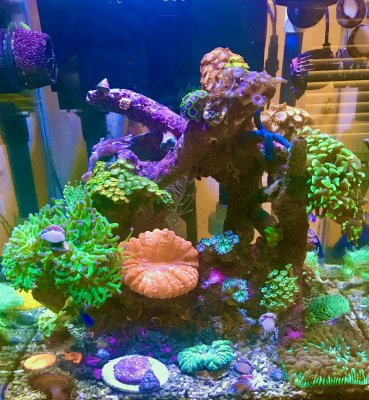
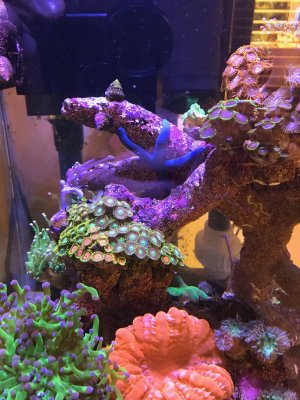
My first reef tank was given to me by my family on Fathers Day 5 years ago. It was built by my LFS under my wife's request. It was a Nuvo 10g tank with a large live rock in the center with smaller live rock around the base. It's lighted by a AI Prime. The LFS chose the coral and the fish and cycled the tank. I was really surprised by the gift and immediately was hooked on the hobby. The first picture is the tank when I received it. The second picture is after a few months. I added some Zoas, rock flower anemone's and mushrooms.


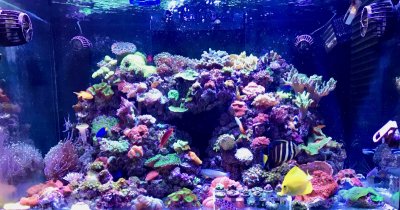
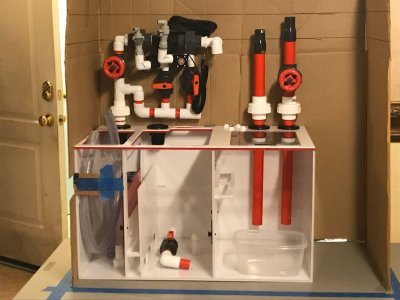
RS 250: Not long after I got my 1st 10g Nuvo reef tank from my family I decided it was time to go bigger. If 10g is good then 54g must be better. I ordered a Red Sea Reefer 250 from my LFS. It was so exciting. The only issue is figuring out what pump to use for the return. I knew nothing at that point. I added an Ecotech Vectra M1, 2 AI Hydra 26s, 2 Jabo PP8s. Over time this tank became "bedazzled" with coral. I was too excited to collect coral and didn't yet have the discipline to the design clean. The RS sump was boring so I decided to add a tiger sump with a manifold. This was fun and gave me some confidence for my next build.


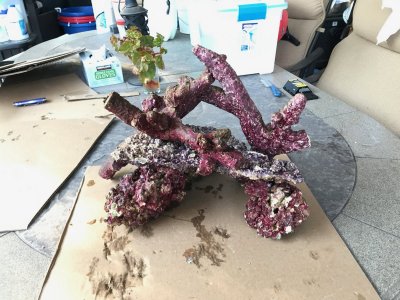
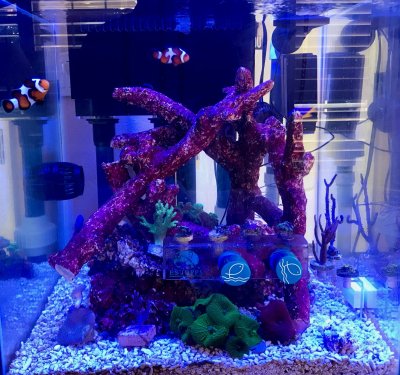
With two tanks under my belt, I was confident I could keep saltwater fish and coral alive and wanted another tank. This time I wanted to add some design to the tank rather than the wall of rocks with a cave or two. I bought a Marineland 25g cube. I wanted to drill the tank and do my own plumbing with an Eshopps Eclipse L Overflow Box into an Eshopps cube sump complete with the Eshopps fuge light and Eshopps X-160 Axium skimmer. I used an Eheim return pump and plumbed a manifold. Major overkill, but I learned a lot. The key was the rockscape with a combination of shelf rock and branch rock. Something simple, but artistic with open space was the goal.
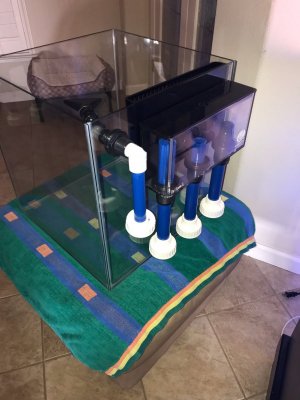
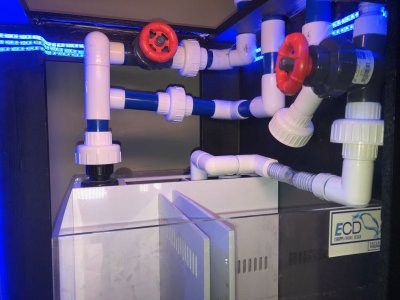
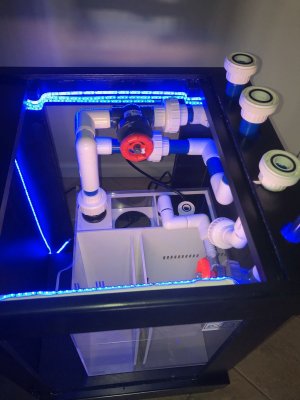
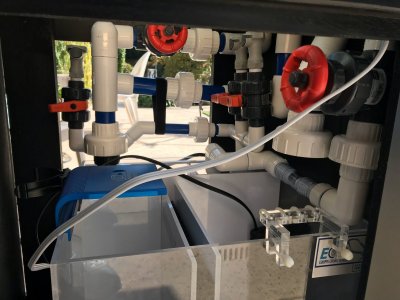
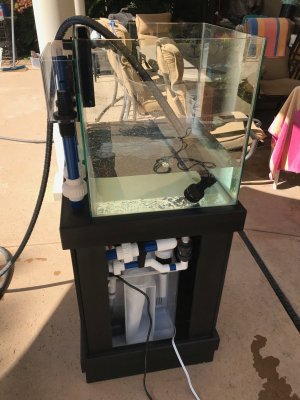


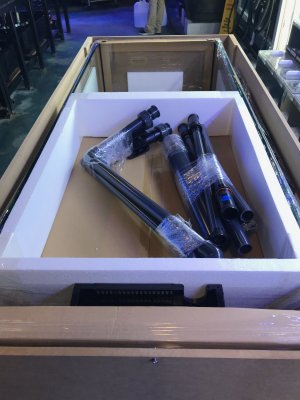
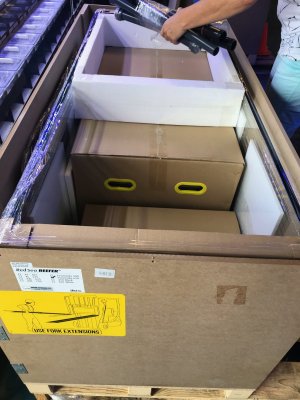
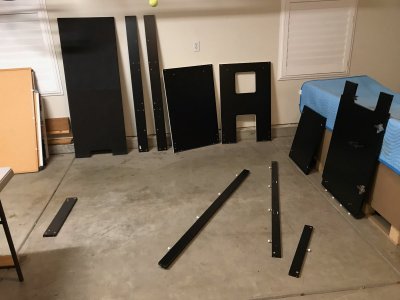
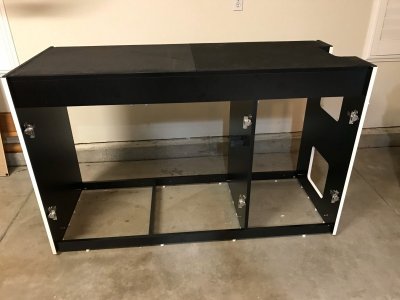
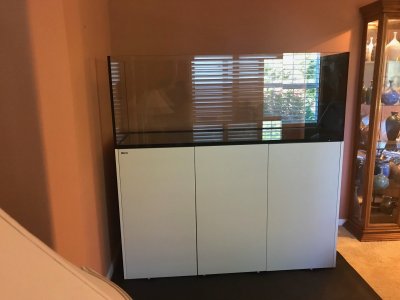
Time for the Red Sea 650 Peninsula. My wife found a new subdivision she fell in love with and talked me into moving. It took a year for the house to be built and a condition of the move was a bigger tank. The house plan we selected had a perfect spot for a peninsula tank and I was really excited about a much bigger tank and the added space to use some of my design skills. I ordered the tank again from my LFS and set it up in my old house to start curing the rock. Since it was being moved to our new house I didn't worry about the peninsula feature and put it against the wall. After assembly I added an Ecotech Marine Vectra L1 pump and added water. I also got 50 lbs of dry pukani rock and some branch rock. Assembly pics:


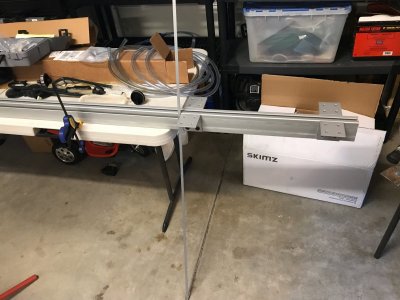
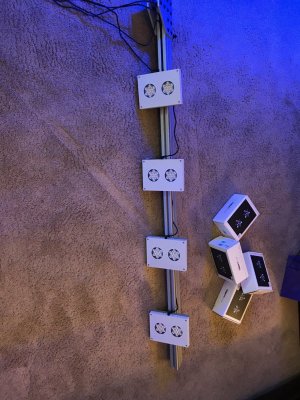
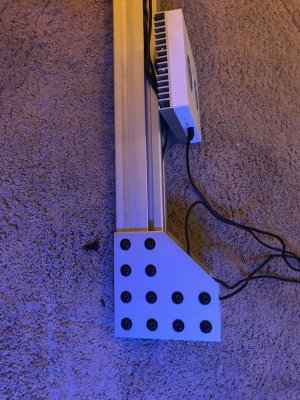
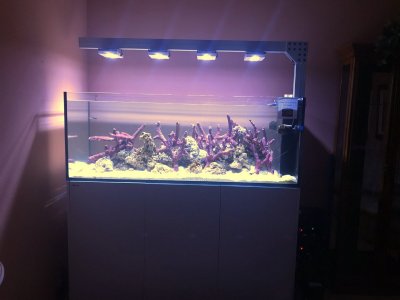
RS 650 Peninsula - Adding Lights. Our new house was going to have 14' ceilings and given the clean style of the home I didn't want to hang lights from the ceiling. I'd seen Deven Rich's @ReefDudes tank where he used 80/20 aluminum to make a light bar. I liked that idea and began researching. I decided to go with 30-15 80/20 aluminum which was much heavier duty then what Deven used because I didn't know if I would ever want to add a canopy. 80/20 is pricey, but easy to assemble and looks clean. I sprung for the slot covers to cover the cords and add a clean look. On the light bar I hung four AI Hydra lights. The cords fit in the slots giving me a clean look. The light bar attached to the overflow side of the tank stand with 3/8" hex nuts. I added 50 lbs of dry pukani rock and two boxes of branch rock just to start curing. When I got to the final rockscape I didn't like the type of branch rock I bought and sold the rock to my LFS and got a different brand branch rock. Note: this was just to cure the rock and not my intended aquascape. If anyone is interested I can find the detail parts list for the 80/20 light bar.


nice story,
I am also setting up a RS 650P beautiful tanks right. mine is going slow as I could not make up my mind on the plumbing. I have had it more then an month now maybe longer and it's still not wet.
love the light bar that is going to be very nice in your new house.
my tank sets between two sections of the house one has really high ceiling the other average luckly I have a nice fux beam I can hang the lights from. but thinking of a "floating canopy" to help with light spill.
floating canopy would work nice. I still toy with the canopy to control light spill, but family members say it doesn't bother them. Lights are lower by 7pm to mostly blues. Good luck with your RSR 650P!
floating canopy would work nice. I still toy with the canopy to control light spill, but family members say it doesn't bother them. Lights are lower by 7pm to mostly blues. Good luck with your RSR 650P!nice story,
I am also setting up a RS 650P beautiful tanks right. mine is going slow as I could not make up my mind on the plumbing. I have had it more then an month now maybe longer and it's still not wet.
love the light bar that is going to be very nice in your new house.
my tank sets between two sections of the house one has really high ceiling the other average luckly I have a nice fux beam I can hang the lights from. but thinking of a "floating canopy" to help with light spill.
New house and tank planning
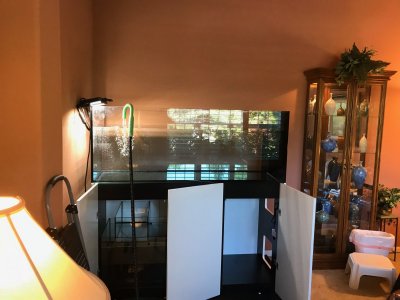
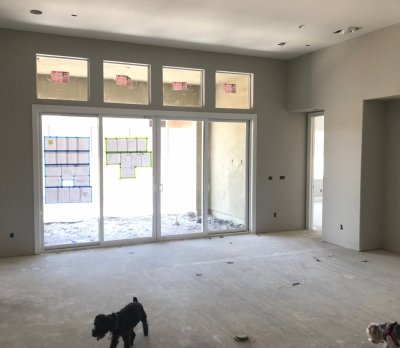
We were able to do significant customization to our house as it was being built. The RSR 650P has a DT of 140g with a 35g sump for a total water volume of 175g. It is 5 feet long and extends from a wall in our great room before entering the master bedroom. It is also adjacent to a large double door sliding glass door. We probably walk by it 100 times a day. Since we were able to choose the flooring we choose 18” tile … waterproof!!! I live in Northern California and since it doesn’t freeze here our homes are on a high tension concrete slab. No basement. Factoring in the weight of the tank wasn’t an issue since it was going on tile on a concrete slab. The tank is going where the white cabinet door is resting in the third picture. There is a lot of tile by design to deal with drips and spills. My last house was dark cherry and we went light in our new house with white & gray. That's why I selected a white tank stand. My dog Macey approves!
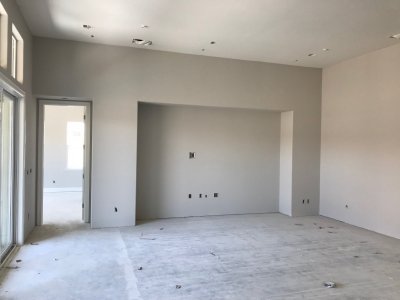
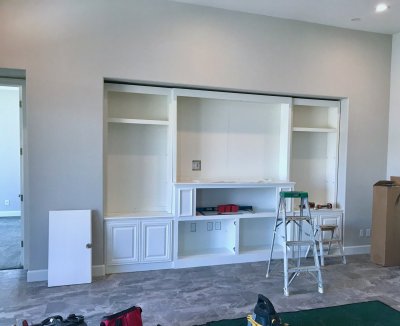
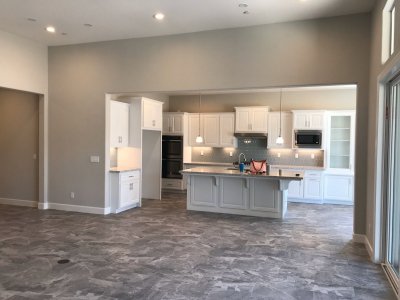

We were able to do significant customization to our house as it was being built. The RSR 650P has a DT of 140g with a 35g sump for a total water volume of 175g. It is 5 feet long and extends from a wall in our great room before entering the master bedroom. It is also adjacent to a large double door sliding glass door. We probably walk by it 100 times a day. Since we were able to choose the flooring we choose 18” tile … waterproof!!! I live in Northern California and since it doesn’t freeze here our homes are on a high tension concrete slab. No basement. Factoring in the weight of the tank wasn’t an issue since it was going on tile on a concrete slab. The tank is going where the white cabinet door is resting in the third picture. There is a lot of tile by design to deal with drips and spills. My last house was dark cherry and we went light in our new house with white & gray. That's why I selected a white tank stand. My dog Macey approves!


- Joined
- May 30, 2020
- Messages
- 386
- Reaction score
- 325
following
Move in date
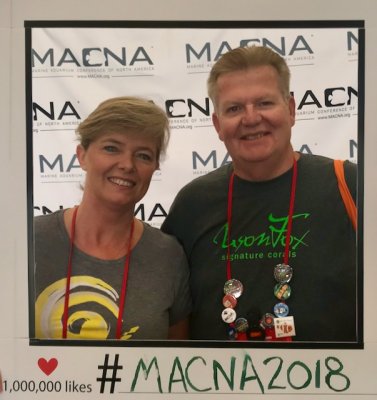
After MACNA 2018 it we finally got the keys and got to move into our new house. I have a terrible back so we hired a moving company (I really do have friends though)
As you could see from my bedazzled RSR 250 tank in the post above I already had a ton of coral to move. My advice when moving is to individually bag each and every coral separately. I didn’t loose any fish, but the coral was another matter. Our move was at the end of August in Northern California. Our old house sold faster than we expected and we only had a week to move out. Two big movers picked up the 280lb tank and put it in the truck and moved it to our new house. Once we got in the house I decided I wanted the doors to be on the opposite side of the tank from where I originally had it assembled. Yikes, I had to work at a panicked pace to make the change before the movers finished so they could set the tank on the stand.
With the tank in place, plumbing reset, old water added back, the pump started again. The problem was I still needed to do the aquascape. I wanted to take my time and do it right so I put in some rock and coral from my old tank. Next up - planning the aquascape.

that is a great spot for your tank ! I think a successful tanks needs to be in view the more the better IMHO.
Aquascape
The aquascape was the most exciting part of the build for me. My 1st tank was the classic rock wall which was a good choice while I learned about fish & coral. My cube tank tiptoed into a more artful design. It’s exciting to me because I have a Masters degree in Fine Arts. It was an opportunity to be creative in the hobby. I also have a Bachelor of Science degree so reefing is an amazing hobby to explore both sides of my brain. NOTE: I’m not saying I’m good at aquascaping, I was just really excited to apply some design elements.
When it comes to design there are a few design methods dating back to the famous Italian Renaissance. Two of the worlds most famous artists lived in two different, but successful camps. Leonardo da Vinci relied on tools for measurements in design accuracy and said “measurement is in the hand.” Michelangelo a contemporary of Leonardo, although much younger, believed “measurement is in the eye.”
In other words, even if it measures right it might not look right. I’m more in Michelangelo’s camp, although I do use a few tools.
Creativity all starts with play. If you need some inspiration on anything get a can of play dough and have some fun.
I knew I wanted to use a combination of pukani shelf rock and real reef branch rock. I also prefer substrate in the tank and love to watch a diamond goby work. To minimize the “snow” from the goby I wanted an “elevated” reef.
Other considerations:
Lots of open or negative space for visual contrast, water flow and lots of hiding places for the fish. Also, since it was a peninsula I only wanted the water flow to come from the overflow side of the tank. Nothing on the end of the peninsula. Given the more power flow on the wall end of the tank I planned on starting with acropora and transitioning to LPS farther away from the powerheads.
I prefer a full looking tank (once mature) so I wanted elements of the rock work to go up at least 1/2 way to the top of the tank.
I’m not a fan of the rule of thirds. Yes, I said it. The rule of thirds is a beginning photography tool. NO WHERE in my design training did anyone use the rule of thirds. I see it taught wrongly all the time.
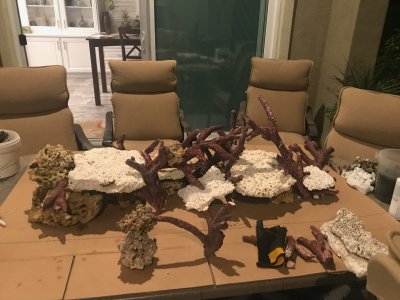
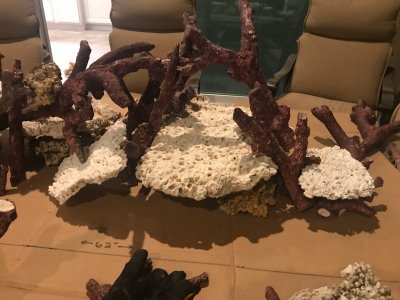
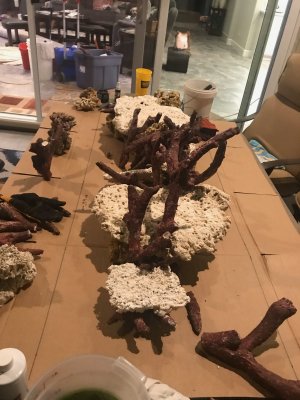
Time to start (sorry this post is so long) Like many I set up cardboard on my patio table to start playing with the rock. I would play then get opinions, then play some more. Once I was happy with the rock work I took pictures and started moving the rock into the tank. Ironically, my final aquascape rock work was quite different than the design I had arrived at on the patio table. It took me a whole day to set it in the tank since it already had water in it and needed the cement/glue to set before adding more rock. The thought crossed my mind that after 3-4 years the coral would grow so dense that the design would be lost in the coral. So the aquascape rock work was set.
What do you think?


- Joined
- May 30, 2020
- Messages
- 386
- Reaction score
- 325
lovely
Following along. I look forward to seeing it wet.
looking good man. I am also excited about aquascaping.
Equipment Purchased:
This will be a boring post, but here is the equipment I purchased. I promise sump pics after I get a full tank shot with coral. Adding coral will be next.
Time to purchase equipment. I’m not including pictures as they are all on the vendor’s websites mentioned below. When I started the tank and needed to add ALK/CA I started with the kalk reactor. I don’t trust it being attached to the ATO as it’s not as consistent as weather changes. I used a BRS 50ml loser on a schedule. I always made sure the dosage was below what was needed by the ATO. Once I out grew the kalk stirrer I started using ESV 2 part.
Neptune Apex - oh gosh! Where do I start? I’m going to save the apex setup until later in the build. I have a ridiculous system with control on everything. Details later.
Purchased from Bulk Reef Supply:
Return Pump: Ecotech Vortech L1
Lights: 4 AI Hydra 26
Skimmer: Skimz SV257 Oval DC Internal Protein Skimmer
Powerheads: 2 Ecotech Vectra MP-40s
Fuge light: Kessel A360 mounted on a hook under the stand
UV light: Pentair 25 watt
Media reactor: BRS single media reactor
Heaters: 2 cobalt 300 watt
ATO - Tunze Osmolator 3155
RODI Reservoir: Trigger 10 gallon ruby red
Dosers: GHL 4 head master and 4 head slave
Battery back-up: 2 Ecotech batteries one for the powerbeads and one for the return pump
Power strips (not including Apex) 2 Kill a watt PS10 usage monitoring power strips
BRS 50 ml doser (for Kalk reactor)
Purchased from Avast Marine:
Kalk Reactor: Avast Marine kalk stirrer
Purchased from Artfully Acrylic:
Aquarium lid: Artfully Acrylic 2 lids each covering 1/2 of the tank. Each has a feed door.
Lowes:
3 18” under the counter lights for stand
Equipment Purchased:
This will be a boring post, but here is the equipment I purchased. I promise sump pics after I get a full tank shot with coral. Adding coral will be next.
Time to purchase equipment. I’m not including pictures as they are all on the vendor’s websites mentioned below. When I started the tank and needed to add ALK/CA I started with the kalk reactor. I don’t trust it being attached to the ATO as it’s not as consistent as weather changes. I used a BRS 50ml loser on a schedule. I always made sure the dosage was below what was needed by the ATO. Once I out grew the kalk stirrer I started using ESV 2 part.
Neptune Apex - oh gosh! Where do I start? I’m going to save the apex setup until later in the build. I have a ridiculous system with control on everything. Details later.
Purchased from Bulk Reef Supply:
Return Pump: Ecotech Vortech L1
Lights: 4 AI Hydra 26
Skimmer: Skimz SV257 Oval DC Internal Protein Skimmer
Powerheads: 2 Ecotech Vectra MP-40s
Fuge light: Kessel A360 mounted on a hook under the stand
UV light: Pentair 25 watt
Media reactor: BRS single media reactor
Heaters: 2 cobalt 300 watt
ATO - Tunze Osmolator 3155
RODI Reservoir: Trigger 10 gallon ruby red
Dosers: GHL 4 head master and 4 head slave
Battery back-up: 2 Ecotech batteries one for the powerbeads and one for the return pump
Power strips (not including Apex) 2 Kill a watt PS10 usage monitoring power strips
BRS 50 ml doser (for Kalk reactor)
Purchased from Avast Marine:
Kalk Reactor: Avast Marine kalk stirrer
Purchased from Artfully Acrylic:
Aquarium lid: Artfully Acrylic 2 lids each covering 1/2 of the tank. Each has a feed door.
Lowes:
3 18” under the counter lights for stand
questions/thoughts
do you think the pentair 25W will work on that many gallons? I have there 40W new in the box but will not fit inside the cabinet was thinking of returning it for the 25W or mount it out side the tank.
i know everyone love the tunze I had one but found it was loud got another pump same so I sold it and got different. hope you have better luck them it.
will the GHL be used for AWC?
some great great there I am sure it was a pretty penny.
keep us posted I am looking forward to your sump and tech cabinet pics.
Similar threads
New Posts
-
Help with Pump placement for an spa dominated aquarium
- Latest: Herbie's Reef
-
-
-
-


