
Navigation
Install the app
How to install the app on iOS
Follow along with the video below to see how to install our site as a web app on your home screen.
Note: This feature may not be available in some browsers.
More options
You are using an out of date browser. It may not display this or other websites correctly.
You should upgrade or use an alternative browser.
You should upgrade or use an alternative browser.
Bagbos Dream Miracles Build - powered by Sfiligoi - Updated 2/8!
- Large Build
- Thread starter soccerbag
- Start date
- Tagged users None


Dave has a good point and I very familiar with the grout. Craig we can use that grout, it is just so expensive. But if Dave can get it wholesale we could take a look at it.
Dave we were going to seal it with the enhancer most likely to deepen the shine on the peebles as we did a test with and without enhancer and I believe we all agreed that the enhanced version was nicer. Craig doesn't do water changes at the tank so spills and such should be at a minimum. That is why I wasn't concerned with using an epoxy. Any suggestions on the corners would be great. We were going to pull off the tiles from the mesh at the edges and hand place them and then grout the corner as that should result in a uniform indentation down the edge. I am certainly no professional and any suggestions would be great.
We should have some good pics later this weekend as soon as I get my butt back from Florida. My job interview is holding up progress!!!! Sorry Craig I'm trying to refocus my priorities.")
Dave we were going to seal it with the enhancer most likely to deepen the shine on the peebles as we did a test with and without enhancer and I believe we all agreed that the enhanced version was nicer. Craig doesn't do water changes at the tank so spills and such should be at a minimum. That is why I wasn't concerned with using an epoxy. Any suggestions on the corners would be great. We were going to pull off the tiles from the mesh at the edges and hand place them and then grout the corner as that should result in a uniform indentation down the edge. I am certainly no professional and any suggestions would be great.
We should have some good pics later this weekend as soon as I get my butt back from Florida. My job interview is holding up progress!!!! Sorry Craig I'm trying to refocus my priorities.
Craig, it would truely be an honor to help you out in any way that i can. Doing the pebbles and making them "wrap the corners will be a bit tricky. I've done a few projects with them (backsplaseses and vanity tops with the edges done). You just have to take your time and carefully select the right pieces so they fit well and look right. As far as the epoxy grout goes I use Laticeretes Specrtraloc. It is very stain resistant and almost non poruos. It also never needs to be sealed. For your application it would mean that you wouldnt have to about any spills or salt creep staining the grout. Also since it is relatively non-porous you don't have to worry about it "growing" things like bacterial type critters. It also has micro ban in it. Any of the cement type grouts will be porous and require periodic sealing. I always use the epoxy grout in wet areas sucha as showers and backsplashes for the same reasons listed above. Also less chance of it fading or washing out over time because it is not a dyed product. If you decide to go with it let me know as i can get wholesale and would be glad to put it in for you if you and Andrew are not comfortable with it.
Dave
OP
OP
My job interview is holding up progress!!!! Sorry Craig I'm trying to refocus my priorities.
Geez...I wasn't gonna say anything, but you really need to get your priorities in order.....

+9999!! mine has grown 2 mm,or less, since i got it...which wasnt that long ago, but who cares i still like my little frag!Slow as molasses! It's beautiful, don't get me wrong....but it's about as slow as they come. Aren't all the good ones?:tongue:
OP
OP
Craig looking good man! Just a few questions about your fixture.. Are the ballast built in? Does it put off much heat?
Clint
Hey Clint - good to hear from you. Hope all is well on your end. Regarding the fixture, the T5 ballasts are built in. However, the 3 250w ballasts are not. This fixture allows you to run either 250w or 400w ballasts. I'll be running 250w's with 20K radiums. The ACLS ballasts from Sfiligoi (I will have 3 - 1 Master and 2 slaves) will drive them. They are incredible ballasts.
Not sure how much heat it will put off. The Sfiligoi T5 Stealth I have now runs very cool but there will be a BIG difference. The fixture is well vented so it will be interesting to see if a chiller is necessary. I'm hoping I can get away with a fan blowing over the sump IF heat becomes an issue.

A few of the really cool features of these ballasts:
-True sunrise / sunset simulation with 0-100 percent dimming capabilities of the halides. I can program for the sun to "rise in the east" and set in the west" - so to speak.
-New bulb feature - when I have to replace the bulbs, no need to cut back the photo period or raise the fixture! The ballast gradually increases the brightness of the bulbs to avoid light shock due to new bulbs.
-I can program cloudy days
-Fixture comes with 6 moonlights and they are completely programmable with the moon cycle.
-T5's will be dimmable as well.
Here is a link to the ballasts. I worked with Tim at Aquatics Elite (R2R sponsor) and I feel this will be exactly what I want!
Sfiligoi ACLS
Hope that answers your questions.
Last edited:

Craig, If you would like i can get the grout for you. I can get the large units for about $40 for the liquids and about another $12-15 for the powder. Probably would take a couple of them to do the entire stand. But once done you will never have to worry about it again! :wink: Let me know what I can do to help.
Dave
Dave

Wow what a beautiful set up. I can't wait to see all up & running. Your frag tank is AWESOME looking Craig
OP
OP
Wow what a beautiful set up. I can't wait to see all up & running. Your frag tank is AWESOME looking Craig
Thank you very much for the comments! And welcome to R2R. I feel very privileged that your first post was on my thread! :bigsmile:
revhtree
Owner Administrator
View Badges
Staff member
Super Moderator
Reef Squad
Partner Member 2024
Excellence Award
RGB
Photo of the Month
Article Contributor
R2R TV Featured
Hospitality Award
Article Administrator
Black Friday Sponsor
Partner Sponsor 2023
Industry Professional
My Aquarium Showcase
- Joined
- May 8, 2006
- Messages
- 47,889
- Reaction score
- 88,299
Welcome to R2R FlowerhornNYC!!

Thanks guys
it's my pleasure to be part of this awesome site
it's my pleasure to be part of this awesome site
OP
OP
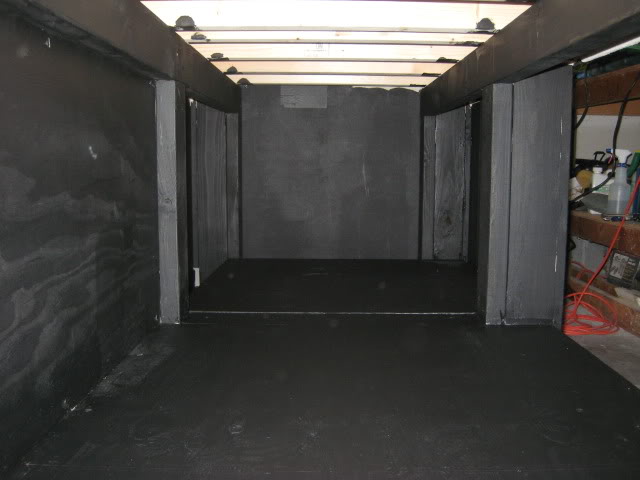
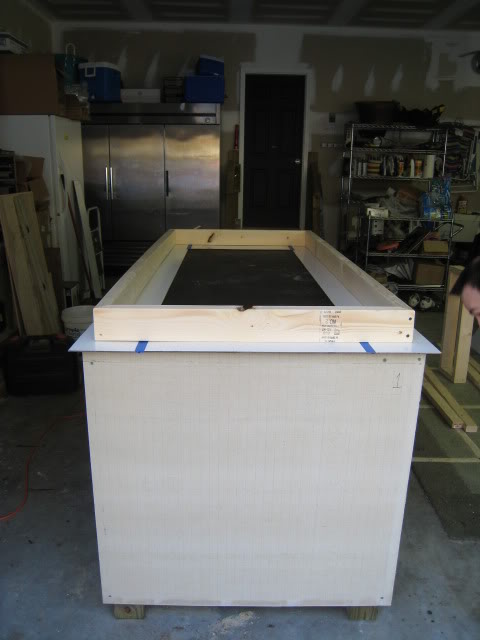
I took tons of pics of the stand being built but I have no idea what I did with them. So all I have are some half-finished shots but it will give you an idea. The stand consists of 6 4x4" posts, cross, braces and a 3/4" sheet of plywood on top. Backer-board was used to frame out the shell where the tile (pebbles) will go. And the openings are the panels (of course).
You can see the 4x4's and cross bracing here - we also put plywood towards the bottom as one side will be for storage and the other for electrical.
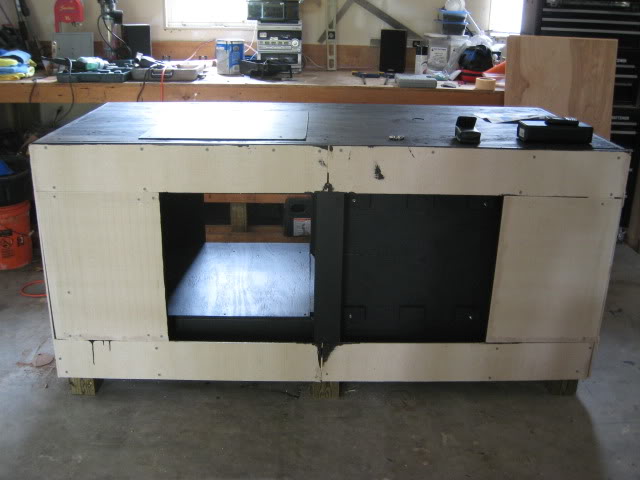
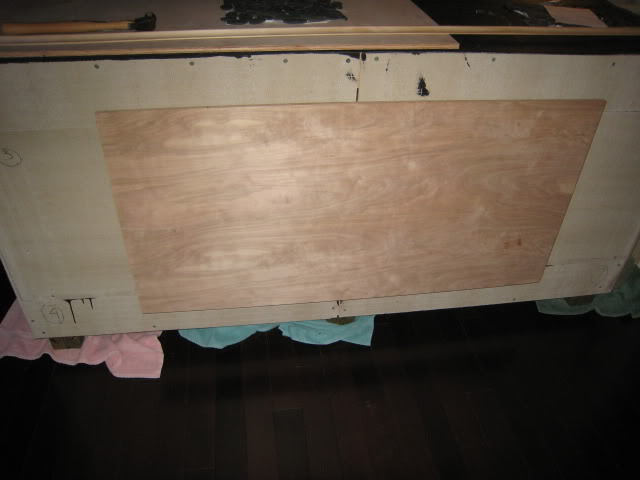
This will be the front side of the tank. The right side of the opening is where the "control panel" will be located (Apex, Vortechs, etc). They will attached to the board that you see and then another board will go over it (with cutouts) to hide all wires and make it look very clean.
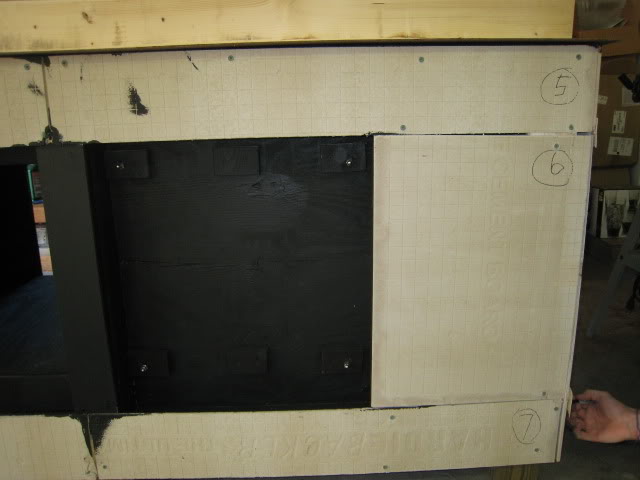
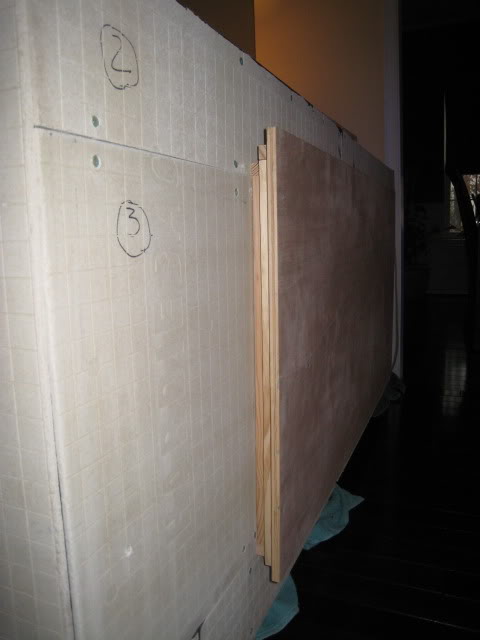
Closer shots of the panel (if you are wondering what the numbers are for, we had to take the backer board off to get it into my house - we didn't trust ourselves to remember which one was which - came in VERY handy)
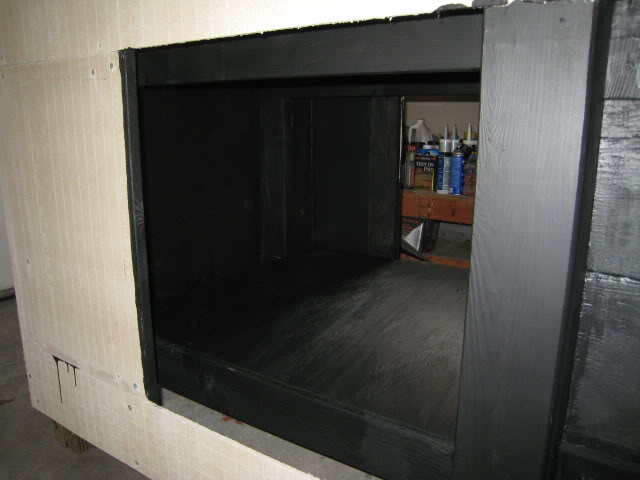
This is the end that will be visible when you walk in the front door. No panel on this side - all stone work.
This is the end that will go pretty close to a wall. There will be enough room to remove this panel as I want to be able to reach the bulkheads if needed.

You can see the 4x4's and cross bracing here - we also put plywood towards the bottom as one side will be for storage and the other for electrical.
This will be the front side of the tank. The right side of the opening is where the "control panel" will be located (Apex, Vortechs, etc). They will attached to the board that you see and then another board will go over it (with cutouts) to hide all wires and make it look very clean.
Closer shots of the panel (if you are wondering what the numbers are for, we had to take the backer board off to get it into my house - we didn't trust ourselves to remember which one was which - came in VERY handy)
This is the end that will be visible when you walk in the front door. No panel on this side - all stone work.
This is the end that will go pretty close to a wall. There will be enough room to remove this panel as I want to be able to reach the bulkheads if needed.
Last edited:
OP
OP
This side will be for storage (towels, etc).
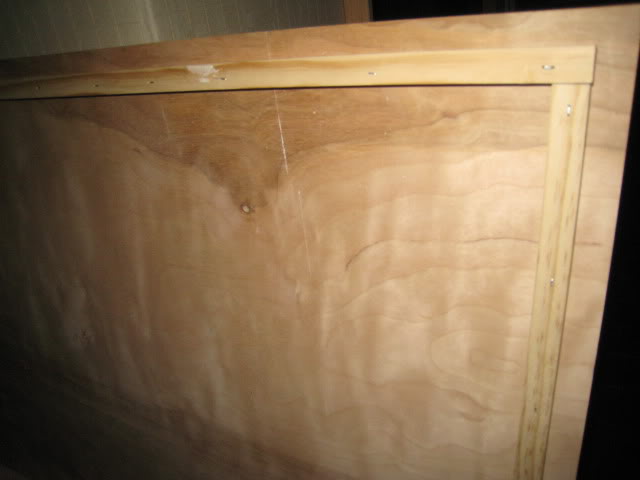
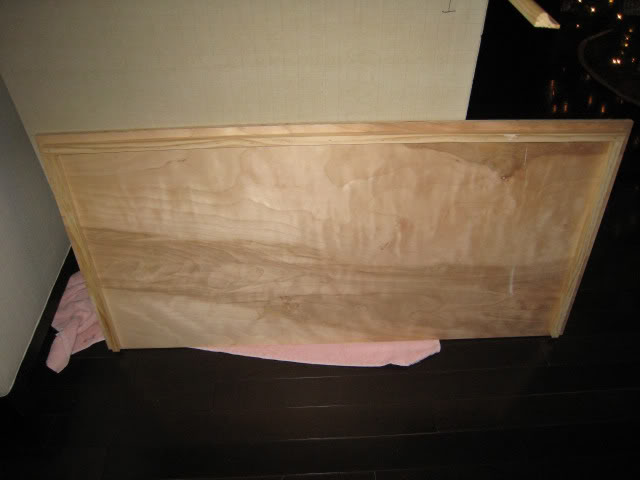
We are using 1/2" plywood for the panels. The two sides are 2' x 4' and the end panel (which mostly will be hidden) is 2'x2'. Here is a pic for reference.
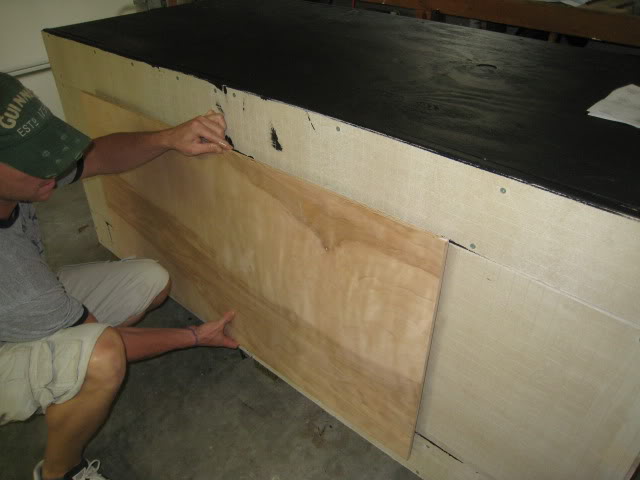
Andrew finally got his priorities in order and helped me last night with the panels.:wink: I will post some pics of one of the finished panels shortly. Well, it won't be finished but it is fastened to the stand the way we want.
We are using 1/2" plywood for the panels. The two sides are 2' x 4' and the end panel (which mostly will be hidden) is 2'x2'. Here is a pic for reference.
Andrew finally got his priorities in order and helped me last night with the panels.:wink: I will post some pics of one of the finished panels shortly. Well, it won't be finished but it is fastened to the stand the way we want.
Last edited:

OP
OP
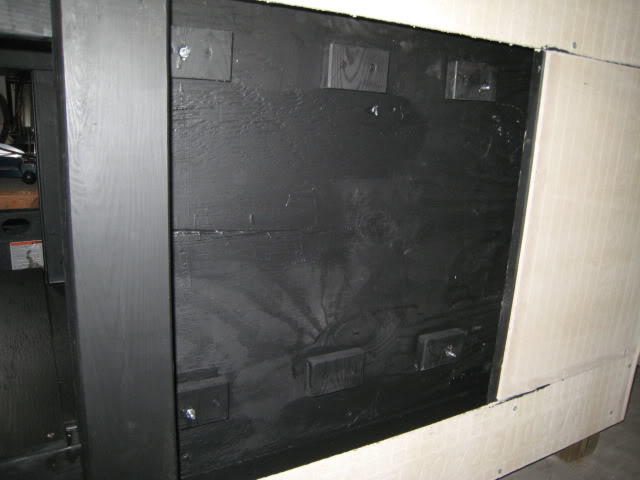
Here are a few shots to show how we will attach the panels.....
Nailed a 4-sided frame to the stand for the panel to rest on
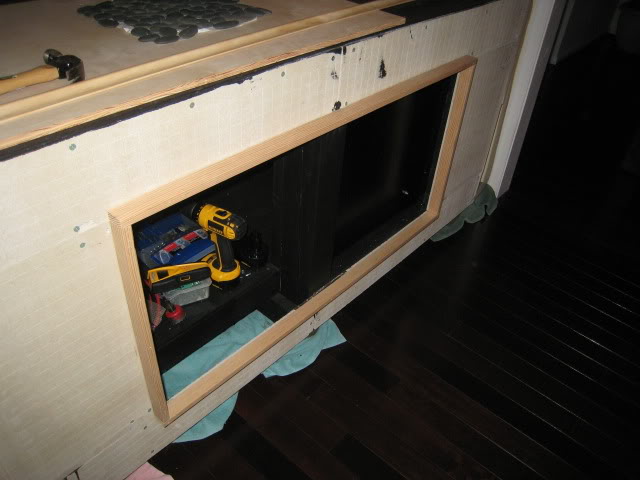
A similar frame to the inside of the panel - slightly larger so that there is a "tad bit" of play when the panel hangs on the stand
Panel site perfectly level and is easy to remove. I placed magnets on the inner and outer frame to eliminate any vibration. They will ensure the panel stays on but it's easy to remove as well.
Side view
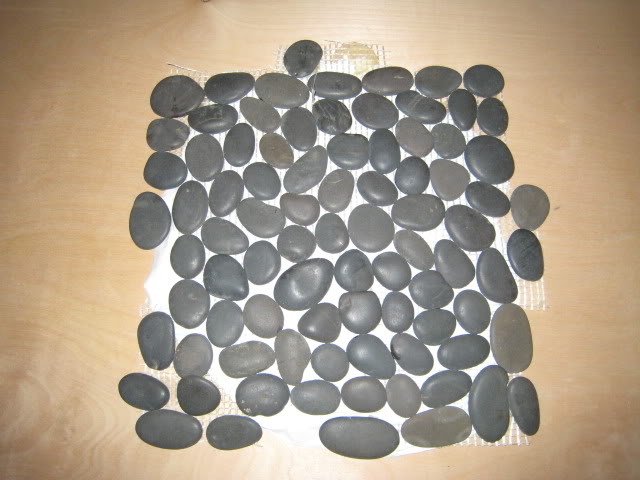
And here is a sample of what the "pebbles" look like. We'll be using a charcoal / light gray grout.
Nailed a 4-sided frame to the stand for the panel to rest on
A similar frame to the inside of the panel - slightly larger so that there is a "tad bit" of play when the panel hangs on the stand
Panel site perfectly level and is easy to remove. I placed magnets on the inner and outer frame to eliminate any vibration. They will ensure the panel stays on but it's easy to remove as well.
Side view
And here is a sample of what the "pebbles" look like. We'll be using a charcoal / light gray grout.
Last edited:
OP
OP
Need some help from any fellow DIY'ers out there. The initial plan was to "wrap" these panels with a very thin sheet of metal - like a brushed nickel color. I am not skilled enough to do this myself as I don't want the corners to be really sharp. I feel certain a metal fabricator would be able to do this. Curious if there are experts here who have done something similar or know how to go about this?
I could wrap the panels with anything really. I don't want to tile them as they will be heavy to remove. I could wrap them in leather or a fabric but don't think that would look good and I really like the initial concept. If you have any ideas, I'm open to hear them for sure!!:bigsmile:
I could wrap the panels with anything really. I don't want to tile them as they will be heavy to remove. I could wrap them in leather or a fabric but don't think that would look good and I really like the initial concept. If you have any ideas, I'm open to hear them for sure!!:bigsmile:
Looking good Craig! I love the stand and selection of tile!

Similar threads
- Replies
- 24
- Views
- 885
- Replies
- 5
- Views
- 170
- Replies
- 18
- Views
- 286
- Price: 4000
- Shipping NOT Available
- Replies
- 15
- Views
- 812


