Ok well not really a build, more like a rebuild...
The back Story:
My Son and I built a 60g cube some time ago, and had a great time doing that together. Since this was his first tank, I let him decide the direction for everything, and he did a really good job.
We bought this tank used, and the tank and stand were in pretty rough shape. So we set out to build what we needed to make it as cool as we could on a limited budget. He insisted that it have an external overflow, and minimal inner weir. So we set out to incorporate that into the build too.
Here is what it looked like in the beginning.

Fast forward a couple years, him growing up and going off to join the Navy, and that left me to care for his tank.
I had a bout of LARS for a while (lazy *** reefer syndrome) and things got a little out of hand.
Aptasia had totally taken over, and a pocillopora had spread everywhere - even growing on the glass!!:eek:
This is what it looked like shortly before the reboot!

One day (must have been especially motivated that day) I thought that I've had enough, and decided to redo/rebuild the tank.
I went into this rebuild with a few objectives:
1. When we built the tank we set the overflow too high and water would sometimes get over the side - it's rimless. I intended to fix that.
2. Minimize a few scratches and haziness in the glass (did I say it was used? Yeah bad idea).
3. I wanted to start fresh with no pests, and especially no APTASIA!!
4. I wanted to do a Bonsai scape and SPS dominant.
So the challenge was upon me and the story begins. If you're still reading I appreciate you sticking around for the ride.
Hopefully my Son will get to follow along with all of us (wherever he is). This build thread is as much for him as it is for anyone.
My first objective was to clean things up and get going on fixing some stuff.
Here's the tank with water and HCL to clean things up - this makes short work of getting coralline and all the old growth out of the tank!;) I even through the skimmer in there so it would be completely submerged.

Here I'm in the midst of using a polisher and Cerium Oxide to polish up the glass as best I could.
This really did a pretty good job, although not perfect. It's a lot better than it was.

Next I needed to tackle lowering the overflow. For some reason I didn't take any pics of that process, but in this pic you can see that the inner overflow is missing - cuz you can see straight through!

Plumbing getting installed...

Like I said before - I neglected to take any pics of replacing the weir - so here's a pic of what it looks like now. It's just a DIY acrylic box, attached with silicone to the inside back of the tank.

So now on to the scape...
For the longest I had been inspired by Bonsai Reefs that you see featured here and the other sites.
Something like this:

If you know who's this is I'd be happy to give credit for the tank/pic, this is one of my all time favorite Bonsai reef pics!
I had always wanted to try something like that and this was my chance.
This is what I came up with. It's not exactly the same as what I had seen before - intentionally so - I wanted something that was my own, and to experiment some.
From the front:

From the left side:

And the Right side:

Hopefully someone likes it (like my Son - since he didn't get to give his opinion during the rebuild).
Here it is on day 1 getting wet!!

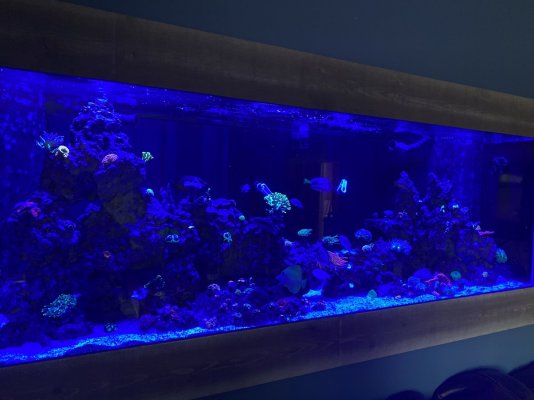
This is 5 days in and I already had to through a frag in there!
I know what you're thinking - but have no fear - no corals were harmed in the making of this build thread!:cool:

Thanks for following along:):) More to come soon!!
The back Story:
My Son and I built a 60g cube some time ago, and had a great time doing that together. Since this was his first tank, I let him decide the direction for everything, and he did a really good job.
We bought this tank used, and the tank and stand were in pretty rough shape. So we set out to build what we needed to make it as cool as we could on a limited budget. He insisted that it have an external overflow, and minimal inner weir. So we set out to incorporate that into the build too.
Here is what it looked like in the beginning.
Fast forward a couple years, him growing up and going off to join the Navy, and that left me to care for his tank.
I had a bout of LARS for a while (lazy *** reefer syndrome) and things got a little out of hand.
Aptasia had totally taken over, and a pocillopora had spread everywhere - even growing on the glass!!:eek:
This is what it looked like shortly before the reboot!
One day (must have been especially motivated that day) I thought that I've had enough, and decided to redo/rebuild the tank.
I went into this rebuild with a few objectives:
1. When we built the tank we set the overflow too high and water would sometimes get over the side - it's rimless. I intended to fix that.
2. Minimize a few scratches and haziness in the glass (did I say it was used? Yeah bad idea).
3. I wanted to start fresh with no pests, and especially no APTASIA!!
4. I wanted to do a Bonsai scape and SPS dominant.
So the challenge was upon me and the story begins. If you're still reading I appreciate you sticking around for the ride.
Hopefully my Son will get to follow along with all of us (wherever he is). This build thread is as much for him as it is for anyone.
My first objective was to clean things up and get going on fixing some stuff.
Here's the tank with water and HCL to clean things up - this makes short work of getting coralline and all the old growth out of the tank!;) I even through the skimmer in there so it would be completely submerged.
Here I'm in the midst of using a polisher and Cerium Oxide to polish up the glass as best I could.
This really did a pretty good job, although not perfect. It's a lot better than it was.
Next I needed to tackle lowering the overflow. For some reason I didn't take any pics of that process, but in this pic you can see that the inner overflow is missing - cuz you can see straight through!
Plumbing getting installed...
Like I said before - I neglected to take any pics of replacing the weir - so here's a pic of what it looks like now. It's just a DIY acrylic box, attached with silicone to the inside back of the tank.
So now on to the scape...
For the longest I had been inspired by Bonsai Reefs that you see featured here and the other sites.
Something like this:
If you know who's this is I'd be happy to give credit for the tank/pic, this is one of my all time favorite Bonsai reef pics!
I had always wanted to try something like that and this was my chance.
This is what I came up with. It's not exactly the same as what I had seen before - intentionally so - I wanted something that was my own, and to experiment some.
From the front:
From the left side:
And the Right side:
Hopefully someone likes it (like my Son - since he didn't get to give his opinion during the rebuild).
Here it is on day 1 getting wet!!
This is 5 days in and I already had to through a frag in there!
I know what you're thinking - but have no fear - no corals were harmed in the making of this build thread!:cool:
Thanks for following along:):) More to come soon!!