Chris's 150 Gallon Mixed Reef Build

cschill2020

New Member
View Badges
Joined
Nov 30, 2021
Messages
20
Reaction score
48
Location
California
Rating - 0%
0   0   0
Hi All,

I am new to the forum and looking forward to learning and engaging with you all! I have been trying to get this aquarium up an running since 2018 and after various delays, life, moving, etc.. I have finally started cycling my main 150 Gallon DT! It was really fun going back through the last 3 years of photos and seeing all the other life that happened in between then and now. I am looking forward to sharing the future evolution.

My starter (fish-only) tank was a smaller 75 gallon acrylic that I picked up for super cheap. The (particleboard) stand started disintegrating, the maintenance was difficult (coralline algae is so hard to clean off acrylic), and the old parts started breaking down. I learned a lot along the way and started researching reef tanks and decided to go for it. My current setup is as follows:

Main DT
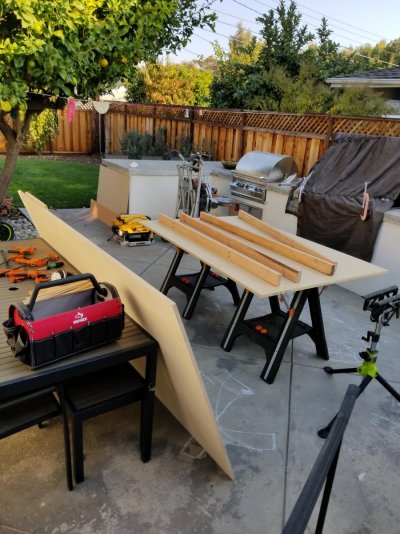
DIY Custom Stand - Cherry Cabinet Plywood
150 Gallon (60x24x24) Eurobrace From Crystal Dynamics
60 Gallon (48x18x18) Ocean Flex Sump
3 Kessil 360x Tuna Blue
BM Curve D9 Protein Skimmer
Neptune Apex Controller
Tunze ATO

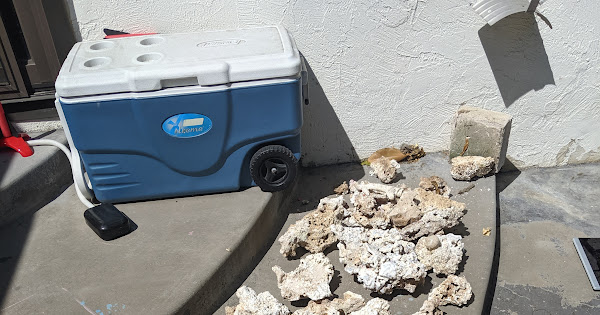
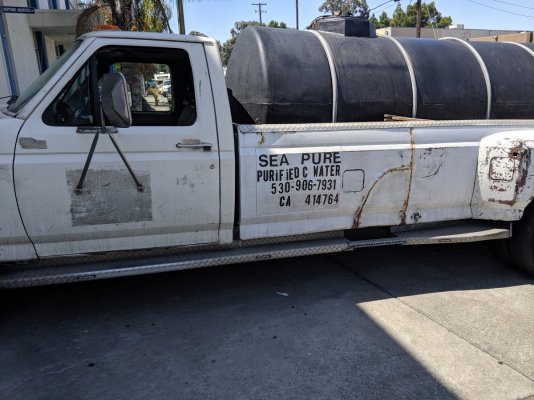
I have an Aqueon 20 and 10 gallon for QT and Hospital tank with Aquaclear HOB filter. I am planning on an Innovative Marine 25 Lagoon for a coral/invert frag and QT tank next to the main DT. I just finished setting up the RODI and salt mixing area and thinking about ways to make water changes easier.

I will reply with a few threads on the different steps I took along the way. The main photo collection is here.

PXL_20211130_013615961.jpg
PXL_20211203_233043547.jpg
 
Last edited:

phillygeeks

Active Member
View Badges
Joined
Nov 6, 2016
Messages
380
Reaction score
199
Location
Spring Lake, MI
Rating - 0%
0   0   0
Welcome! ...and nice start you have going. You can always start a build thread to document your success.

Are you thinking of auto water changes to make things easier?
 
OP
OP
cschill2020

cschill2020

New Member
View Badges
Joined
Nov 30, 2021
Messages
20
Reaction score
48
Location
California
Rating - 0%
0   0   0
As the first aquarium started failing little by little, there were a lot of decisions to make. How to protect the fish while making room for the new gear, new gear choices, placement, making sure the old structure was okay. I was getting nervous about the old stand because there was particle board everywhere and it was just getting worse. I decided to move the old aquarium and quickly built a new stand out of 2x4s and cheap (at the time) plywood so I could check out the damage and make sure the floor was okay. The damage to the old stand was bad but fortunately the floor was okay. After moving the old aquarium I decided pretty quickly to give away my fish as it was going to be a big investment getting the bigger aquarium setup and I didn't want to harm the fish. Fortunately I had only been caring for a few but it was sad as they had been with me for a long time.

The old tank and the hacky stand:
MVIMG_20180726_130637.jpg


MVIMG_20180727_114217.jpg


Moving aquariums is so stressful! I am happy I didn't have a large load in the original tank.
 
OP
OP
cschill2020

cschill2020

New Member
View Badges
Joined
Nov 30, 2021
Messages
20
Reaction score
48
Location
California
Rating - 0%
0   0   0
Welcome! ...and nice start you have going. You can always start a build thread to document your success.

Are you thinking of auto water changes to make things easier?
Thanks! I edited this and added the build thread tag.

Regarding auto water changes, first thing is to determine what size pump I need to run to push the saltwater 50 feet from the mixing tub to the aquarium. I have also seen some auto changes setup using the Apex DOS. I think I will keep it manual for the first year at so while I get used to managing everything else, but defintely exploring options.
 
OP
OP
cschill2020

cschill2020

New Member
View Badges
Joined
Nov 30, 2021
Messages
20
Reaction score
48
Location
California
Rating - 0%
0   0   0
The next step after getting the old tank moved and stable was building the stand. I ended up setting up a mini woodshop in the garage spilling into the yard and spent a lot of time at the LFSs looking and taking pictures inside various cabinets to learn about the load requirements for a 1200+ pound aquarium. This was a great learning experience with many mistakes and course corrections along the way. It was my first major woodworking project with stuff nicer than dimensional pine. I used cherry hardwood and cherry cabinet ply to build the case. I finished with General Finishes stains and poly for protection. The interior was painted with high quality white marine paint.

Making sure everything was square at every step was quite challenging. Some mistakes were harder than others. Definitely had to go back and rebuild major sections of the case before getting a final product I was happy with. Learning how to make frame and panel doors was fun, but the first time through is tedious. Learning how to line everything up (and keep it square) was super difficult. The first set of doors that I made were a complete disaster. I had to rebuild them from scratch.

IMG_20181111_141509.jpg IMG_20181124_153640.jpg

I had to take a break to get skis ready :)
20181213_194619.jpg MVIMG_20181230_112834.jpg IMG_20190605_192100.jpg IMG_20190818_102045.jpg IMG_20190824_180420.jpg
 

Attachments

  • 20181111_085037.jpg
    20181111_085037.jpg
    235.7 KB · Views: 49
OP
OP
cschill2020

cschill2020

New Member
View Badges
Joined
Nov 30, 2021
Messages
20
Reaction score
48
Location
California
Rating - 0%
0   0   0
Finally to the fun stuff! Learning how to do plumbing, aquascaping and actually seeing the first draft of the aquarium come together. By now we are into Fall 2019. And again, I made so many mistakes with plumbing. For instance, I made some bad decisions when plumbing the unions for the overflow:
PXL_20211118_051939379.jpg

And I used 90's from the overflow adding a lot of friction from the horizontal runs:
IMG_20190824_112604.jpg

I setup the ATO using a gravity fed system (30 gallon brute) to a solenoid+float valve and controlled with a Tunze Osmolator.
PXL_20211117_211824186.jpg

I spent a ton of time watching youtube, looking at build threads, and reading about designing aquascapes. Fortunately I had been collecting various rock along the way. I kept it pretty simple and used reef cement to hold everything together. Minimal drilling, chiseling etc....
IMG_20190824_112925.jpg IMG_20190902_111512.jpg MVIMG_20190902_135035.jpg
 

Attachments

  • IMG_20190824_123458.jpg
    IMG_20190824_123458.jpg
    222.2 KB · Views: 44
OP
OP
cschill2020

cschill2020

New Member
View Badges
Joined
Nov 30, 2021
Messages
20
Reaction score
48
Location
California
Rating - 0%
0   0   0
The last year was all over the map. It took a long time to get water, then covid hit, blah blah. I had just started the tank cycling and we decided to start looking for a new place. So that stalled everything over the last year. We moved I finally settled in enough to get going again. So the last few weeks have been stressful, fun, exciting, etc... I took stock of all the gear, cleaned and tested everything. Setup a new RODI/Saltwater mixing station. Planned out the quarantine setups, redid all the plumbing and started the cycle.

The next few weeks and months Ill be spending a lot of time planning out the inhabitants and watching and learning as much as I can on how to take care of fish, corals, and inverts. Definitely going to take it slow and probably will not do too much until I get deeper into the algae cycles. I may try to slowly add a few fish in the next month or 2, but not going to push it too hard.

PXL_20211117_211608926.jpg PXL_20211117_211709435.jpg PXL_20211117_211712305.jpg PXL_20211206_030941489.jpg PXL_20211203_233104566.jpg PXL_20211203_233043547.jpg

Thanks for reading and looking forward to sharing the future progress and learning along the way!
 
OP
OP
cschill2020

cschill2020

New Member
View Badges
Joined
Nov 30, 2021
Messages
20
Reaction score
48
Location
California
Rating - 0%
0   0   0
I decided on the SIcce Ultra Zero Utility Pump for water changes. Fortunately I do not have to worry about head pressure, but I do have ~50ft run from the water mixing station to the aquarium. I also had an drain line drilled into the aquarium which helps with fast water changes. Ill go this route for the first year or so before I think about automating with the Apex+Dos.
Quick question: I assume I would need 2 dos if I want to support AWC and 2-part dosing?

Next on the list was tuning the Synergy Reef Overflow. There are some classic posts in the forums regarding this overflow. Ill share what I did to tune as best I could. I do not know my exact flow, but I am running the Core 20 at ~80%, which I assume is ~1500GPH. I am running into some of the same problems in some of the threads: noise in the weirs, oversized holes in the overflow which was causing the Edrain to leak, and colored plumbing being slightly undersized. I was able to overcome most of this issues that I read about and am fairly happy with the performance for this flow.

I saw this advice and also got the same feedback from synergy:
1. Set the flow rate you plan on running and do not change this. This will cause the overflow to loose it's tuning once set.
2. Open the gate valve 100%
3. Set your primary pipe length high enough that 100% of the flow is going down it only and the rear bulkheads (coming thru the tank) are about 90% covered.
4. Cut your secondary pipe slightly higher than the current running water level in the box. Maybe about 1/2" to 1" higher. This again is subject to your flow rate and can be different on many systems.
5. Leave the "U" Pipe off of the secondary drain. It is only needed in high flow situations and you likely will not need it.
6. Slowly close the gate valve until water starts to slowly flow into the secondary drain. This should start to silence the overflow. If you are having to close it more than 25-50% than the secondary pipe may need to be shortened slightly.

I ended up with the main siphon drain being 3", the secondary durso to be 5" and the Edrain to be 6.5" or so. I found that adding the U to the 2ndary durso helped to increase the water levels in the overflow so I was covering enough of the overflow bulkheads to quiet the incoming water. At 1500 GPH it is difficult to make it completely silent at the overflow, but the sump is very quiet. Overall I am pretty happy with where I ended up. I am pretty confident I could reduce the flow to 1000-1200 and have something very quiet.

To combat the edrain leaking, I added 2 layers of plumbing cement as recommended to the bottom part of the pipe to act as a gasket (let it dry before testing the fit :). I also added some danco silicone grease around the lip of the lid to help combat salt creep.
 
OP
OP
cschill2020

cschill2020

New Member
View Badges
Joined
Nov 30, 2021
Messages
20
Reaction score
48
Location
California
Rating - 0%
0   0   0
Been a while since my last post. I kind of let the aquarium do its thing over the holidays. Went through a bottle of Dr. Tims's Ammonia and it was processing 2ppm ammonia in 24 hours. A couple developments since then:
1) I got my first fish!
2) Some interesting happenings while tweaking my RODI setup.

First the fish:
A pair of Sea and Reef Extreme Snowflake (Amphiprion ocellaris). Even though they are captive bread and from a reputable dealer and the first fish, I thought it would be a good opportunity to practice QT. I'll have to figure out how to take better photos...

PXL_20220119_234853390.MP.jpg PXL_20220121_030906006.jpg

I bought a relatively inexpensive Aqueon 20gal and 10gal aquarium with HOB filter, Eheim Jager heater, and ammonia badge. The 20gal will be in continuous setup as I slowly stock the aquarium over the next few months. The 10gal will be used in case of emergency.

PXL_20211206_030941489.jpg

To setup the QT I took water from the main tank and used a sponge that was seeding in the DT sump for a few weeks. I also added a bio ball from DT.

For the next fish I am researching Tangs, Wrasse, Goby and Blenny.
 
OP
OP
cschill2020

cschill2020

New Member
View Badges
Joined
Nov 30, 2021
Messages
20
Reaction score
48
Location
California
Rating - 0%
0   0   0
Next up was the ATO. I am using Tunze Osmolator. I was using a 5 gallon water jug as a reservoir but I wanted something that didn't need to be refreshed every few days. So I bought a 20 gallon water storage container.

PXL_20220121_025251922.jpg

Here's where things got fun. Today, I decided to fill up the 20 gallon jug so that it was full. The top of the jug is higher than the sump and I didn't think about the siphon once the osmolator pump turned off. The first time the Osmolator alarm went off I thought one of the panels in my sump dropped and raised the water level where the sensor is. The second time I figured out there was a siphon. I do have a float valve as a final layer of protection, so it wasn't a total disaster. Also there is nothing in the DT outside of some diatoms and bacteria :). But the salinity level did drop from 35ppt to 34.1 pretty quickly.

I didn't consider any of this when I purchased the reservoir. I read through a bunch of different ideas in the forum, looked for some solutions from BRS/check valves/siphon breaks etc.

One of the standard solutions is to terminate the output line above the height of the reservoir. Then attach another piece of tubing that has the same ID as the OD of the output line. This allows air to enter and break the siphon. My reservoir was kind of high and I would have had to add various clips and a new float valve, buy new tubing etc to support this.

Another solution is to run the ATO line to the overflow box. I would have had to break the seal on the box and just seems a little messy.

The other thing I saw was to drill a hole in the output line in the reservoir above the water line. This would allow air to enter and break the siphon. You can also buy siphon breaks online. Anyway, I decided to try hacking something around this idea. I drilled a tiny (1/16") hole in an inline push connector and used ca-glue to attach to the cap of the reservoir.
PXL_20220121_024332915.MP.jpg
PXL_20220121_024616757 (1).jpg

The osmolator pump does have to do a bit of extra work and there is a bit more noise when it turns on. I may continue looking for other solutions, but this gets the job done for now.
 
OP
OP
cschill2020

cschill2020

New Member
View Badges
Joined
Nov 30, 2021
Messages
20
Reaction score
48
Location
California
Rating - 0%
0   0   0
I am now maintaining a few tanks.
The QT was wrapped up while the new clowns were settling in.
Our office aquarium is with me during covid. It has a lone tetra.
PXL_20220117_020457346.jpg

I have another 25 gallon IM lagoon ready to setup. I have to find a spot for it. I am planning on using it as a frag/coral QT tank. I think I am going to build a cabinet to hide the ATO reservoir. My other holiday project was this workbench, so I have some good motivation to come up with new projects.
PXL_20220117_215619478 (1).jpg
 

Creating a strong bulwark: Did you consider floor support for your reef tank?

  • I put a major focus on floor support.

    Votes: 53 40.2%
  • I put minimal focus on floor support.

    Votes: 27 20.5%
  • I put no focus on floor support.

    Votes: 48 36.4%
  • Other.

    Votes: 4 3.0%
Back
Top