- Joined
- Oct 23, 2018
- Messages
- 58
- Reaction score
- 79
I started my journey into the salt water community with an existing fresh water system. I am largely still using that system today, but it has morphed quite a bit. I decided I'd start a build thread to show some of what I've done, get some feedback from folks interested, and start trying to share some of my future plans. When I started, my original goal was to try and re-use as much of the existing system as I could, and only add what I needed to to accommodate the shift from fresh water to salt water. My reasons for trying to do this were:
 .
.
Then (September 2018)


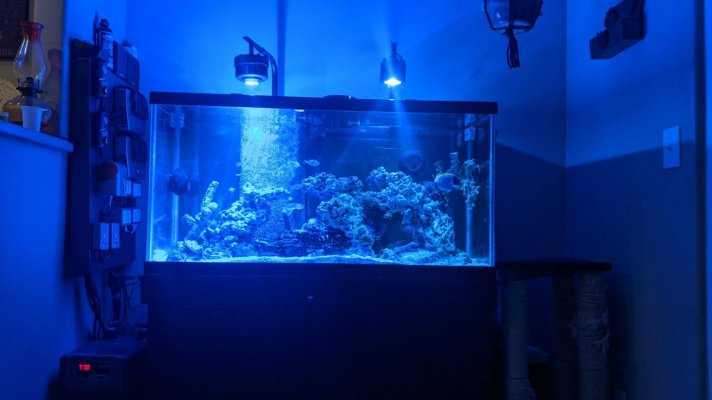
Now (as of October 2021)


Startup Equipment
What I started with
What I started with
Initial Equipment Setup
For my initial setup I opted to get pre-mixed salt water from and almost-lfs (shout-out to the late Paradise, CA pet store ). I tested my tap water before setting up the tank, and didn't like the TDS levels. I did get salt to do my own mixes, but was not comfortable using my tap water. I could've purchased RO/DI water or gone to the vending filtration machines for drinking water (not RO/DI, but better than my tap water.) In the end I opted to start with the lfs pre-mixed water. I figured this would give me a starting baseline to work on hitting in the future.
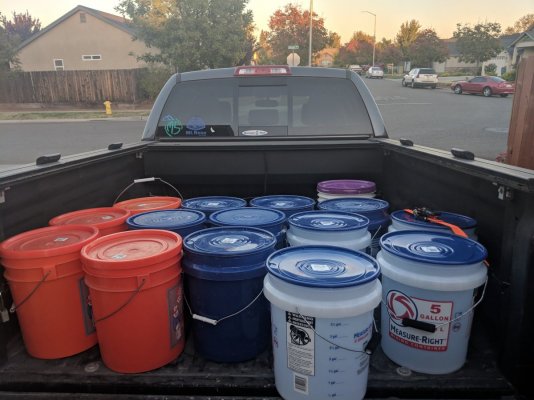
This did wonders for setting my mind at ease for the initial setup. However, after spending the money on this the first time, I would recommend against it for an inital tank setup this size. It is not too difficult to mix salt water, and if you are going to setup a salt water tank, being comfortable with mixing your own will be something you need to get used to eventually. Also, since the first stage is cycling, this is perhaps one of the most forgiving stages for messing up the salinity levels. You have plenty of time to correct the levels while cycling, and gives you practice in adjusting them before there is live residence of the tank that would be negatively impacted.
I filled the tank half way and let it set for a bit to check for drip leaks in the tank, plumbing, and sump (~ 30 minutes or so). After that I filled the tank the rest of the way and plugged everything in.
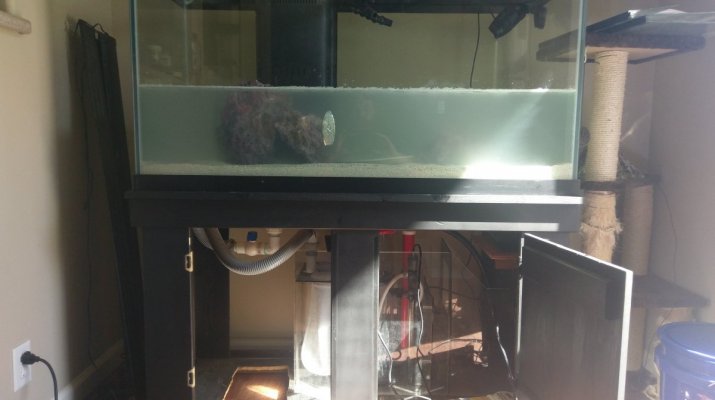
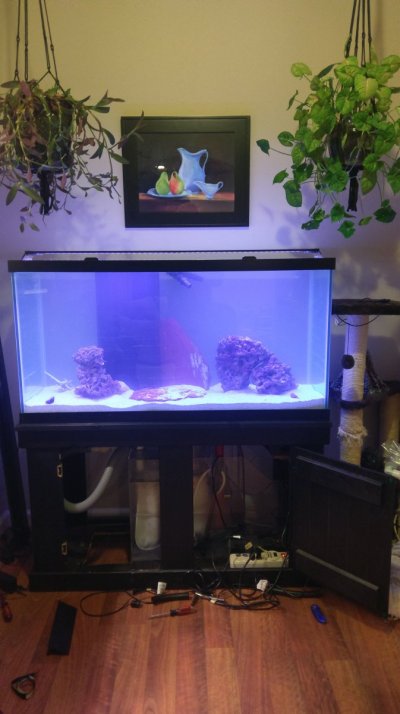
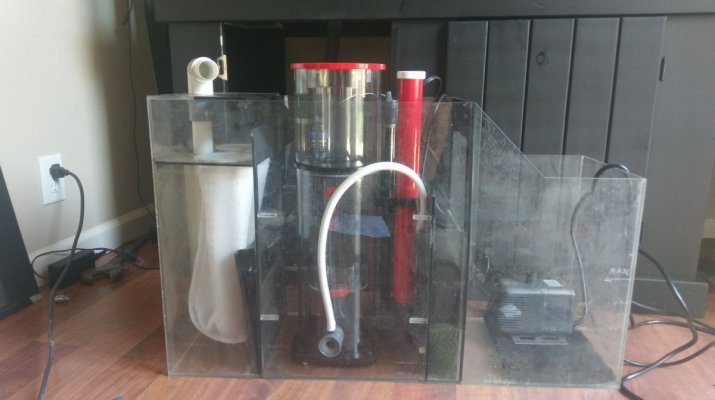
I was originally thinking about having the power strip in the stand but decided against it. There is far too much water in there, and too many opportunities to spill or drip on it. That is a risk anywhere around the tank... but the stand next to the sump seemed to be particularly vulnerable. I am happy with my decision to move it out of there. Later modifications built on moving it out.
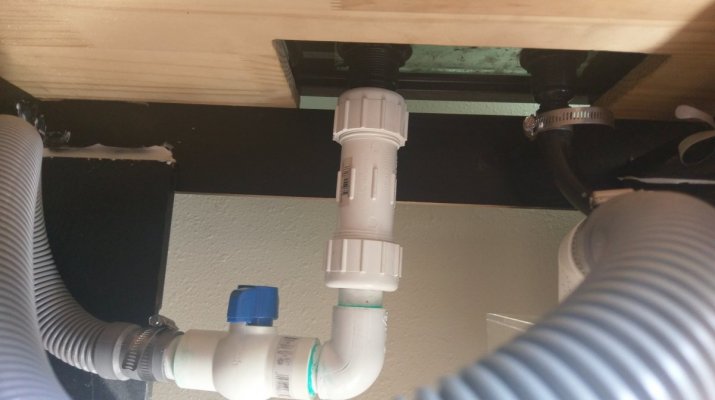
I hated the angles I had to contort to in order to tighten the hose clamps on the bulkheads. I thought that using slips would be easier. I also thought having a ball valve to shut down flow for sump maintenance would be good.
These were both bad ideas that I ultimately regretted. While it was easier to get the slips on and off, and they didn't leak, the took up so much room and made it very difficult to move the sump around in a VERY limited area inside the stand. Also, the ball valve was useless. It was so hard to turn that I was afraid of putting too much lever pressure on the bulkheads in the glass bottom of the tank. I never ended up using it. Also, the overflow takes care of the excess flow for you... this was not a good place to put a ball valve.
The other thing I didn't like about this was the lengthy hose attaching the sump. This was how the fresh water tank was setup, and I didn't want to mess with changing that at the time.
In the end, this plumbing setup worked fine, and it was in place for almost 2 years before changing it. So while I didn't like it, it worked and was not something that caused too much grief.
Ahhh the "live" rock.
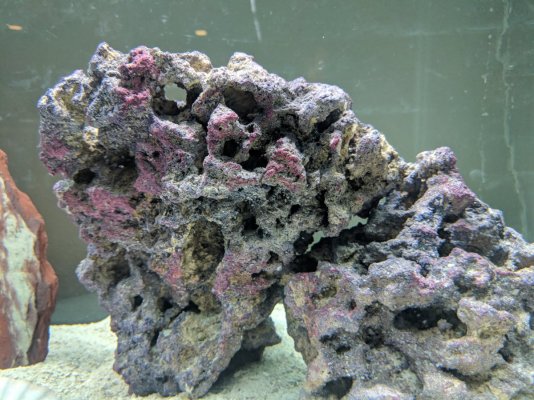 I wanted to start my tank with some live rock. I bought "live" rock from a seller on Amazon. This, in my hindsight opinion, was a mistake. This was nothing but painted reef rock that was sent somewhat wet and wrapped in a cardboard mesh wrap. It worked fine in the tank, but it wasn't the live rock I thought it was, and I don't think I got any benefit from it that one would expect from live rock. To those setting up a new tank and want to get rock, I would recommend:
The Skimmer
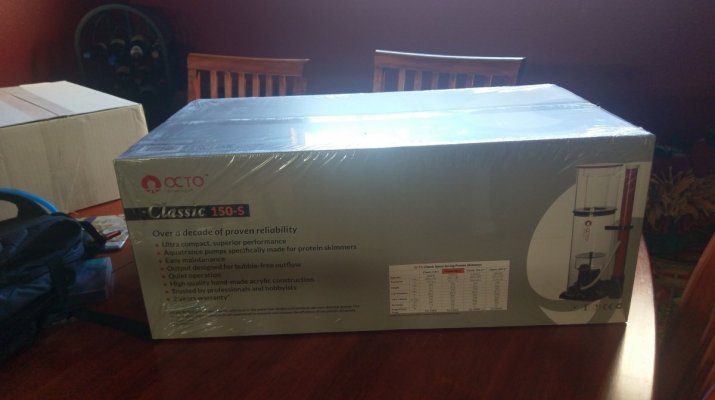
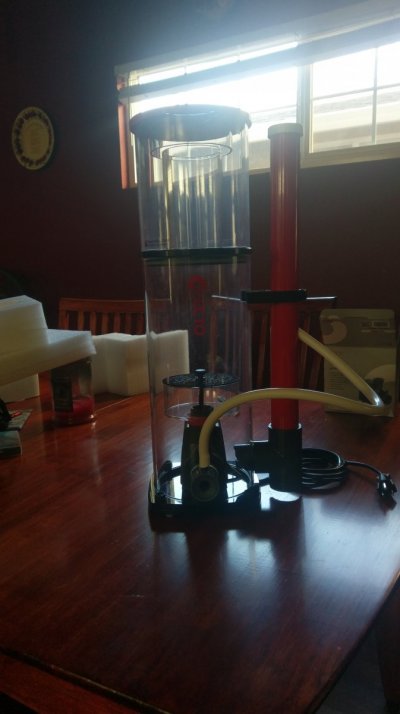
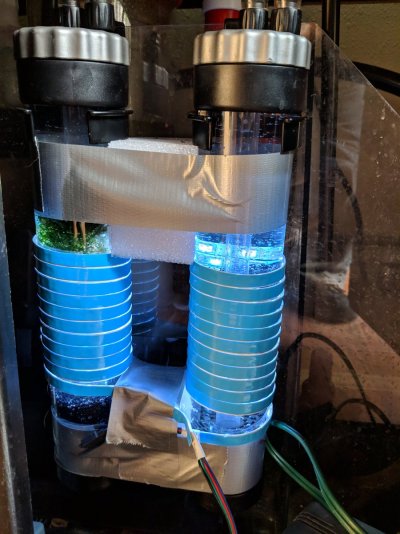
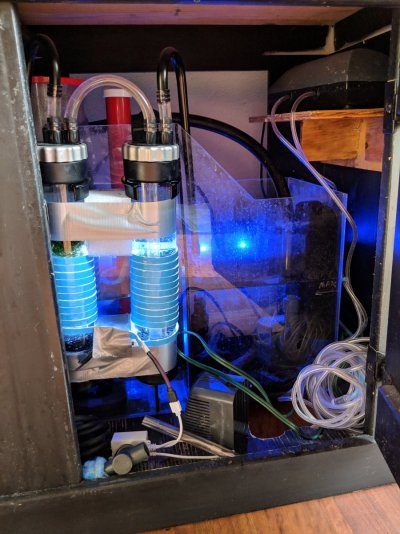
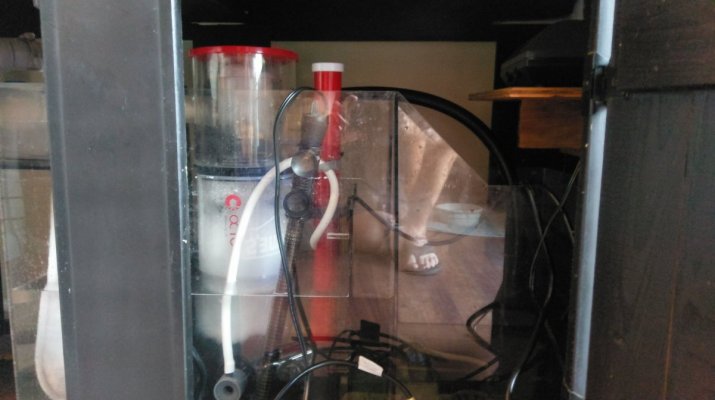
This Reef Octopus 150SSS Classic Protein Skimmer has been great. I needed a compact skimmer that would fit in the sump and the tight cabinet space. I researched protein skimmers quite a bit before purchasing. I found some that I liked more than this one, but they wouldn't fit. This one had such great reviews overall, and it had the goldie-locks dimensions I needed.
I do not regret this decision at all. It is quiet and not too difficult to tune. I still have it, and it is still running great. I have done some very slight modifications to it that I'll talk about later, but I ran it in its stock setup for almost 18 months before tweaking it a little bit.
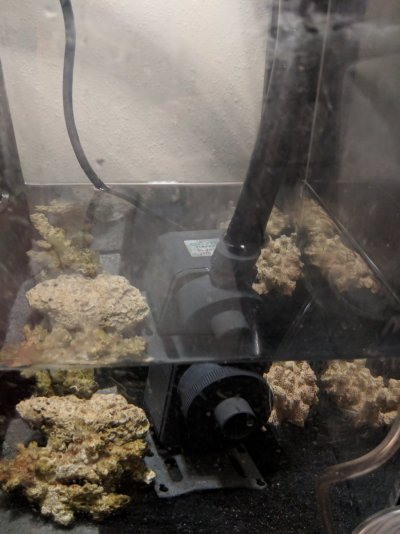
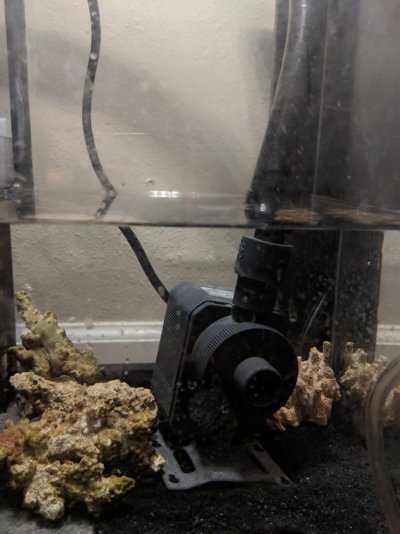
For me, the hardest thing was dialing into how to get the water level in the sump to work with the skimmer. I had zero room to raise or lower the skimmer, so I was completely at the mercy of adjusting the skimmer compartment water levels. I've attached a video of the very first attempt at getting it to skim. This was with all the water needed for the whole system.
Ultimately, adjusting baffles a bit helped to get the water level dialed in with the skimmer. I messed with this for about a week while it was cycling before I got it right.
BTW, the heater in the video and picture... it did not stay there. the heaters went into this section of the sump when it was fresh water, but the skimmer displaced them. I had to have the heater in the display for a little bit. I hid it by having it in the overlfow. While this worked well for me, I don't know that I'd recommend it. I didn't have an issue, but I feel like it is a bit of a gamble that I wouldn't recommend to others.
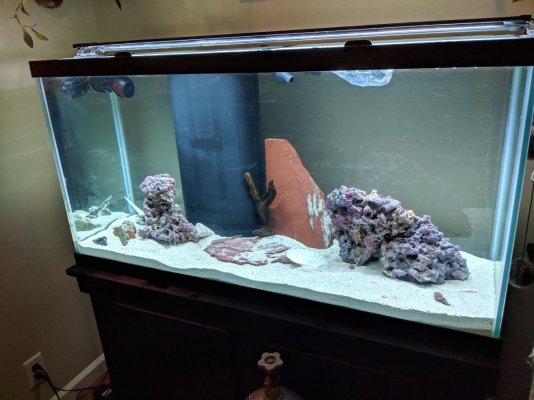
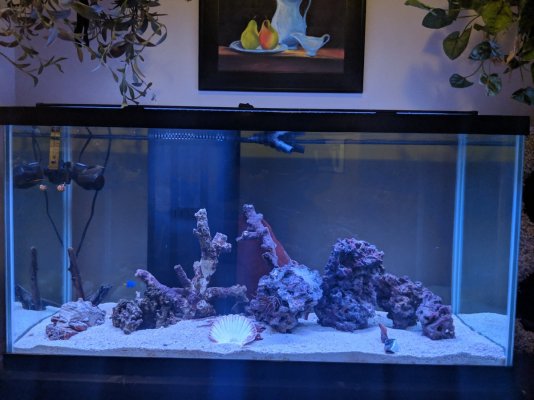
This was the tank at the end of setup day, after the cloudiness had gone down. After this point, I let it cycle for 4 weeks. During that time I moved the aquascape around a bit more, and tinkered with some other tank decorations that came with the tank.
The tank in the bottom of the pic is an CO2 tank. The fresh water tank was setup to run CO2. I ultimately did not use this in the setup, and still don't. I do also dabble with brewing though... so it may have a different purpose in a different hobby.
4 week cycle becomes 6 week cycle
While cycling the tank, I began to notice and obsess about some scratches in the tank. I tried to ignore them... but they drove me nuts. After doing some research, I decided to try buffing them out using cerium oxide. This seemed like the best time to try, since I was still cycling.
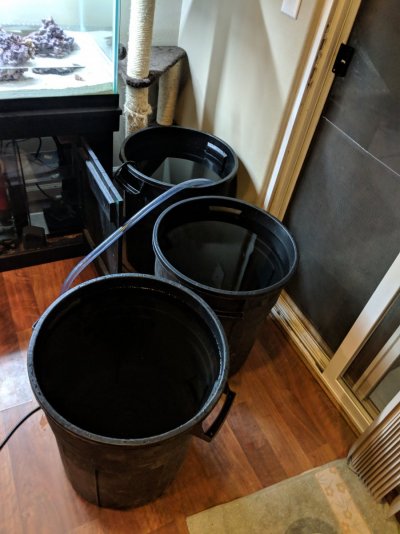
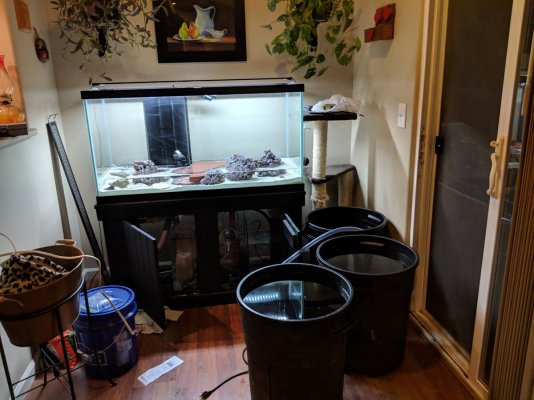
I scrubbed and bleached my recycling bins several times and let them air dry, then used them to drain the majority of the tank. I though I might be able to buff the most annoying culprits out without draining the whole thing. I didn't want to waist the salt water that I had been using in the cycling process.
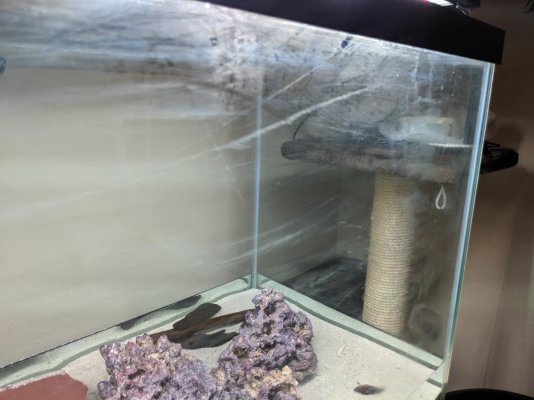
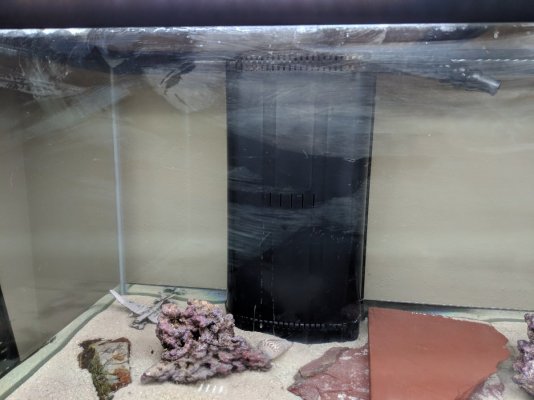
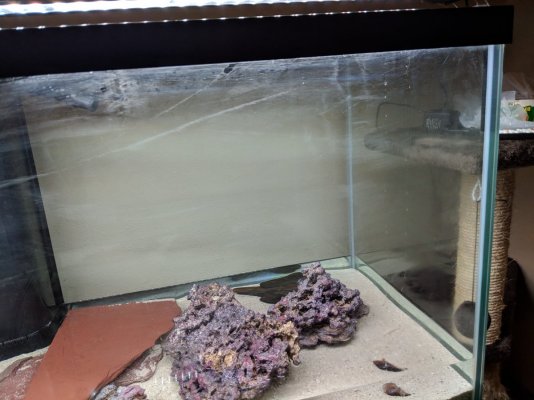
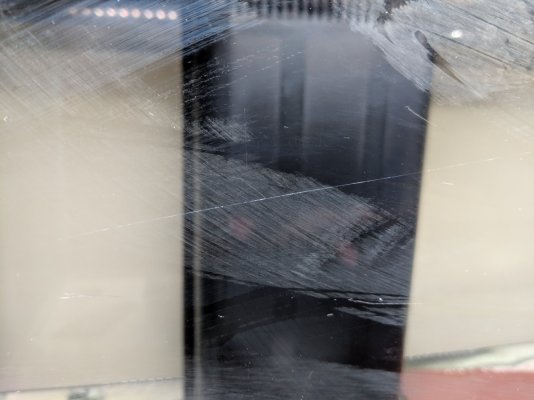
I "tarped" the bottom of the tank. My thought was that this would keep the majority of the cerium oxide out of the sand bed, but if some got through, it likely would not be enough to be a problem for the tank.


I didn't make if far before getting cold feet. Drained the rest of the tank and pulled out all of the sand. Fortunately I had enough 5 gallon buckets to store it all. Once I removed all the water, rock, and substrate; I started to try buffing the glass.
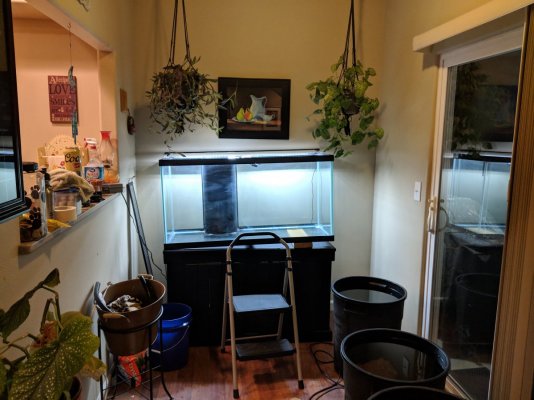
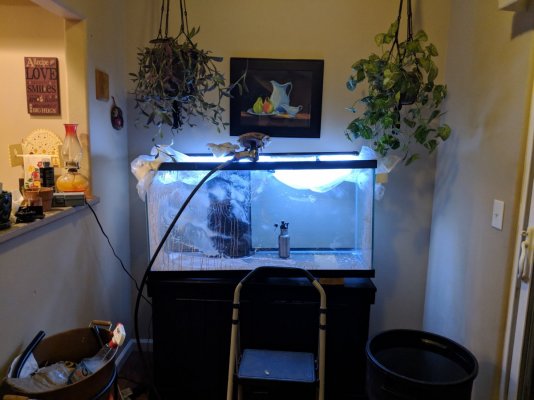
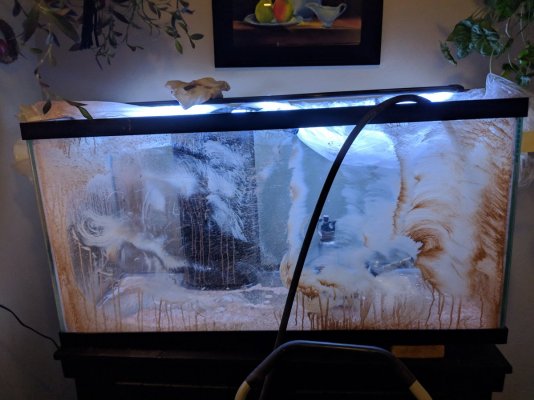
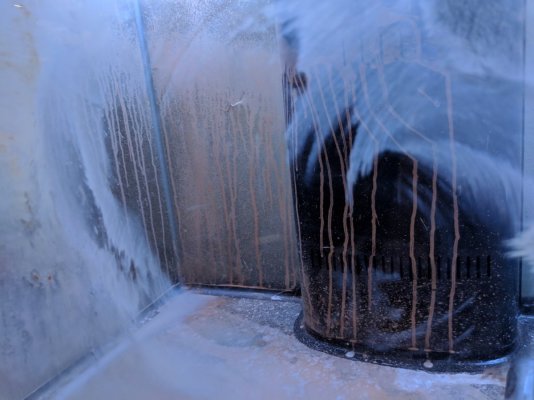
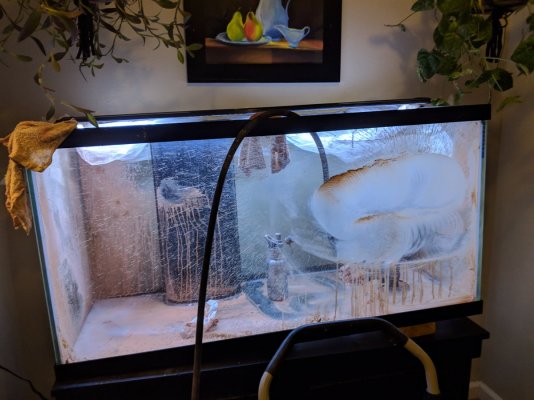
WARNING!!!
DO NOT DO THIS INSIDE IF YOU ARE MARRIED AND VALUE YOUR LIFE AND RELATIONSHIP! (or if your spouse is away on vacation and you have time to clean up before they return.)
This worked pretty well to get out all the minor scratches, but there were some that were so deep that I could not get them out. If I had planned better, and moved this OUTSIDE I might have been able to spend more time trying to smooth out some of the deeper scratches. I Jackson Pollocked the heck out of the room my aquarium was in. I spent more time cleaning up the room than I did buffing out the tank. Tarping was not enough. Between the RPMs of the buffer and how fine the cerium oxide was... this went everywhere. It was coming off of me for days in the shower, even with long sleeve shirt pants, N95 mask and safety glasses. I am alive and still happily married, so the cleanup went well. Once in awhile I still notice a random spec in the aquarium room.
soo much sand... so much sand.
If you wanted to try this to restore an old tank, I think it would work well. I already had the tools, so the only thing I had to buy was the cerium oxide. It worked okay for this, and has worked well on a couple other projects that I've wanted to get scratches out of glass. I would just note that the buffer will heat up the glass so be mindful of how long you are buffing on spot. Take your time. If I ever replace this tank, I want to retry this outside and see if I really could have gotten all the deep scratches out.
After I was done cleaning up the room, I put everything back in the tank. I decided to let it cycle for two more weeks, just to make sure everything stayed where I expected it to. I doubt that was necessary, but I wanted to error on the side of caution.
Initial Inhabitants
I started off with 2 fish, a few snails and hermit crabs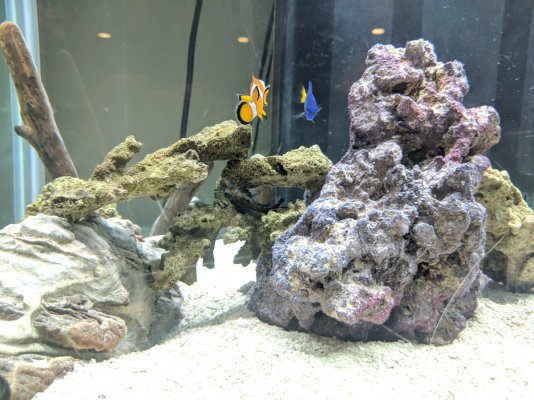
I got some small pieces of actual live rock from the LFS.
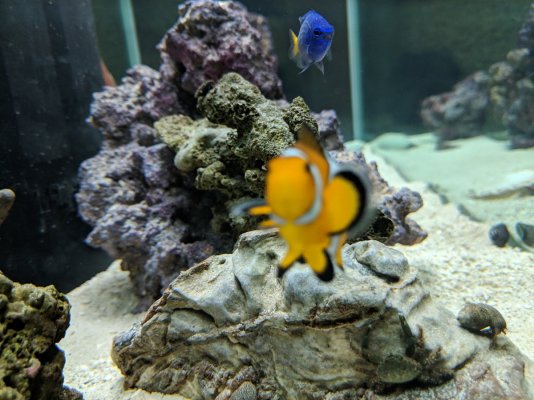
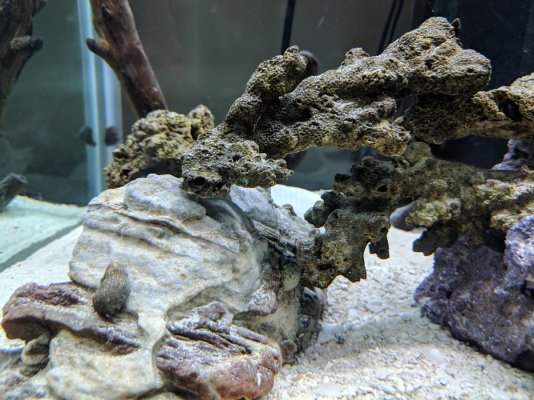
I initially put some in the sump, but ultimately moved it all to either display or inside of the overflow.
After about 4 weeks I got bold and added some additional inhabitants. I really wanted to try out anemones. My preferred local LFS didn't have any, and the next closest one that had salt water inhabitants was a few hours away. While I did find some good ones, the first one I went to wasn't the best. I bought 2 anemones and a sexy shrimp. Once purple-ish in color and the other completely white. I think they were condylactis, but I'm not certain. At the time I thought they were different colors.
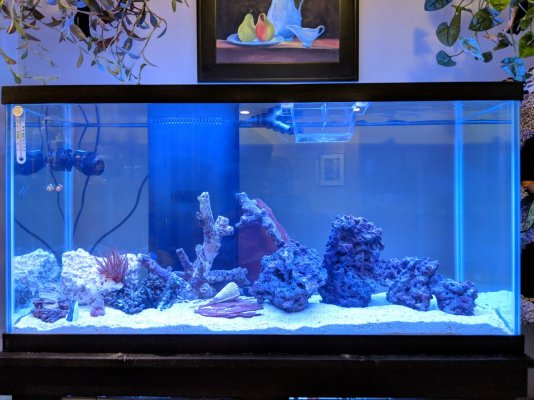
I learned after reading more when getting home that the white one was due to stress. While I wasn't very happy that the rep at the store didn't warn me or let me know; I feel it was partially my fault for not doing enough research first. The sexy shrimp took to the stressed one. I named them Pepe (sexy shrimp) and Penelopi (anemone). I did so because Penelopi would move all over the tank, and no matter where she went... Pepe was there. The other anemone I named Medusa.
In an unexplainable twist, Medusa ended up dying suddenly after a few months. She was the healthier anemone seemed to very suddenly and randomely get and stop eating or staying attached to rocks. Pepe also disappeared after about a year. I was convinced that Penelopi got tired of him and ate him... but I'm not really sure. Penelopi ultimately got healthy again in my tank and is still around today. I actually didn't learn that she was sick until (ironically) she started getting better and it freaked me out that she was changing color.
In the pics above Penelopi is the bleached anemone. Here is a more recent photo of her (from August 2021.)
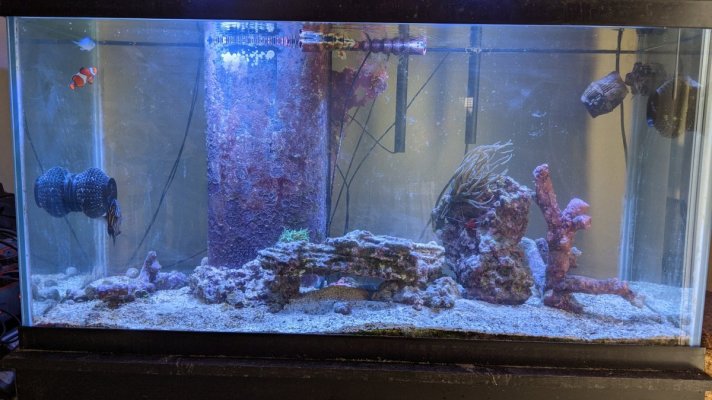
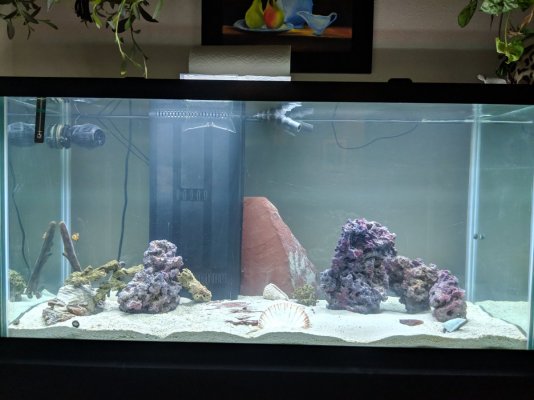
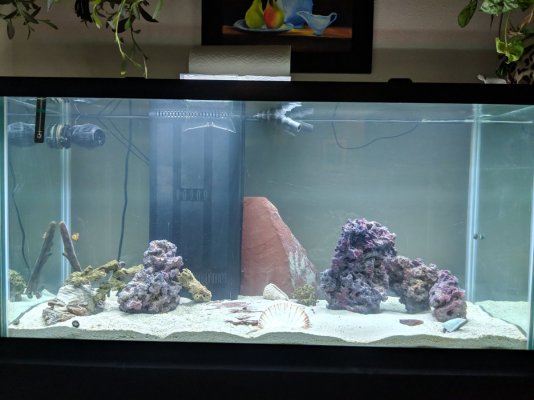
This was pretty much my initial setup.
- Save money by recycling
- Save time on setup
- Recycle existing equipment when possible
- See how much fresh water equipment could cross over for use in salt water setups
- Have an excuse for doing some DIY projects
- Inhabitants
- Equipment
Then (September 2018)
Now (as of October 2021)
Startup Equipment
What I started with
- 18"x48"x24" tank (~ 90 gallons)
- 18"x48"x28" stand
- 10"x18"x14" Fresh water sump (~ 10 gallons)
- 3 different LED light strips
- Rio 2500 return pump (+ spare that I don't remember the brand)
- Aerator
- Assorted slate and decorative rock
- Assorted aquarium decorations and shells
- In-tank/sump aquarium heater
- 1 wave pump
- Plastic bioballs
- Reef Octopus 150SSS Classic Protein Skimmer
- 20 lbs of "live" rock
- 2 bags of Caribbean Sea live sand (40 lbs each)
What I started with
- 1 Clown Fish
- 1 Blue Damsel
Initial Equipment Setup
For my initial setup I opted to get pre-mixed salt water from and almost-lfs (shout-out to the late Paradise, CA pet store ). I tested my tap water before setting up the tank, and didn't like the TDS levels. I did get salt to do my own mixes, but was not comfortable using my tap water. I could've purchased RO/DI water or gone to the vending filtration machines for drinking water (not RO/DI, but better than my tap water.) In the end I opted to start with the lfs pre-mixed water. I figured this would give me a starting baseline to work on hitting in the future.

This did wonders for setting my mind at ease for the initial setup. However, after spending the money on this the first time, I would recommend against it for an inital tank setup this size. It is not too difficult to mix salt water, and if you are going to setup a salt water tank, being comfortable with mixing your own will be something you need to get used to eventually. Also, since the first stage is cycling, this is perhaps one of the most forgiving stages for messing up the salinity levels. You have plenty of time to correct the levels while cycling, and gives you practice in adjusting them before there is live residence of the tank that would be negatively impacted.
I filled the tank half way and let it set for a bit to check for drip leaks in the tank, plumbing, and sump (~ 30 minutes or so). After that I filled the tank the rest of the way and plugged everything in.


I was originally thinking about having the power strip in the stand but decided against it. There is far too much water in there, and too many opportunities to spill or drip on it. That is a risk anywhere around the tank... but the stand next to the sump seemed to be particularly vulnerable. I am happy with my decision to move it out of there. Later modifications built on moving it out.
I hated the angles I had to contort to in order to tighten the hose clamps on the bulkheads. I thought that using slips would be easier. I also thought having a ball valve to shut down flow for sump maintenance would be good.
These were both bad ideas that I ultimately regretted. While it was easier to get the slips on and off, and they didn't leak, the took up so much room and made it very difficult to move the sump around in a VERY limited area inside the stand. Also, the ball valve was useless. It was so hard to turn that I was afraid of putting too much lever pressure on the bulkheads in the glass bottom of the tank. I never ended up using it. Also, the overflow takes care of the excess flow for you... this was not a good place to put a ball valve.
The other thing I didn't like about this was the lengthy hose attaching the sump. This was how the fresh water tank was setup, and I didn't want to mess with changing that at the time.
In the end, this plumbing setup worked fine, and it was in place for almost 2 years before changing it. So while I didn't like it, it worked and was not something that caused too much grief.
Ahhh the "live" rock.
 I wanted to start my tank with some live rock. I bought "live" rock from a seller on Amazon. This, in my hindsight opinion, was a mistake. This was nothing but painted reef rock that was sent somewhat wet and wrapped in a cardboard mesh wrap. It worked fine in the tank, but it wasn't the live rock I thought it was, and I don't think I got any benefit from it that one would expect from live rock. To those setting up a new tank and want to get rock, I would recommend:
- If you want live rock, get it from your reputable LFS or a friend that keeps a healthy tank.
- I think what is better for an initial tank setup is getting dry rock, and cycling it separately or with the tank during it's cycle.
The Skimmer


This Reef Octopus 150SSS Classic Protein Skimmer has been great. I needed a compact skimmer that would fit in the sump and the tight cabinet space. I researched protein skimmers quite a bit before purchasing. I found some that I liked more than this one, but they wouldn't fit. This one had such great reviews overall, and it had the goldie-locks dimensions I needed.
I do not regret this decision at all. It is quiet and not too difficult to tune. I still have it, and it is still running great. I have done some very slight modifications to it that I'll talk about later, but I ran it in its stock setup for almost 18 months before tweaking it a little bit.
For me, the hardest thing was dialing into how to get the water level in the sump to work with the skimmer. I had zero room to raise or lower the skimmer, so I was completely at the mercy of adjusting the skimmer compartment water levels. I've attached a video of the very first attempt at getting it to skim. This was with all the water needed for the whole system.
Ultimately, adjusting baffles a bit helped to get the water level dialed in with the skimmer. I messed with this for about a week while it was cycling before I got it right.
BTW, the heater in the video and picture... it did not stay there. the heaters went into this section of the sump when it was fresh water, but the skimmer displaced them. I had to have the heater in the display for a little bit. I hid it by having it in the overlfow. While this worked well for me, I don't know that I'd recommend it. I didn't have an issue, but I feel like it is a bit of a gamble that I wouldn't recommend to others.

This was the tank at the end of setup day, after the cloudiness had gone down. After this point, I let it cycle for 4 weeks. During that time I moved the aquascape around a bit more, and tinkered with some other tank decorations that came with the tank.
The tank in the bottom of the pic is an CO2 tank. The fresh water tank was setup to run CO2. I ultimately did not use this in the setup, and still don't. I do also dabble with brewing though... so it may have a different purpose in a different hobby.
4 week cycle becomes 6 week cycle
While cycling the tank, I began to notice and obsess about some scratches in the tank. I tried to ignore them... but they drove me nuts. After doing some research, I decided to try buffing them out using cerium oxide. This seemed like the best time to try, since I was still cycling.


I scrubbed and bleached my recycling bins several times and let them air dry, then used them to drain the majority of the tank. I though I might be able to buff the most annoying culprits out without draining the whole thing. I didn't want to waist the salt water that I had been using in the cycling process.


I "tarped" the bottom of the tank. My thought was that this would keep the majority of the cerium oxide out of the sand bed, but if some got through, it likely would not be enough to be a problem for the tank.
I didn't make if far before getting cold feet. Drained the rest of the tank and pulled out all of the sand. Fortunately I had enough 5 gallon buckets to store it all. Once I removed all the water, rock, and substrate; I started to try buffing the glass.


WARNING!!!
DO NOT DO THIS INSIDE IF YOU ARE MARRIED AND VALUE YOUR LIFE AND RELATIONSHIP! (or if your spouse is away on vacation and you have time to clean up before they return.)
This worked pretty well to get out all the minor scratches, but there were some that were so deep that I could not get them out. If I had planned better, and moved this OUTSIDE I might have been able to spend more time trying to smooth out some of the deeper scratches. I Jackson Pollocked the heck out of the room my aquarium was in. I spent more time cleaning up the room than I did buffing out the tank. Tarping was not enough. Between the RPMs of the buffer and how fine the cerium oxide was... this went everywhere. It was coming off of me for days in the shower, even with long sleeve shirt pants, N95 mask and safety glasses. I am alive and still happily married, so the cleanup went well. Once in awhile I still notice a random spec in the aquarium room.
soo much sand... so much sand.
If you wanted to try this to restore an old tank, I think it would work well. I already had the tools, so the only thing I had to buy was the cerium oxide. It worked okay for this, and has worked well on a couple other projects that I've wanted to get scratches out of glass. I would just note that the buffer will heat up the glass so be mindful of how long you are buffing on spot. Take your time. If I ever replace this tank, I want to retry this outside and see if I really could have gotten all the deep scratches out.
After I was done cleaning up the room, I put everything back in the tank. I decided to let it cycle for two more weeks, just to make sure everything stayed where I expected it to. I doubt that was necessary, but I wanted to error on the side of caution.
Initial Inhabitants
I started off with 2 fish, a few snails and hermit crabs

- 1 Ocellaris Clown Fish (Dog)
- 1 Yellow Tail Blue Damsel (Cat)
- Some margarita snails
- Some red
I got some small pieces of actual live rock from the LFS.


I initially put some in the sump, but ultimately moved it all to either display or inside of the overflow.


After about 4 weeks I got bold and added some additional inhabitants. I really wanted to try out anemones. My preferred local LFS didn't have any, and the next closest one that had salt water inhabitants was a few hours away. While I did find some good ones, the first one I went to wasn't the best. I bought 2 anemones and a sexy shrimp. Once purple-ish in color and the other completely white. I think they were condylactis, but I'm not certain. At the time I thought they were different colors.


I learned after reading more when getting home that the white one was due to stress. While I wasn't very happy that the rep at the store didn't warn me or let me know; I feel it was partially my fault for not doing enough research first. The sexy shrimp took to the stressed one. I named them Pepe (sexy shrimp) and Penelopi (anemone). I did so because Penelopi would move all over the tank, and no matter where she went... Pepe was there. The other anemone I named Medusa.
In an unexplainable twist, Medusa ended up dying suddenly after a few months. She was the healthier anemone seemed to very suddenly and randomely get and stop eating or staying attached to rocks. Pepe also disappeared after about a year. I was convinced that Penelopi got tired of him and ate him... but I'm not really sure. Penelopi ultimately got healthy again in my tank and is still around today. I actually didn't learn that she was sick until (ironically) she started getting better and it freaked me out that she was changing color.
In the pics above Penelopi is the bleached anemone. Here is a more recent photo of her (from August 2021.)


This was pretty much my initial setup.
Last edited:


