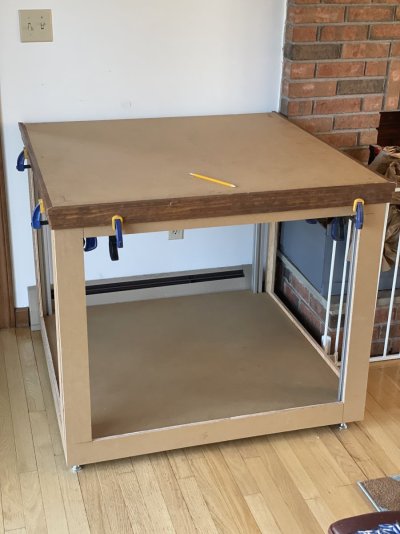
So a little update, here is my stand for the tank. It’s all 15 series extruded aluminum, either 1515 or 1530. It was cut and machined by Tnutz.com. Everything fit together nicely and assembled pretty easily.
the stand dimensions are 37”x37”x33”. I then will be skinning the stand with 1/2” plywood on the sides and 3/4” plywood on the top. I bought a type of plywood called MDO. It’s an exterior grade plywood that you’ve probably seen everywhere and never knew it. It’s the plywood that’s used on all the temporary constructions signs that you drive past everywhere.
I’ve got a 40 gallon breeder tank from Petco that I purchased after Christmas during a 50% off sale. I got an additional 10% off for ordering it online and picking up in the store. All said and done it was just over $50 after tax.
My plan is to have the sump off to the left side so that I’ll have easy access from 2 sides on it. On the right side I plan on putting some kind of cabinet for all the electrical but still haven’t ironed out how I’m going to accomplish that yet. Also need to figure out where I want to put an ato tank as well under the stand.
Getting some more time in on the stand, sorry no pictures at the moment. It’s getting close though, looking to paint it here this week hopefully.
And now for the fun part, what color to paint it. I plan on using a light or white color for the inside. The outside I’m debating whether to go with a gray or go big with a bold color. Also wondering about making the doors a different color than the rest of it. If I was to do that, think I’d go with a darker paint for the stand and a light color for the doors and trim I’ll be putting around the base of the tank once the tank is sitting on it.
Also had an idea tonight that I think I’ll try to incorporate into the build. Thinking I’ll make a shelf with 2 rods sticking out on one side that would slip into holes drilled in the trim around the tank to allow a bigger work area for tank maintenance but not be permanent, taking up space in the room.
So last weekend was a disaster working on the tank. Took me the week to recover mentally from it before I could talk about the horrors.
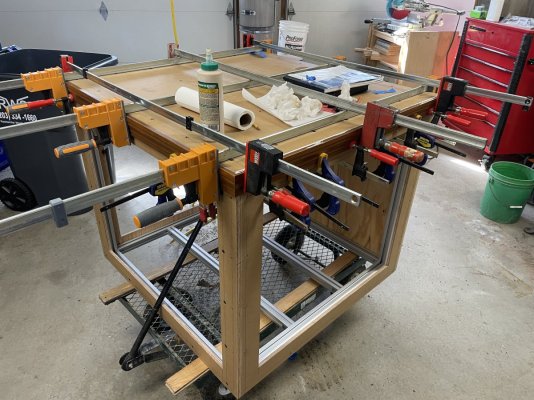
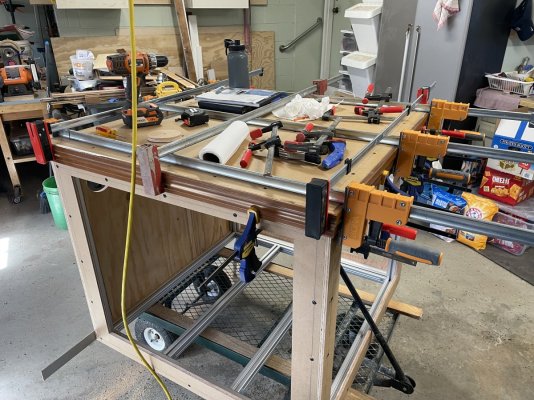
No I didn’t break the tank, let’s not get too crazy now. I worked on glueing up the trim pieces on the top edge and afterwards found out that the glue didn’t stick so now need to figure out a new plan.
Then on top of that decided I’d start priming some of the pieces and partway through bumped my paint tray and got paint on the garage floor. Got that cleaned up and then went back to priming. Realized later on that apparently when the tray fell it cracked so I had been dripping paint all over again. Soooo round 2 of pouring water on the floor and scrubbing it commenced.
It was after all that when I discovered the glue wasn’t sticking.
On a happier note, stopped yesterday at the local hardware store to look at some new paint colors. The samples I grabbed last year were a little too bold so found some more muted blues and grays that I think will work better.
While talking with the guys at the paint department got their interest real quick when I said it was for a fish tank stand as both of them have had tanks over the years. One of them grew up working in a fish store since his dad owned a couple of them and had all sorts of different fish over the years.
So last weekend was a disaster working on the tank. Took me the week to recover mentally from it before I could talk about the horrors.
No I didn’t break the tank, let’s not get too crazy now. I worked on glueing up the trim pieces on the top edge and afterwards found out that the glue didn’t stick so now need to figure out a new plan.
Then on top of that decided I’d start priming some of the pieces and partway through bumped my paint tray and got paint on the garage floor. Got that cleaned up and then went back to priming. Realized later on that apparently when the tray fell it cracked so I had been dripping paint all over again. Soooo round 2 of pouring water on the floor and scrubbing it commenced.
It was after all that when I discovered the glue wasn’t sticking.
Sorry to hear about your challenges. Did you determine why the glue wasn't sticking? Looks like you are using Titebond III and that's normally a pretty good glue.
On a happier note, stopped yesterday at the local hardware store to look at some new paint colors. The samples I grabbed last year were a little too bold so found some more muted blues and grays that I think will work better.
While talking with the guys at the paint department got their interest real quick when I said it was for a fish tank stand as both of them have had tanks over the years. One of them grew up working in a fish store since his dad owned a couple of them and had all sorts of different fish over the years.
Sorry to hear about your challenges. Did you determine why the glue wasn't sticking? Looks like you are using Titebond III and that's normally a pretty good glue.
Ya it’s a good glue. My first thought is it was old but I took a look at something else I glued recently and it was strong. My new theory is the top piece might have been just a smidge too big and didn’t allow the trim to sit flush and left a slight gap and poor joint. I had one piece that held and the 2 side pieces didn’t. I’m going to clean them up and retry it, using a different method of glueing it up.
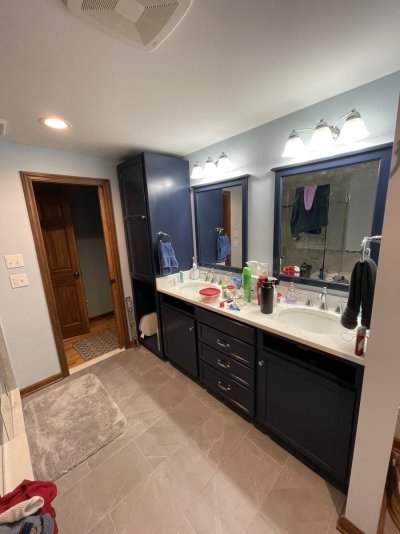
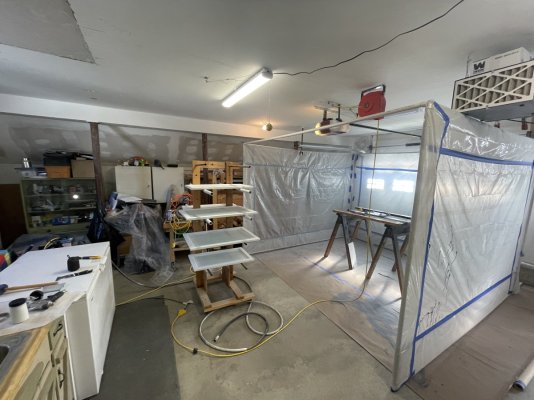
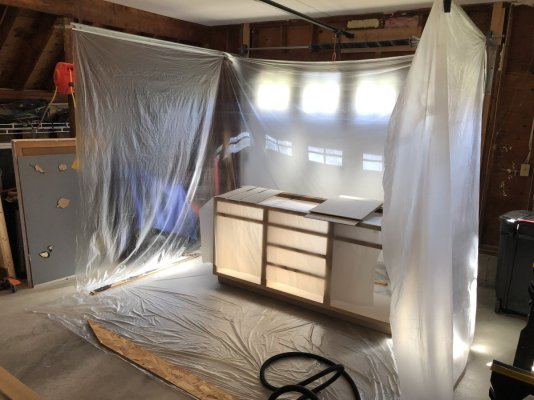
I have a hvlp sprayer that I plan on using. I used it previously on some bathroom cabinets I did myself when we had the upstairs of our house renovated. I setup a paint booth in the garage to spray everything. I used Benjamin Moore advanced paint but think I’ll use their cabinet coat this time around. A little more pricey but the dry time is considerably less.
I have a hvlp sprayer that I plan on using. I used it previously on some bathroom cabinets I did myself when we had the upstairs of our house renovated. I setup a paint booth in the garage to spray everything. I used Benjamin Moore advanced paint but think I’ll use their cabinet coat this time around. A little more pricey but the dry time is considerably less.
That's kinda what I figured you would say based on everything else you posted. An HVLP combined with MDO should give you a very smooth finish and turn out great. Looking forward to seeing it.
That's kinda what I figured you would say based on everything else you posted. An HVLP combined with MDO should give you a very smooth finish and turn out great. Looking forward to seeing it.
Thanks. I’m hoping to get some time this week to put in on it and get it closer to the finish line. Maybe even get it close to getting the stand setup and the tank brought in on it and start thinking about my rock work. Just need to get my wife to agree on some colors to paint it.
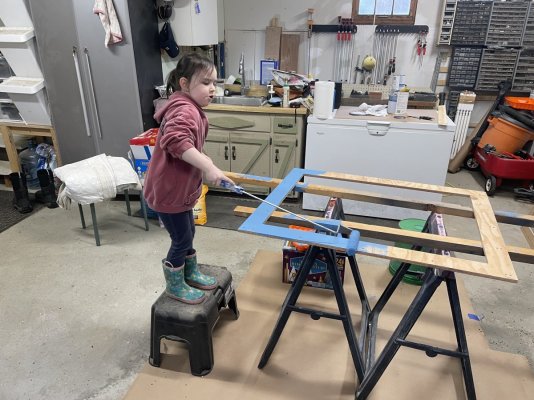
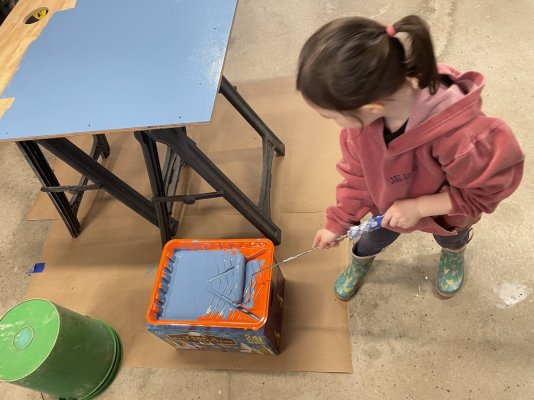
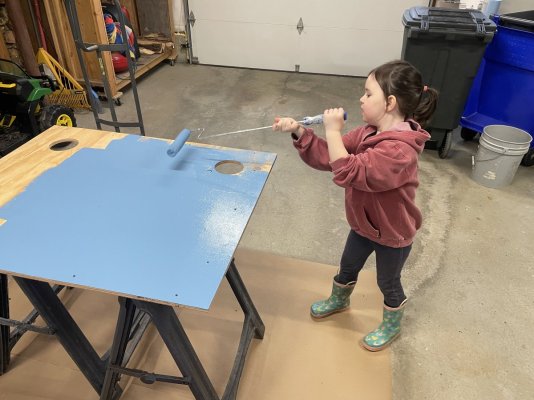
I had some help today doing some painting. My daughter gave me a hand rolling out some primer on the side of the pieces that will be hidden Inside the stand. I had told her she could help me so thought that would be something she could have some fun doing.
So a little update. I was hoping with my work schedule this week that I was going to have some time to work on things. Spoiler alert, didn’t happen. It rained, so ended up working an extra shift and my parents decided to come down for a visit. I did get a little time and reglued the the trim pieces and happy to report they stuck this time. I clamped it up differently this time and think what happened last time was that I had a slight gap on them, causing the week glue joint.
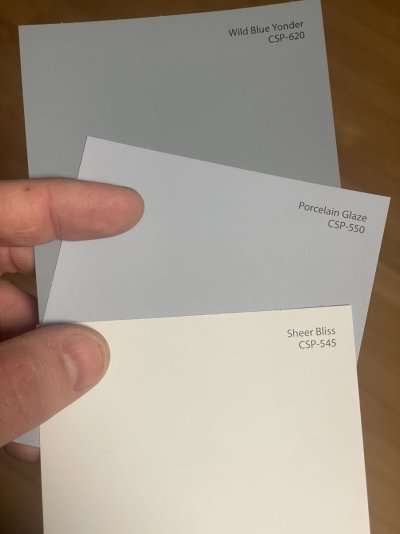
I also got paint colors pick out, so that’s another step in the right direction.
The darker color will be used on the frame and the lighter gray will be used on the panels.
So a little update. I was hoping with my work schedule this week that I was going to have some time to work on things. Spoiler alert, didn’t happen. It rained, so ended up working an extra shift and my parents decided to come down for a visit. I did get a little time and reglued the the trim pieces and happy to report they stuck this time. I clamped it up differently this time and think what happened last time was that I had a slight gap on them, causing the week glue joint.
I also got paint colors pick out, so that’s another step in the right direction.
The darker color will be used on the frame and the lighter gray will be used on the panels.
Haha nope you can’t. I keep picking more up here and there, much to my wife’s chagrin. I was taught that the clamping pressure goes at a 45 degree angle from the edges of the clamp through the piece to the glue joint and that you should use enough clamps so that the cones from each clamp at least touch each other.
Haha nope you can’t. I keep picking more up here and there, much to my wife’s chagrin. I was taught that the clamping pressure goes at a 45 degree angle from the edges of the clamp through the piece to the glue joint and that you should use enough clamps so that the cones from each clamp at least touch each other.
Haha well I’m an engineer so…. I do subscribe to that school when it comes to how much glue to use. If there’s a dry spot then it still needs more glue.