Thanks, I’m excited about them too. I’m hoping to have the stand done and tank setting on it by the end of the month. I’m running out of time before the weather gets nicer and all the outdoor projects take me away from working on this.
What kind of paint are you using Latex? Also, are you thinning It at all to get it to spay better? Also, (sorry for all the questions) what kind of HVLP setup do you use? I normally use an HVLP gun on a regular air compressor but have always wondered if a dedicated HVLP spray system would give better results.
What kind of paint are you using Latex? Also, are you thinning It at all to get it to spay better? Also, (sorry for all the questions) what kind of HVLP setup do you use? I normally use an HVLP gun on a regular air compressor but have always wondered if a dedicated HVLP spray system would give better results.
No worries about all the questions, feel free to ask as many as you want and I will try to answer. The paint is Benjamin Moore cabinet coat that I’m going to be using. I haven’t sprayed with it yet so not sure how it’s going to go but I’ve sprayed their advanced before as well as a latex primer. I’ll probably end up thinning 5%, but will try it first without to see how it goes. My brother in law used it as well when he did his fish tank stand, having never sprayed paint before and didn’t have any issues. What I’ve got is an Aerojet F3 HVLP. It’s a stand alone unit. It was one that I picked up used from someone upgrading to a bigger unit. I didn’t really want to go the compressor style as I would have needed to upgrade my compressor and get an oil/water separator for it. I’ve been quite happy with it.
Thanks, hoping to get it painted here soon. You could very easily get some 1/4” material and put it in the grooves as you put the stand together to skin parts of it if you don’t want to do the whole thing.
Well not much to update, spring is here so back to outside projects. The panels are on the stand frames now at least. Just want to put a couple more trim pieces on then will take it outside and spray it.
Got some more painting done today. Hoping tomorrow I can get someone to help me move the stand inside so I can start looking the plumbing. Would love to get the tank too but it’s buried in the garage so not sure I’ll get that far.
And all this around trying to fix lawn mowers. We have 2 robotic lawn mowers to mow our yard. One of them decided it was going to stop leaving the charging base. Of course looking back at the log, seems like it’s been happening for the past 10 days. Was wondering why the lawn was looking a little ragged. Turns out a rock had gotten lodge in one of the front wheels. Removed that and it seems to be working fine now. We have a smaller fenced in area for the dog and kids in the backyard that isn’t reachable yet by the robot. This area we mow with a riding mower. My wife tried mowing it a couple days ago and couldn’t get it to start. I took a look at it today and turns out the starter went on it so got a new one ordered. Boy was she glad that there was some thing actually wrong with it and it wasn’t just her. (I was glad too, wouldn’t have heard the end of it otherwise.)
Well it finally happened, the tank stand is in the house. Also dug the tank out of the corner of the garage to get it ready to bring it inside. Tomorrow I’ll be picking up a hydraulic lift cart to help with the move. My brother in law is going to be giving me a hand moving it in. Current plan is to put the forks on the tractor, pick up the pallet out of the garage and bring to the door and somehow flip it on its side onto the cart and wheel it over to the stand.
A few things to update, so let’s get started with the first one.
THE TANK IS IN THE HOUSE AND ON THE STAND.
My brother in law came over after work and gave me hand. Of course I had an hour or so to pace around and wait for him to get here after work so came up with contingency plan after contingency plan and options 1,2,3……. On how to do it. So of course I still missed a minor detail. Original plan was to tip the tank sideways while still in the shipping box. I had planned on cutting off the pallet that was on the bottom. So got it brought over with the tractor and now here comes the oops. The tank was sitting on a piece of foam with a cardboard shell on top that just lifted off, no cardboard on the bottom. Well time for plan z that I hadn’t gotten to yet.
So new plan, just going to take everything off and flip the tank by itself on it’s side onto a wooden platform on casters that I had picked up off Facebook marketplace for free a few years ago. Best gas money ever spent. It worked like a charm rolling into the house. Next comes the flip back to being right side up onto the lift cart I bought a couple days before the move. Well here’s plot twist number 2. Before we started moving the tank I tested it out to make sure it would go high enough. Guess what, it didn’t. So plan z, variation 100 became let’s just use the 2 suction cup handles I bought and lift it straight up onto the stand and then flip it down. After a little maneuvering and changing location of the suction cup handles we got it in place and mostly centered on the stand. Here comes another minor detail I forgot about. Where exactly it needed to go on the stand. Well turns out guessing gets you close but not quite there. More on that later.
So tank is in the house and one the stand and my wife gives me the what the f did I agree to with this tank. It is massive. I tried to prepare her over the last 1.5 years by bringing in the aluminum frame and leaving it there so she could get used to the size of the stand. I guess the couple months or so that I had the stand back out in the garage while finishing it erased all that prep work.
That was Thursday, Saturday morning we left to go visit my parents for a few days and let the kids hang out at the lake fishing and swimming. Now my kids think they know what fishing is, but in reality they only know what the meaning of catching is. They are going to be in for a rude awakening on a real fishing trip. Heck they were even able to scoop fish and minnows up with their little dollar store fish nets Grammy bought them. By the end of the trip my daughter could cast her pole out just as far as I could get it to go.
So here’s the rest of the story I promised you earlier. We got back from vacation and I got a step stool out and poked some nails through the foam I had put down before setting the tank in the stand to see how well the holes lined up with the cutout in the top plywood piece. Well turns out I was close but not quite there. So out comes the suction cups again and was able to scoot the tank back the 1/2” that I needed it to go.
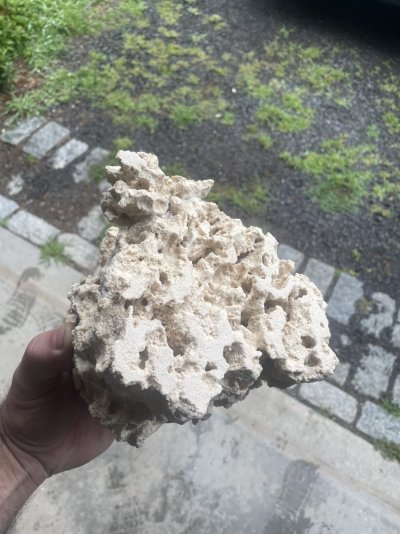
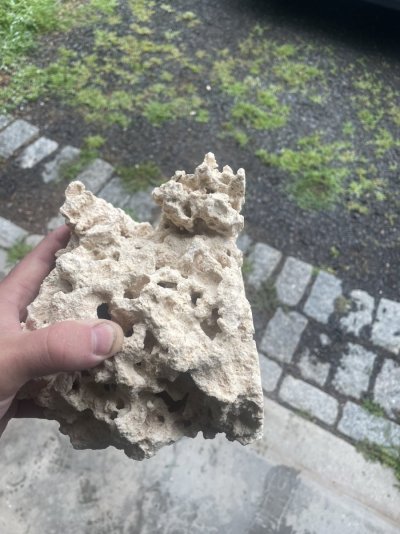
It time for a little aquascaping. I brought in the 2 tubs of Marco rock from the garage to start playing around with it. It’s slowly starting to come together. Started off with one big pile of rocks. Now starting to look a little less like one big pile.
Goal is to have lots of tunnels and caves for the fish to swim around in. The one downside to the location of the tank is it can be a little busy at times with people walking by so want to make sure they are comfortable and able to hide.
Before I go too much further though I plan on taking a cup wheel on a grinder and smoothing out the bottom of the base pieces so the sit nicely on the bottom of the tank. Anyone have any success with doing that. My other thought is I have a demo saw with a diamond blade in it for cutting concrete that I could use to cut it as well, just not sure how to safely hold the prices while I’m cutting.
My experience with Marco Rock is the it cuts pretty easily. I have used a wet saw before and a band saw. To use a demo saw you could probably clamp the rock with 2x4's to a bench. You could also just order a few pieces of Foundation Rock to use as the base
My experience with Marco Rock is the it cuts pretty easily. I have used a wet saw before and a band saw. To use a demo saw you could probably clamp the rock with 2x4's to a bench. You could also just order a few pieces of Foundation Rock to use as the base
Hmmm maybe I’ll try it on the bandsaw. Hadn’t thought about that. If I had access to a bigger tile saw, that would have been my first choice but don’t so thinking about plan b. I saw the foundation rock after I ordered the rock and if I hadn’t already ordered it all, I would have thought about getting some. But I’m also cheap and hate to spend extra money on something that with a little sweat and elbow grease I can do myself. Plus it’s the challenge of figuring out how to do something that I enjoy as well. My other thought is I have some of the e-Marco cement and might just put a glob of that down and set the rock in it to create a smoother, stable base.
Well I tried the bandsaw, it didn’t work out very well. Took out my grinder and cup wheel and was able to get one rock flat relatively easily. One down 6 or 7 more to go.
Thanks, figured it wouldn’t be to difficult to do. Did a little grinding, checked it on my table saw since that’s a nice flat machined surface. Then made some pencil marks where it was rocking, ground a little more. Got it fairly flat but didn’t like the amount of contact so glued in a piece on one side and then did some more grinding & checking till I was happy with it. Took maybe half an hour including gluing the small chunk on it. Gotta love super glue and accelerator.