DIY reef-pi build log

OP
OP
Michael Lane

Michael Lane

Well-Known Member
View Badges
Joined
Aug 11, 2018
Messages
677
Reaction score
1,123
Rating - 0%
0   0   0
All, thanks for the encouragement.
@Bigtrout, your freshwater setup and reef-pi sound great. I have loved reef-pi almost since Ranjib joined R2R, I just get confused with the setup.
I have been reading some builds and enjoying the successes. I am planning to buy @Michael Lane 's hat, but I wonder if the new version would be more "stupid proof" for me because of the led's. I also need to be able to get 0-10v for the sb reef light from the pi or from the hat, I believe. I have watched a video on you tube, but am not sure...I was hurried during lunch time because of a customer issue.
If you aren't familiar with Linux, I'd recommend starting with just getting an rpi and installing reef-pi on it. It isn't difficult, but for some reason that's usually the most frustrating part for me. I like to start with sensing (temperature, water level) first, just to gain some confidence in what I built. Then I add more control to the system one at a time. Ranjib's build guides on Adafruit are fantastic, but any DIY project has so much room for custom ideas that's it tough to cover every point. Many of the individual components are so inexpensive, it's probably worth it to at least try following a guide or two.

My hat does make it easy and quick to get started, and I personally love the LED indicators on the v3 board, but it's so much work to assemble. Hopefully, I'll get time to assemble another one this weekend. If you have a multimeter (even a Harbor Freight cheapie), then you can get the same information fairly easily.

I still haven't bothered moving my ATO to reef-pi. I've been running a a stand alone ATO for years, so I didn't see any value in converting it yet. On the other hand, I do use it on my ATO reservoir (just a brute trash can), and it turns on a lamp when it gets low so I know to refill it. I like that I can pick and choose what to run on each system, so I'm not rushed to get any implementation working.

0-10v output is feasible, but requires a bit of extra hardware. There's a few ways to do it, but it generally involves smoothing the pwm signal and amplifying the output. Ranjib's light controller tutorial shows amplifying the signal, and depending on the light, it may not even need the smoothing.

I'd like to add that to my hat as well, but feel like I'm running low on space. I also have another design that I use in my black box lights that does the same (3.3v PWM to 0-10v analog). I think I'll have that board ready in a month or two.
 

Bigtrout

Valuable Member
View Badges
Joined
Dec 16, 2018
Messages
1,189
Reaction score
2,826
Rating - 0%
0   0   0
If you aren't familiar with Linux, I'd recommend starting with just getting an rpi and installing reef-pi on it. It isn't difficult, but for some reason that's usually the most frustrating part for me. I like to start with sensing (temperature, water level) first, just to gain some confidence in what I built. Then I add more control to the system one at a time. Ranjib's build guides on Adafruit are fantastic, but any DIY project has so much room for custom ideas that's it tough to cover every point. Many of the individual components are so inexpensive, it's probably worth it to at least try following a guide or two.

My hat does make it easy and quick to get started, and I personally love the LED indicators on the v3 board, but it's so much work to assemble. Hopefully, I'll get time to assemble another one this weekend. If you have a multimeter (even a Harbor Freight cheapie), then you can get the same information fairly easily.

I still haven't bothered moving my ATO to reef-pi. I've been running a a stand alone ATO for years, so I didn't see any value in converting it yet. On the other hand, I do use it on my ATO reservoir (just a brute trash can), and it turns on a lamp when it gets low so I know to refill it. I like that I can pick and choose what to run on each system, so I'm not rushed to get any implementation working.

0-10v output is feasible, but requires a bit of extra hardware. There's a few ways to do it, but it generally involves smoothing the pwm signal and amplifying the output. Ranjib's light controller tutorial shows amplifying the signal, and depending on the light, it may not even need the smoothing.

I'd like to add that to my hat as well, but feel like I'm running low on space. I also have another design that I use in my black box lights that does the same (3.3v PWM to 0-10v analog). I think I'll have that board ready in a month or two.
Here is a simple converter, gotta love amazon!

KNACRO 3.3V 0-100% PWM To 0-10V Conversion Module Digital to Analog Module PLC Industrial Interface Conversion Module

https://www.amazon.com/dp/B079B5MRQC/ref=cm_sw_r_cp_apa_i_FuFSCb2K8VRTP
 

Cary

Well-Known Member
View Badges
Joined
Feb 19, 2016
Messages
638
Reaction score
766
Location
Allen, Tx
Rating - 0%
0   0   0
Thanks, @Michael Lane. I currently have reef-pi 1.5 on a pi3 B v1.2 and have a temp controller connected through a bread board (well, I did remove it in prep for purchasing your hat).

I have linux-based (Mint) os on my laptop and I am connected to reef-pi though SSH. I plan to upgrade to reef-pi 2.3 or higher tomorrow (grand kids this afternoon). I also will update Raspbian tomorrow.

I plan to buy your hat today. I was hoping to get a v3, but I need to learn, so that is fine.

Have you tested reef-pi 2.3 yet on your hat?
 

Cary

Well-Known Member
View Badges
Joined
Feb 19, 2016
Messages
638
Reaction score
766
Location
Allen, Tx
Rating - 0%
0   0   0
OP
OP
Michael Lane

Michael Lane

Well-Known Member
View Badges
Joined
Aug 11, 2018
Messages
677
Reaction score
1,123
Rating - 0%
0   0   0
I'm still running 2.0 on my main reef-pi running on my tanks, but I've used 2.2 and 2.3 on test pi.

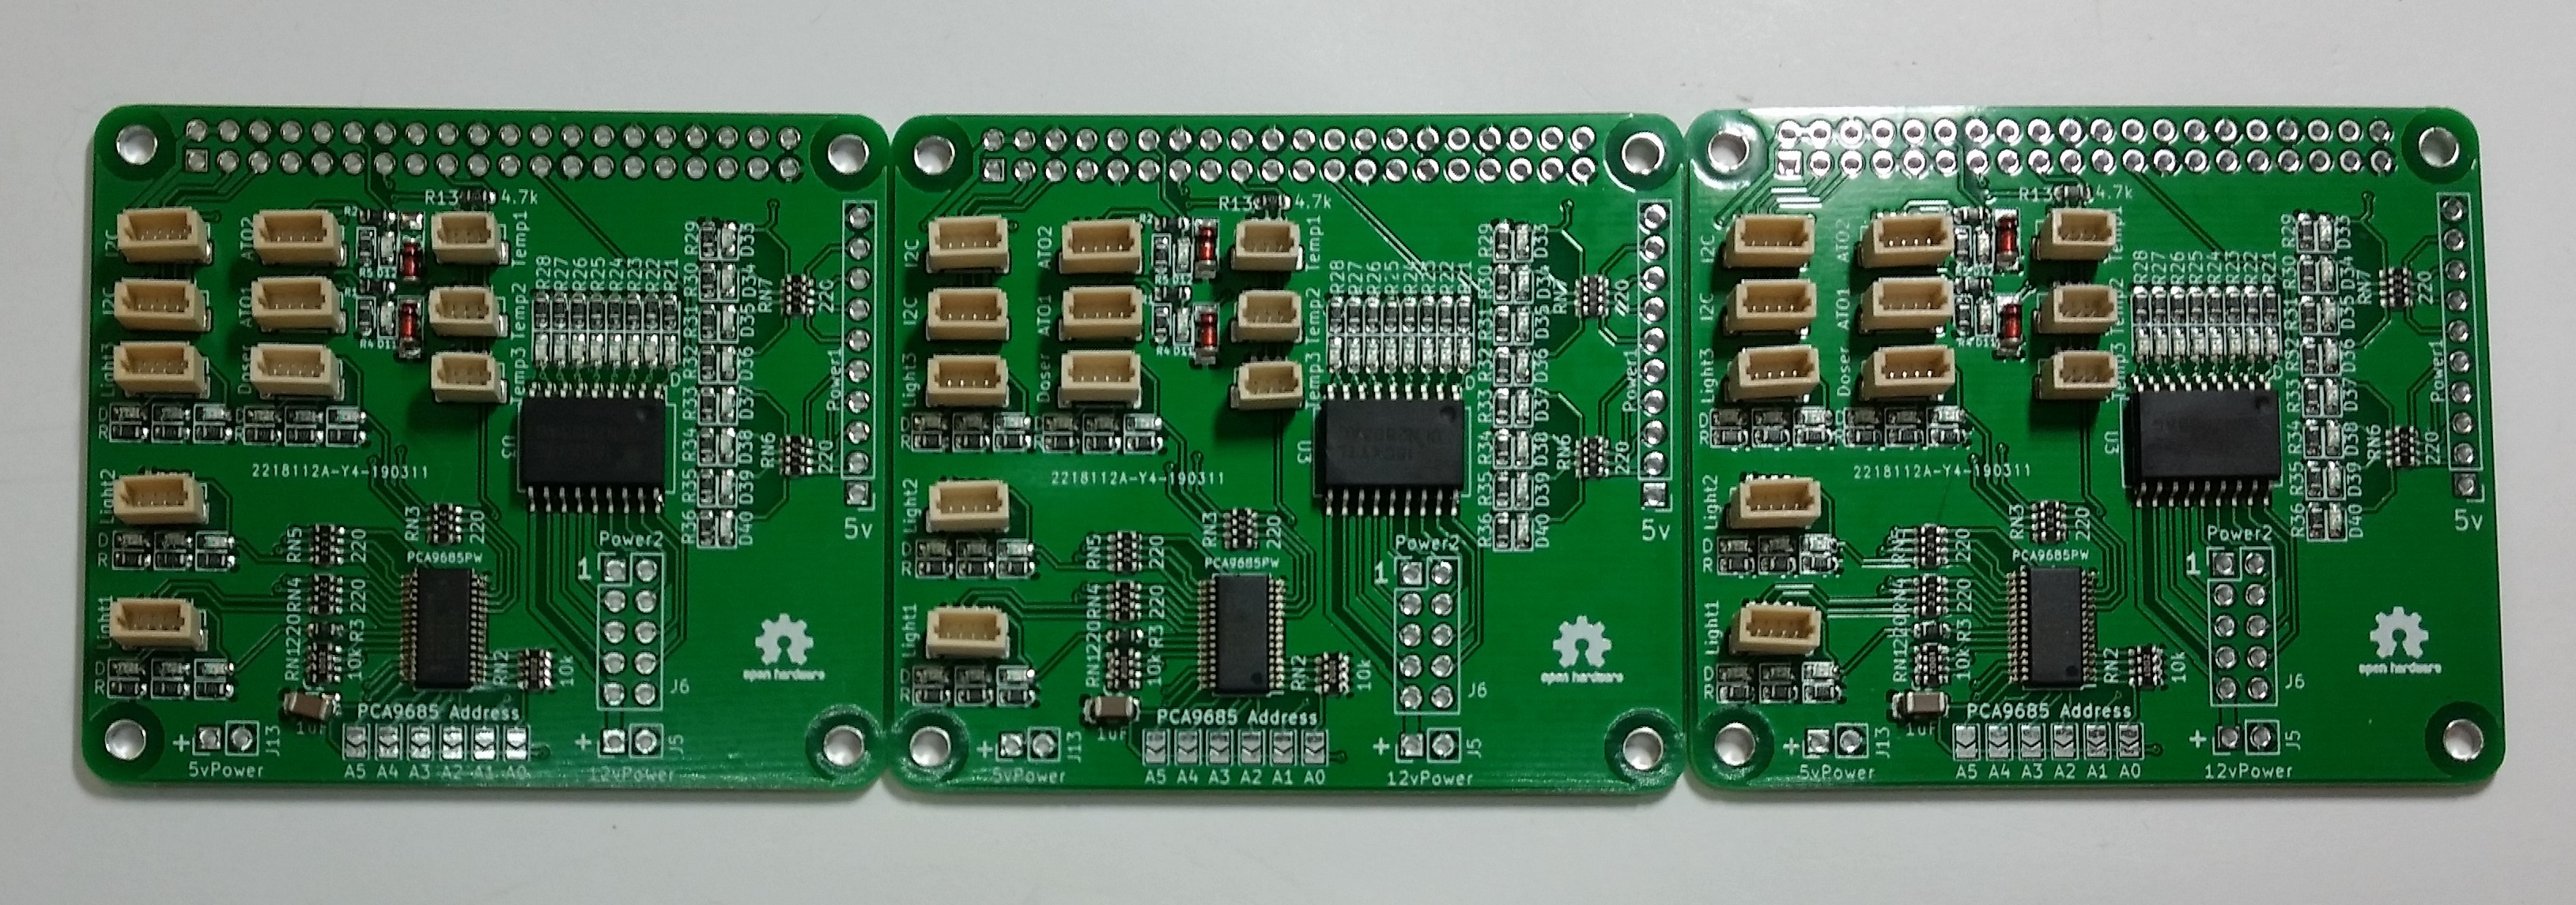
Using the solder stencil gets a little easier with practice, but it still takes a super long time to place all the components. The toaster oven did a much better job than using the hot air gun, plus it was much easier. The connectors didn't melt at all! It still took almost 2 hours to assemble a single board; I can't seem to get it any faster...
TjtmGqd.jpg


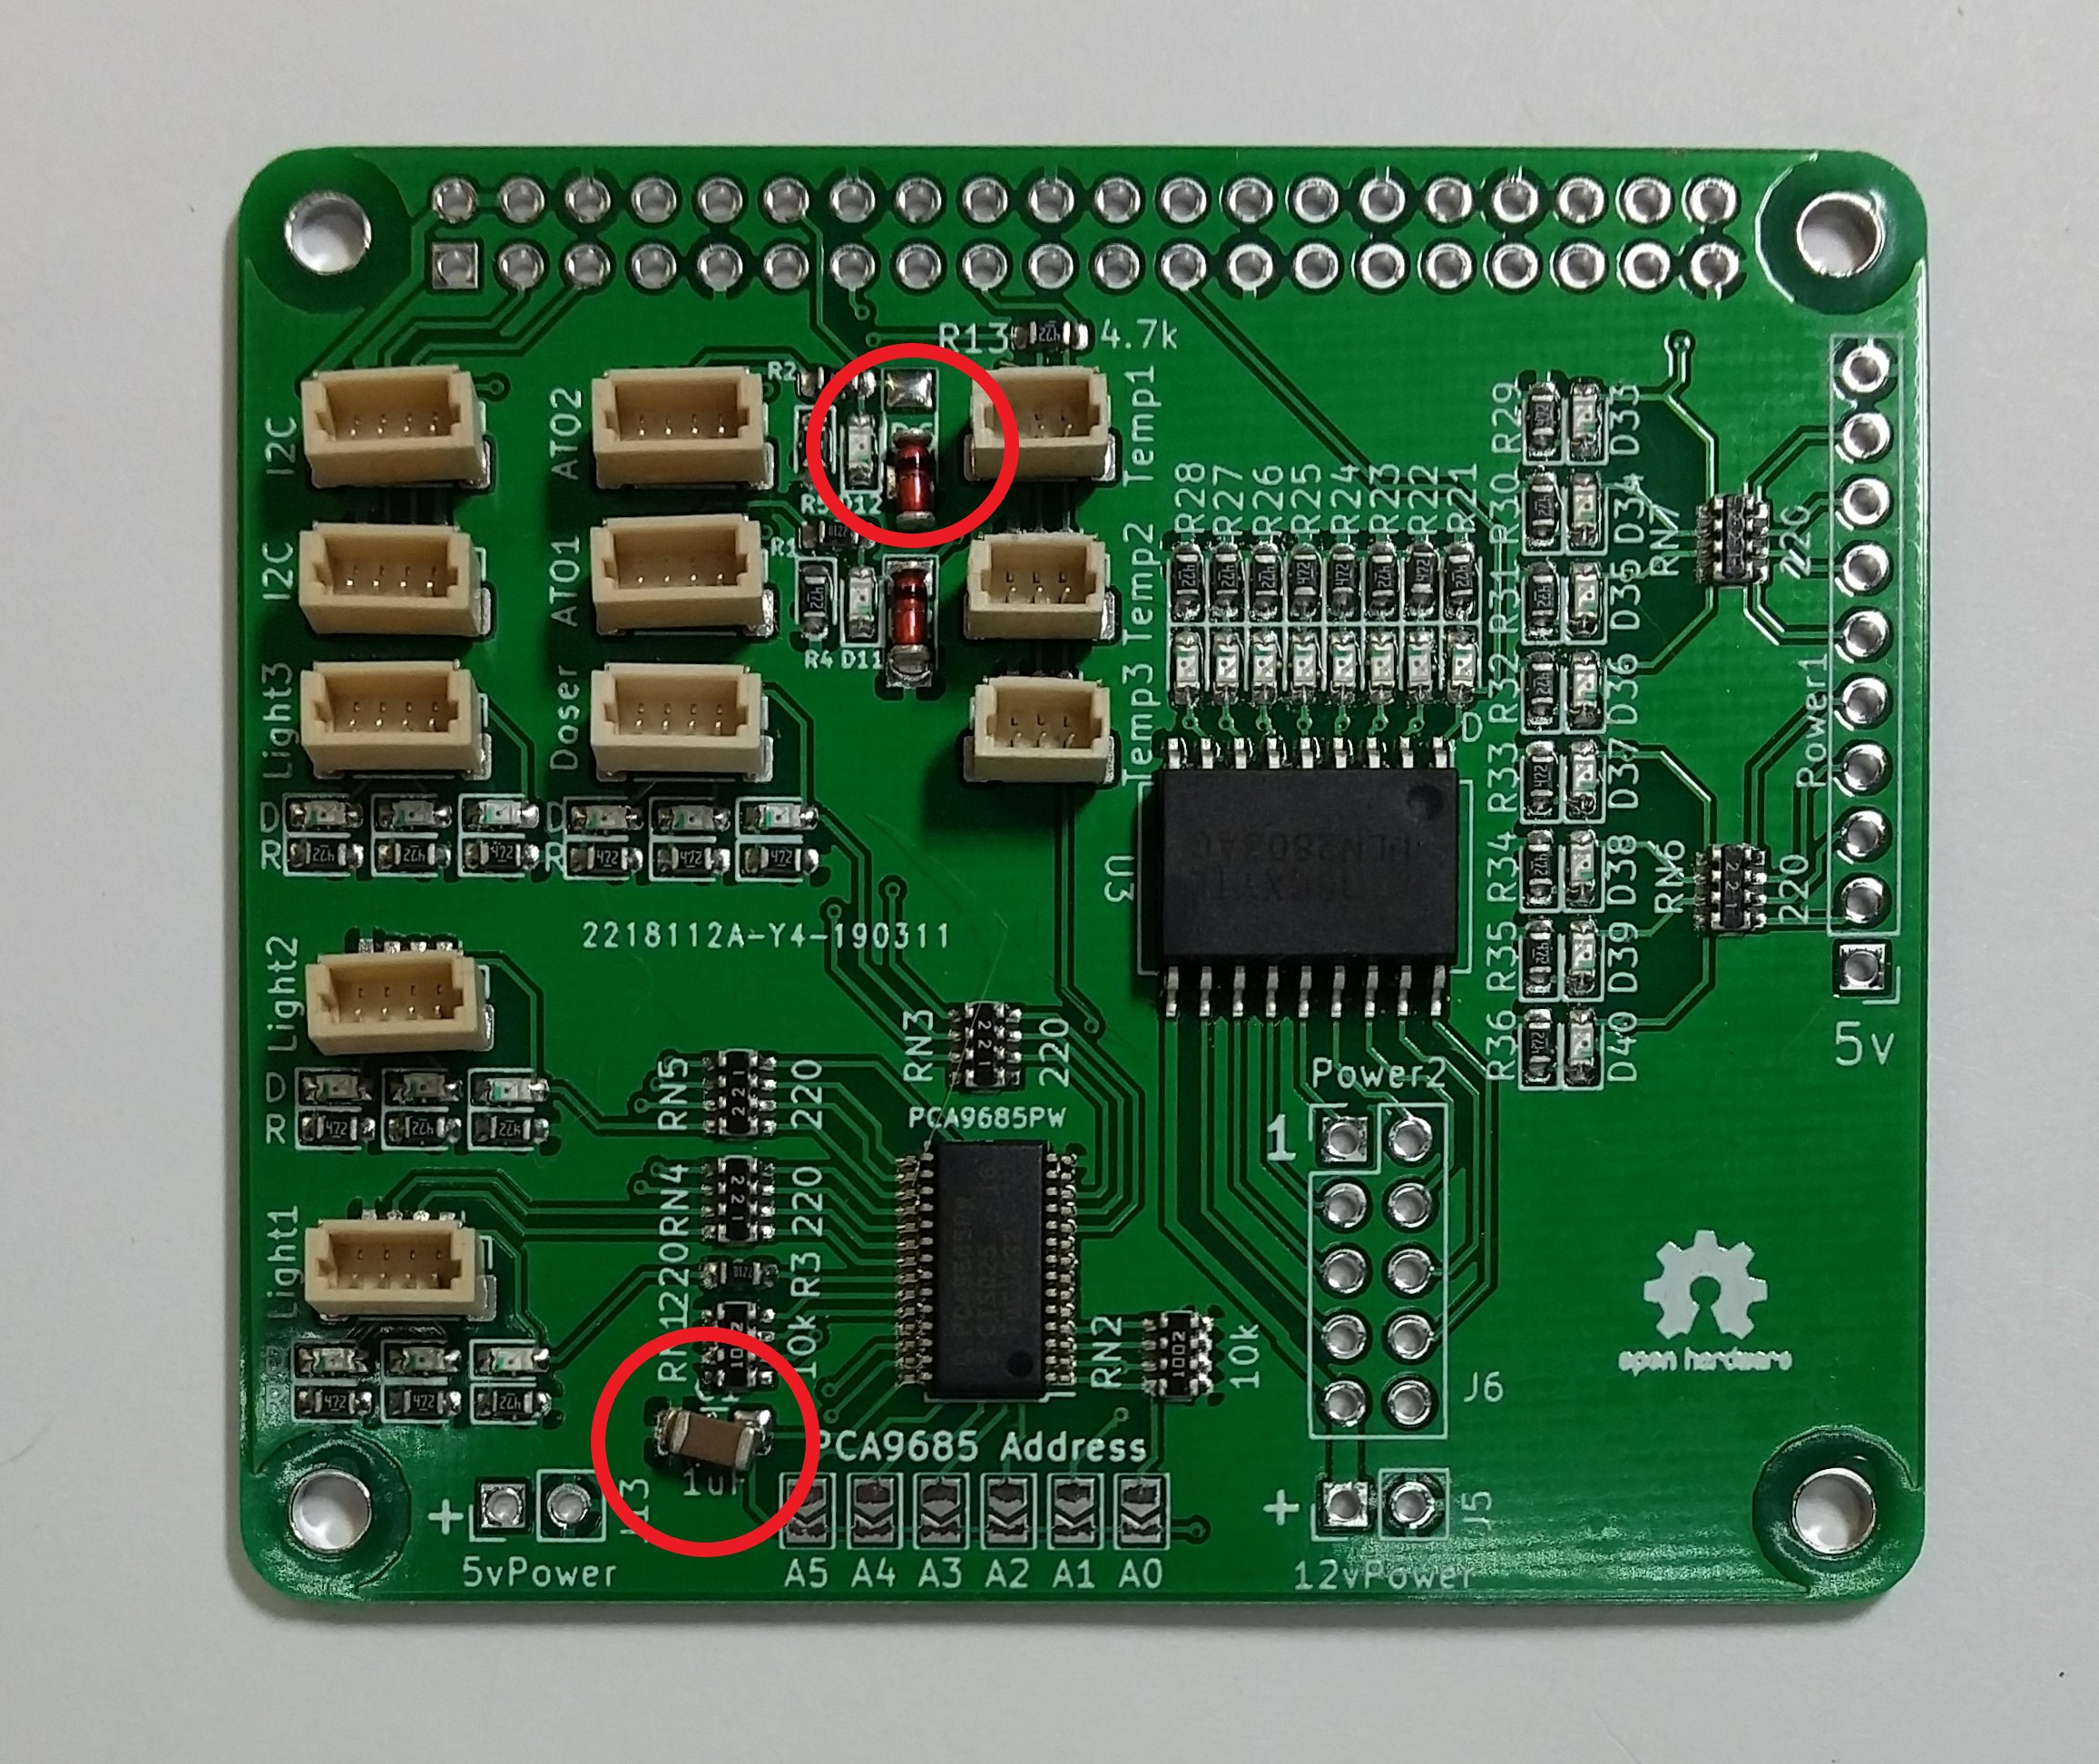
The first board did have a couple of components jump while flowing, but those can easily be fixed by hand.
zenwVPM.jpg


I found a couple more issues on this board after running the test script. I needed to touch up the pca9685, and so far it's looking good. I'll finish populating the connectors on this one tomorrow and can finish full testing.
 

Cary

Well-Known Member
View Badges
Joined
Feb 19, 2016
Messages
638
Reaction score
766
Location
Allen, Tx
Rating - 0%
0   0   0
Congrats. I did a full raspian update and upgrade as well. It is funny how the rasping ui configuration changed. Do we not have to change the /boot/config.txt any more? It seemed liked I could configure everything in the ui.
 
OP
OP
Michael Lane

Michael Lane

Well-Known Member
View Badges
Joined
Aug 11, 2018
Messages
677
Reaction score
1,123
Rating - 0%
0   0   0
Congrats. I did a full raspian update and upgrade as well. It is funny how the rasping ui configuration changed. Do we not have to change the /boot/config.txt any more? It seemed liked I could configure everything in the ui.
I was able to fully set up mine without modifying /boot/config. I'm on kernel 4.14 with Raspian Stretch Lite (9.4). Super easy!
 

Matt Carden

Valuable Member
View Badges
Joined
Apr 13, 2018
Messages
1,641
Reaction score
4,084
Location
Detroit Metro
Rating - 0%
0   0   0
I am also planning on building a reef-pi for my 150. I like your boards and will end up getting a v2 or the v3 if it's out when I start my build in June. I understand the cost will be considerably higher for v3 based on your man hours invested.
 

sjeff35

Active Member
View Badges
Joined
Jun 14, 2018
Messages
172
Reaction score
356
Location
Corrales, NM
Rating - 0%
0   0   0
Hey there,

I just ordered a board from your Tindie store. I can't wait to get it and start playing. I had built a Reef-pi in the early days and it's been running great, but today it gave up the ghost, so time to build a new one. I think I have all the other parts I need.

Did anyone create a 3D printed enclosure yet that will fit the Pi and this Hat?

Thanks
 

Ranjib

7500 Club Member
View Badges
Joined
Apr 16, 2016
Messages
9,843
Reaction score
17,058
Location
Pleasant Hill, Concord
Rating - 0%
0   0   0
Hey there,

I just ordered a board from your Tindie store. I can't wait to get it and start playing. I had built a Reef-pi in the early days and it's been running great, but today it gave up the ghost, so time to build a new one. I think I have all the other parts I need.

Did anyone create a 3D printed enclosure yet that will fit the Pi and this Hat?

Thanks
I want that so much.. a 3d printed enclosure with all the standoff holes etc.. it will be so nice :-0)
 
OP
OP
Michael Lane

Michael Lane

Well-Known Member
View Badges
Joined
Aug 11, 2018
Messages
677
Reaction score
1,123
Rating - 0%
0   0   0
Hey there,

I just ordered a board from your Tindie store. I can't wait to get it and start playing. I had built a Reef-pi in the early days and it's been running great, but today it gave up the ghost, so time to build a new one. I think I have all the other parts I need.

Did anyone create a 3D printed enclosure yet that will fit the Pi and this Hat?

Thanks
I'm sorry to hear that your last build experienced a failure. Do you know what went wrong? Is it something we should all keep an eye out for?

I haven't seen any specific 3D printed cases, but it would be great to see one on the Thingiverse reef-pi group. I've made various laser cut designs for things, I haven't gotten into 3D printing yet, despite having access to some cool printers at my makerspace.
 

sjeff35

Active Member
View Badges
Joined
Jun 14, 2018
Messages
172
Reaction score
356
Location
Corrales, NM
Rating - 0%
0   0   0
I'm not sure what happened. The Temp module started reporting it was 185 degrees F, I had seen that before and fixed it by deleting the temp config and recreating it, but this time it persisted, I rebooted the PI a few times and on the last round I was no longer able to log in. I figured that was a sign it was time to upgrade!

I put a new SD card in it last night with the latest image, now I just have to go through and set up the connections, inputs and stuff.

Jeff
 

sfgabe

Active Member
View Badges
Joined
Sep 7, 2018
Messages
169
Reaction score
264
Rating - 0%
0   0   0
Did anyone create a 3D printed enclosure yet that will fit the Pi and this Hat?
There's probably enough room for the hat in the pump enclosure box if you want to start there. You'll probably need to put the fan on the outside (and you'll want a bigger fan anyway) but otherwise I think there's enough clearance.
 

MaccaPopEye

Well-Known Member
View Badges
Joined
Jan 5, 2016
Messages
697
Reaction score
1,232
Rating - 0%
0   0   0
Hey there,

I just ordered a board from your Tindie store. I can't wait to get it and start playing. I had built a Reef-pi in the early days and it's been running great, but today it gave up the ghost, so time to build a new one. I think I have all the other parts I need.

Did anyone create a 3D printed enclosure yet that will fit the Pi and this Hat?

Thanks
Hey sjeff I still haven't finished my reef-pi yet due to lack of time (it has just been on hold since December unfortunately), but I just quickly uploaded the files for the main housing to thingi as they may be close to what you are after.
https://www.thingiverse.com/thing:3659860

The enclosure does have mounting holes for a Raspberry-Pi already built into it (for m3 screws) but keep in mind that I did not design this enclosure for this hat so I don't know if it will fit (edit: by this I know the hat will fit on the pi as the mounting holes are there, I mean I don't know how it will fit height wise with the plugs on it etc and I don't know if the I/O ports built into the enclosure will work). I designed the enclosure to fit a pi & a half sized proto bread board along with specific I/O ports on the front that will fit my personal needs so your needs / the needs of this hat may be different.

However, I also included the F360 files for the enclosure for anyone to play with. It is a very simple design and would be easy to edit so if you would like to play around with it then you would likely be able to get it to fit your needs quite easily :) (I highly recommend this guys videos for learning Fusion 360. F360 is free for hobbyists and while daunting at first with these videos it is actually quite easy to pick up the basics https://www.youtube.com/user/cadcamstuff).
 

sjeff35

Active Member
View Badges
Joined
Jun 14, 2018
Messages
172
Reaction score
356
Location
Corrales, NM
Rating - 0%
0   0   0
Hey sjeff I still haven't finished my reef-pi yet due to lack of time (it has just been on hold since December unfortunately), but I just quickly uploaded the files for the main housing to thingi as they may be close to what you are after.
https://www.thingiverse.com/thing:3659860

The enclosure does have mounting holes for a Raspberry-Pi already built into it (for m3 screws) but keep in mind that I did not design this enclosure for this hat so I don't know if it will fit (edit: by this I know the hat will fit on the pi as the mounting holes are there, I mean I don't know how it will fit height wise with the plugs on it etc and I don't know if the I/O ports built into the enclosure will work). I designed the enclosure to fit a pi & a half sized proto bread board along with specific I/O ports on the front that will fit my personal needs so your needs / the needs of this hat may be different.

However, I also included the F360 files for the enclosure for anyone to play with. It is a very simple design and would be easy to edit so if you would like to play around with it then you would likely be able to get it to fit your needs quite easily :) (I highly recommend this guys videos for learning Fusion 360. F360 is free for hobbyists and while daunting at first with these videos it is actually quite easy to pick up the basics https://www.youtube.com/user/cadcamstuff).

Awesome! I'll check this out when I get the HAT and see what type of modification it might need!

Thanks
 

MaccaPopEye

Well-Known Member
View Badges
Joined
Jan 5, 2016
Messages
697
Reaction score
1,232
Rating - 0%
0   0   0
Awesome! I'll check this out when I get the HAT and see what type of modification it might need!

Thanks
No worries. If you would like me to make a "blank box" with no I/O ports on the front and nothing but the 4 mounting holes for the Pi (or no mounting holes) that would only take me 1 minute to modify so just let me know. Anything more than that like custom I/O ports or custom stand offs you would need to do yourself :)

But it really is quite easy to modify, you would only need to learn how to use the sketch and extrude tools in fusion 360. To do holes on the front for an I/O port you just have to start a sketch on the I/O side of the box, draw the square or circle to the size you want and then extrude it into the box to cut the shape out of the wall. Then stand offs are pretty much the same, sketch 2 circles to make a doughnut shape (one inside the other) on the floor of the box and extrude the doughnut to the height you want want the stand off to be. I make the inside hole approx .4mm smaller than the screw / bolt size I will be using and then when it is printed I just drive a screw into the hole once to cut the threads (PLA and PETG are soft enough for this to work fairly well).
 

Looking for the spotlight: Do your fish notice the lighting in your reef tank?

  • My fish seem to regularly respond to the lighting in my reef tank.

    Votes: 115 74.2%
  • My fish seem to occasionally respond to the lighting in my tank.

    Votes: 15 9.7%
  • My fish seem to rarely respond to the lighting in my tank.

    Votes: 10 6.5%
  • My fish seem to never respond to the lighting in my tank.

    Votes: 3 1.9%
  • I don’t pay enough attention to my fish to notice if they respond to the lighting.

    Votes: 6 3.9%
  • I don’t have any fish in my tank.

    Votes: 4 2.6%
  • Other.

    Votes: 2 1.3%
Back
Top