Let me start off with a word of thanks to the R2R community. I have been planning and building my 85 gal. reef for about 3 months now and R2R has been a terrific source of information. Thank you, thank you, thank you. I am working towards being knowledgeable enough to give back to new hobbyists just as you have done for me!
I have been an avid freshwater planted aquarium hobbyist for the better part of 3 decades. Here is a picture of my current pride and joy, which I intend to maintain as I build my reef")

...and now on to the story of my reef build!
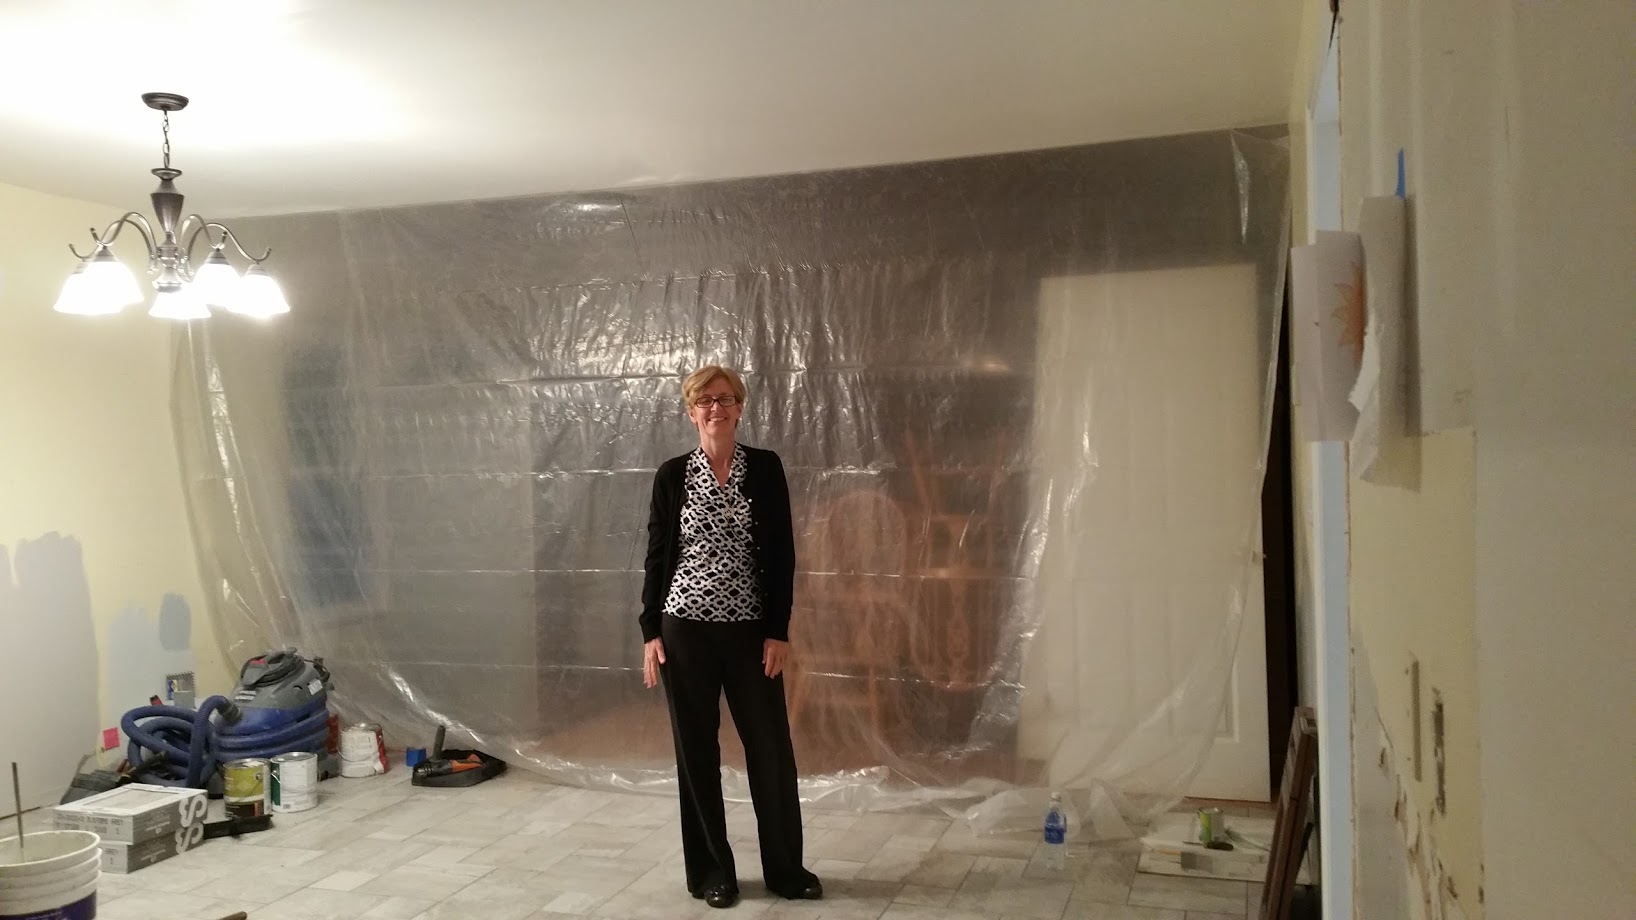
My wife and I recently remodeled the kitchen and I figured it was the right time to take the plunge. This is my wife standing next to the spot where the aquarium will go, ultimately next to our kitchen table. The tank will occupy the space to her right, where the vacuum cleaner is situated. I'm having an 85 gal, 48x24x17 tank built with Starfire glass on three sides.
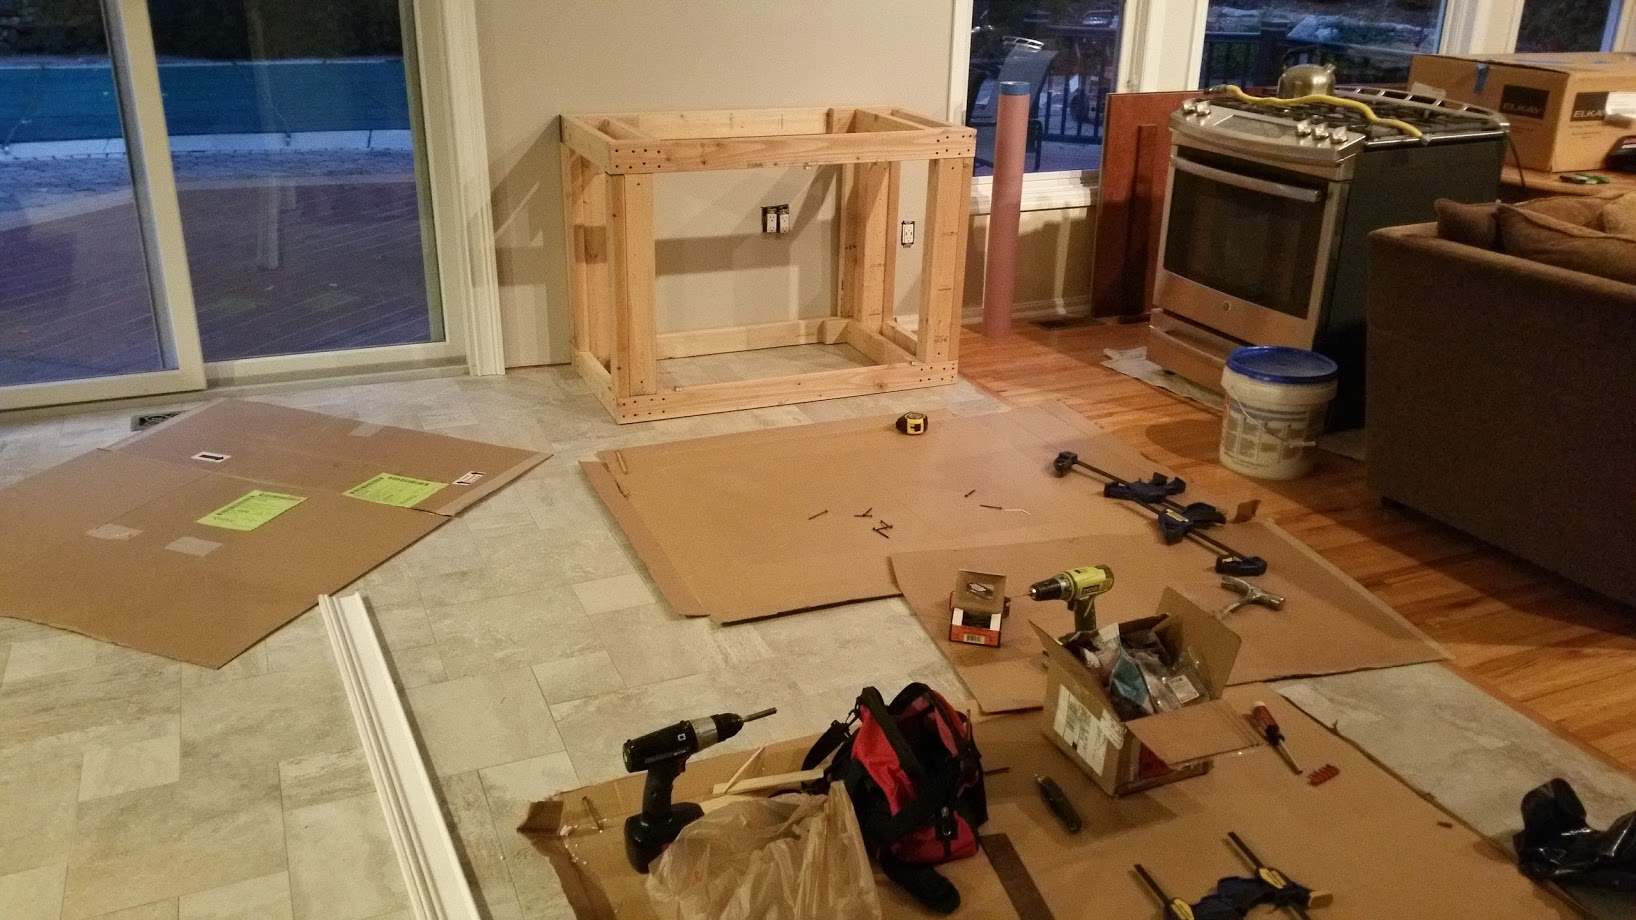
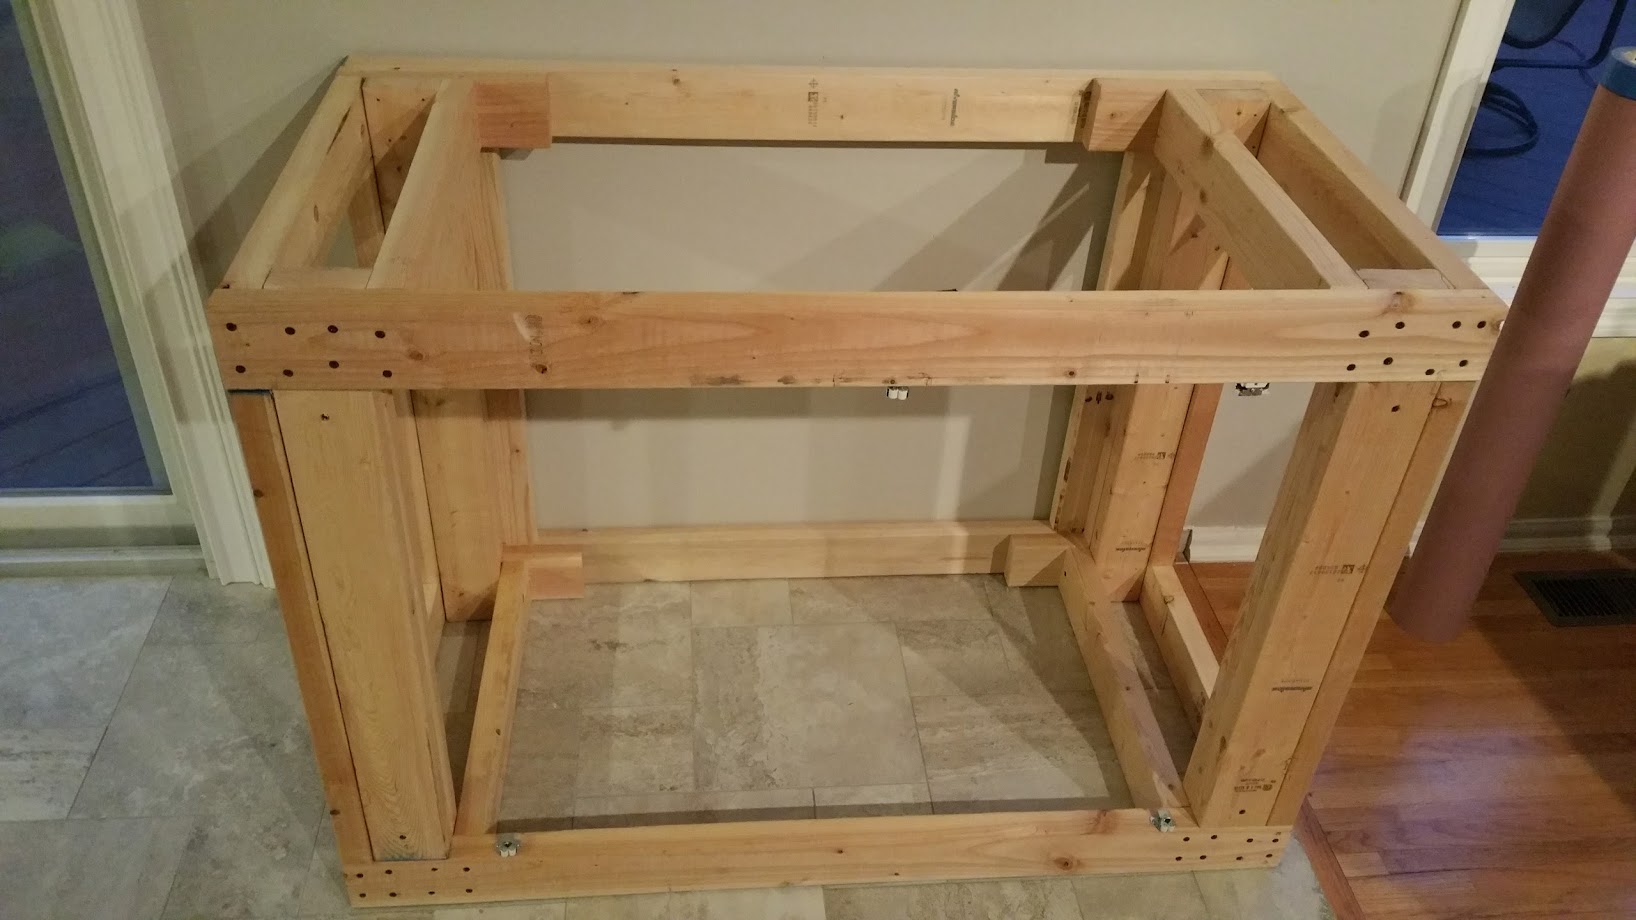
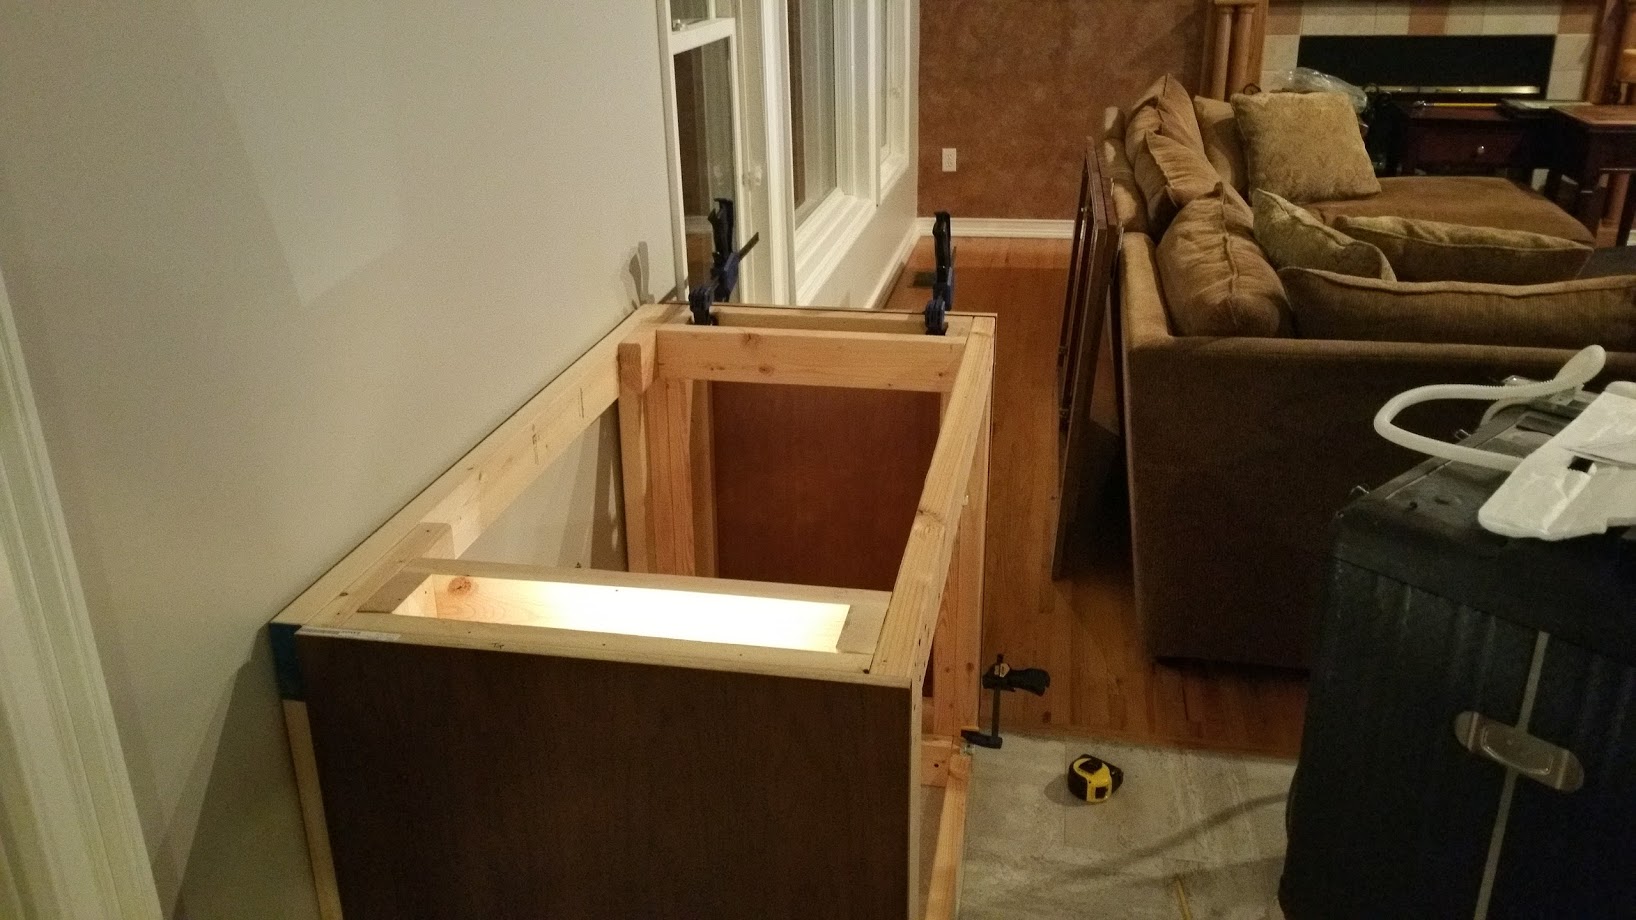
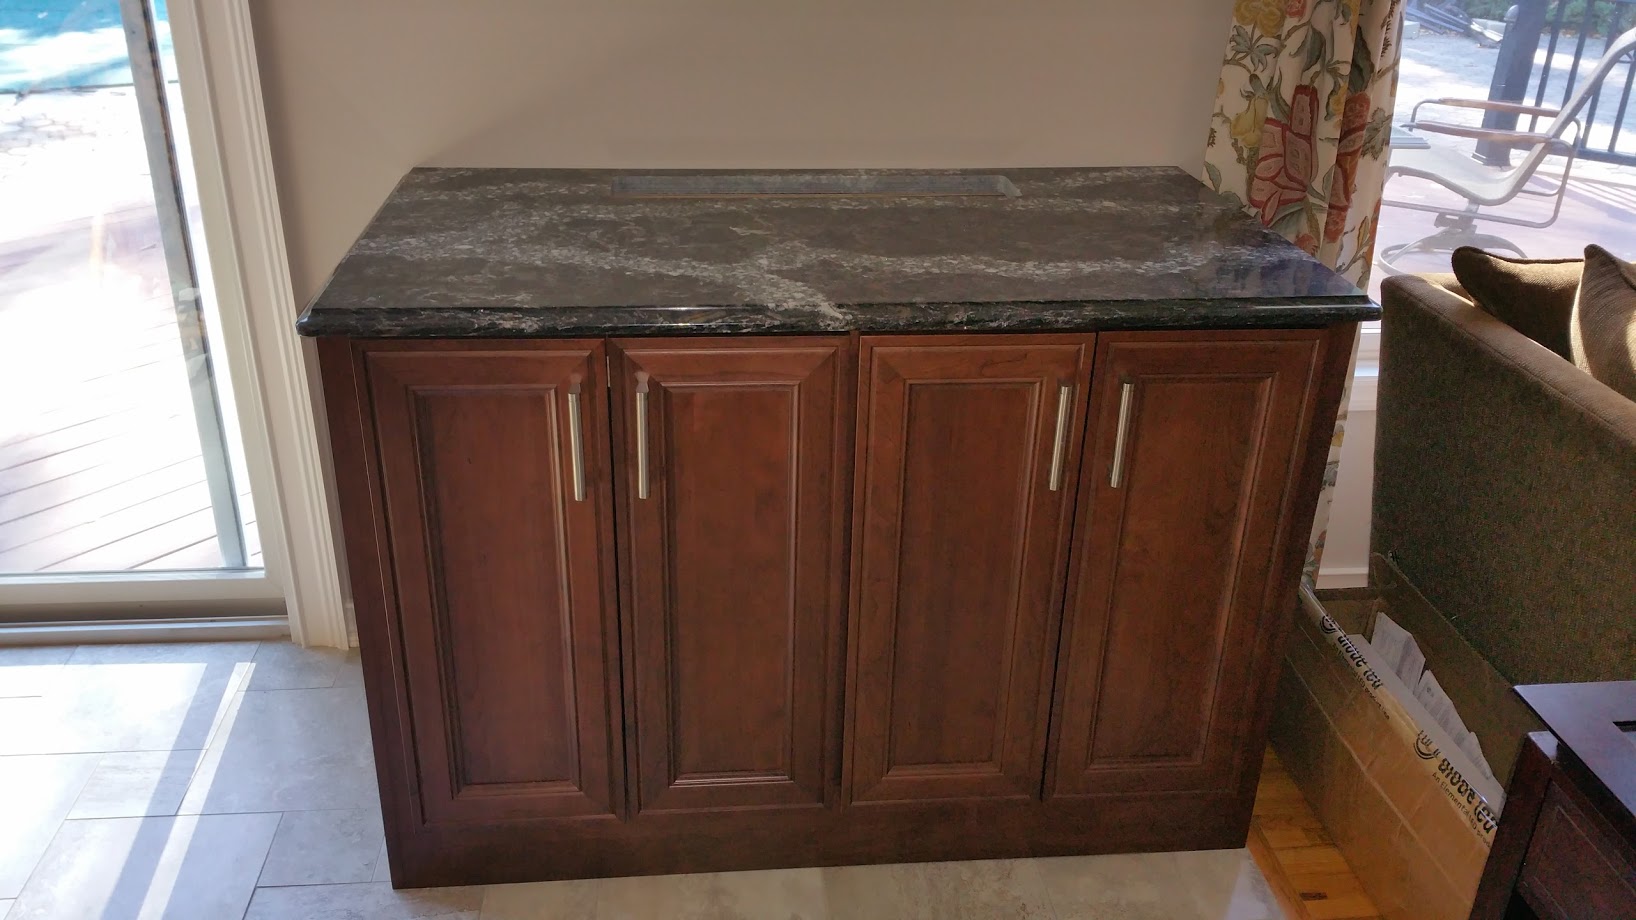
I built the stand with design help from Joey over at The King of DIY. I wrapped it with the same cabinetry and counter top that we used in the rest of the kitchen. The cabinets are held on with magnets so I can easily get under the stand to work on stuff.
One of the huge design decisions was to go through the floor into my utility room in the basement instead of housing everything under the tank.
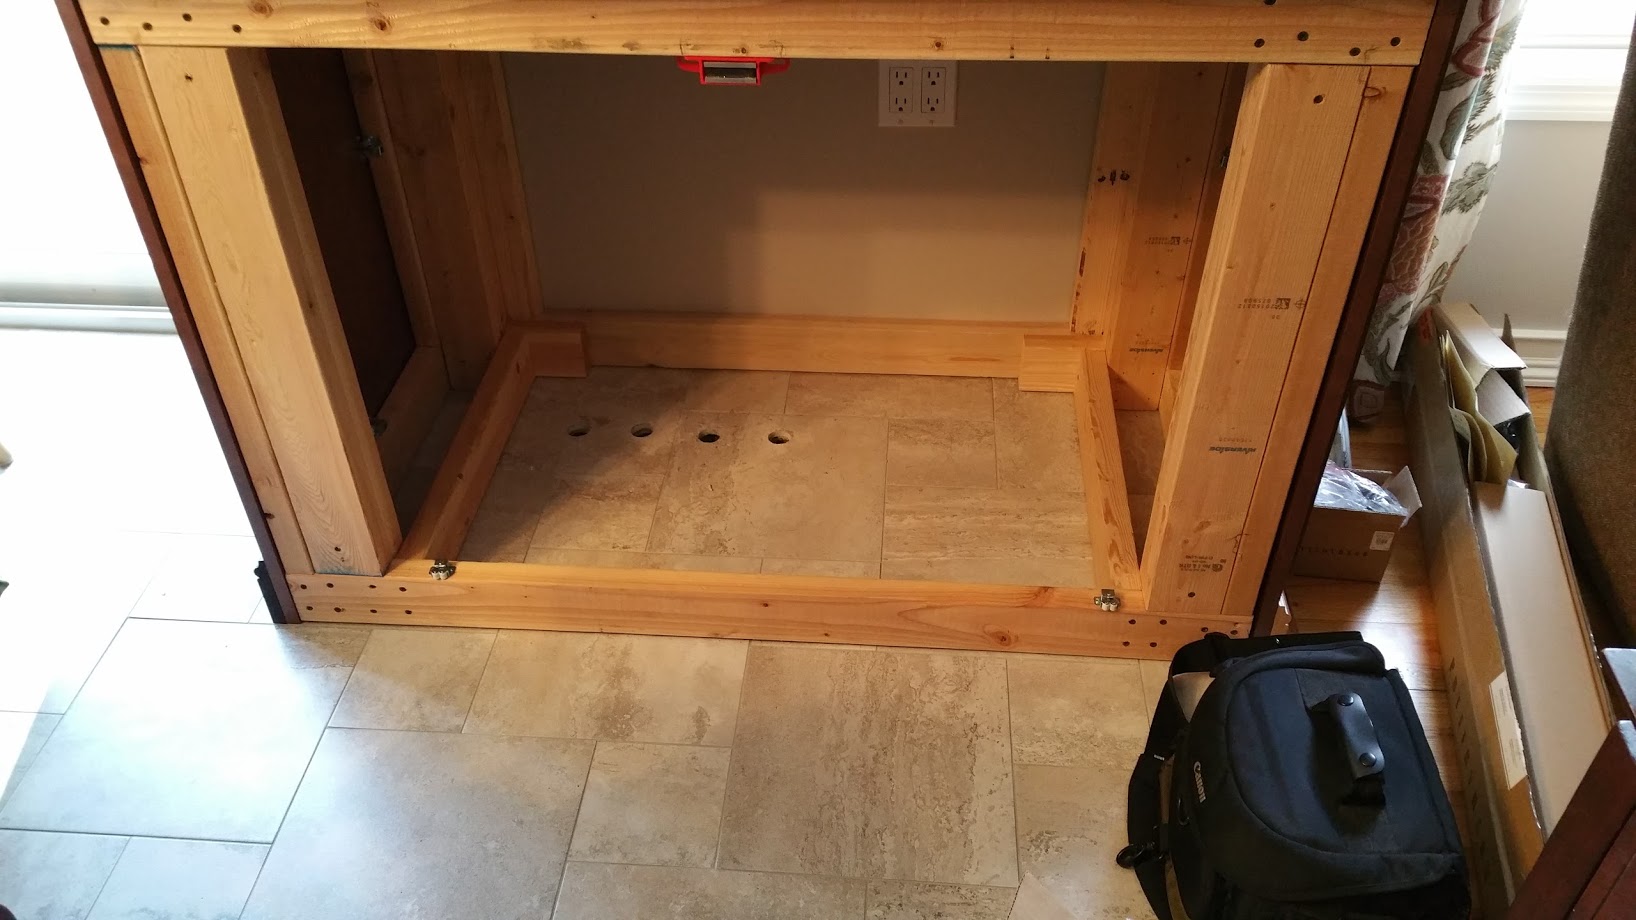
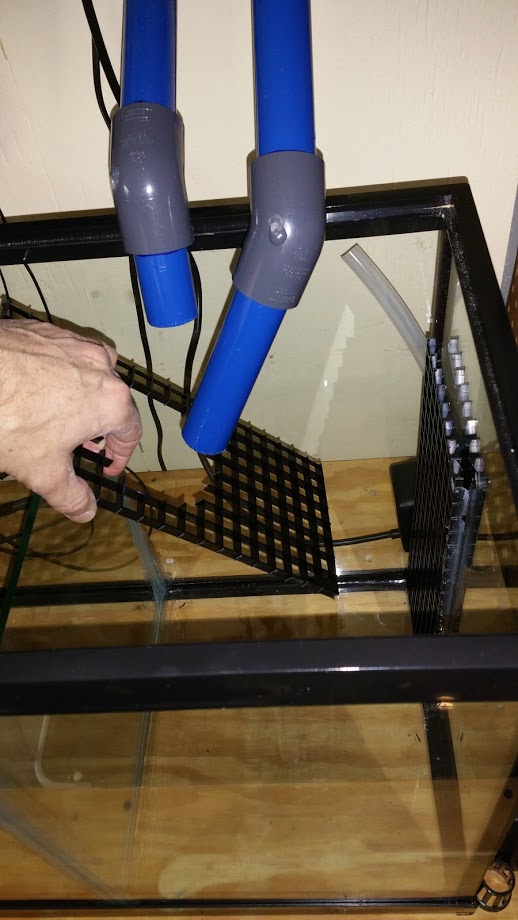
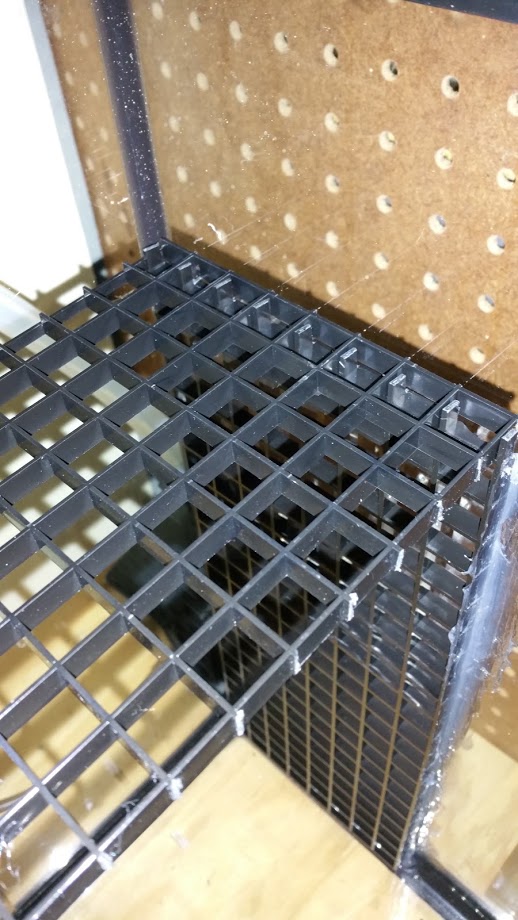
As you can see, there are 4 holes in the floor. I'm running 1 inch PVC with a Bean Animal overflow design. Now down to the utility room where most of the action has been up to this point.
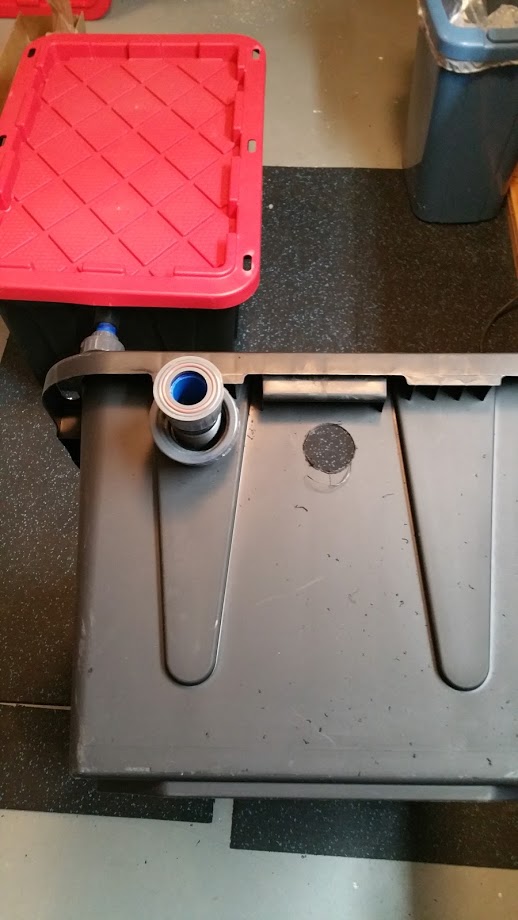
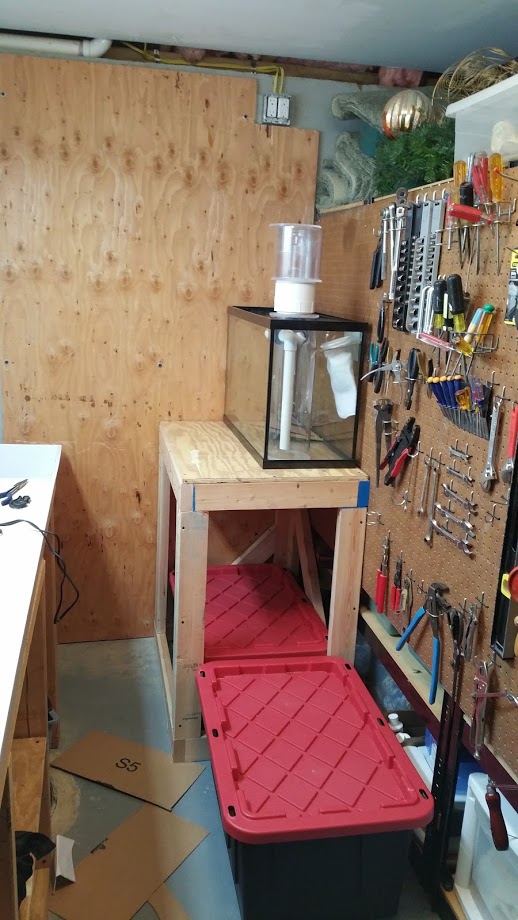
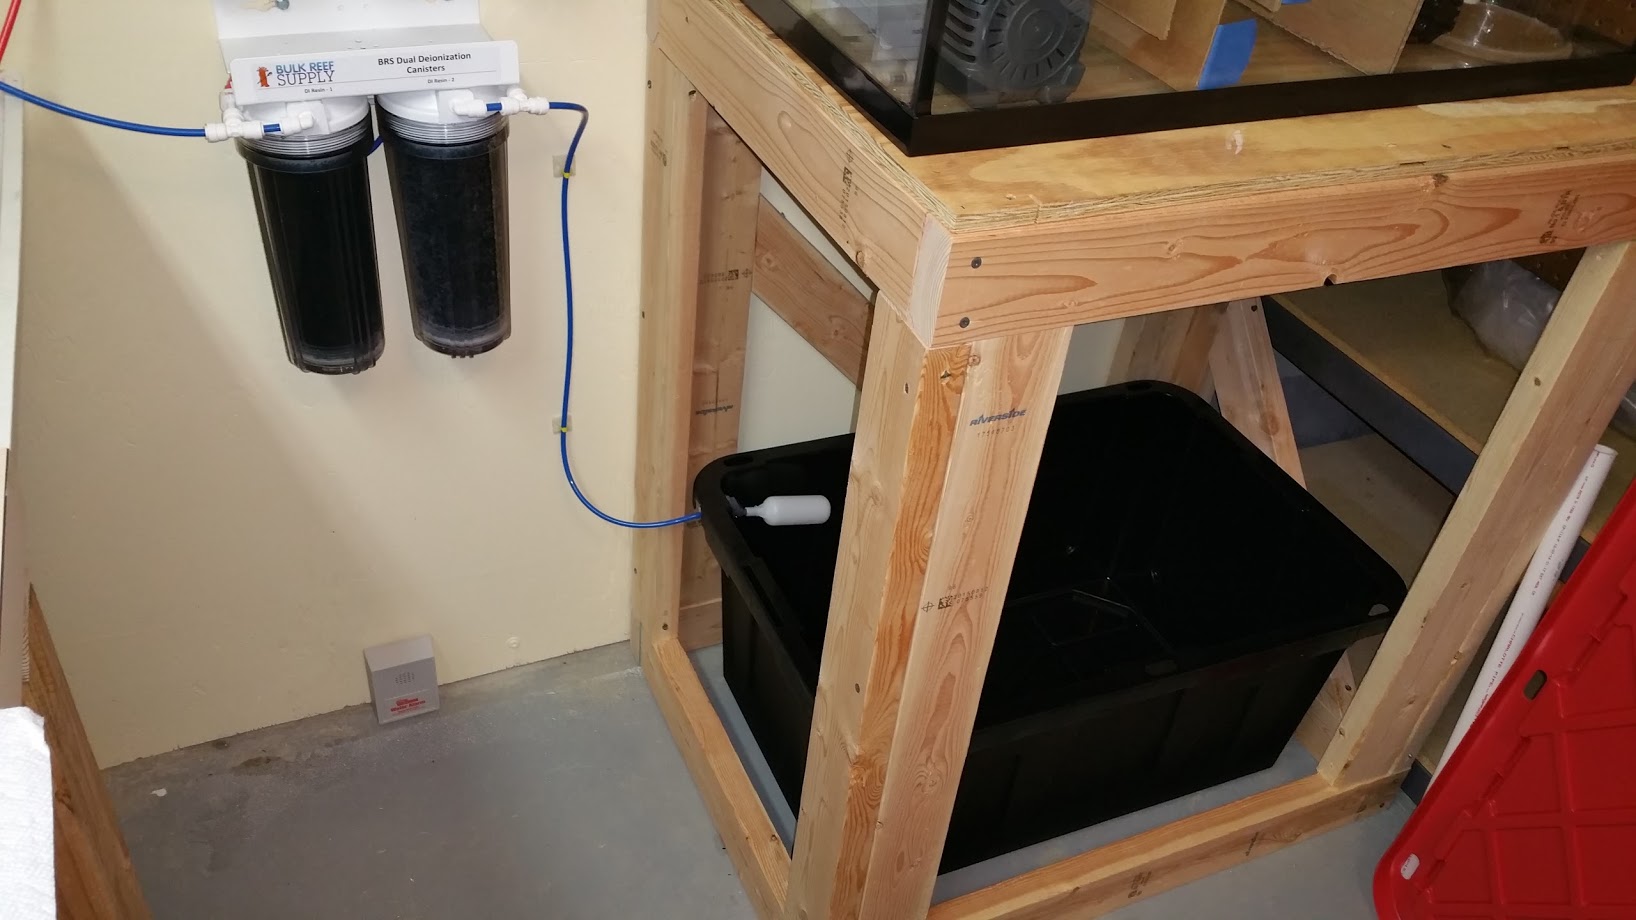
The first tasks were to put up 3/4 inch plywood against the foundation, build a stand for the sump and saltwater mixing station.
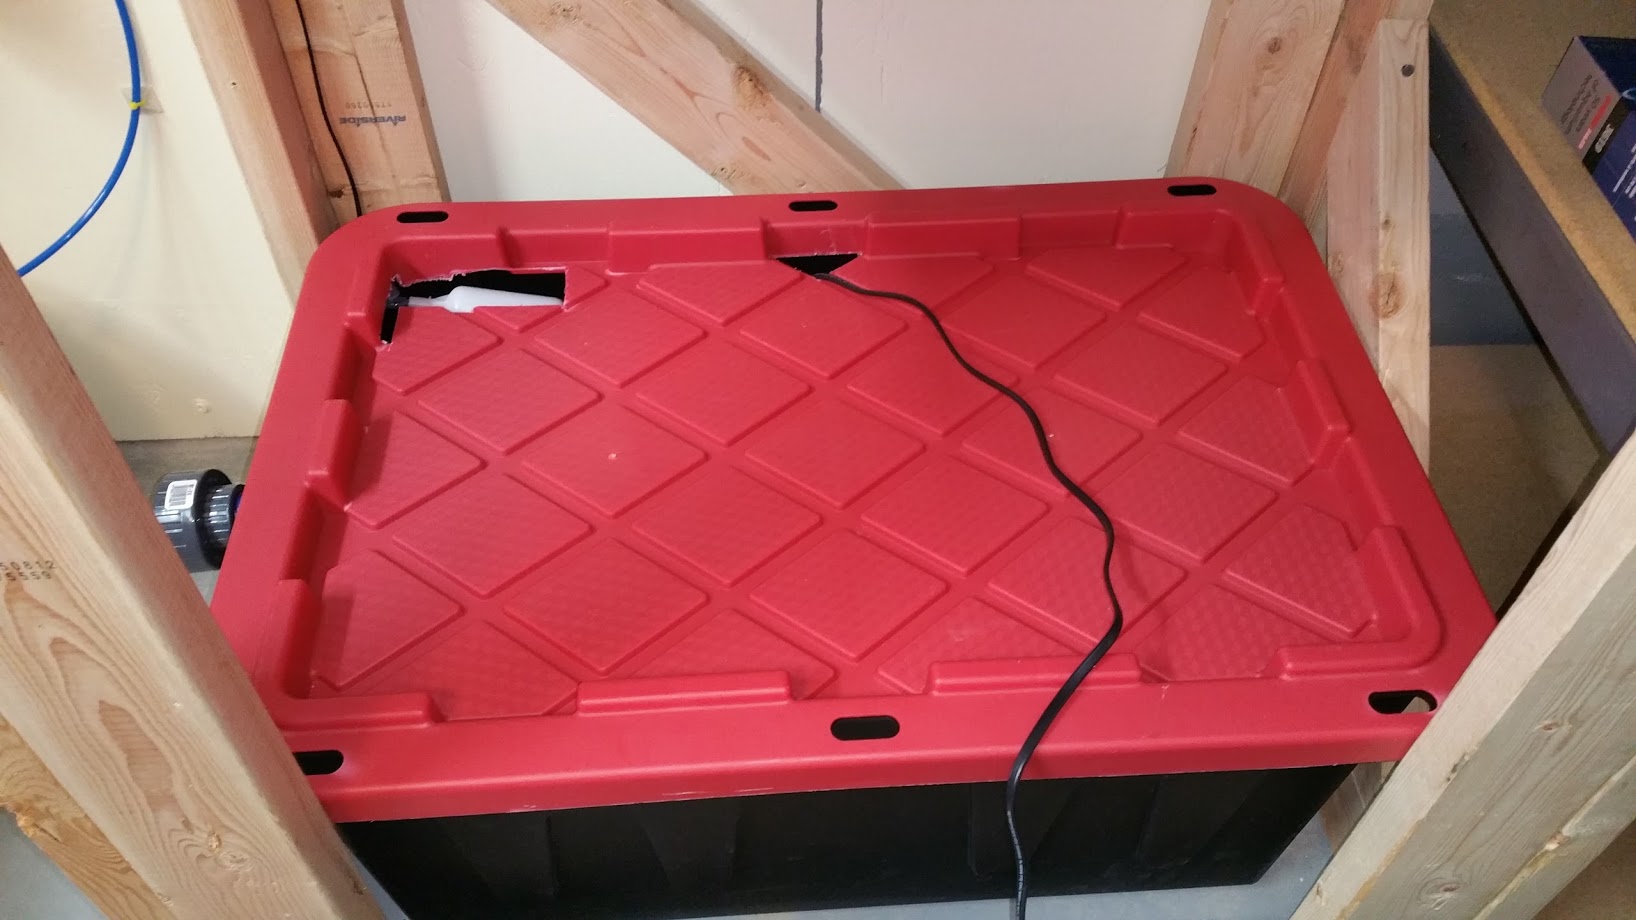
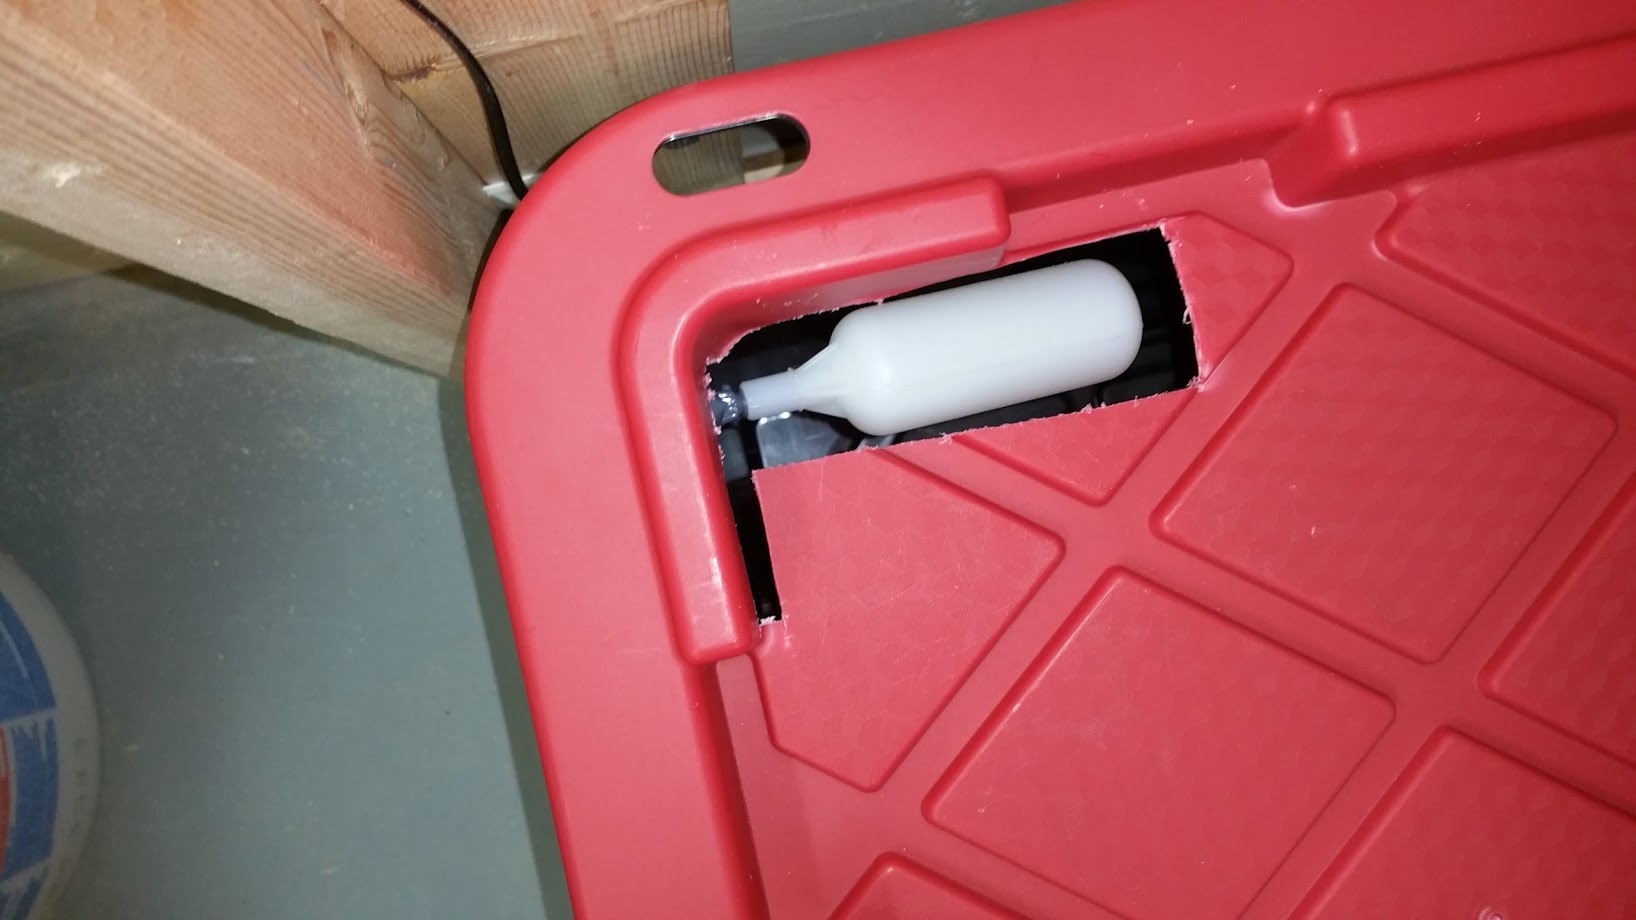
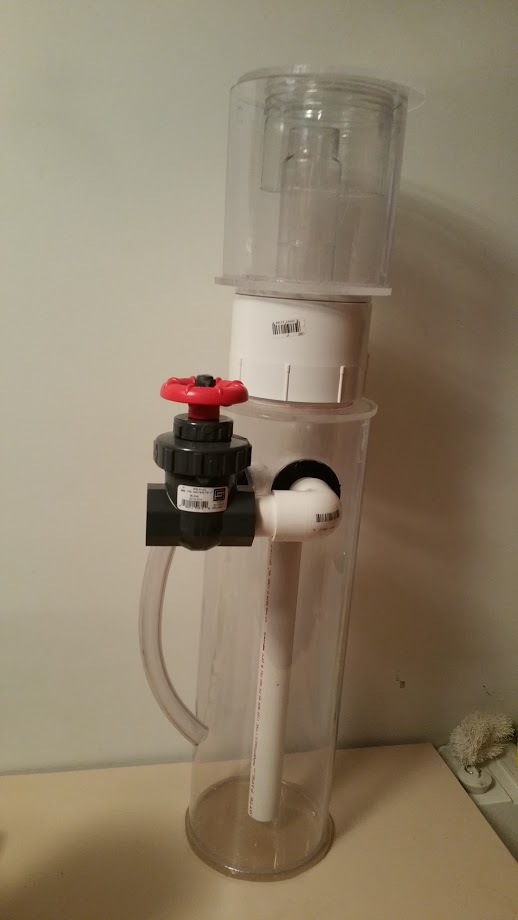
I also built my own protein skimmer. I got the idea from a YouTube video posted by Primo Reef Acrylics. Since I am not operational yet, I can't attest to how well it works, but I'll update this build thread once I get it going.
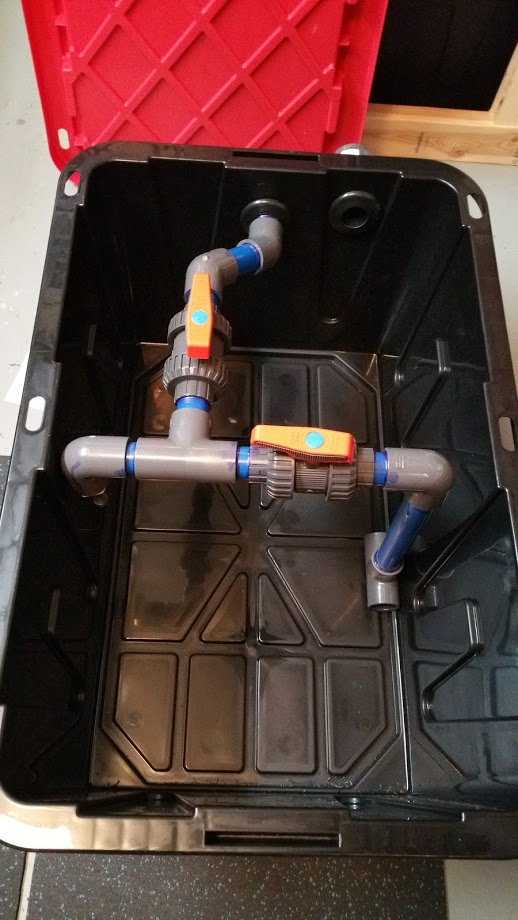
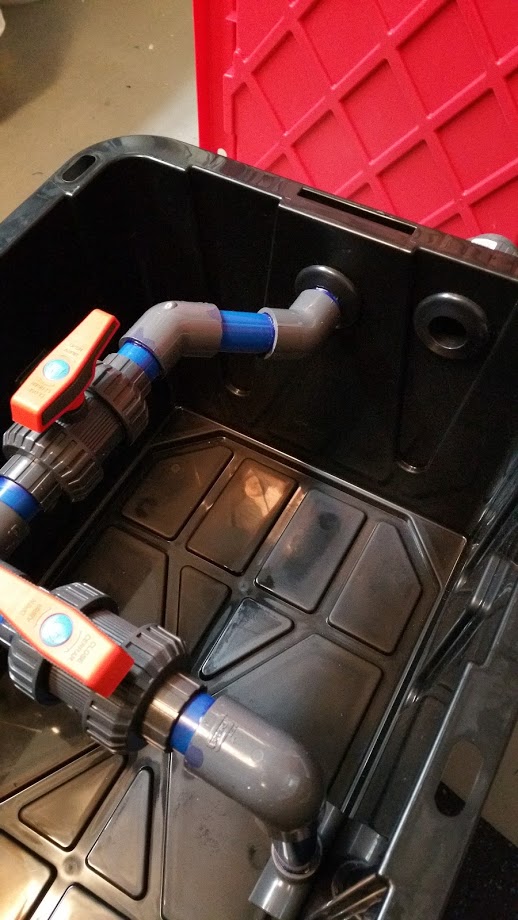
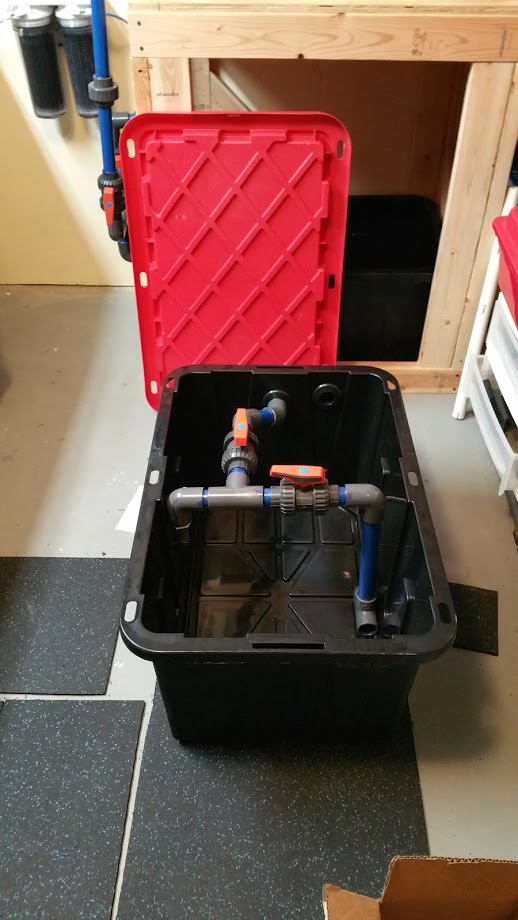
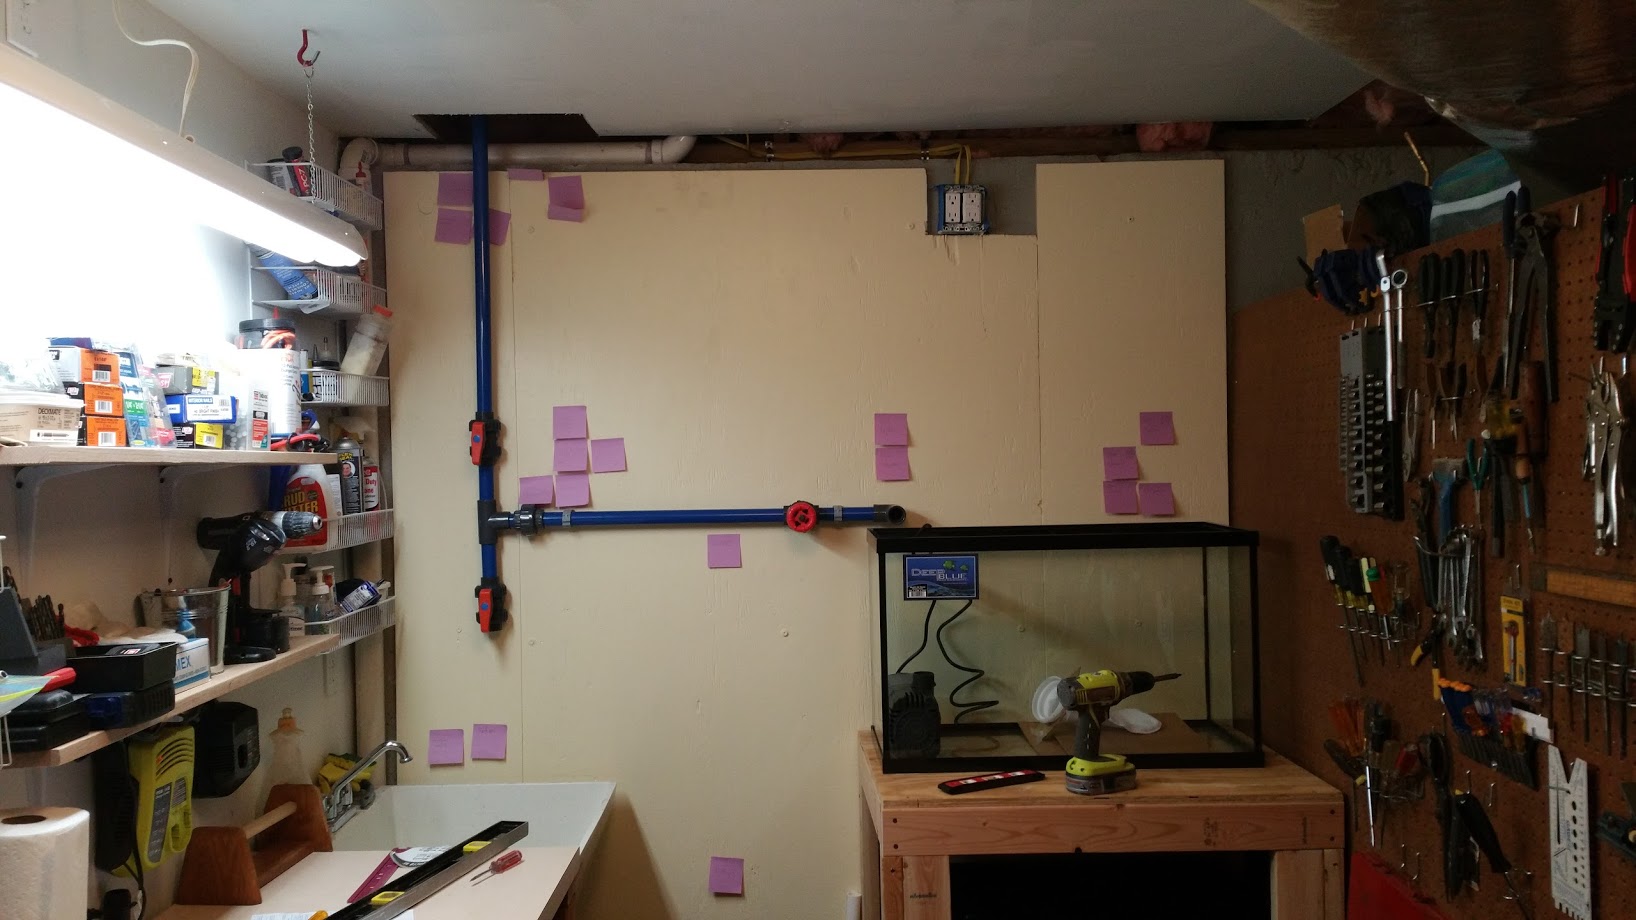
This is a shot of planning out the plumbing. If you are observant, you will notice that I the sump was rotated 90 degrees from the original plan. It took me a couple of weeks to move the workbench wall on the right to make more room, but it was well worth it. My philosophy is to take my time, think things through and always shoot for high quality and maintainability.
This shot shows the plumbing in the utility room nearing completion. The line on the left of the emergency overflow line. The next one over to the right is my return line. The two ball valves allow me to pump sump water to the DT or into my slop sink. The third line is the open channel and the fourth line is the full siphon. As you can see, I have a BRS six stage RO/DI system installed. The FW holding tank and SW mixing tank will be installed under the sump. They are not complete yet, but I'll post pics once they are done.
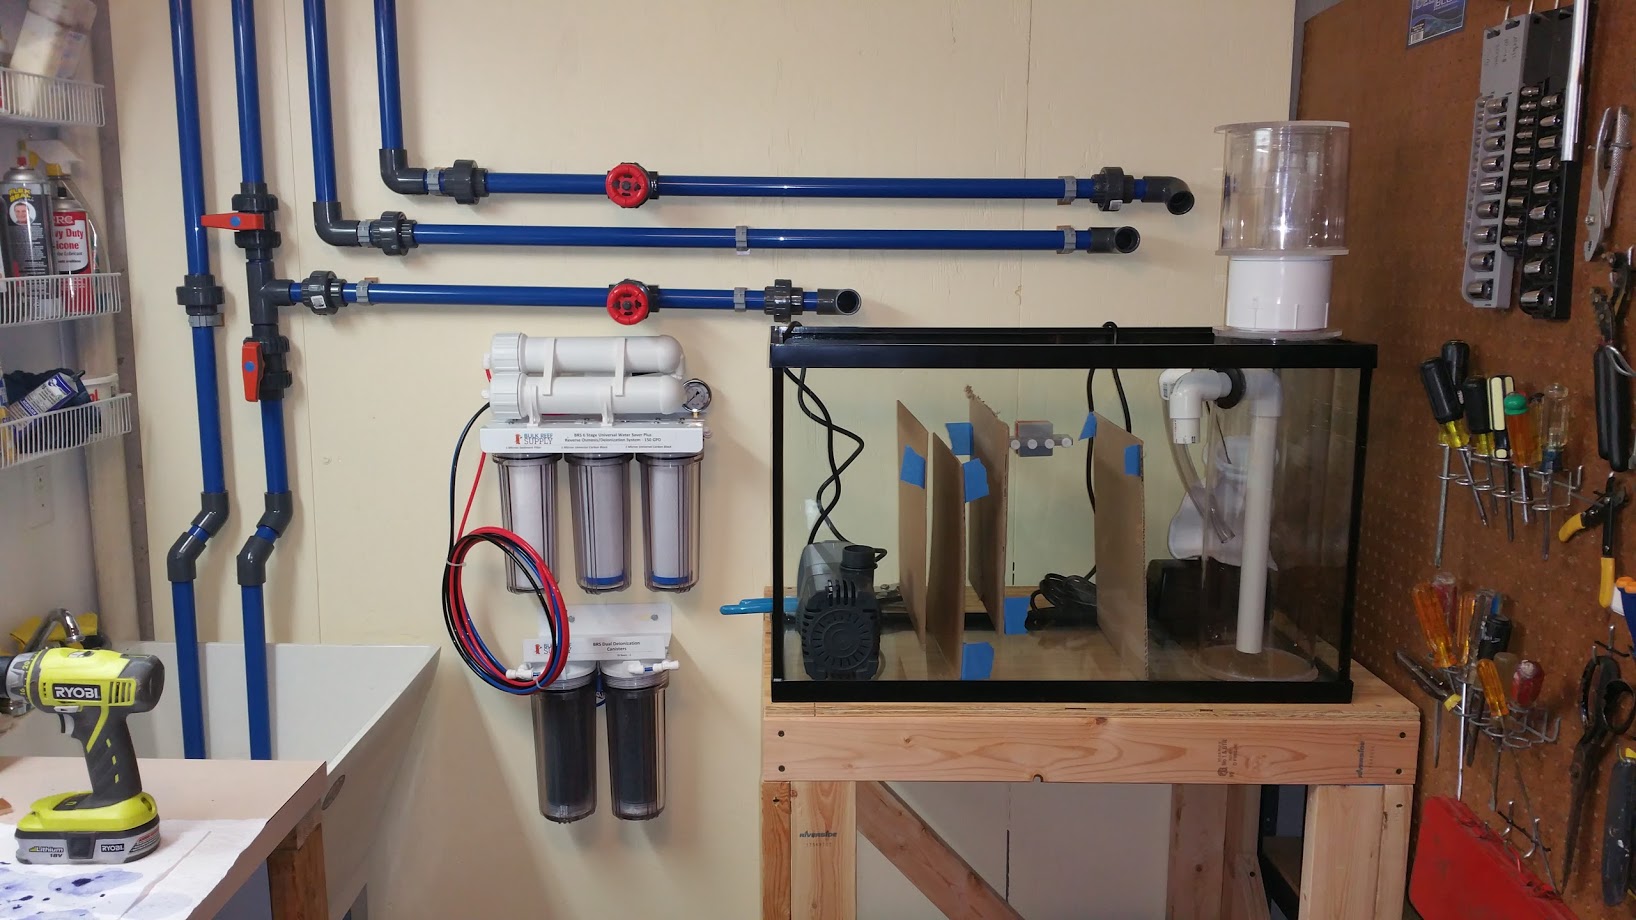
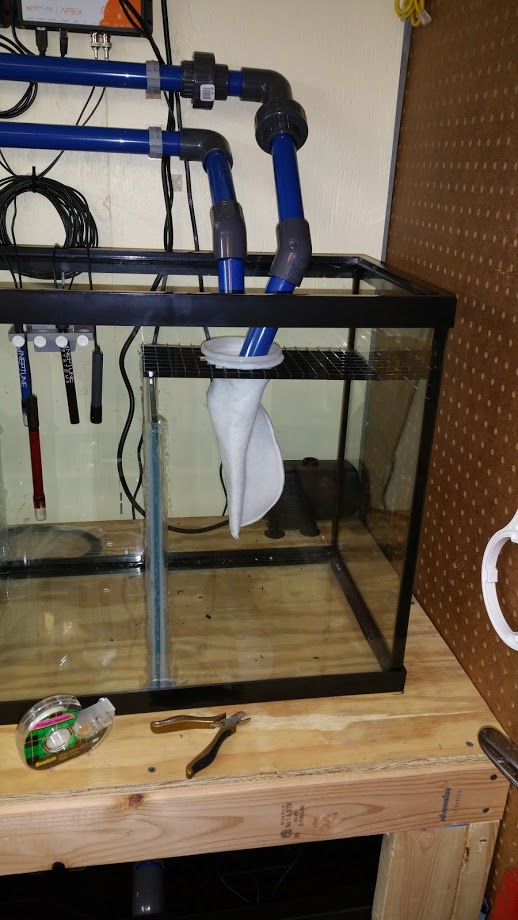
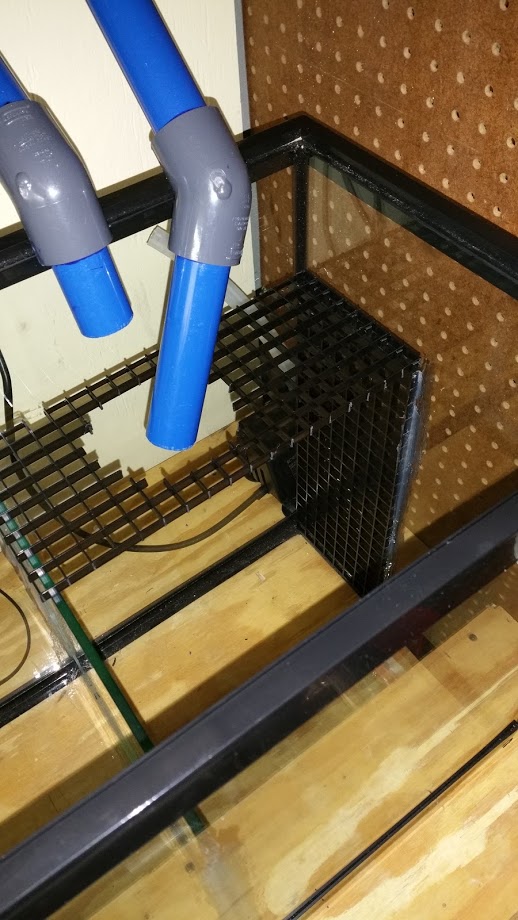
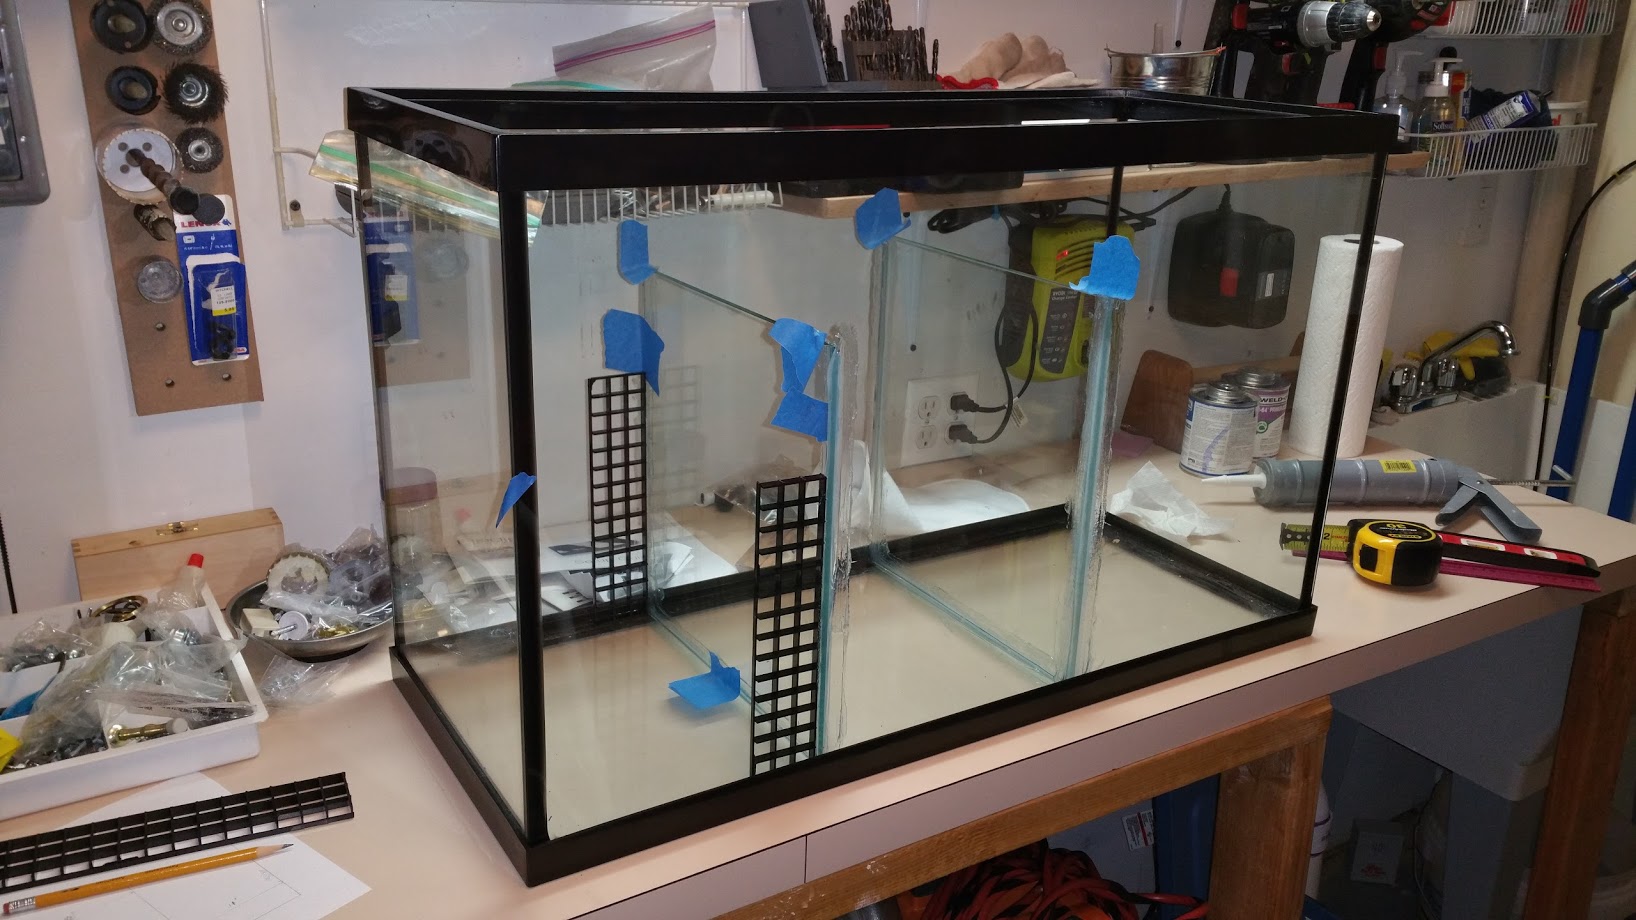
The sump has three sections: 1) Filter sock and protein skimmer 2) refugium 3) Return pump. I also used egg crate to create a shelf where I can place media. I plan to use activated carbon and GFO.

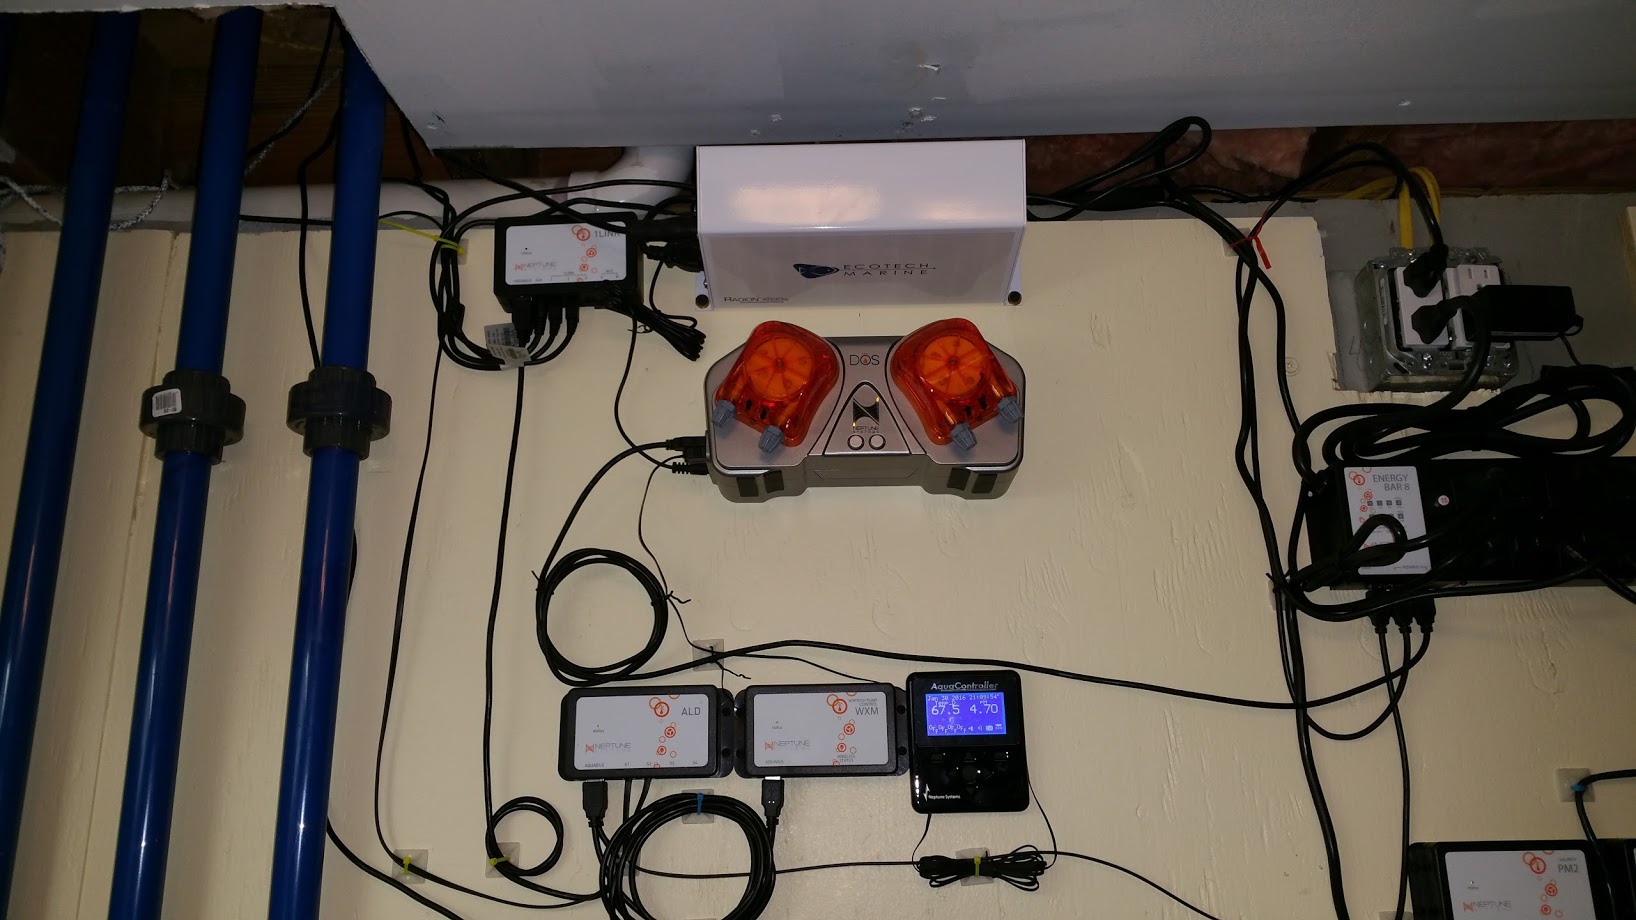
I decided to use a Neptune Apex Controller. I sprang for the Apex Gold. Here I was simply trying to figure out how to connect everything. It is a daunting task but I am incredibly impressed with the capabilities of the system. I will also give kudos to Paul on their technical support team. Superb!
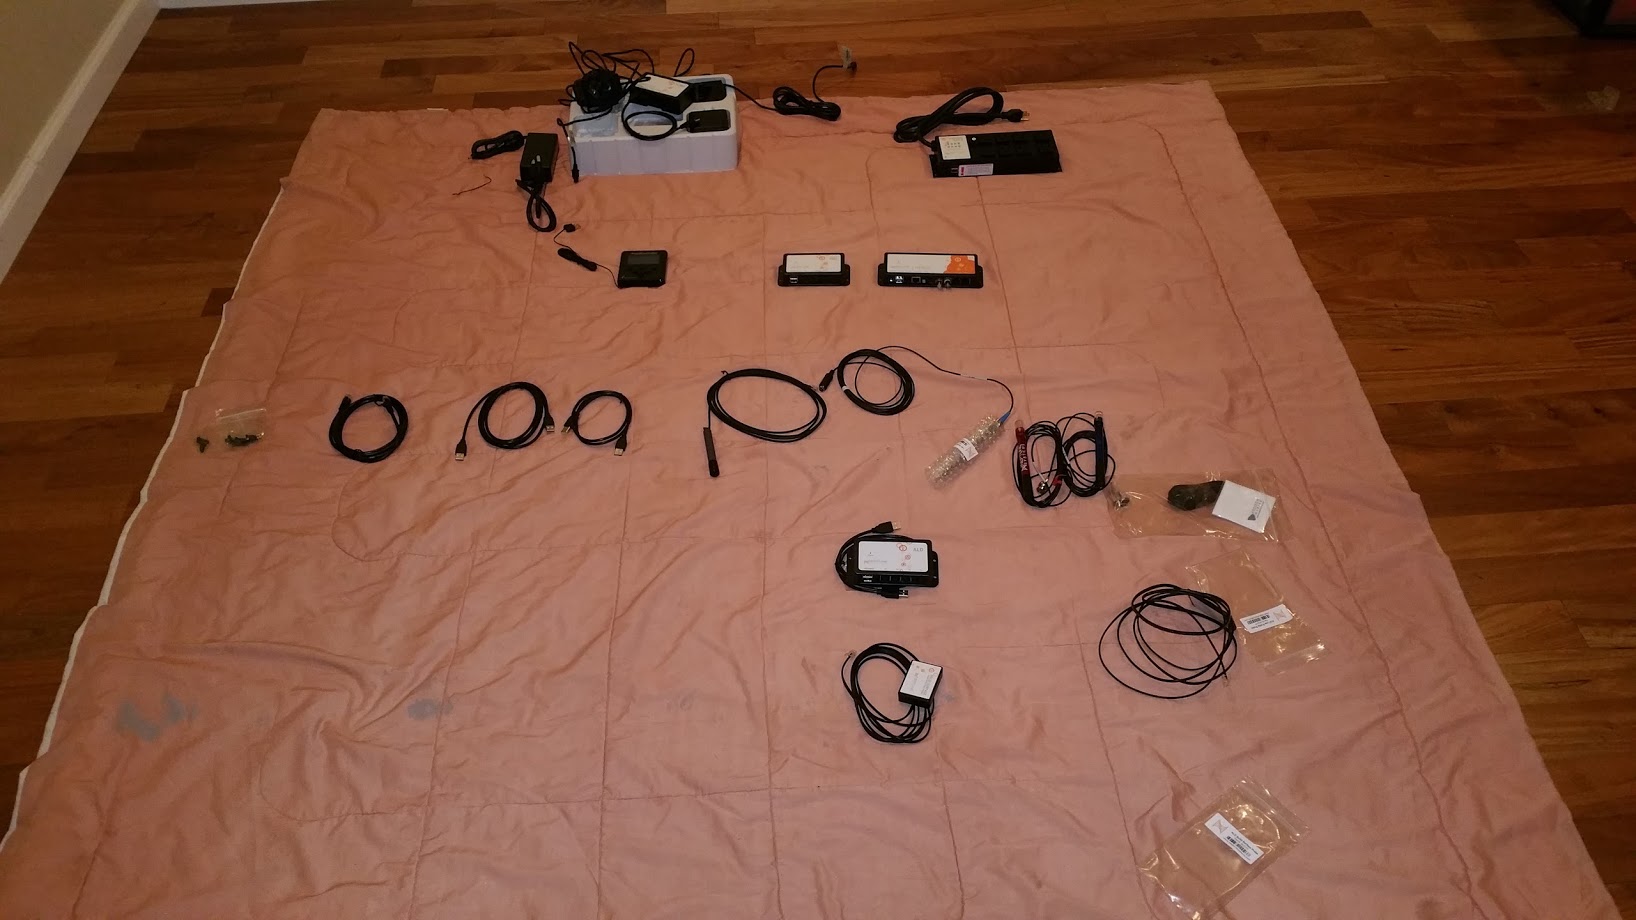
This shot show the area after the Apex install. In addition to the Apex Gold, I got a WAV starter kit, a second leak detector and a WXM wireless module to control my EcoTech Radion XR30w G3 Pro LED Light.
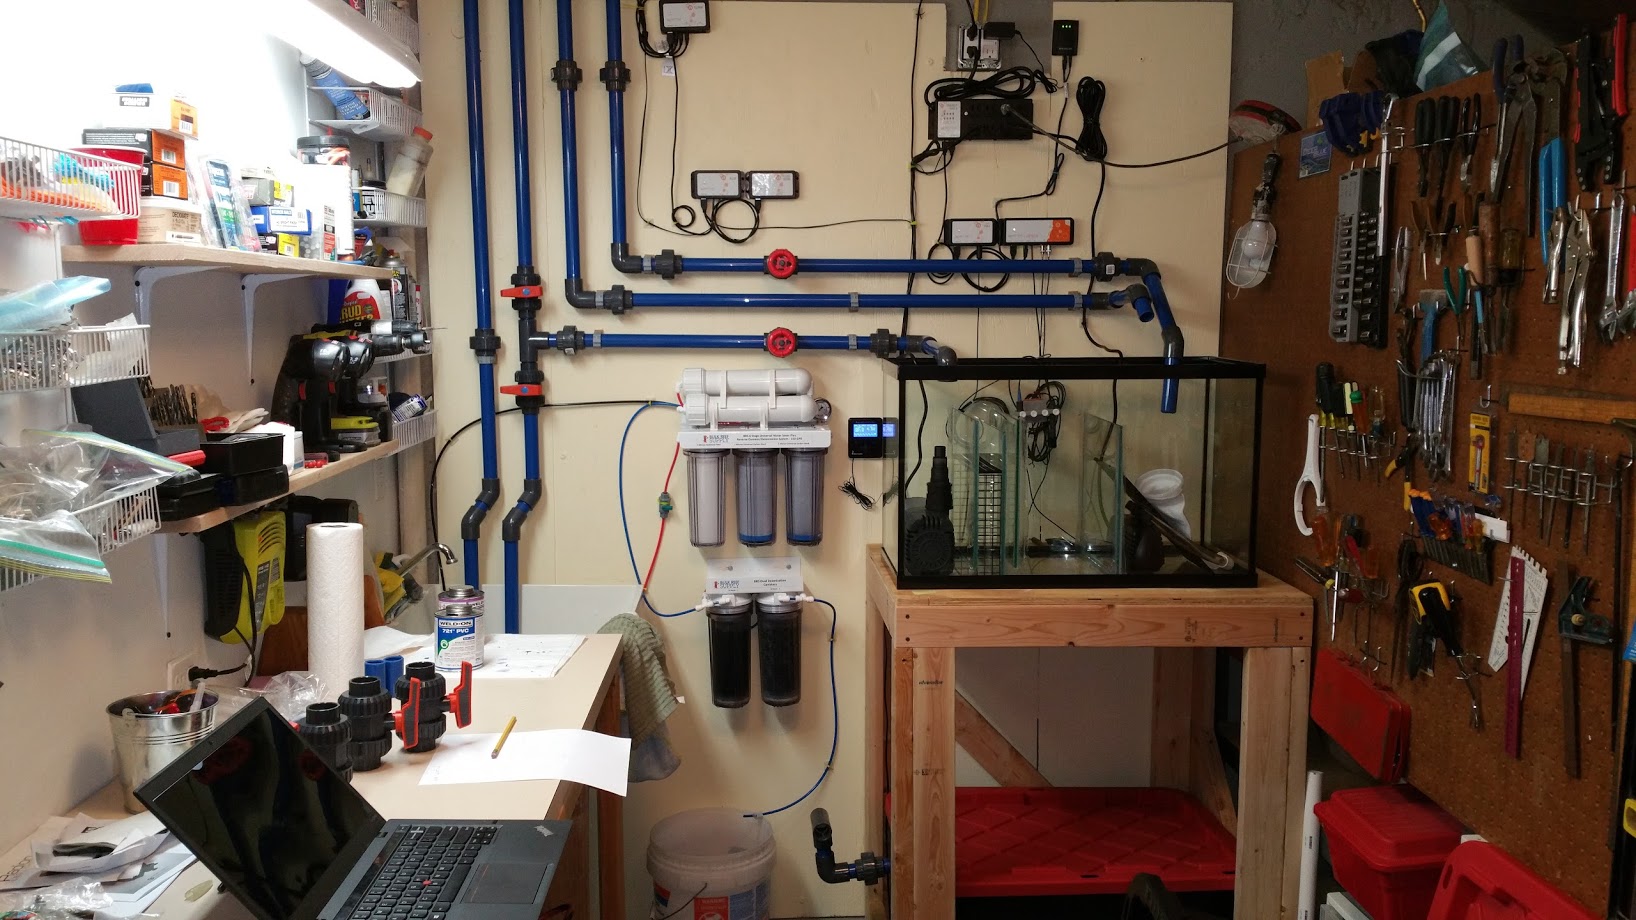
Here is an initial shot of my FW holding tank.
That's how far I have gotten as of 1/2/16. I will post updates as I progress. For those of you who have so generously given your time to help me learn an enormous amount in a short time, "Thanks again". Stay tuned!!
I have been an avid freshwater planted aquarium hobbyist for the better part of 3 decades. Here is a picture of my current pride and joy, which I intend to maintain as I build my reef
...and now on to the story of my reef build!
My wife and I recently remodeled the kitchen and I figured it was the right time to take the plunge. This is my wife standing next to the spot where the aquarium will go, ultimately next to our kitchen table. The tank will occupy the space to her right, where the vacuum cleaner is situated. I'm having an 85 gal, 48x24x17 tank built with Starfire glass on three sides.
I built the stand with design help from Joey over at The King of DIY. I wrapped it with the same cabinetry and counter top that we used in the rest of the kitchen. The cabinets are held on with magnets so I can easily get under the stand to work on stuff.
One of the huge design decisions was to go through the floor into my utility room in the basement instead of housing everything under the tank.
As you can see, there are 4 holes in the floor. I'm running 1 inch PVC with a Bean Animal overflow design. Now down to the utility room where most of the action has been up to this point.
The first tasks were to put up 3/4 inch plywood against the foundation, build a stand for the sump and saltwater mixing station.
I also built my own protein skimmer. I got the idea from a YouTube video posted by Primo Reef Acrylics. Since I am not operational yet, I can't attest to how well it works, but I'll update this build thread once I get it going.
This is a shot of planning out the plumbing. If you are observant, you will notice that I the sump was rotated 90 degrees from the original plan. It took me a couple of weeks to move the workbench wall on the right to make more room, but it was well worth it. My philosophy is to take my time, think things through and always shoot for high quality and maintainability.
This shot shows the plumbing in the utility room nearing completion. The line on the left of the emergency overflow line. The next one over to the right is my return line. The two ball valves allow me to pump sump water to the DT or into my slop sink. The third line is the open channel and the fourth line is the full siphon. As you can see, I have a BRS six stage RO/DI system installed. The FW holding tank and SW mixing tank will be installed under the sump. They are not complete yet, but I'll post pics once they are done.
The sump has three sections: 1) Filter sock and protein skimmer 2) refugium 3) Return pump. I also used egg crate to create a shelf where I can place media. I plan to use activated carbon and GFO.
I decided to use a Neptune Apex Controller. I sprang for the Apex Gold. Here I was simply trying to figure out how to connect everything. It is a daunting task but I am incredibly impressed with the capabilities of the system. I will also give kudos to Paul on their technical support team. Superb!
This shot show the area after the Apex install. In addition to the Apex Gold, I got a WAV starter kit, a second leak detector and a WXM wireless module to control my EcoTech Radion XR30w G3 Pro LED Light.
Here is an initial shot of my FW holding tank.
That's how far I have gotten as of 1/2/16. I will post updates as I progress. For those of you who have so generously given your time to help me learn an enormous amount in a short time, "Thanks again". Stay tuned!!