Gasman's(Bob) 110 REbuild

OP
OP
Gasman

Gasman

Community Member
View Badges
Joined
Sep 16, 2012
Messages
90
Reaction score
14
Location
Annandale, Minnesota
Rating - 0%
0   0   0
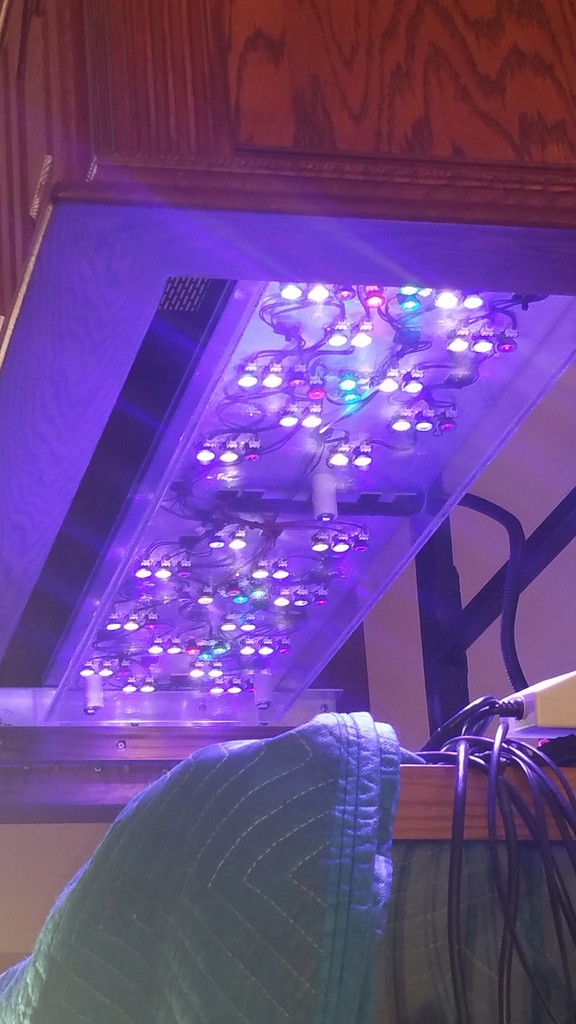
He has a built in lift for the canopy......omg

TCMASgallery.php


TCMASgallery.php


TCMASgallery.php

President - Twin Cities Marine Aquarium Society (TCMAS)
Treasurer of the Marine Aquarium Societies of North America (MASNA)
 
OP
OP
Gasman

Gasman

Community Member
View Badges
Joined
Sep 16, 2012
Messages
90
Reaction score
14
Location
Annandale, Minnesota
Rating - 0%
0   0   0
I see my posting assistant has done her job!!!! This needs some tweaking and paint but, it works! The canopy raises 24" above the tank so I can get in there if needed. I used 2 linear actuators from Progressive Automation along with a wireless remote control system. The power supply is just a laptop type (hard to believe this will lift 300 pounds). The track is from Glacier Machine. It consists of 2 machined 3/4" shafts with ball bearing block guides that ride on both shafts. Both the inner (moving) frame and outer frame my son(the one that went through the ice last year) and I welded together. We all sat around for its first test flight and it worked flawlessly. Funny to look around the room at all the SH** eating grins on every ones faces as it rose in the air........... of course until it looked like it might end up going in to the ceiling, then every one was scrambling for the power cord ....it stopped itself 1" short. The linear actuators have end switches.
Last edited by gasman; 12-27-2014 at 04:10 AM.
 
OP
OP
Gasman

Gasman

Community Member
View Badges
Joined
Sep 16, 2012
Messages
90
Reaction score
14
Location
Annandale, Minnesota
Rating - 0%
0   0   0
Took apart the whole tank and canopy again and out to the garage for added steel welded in on the moving carriage on the lift system. It worked fine until I set the 50lb heat sink on top......then the square tube started to bow enough that the canopy wouldn't come back down right on the tank. I also ordered some new linear actuators. The originals lift 150lbs each(there's 2 installed), the new ones lift 450 lbs each.....more power!!!!!!!! I also cut the lift back to 20" from 24", it was getting way to close to the ceiling. I am still shocked how smooth it works though.
 
OP
OP
Gasman

Gasman

Community Member
View Badges
Joined
Sep 16, 2012
Messages
90
Reaction score
14
Location
Annandale, Minnesota
Rating - 0%
0   0   0
Well, the new Linear Actuators are installed and operate really good. MUCH more power now! My "dead-man-walking" son helped me re-enforce the moving (carriage) part of the lift with more metal and more welding. He found out how much he likes welding! He held on to the canopy with the heat sink and went for a ride all the way up with it. I threatened to leave him there until he stays away from lake ice. Here's a few more pics....

20150113_225712_zps095fd3b8.jpg


20150113_225345_zps691b4063.jpg


20150113_225322_zpsadf04e2f.jpg


20150113_225813_zps3f20ccbe.jpg


Here's a look how the bearing block rides on the machined shaft...

20150113_225828_zpsfeae2b54.jpg


20150113_225458_zps9b55061b.jpg


....and the wireless remote system.

20150113_225551_zps2d02099e.jpg


And it is ALL powered by this laptop type power supply!

20150113_225638_zps75fa8955.jpg

Last edited by gasman; 01-14-2015 at 01:13 AM.
 
OP
OP
Gasman

Gasman

Community Member
View Badges
Joined
Sep 16, 2012
Messages
90
Reaction score
14
Location
Annandale, Minnesota
Rating - 0%
0   0   0
I will be SOOOOOO glad when this is all done. Now this lift is fighting me a bit. I added the stronger linear actuators to lift the canopy....They aren't moving at quite the same speed (synchronized). There are adjustment "pots" on the control to even this out but, its been a fight. My son is coming over this weekend and apart it comes again to weld in some more support pieces to the moving(carriage) part of this lift. I am also adding 2 more bearing blocks that will ride the shafts up and down to make the whole thing stiffer (rigid, I mean....this sounds bad)! Even with all the thick-walled square tubing, it likes to flex and slightly bind on the vertical columns when rising.......And I don't intend to let that it happen anymore!!! One more brace stick of square tubing between the vertical sections, right above where the linear actuators attach "should" minimize the flex. This should (in theory) put more of the weight on the "Over-Achiever" linear actuator and bog it down just slightly to let the other 1 catch up...we'll see if this works. And the whole thing is getting sanded and painted and then THAT"S ENOUGH on this lift!!!!. F@*&%^*R!

EHM, .....Beer please!
user164_pic601_1209494122.gif


20150129_164236_zps2d6056ff.jpg

Last edited by gasman; 01-30-2015 at 12:07 AM.
 
OP
OP
Gasman

Gasman

Community Member
View Badges
Joined
Sep 16, 2012
Messages
90
Reaction score
14
Location
Annandale, Minnesota
Rating - 0%
0   0   0
My son Josh and I were fighting with the canopy lift again tonight. We did some more welding and started sanding the metal down for primer and paint......
Yes, I know how to weld but, Josh enjoys doing it so...... let him, I say.
Slow progress but, what else is new with this tank build!


20150130_203718_zps6da3c798.jpg


20150130_203711_zps5f8c0a80.jpg


20150130_203944_zpsd4bebba7.jpg
 
OP
OP
Gasman

Gasman

Community Member
View Badges
Joined
Sep 16, 2012
Messages
90
Reaction score
14
Location
Annandale, Minnesota
Rating - 0%
0   0   0
As much as it all looks complex(and building it seems to be, with my constant complaining), the system is really quite simple. The electric linear actuators are attached by pins to their mounts and are readily removable for replacement WITHOUT moving the tank.. They are located near the sides (accessible). The bearing blocks that the carriage rides on are mounted with 6mm threaded rods, which can be removed from the sides if I want to remove the moving carriage for any reason. The controller for the linear actuators will be located inside the lower cabinet accessible from the front. And if, for some reason the whole lift assembly (frame and all) needs to come out, removing the 6 mounting bolts(accessible from the sides) will allow the whole thing to be slid out from behind the tank(after lifting off the canopy). My thought was to keep the lift as simple as possible(once built), the last thing I want to do is have more frustration once the tank is wet. I didn't installed the lift for the "Wow" factor, I am doing it for a more practical reason....the top with will weigh about 200 lbs with that blessed 50 lb heat sink for the LED's in the canopy, and I am lazy. The canopy doors open for daily chores like feeding, no lifting required. I will post a video of it lifting the canopy (with Angie's help) once this is done and before I push it back in to position and maybe that will show it better.

.....And as far as my son helping.....He's the one that went through the lake ice Nov. 15th 2013 and had no pulse for 2.5 hours and is back like it never happened (you made not have heard about that). Every minute I get with him is a bonus. Last edited by gasman; 01-31-2015 at 03:19 PM.
 
OP
OP
Gasman

Gasman

Community Member
View Badges
Joined
Sep 16, 2012
Messages
90
Reaction score
14
Location
Annandale, Minnesota
Rating - 0%
0   0   0
And another night of having my living room look like this. And notice the gawd-awful flowery furniture yet? This fine FINE flower arrangement is WAY past ready for the fire pit!

20150131_201624_zpsa561c9e1.jpg
 
OP
OP
Gasman

Gasman

Community Member
View Badges
Joined
Sep 16, 2012
Messages
90
Reaction score
14
Location
Annandale, Minnesota
Rating - 0%
0   0   0
Here, check this out. Here's the canopy lift. Finished some improvements over the weekend and it's working great! The reason for the moving blanket on top is so I could set the 50 lb heat sink for the LEDs up on top just to make sure it worked ok with the added weight.

This is a link to the video of the lift doing it's thing. I don't know how to post video's here yet.

https://www.facebook.com/video.php?v...11578465006364


Here's a couple pic's of the ball bearing blocks this lift rides on. I loaded then up with lithium grease before installing them. I used 6 of these blocks on the lift.

20150204_180708_zpse2628e3c.jpg


20150204_180652_zps9e9fed8d.jpg

Last edited by gasman; 02-05-2015 at 06:38 PM.
 
OP
OP
Gasman

Gasman

Community Member
View Badges
Joined
Sep 16, 2012
Messages
90
Reaction score
14
Location
Annandale, Minnesota
Rating - 0%
0   0   0
Ok, there has been a few questions of where I got the parts from.

The linear actuators(the parts that do the lifting) I bought here.....
http://www.progressiveautomations.co...sec-p-227.aspx
The wireless control box and power supply were from here....
http://www.progressiveautomations.co...tes-p-286.aspx
the machined rails and bearing blocks came from here.....
http://www.glacern.com/sbr

Check around on the internet for these things, you might find a better source. Progressive Automations is in western Cananda. The shipping is kinda expensive.
I see Progressive is selling through Amazon, as well. I don't know if Amazon Prime will work with that company. There's other ways to do lifts...check on YouTube. I seen garage door openers used, medical surplus motors, etc.


If you have questions on building your own....just PM me. It really isn't that tough to do if you have access to a welder and a way to cut metal......just measure, REmeasure and then measure again!
Last edited by gasman; 02-06-2015 at 11:54 PM.
 
OP
OP
Gasman

Gasman

Community Member
View Badges
Joined
Sep 16, 2012
Messages
90
Reaction score
14
Location
Annandale, Minnesota
Rating - 0%
0   0   0
The LED's are getting starting. Brian (ArstenA) came out to house today and got me starting in the right direction. I can see my fun is just starting!!!! Waiting for a few more LED's to show up that I didn't order before.

20150221_204618_zpsce91810c.jpg


20150222_182708_zps2b2e93a9.jpg


20150222_182658_zps3d8ba7ba.jpg
 
OP
OP
Gasman

Gasman

Community Member
View Badges
Joined
Sep 16, 2012
Messages
90
Reaction score
14
Location
Annandale, Minnesota
Rating - 0%
0   0   0
Well Brian stopped out and got me heading in the right direction on the led's. Just finished the wiring this last weekend. I still need to turn down the drivers a little bit. Even though the led's are rated for certain milli-amp ratings it is a better Idea to keep them away from that max current flow. Sounds like the led's can burn out faster if run at the max rating for too long. I know most folks usually don't run their led's all the way up anyway, just want to make sure the driver,also,wont let it happen. If your going to build your own, be sure to watch the max current rating for each color, it can change dramatically. My UV's have a max rating of 700 mA while the 2 different whites are at 1500 mA, the reds are 750, the reg blues and greens are at 1000 and the Royal blues are at 1500.

Here are some pics from the build so far....


Adjusting current on one of the Royal Blue led drivers.
20150301_121931_zpsqesnehl4.jpg


20150301_121712_zpsdmamcumi.jpg


The driver current adjustment pot, turn these all the way down before you plug it in (that's all the way counter-clockwise on these drivers).
20150301_121651_zpskbv7hvj6.jpg


Let there be light!!!! You can see all 6 drivers on the right side of the pic. Each channel is controlled by the Apex. All are dimmable drivers, the 0-10 volt ones.
20150301_131010_zps6iniuavx.jpg

Last edited by gasman; 03-06-2015 at 10:48 PM.
 
OP
OP
Gasman

Gasman

Community Member
View Badges
Joined
Sep 16, 2012
Messages
90
Reaction score
14
Location
Annandale, Minnesota
Rating - 0%
0   0   0
Glued on lenses & added an acrylic cover around the LED's to keep the saltwater away......now to mount it in the cabinet!!

20150315_170839_zps9ya8d5cs.jpg


20150315_171035_zpsbzd8xzql.jpg


20150315_170938_zpszttwinp2.jpg
 
OP
OP
Gasman

Gasman

Community Member
View Badges
Joined
Sep 16, 2012
Messages
90
Reaction score
14
Location
Annandale, Minnesota
Rating - 0%
0   0   0
Finally have the heat sink and led lights mounted in the canopy. What a huge PITA that was. I have a back to build for the canopy yet and secure all the electrical mess, Hears a look....

20150327_145307_zps9pwhyrey.jpg


20150327_145240_zpsotkwgktt.jpg


20150327_145326_zpswqg4mrnr.jpg


20150327_152305_zpsmialzbw9.jpg


20150327_204107_zps8rlqez3j.jpg
 
OP
OP
Gasman

Gasman

Community Member
View Badges
Joined
Sep 16, 2012
Messages
90
Reaction score
14
Location
Annandale, Minnesota
Rating - 0%
0   0   0
Updating build thread photos.................


The back on the canopy, getting a bit busy.
20150406_211439_zpsu0n99wd0.jpg


20150418_095803_zpsrbwqhkgh.jpg


Fan controllers mounted for the left a right sides of the heat sink. I clamped the controller sensors(thermistors) to the heat sink metal so it will be lkess likely to "short cycle" the fans on/off.
20150418_095901_zpstbaukfcj.jpg


Here's a closer look at the mess, will straightened it up.......later.
20150418_095949_zpshnqune9f.jpg


Yet another rats nest to clean up. Glad to finally have components installed. This big box w/the gauge on the bottom is a power supply for the lift. The one that came with the linear actuators fried and really was marginal for what it had to do. This replacement 12 volt power supply can pump out 50 amps.
20150418_095841_zpsfpug5hho.jpg

Last edited by gasman; 04-19-2015 at 12:55 PM.
 
OP
OP
Gasman

Gasman

Community Member
View Badges
Joined
Sep 16, 2012
Messages
90
Reaction score
14
Location
Annandale, Minnesota
Rating - 0%
0   0   0
Updating the build pics, most of this is the return plumbing. That first 2 pics shows the Loc-Line valves installed but, if I would have left it this way the lines from these would have stuck too far into the tank. I added some fittings to tuck the nozzles as close to the back of the tank as possible. My whole plan was to keep them low profile. I think this is as good as it gets without drilling the glass for the return lines.......... NO THANKS! That would be TOO interesting with how tight it is for space behind the tank now.


20150504_011325_zpszd0vjdby.jpg


20150504_011347_zpshpudqmin.jpg


20150505_210810_zpsmgryehcl.jpg


20150505_210840_zpsnvocz2j7.jpg


20150505_210857_zpsvjqwtjl1.jpg

Last edited by gasman; 05-05-2015 at 10:26 PM.
 
OP
OP
Gasman

Gasman

Community Member
View Badges
Joined
Sep 16, 2012
Messages
90
Reaction score
14
Location
Annandale, Minnesota
Rating - 0%
0   0   0
Let there be rock:

Apologies for crappy pics - but at least I remembered to take some!

TCMASgallery.php


TCMASgallery.php


TCMASgallery.php


TCMASgallery.php


TCMASgallery.php


TCMASgallery.php


TCMASgallery.php


TCMASgallery.php


TCMASgallery.php


TCMASgallery.php

President - Twin Cities Marine Aquarium Society (TCMAS)
Treasurer of the Marine Aquarium Societies of North America (MASNA)
 
OP
OP
Gasman

Gasman

Community Member
View Badges
Joined
Sep 16, 2012
Messages
90
Reaction score
14
Location
Annandale, Minnesota
Rating - 0%
0   0   0
Here's an update.....


The cabinet was a rats nest...
20150601_203822_zpsbahuf9xy.jpg


But looks MUCH better after tonight!

20150611_213649_zpsuu1ta9dw.jpg


I noticed some of my cool white led's are dimming and going yellow. I ordered new cool white led's, the more robust led's that can handle up to 3 amps. I think maybe the adhesive I used to attach the lenses to the led's may be the root cause of this dimming and discoloration.


20150607_200550_zpswmziwfds.jpg


20150606_215415_zpsljewdumo.jpg


Got a little more plumbing done, as well.

20150601_201513_zps5dmpdrbh.jpg

Last edited by gasman; 06-11-2015 at 10:49 PM.
 

Tentacled trailblazer in your tank: Have you ever kept a large starfish?

  • I currently have a starfish in my tank.

    Votes: 62 32.1%
  • Not currently, but I have kept a starfish in the past.

    Votes: 50 25.9%
  • I have never kept a starfish, but I hope to in the future.

    Votes: 40 20.7%
  • I have no plans to keep a starfish.

    Votes: 39 20.2%
  • Other.

    Votes: 2 1.0%
Back
Top