Glb's 40g upgrade!

Mandrew

Well-Known Member
View Badges
Joined
Aug 22, 2014
Messages
963
Reaction score
434
Location
United States
Rating - 0%
0   0   0
Love this! So what size bit, bulkhead and pipes did you use? I may buy that stuff locally.
ImageUploadedByREEF2REEF1438730363.295909.jpg
ImageUploadedByREEF2REEF1438730383.120234.jpg
ImageUploadedByREEF2REEF1438730394.346382.jpg


This is how I plumbed it. Out of the bulk head to a condenser and into a flex return hose into my sump. Then the return is self explanatory. Super super easy.
ImageUploadedByREEF2REEF1438730463.679571.jpg
 
OP
OP
glb

glb

7500 Club Member
View Badges
Joined
May 12, 2013
Messages
8,129
Reaction score
3,362
Location
Miami
Rating - 0%
0   0   0
With that shelf in there you won't be able to fit an insump skimmer. Better measure!!
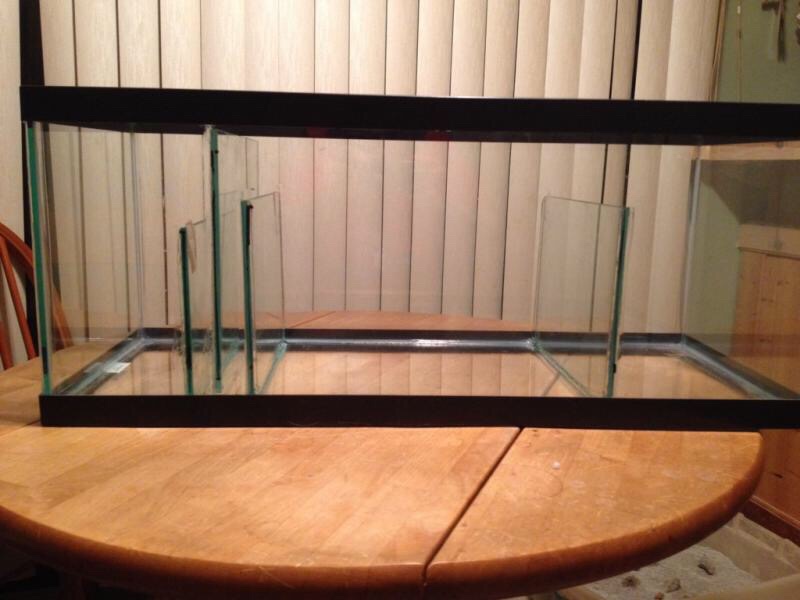
You're right. I've thought about cutting the shelf to make a box on one side of the cabinet for electronics, which would give me the entire height on the other side. Do you think I could get by with a 10g sump?
 
OP
OP
glb

glb

7500 Club Member
View Badges
Joined
May 12, 2013
Messages
8,129
Reaction score
3,362
Location
Miami
Rating - 0%
0   0   0
Also, can someone send me instructions on how to build a sump? I'd have a skimmer and filter sock in the first compartment, filter media like purigen, carbon and gfo in the second, and the return pump in the third. I know you need to build a bubble trap after the first one, and I think there's one wall between the second and third that may have openings in it, but I have no clue how it all goes together.
 
OP
OP
glb

glb

7500 Club Member
View Badges
Joined
May 12, 2013
Messages
8,129
Reaction score
3,362
Location
Miami
Rating - 0%
0   0   0
ImageUploadedByREEF2REEF1438730363.295909.jpg
ImageUploadedByREEF2REEF1438730383.120234.jpg
ImageUploadedByREEF2REEF1438730394.346382.jpg


This is how I plumbed it. Out of the bulk head to a condenser and into a flex return hose into my sump. Then the return is self explanatory. Super super easy.
ImageUploadedByREEF2REEF1438730463.679571.jpg
So those are 1" pipes for everything?
 

Mandrew

Well-Known Member
View Badges
Joined
Aug 22, 2014
Messages
963
Reaction score
434
Location
United States
Rating - 0%
0   0   0
My Berlin sump came with the flex hose for the overflow. Then I got an adapter to glue into the bulkhead from glass holes. Other than that I'm pretty sure all my return stuff is 1"
 

redfishbluefish

Stay Positive, Stay Productive
View Badges
Joined
Mar 22, 2012
Messages
11,706
Reaction score
25,730
Location
Sayreville, NJ
Rating - 0%
0   0   0
If you're going Glass-Holes, which I'd recommend, the kit comes with everything....including the drill bit to drill the hole....and it won't be close to the plastic trim. The template will direct you where to drill the hole. And anyway, the general rule on glass is never closer to the edge or another hole than the diameter of the hole.

The 700 gph kit (which I recommend for a 40B) will have a 1 1/2 inch drain out the back of the tank. The Glass-Holes folks do not want you to neck that down....so 1 1/2 inches into the sump.

As mentioned, that second shelf will have to go....for the height of the skimmer and for getting in and out of the sump. You'll need to fit your equipment in their, or in a cabinet next to this one, or build a custom cabinet to hold everything. And I'd prefer the 20 gallon over the 10 gallon sump....gives you more room and flexibility.

As far as building the sump....easy peasy. You'll need a builder's square, a Sharpie, appropriate silicone (I use GE Silicone I), and your baffles. Baffles can be plexi or glass that you'll want cut about a 32nd smaller than the inside width of the tank. I've built my fair share of sumps and now build them without bubble traps. I think the new skimmers are pretty efficient in putting out bubble free water. I originally build three baffled bubble traps just to watch, as not a single bubble would go into the trap. My current sump has two baffles. Here's a picture, and just so you know, I have two drains, one each in the back two corners, with my return section in the middle of the sump.


OK, building a sump.....the critical compartment is the skimmer.....you need to have the width to fit your skimmer....and here's the important part.....and also be able to get it in and out of the sump when in the stand. So just don't go off the actual width of the skimmer. Add an inch or whatever is needed so you can angle it out of the sump (when it's in the stand). The other critical area is the return section....simply needs to fit the pump. The refugium/reactor/whatever section is going to be whatever is left over.

So you've determined the sizes of each compartment. Now mark the outside of the sump with these dimensions. Using the building square, draw lines perpendicular to the base of the tank that show where the baffles will go. You're doing these lines on the outside of the sump so that when you're all done, a swipe with some rubbing alcohol will remove these lines. Oh, and I put these lines on both sides of the tank and on the bottom as well....so I know where to put the silicone.


If you're using plexi, as a minimum, use 1/4 inch. Anything smaller will bend too easily from the weight (force) of the water. With glass, don't simply use that real thin window pane glass they have at the big box stores...that's too thin....need to go a bit thicker (and I can't tell you exactly because I only use plexi or polycarbonate). Now lay down a pretty thick bead of silicone alone the lines you drew. Holding the baffle at an angle, place it into the silicone at the bottom of the tank. Now straighten out the baffle to align with the Sharpie lines. Use your finger to smooth out the excess silicone on the one side of the baffle and now add more silicone to the "dry" side of the baffle and smooth that with your finger. With a sump, neatness doesn't count. Whether glass or plexi, you want to trap that baffle in a load of silicone. If you're a super neat freak, you can put painter's tape about a 1/4 inch or so away from each of your lines to be removed after you do your silicone job.

Repeat above with additional baffles.

Note, if you do a bubble trap, you'll need something long to smooth the silicone between the two baffles. I've used a dowel or thin piece of plywood I've cut just for this purpose.

Sorry for the long winded answer.
 
Last edited:

redfishbluefish

Stay Positive, Stay Productive
View Badges
Joined
Mar 22, 2012
Messages
11,706
Reaction score
25,730
Location
Sayreville, NJ
Rating - 0%
0   0   0
I just re-read this thread....and here's my offer:

You buy:
1) the Glass-Holes kit
2) The baffles
3) The silicone
4) The cost of my trip to Miami and back (and I'm hoping Miami Beach....I did go to school in Coral Gables, so I know the area)
5) Thompson's Waterseal

And I'll build your sump, drill your tank, install the Glass-Holes kit, and power wash all that mold off your deck and give it a good sealing!

image-jpg.252272


Now how can you turn that down! :rolleyes: :eek: :D
 
OP
OP
glb

glb

7500 Club Member
View Badges
Joined
May 12, 2013
Messages
8,129
Reaction score
3,362
Location
Miami
Rating - 0%
0   0   0
I just re-read this thread....and here's my offer:

You buy:
1) the Glass-Holes kit
2) The baffles
3) The silicone
4) The cost of my trip to Miami and back (and I'm hoping Miami Beach....I did go to school in Coral Gables, so I know the area)
5) Thompson's Waterseal

And I'll build your sump, drill your tank, install the Glass-Holes kit, and power wash all that mold off your deck and give it a good sealing!

image-jpg.252272


Now how can you turn that down! :rolleyes: :eek: :D
Haha!!! How in the world did you guess that my deck is the next home improvement project?
 
OP
OP
glb

glb

7500 Club Member
View Badges
Joined
May 12, 2013
Messages
8,129
Reaction score
3,362
Location
Miami
Rating - 0%
0   0   0
My 20L sump. Left to right-return, refugium, overflow/skimmer
67565dcaaa94705da854042c5ccd0350.jpg
Nana, what are the heights on your dividers, and how do you figure that out. Also, how much space is at the bottom of the second one?
 
OP
OP
glb

glb

7500 Club Member
View Badges
Joined
May 12, 2013
Messages
8,129
Reaction score
3,362
Location
Miami
Rating - 0%
0   0   0
I guess I could put my ato pump behind the stand. I know the inside is cramped, but this is an older piece of furniture that's about the most solidly built thing I own. It would cost a ton to build another one like this.
 
OP
OP
glb

glb

7500 Club Member
View Badges
Joined
May 12, 2013
Messages
8,129
Reaction score
3,362
Location
Miami
Rating - 0%
0   0   0
Where does everyone store their electrical equipment? Isn't humidity an issue if it's in the stand?
 
OP
OP
glb

glb

7500 Club Member
View Badges
Joined
May 12, 2013
Messages
8,129
Reaction score
3,362
Location
Miami
Rating - 0%
0   0   0
Ok I only have a 20" clearance in the stand even without the shelf. But...I just realized the bottom is 5" above the floor and I could cut it out without compromising the integrity of the stand. That would give me a lot more clearance and maybe room for a partial shelf on one side of the cabinet for electronics. Another option would be to get a good hob skimmer and mount it on the front of the sump where I'd have easy access. The reef octopus space saver is 19-something inches tall, so I'm not sure I could get it in and out of the sump even if I cut out the bottom.
 

redfishbluefish

Stay Positive, Stay Productive
View Badges
Joined
Mar 22, 2012
Messages
11,706
Reaction score
25,730
Location
Sayreville, NJ
Rating - 0%
0   0   0
........The reef octopus space saver is 19-something inches tall, so I'm not sure I could get it in and out of the sump even if I cut out the bottom.

Realize when your putting in and taking out the skimmer from your sump you've removed the skimmate cup on the top.....so it's not 19 inches at that point.
 
OP
OP
glb

glb

7500 Club Member
View Badges
Joined
May 12, 2013
Messages
8,129
Reaction score
3,362
Location
Miami
Rating - 0%
0   0   0
Realize when your putting in and taking out the skimmer from your sump you've removed the skimmate cup on the top.....so it's not 19 inches at that point.
Good point. So I only need clearance to remove the cup and then enough space to tilt the rest of the skimmer and get it out to clean. Thanks!
 
OP
OP
glb

glb

7500 Club Member
View Badges
Joined
May 12, 2013
Messages
8,129
Reaction score
3,362
Location
Miami
Rating - 0%
0   0   0
So with the 10g in the bottom I'd have room to build a vertical divider and have electronics on the right and the sump on the left with no shelf over it. I know that's a smaller sump, but couldn't I manage it? Here's a pic of the cabinet with the 10g underneath.
image.jpg

I'd put the ato water to the right of the sump and put the divider to the right of that for electrical. There's another inch of space behind the side of the cabinet. Another thing you can see in this pic is the top of the stand. That black line in the middle is because the top has hinges on each end so it can be expanded, like a buffet. There's another top beneath it that I could reinforce with more plywood. If I extended those leaves, I could build frames under them to extend the stand on each side. The tank fits on the main stand but this would be another way to make more space. Like I said, this is a cool piece of furniture!
 

miamiangler

Active Member
View Badges
Joined
Sep 17, 2013
Messages
399
Reaction score
11
Location
miami
Rating - 0%
0   0   0
Hey ,GLB

Good to see you are going larger . don't cut holes in the tank till you get the kit ! For my 60 gal & 30 gal I used the 700 gal kit from glass Holes also I am using the Jebao DC pump 3000 which is good enough for your tank . If you need help cutting the holes I can help . it`s fun drilling the holes ! In the photo I have the overflow on the right and return on the left side . As for skimmer I like the Bubble Magus 3.5 0r 5 depending on your bio load . I have both and they work great for me .


Willi
 
Last edited:

Reefing threads: Do you wear gear from reef brands?

  • I wear reef gear everywhere.

    Votes: 7 15.9%
  • I wear reef gear primarily at fish events and my LFS.

    Votes: 2 4.5%
  • I wear reef gear primarily for water changes and tank maintenance.

    Votes: 0 0.0%
  • I wear reef gear primarily to relax where I live.

    Votes: 7 15.9%
  • I don’t wear gear from reef brands.

    Votes: 26 59.1%
  • Other.

    Votes: 2 4.5%
Back
Top