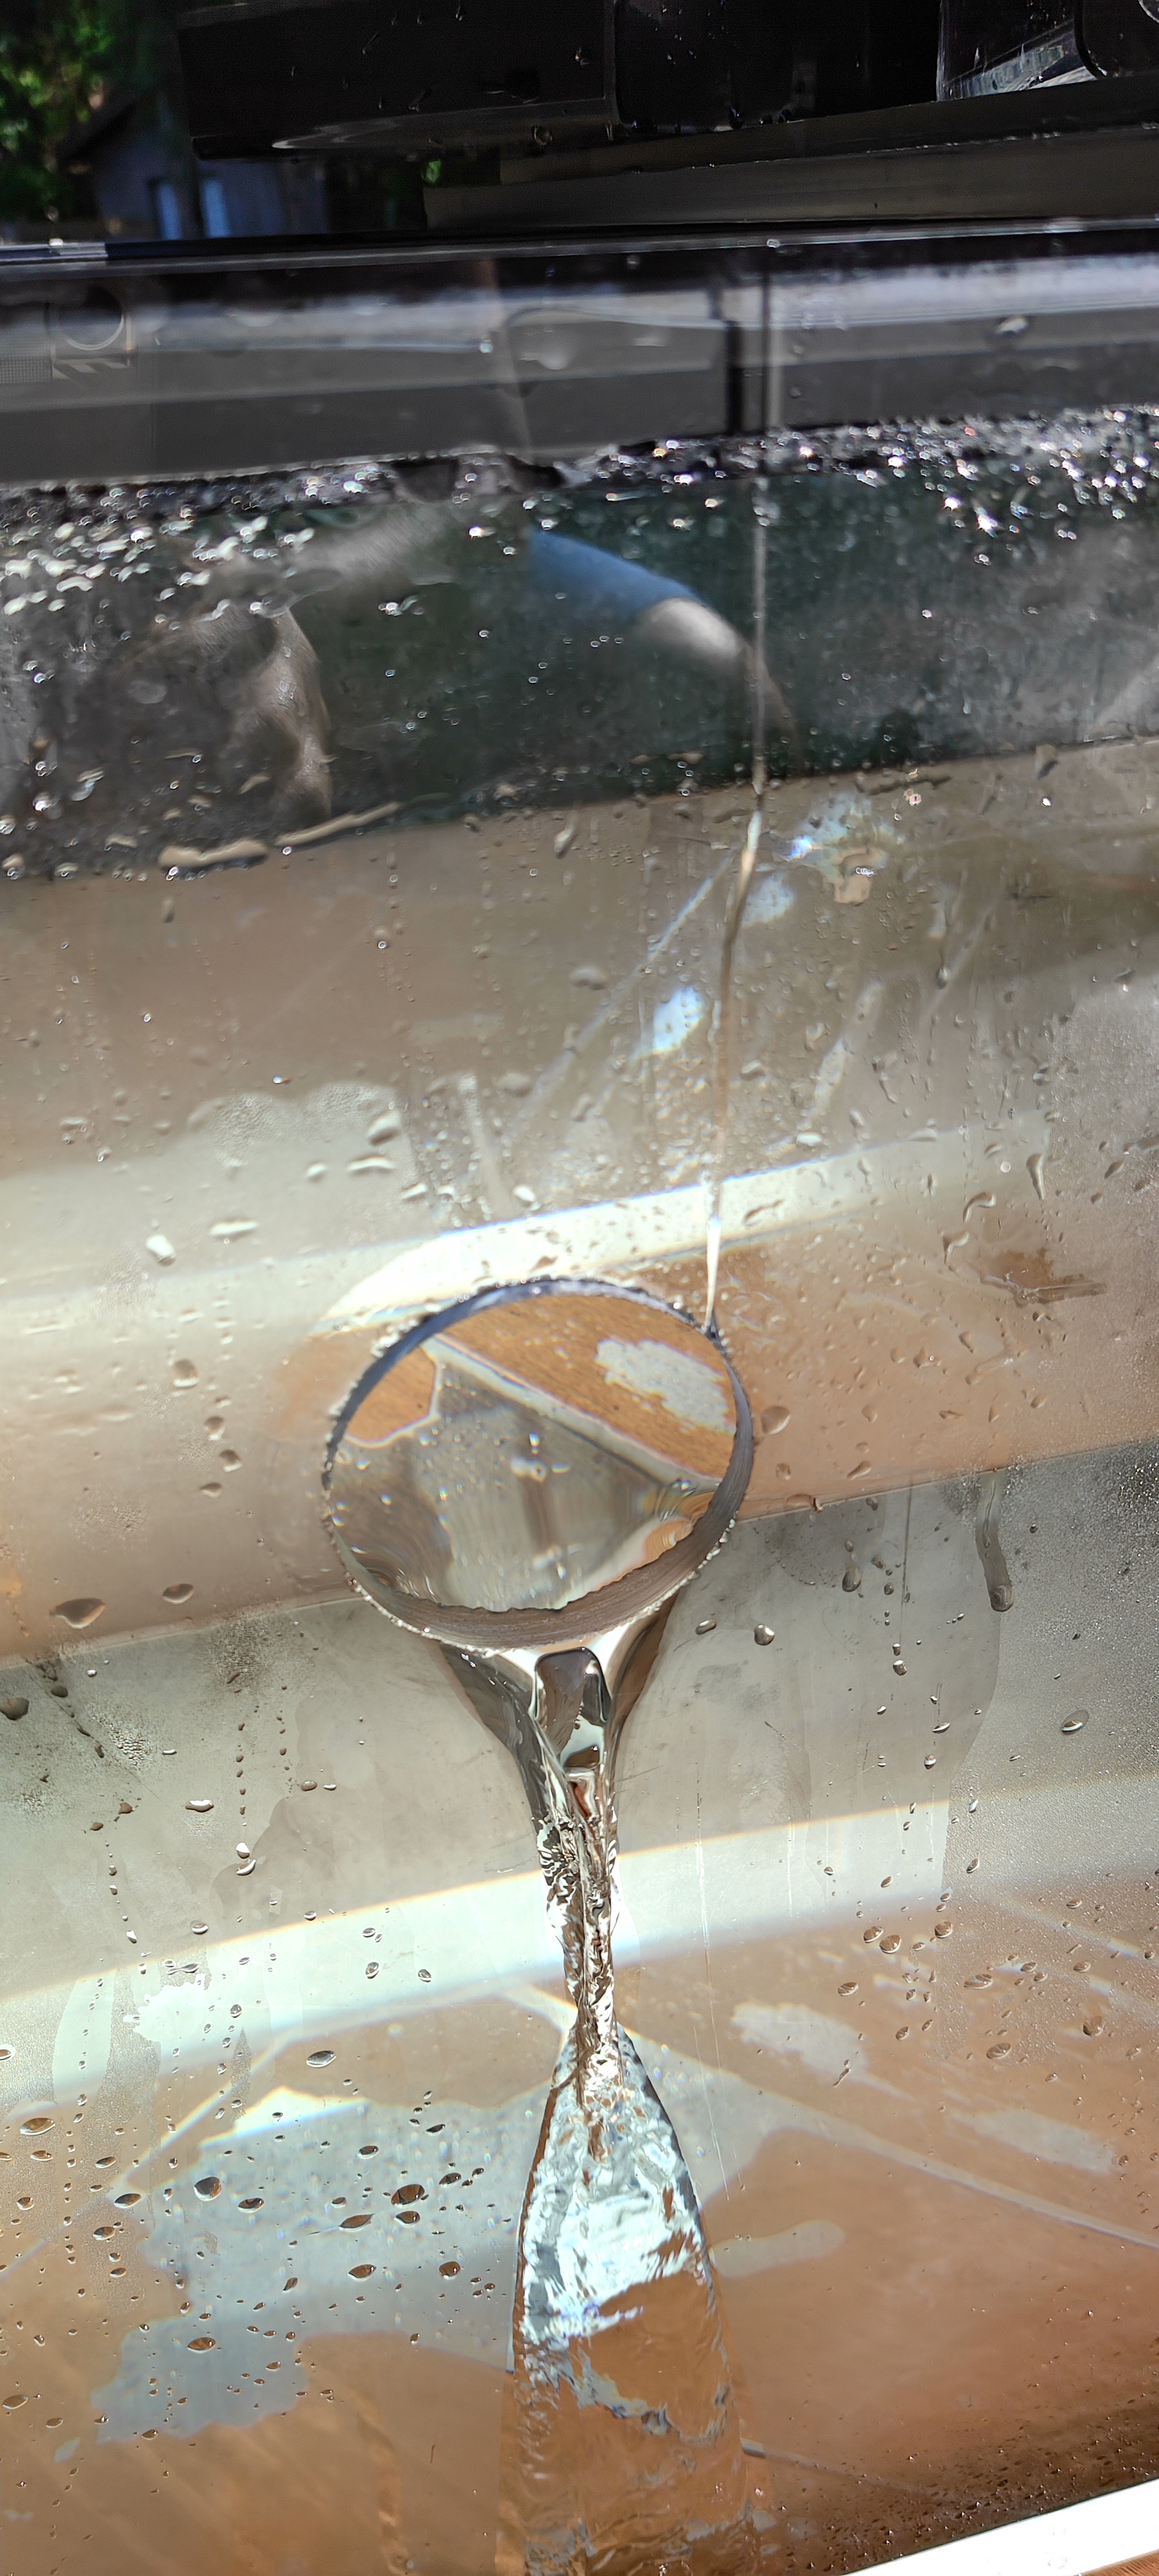
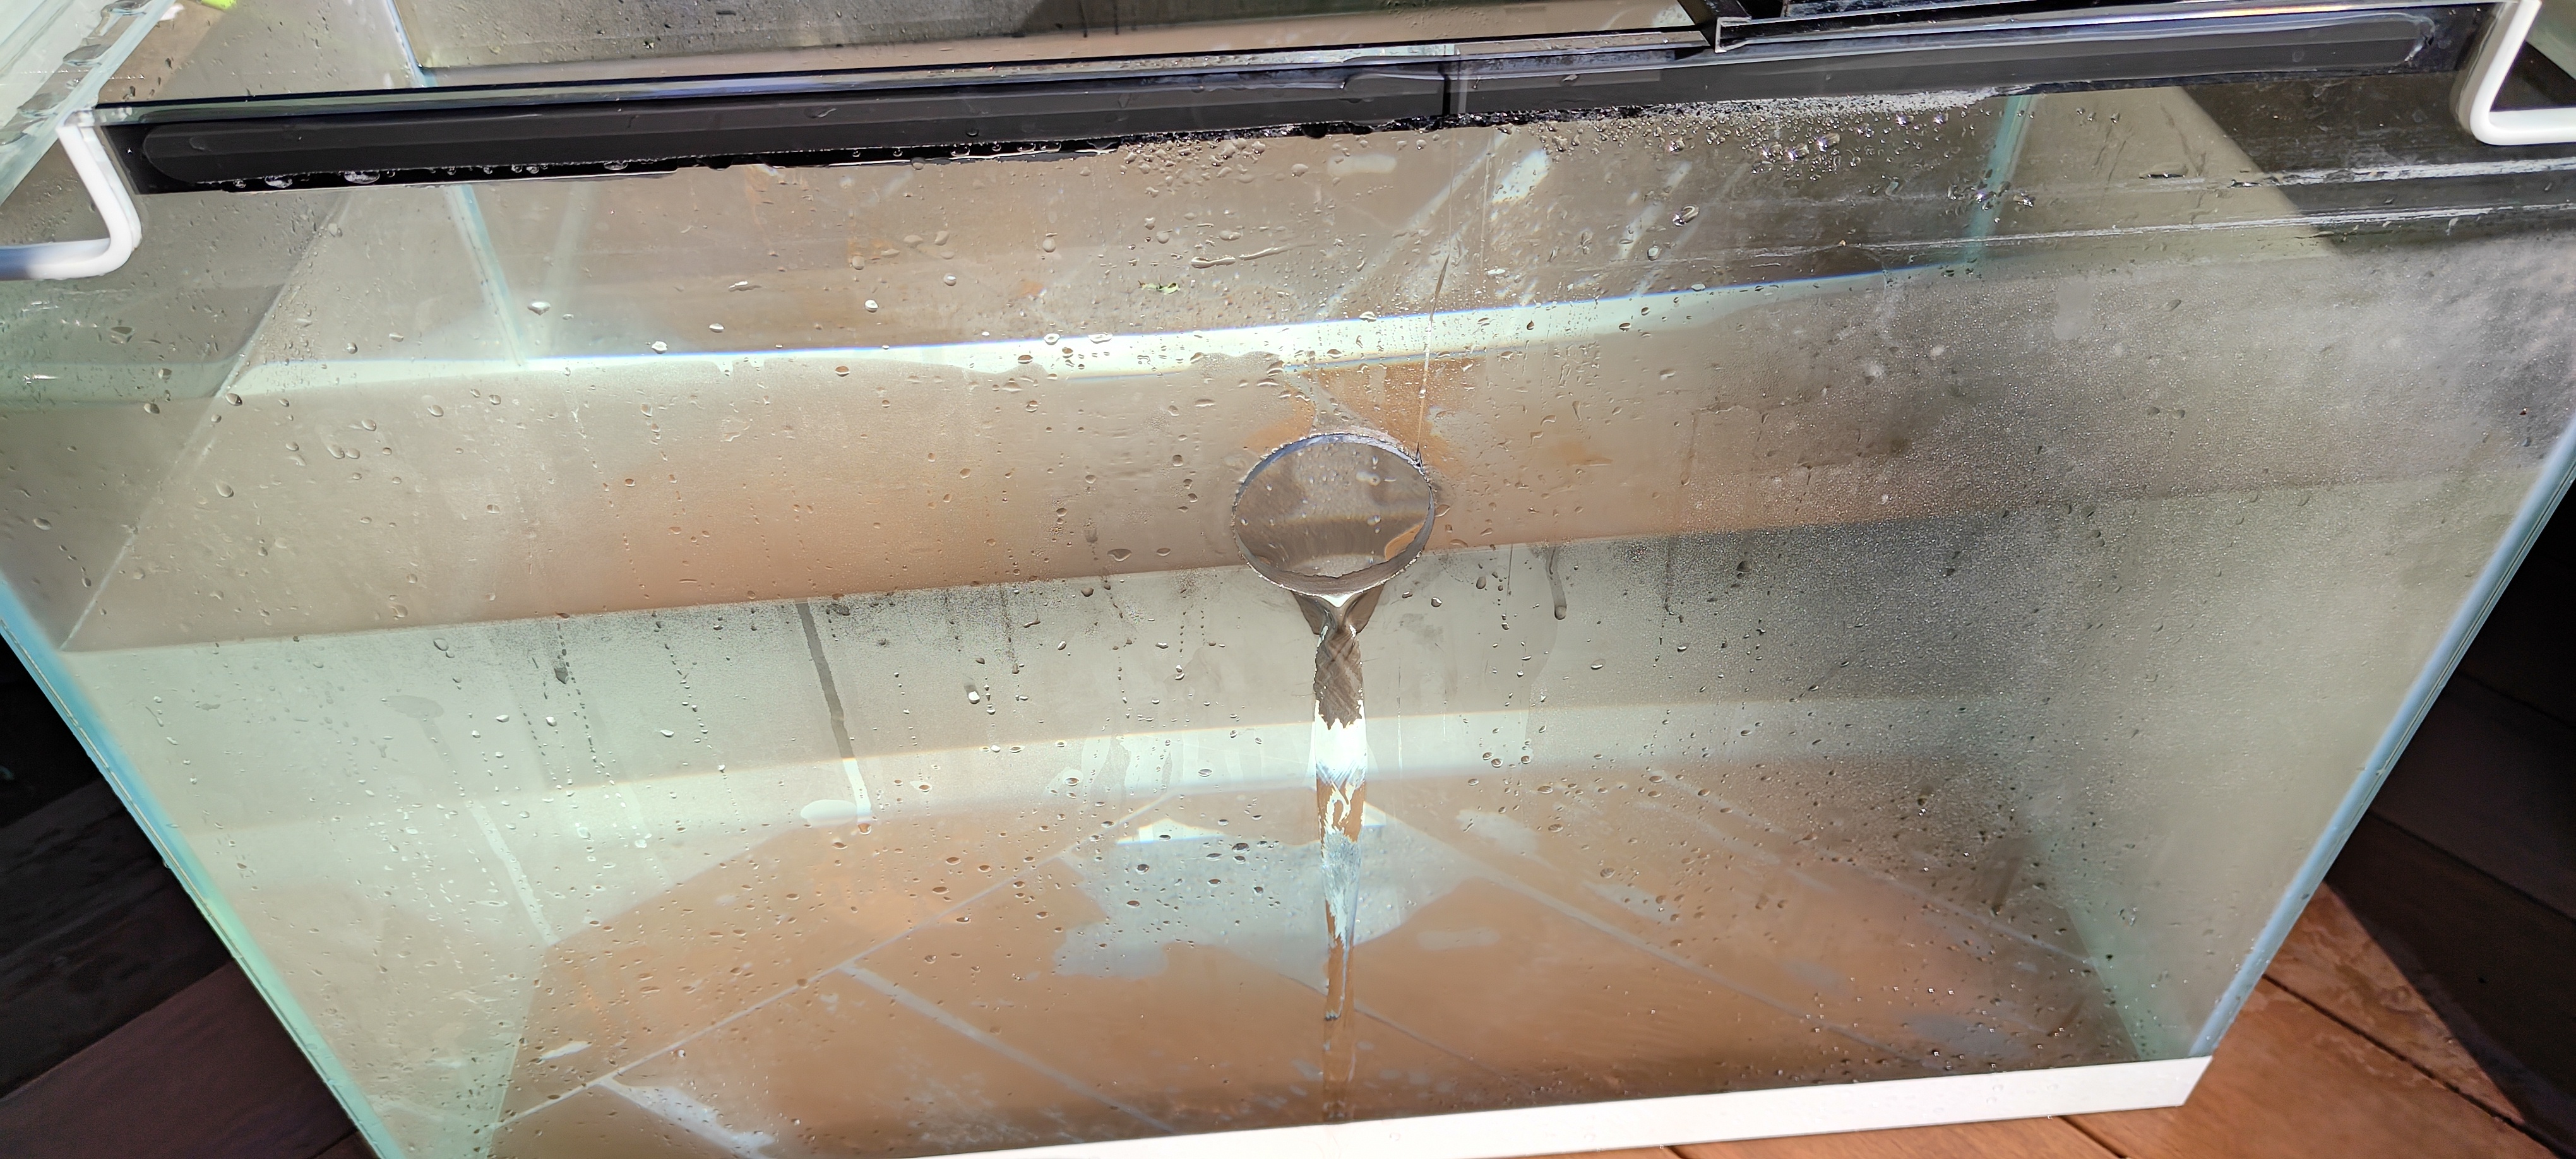
I messed up drilling.

  • Thread starter Thread starter Pen3
  • Start date Start date
  • Tagged users Tagged users None

Pen3

New Member
View Badges
Joined
Mar 23, 2024
Messages
9
Reaction score
3
Location
Hopkins
Rating - 0%
0   0   0
I have drilled about 40 holes and they were all fine, but i finally messed up on my own tank. I picked up a Freshwater Waterbox Eden 40 locally for really cheap, $250 for a clean tank, Ai Blade and stand. So of course the first thing i did was test for leaks and it passed, so i went to drill for a 1.5" overflow bukhead and it cracked on me. I did every i normally do and clamped a piece of plywood underneath to prevent a blow out. I am soo disappointed in myself.

IMG_20260712_180235.jpg
IMG_20260712_180304.jpg
 
Since i got it for cheap, would it be worth it to replace the rear glass? I've taken tanks apart to resilicone beore, but they were 5-20 gallons. A 40 shouldn't be much different.
 
Sorry this happened!

The images you posted didn't come through, at least for me.

Maybe #UncommonSense can help 🙂
 
Do you normally drill you tank with water in it? I'm wondering if the water pressure caused it to crack.
 
Sorry this happened!

The images you posted didn't come through, at least for me.

Maybe #UncommonSense can help 🙂
Weirdly, I didn’t get a notification for this! — I found my own way to the party!

Perhaps the hashtag messed it up?


IMG_2075.png


Since i got it for cheap, would it be worth it to replace the rear glass? I've taken tanks apart to resilicone beore, but they were 5-20 gallons. A 40 shouldn't be much different.
This isn’t an unreasonable fix! The major concern will be the mating joint between old silicone and new silicone, in the bottom corners of the replaced pane!

The tank is short enough that you could probably get away with it… however, I think you’ll have much better results if you also add a little triangle of glass to each of those inside corners during the pane swap!

You can get these right triangles of glass out of the corners of your broken pane, don’t make them very big though! Maybe 1” max leg length…


Why keep the glass triangles so tiny?

— standard aquarium silicone is Room Temperature Vulcanizing (RTV), and requires humidity from atmospheric air to actually cure! This means a large slab of silicone laminating two pieces of glass together, face to face, will take an extremely long time to cure, and may never cure if any one edge of the silicone is too far from the center! (You can expect a silicone cure rate of around 1mm per-day after the first ~14mm of depth… so, a 1” leg length triangle that’s <=1/4” thick can take upwards of 3 weeks to fully cure out if laminated down to tank bottom and vertical panes!)

(The idea here being to bridge the questionable new/old silicone interface with a large surface area of fresh silicone in a strong glass:glass bond!)

 
Weirdly, I didn’t get a notification for this! — I found my own way to the party!

Perhaps the hashtag messed it up?


IMG_2075.png


This isn’t an unreasonable fix! The major concern will be the mating joint between old silicone and new silicone, in the bottom corners of the replaced pane!

The tank is short enough that you could probably get away with it… however, I think you’ll have much better results if you also add a little triangle of glass to each of those inside corners during the pane swap!

You can get these right triangles of glass out of the corners of your broken pane, don’t make them very big though! Maybe 1” max leg length…


Why keep the glass triangles so tiny?

— standard aquarium silicone is Room Temperature Vulcanizing (RTV), and requires humidity from atmospheric air to actually cure! This means a large slab of silicone laminating two pieces of glass together, face to face, will take an extremely long time to cure, and may never cure if any one edge of the silicone is too far from the center! (You can expect a silicone cure rate of around 1mm per-day after the first ~14mm of depth… so, a 1” leg length triangle that’s <=1/4” thick can take upwards of 3 weeks to fully cure out if laminated down to tank bottom and vertical panes!)

(The idea here being to bridge the questionable new/old silicone interface with a large surface area of fresh silicone in a strong glass:glass bond!)

Yes, my tag should have been an "@" not and "#" but glad you found the party brother 🙂
 
So after you drilled it you filled it up with water ?
Anyways it sucks been there . Replacing the glass wouldn’t be bad . It would at least be less expensive then replacing the tank
 
I have drilled about 40 holes and they were all fine, but i finally messed up on my own tank. I picked up a Freshwater Waterbox Eden 40 locally for really cheap, $250 for a clean tank, Ai Blade and stand. So of course the first thing i did was test for leaks and it passed, so i went to drill for a 1.5" overflow bukhead and it cracked on me. I did every i normally do and clamped a piece of plywood underneath to prevent a blow out. I am soo disappointed in myself.

IMG_20260712_180235.jpg
IMG_20260712_180304.jpg
How stupid are You !. I did the same thing 😁. I took mine apart and got the glass cut and made my own sump. Just take it apart don't try and save the rim just hack saw it apart and clean the glass with alcohol ( you can drink some )😃 . Kidding . Wrap it in cardboard store it . Make a Sump its a fun project. As to the crack. I bought another tank let a glass place do it . I used the same method as you even used a drill guide felt the one side go through so did a little tilt . WRONG ! the glass guy put the tank on its side on plywood and it went perfect even with the gap from the rim. Go figur
 
I got a quote from a local glass place just 10mins away. I've never ordered custom cut glass before, does the price sound fair?

31-1/2" x 21-5/8" 3/8" thick, all edges flat polished and tinted black.
Total $154
 
I got a quote from a local glass place just 10mins away. I've never ordered custom cut glass before, does the price sound fair?

31-1/2" x 21-5/8" 3/8" thick, all edges flat polished and tinted black.
Total $154
For 3/8” thick, and tinted… especially if already drilled, it’s in the higher end of reasonable!

You could probably save a few bucks by applying black vinyl or paint yourself, up to you!

(for context, the edge polishing is a 4-7 step manual process on all four edges, plus all eight bevels if the shop doesn’t have a dedicated multi-thousand dollar edge finishing machine!)
 
For 3/8” thick, and tinted… especially if already drilled, it’s in the higher end of reasonable!

You could probably save a few bucks by applying black vinyl or paint yourself, up to you!

(for context, the edge polishing is a 4-7 step manual process on all four edges, plus all eight bevels if the shop doesn’t have a dedicated multi-thousand dollar edge finishing machine!)
Its not actually a tint screen, but oxides added in the melting process. The clear glass was only $20 cheaper. If thats still too much, i can get some more quotes. For some reason there are about 3 glass specialty shops near me.
 
I got a quote from a local glass place just 10mins away. I've never ordered custom cut glass before, does the price sound fair?

31-1/2" x 21-5/8" 3/8" thick, all edges flat polished and tinted black.
Total $154
I don't know about the tinted part but that's thick glass. My place does not even carry it. Unless you need it that thick . The cuts are not the expense . sounds a little high considering its US dollars
 
Back
Top
Home
Post thread…
Market
What's new