IndyReef 210 Gallon Peninsula Build

TonapahNorth

Reefed In
View Badges
Joined
Sep 29, 2013
Messages
949
Reaction score
661
Location
Indiana
Rating - 0%
0   0   0
I set up my water changing/RO station, which has been an absolute luxury compared to the free standing trash can and flooding the basement when I forget to turn off the water. Here's the finished result.
IMG_4979.JPG


The tanks are 55 gallon Ace Roto Mold Utility Tanks from Rural King. I ordered online and received free shipping, so I would highly recommend that. I am also using a Vectra M1 pump, which is overkill, but it will also serve as my backup return pump if my main ever goes out. The RO/DI system is the BRS 150 GPD 6 stage. For an extra tip, I used Oatey clear primer instead of purple primer to keep the glue joints clean. Where I live, you can only get the clear primer from a specialty plumbing store (versus HD or Lowes), but it was well worth the trip.

If someone wants a plumbing part list for the setup, here you go:
  • Adapter - Male threaded-slip x2 (will need to shop at Lowes for exact size)
  • Union - slip-slip_1" x 3
  • Cepex Ball Valve_1" x 2
  • 90 degree - slip-slip_1" x 2
  • Tee_1" x 1
  • Tee_3/4" x 1
  • Cepex Ball Valve_3/4" x 2
  • 90 degree_3/4" x 2
  • 45 degree_3/4" x 1
  • Uniseal_3/4" x 2 (one is extra to run a heater wire but not required)
Nicely done. I value my water mixing station highly and I’ll never run another tank without one.

Now are you planning auto water changes?
 

don_chuwish

Smells something fishy
View Badges
Joined
Mar 21, 2012
Messages
3,013
Reaction score
3,386
Location
A better place
Rating - 0%
0   0   0
I agree a tall stand is a good thing - both for space under it and best viewing height. I'm occasionally frustrated that I can't easily reach into the tank but it's a good trade off. Kudos to Planet Aquariums for doing the full replacement. I'm just stunned that anyone is driving nails in the shipping crates!
 
OP
OP
I

Indy Reef

New Member
View Badges
Joined
Sep 4, 2017
Messages
17
Reaction score
12
Rating - 0%
0   0   0
Sorry for the hiatus, but life has been very busy. It's taken two years, but things are starting to get rolling. They say nothing good happens quickly in a reef tank, but even I will admit two years is a little ridiculous. This tank build has been a lot of fits and starts. . . but mostly fits.

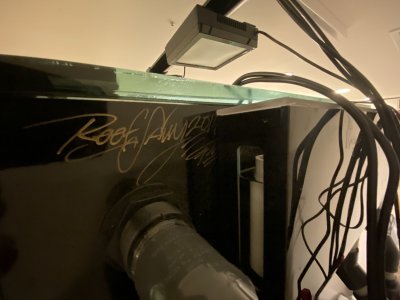
For a quick update, after I returned the Planet Aquarium tank for poor build quality (major setback #2), I ponied up for a custom 68L x 30W x 26H Reef Savvy peninsula tank (low iron glass, armored seams, phantom bottom, and ghost overflow). No more messing around! It looks amazing, and working with Felix was great. It's no secret that Reef Savvy has a long lead time, so that added 9 months to the timeline. However, I am very happy with the result and have great peace of mind that the tank is built for longevity.

While I waited for the tank I set up a temporary 65G tank from Glass Cages to start maturing my previously dry Pukani rock. Things were going very well until my sump from Advanced Acrylics spring a leak - no beuno (major setback #3)! The sump was PVC sump with acrylic windows, which looked amazing but in hind sight, these windows introduce an unnecessary point of failure into the system. From now on, I am only buying all acrylic sumps. I bought an IceCap 36XL sump, so now I am back in business.

I really like the sump layout (big room for skimmer, built in refugium, 24' width, and return section large enough for L1), but it did require me to redo all my hard plumbing, which I have now completed.

In my early 20s, the setbacks above would have been addressed in a weekend. With work and family, these were two-year obstacles. So after all the trial and tribulations, we are finally getting to a place where I can start really cycling the tank and prepping for fish! Stay tuned! Pics coming.
 
OP
OP
I

Indy Reef

New Member
View Badges
Joined
Sep 4, 2017
Messages
17
Reaction score
12
Rating - 0%
0   0   0
It's still very much a work in process, but everything is fully plumbed and circulating. The next step is to rebuild my control panel, so I can get the Apex and all my other equipment back online.

Based on what BRS recently said, I plan on starting with fish only and very low light until my rock gets more established. I know the ugly tank stage is inevitable, but I am hoping to minimize as much as possible by establishing my herbivores, biological filtration, and eventually my refugium before I really start blasting display tank lights. I am now dosing Microbacter7 and Dr. Tim's Ammonium Chloride to complete a fishless tank cycle. I hope I can add some fish in a week or so.

Some pics below. . .

IMG_1255.jpg


IMG_1256.jpg
IMG_1251.jpg
IMG_1253.jpg
 

Joe Glass Cages

Passionate Glass Cages’s Team Member
View Badges
Joined
Dec 13, 2019
Messages
1,180
Reaction score
5,667
Location
Dickson, TN
Rating - 0%
0   0   0
Sorry for the hiatus, but life has been very busy. It's taken two years, but things are starting to get rolling. They say nothing good happens quickly in a reef tank, but even I will admit two years is a little ridiculous. This tank build has been a lot of fits and starts. . . but mostly fits.

For a quick update, after I returned the Planet Aquarium tank for poor build quality (major setback #2), I ponied up for a custom 68L x 30W x 26H Reef Savvy peninsula tank (low iron glass, armored seams, phantom bottom, and ghost overflow). No more messing around! It looks amazing, and working with Felix was great. It's no secret that Reef Savvy has a long lead time, so that added 9 months to the timeline. However, I am very happy with the result and have great peace of mind that the tank is built for longevity.

While I waited for the tank I set up a temporary 65G tank from Glass Cages to start maturing my previously dry Pukani rock. Things were going very well until my sump from Advanced Acrylics spring a leak - no beuno (major setback #3)! The sump was PVC sump with acrylic windows, which looked amazing but in hind sight, these windows introduce an unnecessary point of failure into the system. From now on, I am only buying all acrylic sumps. I bought an IceCap 36XL sump, so now I am back in business.

I really like the sump layout (big room for skimmer, built in refugium, 24' width, and return section large enough for L1), but it did require me to redo all my hard plumbing, which I have now completed.

In my early 20s, the setbacks above would have been addressed in a weekend. With work and family, these were two-year obstacles. So after all the trial and tribulations, we are finally getting to a place where I can start really cycling the tank and prepping for fish! Stay tuned! Pics coming.
@Indy Reef, so glad Glass Cages could be part of your journey. Yes, this is a journey. Enjoy all the victories, even the small ones. We are here if you need us again! That Reef Savvy tank looks beautiful. They do a wonderful job!
 

Reefing threads: Do you wear gear from reef brands?

  • I wear reef gear everywhere.

    Votes: 36 15.7%
  • I wear reef gear primarily at fish events and my LFS.

    Votes: 13 5.7%
  • I wear reef gear primarily for water changes and tank maintenance.

    Votes: 1 0.4%
  • I wear reef gear primarily to relax where I live.

    Votes: 30 13.1%
  • I don’t wear gear from reef brands.

    Votes: 133 58.1%
  • Other.

    Votes: 16 7.0%

New Posts

Back
Top