Jackie's Dream Tank - SCA 150g

Wheeljack

Community Member
View Badges
Joined
Dec 20, 2018
Messages
46
Reaction score
157
Location
Charleston
Rating - 0%
0   0   0
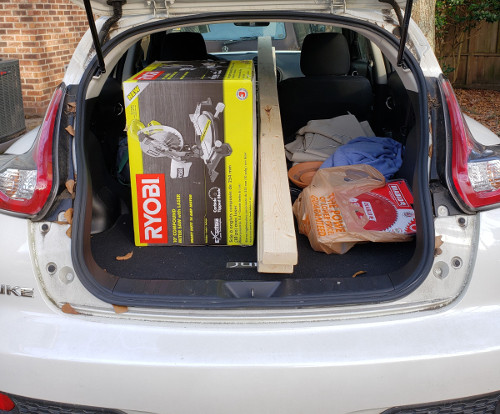
After far too long of telling myself "one day, one day," I can finally say I have started the path down owning a reef tank! This will be a rather slow build, as I won't be buying the tank until April/May, but I have already started buying equipment and just today I went out and bought what I needed to start building two separate stands. One will be for my quarantine tanks and the other will be for my future SCA 150g tank.

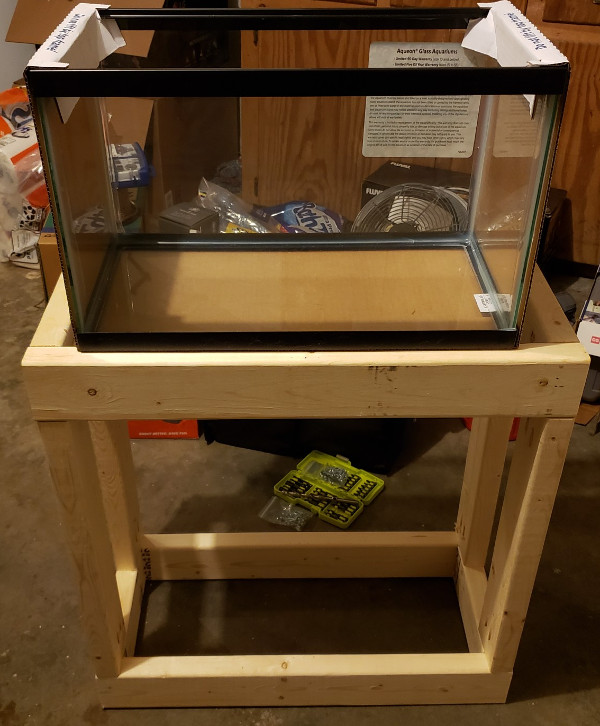
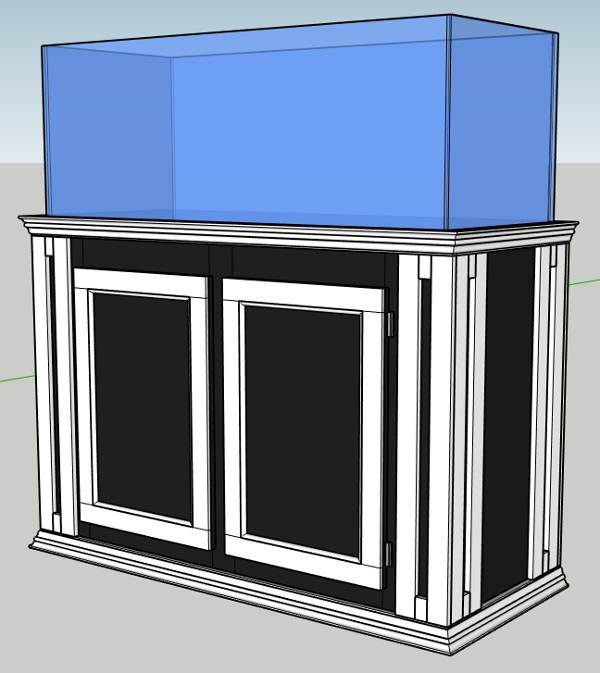
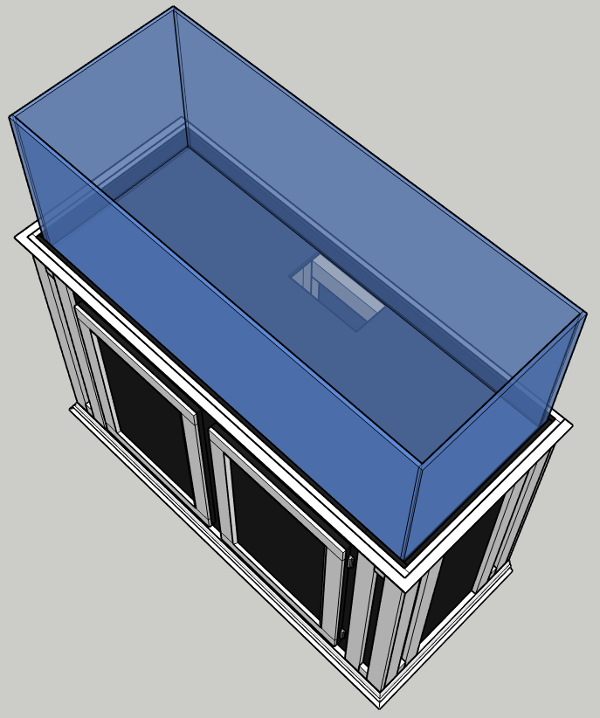
All of my experience up to this has been fresh water, both planted and not tanks. From the smallest 5g build to a 100g I looked after for family for about five years. This will be the biggest tank I've put together to date, and I'm excited! I've reading and researching just about everything I can get my hands on. Not only do I feel well prepared, but I'm also finally in a position I can get what I really want. I was originally considering starting with something much smaller - in the 30-50g size range - but I know myself. If I got the smaller tank, I'd want to upgrade at some point. So I've finally decided on the SCA 150g tank. It's 5ftx2ftx2ft and it's the biggest tank I feel comfortable starting with. I had originally decided on the RS 525 XL, but after looking at the SCA tanks and getting the bug to build my own stand, I'll be saving money AND getting a bigger tank AND getting the stand designed the way I want it. Win-win, I think!

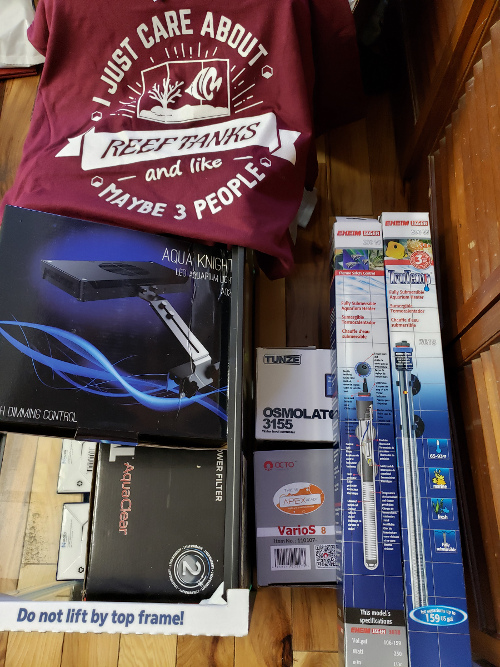
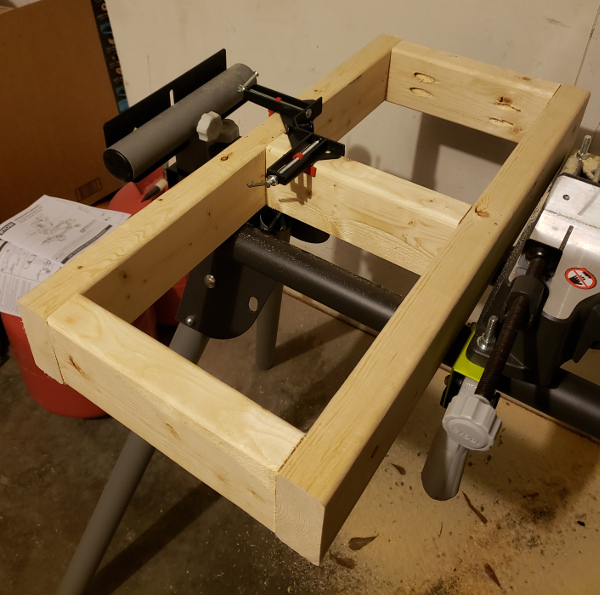
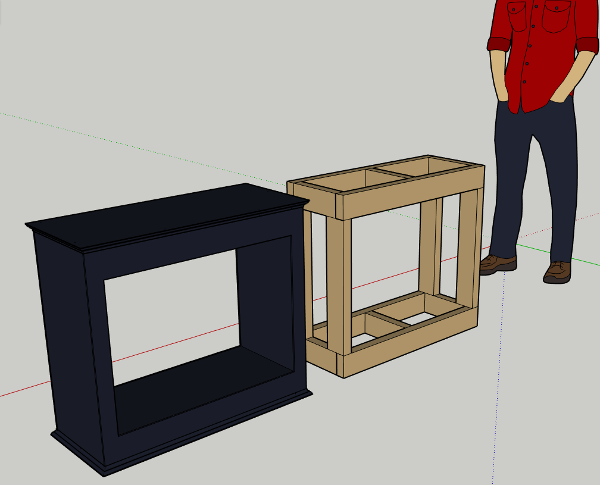
So what's my plan? First off, getting most of what I need before I get the tank. This includes all equipment, rock, sand, water station built, quarantine tanks, plumbing planned and parts bought and two stands built. The idea is the moment that tank comes through the door, I'm primed to set it up and get the cycle started. And that's in full swing as of last week! Pictures will follow in a separate post!

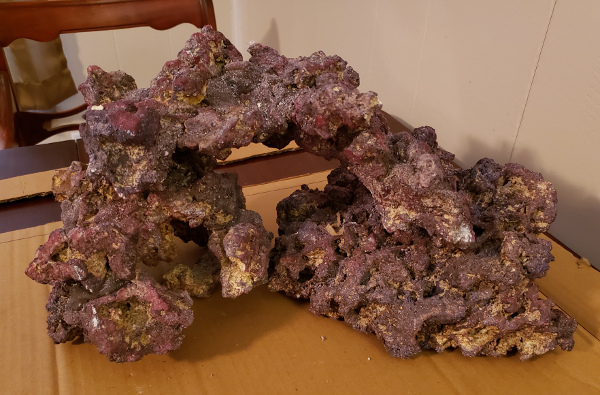
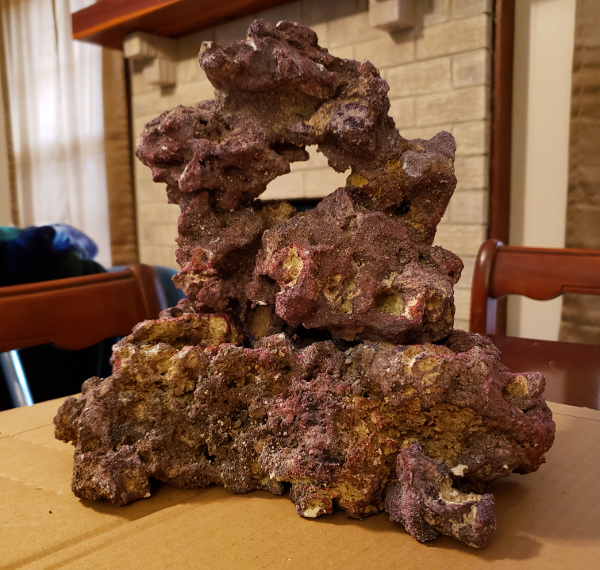
What's the long term plan? I will be starting with a fishless cycle by dosing DrTim's Ammonia to 2ppm. I will be adding a bottle of Biospira to kick start the cycle, but I expect the tank to run fishless for at least a month, possibly two. I will be adding live rock but the majority will be dry rock. For the first month or so, I will be watching what crawls out of the live rock and taking anything bad out. Algae management will be a wait and see approach. I know about and expect the tank to go through its ugly stages and I've already warned my roommate that we'll have a fancy box with rocks for a while in the beginning. This was met with utter, genuine disbelief which gave me a good laugh.

Once I'm sure the water parameters have stabilized out and I'm set in a routine for testing the water, and doing water changes, I will likely be starting with two or three small fish set up in a 10g quarantine. I'll be doing a short observation period to allow the fish to calm down and get them eating good before treatment. I'm still on the fence on copper treatment, but I will most likely be doing that with other treatments before or after. There's a lot of good info and quarantine procedures here so I feel confident I can be reasonably successful. Which fish, you ask? Either a pair of Purple Firefish, or a pair of Black Photon Clowns. Leaning toward the Firefish because I want them to be able to claim territory without having to fight for it. I doubt a pair of clowns would claim an entire 150g tank, but knowing my luck, I get the pair that does.

I'll be attempting to go from most peaceful through to the few fish I have planned that need to be added last. My aim was for interesting behaviors, and a rainbow of colors. Pretty sure I nailed it! Consider the four listed above a sneak peak into my fish list. :p

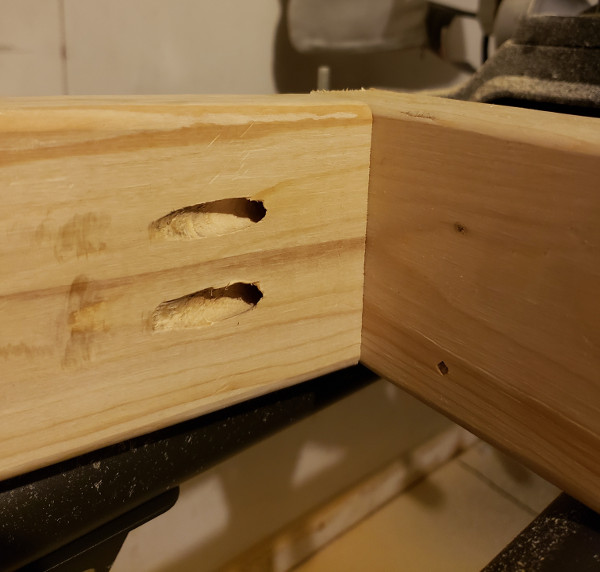
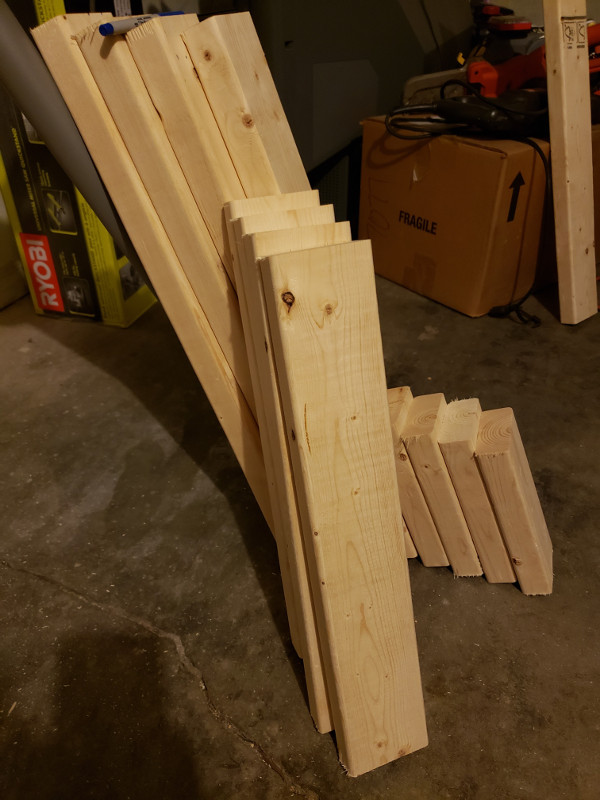
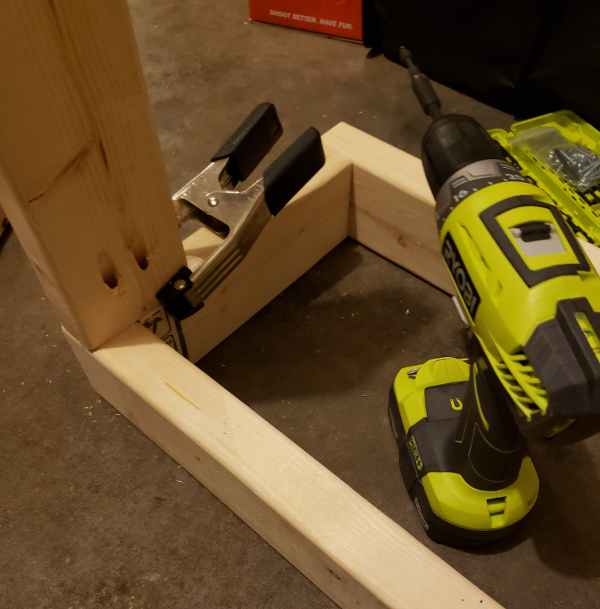
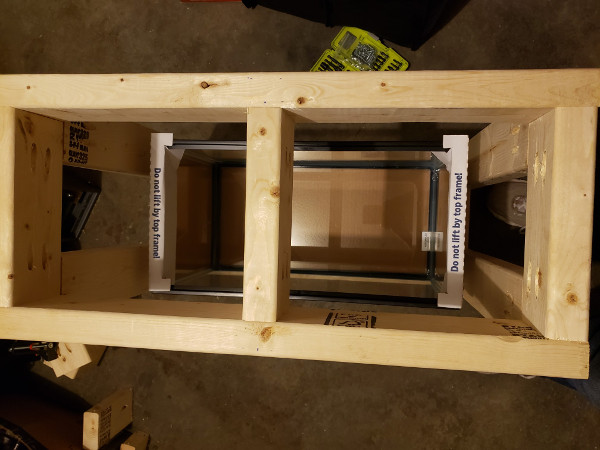
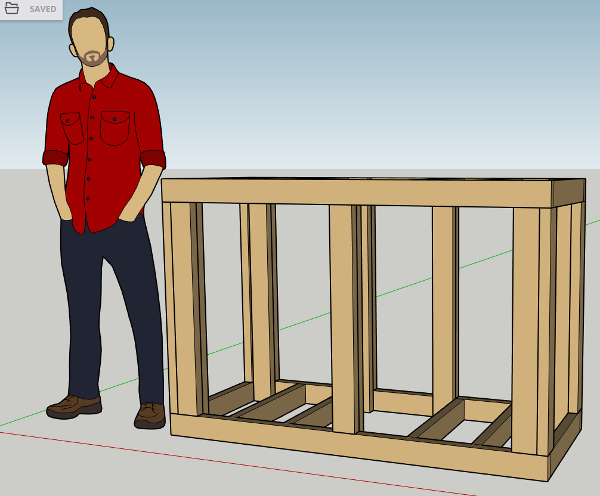
I think I'm done rambling now, though! Expect a few pictures in my next post, and then even more tomorrow when I start building my quarantine stand! At some point, I'll be getting my stand build plans posted as well!

Equipment List
(Italicized items are bought already)
Sump: Trigger Systems Sapphire Sump - 39 inch
Return Pump: VarioS 8
Lights: Hydra 52's x3
Skimmer: Nyos 160
Powerheads: Gyre 350's x2
ATO: Tunze 3155
ATO Reservoir: Trigger Systems Sapphire - 10 Gallon
RODI Unit: 6 Stage Deluxe Plus
Heater: Jager TruTemp 250 x2
Refractometer: MD Refractometer
Algae Scrubber: RAIN2 or DIY
UV: ???
Reactor: Standard Aquamaxx GFO/Carbon x2
Controller: Neptune Systems Apex
Doser: Neptune Systems DOS+DDR
Also Needed:
Fish Quarantine: Tank + Equipment
Coral/Invert Quarantine: Tank + Equipment (Everything but filter bought)
Rock: 100lbs of ReefCleaners Dry Rock + 30-40lbs of LFS live rock
Sand: CaribSea Dry Aragonite Special Grade 40lb Bags x3
Testers: Hanna Checkers (Alk, Calcium, Phosphate, Copper) + Amm/Nitrite/Nitrate test kit​
 
Last edited:
OP
OP
Wheeljack

Wheeljack

Community Member
View Badges
Joined
Dec 20, 2018
Messages
46
Reaction score
157
Location
Charleston
Rating - 0%
0   0   0
b0pwBpf.jpg

The first big order of stuff came in the mail last week (with a free t-shirt, woohoo!). All the quarantine tank equipment was bought from a local pet store I frequent. The AquaKnight lights were highly recommended in a nano reef community, so I figure they'll be good for my coral quarantine. Underneath that, is an AquaClear 70 and the rest of the stuff needed. Going with two 10g tanks for for both the fish and the coral/invert tanks. There will be a third at some point as well for tank transfers during treatment. Looking at getting my lights next!

xRjignz.jpg

And today, I made a trip out to Home Depot to pick up some stuff~ If you ever wanted to know if 8ft 2by4's fit in a Nissan Juke... they do! I did actually measure out the space to make sure beforehand, I promise. :p I'll be making the quarantine stand with those boards. It'll be pretty basic and I know it'll be over built considering two 10g weigh nothing compared to the 150g I'll be supporting on the other stand! I also got extra wood to practice on with the miter saw and the pocket hole jig I bought that's hidden in the bag. My main objective with this stand is to practice and get comfortable setting up the frame of the stand. I will be finishing and wrapping this stand, but that'll be later.

Stay tuned for the adventure in wood cutting and framing out a stand!
 

SPR1968

No, it wasn’t expensive dear....
View Badges
Joined
Feb 21, 2017
Messages
20,043
Reaction score
124,711
Location
Nottinghamshire England
Rating - 0%
0   0   0
Great write up and thanks for taking the time.

I have the NYOS Quantum 160 and it’s a great skimmer and silent I als9 have the Tunze Osmolator which is a good and reliable choice.

If you don’t want to wait 1-2 months, unless you want to, get one of the modern bacterias in a bottle that instantly cycle the tank. I’ve used ATM Colony twice and it works and there are others. You can basically add fish straight away pretty much.

And bring on the pictures!
 
OP
OP
Wheeljack

Wheeljack

Community Member
View Badges
Joined
Dec 20, 2018
Messages
46
Reaction score
157
Location
Charleston
Rating - 0%
0   0   0
Great write up and thanks for taking the time.

I have the NYOS Quantum 160 and it’s a great skimmer and silent I als9 have the Tunze Osmolator which is a good and reliable choice.

If you don’t want to wait 1-2 months, unless you want to, get one of the modern bacterias in a bottle that instantly cycle the tank. I’ve used ATM Colony twice and it works and there are others. You can basically add fish straight away pretty much.

And bring on the pictures!

I've heard a lot of great things about the Nyos skimmers, and their silence was the main deciding factor for me! The tank's going in the living room so the quieter the better.

Part of the reason for holding off on the fish was to see what crawls out of the live rock I get. It'll be easier to chase bad hitchhikers around and snatch them out without stressing out any fish I might get first. At least, that's the plan. For this I promised myself I was going to go slow and steady to make sure I'm less likely to rush and forget something.

Thanks for stopping by though! I'm actually about to go unbox my shiny new saw and true up the blade for some test cutting. Pictures of the process incoming later today! :D
 
OP
OP
Wheeljack

Wheeljack

Community Member
View Badges
Joined
Dec 20, 2018
Messages
46
Reaction score
157
Location
Charleston
Rating - 0%
0   0   0
6kdQase.jpg
Leaving this teaser here of a test join! The screws I got were a touch too long and broke through to the other side, so I gotta hop back over to the store and get something smaller. It's coming along nicely, though! Got all the framing cut out and everything. See you guys soon! :D
 
OP
OP
Wheeljack

Wheeljack

Community Member
View Badges
Joined
Dec 20, 2018
Messages
46
Reaction score
157
Location
Charleston
Rating - 0%
0   0   0
Whelp, I am exhausted but victorious! My quarantine stand frame is DONE. And it's pretty darned level to boot. There's a very slight tilt to it but I can sand that out before wrapping it and finishing it. It was an adventure, though. A fun adventure I have to say. Never done any sort of wood working but after reading up and watching hours of youtube videos, I was confident going into it. Now, picture time! ;Snaphappy

PYqX6IV.jpg
My tool of choice: miter saw! Not only perfect for cuttin 2by4s but later on when I need to cut crown molding, I can get those perfect 45 degree cuts too! I have to say this saw is amazing. Came out of the box and was pretty much ready to go. The blade was already squared so instead of taking it off and using the other blade I bought, I left it on and did a few test cuts. Going nice and slow and steady, the cuts were pretty dang smooth. A little splintering on the ends, so I'll be switching the blade out when I start the big stand. Only thing I had to adjust was the laser line and then I was cranking out boards!

BgufuTG.jpg
This was such a satisfying sight. All my pieces nicely cut and lined up! The smell of fresh cut wood was also oddly satisfying. ;Joyful

1jOpsoS.jpg
As you can see here, I decided to go with pocket holes to join everything up. I was originally going to get a kreg jig to do this, but a nice associate pointed me at another jig that was a third of the price. Most of the holes were nice enough, but I'm not sure the bit was quite sharp enough or it wore out super fast. My later holes started splintering around the edges. Not too concerned with it, considering everything is going to be hidden, but I'll be getting the other jig for my big stand.

68BkVUP.jpg
And here we go joining everything up! Used a 90 degree clamp to help make sure everything was square. It was funny. I bought two. One was a heavy duty $25 clamp and the one seen here was a cheapo $5 one. The cheapo wound up being the one I used for the entire build. The other one was just too clunky and blocked my pocket holes. Otherwise everything went pretty smoothly with only minor hiccups here and there. A word of caution: when making smaller stands, make sure your drill can actually fit between the boards to drive in the screws. Guess who had to hand screw 12 screws. Meeeeeeee! For the other framing, I flipped the boards outward. Not a problem considering no one will be able to see it once it's done!

pfdmC4i.jpg
Putting the legs on, so to speak. I was really iffy over whether or not these clamps were going to be able to hold this wood in place when I started drilling. I didn't have much else to use which was a bit of an oversight on my part. Surprisingly, they held just fine with me putting weight down on the 2by4. You'll also notice this frame doesn't have a middle brace. One of my pieces was just a hair too short and rather than have the frame be pulled inward, I left it off for now. It had gotten much too late at this point, and I didn't want to bother my neighbors with turning the saw back on. Technically I don't need it considering there's going to be a piece of plywood on top of it, but I'll probably cut a new one and attach it anyway.

wMdKpTa.jpg

And then there was a stand! Well, the frame of a stand. :p Final dimensions are 26"x12"x27". This puts it at a nice height where I can work on the top tank with no issues. I'll be putting a piece of plywood on both the top and the bottom and then on the sides (both inside and out) a thinner piece of plywood. The back and front will be left open, and then to finish it up nice, I'll be putting molding around the top and bottom!

YL6lqWB.jpg
And one last picture! Top down view with the 10g tank on the bottom. Plenty of room to work the bottom tank and if I wanted to, I could mount the light I got to the bottom of the top frame! The bottom quarantine tank will house my corals and inverts. I may wind up regretting putting it so low to the ground, but I can always sit and work on it!

So that was my day. A very productive day and for my first time really messing with wood or doing any sort of framing or furniture work, I am insanely proud of how it turned out. I'm also now 100% certain I can make the big 6ft stand and be confident it's going to hold the 150g without issue. I'm going to attempt to draw up the frame design for the big tank in SketchUp and get it posted here in the next few days. If I'm really ambitious, I'll even wrap it and show off my final goal for the stand!

For now, I'm gonna wind down and relax in the glow of a good job!
 
Last edited:

NY_Caveman

likes words, fish and arbitrary statistics
View Badges
Joined
Sep 8, 2017
Messages
17,008
Reaction score
108,390
Location
New York
Rating - 0%
0   0   0
Whelp, I am exhausted but victorious! My quarantine stand frame is DONE. And it's pretty darned level to boot. There's a very slight tilt to it but I can sand that out before wrapping it and finishing it. It was an adventure, though. A fun adventure I have to say. Never done any sort of wood working but after reading up and watching hours of youtube videos, I was confident going into it. Now, picture time! ;Snaphappy

PYqX6IV.jpg
My tool of choice: miter saw! Not only perfect for cuttin 2by4s but later on when I need to cut crown molding, I can get those perfect 45 degree cuts too! I have to say this saw is amazing. Came out of the box and was pretty much ready to go. The blade was already squared so instead of taking it off and using the other blade I bought, I left it on and did a few test cuts. Going nice and slow and steady, the cuts were pretty dang smooth. A little splintering on the ends, so I'll be switching the blade out when I start the big stand. Only thing I had to adjust was the laser line and then I was cranking out boards!

BgufuTG.jpg
This was such a satisfying sight. All my pieces nicely cut and lined up! The smell of fresh cut wood was also oddly satisfying. ;Joyful

1jOpsoS.jpg
As you can see here, I decided to go with pocket holes to join everything up. I was originally going to get a kreg jig to do this, but a nice associate pointed me at another jig that was a third of the price. Most of the holes were nice enough, but I'm not sure the bit was quite sharp enough or it wore out super fast. My later holes started splintering around the edges. Not too concerned with it, considering everything is going to be hidden, but I'll be getting the other jig for my big stand.

68BkVUP.jpg
And here we go joining everything up! Used a 90 degree clamp to help make sure everything was square. It was funny. I bought two. One was a heavy duty $25 clamp and the one seen here was a cheapo $5 one. The cheapo wound up being the one I used for the entire build. The other one was just too clunky and blocked my pocket holes. Otherwise everything went pretty smoothly with only minor hiccups here and there. A word of caution: when making smaller stands, make sure your drill can actually fit between the boards to drive in the screws. Guess who had to hand screw 12 screws. Meeeeeeee! For the other framing, I flipped the boards outward. Not a problem considering no one will be able to see it once it's done!

pfdmC4i.jpg
Putting the legs on, so to speak. I was really iffy over whether or not these clamps were going to be able to hold this wood in place when I started drilling. I didn't have much else to use which was a bit of an oversight on my part. Surprisingly, they held just fine with me putting weight down on the 2by4. You'll also notice this frame doesn't have a middle brace. One of my pieces was just a hair too short and rather than have the frame be pulled inward, I left it off for now. It had gotten much too late at this point, and I didn't want to bother my neighbors with turning the saw back on. Technically I don't need it considering there's going to be a piece of plywood on top of it, but I'll probably cut a new one and attach it anyway.

wMdKpTa.jpg

And then there was a stand! Well, the frame of a stand. :p Final dimensions are 26"x12"x27". This puts it at a nice height where I can work on the top tank with no issues. I'll be putting a piece of plywood on both the top and the bottom and then on the sides (both inside and out) a thinner piece of plywood. The back and front will be left open, and then to finish it up nice, I'll be putting molding around the top and bottom!

YL6lqWB.jpg
And one last picture! Top down view with the 10g tank on the bottom. Plenty of room to work the bottom tank and if I wanted to, I could mount the light I got to the bottom of the top frame! The bottom quarantine tank will house my corals and inverts. I may wind up regretting putting it so low to the ground, but I can always sit and work on it!

So that was my day. A very productive day and for my first time really messing with wood or doing any sort of framing or furniture work, I am insanely proud of how it turned out. I'm also now 100% certain I can make the big 6ft stand and be confident it's going to hold the 150g without issue. I'm going to attempt to draw up the frame design for the big tank in SketchUp and get it posted here in the next few days. If I'm really ambitious, I'll even wrap it and show off my final goal for the stand!

For now, I'm gonna wind down and relax in the glow of a good job!

That was an awesome read. Great job. I am proud of you too.

 
OP
OP
Wheeljack

Wheeljack

Community Member
View Badges
Joined
Dec 20, 2018
Messages
46
Reaction score
157
Location
Charleston
Rating - 0%
0   0   0
That was an awesome read. Great job. I am proud of you too.

Hey, thanks! Glad it was a good read. I'm really looking forward to the build for the bigger stand now. That'll get started sometime in February, or at least, that's what I'm shooting for. For now, the focus will be on finishing the small stand and getting more equipment. Full speed ahead!
 
OP
OP
Wheeljack

Wheeljack

Community Member
View Badges
Joined
Dec 20, 2018
Messages
46
Reaction score
157
Location
Charleston
Rating - 0%
0   0   0
Xrmid6x.png
So I've finally found some free time to dive into SketchUp to help plan out the dimensions of the plywood I need to cut to wrap my quarantine stand and get it finished. As I said before, I'm going relatively simple with some crown molding to help jazz it up a bit. I may add trim on the corners but I won't decide that til its basically finished. Happy I did this because I will need to pick up more plywood than I originally calculated.

Next up is taking my sketch of the main stand and getting it into SketchUp. That will hopefully be done by later today or tomorrow and will help me nail down my cuts and how many 2x4s I'll need for it. I will definitely be sharing the pictures of that here so stay tuned!
 
OP
OP
Wheeljack

Wheeljack

Community Member
View Badges
Joined
Dec 20, 2018
Messages
46
Reaction score
157
Location
Charleston
Rating - 0%
0   0   0
j3YFLJb.png
Frame for my DT stand planned out! All together I need 95ft of 2x4s to get the frame completely done. That's roughly 12 8ft boards if I didn't have any waste. I'll be planning my cuts like I did for the smaller stand so I know I've got enough on hand to complete it. Went with a 40 inch base to start with as this tank will primarily be viewed from a standing position.

dOwQmj2.png

spewBnP.png
And here we have the stand wrapped and basically finished up! Final dimensions are 65" x 28" x 44" (5' 5" x 2' 4" x 3' 8"). The tank itself is sunk 2.5" into the stand which should bring my sand bed level with the lip. There's also still a few details I want to add and I do need to get the canopy done up as well. In the top down view, you can see the cut away where the plumbing will drop down into the stand. I didn't add the overflow box to the tank but it matches up exactly with that cut away. When I get my final detail pass in, I'll likely add that in (as well as the euro bracing) to get a real feel for how it will look.

dSSvBFU.png
And one last shot with the doors hidden. I mocked up the sump I want to buy to make sure it'll fit in the stand. My only concern right now is whether I can slide it in at an angle. The doors are plenty wide enough to accommodate the sump's width, but with how long it is, I may not be able to caddy-corner it in. Tomorrow I'm going to play with it and see if I have the clearance to swing it in using SketchUp's protractor tool. If not, I'll be making one of the sides a removal panel so I can slide it in from the side. May still do this just to make it easier in general to get at the sump.

Also, I'm going to revisit my quarantine stand and make it match the DT stand. I was originally going to do an all black stand for both, but I really like the added white. Gives it depth and makes it pop! Let me know what you guys think and feel free to offer suggestions or criticism!
 
OP
OP
Wheeljack

Wheeljack

Community Member
View Badges
Joined
Dec 20, 2018
Messages
46
Reaction score
157
Location
Charleston
Rating - 0%
0   0   0
Hello friends!

Back with a quick update. I managed to pick up a few things over the weekend and marked off some more stuff on my 'needed' list. My second quarantine tank has been bought, and all but the HOB filter has been purchased for it. They didn't have the same AquaClear 70 that I got for the other tank, so I held off on getting anything. I considered getting the next size down from that for the fish quarantine so I may wind up following through on that. Also, plywood for the quarantine stand!
That wasn't all I picked up though. I made it out to my favorite LFS in town. They recently had a re-grand opening after a drunk driver plowed into the front of their store and took out the entrance AND the gorgeous reef tank that was on display near said entrance. I've been meaning to poke my head in and see what all they changed. I meant to take pictures, but I got distracted by all the fish and coral and equipment. Speaking of, my original plan was to head in and hopefully walk out with the first of my lights. That sadly didn't happen. My LFS only carries Kessils. Which, in hindsight, I should have realized was a possibility. They have ap700's on most of their tanks. Very nice lights, btw, and I'm tempted to get them every time I go in. I was able to resist temptation, however, and refrained from pulling the trigger. I'd need two on my tank, and I'm still pretty set on the Hydras at this point. What I DID get however...

CxCc7r0.jpg

canViJ3.jpg

ROCKS! ;Woot
I had not planned on getting rocks this early in the game, but they had several pieces that were interesting shapes and two nice sized foundation rocks. Here are some pics of me just playing around with them. They'll be tossed in a brute can to begin curing at some point. There's five pieces total here and it's about 40lbs of "LifeRock". They claim there's spored bacteria all throughout the rock. Not sure I believe them but I like the shapes and there are plenty of holes and swim throughs in the bigger pieces. Admittedly, I was not planning on getting this particular dry rock. I've seen it online a few places and it's pricey. Seeing it in person and being able to choose my own pieces helped immensely. I'm still getting about 100lbs of ReefCleaners Rock, and then on top of that, still plan on using at least 30lbs of actual live rock. I know I won't being using it all, but better to get too much than having to scramble for more at the end. Whatever I don't use will either be put in my coral quarantine or donated to my roommate who might have contracted the reef bug and wants to set up a small 20-30g for 'science'. (His science, btw, is putting GSP and Xenia together and seeing who wins by taking over the tank first.)

5bKspl5.jpg

LwEPWal.jpg

And then there was light after all!
Last thing I picked up was this 20$ grow light. Bought it off Amazon after stumbling upon a thread highly recommending it as a fuge light. I did some digging and most people seem very happy with these lights. They're also modular and can be configured as a square or put end to end for a longer, narrower band. These suckers are BRIGHT, let me tell you. At 20w I wasn't expecting them to nearly blind me. We'll see how they do. I've been tempted to set up one of my quarantine tanks and get a pod population going with some chaeto, and it'd be a nice test of the light before I get my DT in. At 20$ I won't be heartbroken if they don't work out. I've got plenty of other plants I can use them on, especially seedlings in the spring.

That's it for now, though. My next update will hopefully harold the arrival or either my skimmer, powerheads, or the first of my lighting. See you then!
 

High pressure shells: Do you look for signs of stress in the invertebrates in your reef tank?

  • I regularly look for signs of invertebrate stress in my reef tank.

    Votes: 35 31.3%
  • I occasionally look for signs of invertebrate stress in my reef tank.

    Votes: 26 23.2%
  • I rarely look for signs of invertebrate stress in my reef tank.

    Votes: 21 18.8%
  • I never look for signs of invertebrate stress in my reef tank.

    Votes: 30 26.8%
  • Other.

    Votes: 0 0.0%
Back
Top