Kyle's 125 build

Kyle Rinker

Active Member
View Badges
Joined
Feb 15, 2017
Messages
139
Reaction score
149
Rating - 0%
0   0   0
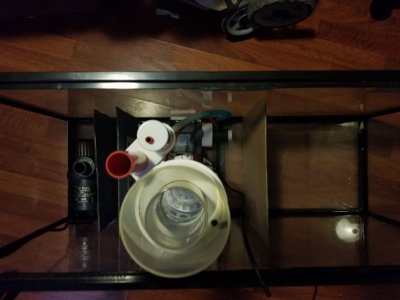
So it finally happened--that moment when you know you let your tank go way too far down the wrong road. I have previously built a 125 gallon tank and created a sump out of a 55 gallon tank. I drilled the 125 myself and did all schedule 80 plumbing with red schedule 40 PVC pipe. I loved the way it looked and over the course of about 1.5 years, it was looking great. But then life got in the way. In becoming incredibly busy and creating a tank at my office, I let my 125 go. Everything maintained itself for awhile, but when the remainder of my dosing solution ran dry, I started loosing some of my stony corals.
20170419_201008.jpg

I had decided that it was time to go down to 1 tank. I had my 125 at home and my Nuvo 40 at my office. All of my nice equipment was on the Nuvo 40 so I decided to keep that. I removed the rock from my 125, drained the water, and quarantined the fish. And then it hit me--I can't get rid of this tank. No matter how bad I want to go down to one tank, I have had an aquarium up and running at home for so long, I couldn't get rid of this thing. So I did what most reasonable reefers would do--I am keeping the tank at home--sort of.

I decided it was time to completely rebuild my tank. Pretty much the only thing I'll be using from my old tank is the Vertex Omeaga 150 skimmer and the stand I built. I also decided it was time to part ways with my office tank. It is difficult to keep up with maintenance on an office tank when you have a family to get home to and have to haul water down the road. Here is to a happy year reefing!
 

NY_Caveman

likes words, fish and arbitrary statistics
View Badges
Joined
Sep 8, 2017
Messages
17,009
Reaction score
108,392
Location
New York
Rating - 0%
0   0   0
So it finally happened--that moment when you know you let your tank go way too far down the wrong road. I have previously built a 125 gallon tank and created a sump out of a 55 gallon tank. I drilled the 125 myself and did all schedule 80 plumbing with red schedule 40 PVC pipe. I loved the way it looked and over the course of about 1.5 years, it was looking great. But then life got in the way. In becoming incredibly busy and creating a tank at my office, I let my 125 go. Everything maintained itself for awhile, but when the remainder of my dosing solution ran dry, I started loosing some of my stony corals.
20170419_201008.jpg

I had decided that it was time to go down to 1 tank. I had my 125 at home and my Nuvo 40 at my office. All of my nice equipment was on the Nuvo 40 so I decided to keep that. I removed the rock from my 125, drained the water, and quarantined the fish. And then it hit me--I can't get rid of this tank. No matter how bad I want to go down to one tank, I have had an aquarium up and running at home for so long, I couldn't get rid of this thing. So I did what most reasonable reefers would do--I am keeping the tank at home--sort of.

I decided it was time to completely rebuild my tank. Pretty much the only thing I'll be using from my old tank is the Vertex Omeaga 150 skimmer and the stand I built. I also decided it was time to part ways with my office tank. It is difficult to keep up with maintenance on an office tank when you have a family to get home to and have to haul water down the road. Here is to a happy year reefing!

Sounds like you made the correct choice. I have a JBJ 45 at home and I am trying to imagine managing it at work. Ambitious, but no thank you.
 

SPR1968

No, it wasn’t expensive dear....
View Badges
Joined
Feb 21, 2017
Messages
20,047
Reaction score
124,735
Location
Nottinghamshire England
Rating - 0%
0   0   0
Yes happy reefing! Great picture as well
 
OP
OP
Kyle Rinker

Kyle Rinker

Active Member
View Badges
Joined
Feb 15, 2017
Messages
139
Reaction score
149
Rating - 0%
0   0   0
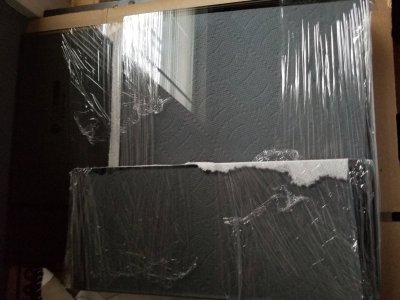
So I was able to sell several pieces of equipment, including my old 125. I was able to find that a local pet store was selling new Marineland 125 gallon tanks for $319, so I snagged one while I was able. Here is the plan for this new tank:
SPS dominant but mixed reef
Display--Marineland 125 gallon
Sump--38 gallon Deep Blue Professional with custom cut glass baffles to run triton
Synergy Reef Ghost overflow
Maxspect gyre xf230 x 2
Jebao DCT 8000 return
1" PVC for return line with manifold (4 gate valves on the manifold--1 for dual GFO/Carbon and 1 for additional flow in fuge, the other 2 unused for now)
Apex 2016
Neptune Dos (2 units) for Triton elements
Neptune FMK
Neptune leak detectors and float level sensors
Neptune ATK
Innovative Marine 5 gallon ATO reservoir with automatic line to RO unit (multiple lines of redundancy)
Home built stand
lighting--unsure for now, but looking at several options (Kessil A360s, AP700s, SB reef lights, rapid LED corona, etc)

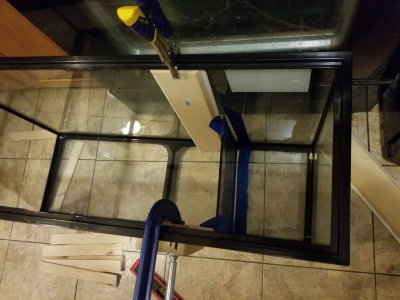
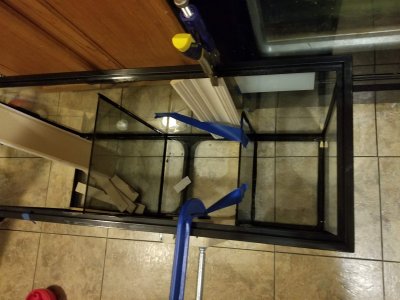
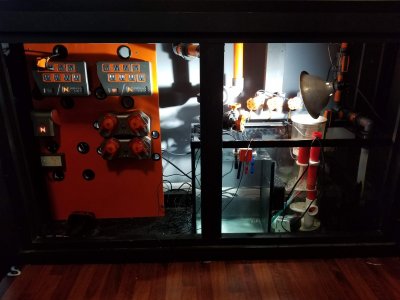
For now, here are some photos of the stand build process. I hope to add glass into the stand doors down the road. I tried to make it an open concept, easy for getting items into and out of the stand, as well as through the back. It has 36" of head space inside the stand for easy work in the sump, and is the perfect height for viewing for both standing and sitting on the couch.
Yes happy reefing! Great picture as well
20170116_173929.jpg

20170117_130011.jpg

20170118_104022.jpg

20170120_105924.jpg

20180817_175835.jpg


20170116_174714.jpg


20170117_130453.jpg


20170117_141920.jpg


20170120_105924.jpg
 
OP
OP
Kyle Rinker

Kyle Rinker

Active Member
View Badges
Joined
Feb 15, 2017
Messages
139
Reaction score
149
Rating - 0%
0   0   0
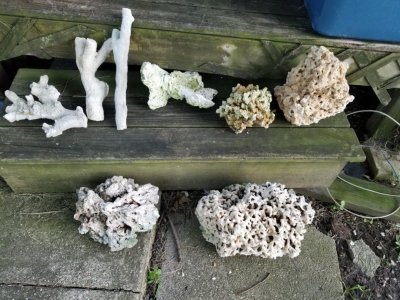
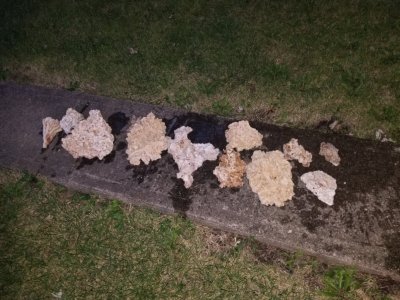
The cleanup begins. I want to control hitchhikers in my new tank as much as possible, so everything that was in the previous tank is getting a serious cleaning. The Vertex skimmer ran in a vat of vinegar/water for about 5 days, and then again in RODI water for another 3 days in order to clean it out. The liverock from my prior tank was placed in a bleach solution with a pump and has been sitting like this for 4 weeks now, following a similar procedure to what @Ryanbrs mentioned in the BRS Investigates series about 1 year ago. While I didn't have any major outbreaks of any identifiable pests, it simply isn't worth the risk to me to bring something unwanted into a new build. Plus, I find that working with dead rock allows more time and precision in aquascaping.
20180729_115645.jpg

I didn't have the heart to take photos of the skimmer prior to cleaning it :)

20180727_232615.jpg
This was bad enough--end of day 1 in the vinegar solution

20180726_205923.jpg

Three containers total for the liverock, and a mix of Pukani and BRS reef saver. I used 1 bottle of concentrated bleach and about 15 gallons of water in each container.

20180726_205913.jpg

20180726_205858.jpg

And of course, everything was cured outside to keep the fumes down

20180729_115645.jpg
 
OP
OP
Kyle Rinker

Kyle Rinker

Active Member
View Badges
Joined
Feb 15, 2017
Messages
139
Reaction score
149
Rating - 0%
0   0   0
I did decide to use a Synergy Reef Ghost overflow for this tank. After looking at multiple configurations, I decided to place it in the center of the tank and to use a 3 foot long sump underneath, so that the drains coming down will be able to go in as straight a line as possible.
20180818_194806.jpg
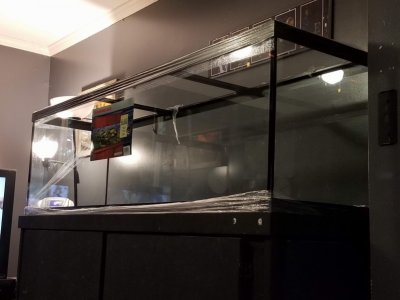
The new tank prior to drilling. I have gotten so accustomed to either a herbie or bean animal overflow that I don't think I will ever buy a traditional "reef ready" tank again. I was able to buy this 125 and the overflow for substantially less than a reef ready 125 would have cost. I do love the black silicone look which is one of the reasons I went with the Marineland tank. My preference would have been for low iron glass, but I did not go all out on this build.
20180822_180919.jpg
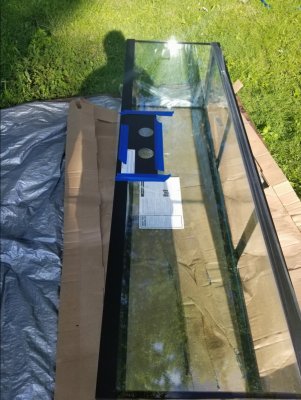
Tank on its side in the yard with the template for drilling taped in place. Fortunately for me, this was the second aquarium I have drilled so I wasn't so nervous this time.

20180822_181615.jpg
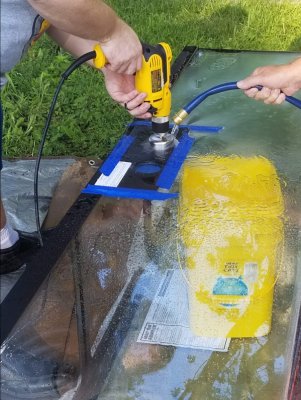
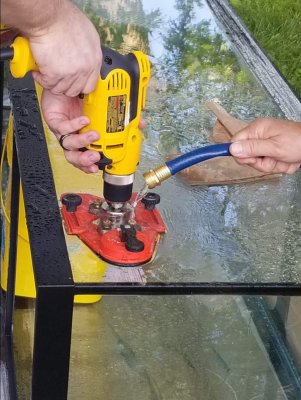
The last time I drilled a tank there was snow on the ground which forced me to drill it inside the house. Doing it outside with a running hose is definitely my preference.

20180822_183417.jpg
After much consideration, I decided to go with a single return line. I do not find it necessary to have a ridiculous amount of flow through the sump, so I will make up for the difference with powerheads in the display. I plan for somewhere between 750 and 1000 gph through the sump--basically in the neighborhood of 10x turnover. If I max out my gyre xf230, I will add another 25x flow, and if I add a second xf230, I will be able to run at a combined total of around 60x turnover.

20180822_183559.jpg
My littlest photobomber.

20180822_180919.jpg
 
OP
OP
Kyle Rinker

Kyle Rinker

Active Member
View Badges
Joined
Feb 15, 2017
Messages
139
Reaction score
149
Rating - 0%
0   0   0
So I've been pretty busy with working on the tank. The most recent work focused on siliconing the baffles in place for the sump and completing my plumbing. For the sump, I went with a 38 gallon from Deep Blue Professional. I wanted to make a sump that was only 36" long so that I would still have another 36" inside the stand for an ATO reservoir and all of my controller equipment. The sump is 22" tall so it still maximizes water volume in a shorter length.
20180817_201954.jpg
I cut some baffles out of cardboard to get an idea of how I want them set up. I made the return section about 7.5" wide and the skimmer section is about 13" wide. After having a 2.5" bubble trap, I was left with a fuge/drain section of about 13" so I decided to make it 20" tall to maximize the space for macroalgae growth and pod breeding.
20180821_194511.jpg
My local glass shop cut my baffles for me out of 1/4" fogged glass. I also had them cut some plates to set across the top so I can mount some bulkheads for the return line and drain section.

20180828_212016.jpg 20180829_204057.jpg
Siliconing the baffles in place. I ordered some ASI black silicone to keep the look the same throughout the build.

20180902_195208.jpg
On a weekend we went to visit family in Columbus, Ohio. One of the best reef stores I have ever been to is in New Albany and just about 30 minutes from where we were staying. Reef Systems Coral Farm is huge and has a ton of corals and high-end supplies. They happened to have a 20% off sale going on for the holiday and also had pukani and tonga branch rock left from a prior order. So while I was there, I had to buy about 60 more pounds :)

20180906_000303.jpg
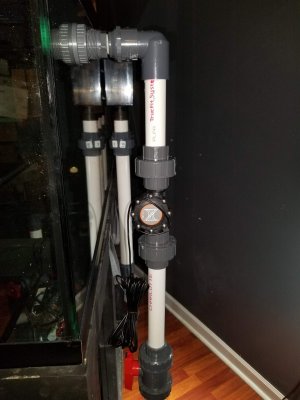
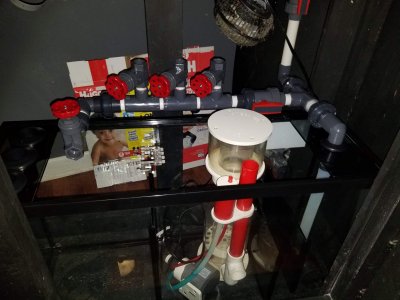
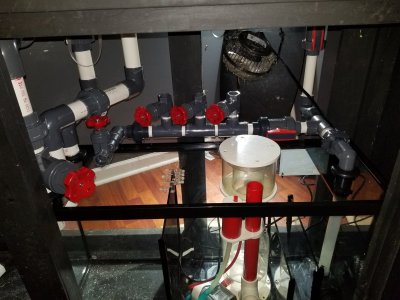
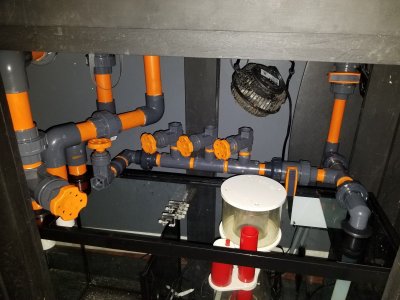
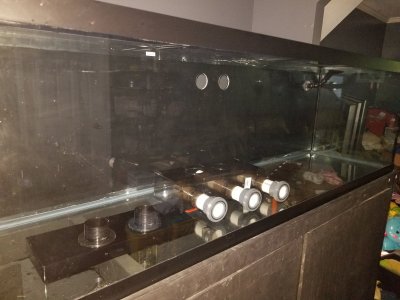
I started the process of plumbing but focused on the return line first because of the complexity of plumbing the manifold. I did throw on a Neptune flow meter so I can ensure I am putting enough flow through the sump.

20180905_073158.jpg
Manifold plumbed

20180906_000346.jpg
Drain lines plumbed. I did go with 1.5" drain lines and a 1" return line. The primary part of the manifold is 1" with a 1" to 3/4" T, and gate valves on the manifold are all 3/4". There is a ball valve on the start of the manifold so I can shut off the manifold entirely. There is also a ball valve on the verticle pipe above the manifold to hopefully redirect flow through the manifold. The only question is whether or not the current return pump is large enough to feed everything.

20180909_124949.jpg
I ended up painting all the pipe orange to match the Neptune equipment that will be installed. I did save quite a bit of money by painting all the pipe myself. However, the next time I will bite the bullet and just buy the proper colored tubing. The amount of time I had to spend on tape off everything was not worth the cost savings!
20180817_175854.jpg


20180906_000318.jpg


20180906_000330.jpg


20180909_131407.jpg
 
OP
OP
Kyle Rinker

Kyle Rinker

Active Member
View Badges
Joined
Feb 15, 2017
Messages
139
Reaction score
149
Rating - 0%
0   0   0
Well crap--for the first time ever, I have a small leak in my plumbing. I have plumbed several things in the past, but never before have I had a leak. In the section of my return line just after my manifold where the line makes a 90 degree turn upward, the line coming down from the top of the tank is about 1/4" too long which makes the unions not line up quite correctly. I have been able to maneuver the plumbing enough to connect the union, but it does nonetheless drip. I have tried loosening other connections and starting by connecting the problem piece first, but the same issue results.

Long story short, I have to replumb about a 2 foot section, but it is a complex one. This is the part that makes the lefthand turn to the manifold and takes the return line up and behind the tank. At least I put several unions on the tank--that will enable me to replace a smaller section of the plumbing.

We are supposed to share our failures as well as our successes, right? Oh well--if I wasn't on call for work tonight it would be time for a beer.
 
OP
OP
Kyle Rinker

Kyle Rinker

Active Member
View Badges
Joined
Feb 15, 2017
Messages
139
Reaction score
149
Rating - 0%
0   0   0
Well, I guess I'm not as bad off as I thought. Fortunately, have enough leftover plumbing pieces to rebuild my corner of the return line. However, when taking apart the union pieces to find the best method for rebuilding, I noticed the o-ring was missing from the leaky union. I thought I had inspected each of them prior to installation, but I must have missed one. The plumbing functions perfectly now :)
 
OP
OP
Kyle Rinker

Kyle Rinker

Active Member
View Badges
Joined
Feb 15, 2017
Messages
139
Reaction score
149
Rating - 0%
0   0   0
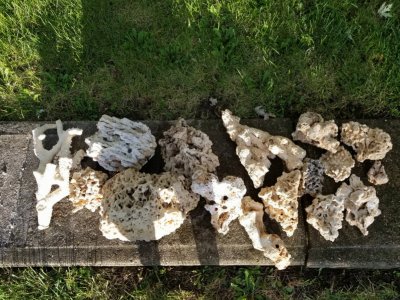
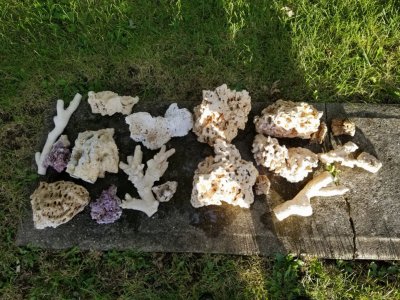
I have been very patient in waiting for my bleach cure to finish. After soaking for a minimum of 10 days in 10% bleach solution, I pulled all the rock out and gave them a good rinse with a hose. Then I placed them all back in the storage bins and covered in RODI water and added a dechlorinator. After another week, my test strips showed there was no more chlorine present in the water so all the rocks came out and were set out to dry. Talk about clean--these rocks are as pest free as they come!
20180926_194555.jpg 20180927_183522.jpg 20180927_183527.jpg
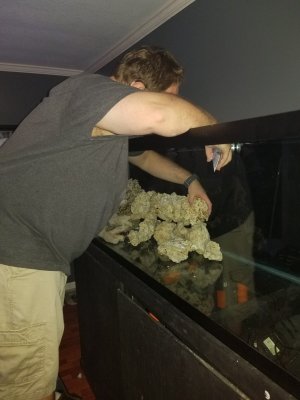
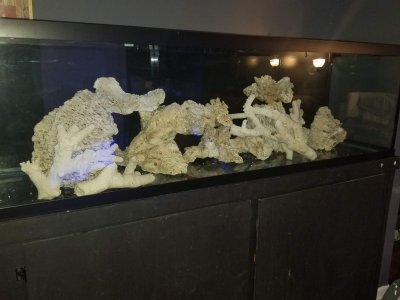
I did sort the rocks into 3 separate groups--reef saver, Pukani, and Tonga. After running through some quick scenarios, I decided to aquascape entirely out of Pukani and Tonga, having only 1 piece of reef saver in the tank for added stability behind the rock structure.
20180930_211842.jpg
While the aquascape is not finalized, I am close to where I want it. The rock structure is held in place by a combination of JB water weld and Goop Marine. I am allowing about 1 week of dry time after adding these adhesives to ensure a complete cure.
20180930_221341.jpg
Prior to placing the rocks in the tank, I added acrylic paint to the back glass. Needless to say, this has always been my least favorite part. Paint does not necessarily stick well to glass, but being patient and allowing dry time between coats sure helps. This took around 6 coats to completely cover all of the glass and not allow light to shine through from the back.
20180923_093555.jpg

20180922_171920.jpg
 
OP
OP
Kyle Rinker

Kyle Rinker

Active Member
View Badges
Joined
Feb 15, 2017
Messages
139
Reaction score
149
Rating - 0%
0   0   0
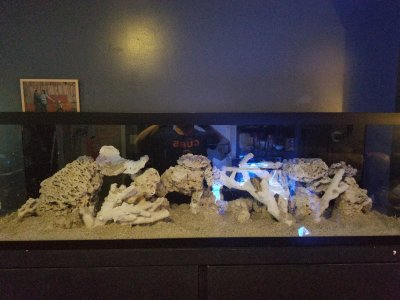
It took me 3 days but I did get the dry scaping done. All together I used 4 tubes of JB water weld and 3 tubes of Marine Goop. Once it all cured, the rock structure became very solid. In days gone by, I created a simple and solid rock wall. This time I wanted to do something different. I wanted to create a unique scape with caves, crevices, tunnels, and a sense of depth by having areas of rockwork closer to the front and others closer to the back. While it's not perfect, it is better than my previous attempts. I tried to use a rule of thirds approach to complete this scape.

I did order sand from my LFS on Friday. I had seriously considering going bare bottom on this build, but I couldn't bring myself to do it. I do appreciate and understand all the reasons to use a bare bottom tank, but I just can't get past how more natural a sandbed looks to me. I decided to order special grade and it should be here Wednesday this week. Needless to say, I hope to get this tank wet sometime before the weekend :)
20181003_205247.jpg

20181003_204931.jpg

20181003_204834.jpg
 
OP
OP
Kyle Rinker

Kyle Rinker

Active Member
View Badges
Joined
Feb 15, 2017
Messages
139
Reaction score
149
Rating - 0%
0   0   0
My LFS did get me 80 pounds of special grade live sand this week and I was able to get it all placed. And finally, I was able to get water in this tank. What has been many weeks in the making is finally coming together in a way I can visualize the point where livestock can be planned. 20181010_190052.jpg
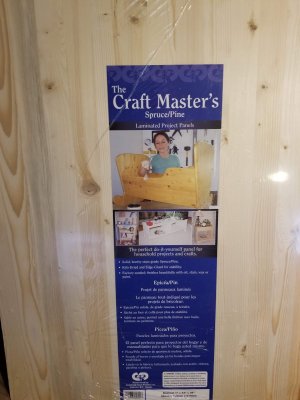
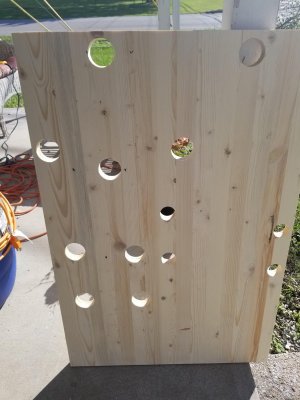
The sand is the depth I was going for overall, but it is shallow for sure in some places in the back. However, it isn't really noticeable when viewing from the front. With the tank filled with water, it was time to move on to mounting all of my control equipment. I wanted to mount all of my apex equipment and controllers on a board under the stand. For simplicity sake, I ended up using a "craft board" that was essentially glued together strips of pine board. I found this a my local Lowes, and the size was about perfect for what I was looking for: 24"x36"x1".
20181013_092312.jpg
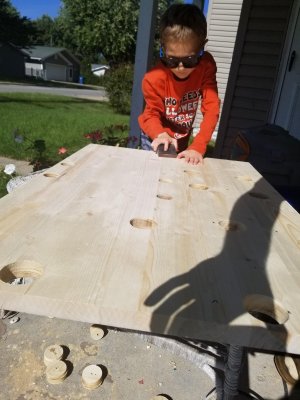
I printed out all of the templates of the Apex equipment and taped them to the board and then marked where all the holes would be drilled for cable management. I did enlist some free labor from my curious 6 year old--nothing like letting him take care of my least favorite part of the job :)
20181013_133854.jpg
20181013_152652.jpg
After all of the drilling and sanding was completed, it was time to paint the board. I decided to use an orange spray paint to go along with the Apex theme. I am definitely not done with mounting all of the equipment and controls, but it is moving along.
20181014_121140.jpg
There are several things yet to go. I won't be adding my refugium light for two or more months. I plan to add a breakout box so I can use magnetic switches to trigger lights to turn on when opening the stand doors. I also plan to add an automatic shutoff switch on the skimmer. This week I will be adding my ATO reservoir and the Neptune ATK. To go along with this, I plan to add a second RODI unit under the kitchen sink, located directly behind the wall the tank sits on. I will then connect the RODI unit to the ATO reservoir and include multiple layers of redundancy to help prevent flooding disasters. I also would like to add a third Neptune DOS in order to set up an auto water change or a push button water change.
 
OP
OP
Kyle Rinker

Kyle Rinker

Active Member
View Badges
Joined
Feb 15, 2017
Messages
139
Reaction score
149
Rating - 0%
0   0   0
It's been a lot of waiting around here--following along with @Bulk Reef Supply and the BRS/WWC hybrid series and I'm trying to be patient with this build. It is proving to be difficult, but patience is winning out :) I am trying to finish putting together the rest of the system while I wait on the tank to cycle and mature enough to feel ok about turning on the lights. Here is a rundown of the latest of my build!

I did get a new gyre pump for this build. My existing Maxspect gyre is having some issues and I haven't decided whether I will scrap it and replace it or maybe repair it. Here is the new gyre. Ultimately I will add more flow to this tank as it will be SPS heavy.
20181016_183001.jpg
I do like the gyres for their relatively small footprint and their ability to move sheets of water at a time instead of cone-shaped columns of water.

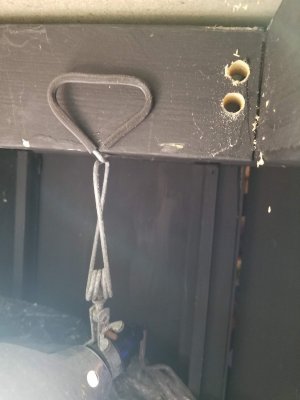
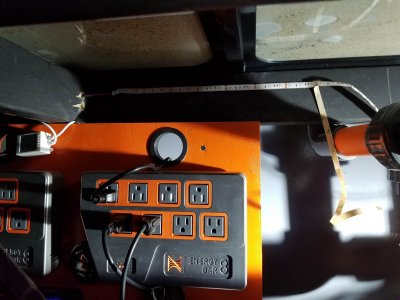
Next, it was time to install my under-cabinet lighting. I wanted to put in LED string lights in two strips. First, I bought a dimmable multi-colored string light. The plan is to dim this light down as far is it will go and always leave it on. Going with my build theme, this string will be set with an orange hue. One problem I ran into here was that the cross members underneath the stand were in the way. So, I had to drill holes through the cross members. In order to prevent the wood and sawdust from falling into the sump, I covered it with a plastic drop cloth.
20181026_210306.jpg
20181026_210932.jpg
The ultimate goal here was to have two separate strands of light, so two holes were made.
20181026_212742.jpg
First I peeled back the adhesive and stuck the tape light to the stand, and then I used a series of cable nail clips to hold the lights up.
20181026_214524.jpg
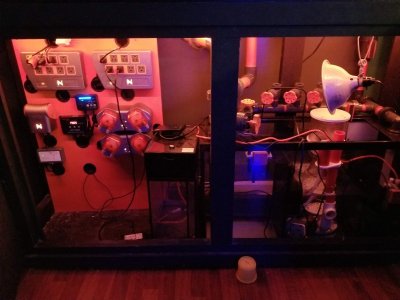
Here, the lights are in place and turned on. They are actually quite a bit dimmer than the photo suggests.
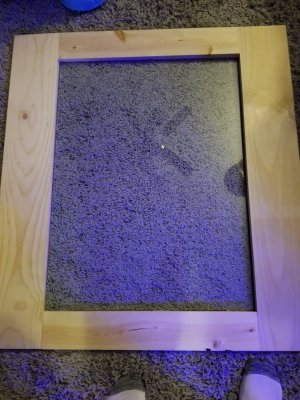
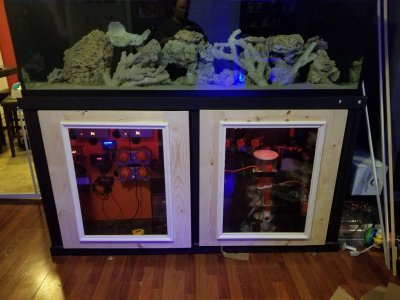
From the outset of this build, I had wanted to put glass panels in my stand doors for visual effect. The least expensive route was for me to have my local glass shop cut the glass out of 1/4" sheet glass, but this turned out to be quite heavy. I had originally planned on using the original doors and simply cutting out holes for the panels to sit in but the original doors were particleboard. I did not feel this would be strong enough to support the weight of the door with the glass. So, I bought appearance grade pine boards from my local Lowe's and built some new doors.
20181030_194954.jpg
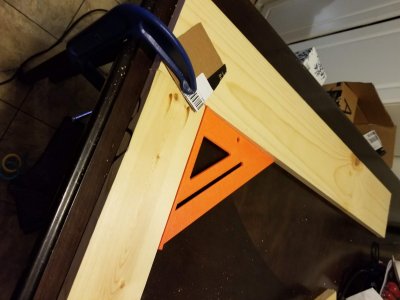
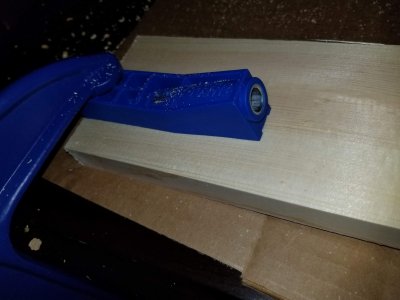
I bought a new pocket hole jig to be able to make perfect corners. Since I was only needing it for 8 holes, I bought a single hole jig that saved a lot of money and did just as good of a job.
20181030_200900.jpg
Building the first door and the first 90-degree corner put in place. I couldn't believe how easy this jig was to use and how perfect and solid of doors it made.
20181030_204614.jpg
Glass in place on the first door.
20181103_231724.jpg
Trim mounted and the doors were finally hung. I used 3 black door hinges on each door. I found them on Amazon for a steal of a deal and couldn't pass them up. I only needed 6 but they came in a 12 pack for far less than I could have purchased 6 at the local hardware store. I will be painting the doors black to match the stand.

20181104_145442.jpg
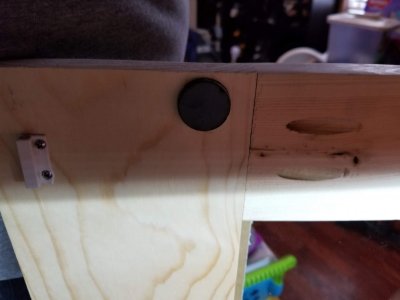
The second set of lights will be bright white and hooked up to my breakout box to turn on automatically when the cabinet doors are opened. In order to help ensure the doors stay shut when I want them to, I superglued a set of magnets to the top and bottom of each door. I wanted to get a magnetic cabinet door catches but Lowe's did not have anything that seemed like it would be strong enough, and the magnets I did buy were very inexpensive.

20181106_214755.jpg


20181106_215312.jpg


20181106_220459.jpg


20181106_221750.jpg


20181106_214755.jpg


20181106_215312.jpg


20181106_220459.jpg


20181106_221750.jpg
 

VetReefer

Active Member
View Badges
Joined
Dec 14, 2018
Messages
386
Reaction score
196
Location
Clarksville, TN
Rating - 0%
0   0   0
It's been a lot of waiting around here--following along with @Bulk Reef Supply and the BRS/WWC hybrid series and I'm trying to be patient with this build. It is proving to be difficult, but patience is winning out :) I am trying to finish putting together the rest of the system while I wait on the tank to cycle and mature enough to feel ok about turning on the lights. Here is a rundown of the latest of my build!

I did get a new gyre pump for this build. My existing Maxspect gyre is having some issues and I haven't decided whether I will scrap it and replace it or maybe repair it. Here is the new gyre. Ultimately I will add more flow to this tank as it will be SPS heavy.
20181016_183001.jpg
I do like the gyres for their relatively small footprint and their ability to move sheets of water at a time instead of cone-shaped columns of water.

Next, it was time to install my under-cabinet lighting. I wanted to put in LED string lights in two strips. First, I bought a dimmable multi-colored string light. The plan is to dim this light down as far is it will go and always leave it on. Going with my build theme, this string will be set with an orange hue. One problem I ran into here was that the cross members underneath the stand were in the way. So, I had to drill holes through the cross members. In order to prevent the wood and sawdust from falling into the sump, I covered it with a plastic drop cloth.
20181026_210306.jpg
20181026_210932.jpg
The ultimate goal here was to have two separate strands of light, so two holes were made.
20181026_212742.jpg
First I peeled back the adhesive and stuck the tape light to the stand, and then I used a series of cable nail clips to hold the lights up.
20181026_214524.jpg
Here, the lights are in place and turned on. They are actually quite a bit dimmer than the photo suggests.
From the outset of this build, I had wanted to put glass panels in my stand doors for visual effect. The least expensive route was for me to have my local glass shop cut the glass out of 1/4" sheet glass, but this turned out to be quite heavy. I had originally planned on using the original doors and simply cutting out holes for the panels to sit in but the original doors were particleboard. I did not feel this would be strong enough to support the weight of the door with the glass. So, I bought appearance grade pine boards from my local Lowe's and built some new doors.
20181030_194954.jpg
I bought a new pocket hole jig to be able to make perfect corners. Since I was only needing it for 8 holes, I bought a single hole jig that saved a lot of money and did just as good of a job.
20181030_200900.jpg
Building the first door and the first 90-degree corner put in place. I couldn't believe how easy this jig was to use and how perfect and solid of doors it made.
20181030_204614.jpg
Glass in place on the first door.
20181103_231724.jpg
Trim mounted and the doors were finally hung. I used 3 black door hinges on each door. I found them on Amazon for a steal of a deal and couldn't pass them up. I only needed 6 but they came in a 12 pack for far less than I could have purchased 6 at the local hardware store. I will be painting the doors black to match the stand.

20181104_145442.jpg
The second set of lights will be bright white and hooked up to my breakout box to turn on automatically when the cabinet doors are opened. In order to help ensure the doors stay shut when I want them to, I superglued a set of magnets to the top and bottom of each door. I wanted to get a magnetic cabinet door catches but Lowe's did not have anything that seemed like it would be strong enough, and the magnets I did buy were very inexpensive.

20181106_214755.jpg


20181106_215312.jpg


20181106_220459.jpg


20181106_221750.jpg


20181106_214755.jpg


20181106_215312.jpg


20181106_220459.jpg


20181106_221750.jpg
That's a very very nice set up bro
 
OP
OP
Kyle Rinker

Kyle Rinker

Active Member
View Badges
Joined
Feb 15, 2017
Messages
139
Reaction score
149
Rating - 0%
0   0   0
OK it seems like it's been forever since I posted an update but the build has substantially slowed and I've done a LOT of waiting around. I waited about 4 weeks after first putting water into the tank before adding my fish from quarantine into the display. After the 4 weeks, I hade 0 ammonia and nitrite and was showing detectable nitrate. A few times a week I did phantom feeding in order to move along the cycle, along with adding some marine pure spheres that had been established for about 18 months in the sump of another tank I had. So, in went 2 clowns, 1 small blue tang, and 1 royal dottyback.

Over the last 4 months I have added livestock a little at a time, but definitely faster than I would recommend. I did add a substantial amount of biospira to help boost bacteria each time. I will also say that, although I planned to quarantine my fish, I did not. Since this was already a tank without much in it, I decided to take the risk. Once I start to fill the tank with additional livestock/corals, quarantine will be a necessity.

I added my primary lighting during this time, and ultimately went with Maxspect Etheral lights. While the lights have been mounted on the tank for quite a while, I waited until the tank had water in it for 3 months before I turned the lights on. The amount of output is just enough to grow SPS corals, meaning I won't cook them. They also put out enough spread that I only need 3 fixtures to provide excellent coverage.
20190104_204338.jpg
However, I will say that you have to be careful with these fixtures. When I first got them I set two of them on my couch--one on each arm. I plugged them in, not realizing that they would instantly turn on (I thought maybe you had to turn the dial or something first). Since we should openly share our failures, I will state that the lights melted the fabric on my couch. Yes, they put out that much light intensity. Good thing my couch is still under warranty :(
20181023_201736.jpg

I also decided that the gyre pump wasn't really going to give me the movement I was looking for across the top of the tank. I moved the gyre to the back and side of the tank so that it keeps detritus suspended behind the rockwork. For the main display area, I picked up two Jebao OW 40 powerheads (see first photo in this post). These things move massive amounts of water and have a surprisingly wide spread. Plus, they communicate with one another so I can alternate flow patterns.

The biggest downer is that my pump on my Vertex Skimmer bit the dust. In speaking with Vertex support, I attempted to pull the impeller from the pump, but it had seized. The impeller ended up breaking and the pump is essentially useless. On a more positive note, I was able to trade a local hobbyist an algae reactor I had built for his ASM G2 skimmer. While it's not my first choice in a skimmer, it is definitely effective.
20190102_182119.jpg
20190102_182129.jpg

I also installed a COB style 100 W grow light over my refugium section and bought a small batch of chaeto to start growing. I must say that for $30, this light puts out some serious power. It is a CANAGROW light I purchased from Amazon. I was also impressed with how low profile it is and how heavy duty it feels. Time will tell how much results it yields.
20181209_215154.jpg


I can say that my kids definately appreciate the arrival of new fish.


A couple tank videos:

 
OP
OP
Kyle Rinker

Kyle Rinker

Active Member
View Badges
Joined
Feb 15, 2017
Messages
139
Reaction score
149
Rating - 0%
0   0   0
I can't believe its been over 3 months since my last update. Lots of positive and negative things have happened since then. I got some livestock from a local hobbyist--quite a mix of corals, 1 clownfish, and a black widow anemone, a starfish, and some crabs, shrimp, and snails. I placed the corals in quarantine but put the other items in my display, breaking the primary rule I intended to follow with this build. Yep--that was a big mistake. It was within the next 10 days I had noticed white spots on 3 of my tangs. I knew it was marine ich, but couldn't get my mind around the best way to do treatment. I had a few main options: 1) tear out all the rock to catch all the fish; 2) catch all the fish and treat outside of the tank (hypo, copper, etc); 3) remove all the invertebrates and treat inside the tank. Ultimately, I was able to catch all of the fish over time using a homemade trap. I then transferred them all to quarantine and kept them in hyposalinity between 1.008 and 1.009 for 10 weeks. Unfortunately, during this process, I lost quite a few of them, including all but 1 of the oldest fish I have had for years. When it was all said and done, I am left with 5 fish: 1 sailfin tang, 1 (new) lightning maroon clown, 1 black ice clown, 1 bangai cardinal, and 1 firefish. Lesson learned--don't take shortcuts around the safeguards you have already established!
 

Creating a strong bulwark: Did you consider floor support for your reef tank?

  • I put a major focus on floor support.

    Votes: 53 42.4%
  • I put minimal focus on floor support.

    Votes: 25 20.0%
  • I put no focus on floor support.

    Votes: 43 34.4%
  • Other.

    Votes: 4 3.2%

New Posts

Back
Top