Manny, The tank build looks great!! I love the idea of the two slim boxes for the ATO and dosing containers. Really cool idea!!! I might have to steal that idea for my new build.... Everything looks so well thought and planned. I love that slim overflow box as well! It's similar to the ghost overflow by Reef Savvy. I can't wait to see everything all finished and with water. Great job bud!!!

Navigation
Install the app
How to install the app on iOS
Follow along with the video below to see how to install our site as a web app on your home screen.
Note: This feature may not be available in some browsers.
More options
You are using an out of date browser. It may not display this or other websites correctly.
You should upgrade or use an alternative browser.
You should upgrade or use an alternative browser.
My dsa neo 105 build!
- Thread starter HtfdWhaler
- Start date
- Tagged users None


Manny, The tank build looks great!! I love the idea of the two slim boxes for the ATO and dosing containers. Really cool idea!!! I might have to steal that idea for my new build.... Everything looks so well thought and planned. I love that slim overflow box as well! It's similar to the ghost overflow by Reef Savvy. I can't wait to see everything all finished and with water. Great job bud!!!
Thanks for the compliments, I appreciate it.
I am glad everything looks planned out because it's not. LOL.. I had an idea in my head and then went from there. The ultimate goal is to have a fully automated system that I don't have to do much to except stare at it.
The slim containers I had to come up with on the fly because I had no space. LOL. They are only 4 inches wide.
On the overflow, I orginally wanted the reef savvy overflow but could not find it anywhere. So then I was going to with the glass holes overflow but then came across this one and glad I went with it. It is slimmer, shorter and much longer. Which is nice because you get more surface skimming on the water.
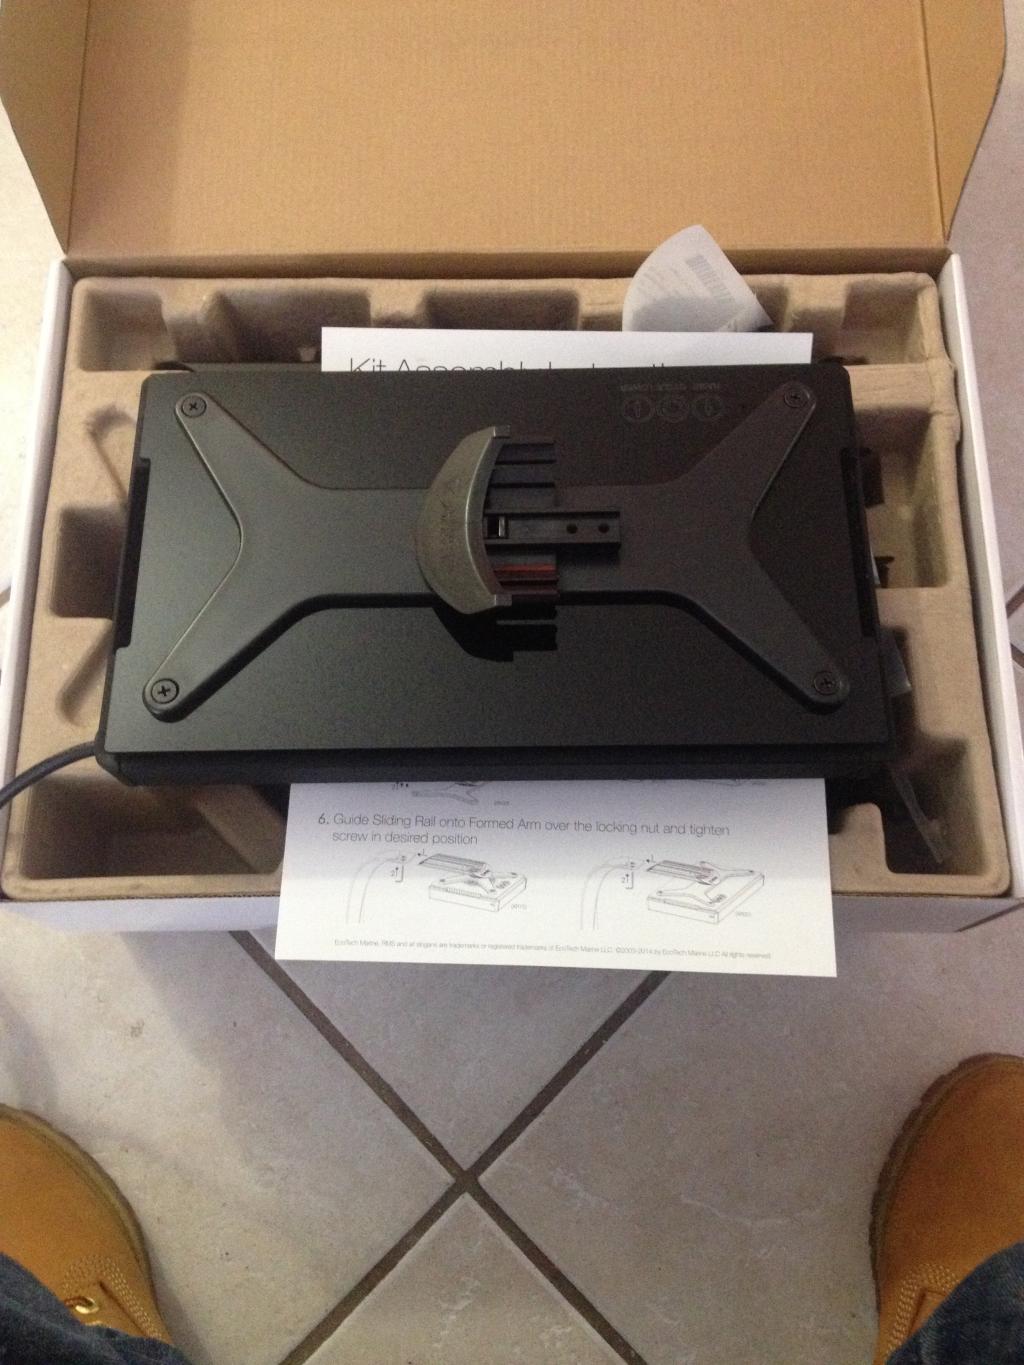
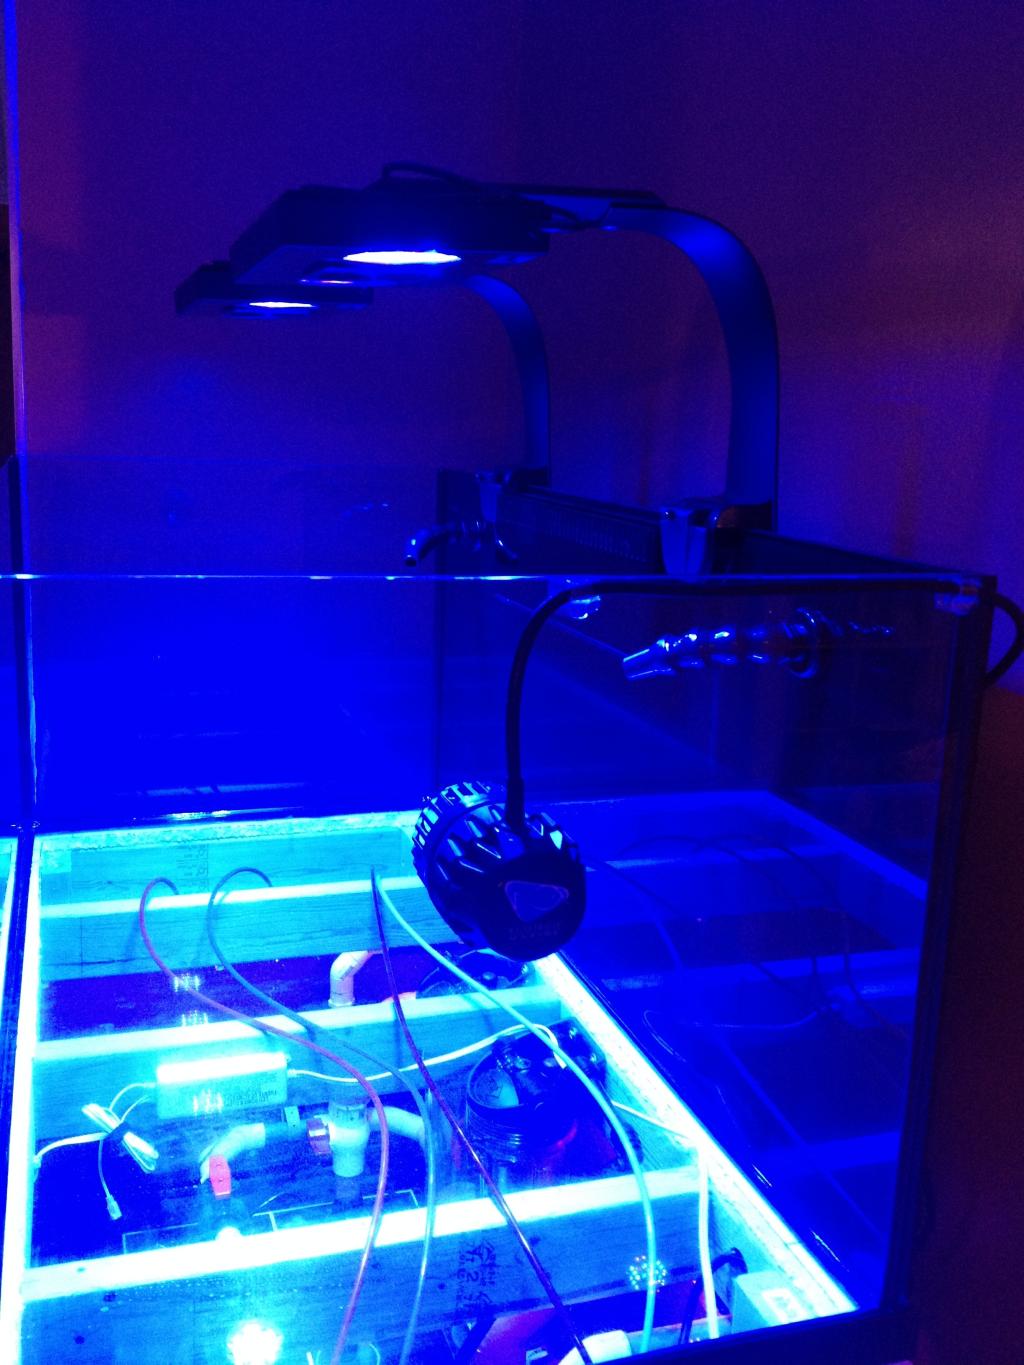
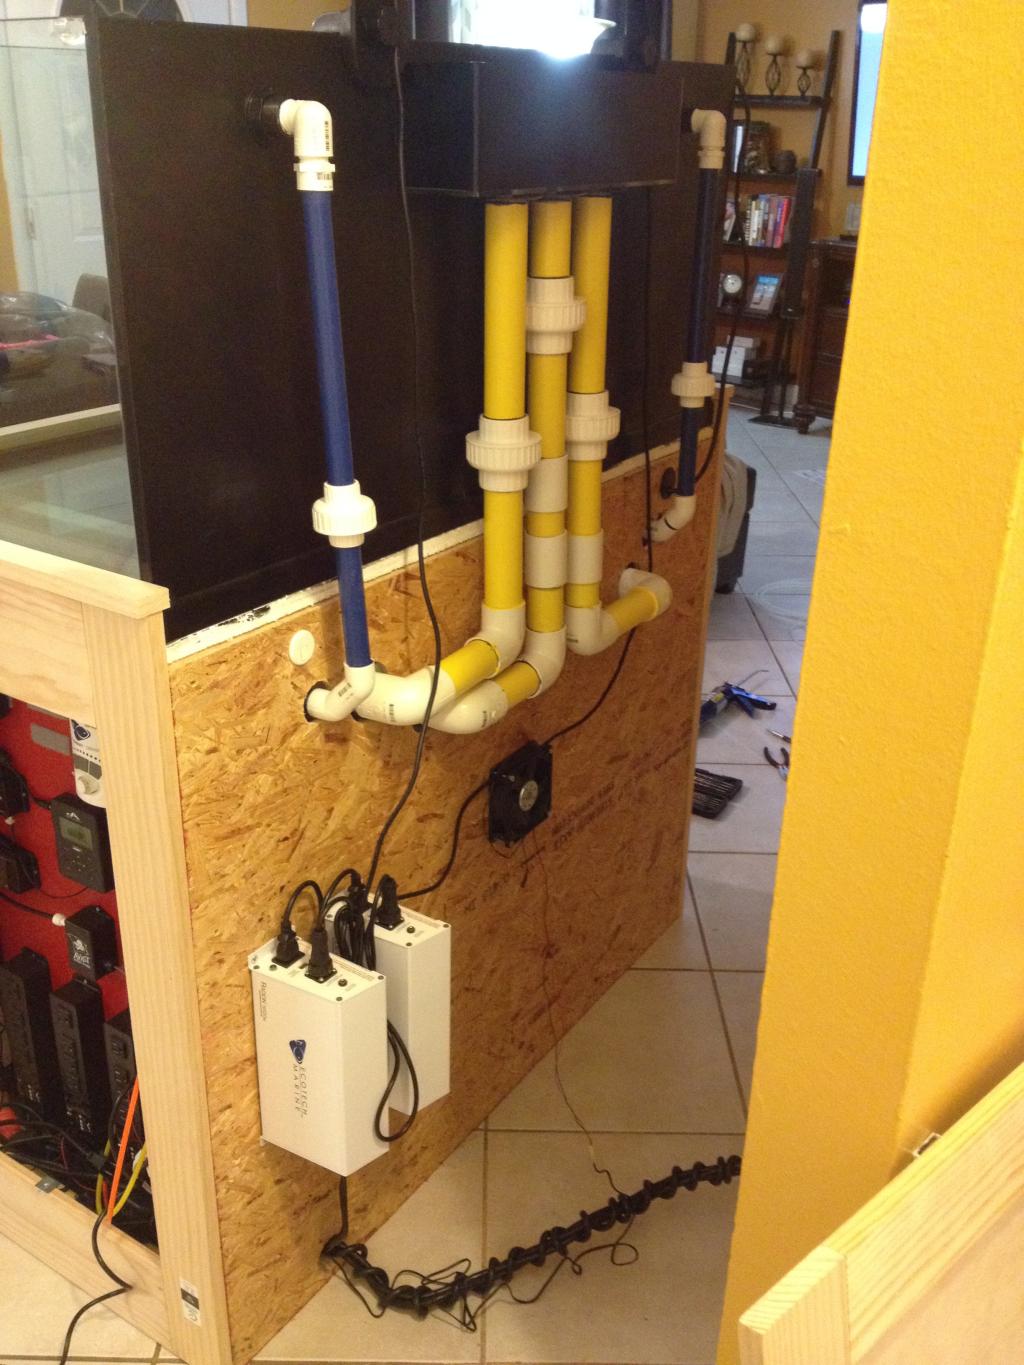
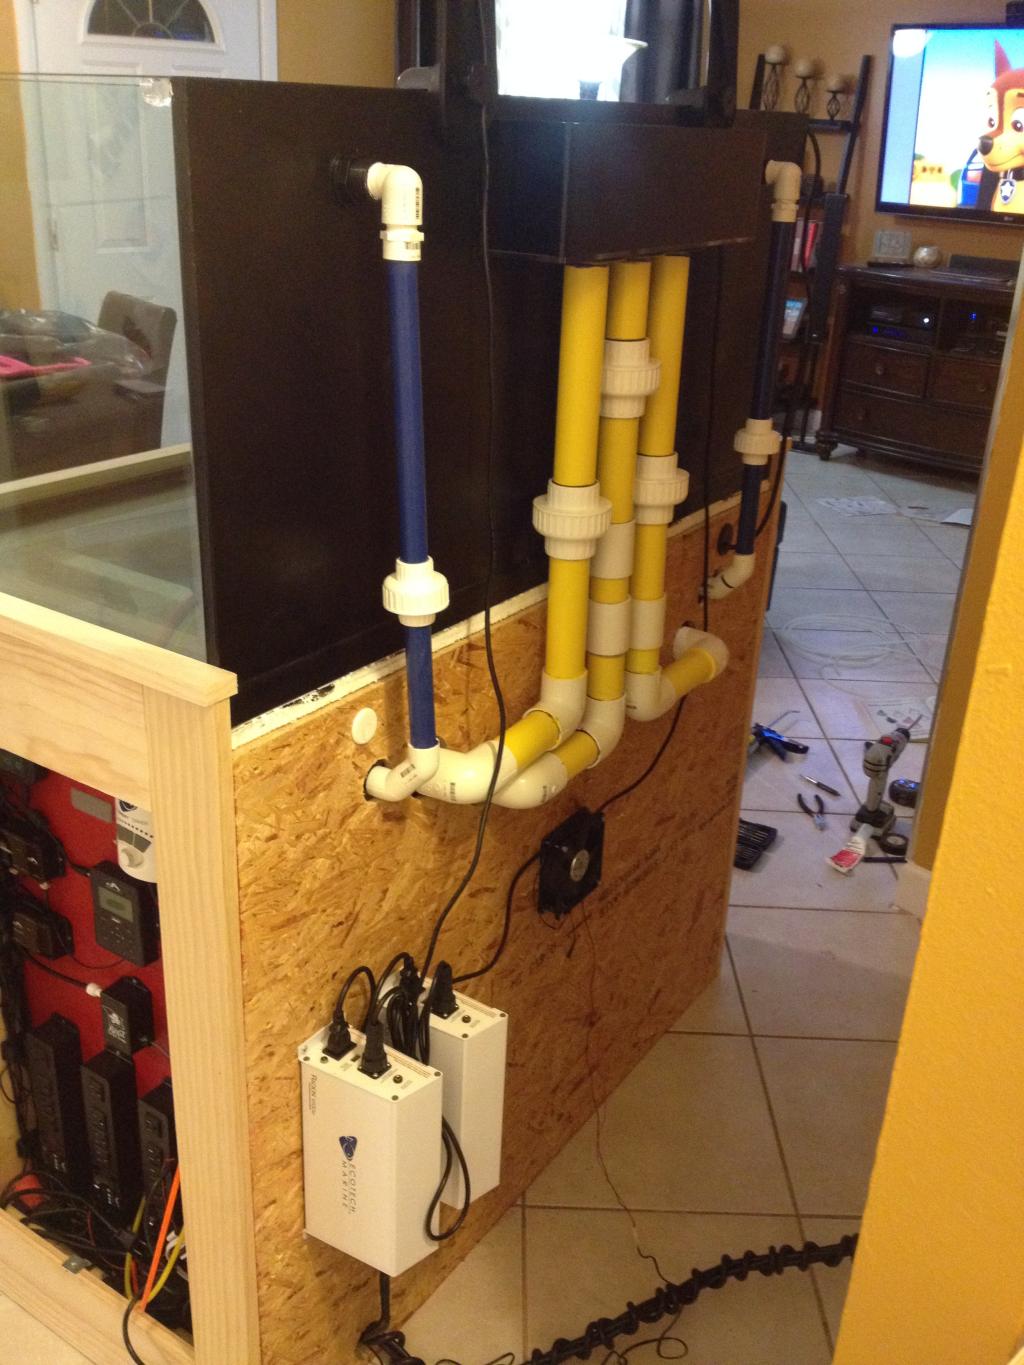
Update: So I went ahead and purchased the ecotech RMS mounts. I must say they are nice and extremely well built, I also love the look.
Here are some pics
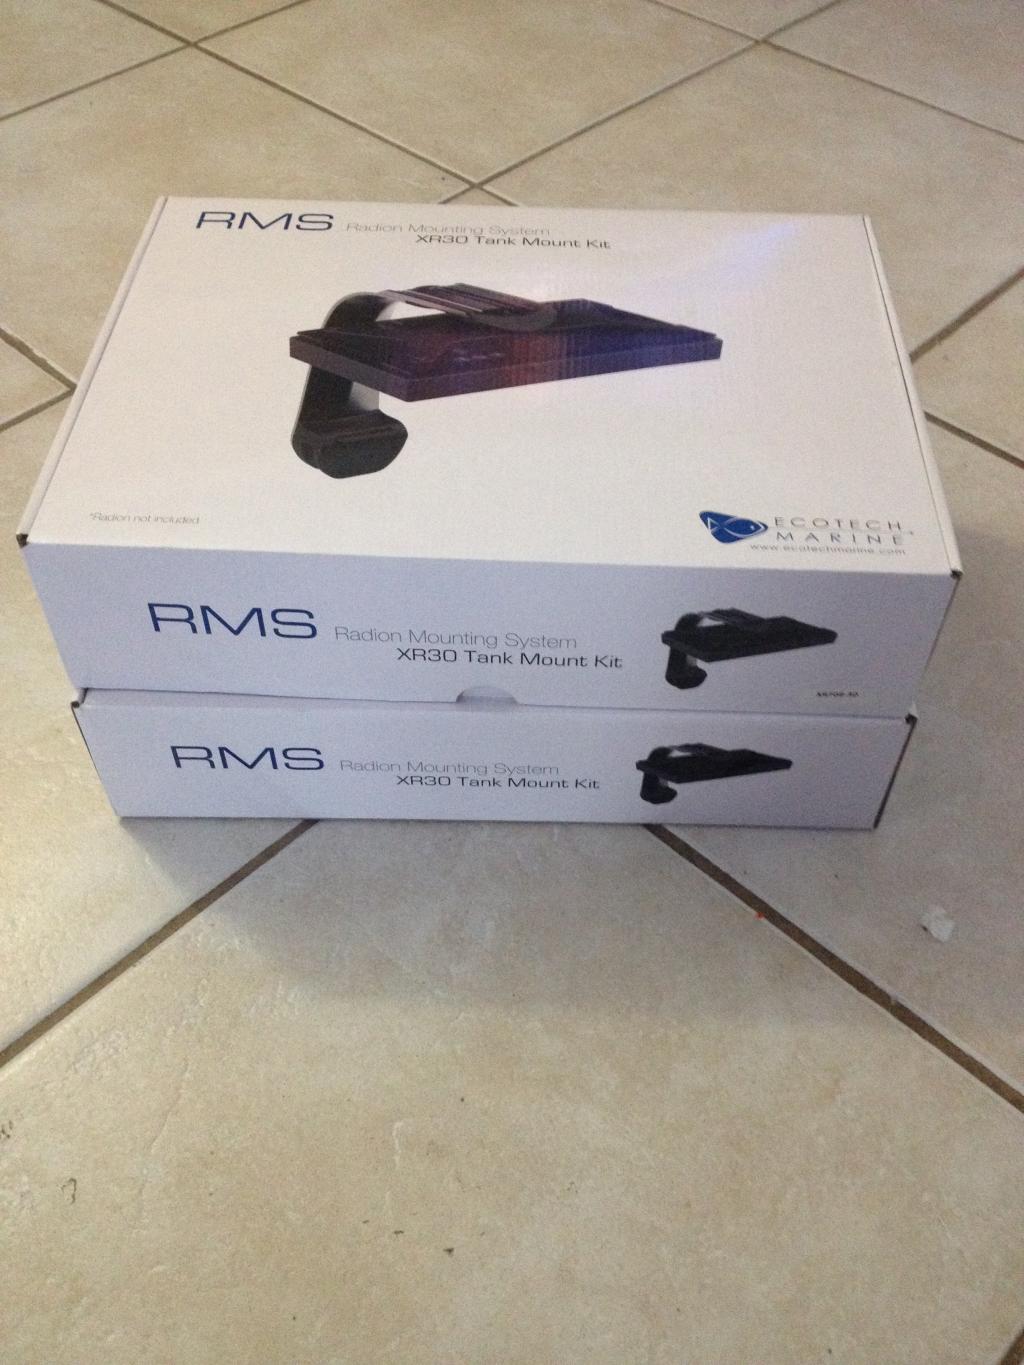
front view

Side view

Here are some pics


front view

Side view


Looking good. How long till you get water in it. I think i enjoyed building mine just as much as stocking it.
Yo manny question on the mounts how big does the part that clamps on to the tank get 1" 2" 3" ????
Looking good. How long till you get water in it. I think i enjoyed building mine just as much as stocking it.
Thanks!
Good question, idk when I'll be ready for water. I am in no hurry though, I just want to make sure I have all my equipment all set up before I do and that everything works well.
Stocking is always fun!! Can't wait..

Yo manny question on the mounts how big does the part that clamps on to the tank get 1" 2" 3" ????
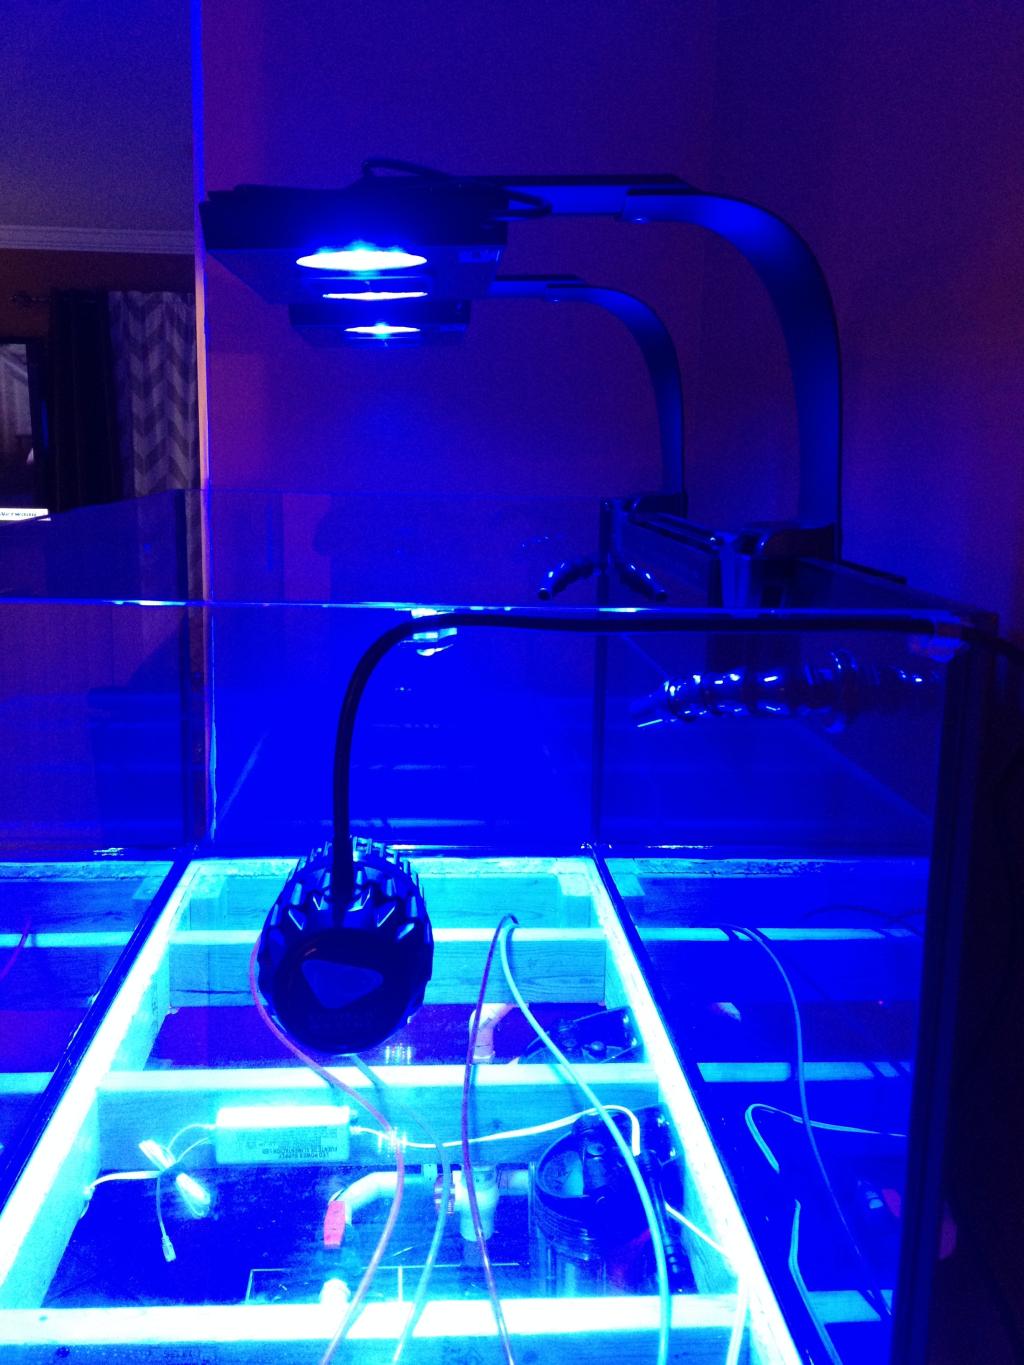
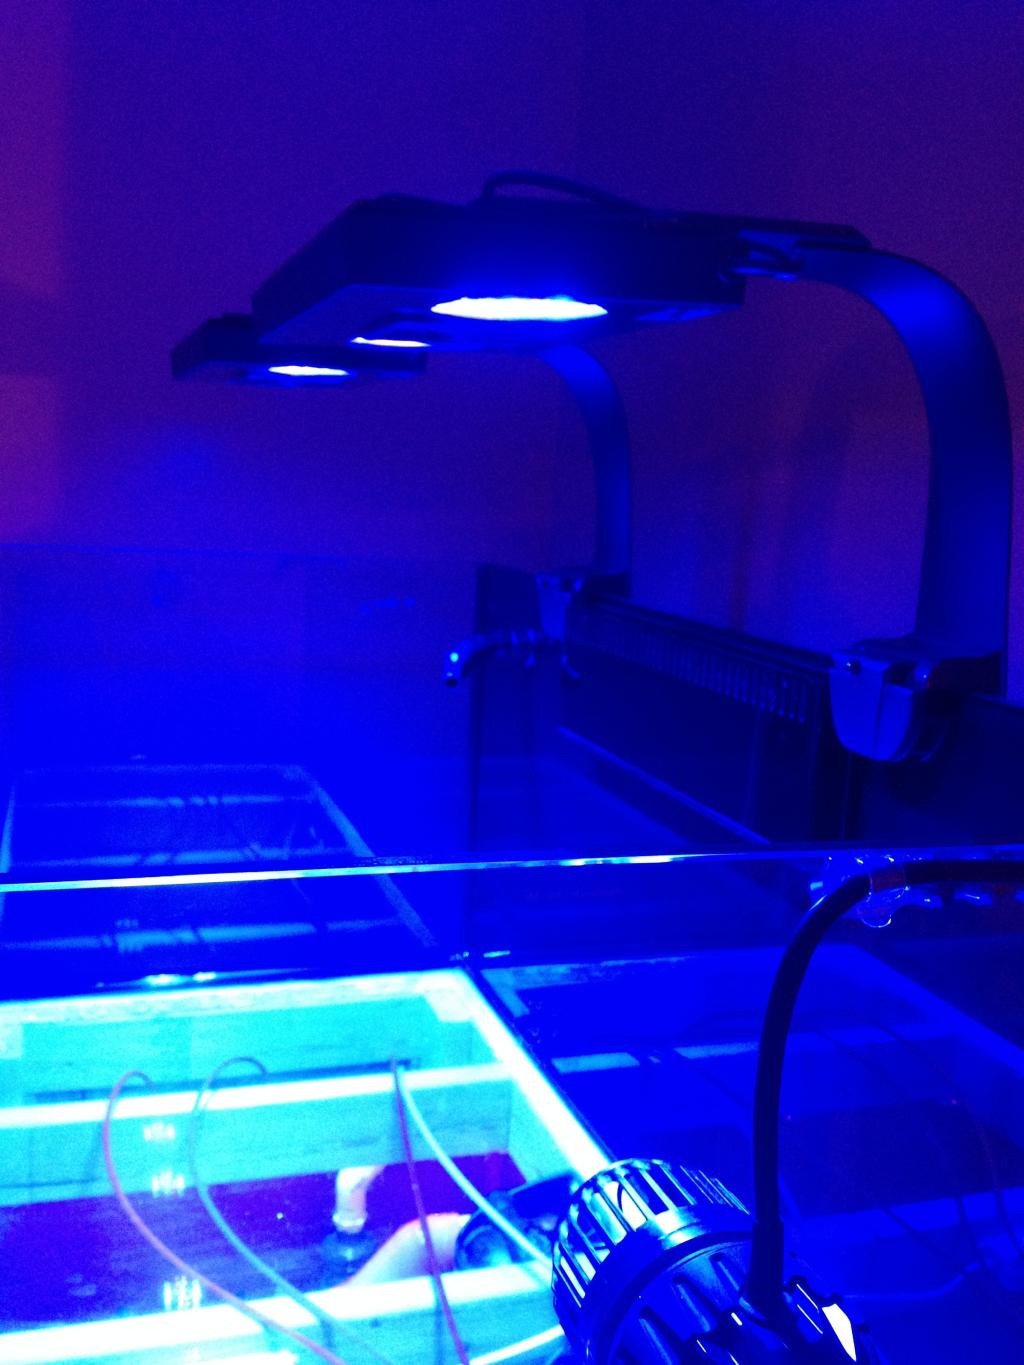
I want to say it's a little over 2 inches. Ecotech says that it would work on any tank rimless, rimed, and euro. It has a different fitting for different applications.
Very nice! I love my advanced acrylics ato reservoir.
Very nice! I love my advanced acrylics ato reservoir.
Thanks!! Yes they do a good job at advanced acrylics. I am happy with the work they have done for me.

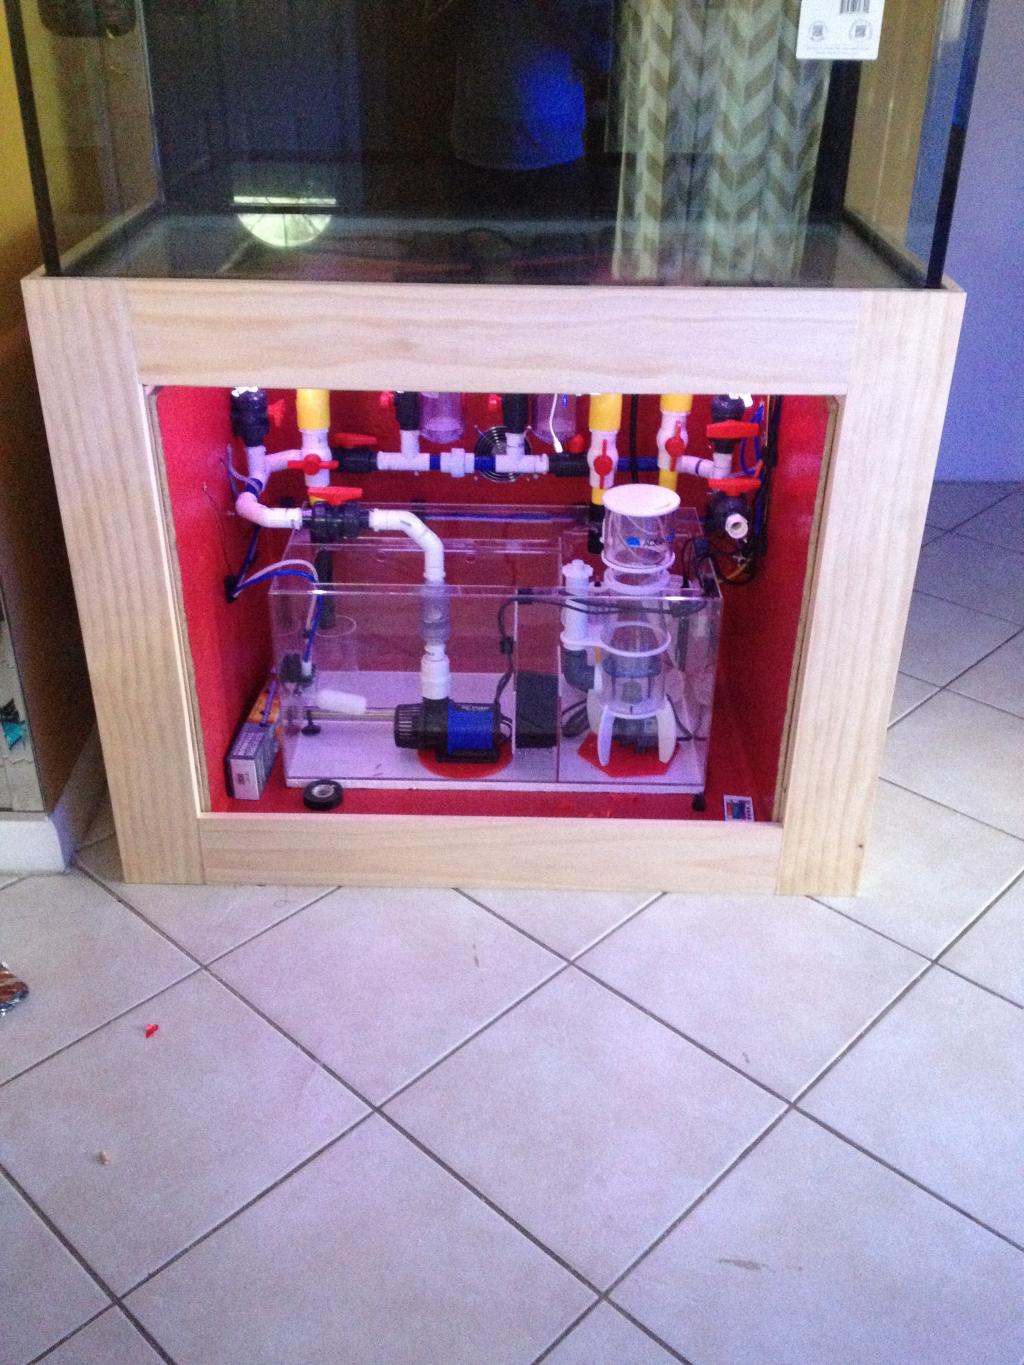
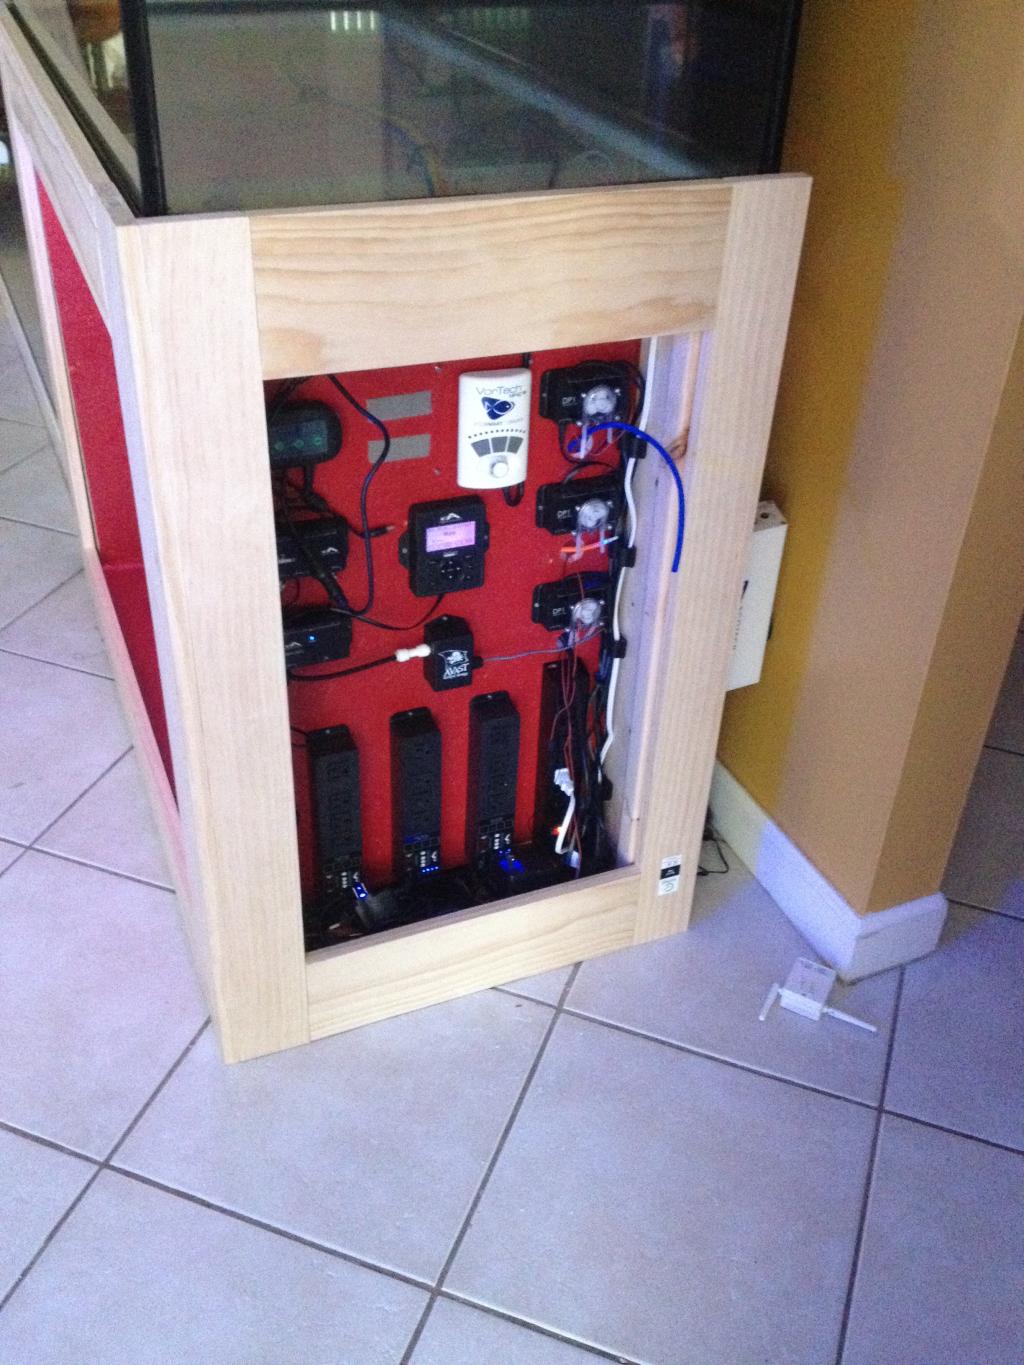
Update: 2/6/15 Current status of my build. I added a couple new things. The first thing is a heater (can't belive I forgot the heater lol). I went with the Reef Octopus 800w titanium heater. It will be controlled by my Reef Keeper. I believe I am going to add a heater controller for redundancy. I don't feel confident in the Reef Keeper, and I don't want to boil my reef, being that this is a very strong heater. I think the 500w would of been enough, the logic behind the 800w is that it will quickly heat up the water therefore be on a lot less. $50
Pics:

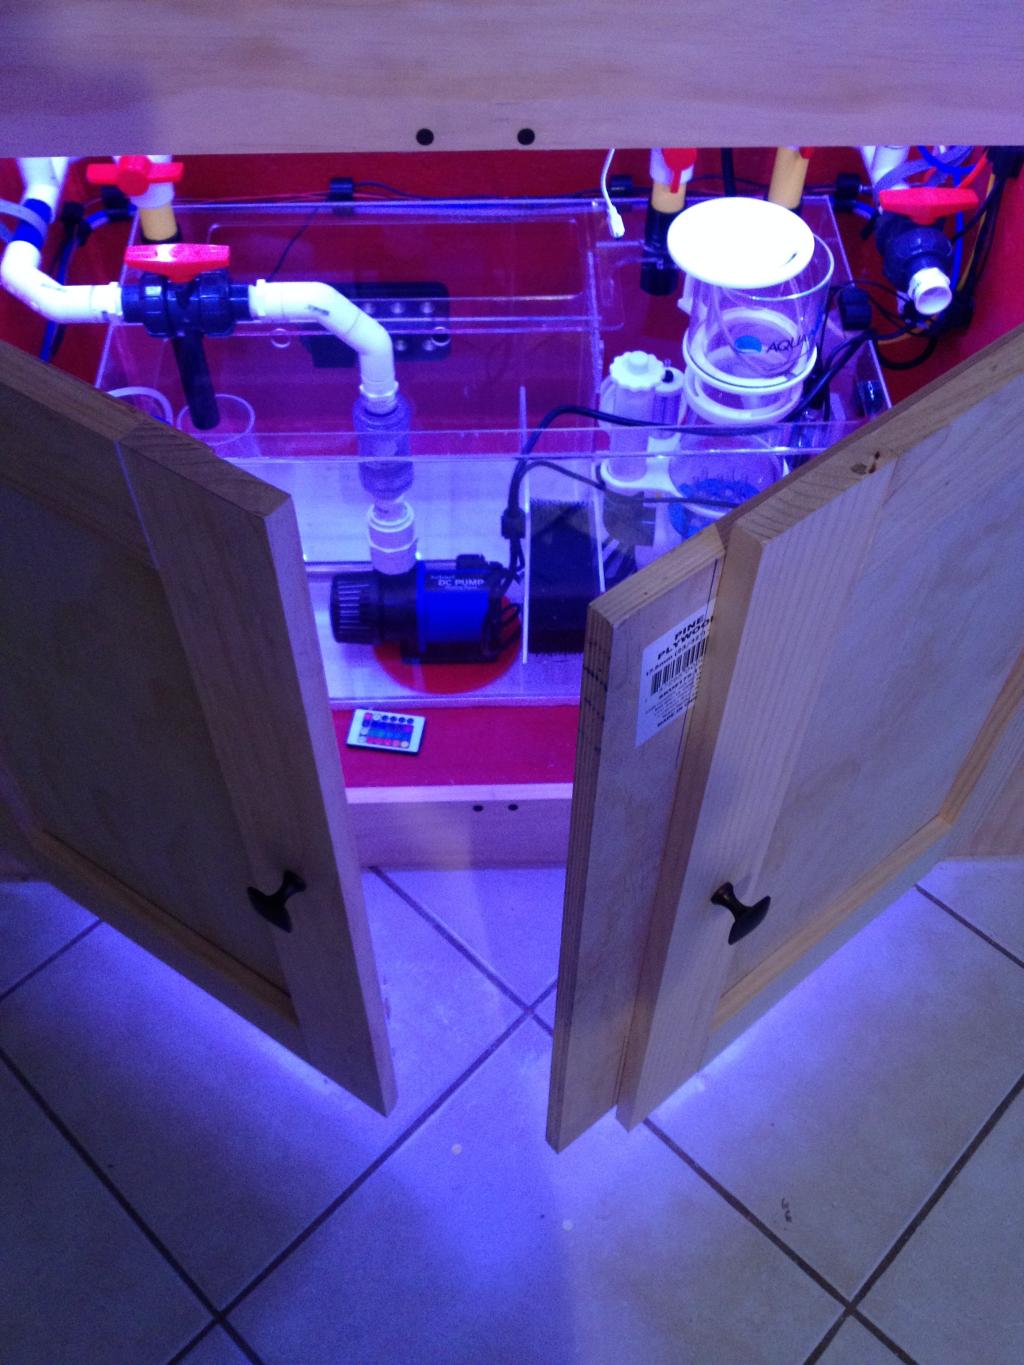
I put in the the return pump chamber

Second thing I added was the light for my refugium. I went with the Innovative Marine Magnafuge. I did not want something that sits on top of the sump. I liked the design of this light because it is not in the way and it's pretty sleek. I was surprised to see how powerful it is. I don't know whether it is going to be enough, I am likely only going to have a few Macro algaes in the fuge. If it's not enough, I may have to go a different route. $50
Pics

Placed behind the fuge

Light on

Now with that, I am done with all the hardware for now and could start my reef tank. There are some things that I am considering but do not need, so I can move on with adding water.
I am considering a UV sterilizer. Also thinking about updating my gen2 pro radions to gen 3 pro. I may have to upgrade my current DC6000 return pump, to the DC9000.
Even though I love my aqua maxx skimmer, I may have to upgrade that later down the road depending on my bio load. It is rated for 175 gallons, my total volume will be around 135 gallons. I SAW THOSE NEW NYOS SKIMMERS!! THOSE ARE SWEET. I will wait for reviews on those. (they are engineered in Germany, so they have to be good right? lol)
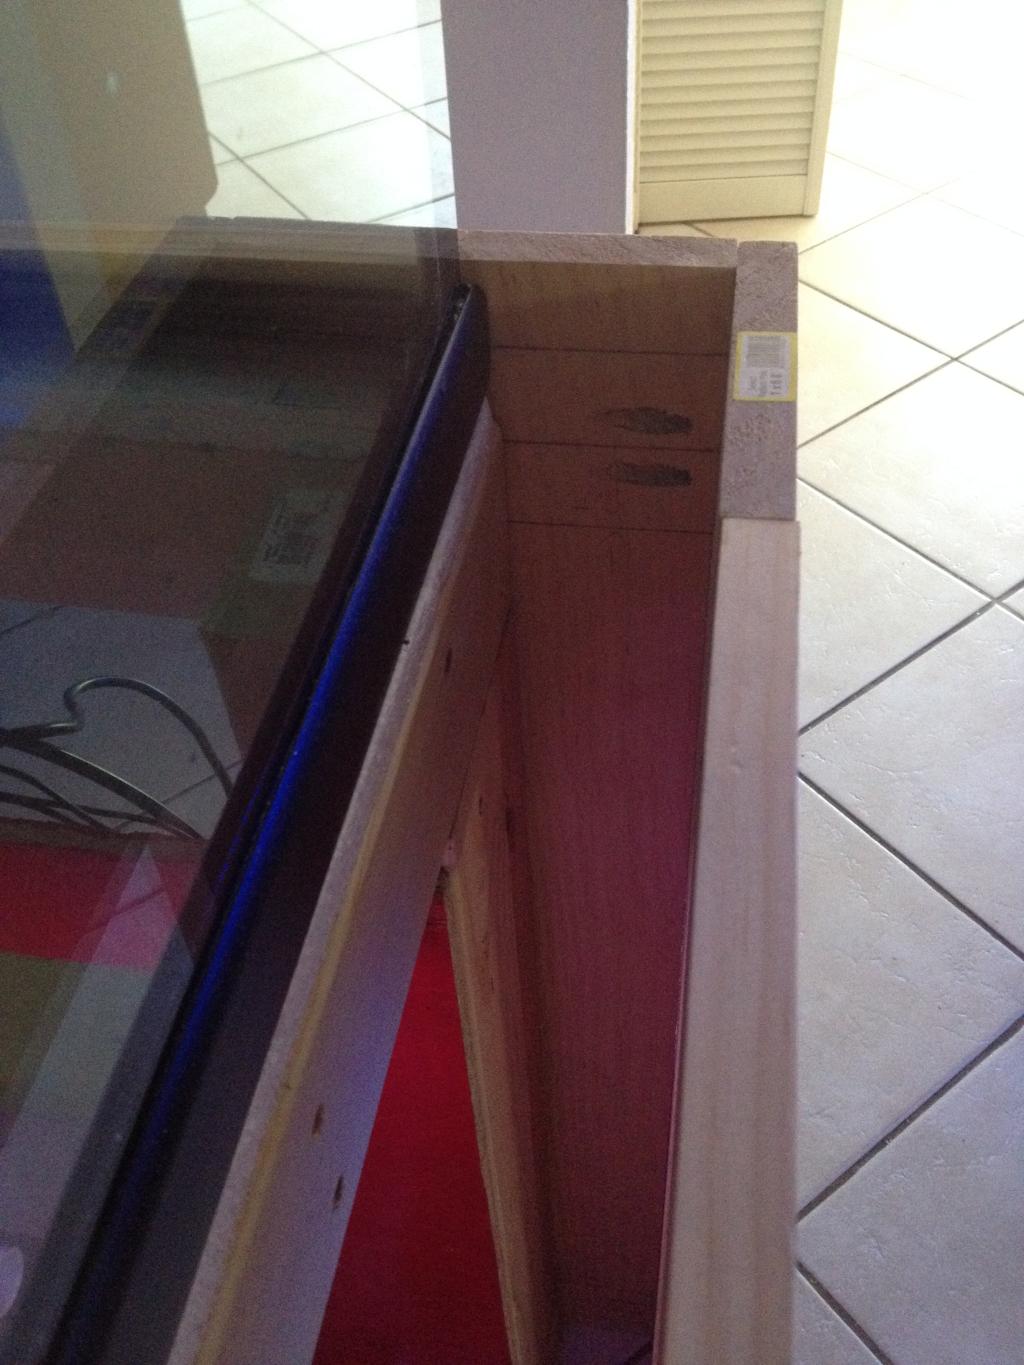
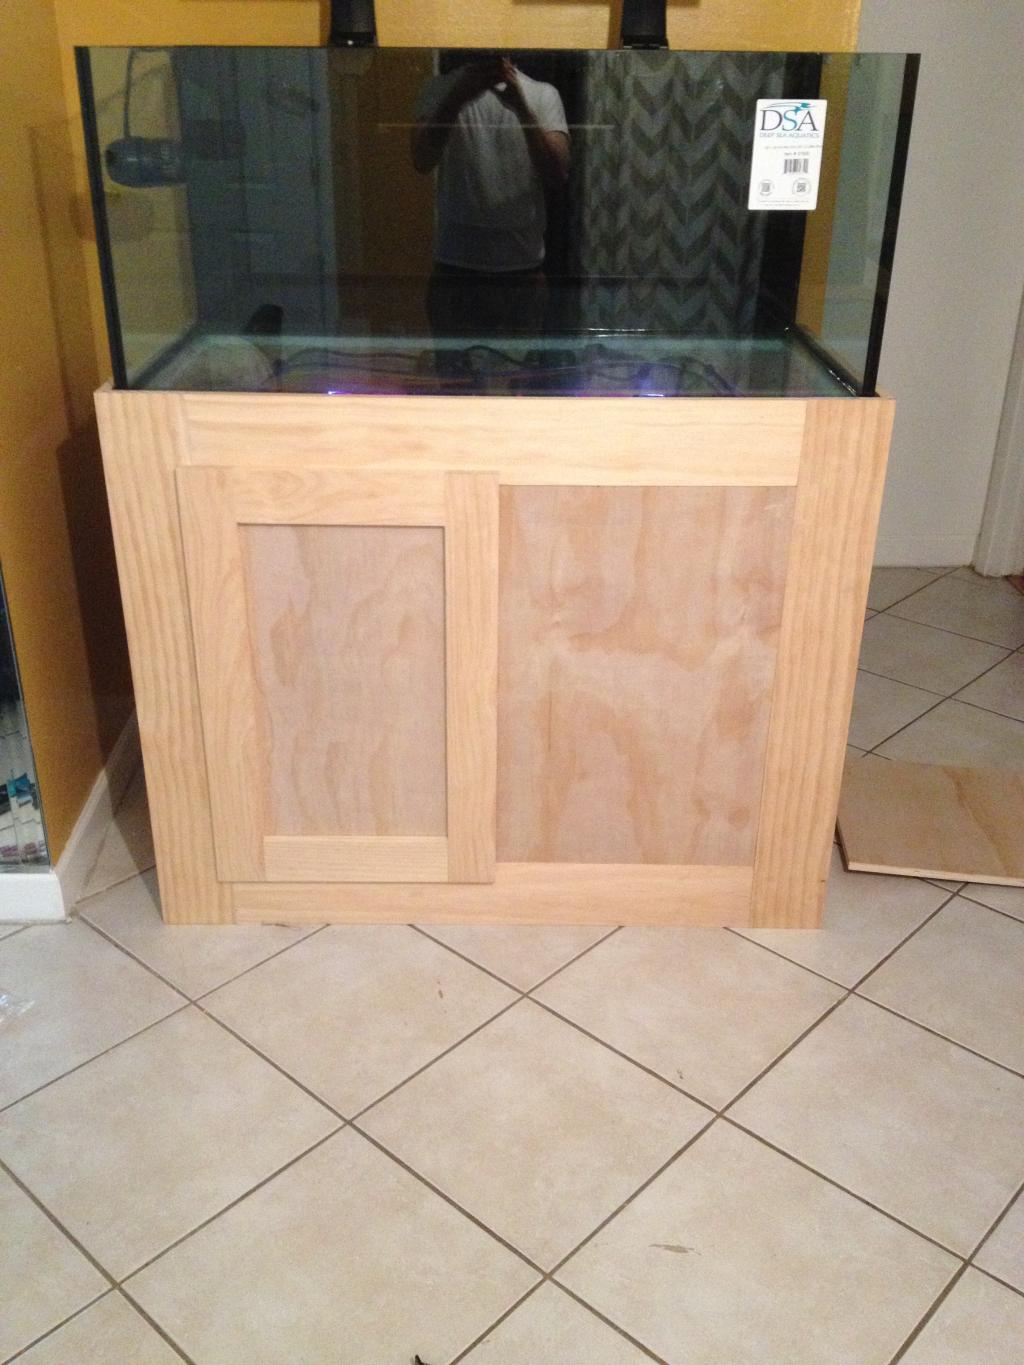
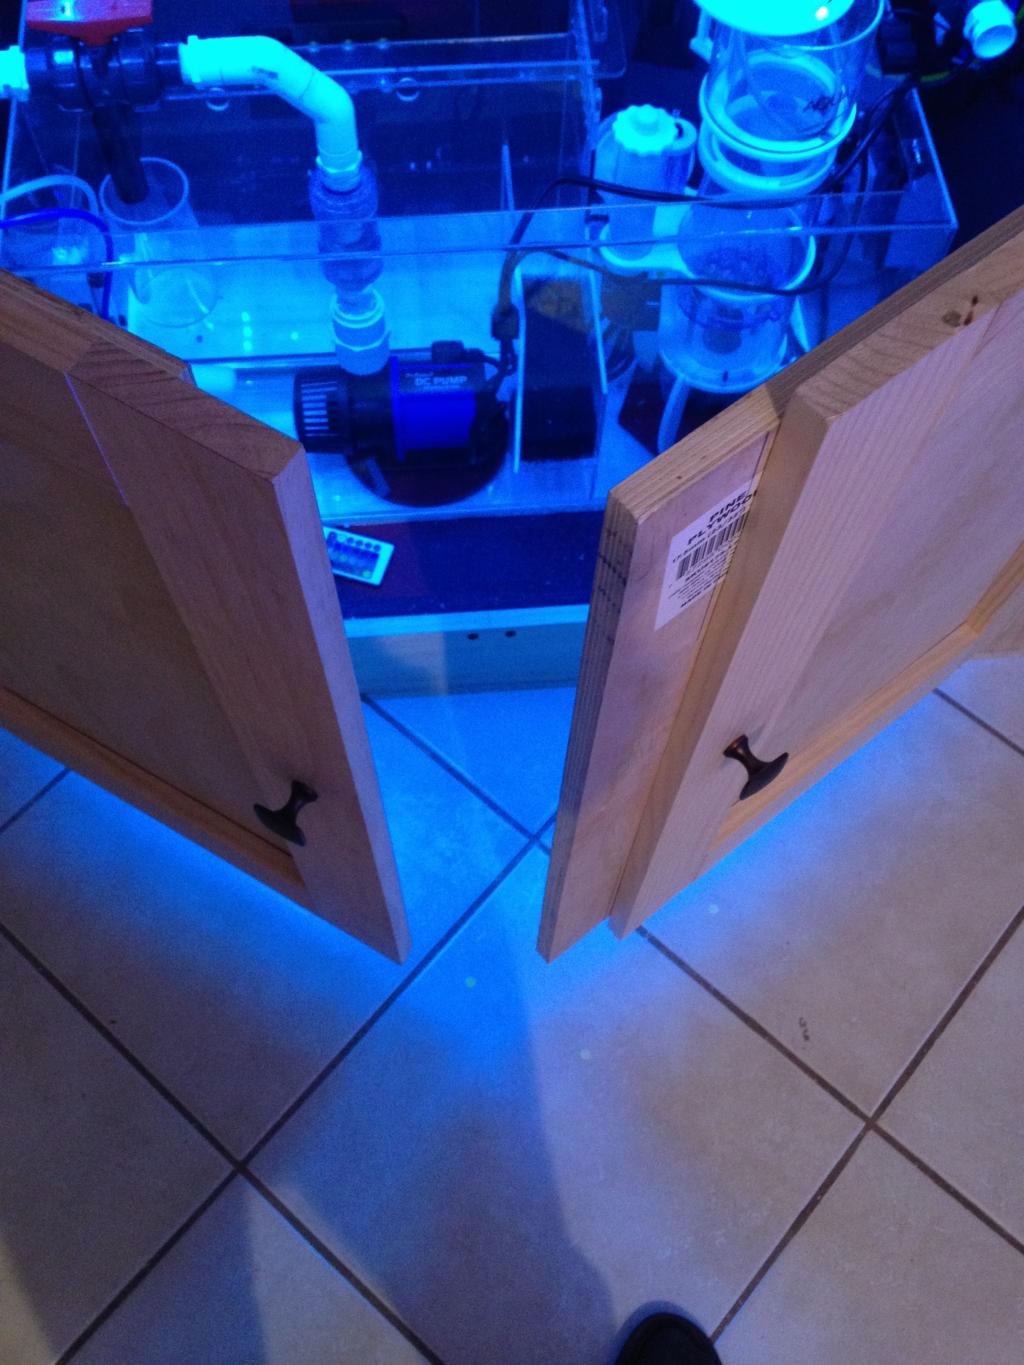
NEXT!! So since I am done with hardware for now. I started skinning the stand. I got a lot of questions about how I will do this, I truthfully answered "I don't know" I am no carpenter. I have very little experience. So after doing some research I began the project.
The price to skin the stand will be around $150 (estimate) after I buy the molding. I will have a total of 4 doors. Left and right side doors then 2 doors in front side.
Pics
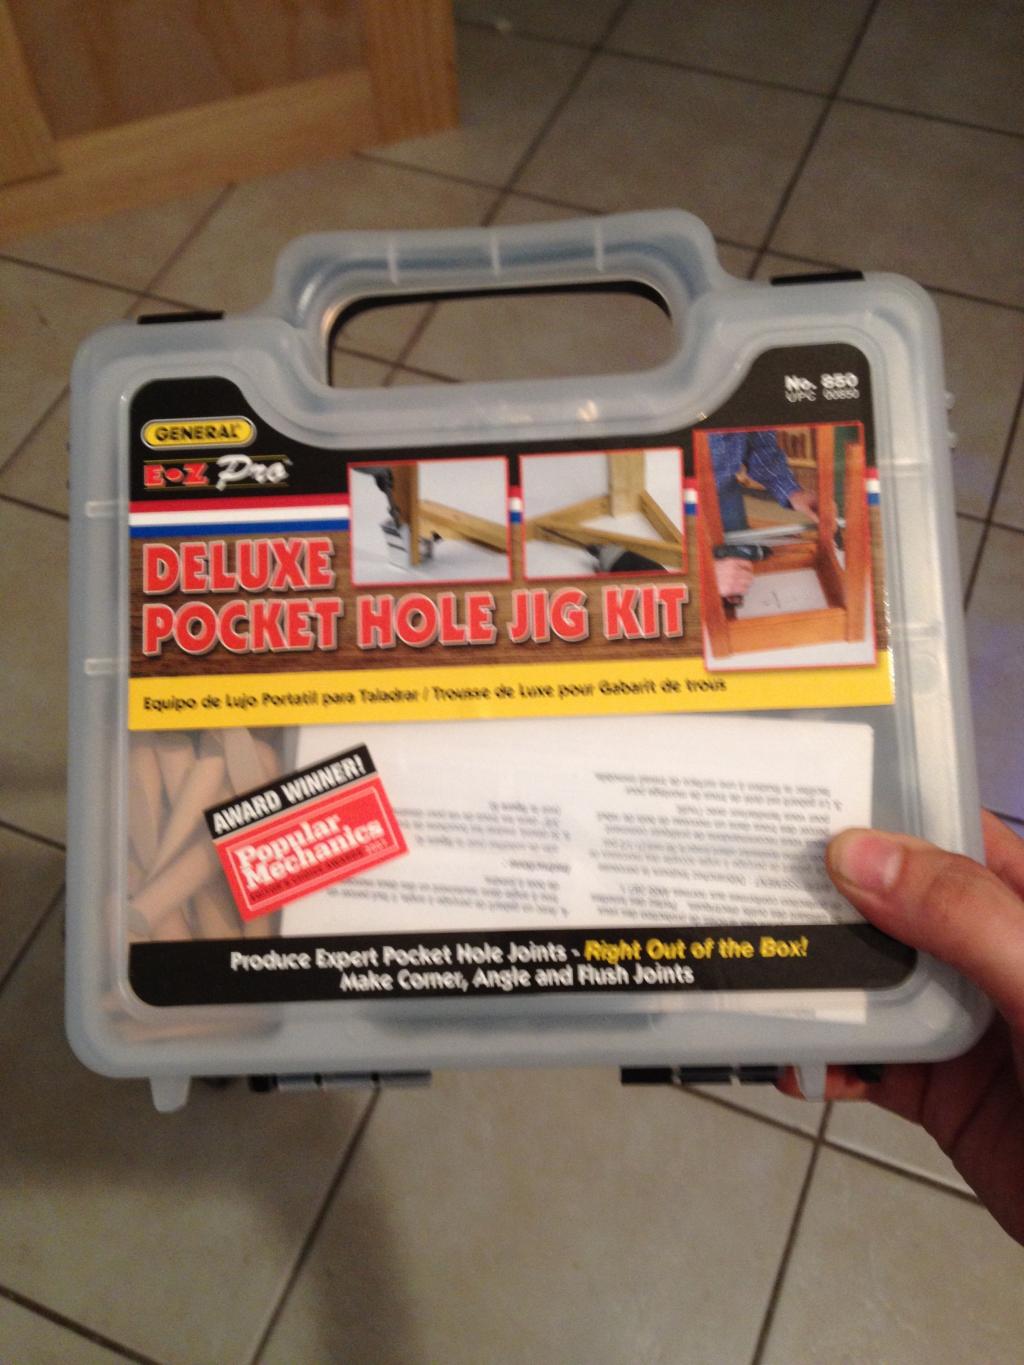
So honestly it is not that hard. THE PLUMBING WAS STILL THE BIGGEST PAIN OF THIS PROJECT SO FAR!!
This is the only special tool you need, besides your regular tools like drill and stuff like that.
Began to go to work

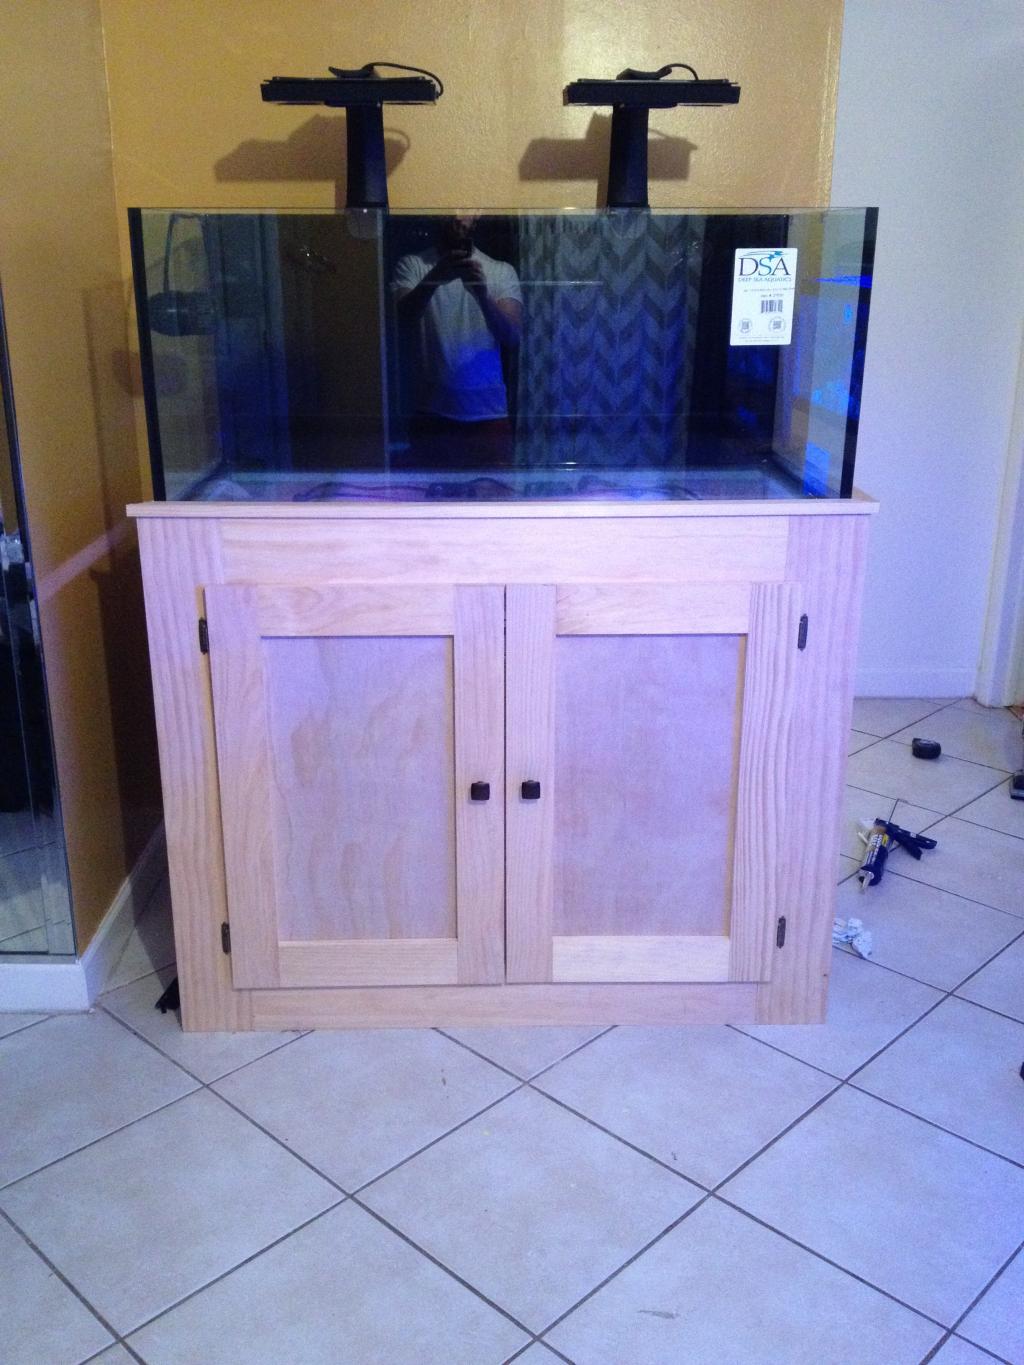
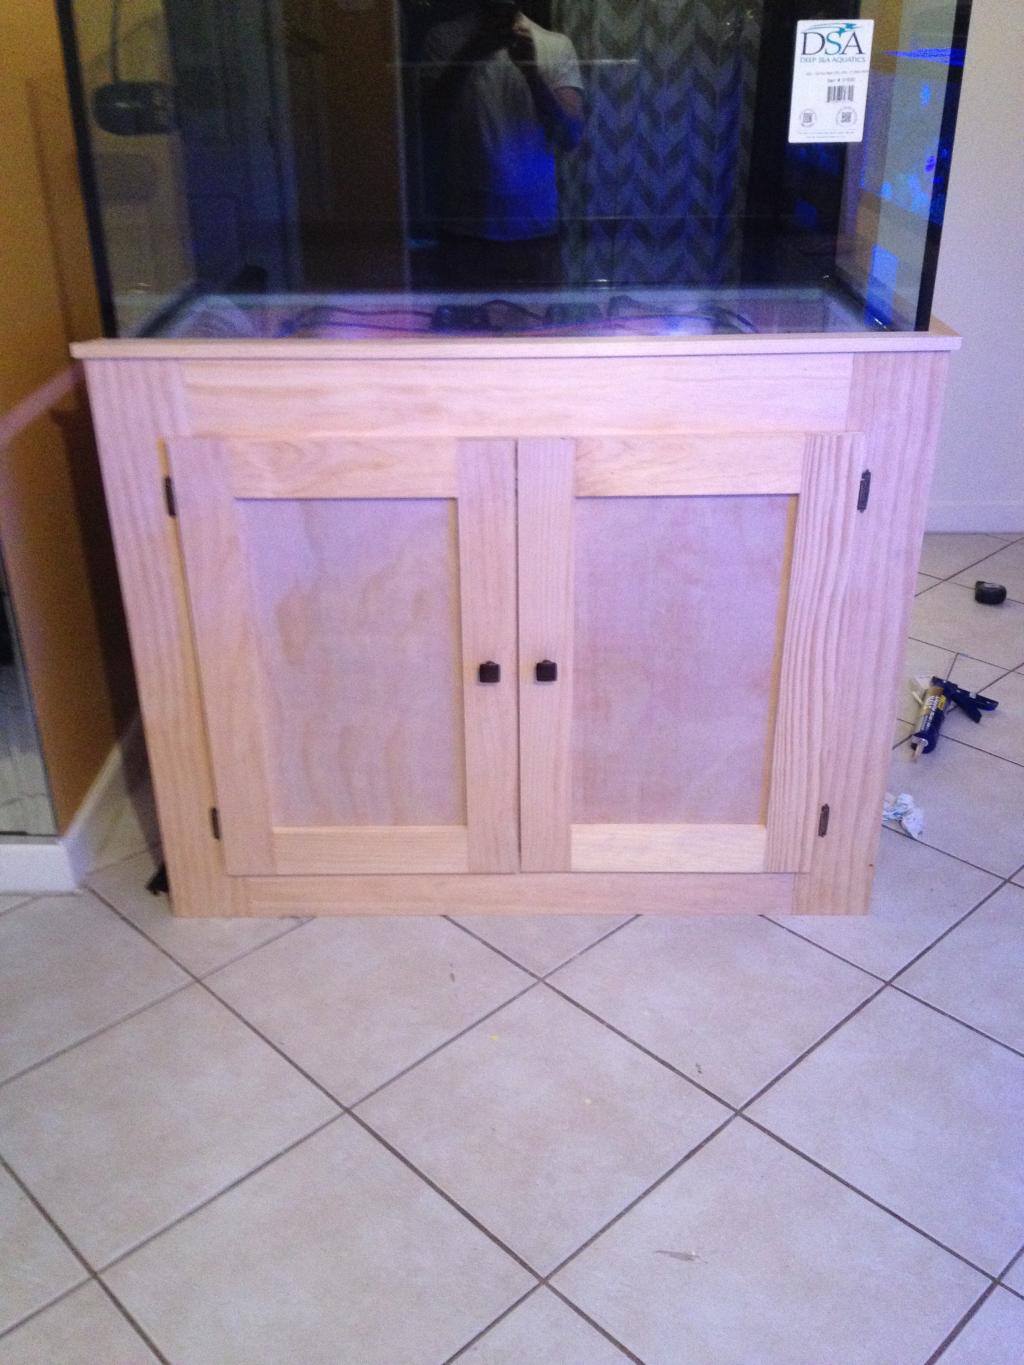
Nice thing about it is that it is literally a skin. I will be able to slide on and off as a I please. I will secure with a couple of hidden screws that can easily be removed.


Front side
Right Side, loose wiring not set up yet.
Left Side
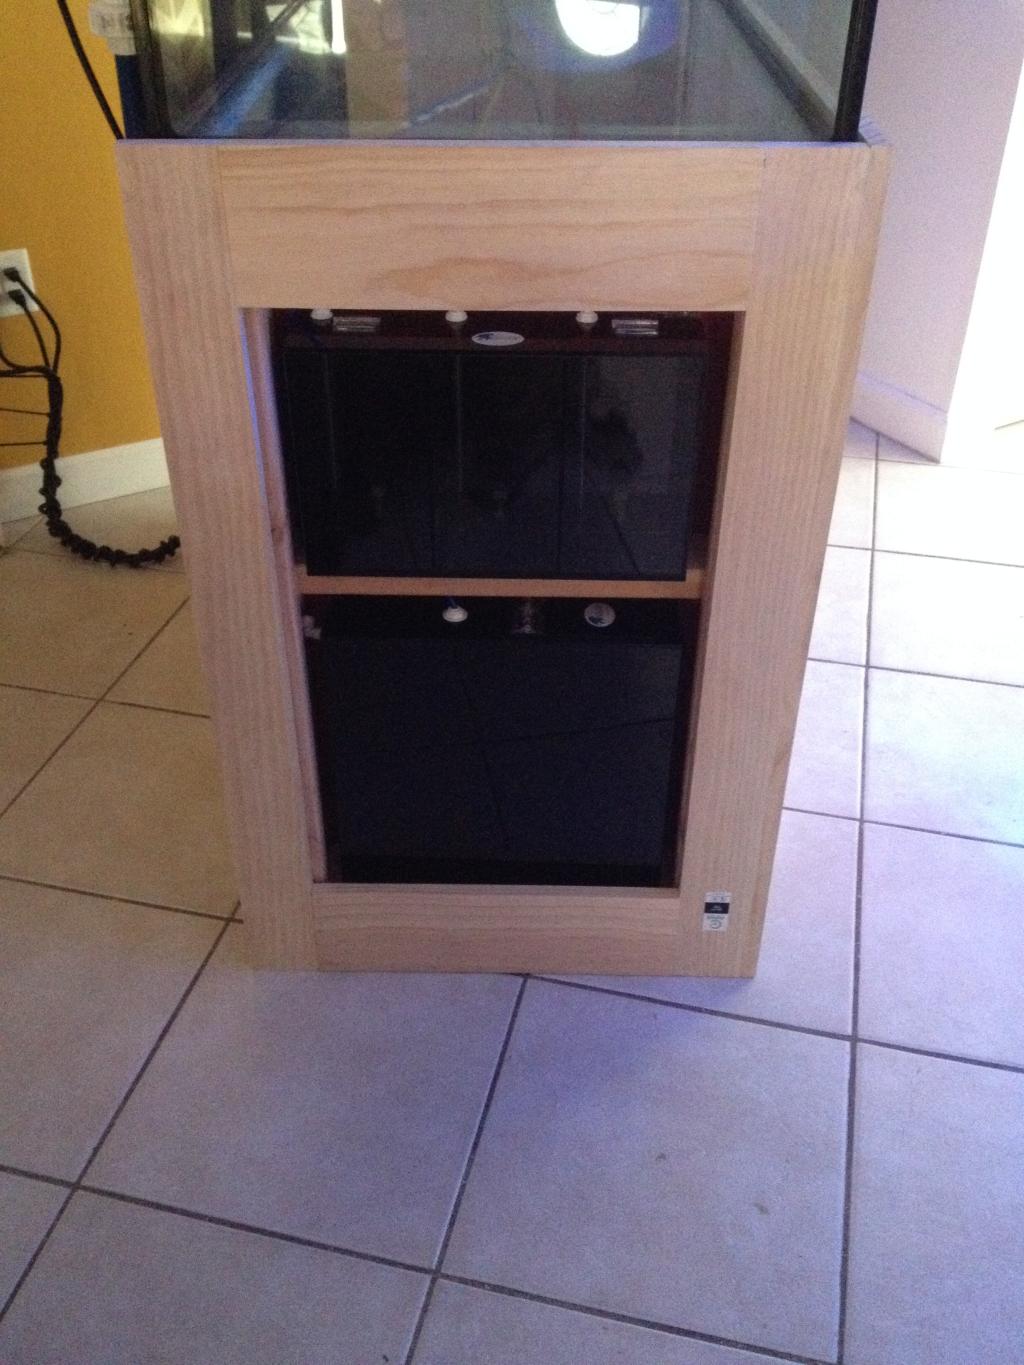
Front doors
Left front door
And this is where I left off. I ran out of wood. I will have to head back to Home depot tomorrow.
Thoughts, suggestions and advice is appreciated.
Pics:

I put in the the return pump chamber

Second thing I added was the light for my refugium. I went with the Innovative Marine Magnafuge. I did not want something that sits on top of the sump. I liked the design of this light because it is not in the way and it's pretty sleek. I was surprised to see how powerful it is. I don't know whether it is going to be enough, I am likely only going to have a few Macro algaes in the fuge. If it's not enough, I may have to go a different route. $50
Pics

Placed behind the fuge

Light on

Now with that, I am done with all the hardware for now and could start my reef tank. There are some things that I am considering but do not need, so I can move on with adding water.
I am considering a UV sterilizer. Also thinking about updating my gen2 pro radions to gen 3 pro. I may have to upgrade my current DC6000 return pump, to the DC9000.
Even though I love my aqua maxx skimmer, I may have to upgrade that later down the road depending on my bio load. It is rated for 175 gallons, my total volume will be around 135 gallons. I SAW THOSE NEW NYOS SKIMMERS!! THOSE ARE SWEET. I will wait for reviews on those. (they are engineered in Germany, so they have to be good right? lol)
NEXT!! So since I am done with hardware for now. I started skinning the stand. I got a lot of questions about how I will do this, I truthfully answered "I don't know" I am no carpenter. I have very little experience. So after doing some research I began the project.
The price to skin the stand will be around $150 (estimate) after I buy the molding. I will have a total of 4 doors. Left and right side doors then 2 doors in front side.
Pics
So honestly it is not that hard. THE PLUMBING WAS STILL THE BIGGEST PAIN OF THIS PROJECT SO FAR!!
This is the only special tool you need, besides your regular tools like drill and stuff like that.

Began to go to work

Nice thing about it is that it is literally a skin. I will be able to slide on and off as a I please. I will secure with a couple of hidden screws that can easily be removed.


Front side

Right Side, loose wiring not set up yet.

Left Side

Front doors

Left front door

And this is where I left off. I ran out of wood. I will have to head back to Home depot tomorrow.

Thoughts, suggestions and advice is appreciated.
Last edited:
Everything is looking good. Just thinking a 800w heater is a bit much. Im only using a 300 watt and tank stays at 78.4 all day. The heater has a controller and also hooked to my apex. I bought 2 300w heaters and never put the second one in. Use it for my mixing tank. Love you stand. Will copy it if i ever need to replace mine. Nice work
Everything is looking good. Just thinking a 800w heater is a bit much. Im only using a 300 watt and tank stays at 78.4 all day. The heater has a controller and also hooked to my apex. I bought 2 300w heaters and never put the second one in. Use it for my mixing tank. Love you stand. Will copy it if i ever need to replace mine. Nice work
Thanks!
Yea, Reef Octopus recomends the 500W for 130 gallons. Since I was right on the fence there around 135 gallons, I went with the 800W since it was the next one up. I'm hoping it kicks in for a minute or 2 and turns off. I remember having a 250W on my 75 gallon (100g total volume) and it was always on all day until I changed it to a 300 watt.

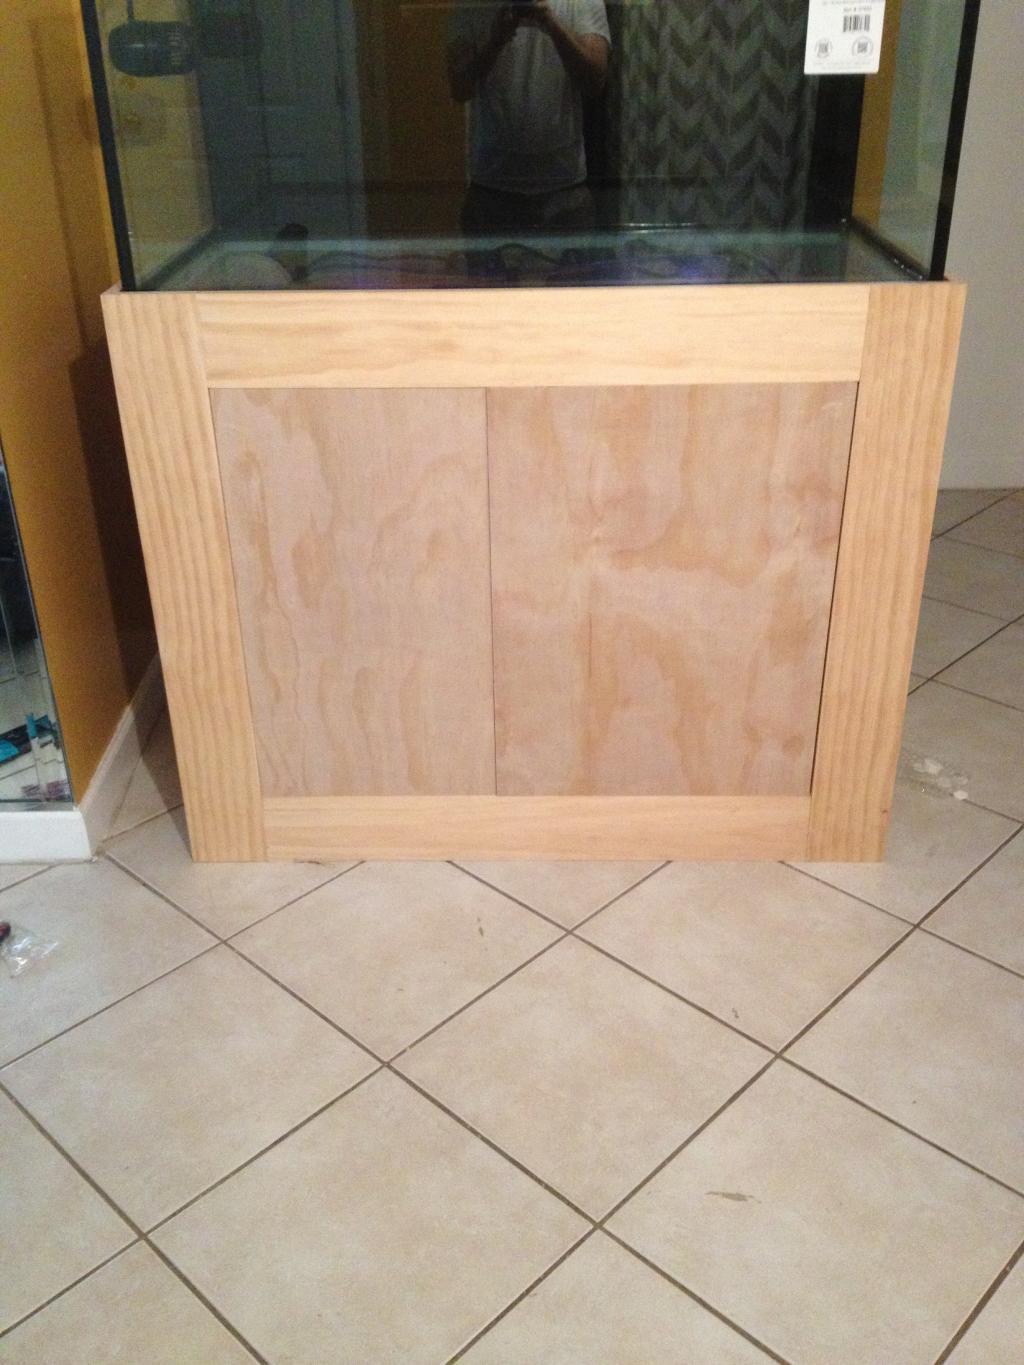
Update: I am about 75% done on the skin. I finished front and right side, all I have left to do is the left side. Afterwards I plan on staining the wood a really dark brown or light black.
I wanted black to match the tank seams, radions and light brackets. Pretty much everything is black which I like, that was original stand. BUT..... The lady of the house doesn't want me to stain in black because it does not match furniture in the house. So let's see what happens there.
I was going to add some nice detailed molding but I am pretty happy the way it stands. That will be up to the misses as well, she likes the way it sits now but she wants to look at some moldings at the depot.
Some Pics.
Hinges: I was wanted to do euro hinges but could not figure them out. The total thickness of the doors is 1.5 inches, I could not find a euro hinge that fits so I went with standard hinge.


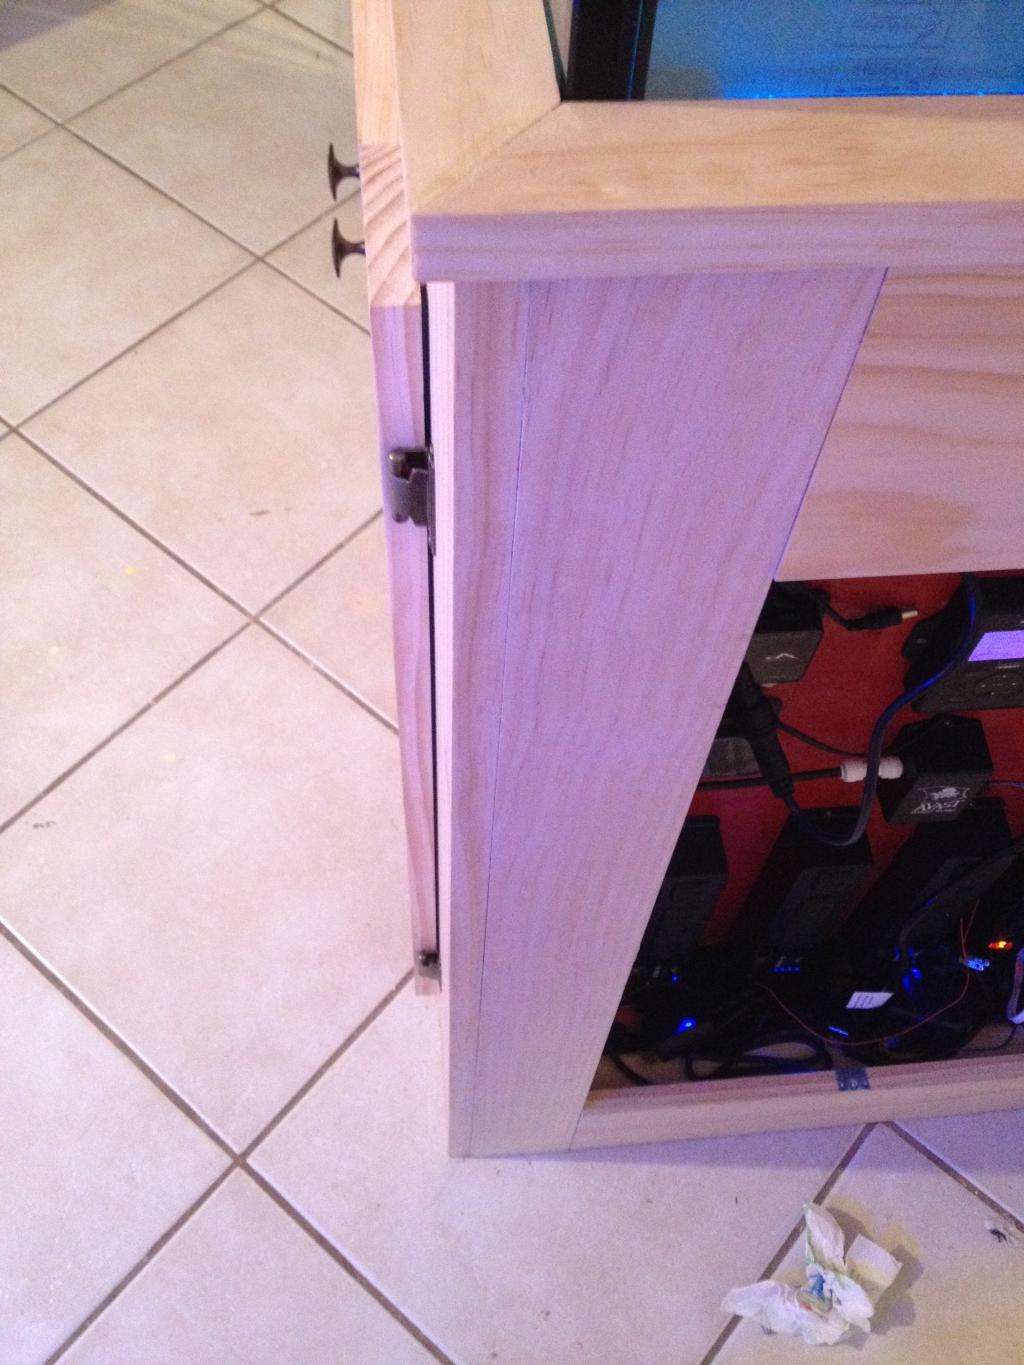
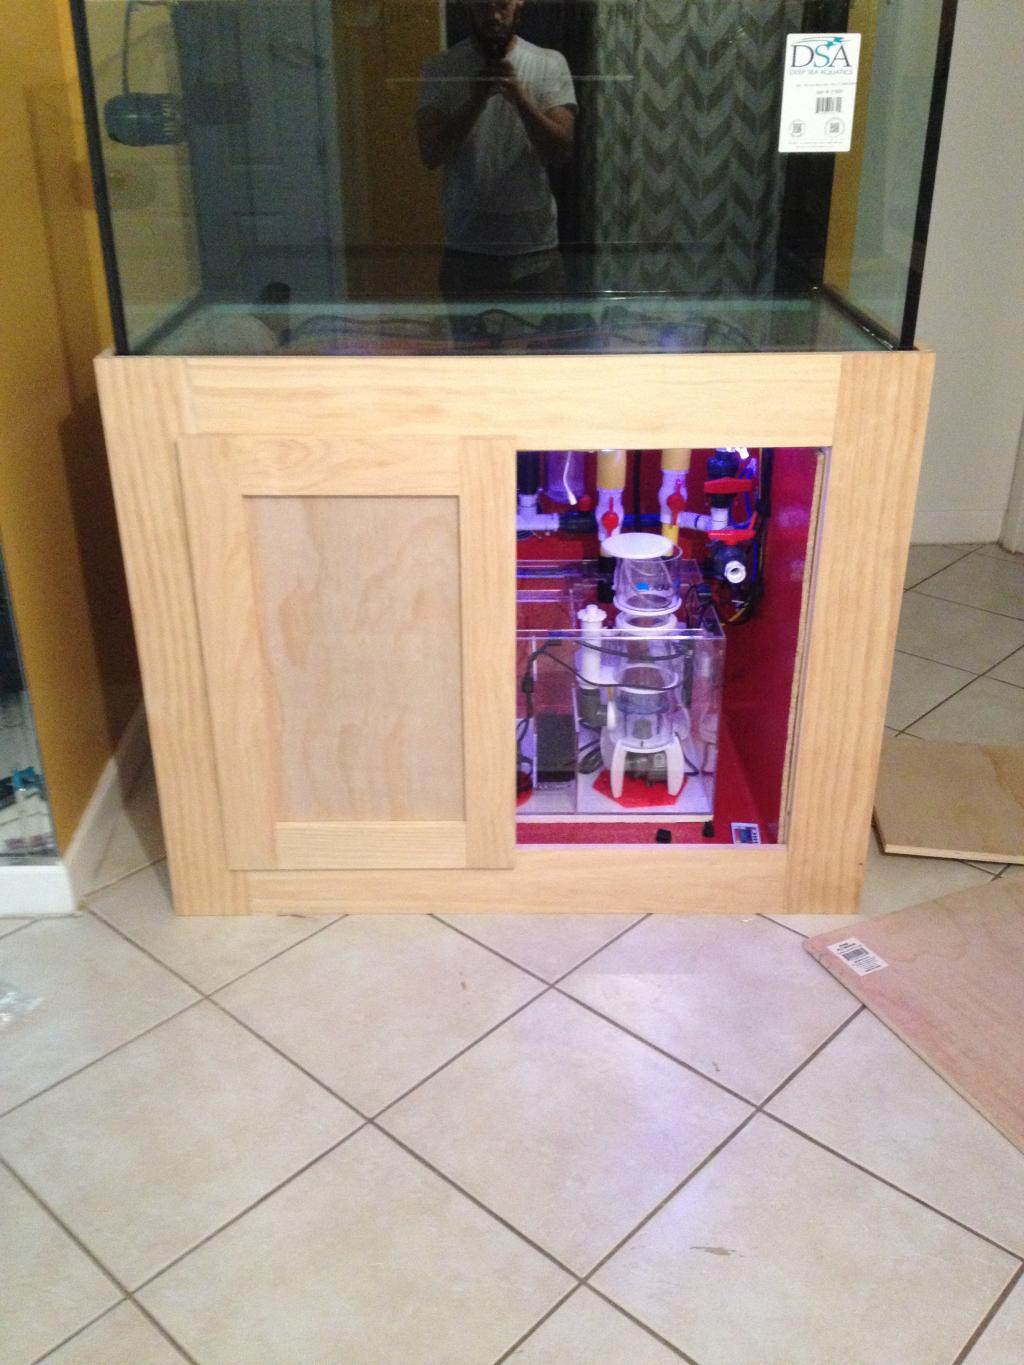
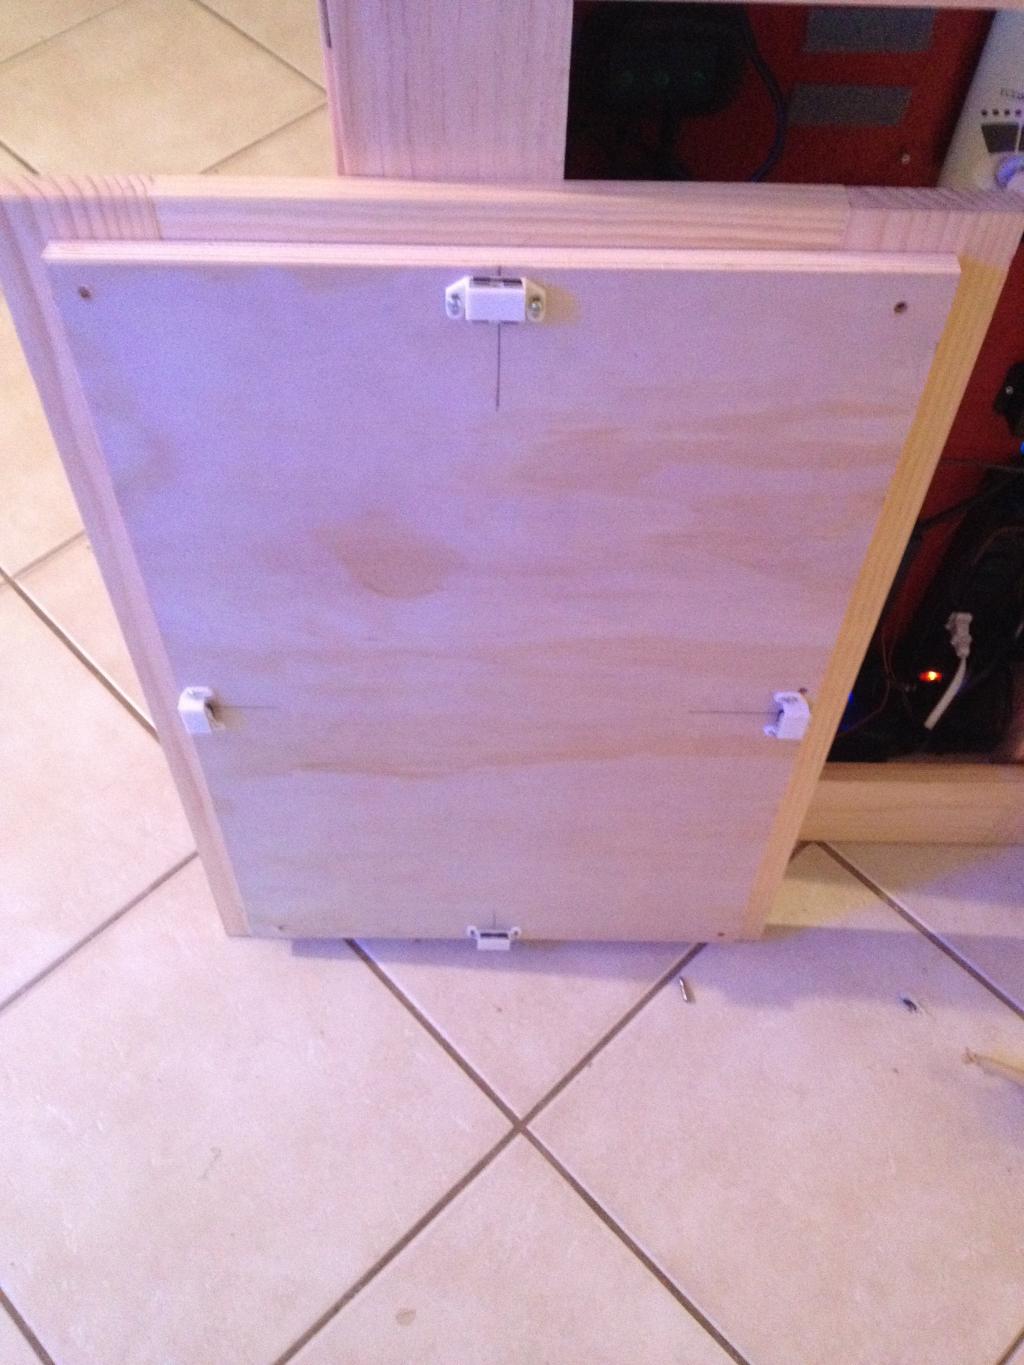
The right and left side of the stand I decided to do removable panels not doors. They are held by magnets, and when I want I can remove the whole panel for maintenance.


Next is sanding and staining...
Thank you for looking!
I wanted black to match the tank seams, radions and light brackets. Pretty much everything is black which I like, that was original stand. BUT..... The lady of the house doesn't want me to stain in black because it does not match furniture in the house. So let's see what happens there.
I was going to add some nice detailed molding but I am pretty happy the way it stands. That will be up to the misses as well, she likes the way it sits now but she wants to look at some moldings at the depot.
Some Pics.
Hinges: I was wanted to do euro hinges but could not figure them out. The total thickness of the doors is 1.5 inches, I could not find a euro hinge that fits so I went with standard hinge.


The right and left side of the stand I decided to do removable panels not doors. They are held by magnets, and when I want I can remove the whole panel for maintenance.


Next is sanding and staining...
Thank you for looking!
Buy new furniture. LOL
Buy new furniture. LOL
Yea, not happening. lol. I am already wayyyyyy over budget as it is. Maybe I'll buy her something nice on V day, then ask if it's ok to stain it blk.
Looks great!!!
Thanks bro!
Getting closer to water day. My salt came in yesterday. I have always done reef crystals but switching it up, I'm going with the tropic Marin Pro reef for this system...
Pic

Pic


Some progress today...
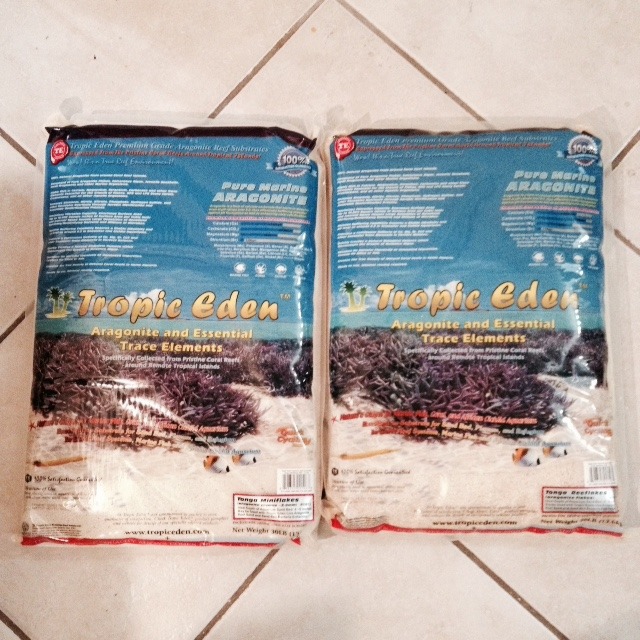
First of all got my sand in today. I ordered 90 lbs total. 60 lbs of reef flakes and 30 lbs of mini flakes. Goal is to do light sand bed just for aesthetics only.
Did a screen the tank with BRS 1/4 inch mesh

I drilled the hole for 1/4 tubing. I plan to hook up my RO system to my ATO reservoir, which has a float valve in it.
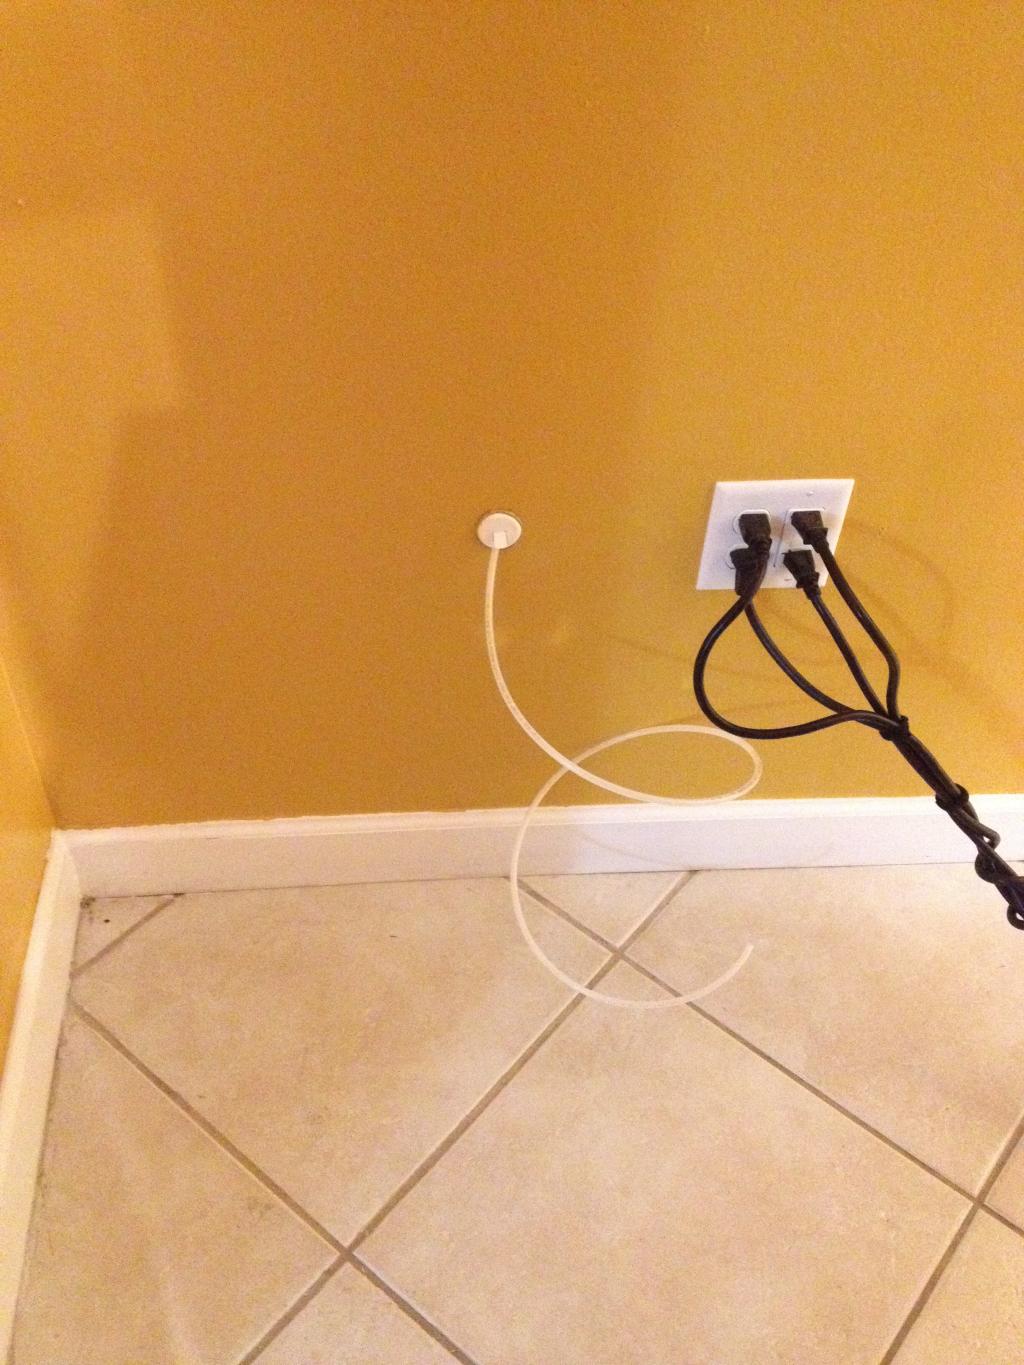
Pics of behind the tank
I may do aqua scape this week.
First of all got my sand in today. I ordered 90 lbs total. 60 lbs of reef flakes and 30 lbs of mini flakes. Goal is to do light sand bed just for aesthetics only.

Did a screen the tank with BRS 1/4 inch mesh

I drilled the hole for 1/4 tubing. I plan to hook up my RO system to my ATO reservoir, which has a float valve in it.

Pics of behind the tank


I may do aqua scape this week.
Similar threads
- Replies
- 28
- Views
- 323
- Replies
- 8
- Views
- 96


