- Joined
- Nov 12, 2018
- Messages
- 141
- Reaction score
- 103
First off I'd like to say hello to everyone!!!!
I've spent countless hours reading and learning over the past few months!!!
lucky for me a quick search and lots of reading has answered all my questions so far.
Ive been in the hobby since i was a kid with many breaks along the way last my last tank was a 110gal tall ALL GLASS tank and after 5 years of moving back and fourth i finally moved across the country so i sent it down the road. the plan before for the move was to relocate a few very large oscars and make the jump from freshwater to saltwater but plans change and ive been tankless every since.
AUG. of last yea the idea of buying a new tank was seeded as my life has dramatically changed since the last tank.
A seed was all it took and this time from the start i said if i do it again it will be saltwater!!
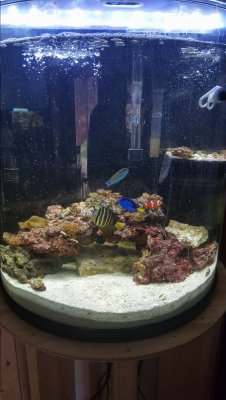
A 30 gallon half moon was purchase and the journey began obviously 30 gallons isnt enough enough ever but i was enough to prove i could do it and it wasnt as hard as i once thought it was!
everyone in the tank is happy but purchases of fish have dictated the future of what we need!
SAILFIN TANG , BLUE HIPPO TANG, CLOWN FISH, LUNAR WRASE
Cleaner shrimp, and a handful of crabs,hermits,and snails
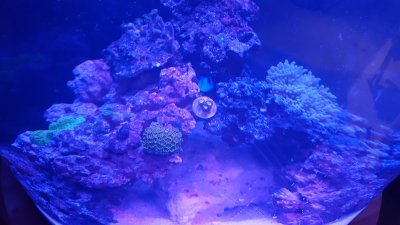
Other things are a few zoas, duster, carpet anemone luckly he hasnt moved from the rock he was on in the lfs.
With every purchase the salesman informed me of the requirements to successfully keep these beautiful fish and i responded with a larger tank is in the works and it is....
SO HERE THE BUILD GOES!!
PURCHASED
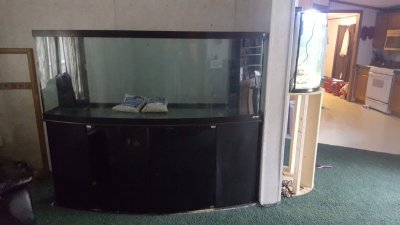
Oceanic Bowfront 180 gallon with 2 box overflows on either side predrilled for 1 drain 1 return the return will be re plumbed and the internal will be used for an emergency line. With matching stand but this will not be used !
SUMPS
30 gallon aqueon tank - to be drilled to allow overflow into larger sump.... im thinking kind of pre sump where overflows either run thru socks or foam but something that is easy to clean. and have a few baffles to again to catch what it can before entering the larger sump. maybe some bio filtration compartments but simple in this sump.
75 gallon aqueon tank - this be split 3 ways still working on the design but will include LARGE Refuge approx 30 gallon which plans are to split the overflow feed from the 30 gal presump to dial it to about 30 - 40 gal per hour overflowing into the frag tank next to it from and skimmer on the far other side so basically skimmer on the left/ refuge on the right and a frag tank in the middle with flow from both sides and overflowing to the rear where the return for the sump will feed the tank.
Other Supplies
7 bags of aragonite 10lb need approx. 10-12 more
these have been purchased from petco for 4.89 a bag!
1 160w led light
1 70w led grow light for refuge
1 box of dryrock 40lb need 3 more
PLANS
-----------------
FLOW
Return from sump and overflow 1000 - 1200gph dc pump
reason.... sump flow works just as good high or low to an extent either the skimmer gets more time with the water or it sees it more often is this thought sound???
Closed loop system will be used on this build i want the display tank to be just that a display.
2-3 more 1000 - 1200 gph dc pumps hooked up to 2-3 closed loop systems
LEFT / RIGHT / CENTER Channels
3 to 5 heads on each CLS nozzles will be hidden behind rock work or inside of it or under sand.
reason for the different channels will be timers at first to alternate flows but reefpi will be in the future and it seems like i could get some real dynamic flow from this setup.
added benefit of keeping all dc pumps the same is the fact that if one goes down in the sump there is more to pull from til a replacement arrives or possibly keep a backup handy.....
FIRST STEPS.......
step 1
REINFORCE THE FLOOR.......
plans for this are 2x6 rectangle approx 6' by 4' with 2x6 12" on center butted up the the floor joist under the tank attach it and add treated 4x4s 4 on the front 4 on the back and concrete them 24" into the ground it seems like enough to me and a few construction guys i know but let me know what you think!!!
step 2
Build a stand that makes sense while also looking really good.. currently the ideal location is about 18 inches from the wall its infront of because of the design of the living room this also give me room behind the tank i actually can walk back there which is the one thing i always hated about the 110 gal i had it setup once as a peninsula and loved being able to work on was hands down the easiest that way.
this stand will be 40" tall i feel that for me this is a more optimal level for viewing and my 30 gallon is about the same height tank and same 40" stand so for me this is ideal yes i cant reach the bottom without a step stool but this also keeps my hands and arms out of the tank and ive become very good with the grabber tool stick thing.....lol
the reason for the tank location was really the layout of the living room doesnt allow a better location and it places it with 1 side setting on the steel Ibeam for the home and the wall to the right of the tank is only 6 inches wide which will be cover in black to match the stand maybe with a tablet displaying the tank status.... we will see about that but the 30 gallon is on the other side of the wall now and the tank will have to be up and running til after this one is ready to go this will be months from now so why not plan on keeping it there and making it look like it wraps around the wall i think its a cool idea look the pictures and see for yourself...which if it stays then yes it will also be hooked into the system.
HOOD
this will be built last since it is just for appearances but the hood will run up to the roof over both tanks to get that seamless the house was built around the tanks look.....
DRY ROCK
on the fence about the design of this either 3 deep pillars or 3 arch ways im leaning to the latter with caves under the pillar/ archways to give shelter to small inhabitants and keep rock to sand contact to a minimum and allow the flow to pass thru
one thing i hate about my 30 gallon is that it looks like rocks are just dropped in.
other things on this build will be a drain pipe across the house and outside under the stand just in case there is a failure and for water changes.
ro filter directly under the stand and tank for auto top off
MIXING station hasnt been thought out yet.....
ANY IDEAS FOR SKIMMERS? STUFF FOR SUMPS ? ANY IDEAS ARE WELCOME IM LEARNING AS I GO HERE!!!!
The goal is to get the tank up and running by april and run a 3 month cycle on it and start stocking it around july!!!


