Paul’s 240 gallon upgrade!

User

2500 Club Member
View Badges
Joined
Aug 15, 2017
Messages
4,523
Reaction score
7,477
Rating - 0%
0   0   0
Currently working in IT, and seeing the picture of your printer worries me. Great build so far.

That’s temporary. The inside of that cabinet is going to be totally sealed from the tank, and the printer will be on a table top on the opposite side. It’s just sitting there while we finish the wife’s desk.
 

DarkTang

Valuable Member
View Badges
Joined
Oct 21, 2014
Messages
1,040
Reaction score
718
Rating - 0%
0   0   0
Yes!!

Okay, here's where we are with the rearrangement of the fish room. The 40 breeder will serve as a fuge/settling tank and the 125 sump will do sump things. Any advice before I move forward?
Screen Shot 2018-08-29 at 6.30.40 PM.png
Screen Shot 2018-08-29 at 6.31.01 PM.png

Nice build! What software are you using
 
OP
OP
Dubs83

Dubs83

Valuable Member
View Badges
Joined
Jul 13, 2016
Messages
1,004
Reaction score
1,418
Location
New Jersey
Rating - 0%
0   0   0
A little more progress

1/2 of the wiring has been run for the display tank to where the Apex will sit. Still need 8 more outlets behind the sump and then I’ll move onto wiring mixing station outlets and QT. I’m hoping I’ll be home tonight through the rest of the week and it should all be done.

Once the wiring is done, I’ll move onto plumbing, which shouldn’t take long.

Electrical and float switch wiring
cb007d0b33858695ba9a3df1ab4bc05f.jpg

ec8e6f200bace21326238c6a58de2c66.jpg


Paul
 

User

2500 Club Member
View Badges
Joined
Aug 15, 2017
Messages
4,523
Reaction score
7,477
Rating - 0%
0   0   0
Man, I’m jealous.

What wire gauge you using for the floats?

I ran cat5 and can get 4 float switches out of 1 wire. I only had 12 feet to run though.
 
OP
OP
Dubs83

Dubs83

Valuable Member
View Badges
Joined
Jul 13, 2016
Messages
1,004
Reaction score
1,418
Location
New Jersey
Rating - 0%
0   0   0
Man, I’m jealous.

What wire gauge you using for the floats?

I ran cat5 and can get 4 float switches out of 1 wire. I only had 12 feet to run though.

It’s 20 gauge dog fence wire. Came in a roll of 500’ for something like $20. It’s similar in thickness to CAT5 wire but I needed 6 connections on that side with 20’ run. Now I have to extend my probes. I know believe the ORP and pH probe are shielded or maybe even the Salinity probe so I need extension cables of about 25’.
 

Zack33

Active Member
View Badges
Joined
Oct 4, 2015
Messages
107
Reaction score
87
Rating - 0%
0   0   0
Good point. We are struggling a bit with a large over hang we want to create. I’ve thrown around the idea of attaching a 1/2” panel of glass along the back with some triangle brackets to create an over hang but I’m too afraid that it will let go. I do have some threaded nylon rods coming and a large masonry bit to see if there are other ways to create the look.
I think that could work. How big is this overhang? Can you secure it with a counterweight over the top of it and a lot of epoxy?
 
OP
OP
Dubs83

Dubs83

Valuable Member
View Badges
Joined
Jul 13, 2016
Messages
1,004
Reaction score
1,418
Location
New Jersey
Rating - 0%
0   0   0
I think that could work. How big is this overhang? Can you secure it with a counterweight over the top of it and a lot of epoxy?

I’d like it to be close to 24”. I have a fairly heavy baserock for that section and I’m almost certain it’ll be able to hold it. It’s just a matter of securinng the overhang. The nylon threaded rods showed up today so I’ll dork around with it tomorrow!
 

User

2500 Club Member
View Badges
Joined
Aug 15, 2017
Messages
4,523
Reaction score
7,477
Rating - 0%
0   0   0
I originally envisioned my 24” long Tonga shelf to have 3-4” resting on a nice piece of pukani, then a 20-21” overhang suspended about 12” off the bottom. I drilled through the shelf and base rock and set fiberglass rods in epoxy to lock it in. A day later, I moved it around my planning table and a chunk of the pukani broke off and sent the shelf tumbling.

I haven’t been able to reconcile that with trying it again, so I ended up sitting the shelf on the base rock and having a 6-8” overhang right midline in the tank.

b3ff2dc875b0ca646d500d968ff33aea.jpg
2312808b20a4c51b142774154f194561.jpg


Of course, the cement I used to attach small leveling rocks to the pukani to even out the shelf basically crumbled to dust and I’m looking at a big epoxy repair job tomorrow.

I hope you can realize your vision with your shelf. It’ll be amazing if you figure it out. While not my original plan, I have come to like the shape and aesthetic of what I ended up with.
 

Zack33

Active Member
View Badges
Joined
Oct 4, 2015
Messages
107
Reaction score
87
Rating - 0%
0   0   0
I’d like it to be close to 24”. I have a fairly heavy baserock for that section and I’m almost certain it’ll be able to hold it. It’s just a matter of securinng the overhang. The nylon threaded rods showed up today so I’ll dork around with it tomorrow!

That would look awesome! Hopefully it'll workout for you!
 

User

2500 Club Member
View Badges
Joined
Aug 15, 2017
Messages
4,523
Reaction score
7,477
Rating - 0%
0   0   0
I’d like it to be close to 24”. I have a fairly heavy baserock for that section and I’m almost certain it’ll be able to hold it. It’s just a matter of securinng the overhang. The nylon threaded rods showed up today so I’ll dork around with it tomorrow!

It’s more than half way through tomorrow already- how’d the dorking around go?
 
OP
OP
Dubs83

Dubs83

Valuable Member
View Badges
Joined
Jul 13, 2016
Messages
1,004
Reaction score
1,418
Location
New Jersey
Rating - 0%
0   0   0
It’s more than half way through tomorrow already- how’d the dorking around go?

You know... I’m absolutely terrible at estimating how much time something will take. Lol. I wanted to finish the electric... and I finally did it today but I’m absolutely spent.

Main lines for Essential and Non Essential EBs
IMG_0944.JPG


Fish room from the entry
IMG_0945.JPG


Rats nest for the control board.
IMG_0946.JPG


Dry fitting the return pump
IMG_0947.JPG
 

User

2500 Club Member
View Badges
Joined
Aug 15, 2017
Messages
4,523
Reaction score
7,477
Rating - 0%
0   0   0
Love it. Great work.

I’m confused by the mainlines for the eb8 s though. Where do they plug into and where are they coming from?

I love the colored wire wrap. I have the same in my amazon cart
 
OP
OP
Dubs83

Dubs83

Valuable Member
View Badges
Joined
Jul 13, 2016
Messages
1,004
Reaction score
1,418
Location
New Jersey
Rating - 0%
0   0   0
Love it. Great work.

I’m confused by the mainlines for the eb8 s though. Where do they plug into and where are they coming from?

I love the colored wire wrap. I have the same in my amazon cart

Thanks! It’s been a long few afternoons with this stuff.

So, I’ll try to explain it. The APEX is going live in the corner of the fish room. They lay out of the electrics is something I wish I had done a little differently the first time around but I digress.

fe93996c219268c35796742bbcbab945.jpg


The above picture shows what I describe as “mains” but it also shows outlets on either side of the braided cables. Those both have 8 outlets and are powered by different dedicated circuits. The one on the left is powered by what I call an “essential” circuit and the one on the right is powered by what I dub a “non essential” circuit. Each is 20amps but the left one (essential) is also hooked up to my generator transfer box so in the event of a power failure, I can power the left bank of outlets via generator. The reason I dub it the essential circuit is because it has essential equipment to keep the aquarium from crashing during a power outage. The “main lines” are essentially extension lines I ran from the panel housing the APEX and supporting equipment (including EB832 and EB4). The EB4 is plugged into the essential circuit and will have heater, return pump, skimmer and the two Gyres. The EB832 is plugged into the “non essential” circuit and provides the creature comfort equipment (UV, ATO, FUGE LIGHT, ETC).

I do plan on upgrading the EB4 to an 832 in the future, maybe Black Friday?

Anyhow, I hope that makes a little more sense.

Paul

You have to excuse the essential / non essential crap. I’m a pilot so I can’t but be nerdy about it.
 
OP
OP
Dubs83

Dubs83

Valuable Member
View Badges
Joined
Jul 13, 2016
Messages
1,004
Reaction score
1,418
Location
New Jersey
Rating - 0%
0   0   0
Once again, I lost track of time and didn’t come close to working on the scape. Tomorrow I promise!

Here’s what is done. Majority of the work on the fish room. I can happily say the wiring is complete! Also, the pump plumbing is complete! I made a mistake with the valve placement but I will fix it tomorrow. Newbie mistake because I started to rush. I’m sure you guys will spot it in the photos. Anyway!

The complete mess of wiring at the meeting where the APEX will live.
dae32960c3fbdd40db637d8ca8ee22d1.jpg


The yellowtail plumbed.
85da5b9ee79e2a412031adfff1484d02.jpg


Heat exchanger
e3a263140e60721adead267afbbd1c79.jpg


Running PEX for the heat exchanger.
e694d3c10a8b2c493e1a354bd78b205e.jpg


d7d674c0141b110a820cc928b42725c6.jpg


0bf3fcac7afa741cb9f9ce753294827f.jpg


Paul
 
OP
OP
Dubs83

Dubs83

Valuable Member
View Badges
Joined
Jul 13, 2016
Messages
1,004
Reaction score
1,418
Location
New Jersey
Rating - 0%
0   0   0
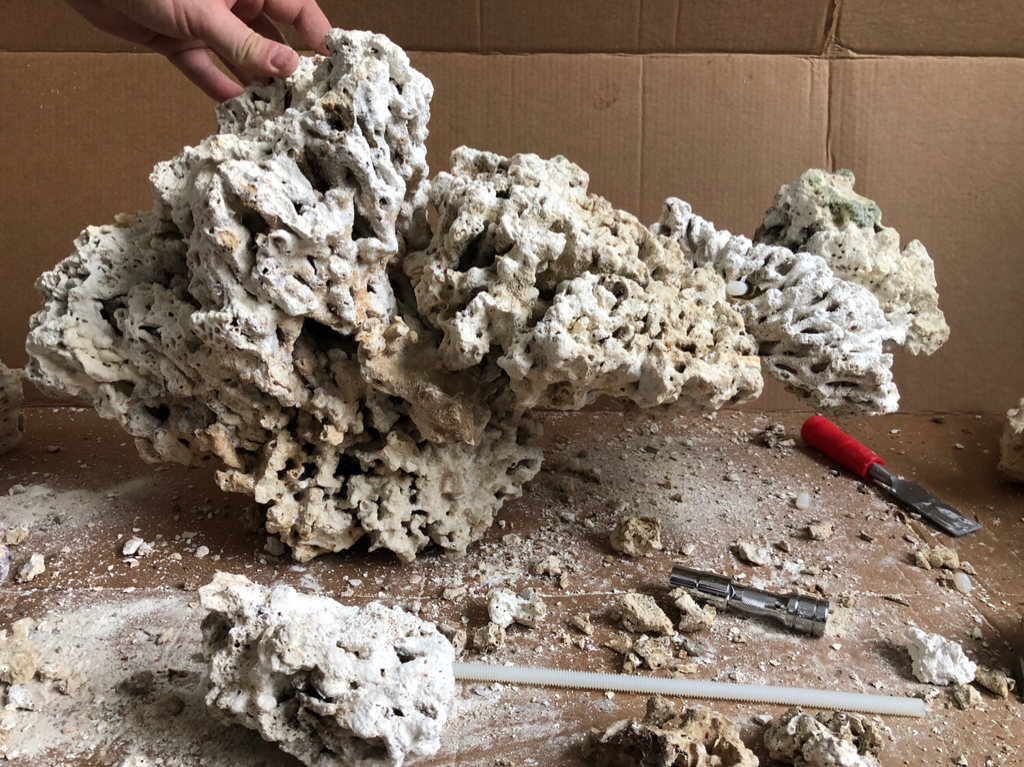
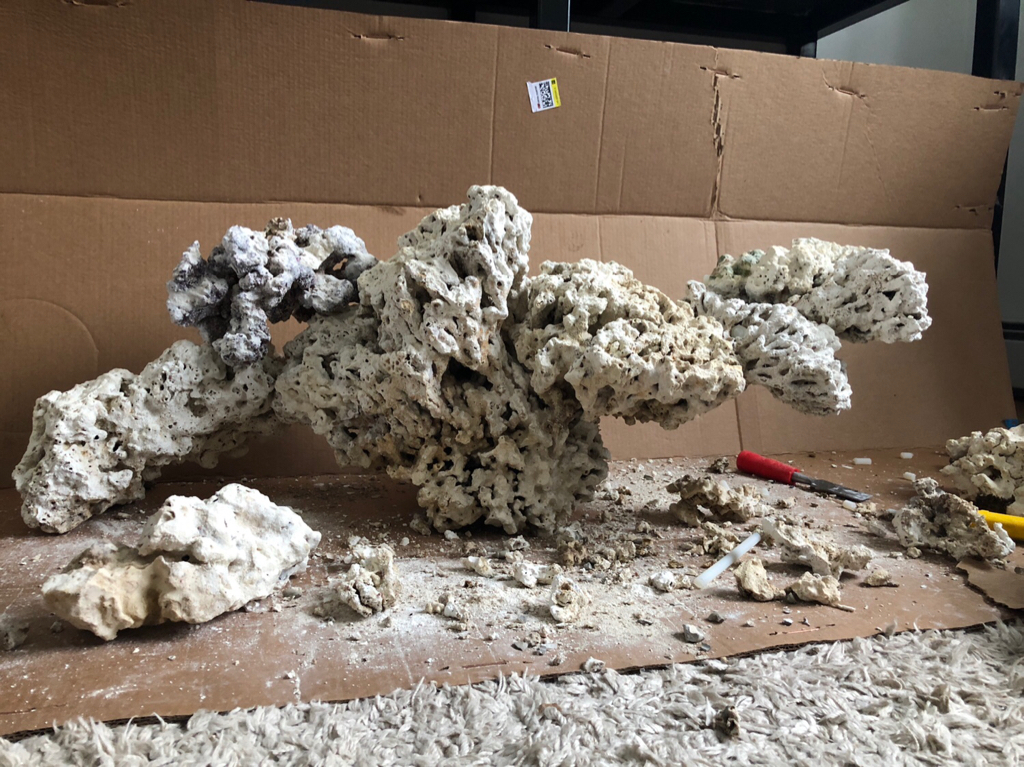
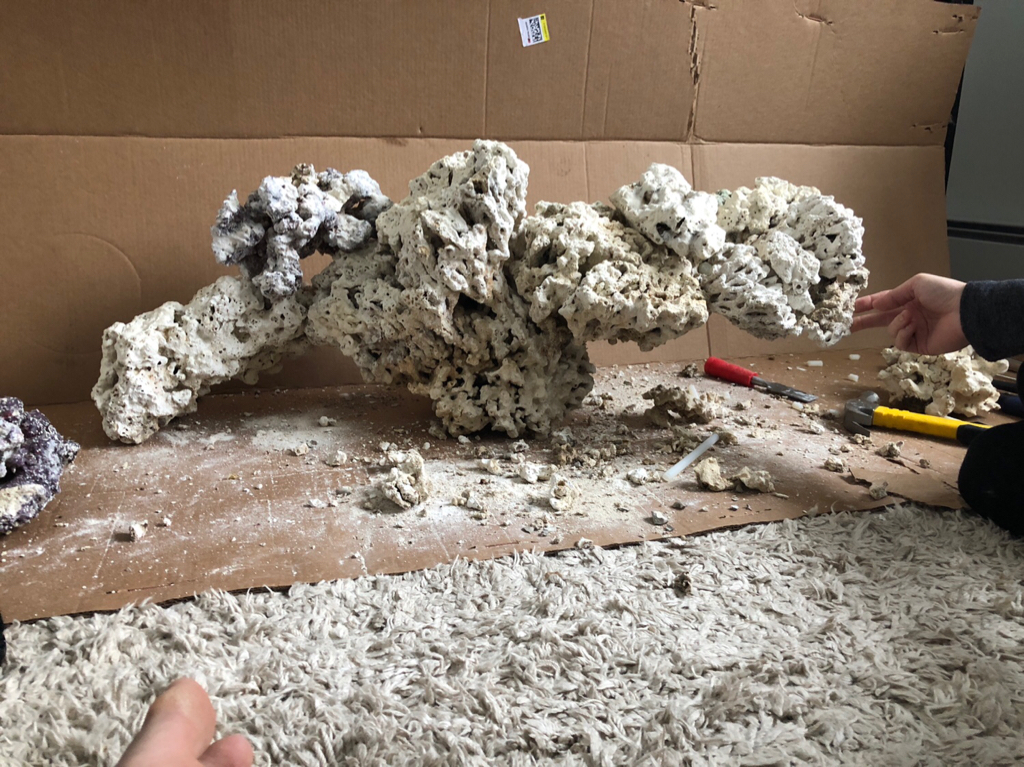
As promised, some rock work today. Used nylon rods with nylon nuts. The rods are flexible but once cut to size they became pretty rigid. Anyhow, we’re currently splitting duty between this and cleaning the house for thanksgiving. I really wish I took pictures of the process but most of it was checking to see if it worked and then leaving it a lone lol. I’ll provide more details later when we settle in for the night. Here’s a sneak peak.

eea73ac7c36dabd56aec9a8ae90db032.jpg


50f8112b4ce613159d7058b149f8aba3.jpg


dba37e9314cd46268892032fe9490907.jpg


We’ll be filling the gaps in and covering the nuts with rubble and super glue a little later today. The aquafix is currently setting before we place it in the aquarium and build the remainder of the scape! Let me know what you think!

-Paul
 

User

2500 Club Member
View Badges
Joined
Aug 15, 2017
Messages
4,523
Reaction score
7,477
Rating - 0%
0   0   0
Yeah, officially jealous. That looks awesome, and that heat exchanger is going to do wonders for dropping your electrical costs with not having to run heaters.

I’m currently watching a Sesame Street live show, so no sump progress. Maybe tomorrow...
 

Crabby48

7500 Club Member
View Badges
Joined
Mar 5, 2018
Messages
7,677
Reaction score
44,767
Location
NJ
Rating - 0%
0   0   0
So much work in a short time. Everything is come out great! Your beam came out nice and the size of the tank fits the wall perfect.
Liking your rock work would you like to stop by and finish mine lol
 

Ingenuity against algae: Do you use DIY methods for controlling nuisance algae?

  • I have used DIY methods for controlling algae.

    Votes: 45 47.4%
  • I use commercial methods for controlling algae, but never DIY methods.

    Votes: 22 23.2%
  • I have not used commercial or DIY methods for controlling algae.

    Votes: 22 23.2%
  • Other.

    Votes: 6 6.3%

New Posts

Back
Top