Paul's First Saltwater Tank

OP
OP
PaulPerger

PaulPerger

Active Member
View Badges
Joined
Oct 16, 2017
Messages
427
Reaction score
550
Location
Lewis Center, OH
Rating - 0%
0   0   0
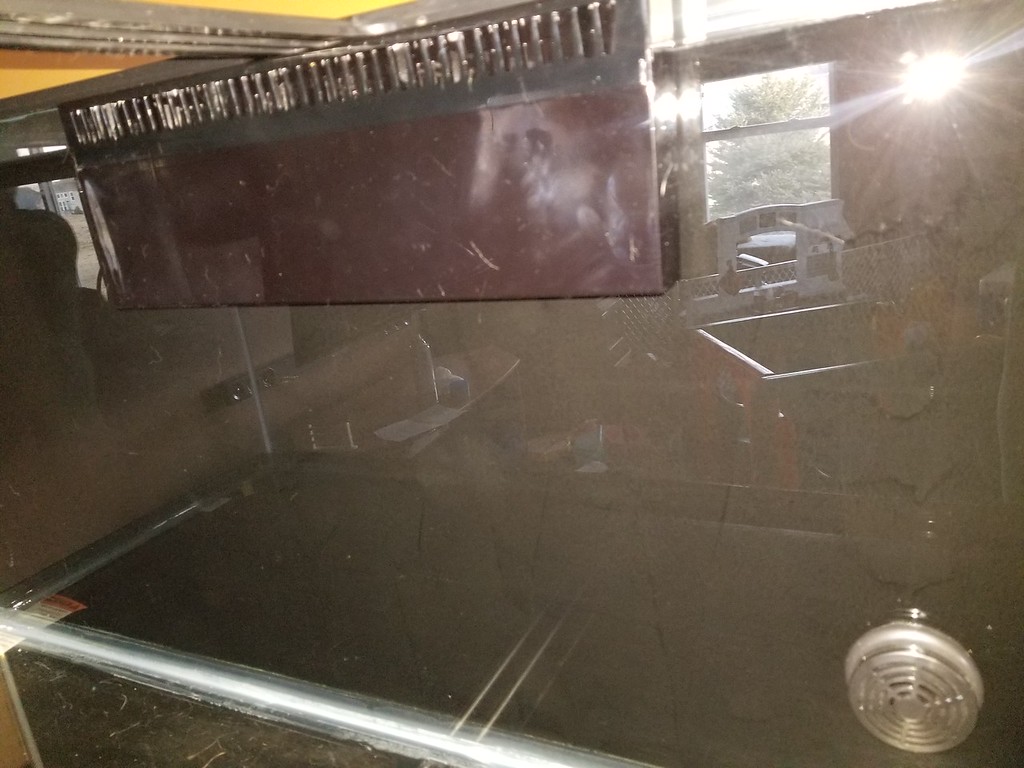
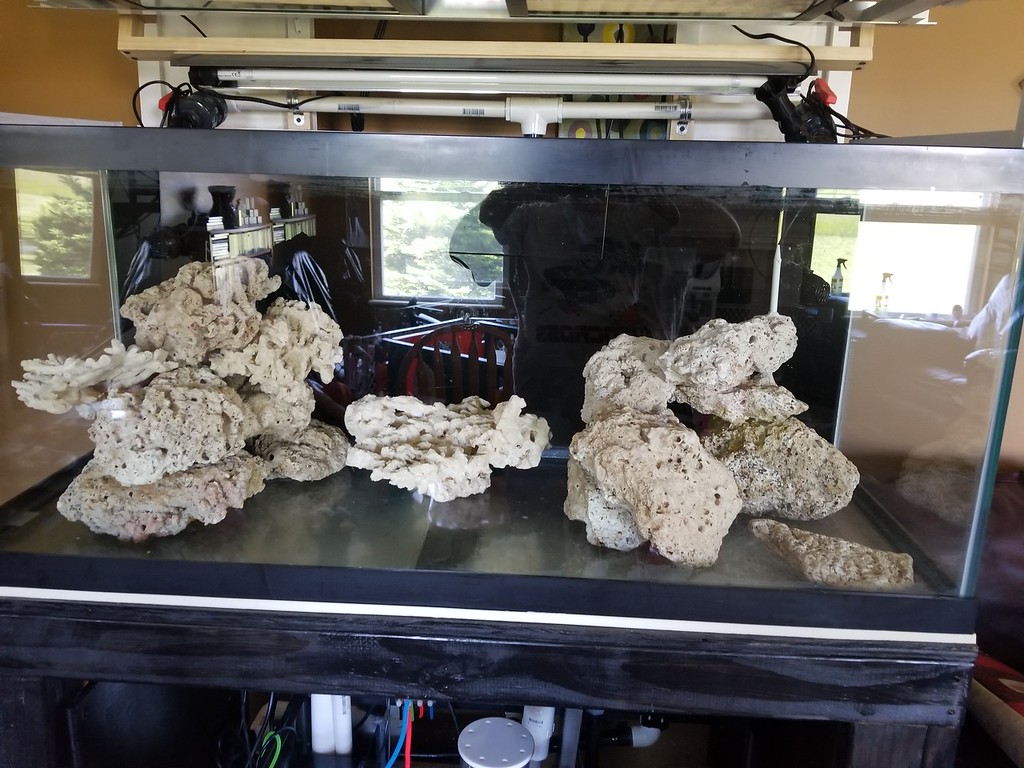
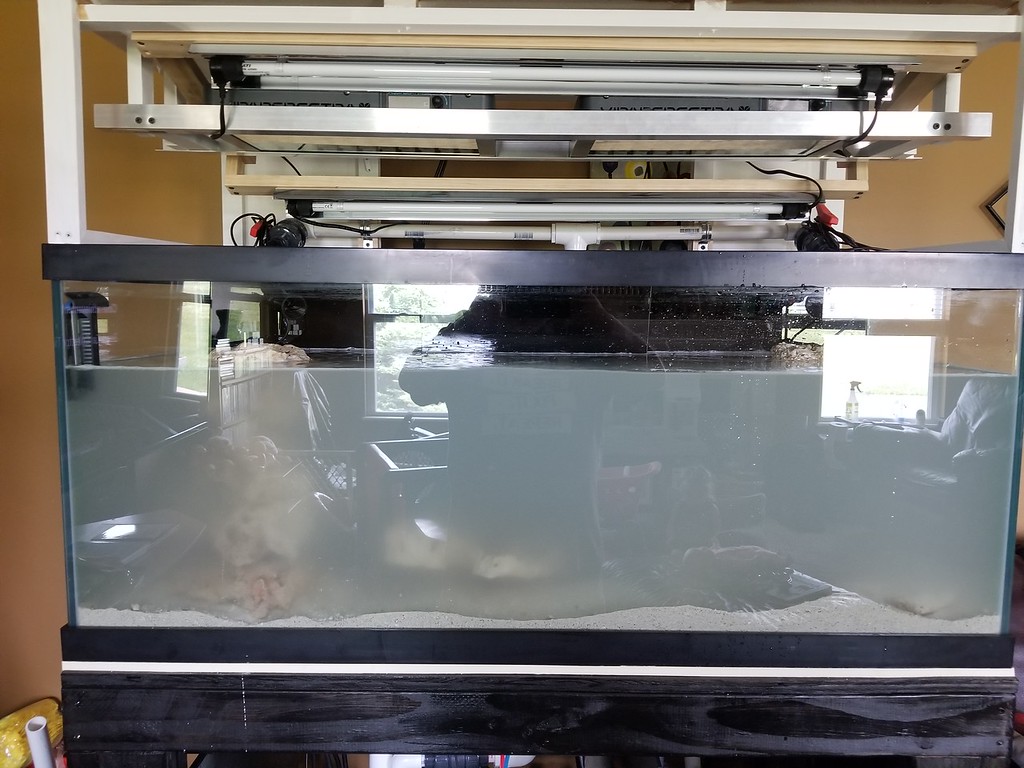
Today I painted the back of my tank...

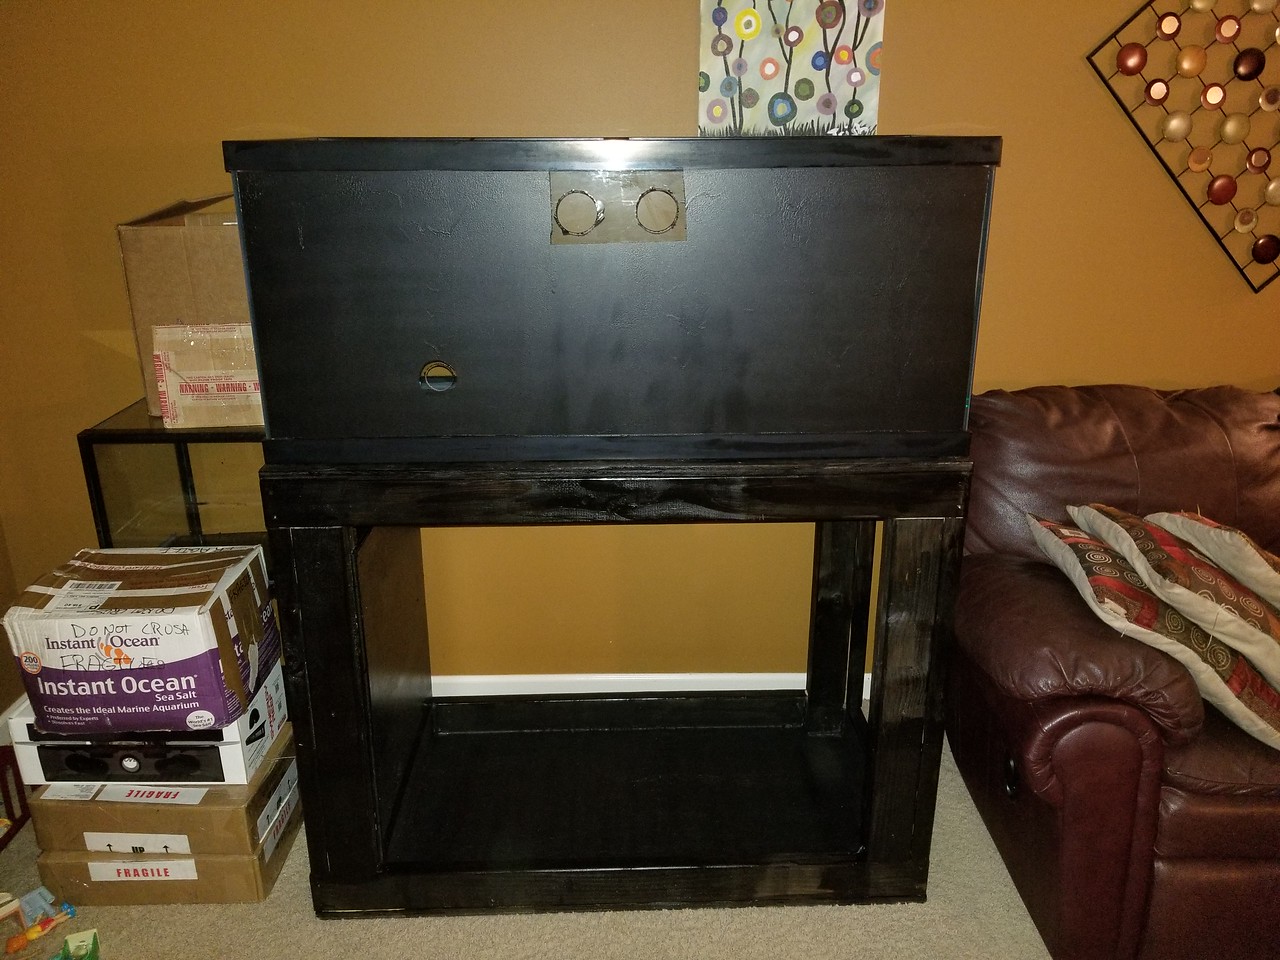
Photo after 2 coats...
20190326_200443-XL.jpg


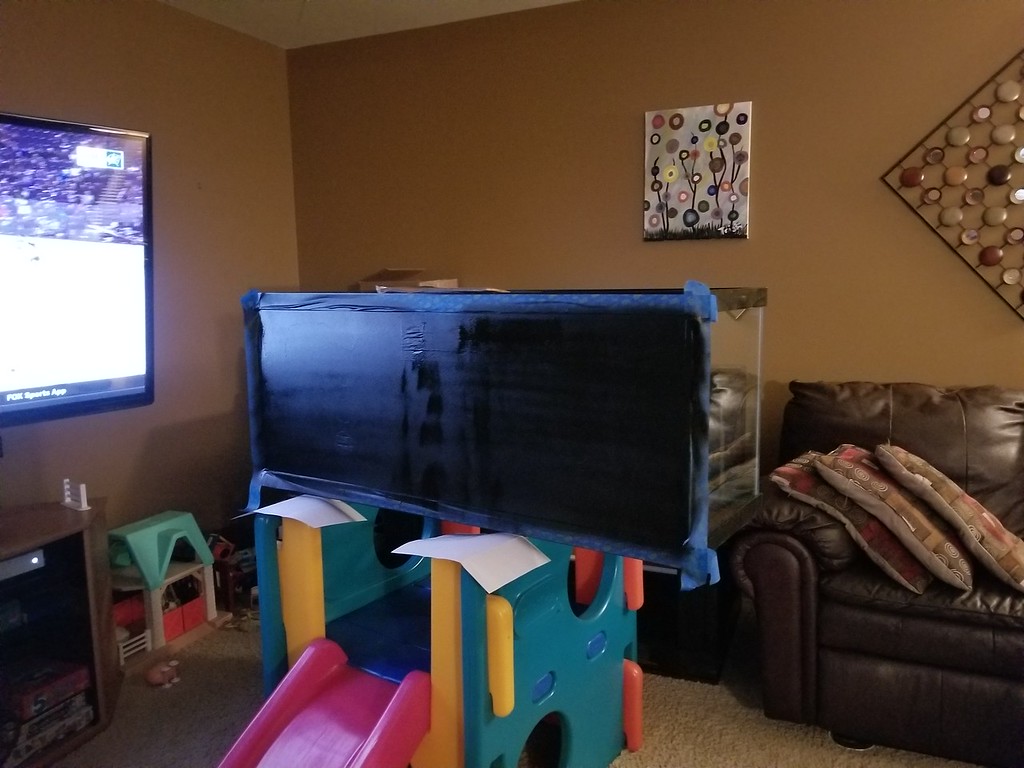
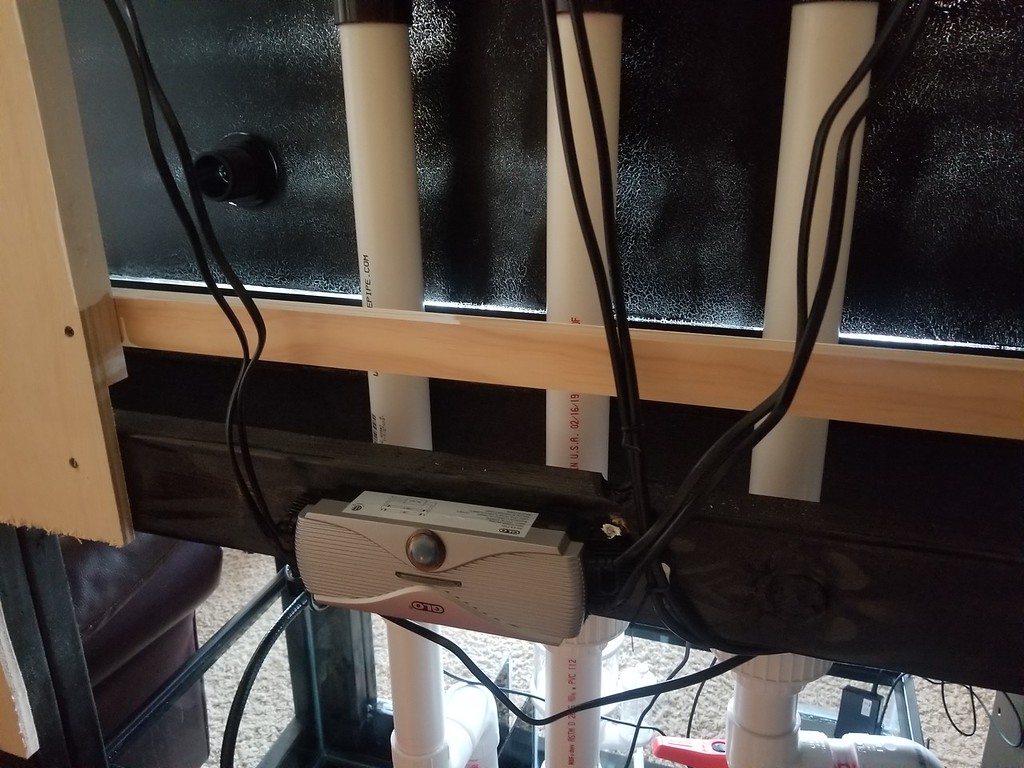
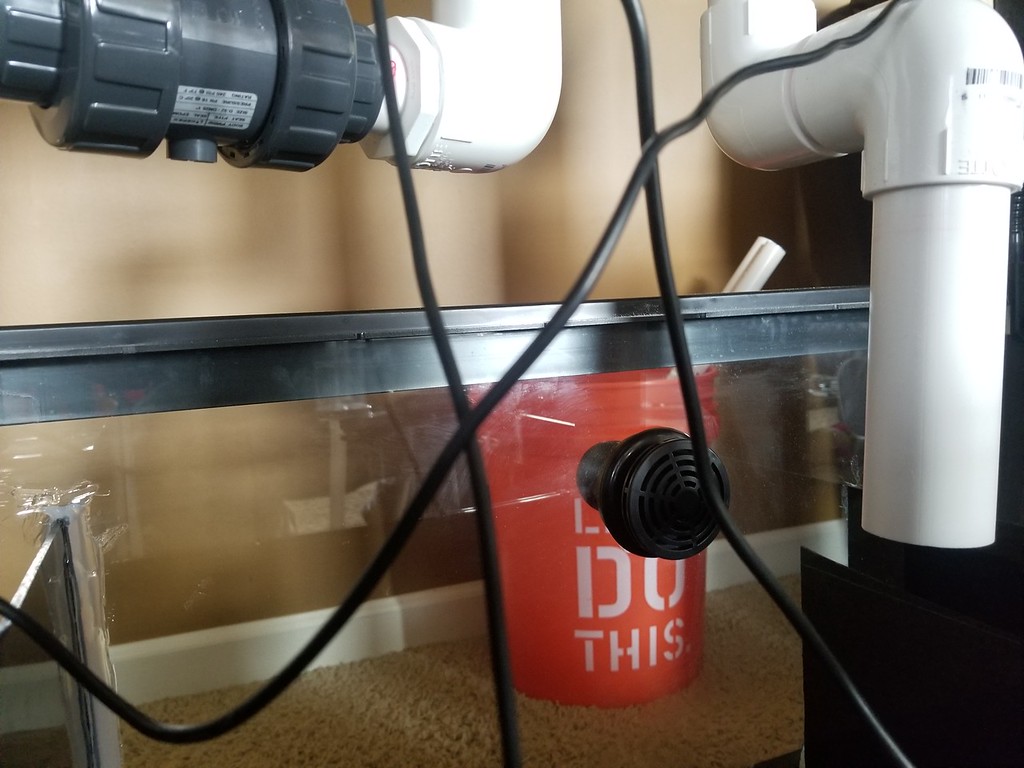
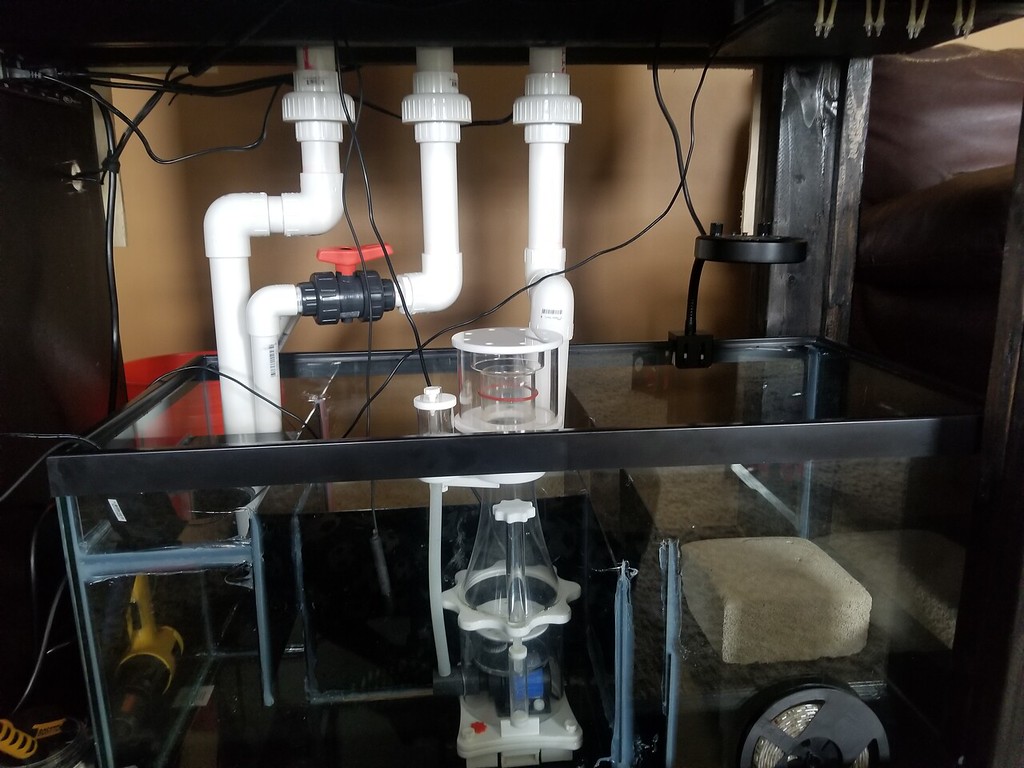
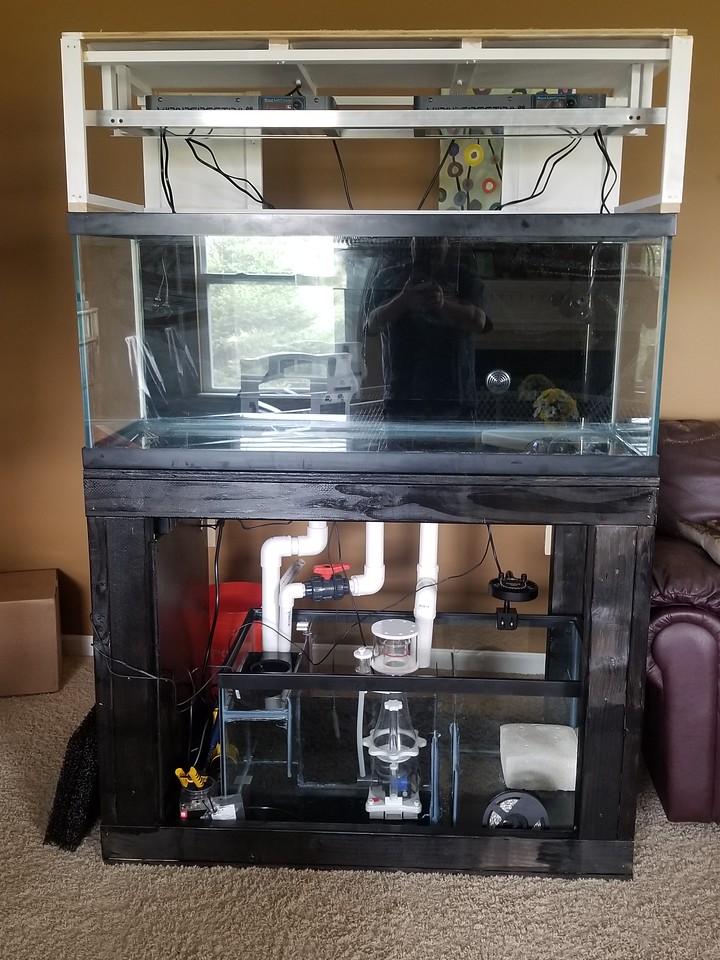
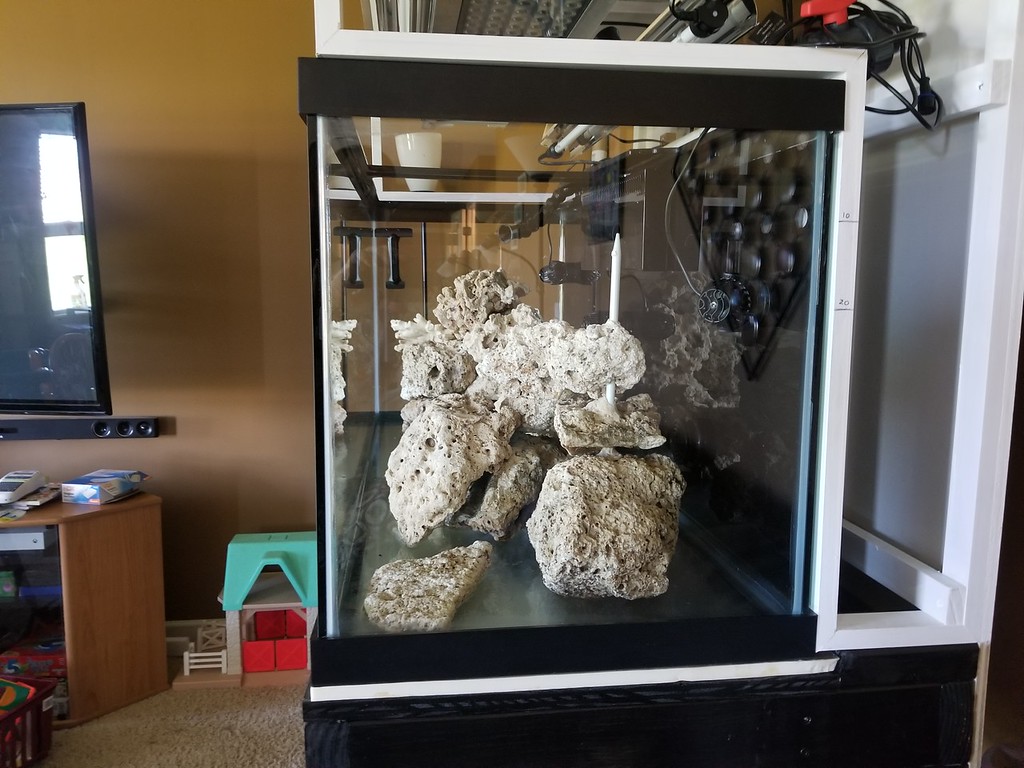
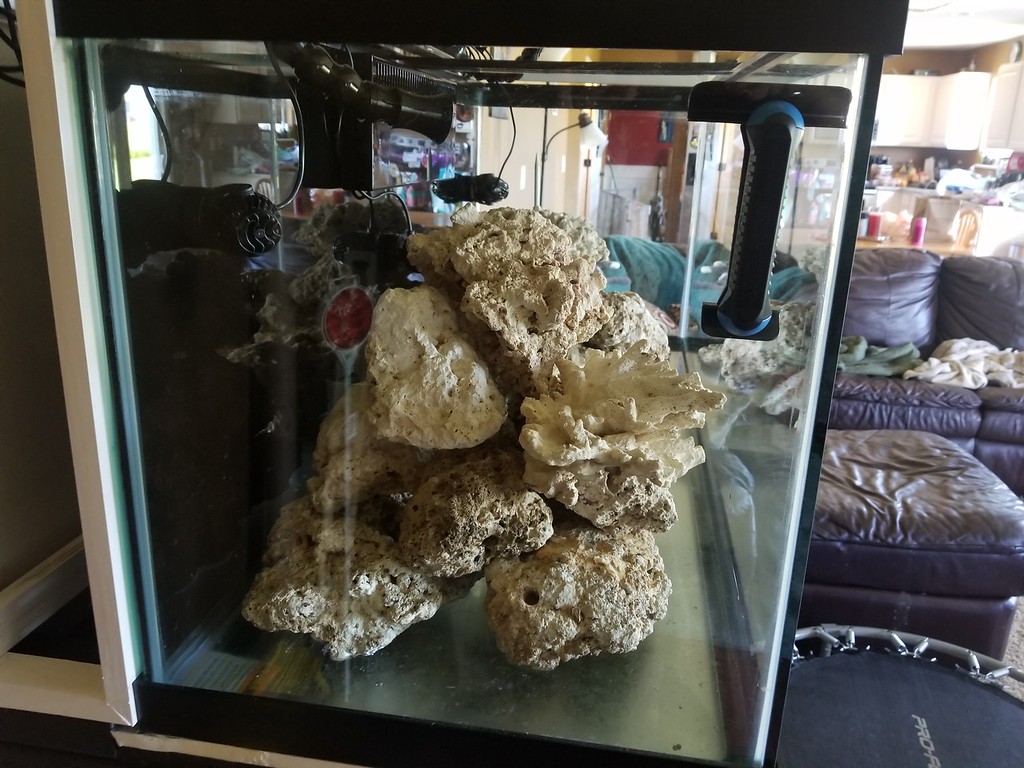
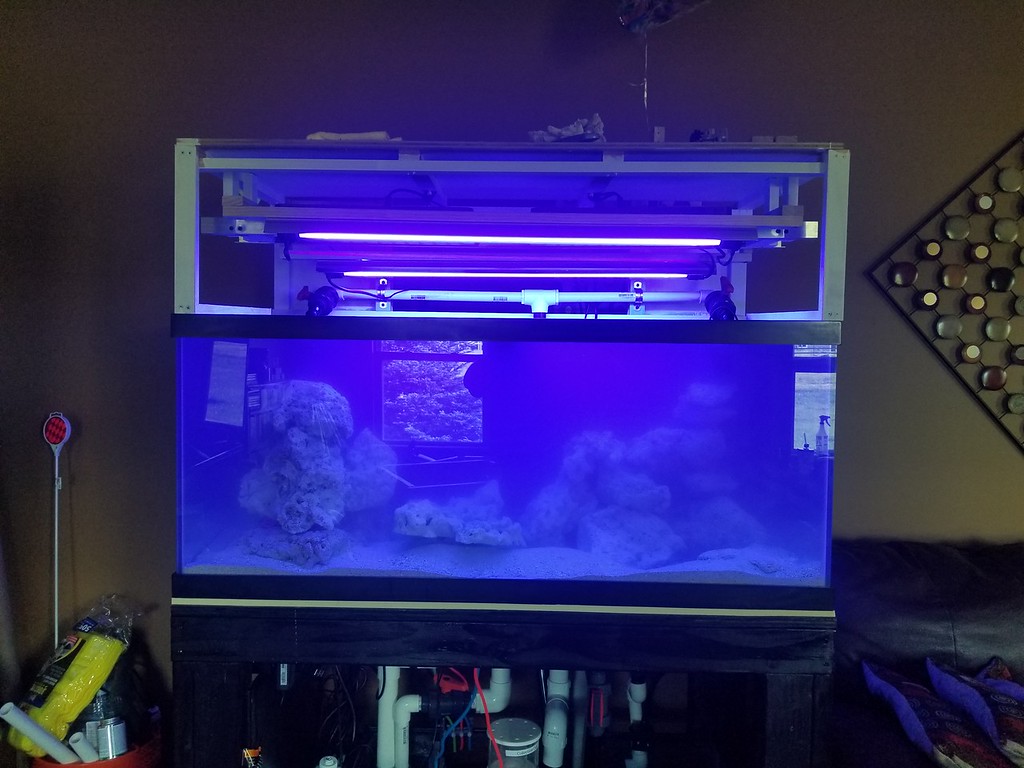
Photo when finished and put on stand...
20190326_210714-X2.jpg


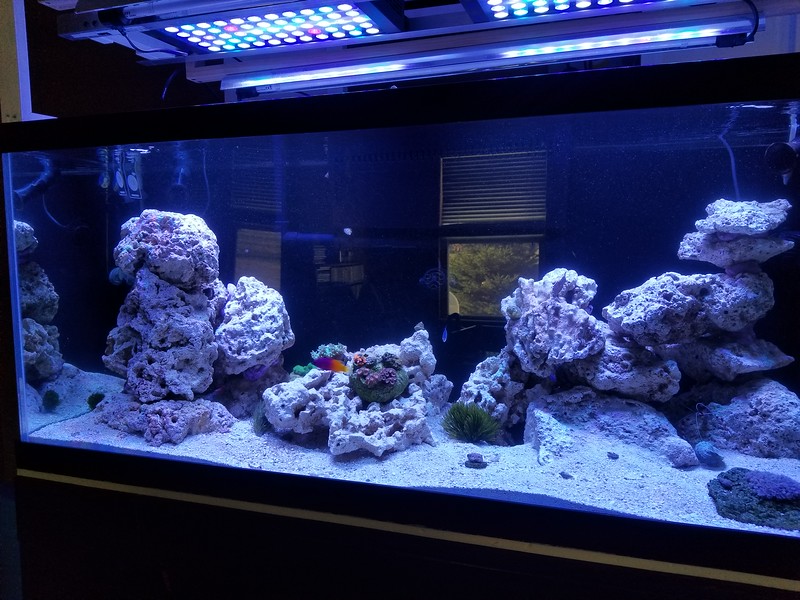
This is going to be where it will be. Of course I will turn the tank around after I clean up around the holes to get a gasket to glass seal and I will install the drain bulkhead and the overflow before I turn it around tomorrow.
 
OP
OP
PaulPerger

PaulPerger

Active Member
View Badges
Joined
Oct 16, 2017
Messages
427
Reaction score
550
Location
Lewis Center, OH
Rating - 0%
0   0   0
So. A LOT has happened since my last post. I had surgery yesterday to repair a 10 year old umbilical hernia so I worked like crazy last weekend hoping to get water in the tank before I have to be home for a week not allowed to do much...

As a result of working so hard, I took no photos last weekend. Today, during my first day of recovery, I took a bunch of photos of my progress. I can't lift 5 pounds, but my phone weighs considerably less than 5 pounds, and I can type, so here we go...

The overflow box fully mounted, and the drain hole for easy water changes.
20190327_185652-XL.jpg


The back of the tank... The three pipes are from the overflow, Main in Center, Secondary on Right and Emergency on Left. The drain is on the left. At the bottom of the photo is the ballast for the T5s.
20190410_171816-XL.jpg


I drilled my sump and put an emergency drain here as well. Should something malfunction horribly, I won't flood my family room.
20190410_171831-XL.jpg


The sump. Where most of the work was done. Here you can see the overflow drains. The main is in the middle with the ball valve. I know a gate valve would be much better, but I ordered the wrong valve and decided to move forward with what I have. (Remember that I was trying to get this tank wet over the weekend.) The Emergency drain on the right will splash into the return section if it ever sees water alerting me to a problem. The main and the secondary drains drain into a splashdown chamber which overflows into the two socks, then into the sump section and then overflow to the center in the rear where the return pump will be. The refugium section is on the right with a Kessel H80 to light it. Above that I built a small shelf for the auto doser.
20190410_171752-XL.jpg


The shelf holding the doser. More to come on that later...
20190410_171732-XL.jpg


The LEDs and the wires hanging from the right and left down into the tank are for the T5s that will hang in front of and in back of the LEDs.
20190410_171526-M.jpg
20190410_171533-M.jpg


The whole tank in all of it's glory... Notice it isn't wet...
20190410_171500-X2.jpg


It's still dry because when I to this point, I got in a fight with a drill bit and cut my finger up pretty good. I won't share a photo from the hospital as I didn't take a photo, I'm a bit squeamish . My 2.5 year old Granddaughter however, watched the whole thing from the foot of my bed. The doctor explained everything he was doing and she asked questions and wasn't phased by the large amount of blood or the needles or her Papa being sewn back together. This is today. Clean and not "gross".
20190410_200649-L.jpg


So, here I am recovering from surgery and looking at a dry box. Oh, well. I'll get back to it soon.
 
OP
OP
PaulPerger

PaulPerger

Active Member
View Badges
Joined
Oct 16, 2017
Messages
427
Reaction score
550
Location
Lewis Center, OH
Rating - 0%
0   0   0
Isn’t always best to do 45 on pipes vs 90’s? What made you go with 90’s?

Simple answer. No, the difference between two 45s and one 90 is so negligible that it isn't worth the extra cost or hassle to me. I did the math. According to the math, it makes much larger difference when you get into pipes about 10 inches or larger in diameter, but at less than 2 inches in diameter, there isn't much of a difference at all.

Then I found this video of BRS actually performing tests. It's worth the eight minute watch...
BRStv Investigates: Which reduces more flow, 45 or 90 degree elbows?
 
OP
OP
PaulPerger

PaulPerger

Active Member
View Badges
Joined
Oct 16, 2017
Messages
427
Reaction score
550
Location
Lewis Center, OH
Rating - 0%
0   0   0
So, I finally got my tank to the point where I can add water and test my plumbing for leaks! YEAH!! So I filled the tank. As water passed the in tank drain I watched closely to see if the bulkhead leaked at all and found no leak. So, I had tightened that up enough. Then I waited for the water to fill the DT and reach the overflow box. As it got close, I watched the bulkheads for the overflow, and as the water level passed the bottom of the bulkheads, I got some leakage, so I reached in and tightened them up until no water was dripping.

As water reached the overflow and rushed into the overflow box, I got some more bulkhead leakage, so I had to tighten them up again. I dried off the back glass so I could see if I had tightened them up enough and the black back showed no signs of water dripping!

So then I followed all of the pipes with a flashlight looking at all glued joints and all unions for signs of leakage, and found none. I was very happy. Then about 15 minutes of having no leaks I heard dripping. This is what I found...


I was NOT a happy camper! I also realized I now had to drain the tank, so I began draining the tank and as the water level reached the bottom of the overflow box, the water drip slowed dramatically. It was then that I realized I didn't have a leaky tank after all. I still had a bulkhead leak...


I have decided to wait and see how the tank looks after it has had a chance to dry thoroughly. Hopefully I won't have to redo the back.
 
OP
OP
PaulPerger

PaulPerger

Active Member
View Badges
Joined
Oct 16, 2017
Messages
427
Reaction score
550
Location
Lewis Center, OH
Rating - 0%
0   0   0
It's been a while since I updated, but I finally figured out my leaking situation. And I feel REALLY silly. I finally decided to take everything apart as I constantly had a very slow leak and could not for the life of me figure out why it was leaking. So, as I started taking the overflow off I immediately found my problem. I had put the gasket on the INSIDE of the overflow box. There was nothing between the overflow box and the glass! I spent two weeks trying to figure out where this leak was coming from. I had tightened those bulkheads so tight I am surprised I didn't crack the overflow box.

So, after putting the gaskets where they are SUPPOSED to be and refilling the tank. Presto. NO LEAKS!! I ran it for a week to make sure everything was as it was supposed to be and everything works exactly as planned. So the tank has once again been fully drained and I am working on my rockscape and making 100 Gallons of RODI water to make SW so I can FINALLY get this tank full of water and cycling!

Here is my first pass at a rockscape. I will be filling in some of the small gaps with some rubble rock to hide some of the seams, and the rod you see on the right will b cut to height and completely hidden by rock cement and I will press some rubble into the adhesive to make it less noticeable. My plan is to make the center "island" a Zoa Garden. The small flat rock on the sand will be for Pulsing Xenia. I love it, and have to have it in my tank. I have heard if I isolate it, it will be less likely to overtake the tank.

Front View of Tank.
20190527_103755-XL.jpg


Side View that will be seen from couch...
20190527_103745-XL.jpg


Side view from corner "behind" the tank...
20190527_103804-XL.jpg


And a short video walk around...

Critiques and suggestions are very welcome! Thanks!
 
Last edited:
OP
OP
PaulPerger

PaulPerger

Active Member
View Badges
Joined
Oct 16, 2017
Messages
427
Reaction score
550
Location
Lewis Center, OH
Rating - 0%
0   0   0
It is FINALLY officially an AQUARIUM and not a glass box on a wood box frame!! I made a hundred gallons of salt water, finalized my rockscape, put in my live sand and filled it with water!!

After my first day's water production...
20190601_144717-XL.jpg


And after day 2 with the Actinic T5s lit up. Later this week I am going to add some coraline algae starter and then I'll have the actinics on 10 hours per day, so I had to make sure they still worked. Zelda immediately said, "Oohh, Papa. Purple Lights are PRETTY!" I'm glad she likes them because for the next four to six weeks, that's going to be extent of what we see in here.
20190602_183607-XL.jpg


Of course, it will look much nicer once the water clears up and I finish the cabinet pieces and cover up the top and the sump. Speaking of which, here is the sump...
20190602_141132-XL.jpg


And in the interest of documenting the FULL journey... At this point I have done nothing with electrical wires other than ensure there is a water loop on every one of them. This control panel has a LOT of work that needs to be done... Everything is currently just plugged into the E-107. I am going to tackle the Apex JR. another weekend. Until it is fully cycled, I am not really concerned with lighting schedules, pump flows, etc.
20190602_141206-XL.jpg


THANKS for following along... Cycling will begin this week. The next update should be a neat and organized control panel... Until then, Reef Safe!
 

NY_Caveman

likes words, fish and arbitrary statistics
View Badges
Joined
Sep 8, 2017
Messages
17,008
Reaction score
108,390
Location
New York
Rating - 0%
0   0   0
It is FINALLY officially an AQUARIUM and not a glass box on a wood box frame!! I made a hundred gallons of salt water, finalized my rockscape, put in my live sand and filled it with water!!

After my first day's water production...
20190601_144717-XL.jpg


And after day 2 with the Actinic T5s lit up. Later this week I am going to add some coraline algae starter and then I'll have the actinics on 10 hours per day, so I had to make sure they still worked. Zelda immediately said, "Oohh, Papa. Purple Lights are PRETTY!" I'm glad she likes them because for the next four to six weeks, that's going to be extent of what we see in here.
20190602_183607-XL.jpg


Of course, it will look much nicer once the water clears up and I finish the cabinet pieces and cover up the top and the sump. Speaking of which, here is the sump...
20190602_141132-XL.jpg


And in the interest of documenting the FULL journey... At this point I have done nothing with electrical wires other than ensure there is a water loop on every one of them. This control panel has a LOT of work that needs to be done... Everything is currently just plugged into the E-107. I am going to tackle the Apex JR. another weekend. Until it is fully cycled, I am not really concerned with lighting schedules, pump flows, etc.
20190602_141206-XL.jpg


THANKS for following along... Cycling will begin this week. The next update should be a neat and organized control panel... Until then, Reef Safe!
Very nice! Congratulations!

 
OP
OP
PaulPerger

PaulPerger

Active Member
View Badges
Joined
Oct 16, 2017
Messages
427
Reaction score
550
Location
Lewis Center, OH
Rating - 0%
0   0   0
I have done a lot of research and I think I have my list pretty much complete. Any suggestions on modifications to this list would be much appreciated. Also stocking order is something I haven't thought much about, I think I will go pretty much in the order I have them listed.


Group 1 & 2

5-7 Blue Chromis

1 Firefish (Maybe two if I can find a mated pair)

1 Kauderns Cardinal

1 Orchid Dottyback

1 Tailspot Blenny


Group 3

1 Fairy Wrasse

2 Clownfish

Group 4

1 Yellow Tang


After tank is well established with HUGE pod population

1 Mandarin

1 Flame Angel


Of course I will have a pretty standard clean up crew and assorted corals (no sticks...)


Any advice or comments very welcome.


DISCLAIMER: I know a Tang shouldn't live in a 75 long term. I will be moving him or her to a larger tank in a few years or sooner if its growth dictates the need.
 

Fudsey

Jack of all trades, Master of none ;-)
View Badges
Joined
May 7, 2016
Messages
10,038
Reaction score
48,998
Location
So. New Hampshire
Rating - 0%
0   0   0
The only fish that brings a question to my mind is the Dottyback. I have heard that they can become mean.

As for the Yellow Tang, have you thought about a Tomini, 2 Spot or Kole instead? They can be in a smaller tank longer.
 
OP
OP
PaulPerger

PaulPerger

Active Member
View Badges
Joined
Oct 16, 2017
Messages
427
Reaction score
550
Location
Lewis Center, OH
Rating - 0%
0   0   0
The only fish that brings a question to my mind is the Dottyback. I have heard that they can become mean.

As for the Yellow Tang, have you thought about a Tomini, 2 Spot or Kole instead? They can be in a smaller tank longer.

I did. But my wife loves Yellow Tangs. So. I explained to her that a yellow tang would likely get too large for our tank and she basically interrupted me and said, "Then you should have gotten a bigger one!" Short conversation even shorter... I am going to be getting a large peninsula that will likely be a FOWLR system as she likes a lot of fish that aren't necessarily "Reef Safe" or need a larger than 75 Gallon tank! I am thinking 10' x 4' x 3' (LxWxD) between our Family Room and Kitchen.

As for the dottyback... I have read both extremes on this fish from people's experiences and from vendor's sites. I am not sure what to think of it... I have read having two can help if one is aggressive toward other species, but not all are.

Thanks for the question and input.
 
OP
OP
PaulPerger

PaulPerger

Active Member
View Badges
Joined
Oct 16, 2017
Messages
427
Reaction score
550
Location
Lewis Center, OH
Rating - 0%
0   0   0
Since my last post here I lost my yellow tang. It wedged itself very snuggly into a rock in my holding tank and couldn't get out. This was the second fish that has done this, as a clown fish I had did the same thing. Is this common for juvenile fish?

I also added some Dr. Tim's to spike my tank with bacteria and it is now keeping ammonia to safe level. I will test the water tomorrow night and see what my current parameters are. One thing I find odd is that within 12 hours of adding Dr. Tim's I saw what I thought was algae growing in my tank. On one hand I am thrilled to see life of any kind, on another, in less than 48 hours my suspicion of algae was confirmed, as this is now all over my tank and spreading very quickly!

20190622_090236-XL.jpg


In addition to my little brown dot friends accumulating everywhere I have some green hair algae taking hold as well. Here you can see a small tuft of what is clearly green algae growing off of a penny sized chunk of live rock with coraline algae on it that I added to seed coraline in my tank (I added 8 such pieces to the tank). Is it a good time to add a small CUC? Or should I wait and let this go a bit longer?
20190622_090349-XL.jpg
 

Fudsey

Jack of all trades, Master of none ;-)
View Badges
Joined
May 7, 2016
Messages
10,038
Reaction score
48,998
Location
So. New Hampshire
Rating - 0%
0   0   0
Well your rock is going to get real ugly before it gets purple. I wouldn't worry about it. Tank uglies will make you think you've done something really wrong but it's all par for the course. I'd wait a couple more weeks before adding cuc.
 
OP
OP
PaulPerger

PaulPerger

Active Member
View Badges
Joined
Oct 16, 2017
Messages
427
Reaction score
550
Location
Lewis Center, OH
Rating - 0%
0   0   0
Hoping someone can help me figure out what is happening. As I was sitting in my Family Room last night watching my empty cycling tank, I noticed that I am getting air bubbles out of one of my return lines about every 2-5 minutes. It is only happening on one side which happens to be the side with the syphon break hole drilled at the water's surface. Below is a two minute video that shows what is happening, and I show the plumbing all the way down to the return pump.

The "event" is at the 20 second mark if you wish to jump forward in the video.
Any ideas would be appreciated...


Fudsey

Jack of all trades, Master of none ;-)
View Badges
Joined
May 7, 2016
Messages
10,038
Reaction score
48,998
Location
So. New Hampshire
Rating - 0%
0   0   0
I would be suspicious of the siphon hole. Can you block it with something and see if that stops the air bubbles?
 
OP
OP
PaulPerger

PaulPerger

Active Member
View Badges
Joined
Oct 16, 2017
Messages
427
Reaction score
550
Location
Lewis Center, OH
Rating - 0%
0   0   0
Well. It has been a while since I posted... Summer is racing season, and my car was totaled when I was rear ended by someone not paying attention to the traffic. On a positive note, nobody was hurt, and I got a better car to replace the damaged one.

OLD: (Not seen in photos is a cracked frame...)
20190710_192030-L.jpg


20190710_192039%20%281%29-XL.jpg


20190710_192523-XL.jpg


NEW: Bought the car in North Carolina, had to go drive the Tail of the Dragon!

20190721_085127-L.jpg


And Day three I got the windows tinted:

20190723_105717-L.jpg


The tank now has some coral and some fish...
20190824_084925-L.jpg


20190824_082537-L.jpg


More to come soon...
 

Algae invading algae: Have you had unwanted algae in your good macroalgae?

  • I regularly have unwanted algae in my macroalgae.

    Votes: 39 35.1%
  • I occasionally have unwanted algae in my macroalgae.

    Votes: 23 20.7%
  • I rarely have unwanted algae in my macroalgae.

    Votes: 9 8.1%
  • I never have unwanted algae in my macroalgae.

    Votes: 6 5.4%
  • I don’t have macroalgae.

    Votes: 30 27.0%
  • Other.

    Votes: 4 3.6%
Back
Top