Current status:
- Prototype built
- Firmware complete
- ReefPi integration ongoing
---
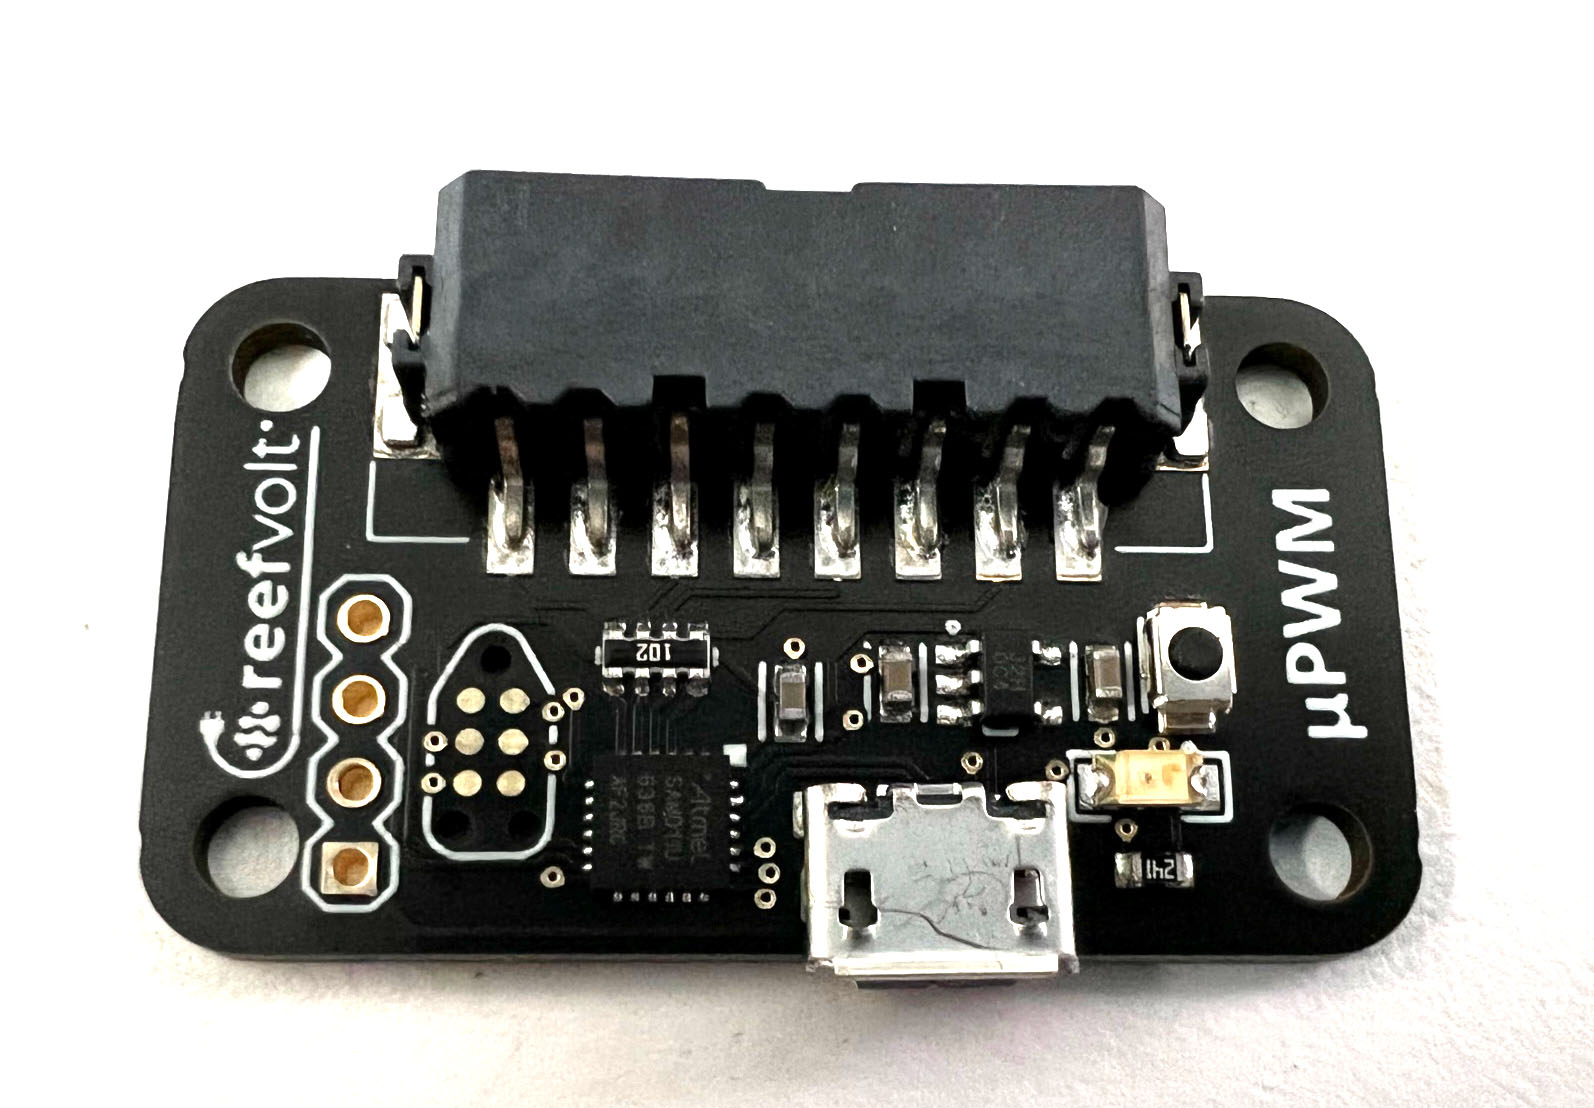
You may remember me from past threads, including the omni-thread talking about the Reef-Pi Pico (a veritable collectable now!), and follow on with the USB 8 outlet power strip (delayed for all eternity on some critical semiconductors, though I'm ready to simplify it out of spite), the ReefVolt MiniCore USB controller (pH!, 1wire! on USB!)
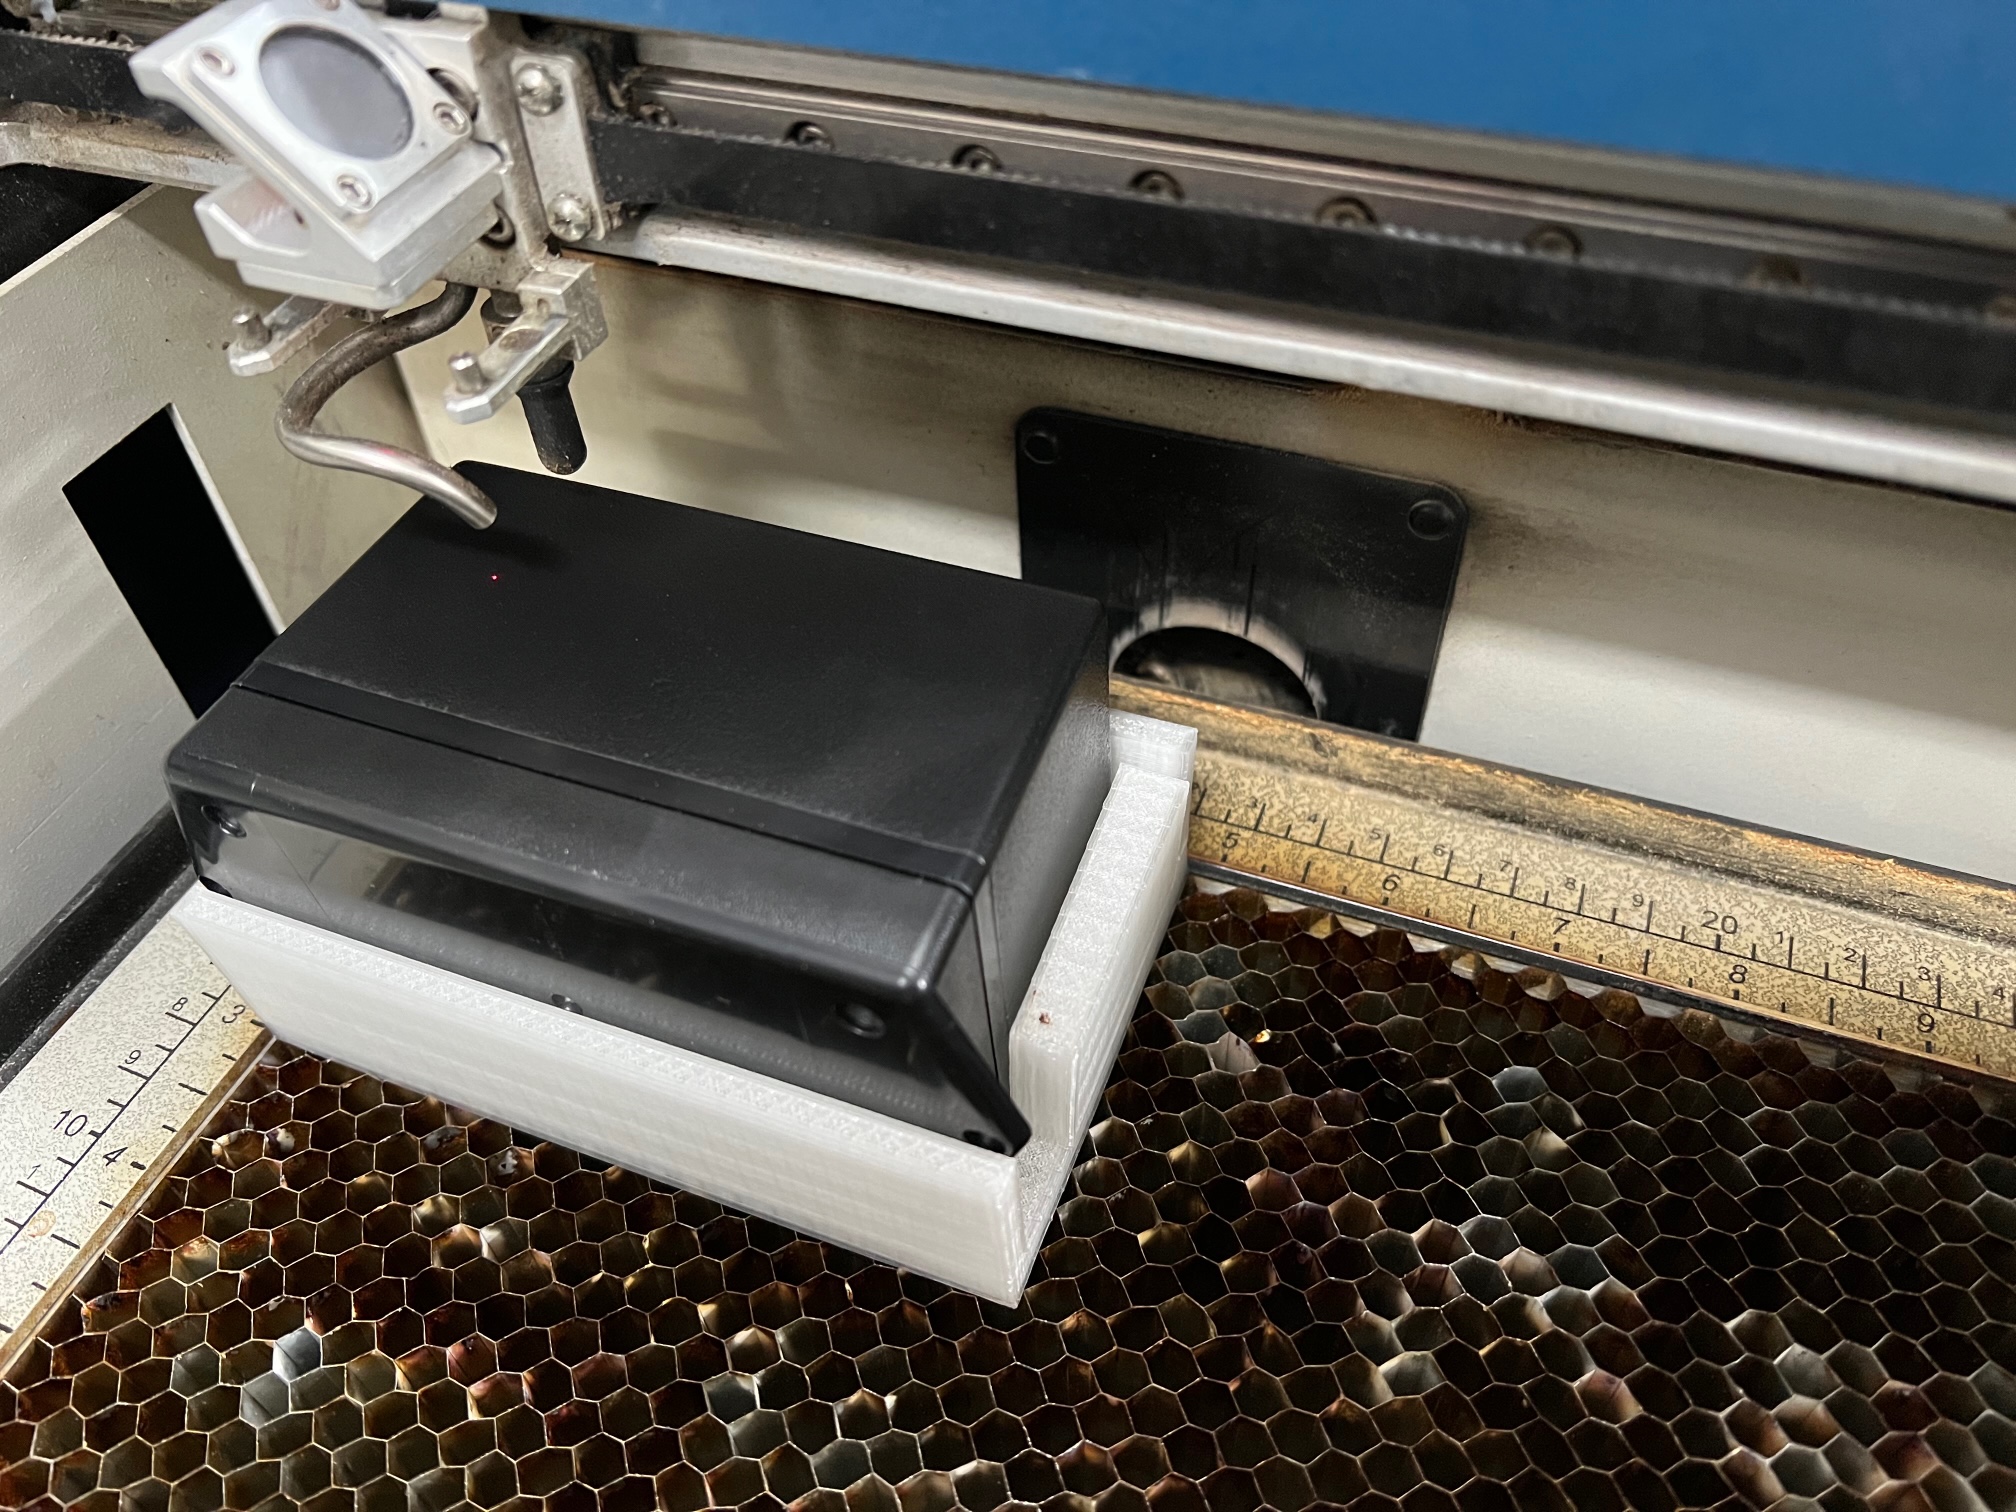
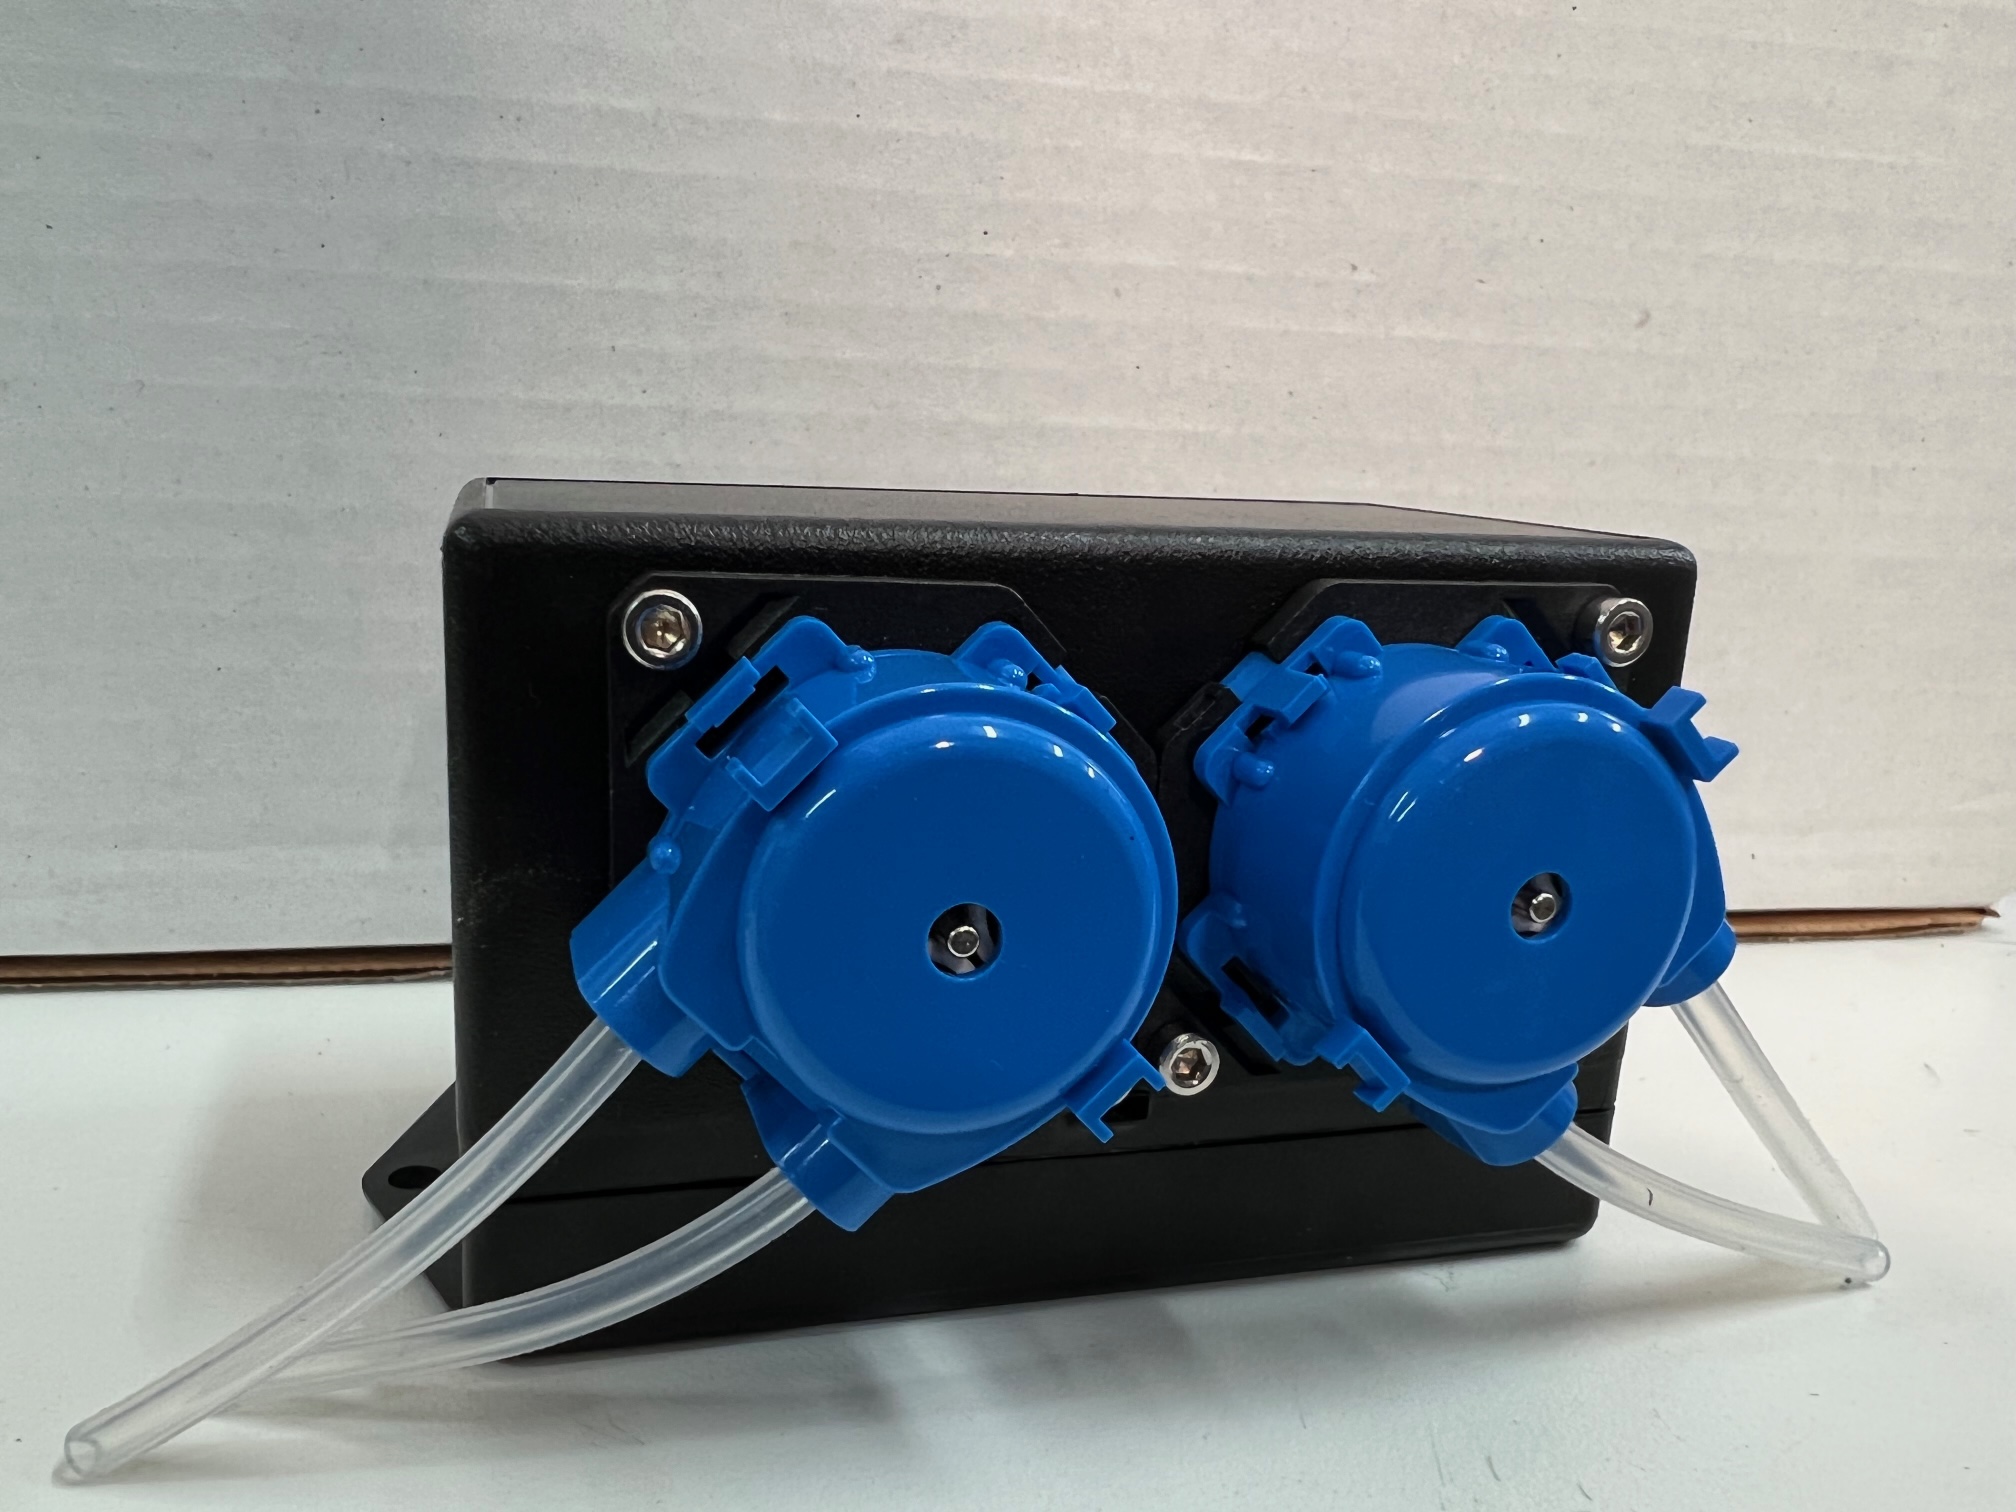
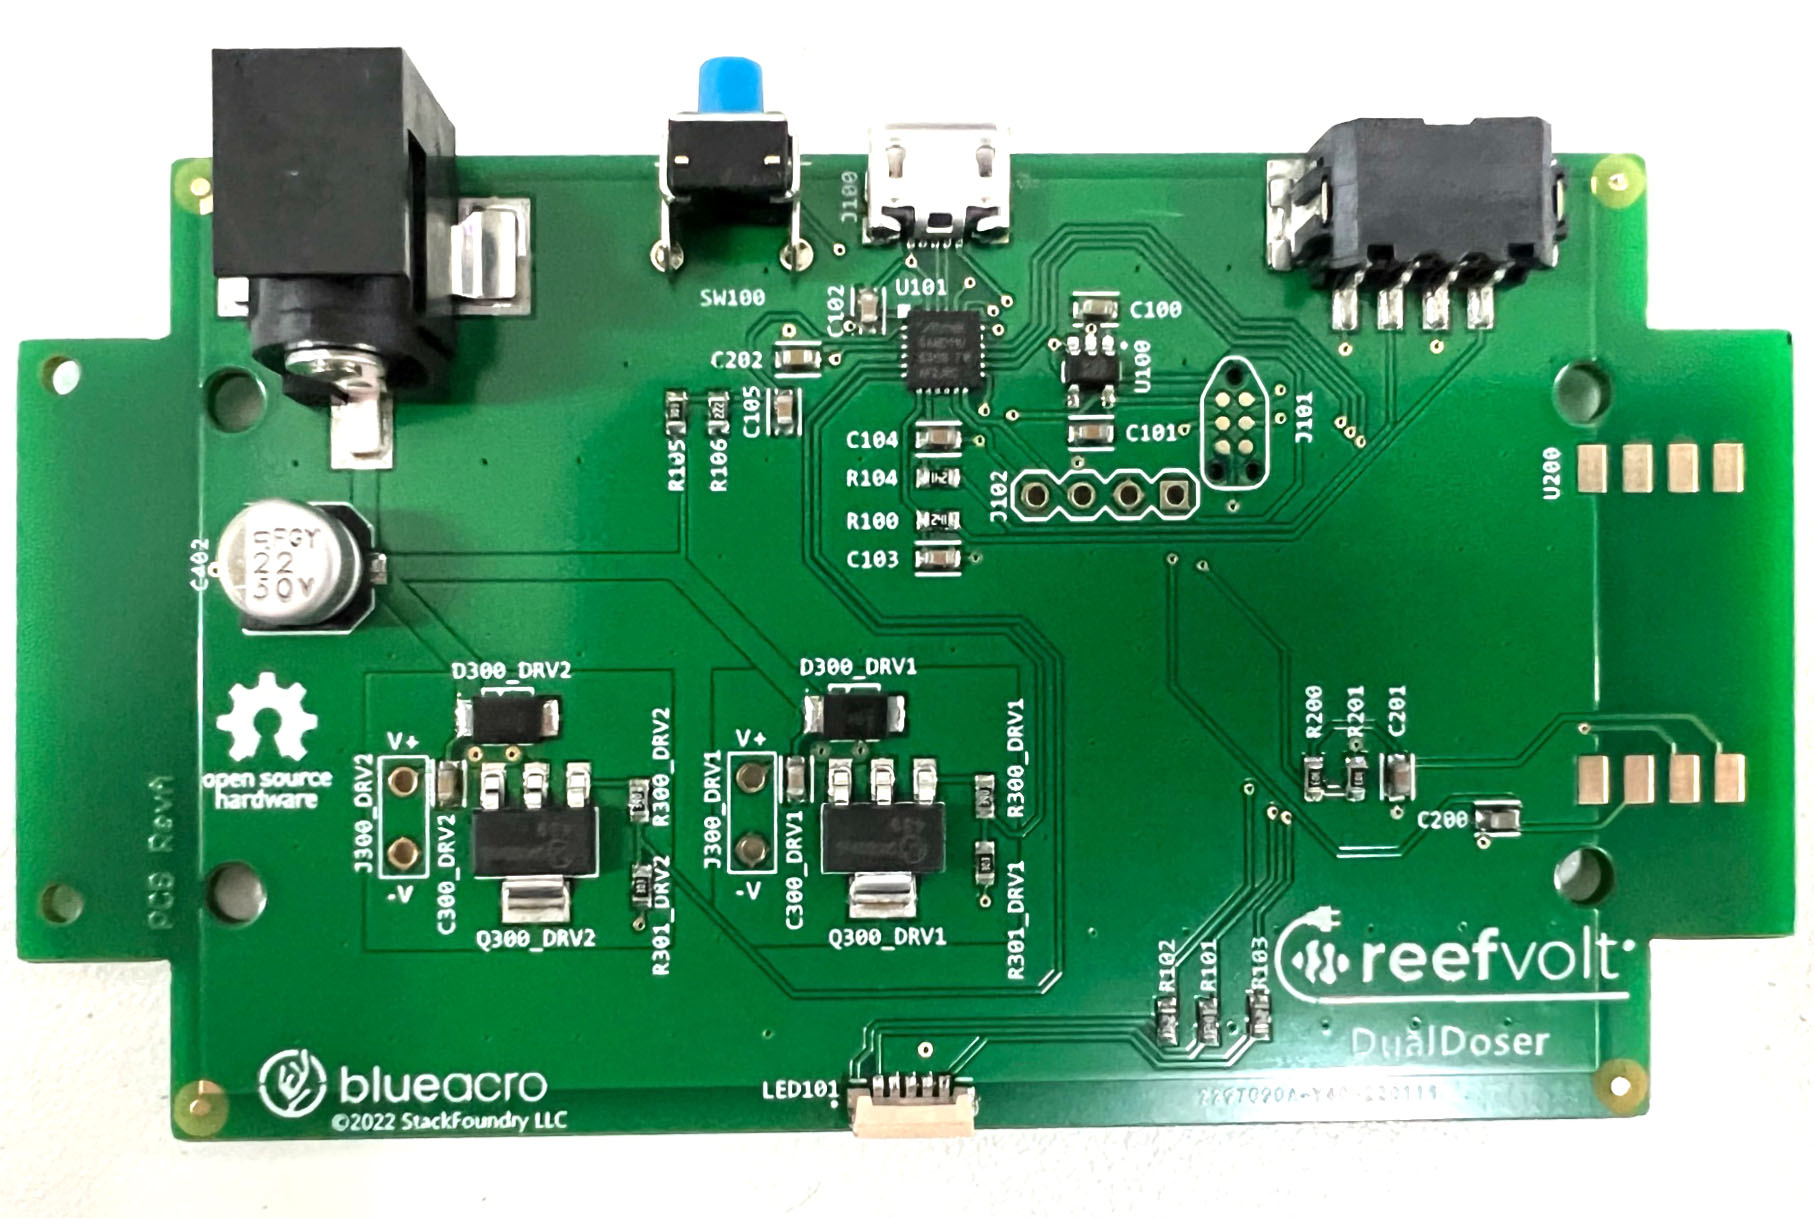
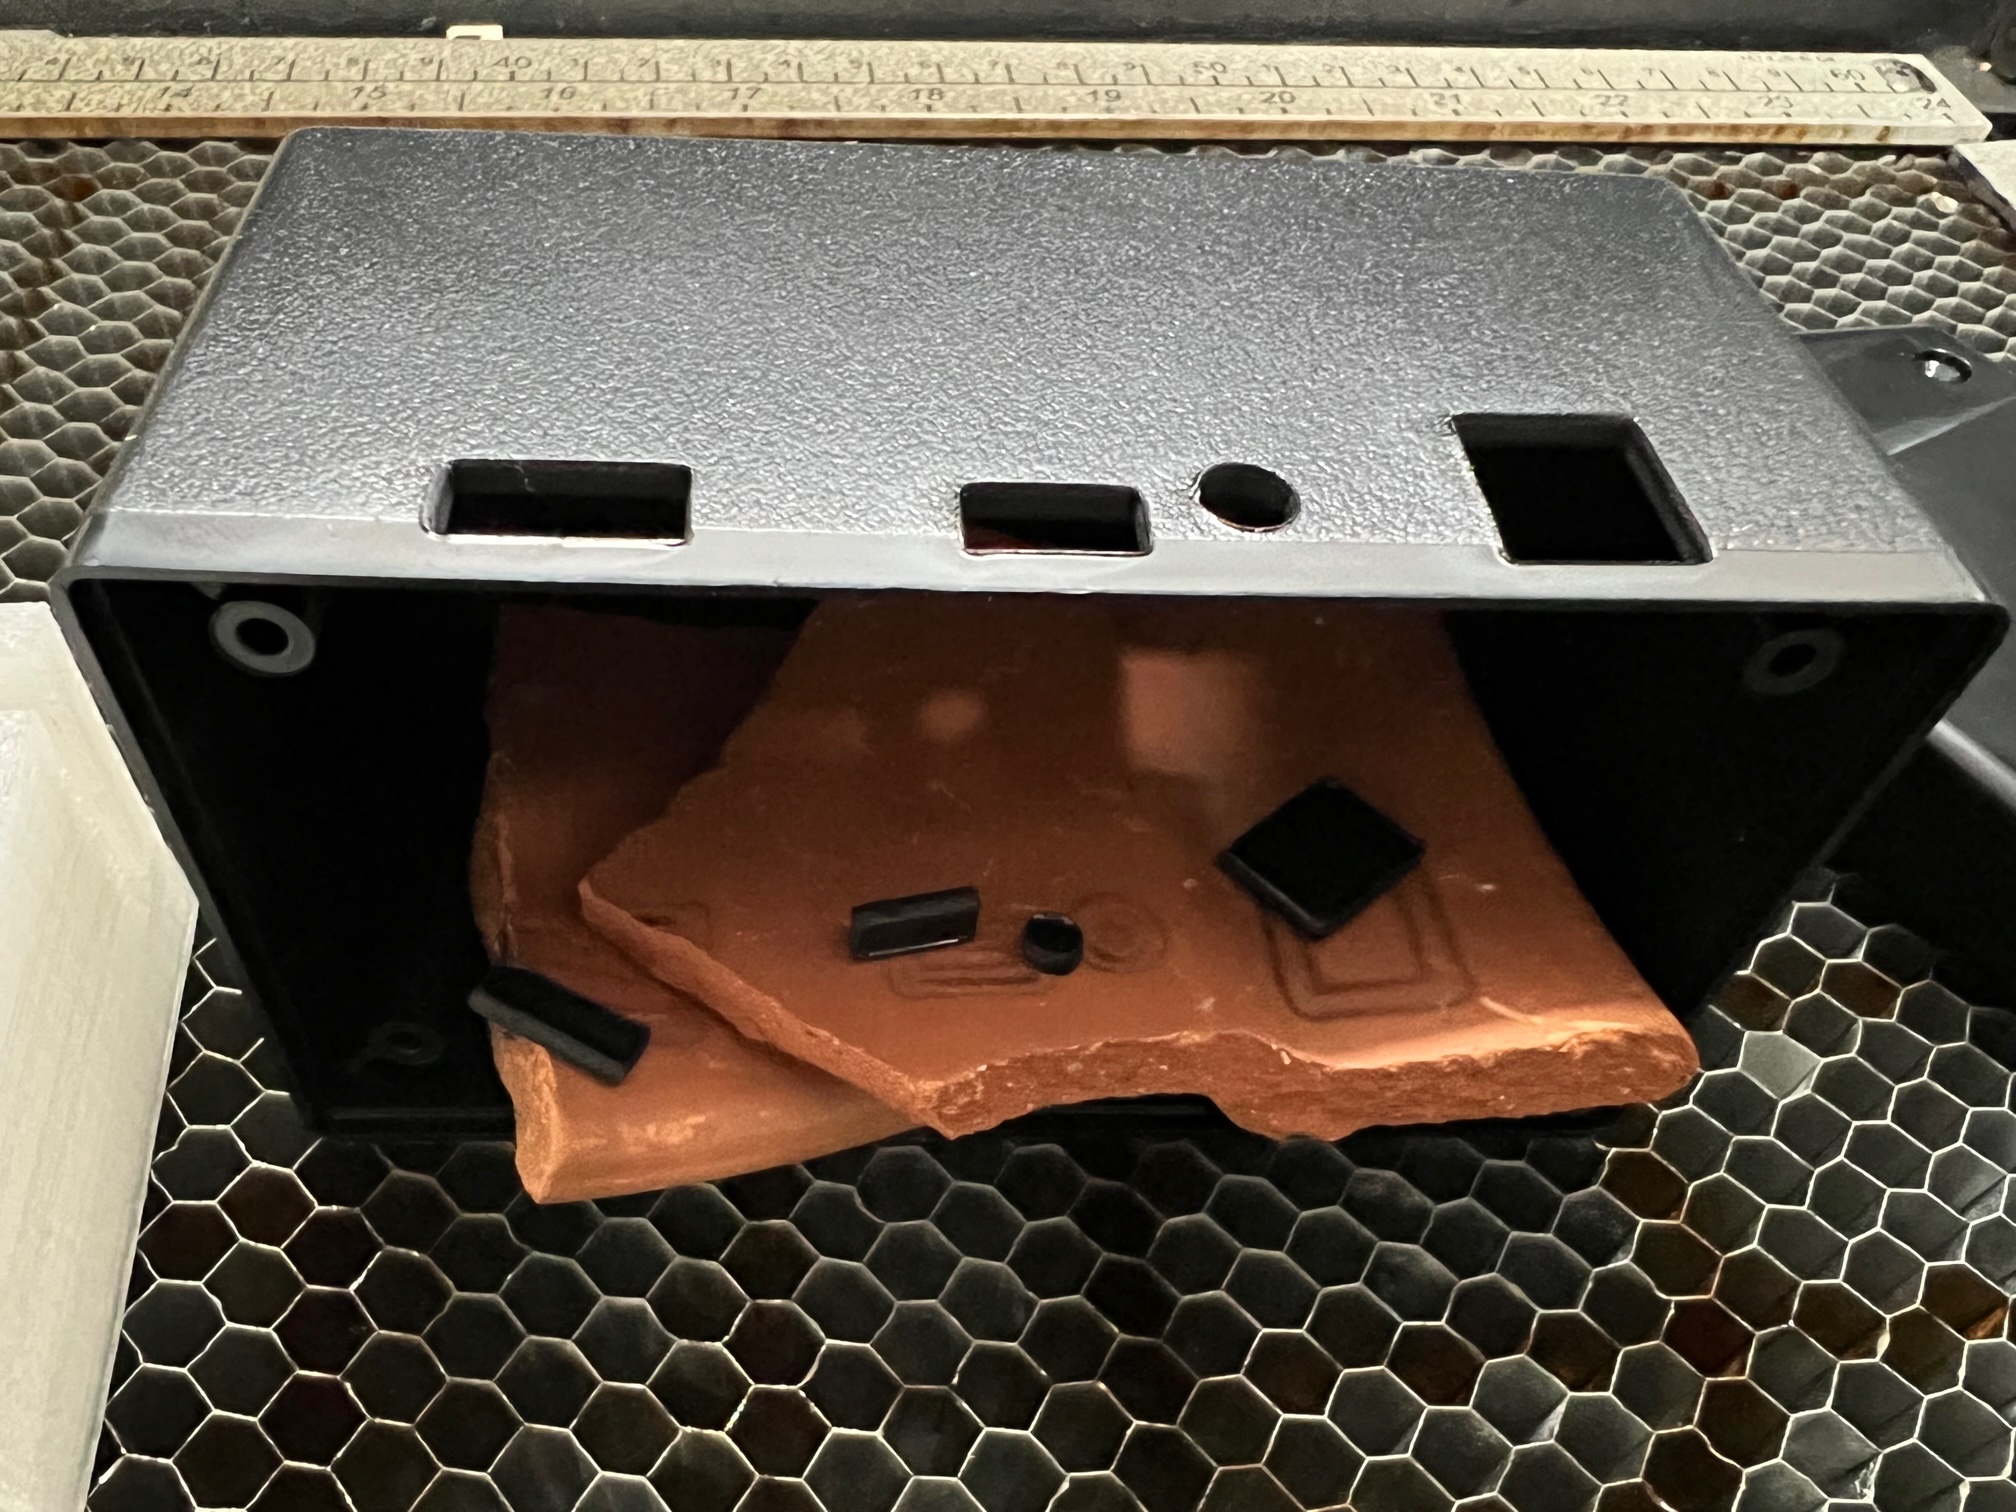
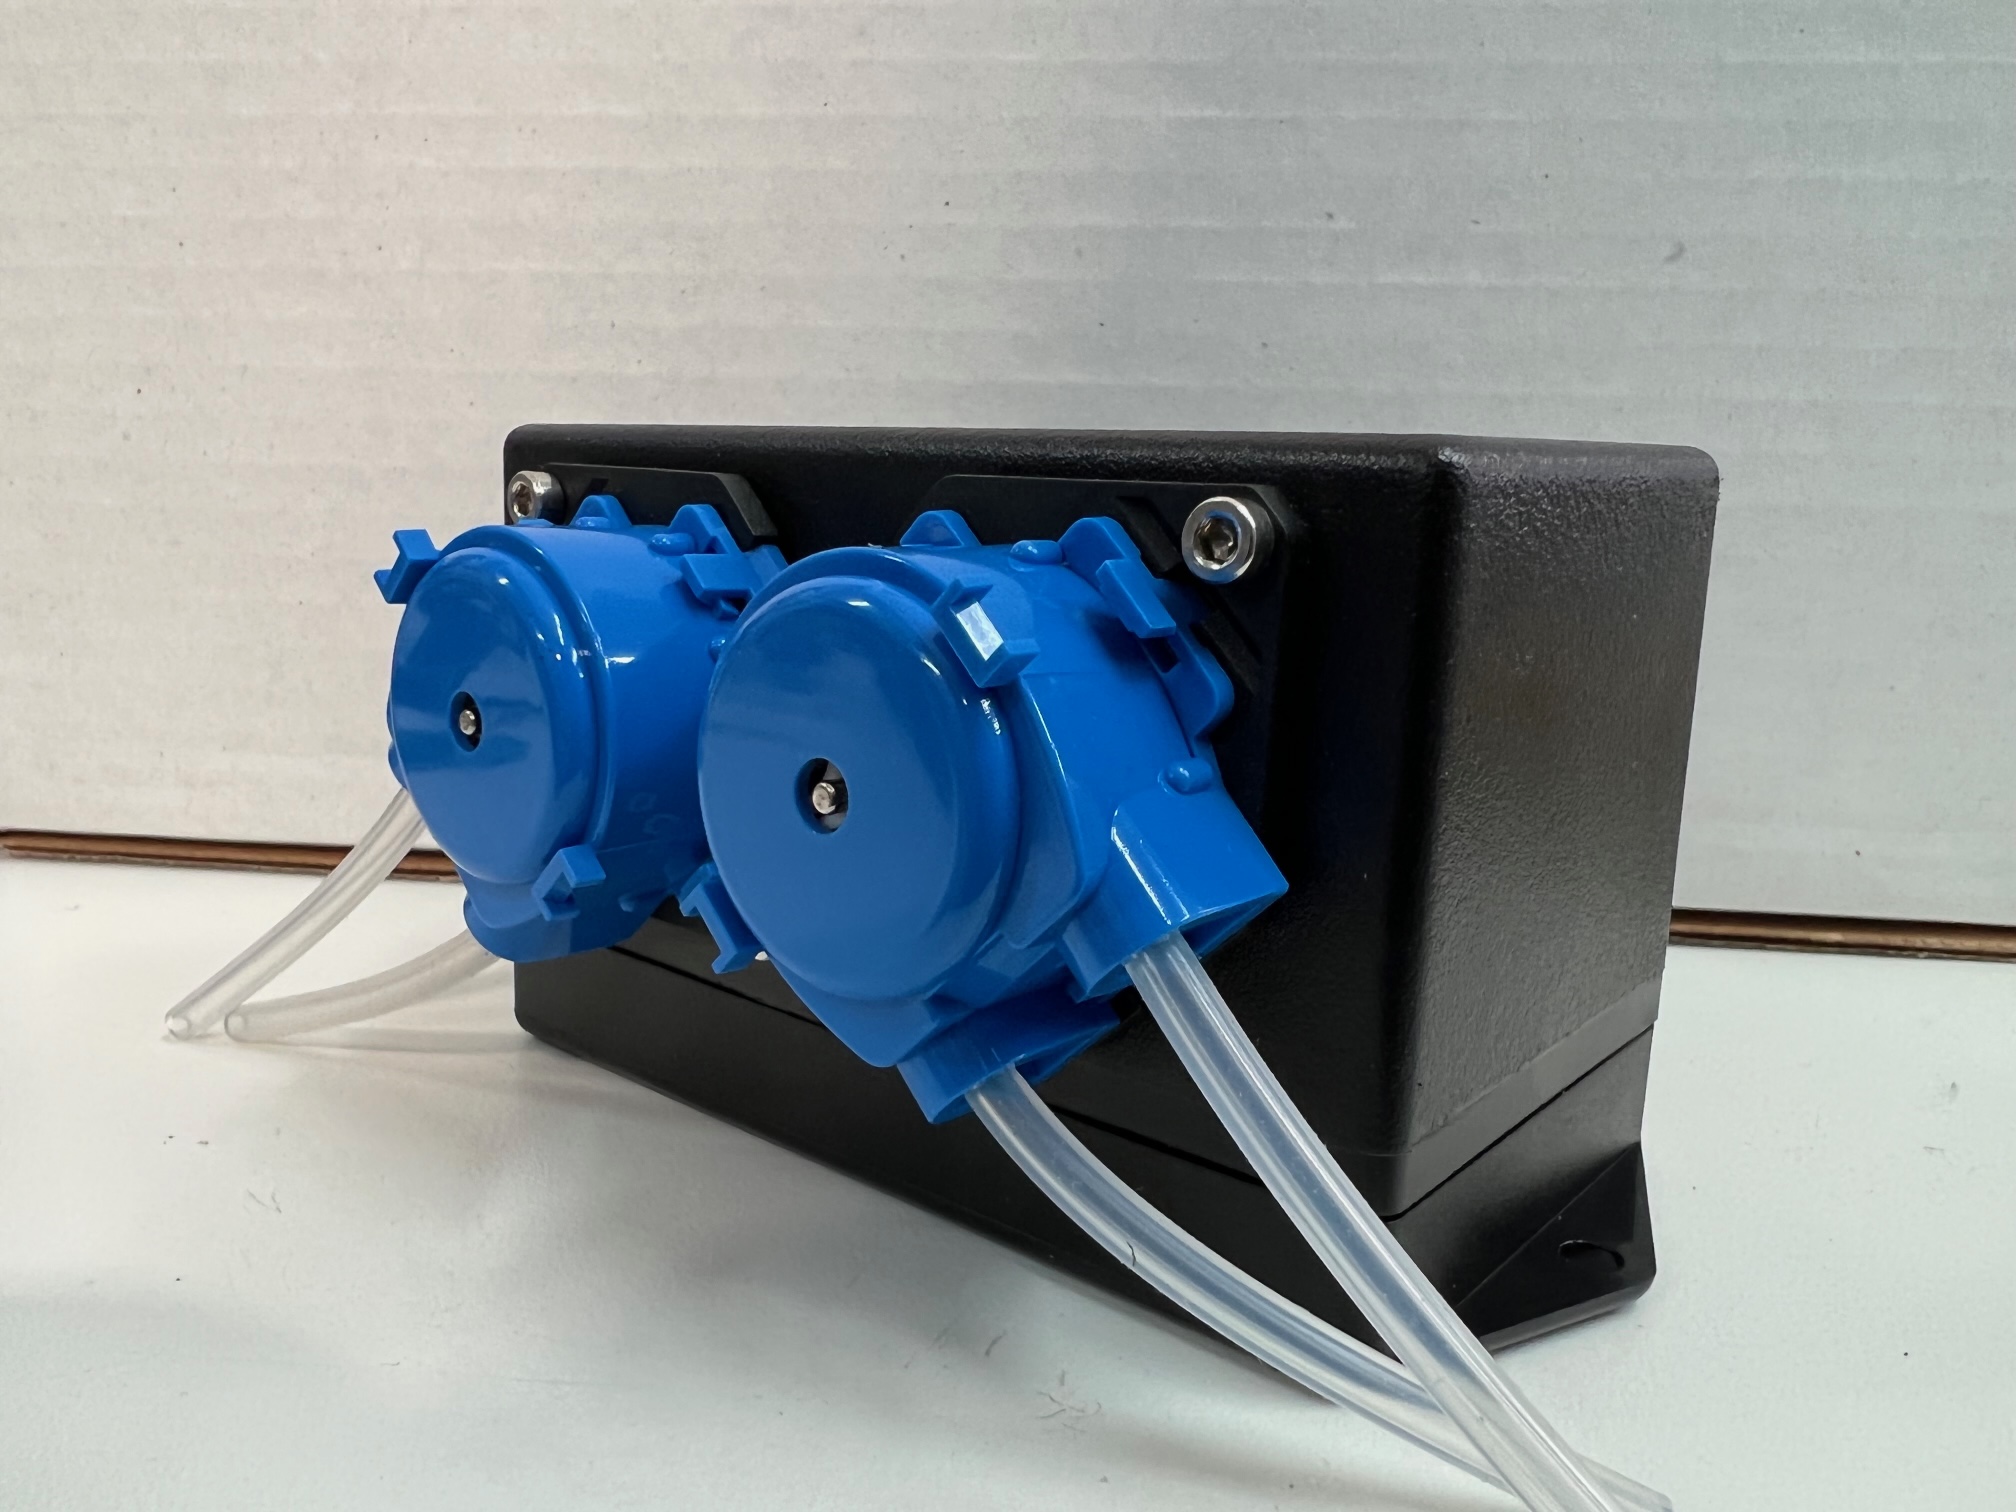
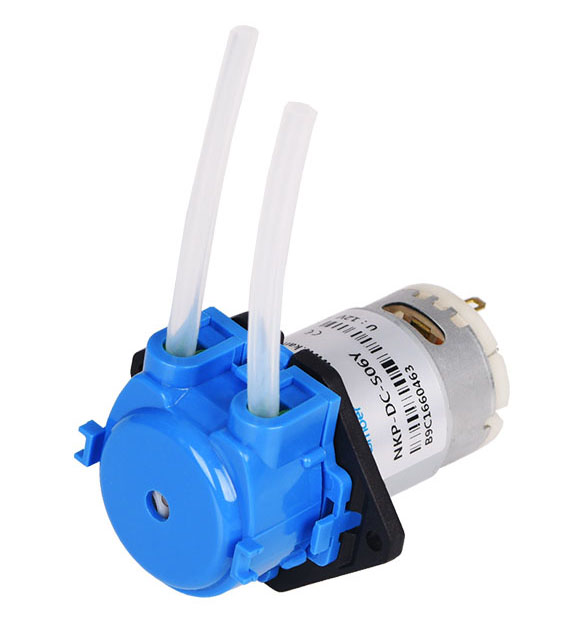
On to the next rapid developed product, the dual doser pump! Below is a rough mechanical mockup as parts are still landing (cases, pumps), just so you can follow along a rapid concept to product story. I have fun writing some of these little journals, what can I say.
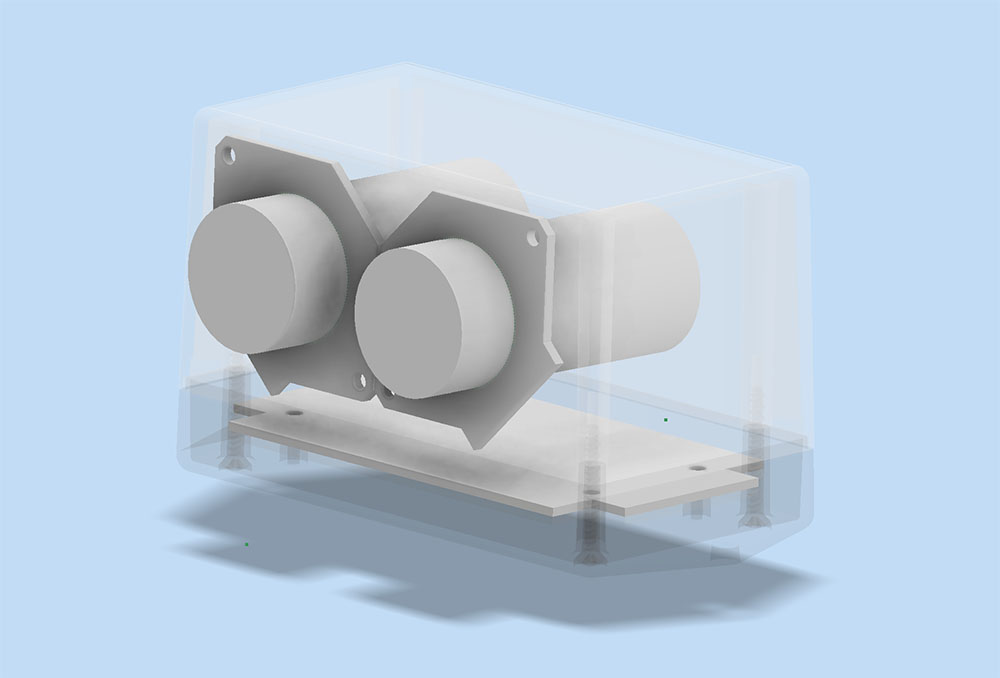
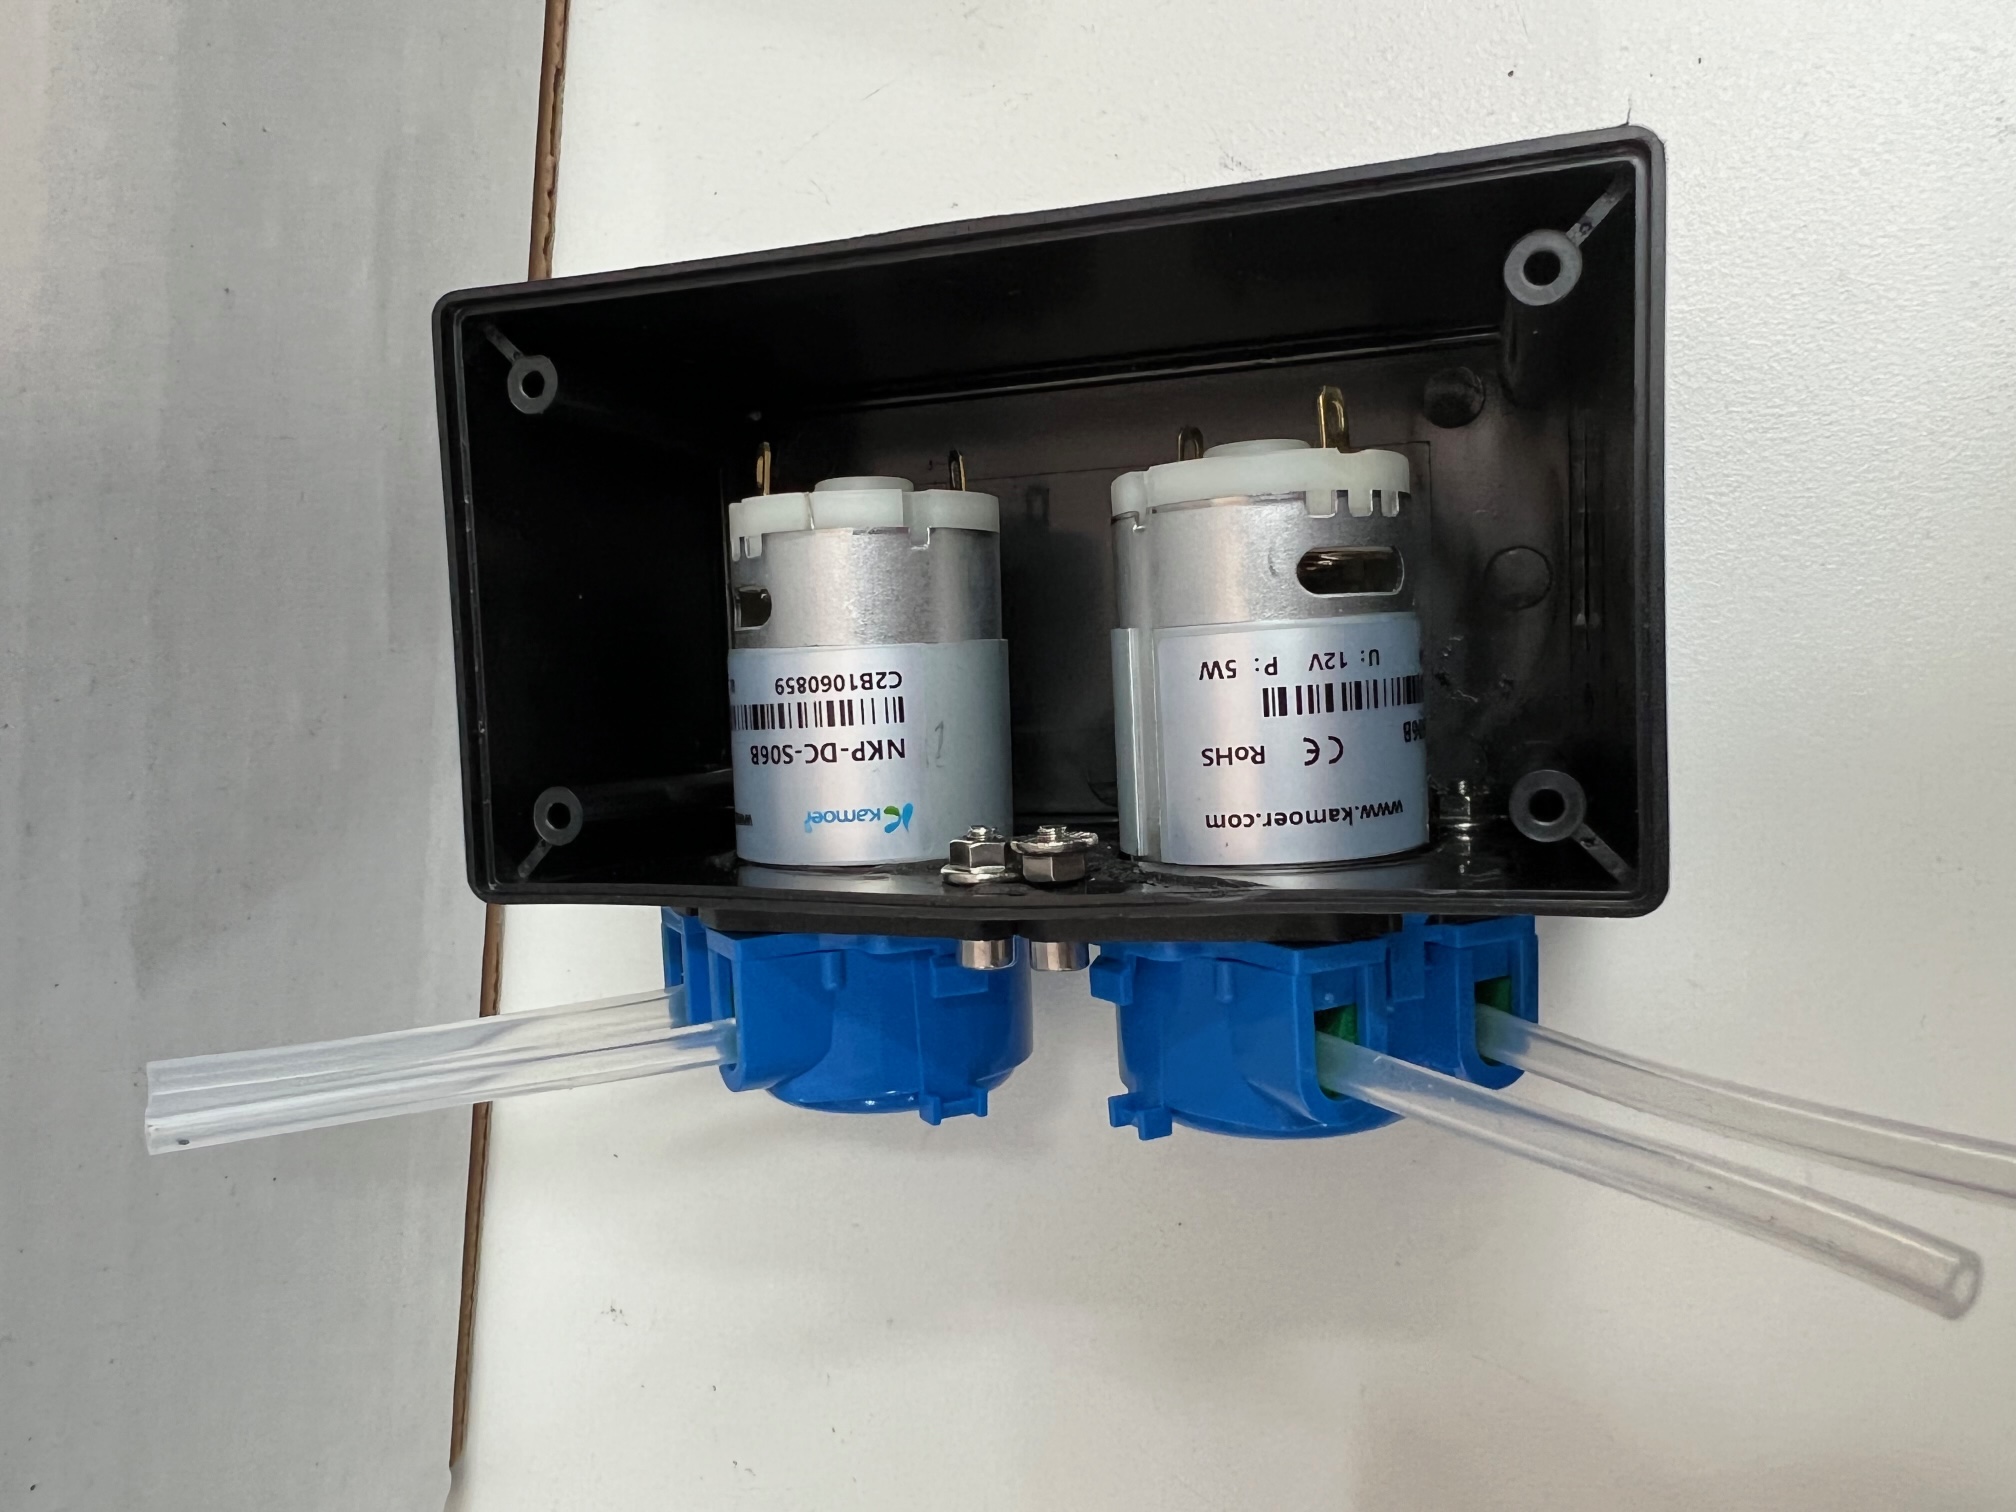
Featuring a pair of inexpensive DC brushed motor peristaltic pumps, this thing will be built from a pile of parts I already have, which ensures it can be finished this side of 2022.
On to the details:
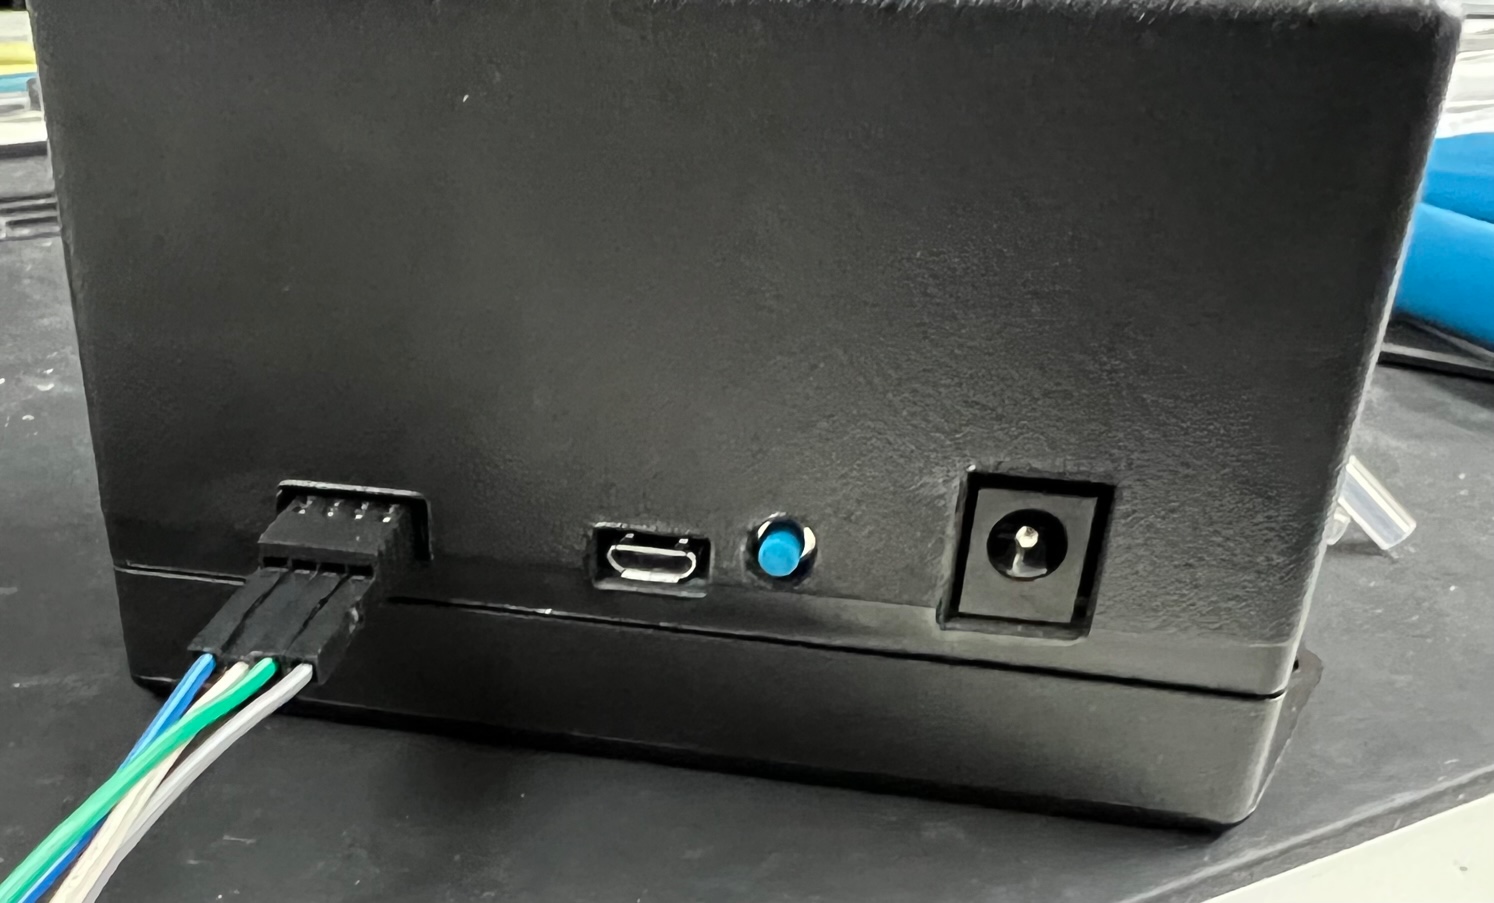
- 12V powered!
- USB connection to a Raspberry Pi! Need to add more? Out of USB ports? Just add a USB hub.
- Controllable with Reef-Pi! (File driver at the moment)
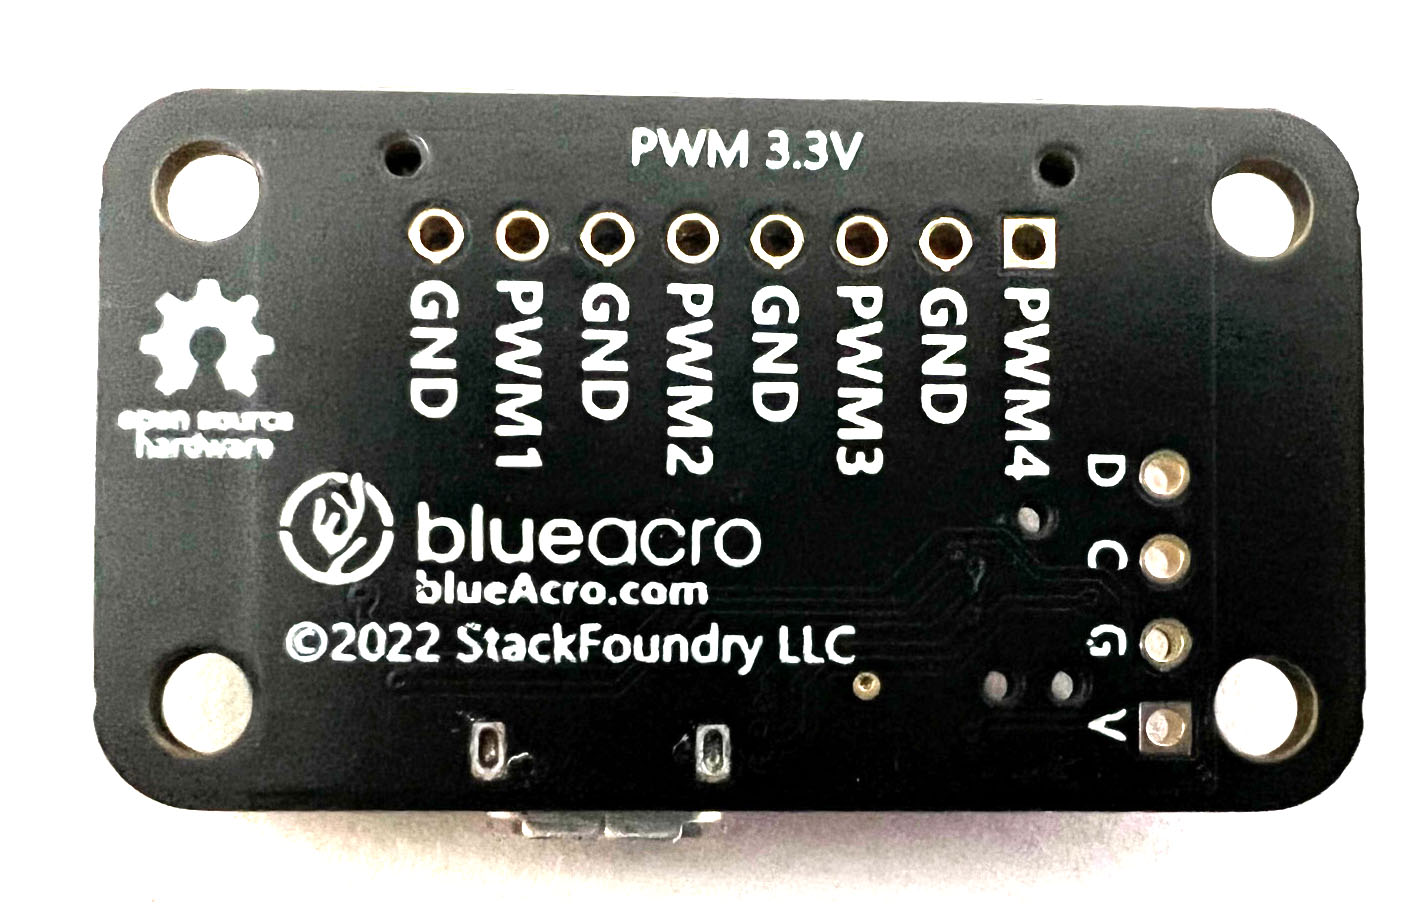
- PWM doser control!
- Inputs for level switches!
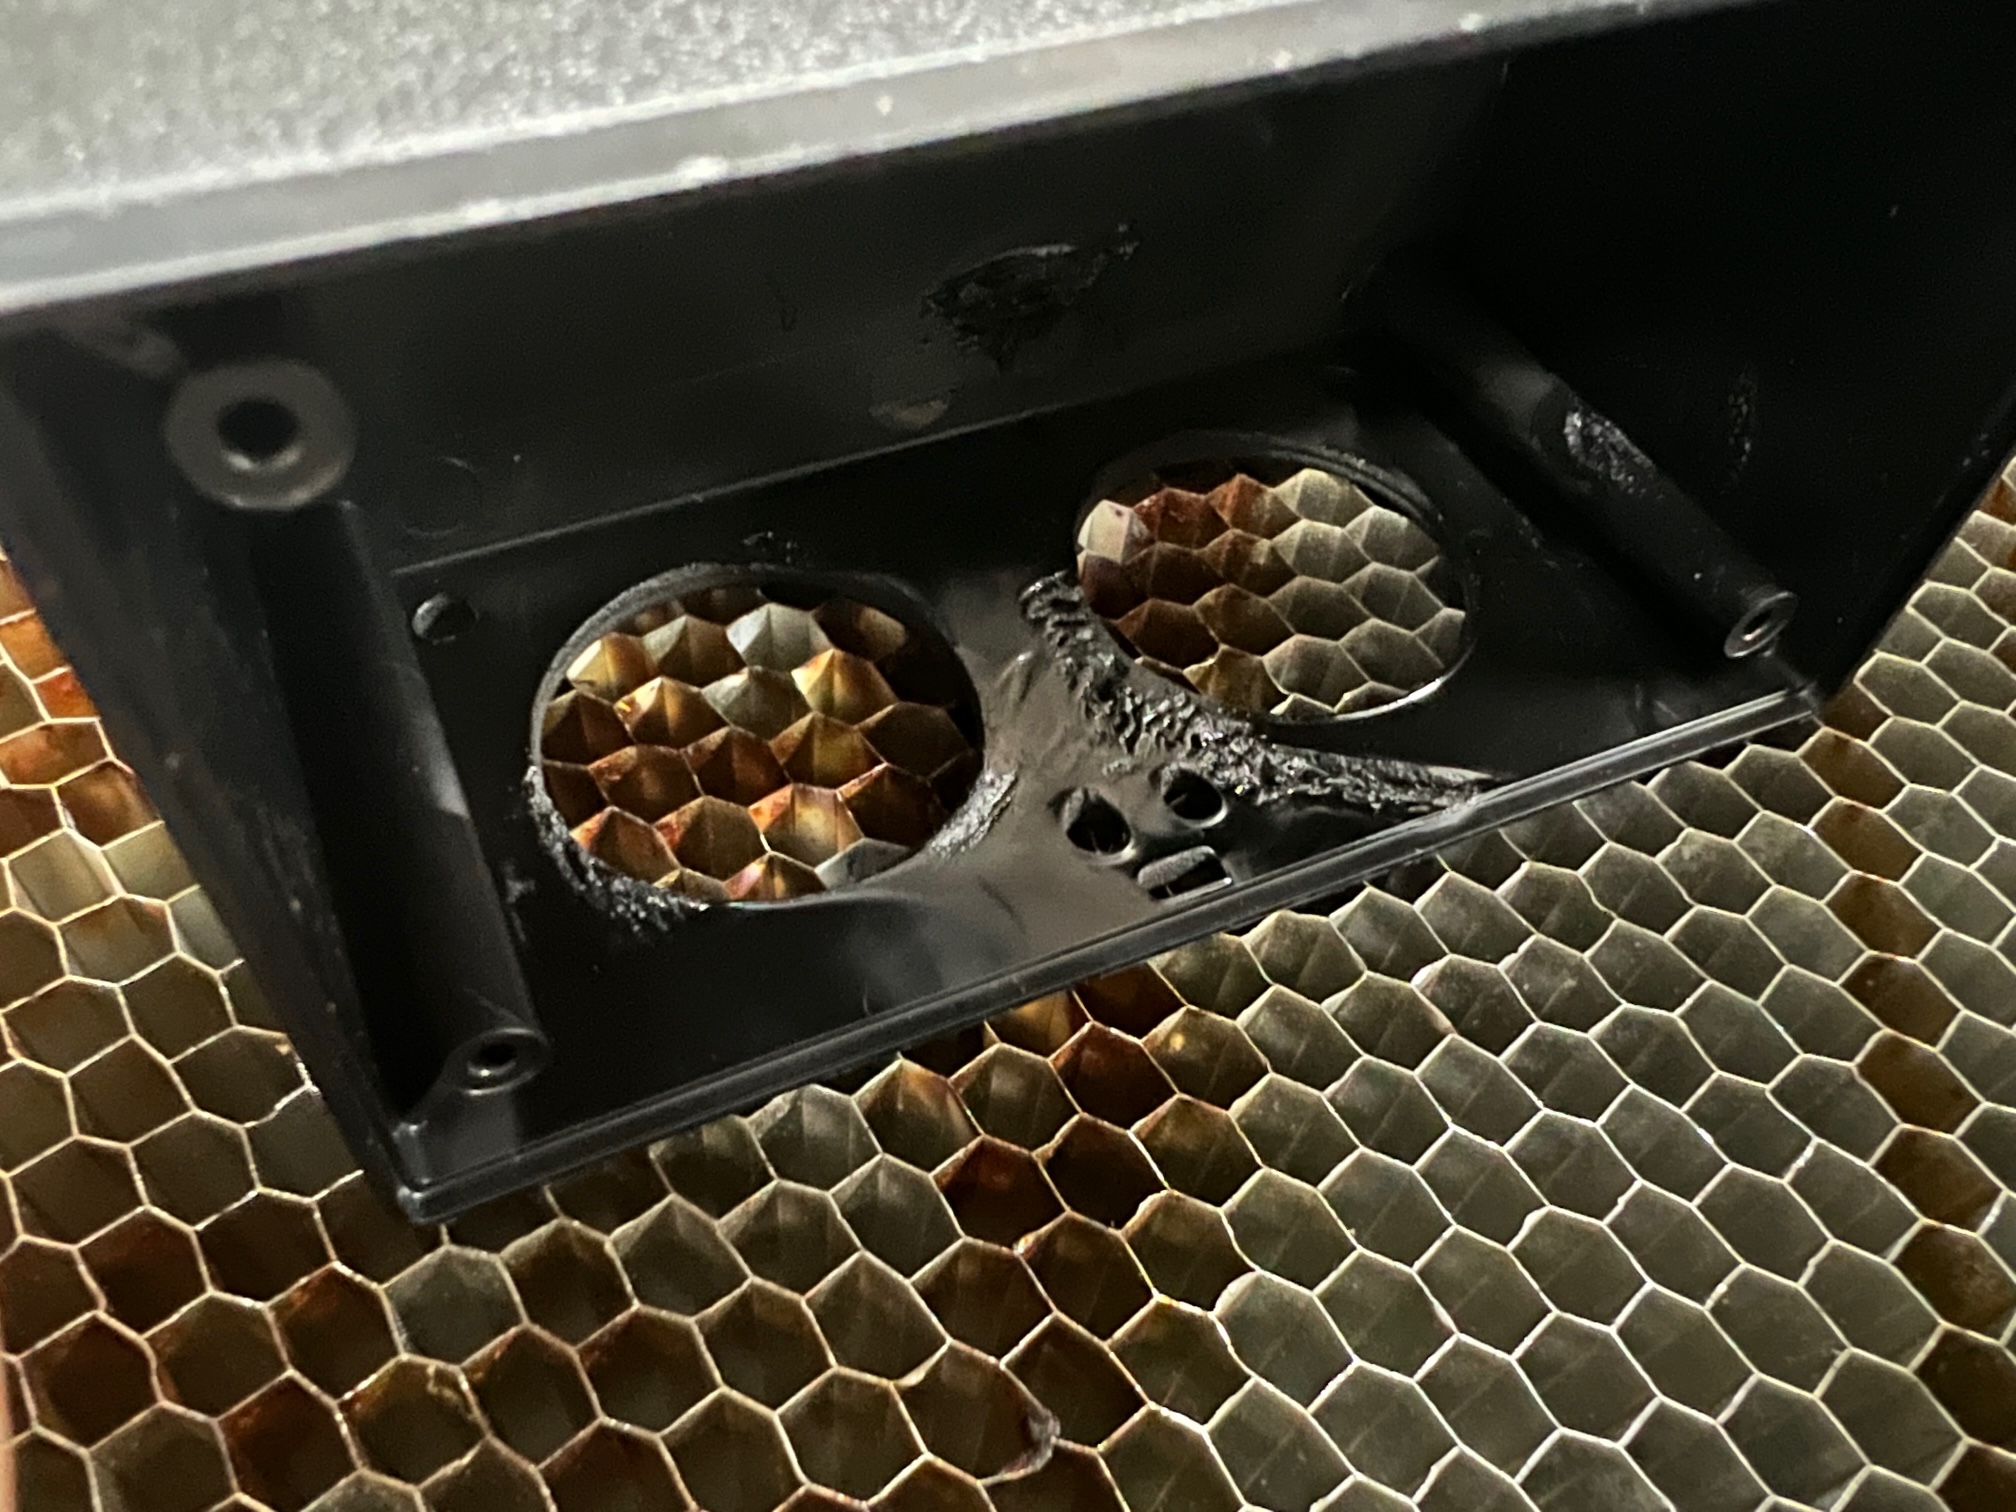
- All in a swanky off the shelf box, CNC machined / laser cut
Pumps used are the inexpensive Kamoer NKP series, making it very budget friendly.
I've also spent a lot of time with a prior prototype I didn't share too much on, which is a reliable analog level sensor based on a low pressure sensor. These parts were unobtanium for much of the pandemic, but now I happen to be sitting on a whole reel of MPXV7002DP and by darn I'm going to put them in something. In addition to giving mechanical on/off sensing via float switches (a great backstop), adding an analog sensor gets you about 8" of level sensing (with some uncertainty due to temperature changes over time). Useful for building a batch auto water changer, or checking if you're low on 2-part in your doser, or even tracking how much you've used.

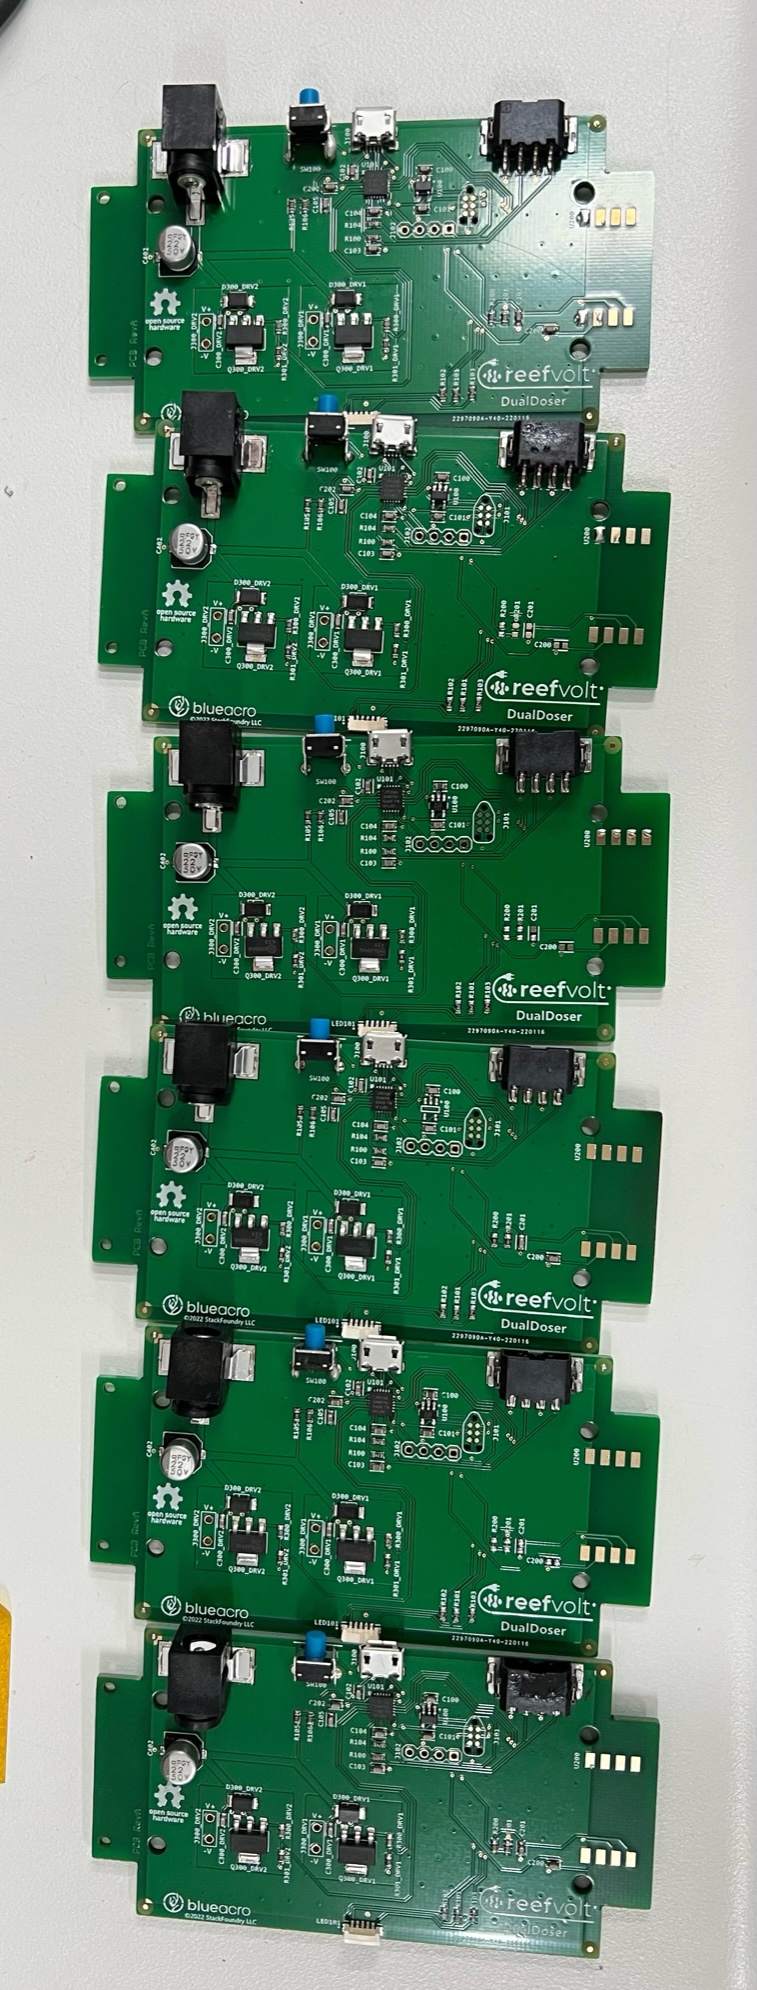
More on the controller PCB soon...
- Prototype built
- Firmware complete
- ReefPi integration ongoing
---
You may remember me from past threads, including the omni-thread talking about the Reef-Pi Pico (a veritable collectable now!), and follow on with the USB 8 outlet power strip (delayed for all eternity on some critical semiconductors, though I'm ready to simplify it out of spite), the ReefVolt MiniCore USB controller (pH!, 1wire! on USB!)
On to the next rapid developed product, the dual doser pump! Below is a rough mechanical mockup as parts are still landing (cases, pumps), just so you can follow along a rapid concept to product story. I have fun writing some of these little journals, what can I say.
Featuring a pair of inexpensive DC brushed motor peristaltic pumps, this thing will be built from a pile of parts I already have, which ensures it can be finished this side of 2022.
On to the details:
- 12V powered!
- USB connection to a Raspberry Pi! Need to add more? Out of USB ports? Just add a USB hub.
- Controllable with Reef-Pi! (File driver at the moment)
- PWM doser control!
- Inputs for level switches!
- All in a swanky off the shelf box, CNC machined / laser cut
Pumps used are the inexpensive Kamoer NKP series, making it very budget friendly.
I've also spent a lot of time with a prior prototype I didn't share too much on, which is a reliable analog level sensor based on a low pressure sensor. These parts were unobtanium for much of the pandemic, but now I happen to be sitting on a whole reel of MPXV7002DP and by darn I'm going to put them in something. In addition to giving mechanical on/off sensing via float switches (a great backstop), adding an analog sensor gets you about 8" of level sensing (with some uncertainty due to temperature changes over time). Useful for building a batch auto water changer, or checking if you're low on 2-part in your doser, or even tracking how much you've used.
More on the controller PCB soon...
Last edited: