SCA 150 Build

Sqwertyl

Active Member
View Badges
Joined
Jun 18, 2020
Messages
146
Reaction score
178
Rating - 0%
0   0   0
So I've never done a build thread while it was currently taking place, step by step. Figured I'd start today and update along the journey. This is an upgrade from my little 65 gallon tank.

I've been eyeballing the SCA 150 for about 2 months, wondering whether or not I could justify dropping 1100 on a tank and then another 3-500 building the stand and all the larger equipment that goes with having a larger tank. And then I stumbled across a post on marketplace for the tank and what looked like a decent stand for $700! I jumped on it (apparently along with a long list of other people). It was about 4 hours south of me so I rented a 5'x8' trailer and took a trip south. I was nervous having never moved such a large and seemingly delicate piece of furniture before, but truthfully it wasn't that bad.

I got it home in one piece! My wife and I unloaded the stand and there a bit of work I need to do to make it "mine", but it's fairly solid. It was on just 2x6 crossbeams, which I was unhappy with, so I cut a piece of 3/4" ply and set that on top. I bought a yoga mat to go in between that and the tank. Moving the tank inside was the hardest part..

I had a buddy come over to help move the tank, and I'm still not pleased with how it sits on the mat, but it won't see water for a while so there's time to fix that. The tank sits about 41" high which is awesome, I don't like the look of those 31" stands where I have to lean over to look inside (I'm 6'5"). This tank looks massive in my little 1400sqft house!! I'm super excited to see this tank come together! Pictures to come.
 
OP
OP
Sqwertyl

Sqwertyl

Active Member
View Badges
Joined
Jun 18, 2020
Messages
146
Reaction score
178
Rating - 0%
0   0   0
20210207_212842.jpg
20210206_212503.jpg
 
OP
OP
Sqwertyl

Sqwertyl

Active Member
View Badges
Joined
Jun 18, 2020
Messages
146
Reaction score
178
Rating - 0%
0   0   0
Started working on the stand today. The more I take it apart the more I wish I had built my own. I have some work to do to level the top, there's a quarter inch too much plywood propping up the left side throwing the whole tank off level.

I took all the doors off and my wife decided it needs to be shaker style doors to match the house, I'm ok with that. I have one door currently in glue up and will finish the other when I get some more time off work. (12 hour shifts leave little time on work days ).

Decided to make the "door" on the side of the stand into an actual door with a control board inside. I guess the previous owner used that as an entry point to put his sump in.

Also planning on doing a floating canopy which I am just going to do a facade around a wire shelf above the tank.

Aside from that, I picked up a 40breeder today on trade credit since there are none used within 2 hours of my location, purchased all of my plumbing except a few unions, and I got my jebao dcp-8000 (pump is enormous). I'm waiting on an acrylic filter sock holder for the 40b and new loc line modular hoses in 3/4" since I didn't like the idea of the stock 1/2" reducers on the SCA tank.

All in all it's turning out to be a lot more work than I thought to set this up, but I want to do it right the first time around instead of settling like I normally do.
20210211_192235.jpg
20210211_192246.jpg
20210211_192342.jpg
20210211_193537.jpg
20210211_200048.jpg
 
OP
OP
Sqwertyl

Sqwertyl

Active Member
View Badges
Joined
Jun 18, 2020
Messages
146
Reaction score
178
Rating - 0%
0   0   0
Got some decent progress today, excited for my 3 day weekend coming up. I'm hoping to have this thing ready for water within the next month. This is my first tank of this size and I'm realizing that every step is infinitely longer than smaller tanks.

First I finished the construction of my remaining two doors. I won't put a finish on them until I have the doors and stand prepped. Had to run around town to pick up my sump baffles and some pipe cutters, a step bit and a roller to paint the wall behind the tank.

My wife asked for an ice cream cake from coldstone for valentines day so we picked that up too (did not live up to the hype, especially for $40 for a 6" cake).

Got home and immediately went to work putting the baffles in the sump. They're definitely not my best work but I'm sure they'll hold water lol.

I had some work buddies come over for leg day and they helped me move the tank again so I could belt sand the 2x6s level. I also put a thicker yoga mat under the tank to ease my mind a little more.

After leg day, I removed the rear center 2x6 and all I can say is wow. There was only one threaded screw in this support. I don't get it. I put some pocket holes in and reinforced with a 1/4" metal bracket cause why not.

I also did some interior painting and lighting in the stand prior to all this.

Last but not least the start of plumbing. I hate it. Making the return standpipe was a pita. What comes with this tank was 1/2" loc-line but I wanted 3/4" so I had bore a larger hole in the overflow and make the entire thing all from scratch (previous owner also destroyed the bulkheads and they were cemented so no choice really). I spent the better part of an hour cutting pvc trying to get it perfect, and it looks great, we'll find out when she's filled.

All in all things are looking promising. I'm still waiting on my check valve so I gave up for the night. Also running low on funds, so next up is what I have supplies for already which is the rest of plumbing, the shelf, the canopy and putting a finish on everything.

20210216_235043.jpg
20210216_235050.jpg
20210216_235113.jpg
20210216_235120.jpg
20210216_235131.jpg
20210216_235237.jpg
 

benapilot

Active Member
View Badges
Joined
Feb 15, 2015
Messages
490
Reaction score
584
Location
Wasilla, Alaska
Rating - 0%
0   0   0
Tank and stand for $700? Totally worth the drive!

Looks great!

That 40 gal sump will be so nice with all the room in there!
The Jebao pumps are solid, quiet pumps; and they don’t break the bank (cheap enough to buy another and have a spare on hand).

Ill be following along!
 

Zach B

Noo-Psyche Sales Rep
View Badges
Joined
Nov 7, 2020
Messages
4,904
Reaction score
32,601
Location
Slinger, WI
Rating - 100%
3   0   0
Awesome build! I am also thinking of doing a floating canopy. Following along :)
 
OP
OP
Sqwertyl

Sqwertyl

Active Member
View Badges
Joined
Jun 18, 2020
Messages
146
Reaction score
178
Rating - 0%
0   0   0
Not sure how much more I'll get don't today but decided I wanted to get this canopy done.

I had a 75 gallon when I first started this hobby and simply used a wire closet shelf to hang my lights. I want this to look a little nicer, and have learned a little bit since then, and I have a decent amount of tools now.

I originally planned to build a box to enclose the wire shelf except the bottom, rout the inside for a plywood cover insert, add fans for ventilation etc, but I happened to like how accessible it was while I was fitting it, and it saved me a lot of time and effort for the same look.

In case anyone might be interested in this idea, it's simply 1x8" primed pine with pocket holes, and it hangs in the front by curtain rod brackets (found them in the garage and they worked surprisingly well), and rests against the wall.

I might work on the stand today, currently waiting for my wood filler to cure. Maybe another post today?
20210220_121229.jpg
20210220_122440.jpg
20210220_123610.jpg
20210220_125424.jpg
20210220_130934.jpg
 
OP
OP
Sqwertyl

Sqwertyl

Active Member
View Badges
Joined
Jun 18, 2020
Messages
146
Reaction score
178
Rating - 0%
0   0   0
Got a little more done on the stand. Night shift has my sleep schedule all out of whack so I'm calling it quits right at 4am.

Finally got the trim put on and all of the holes filled (some that I just can't be bothered, previous owners construction ).

Prepped all my doors earlier and the stand so I decided to prime everything at 2am when I should've gone to bed lol.

Doubt much will take place in the next few days, but looking forward to see how this behr cabinet enamel turns out (then I get to redo my whole kitchen to match this shaker style per the wife).

Also not looking forward to plumbing. This will be my first time plumbing in a manifold for my gfo and carbon reactor, and an emergency drain, wish me luck!
20210221_032432.jpg
 
OP
OP
Sqwertyl

Sqwertyl

Active Member
View Badges
Joined
Jun 18, 2020
Messages
146
Reaction score
178
Rating - 0%
0   0   0
Whew! I am starting to see the finish line. The stand looks amazing, I'm thrilled how it turned out. I still have the hardware to install but I couldn't be happier.

On a whim I decided to dabble with the plumbing and just as I imagined this is giving me anxiety lol. This is the first time I've ever plumbed a tank like this and I'm just scared it's gonna leak somewhere. I am open to any and all input as I won't be gluing this for a couple weeks.

This tank has come a long way and I'm really impressed with how it turned out. I can't wait to fill it up, and my daughter is very excited to finally have a "follow fish" (naso tang), my favorite as well.
20210222_012906.jpg
20210222_012911.jpg
20210222_012758.jpg
20210222_012743.jpg
20210222_012737.jpg
20210222_012733.jpg
20210222_012725.jpg
 

1guydude

Well-Known Member
View Badges
Joined
Dec 19, 2014
Messages
886
Reaction score
766
Location
WA state U.S.A
Rating - 0%
0   0   0
Get some plastic plumbers tape to hang the plumbing instead of the zip ties and screws. The pumbers tape has holes in it so you can screw it down.
Looks great! Id replace the blue and orange loc line with all black.
You seem to be pretty handy. This is great.for the diyer and the pocket. Lol.
Keep at it! Lookin great. Im on the nightshift now too so we can be night hawk buddies or night owls. Lol.
D
 
OP
OP
Sqwertyl

Sqwertyl

Active Member
View Badges
Joined
Jun 18, 2020
Messages
146
Reaction score
178
Rating - 0%
0   0   0
Get some plastic plumbers tape to hang the plumbing instead of the zip ties and screws. The pumbers tape has holes in it so you can screw it down.
Looks great! Id replace the blue and orange loc line with all black.
You seem to be pretty handy. This is great.for the diyer and the pocket. Lol.
Keep at it! Lookin great. Im on the nightshift now too so we can be night hawk buddies or night owls. Lol.
D
I will definitely look into the plumbers tape, didn't know such a thing existed. The blue and orange locline was so much cheaper than black and I didn't think it would make so much of a difference, but it is an eyesore.

Appreciate the input and suggestions. I'm going on 8 years of night shift now (7pm-7am), wasn't so bad when I didn't have little ones, now I live off naps lol.
 
OP
OP
Sqwertyl

Sqwertyl

Active Member
View Badges
Joined
Jun 18, 2020
Messages
146
Reaction score
178
Rating - 0%
0   0   0
Well, working on the tank today has been nightmarish. I am not by any means a plumber but I've done my fair share of watching videos and reading, and nothing prepared me for this lol.

So I came up with a manifold configuration I was happy with and gave me room inside the sump, all was great. I then forgot the nut to my drain line for my valve after gluing, and had to scrap the whole thing. That was my first big mistake. I spent a couple hours breathing pvc cement and had finally gotten everything set up to leak test.

I started pumping in water to the sump to allow my return to send it to the display and everything looked water tight, couldn't help but stop to think man, I'm good.

I got about 20 gallons in and decided to instead just pump directly into the over flow, and that's when it started. Immediately all 3 leakheads started gushing water, I guess my hand tight threading wasn't anywhere near sufficient. I bolted out the back door to turn the water off and hit my shin on a chair, and split my shin open.

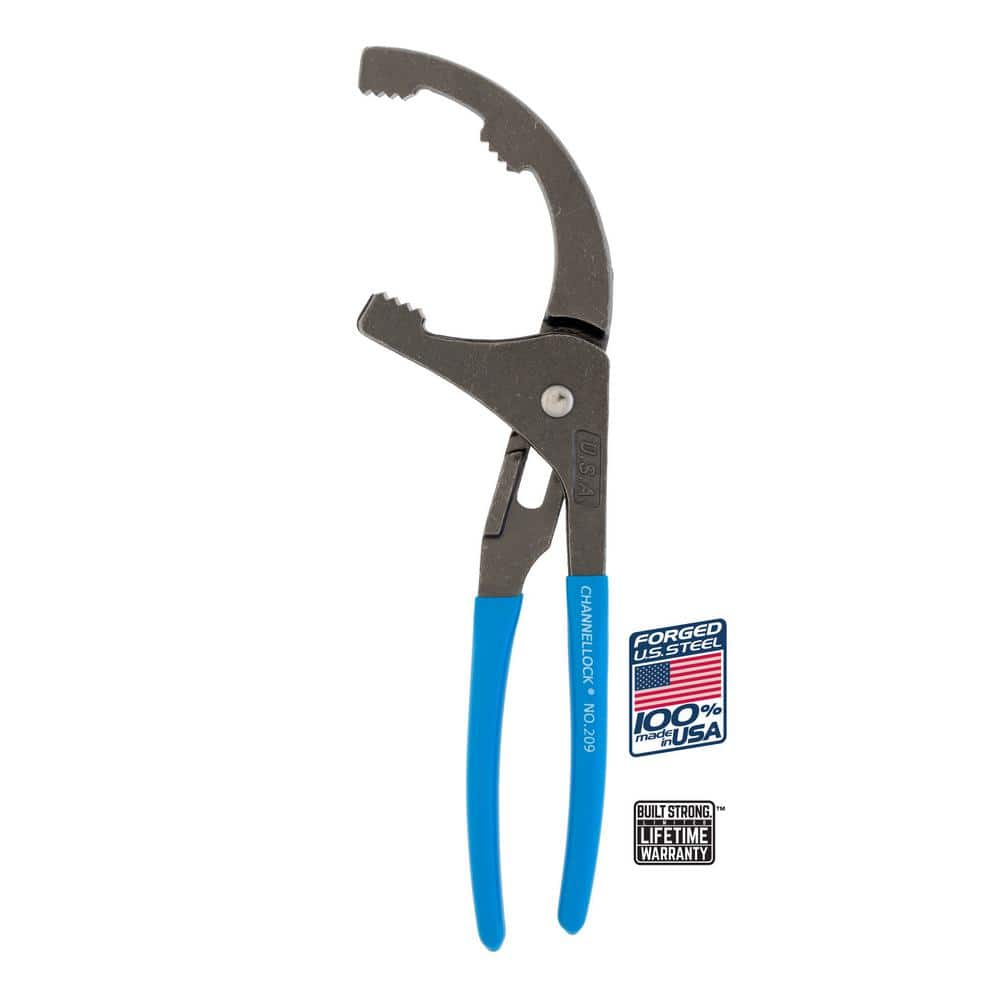
Got the water off and grabbed my channel locks to tighten her up. In the meantime I had shut my return pump off (or so I thought) and had also disconnected the union directly after my vinyl tubing to glue a fitting I forgot. While tightening the bulkheads, feed mode ended and I sent probably 10 gallons straight up in the air. Nightmare.

After listening to the tank gurgle for 30 minutes I finally tuned the flow to allow an almost silent siphon. At this point I realized my bulkheads were still leaking and at a fairly high rate.

I sat under the stand for probably an hour, cussing and mad as can be trying to tighten these bulkheads in the limited space I have under there, with channel locks that are too small because I cannot maneuver the correct size in the tight space. I finally got it down to about a drip every 10 minutes, boy I was getting upset.

It was 10:15 pm and decided I'd try to find some better channel locks at Walmart before they close. Found so groove joint pliers, and I bought both sizes, just in case. They did me no good. So instead I laid in the stand and absolutely butchered the bulkhead nuts with my 1 size too small channels locks and I have gotten the drip to what seems like 1 drop per 45 minutes on 2 and what seems like a seal on the 3rd. I have the bulkheads so tight I'm afraid I'm gonna snap the nut (yes it was incremental not all at once), so I'm at a loss.

Do I keep tightening? Say that like it's an easy feat. If there is a tool for this, I'm gonna feel like an idiot. If there isn't, someone should make one and take it on shark tank cause this has been a disaster for me lol.

Anyhow that's where I'm at, plumbing has a slow leak and I'm slowly trying to tighten until it stops. If I snap a nut, or something similar I feel like I'll have an empty tank sitting here until I can muster up the will to replace all of what I've done in there today.
20210226_033121.jpg
20210226_033142.jpg
 

PanhandleReef

Active Member
View Badges
Joined
Dec 22, 2018
Messages
131
Reaction score
230
Rating - 0%
0   0   0
Every leak I've ever encountered came from a bulkhead. I learned on my first tank to always pour a little water in the overflow and let it sit for a bit before filling the tank. It's much easier to move the tank or sump if need be to get to plumbing and a lot less water to dump out. You may just have something between the seal and glass so make sure you clean it well before putting bulkhead in. BRS sells bulkhead wrenches. They are 3D printed so I'm sure you can find them other places also. Hope you get the leak stopped.
 

Zach B

Noo-Psyche Sales Rep
View Badges
Joined
Nov 7, 2020
Messages
4,904
Reaction score
32,601
Location
Slinger, WI
Rating - 100%
3   0   0
Sorry to hear you are going through all of that, definitely not a fun part. I'm sure you will get it worked out though & that's gonna be a heck of a system :) Good luck & don't give up!
 

1guydude

Well-Known Member
View Badges
Joined
Dec 19, 2014
Messages
886
Reaction score
766
Location
WA state U.S.A
Rating - 0%
0   0   0
 

1guydude

Well-Known Member
View Badges
Joined
Dec 19, 2014
Messages
886
Reaction score
766
Location
WA state U.S.A
Rating - 0%
0   0   0
I have this + the monkey wrenches or channel locks that ur talkin about.
Some people use the really big blue handle channel locks but those r overkill imo.

Your manifold looks heavy. You are connecting it to your downpipes with a union? I would tighten the bulkheads 1st. Than build down.

Sorry wish i could help. I would if i was their.

Its deff a learning curve. After about 3 or 4 tanks you kinda know what your doin. LOL!
Kinda...
D
 

High pressure shells: Do you look for signs of stress in the invertebrates in your reef tank?

  • I regularly look for signs of invertebrate stress in my reef tank.

    Votes: 31 31.0%
  • I occasionally look for signs of invertebrate stress in my reef tank.

    Votes: 25 25.0%
  • I rarely look for signs of invertebrate stress in my reef tank.

    Votes: 19 19.0%
  • I never look for signs of invertebrate stress in my reef tank.

    Votes: 25 25.0%
  • Other.

    Votes: 0 0.0%
Back
Top