The FrankenReefer 450

Hey @Joe Glass Cages , welcome to the party!

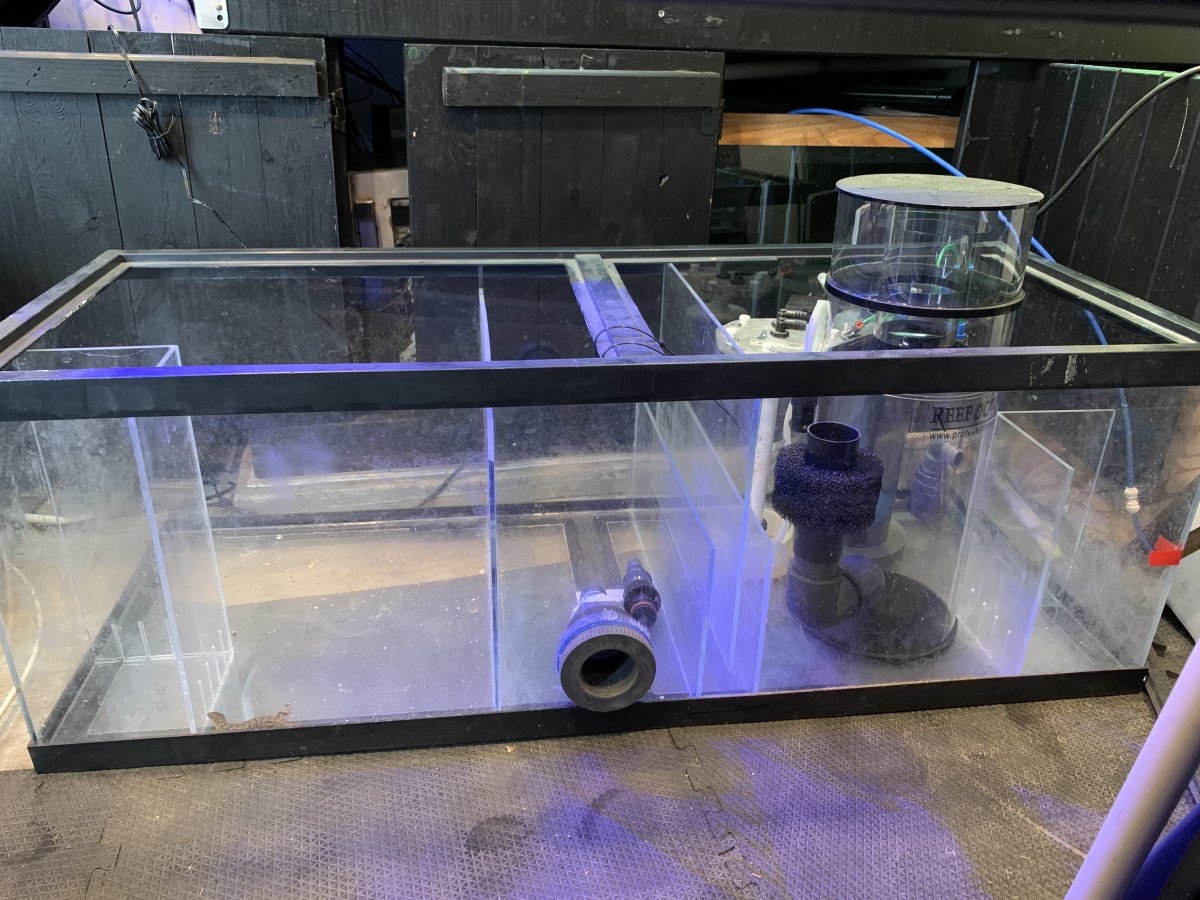
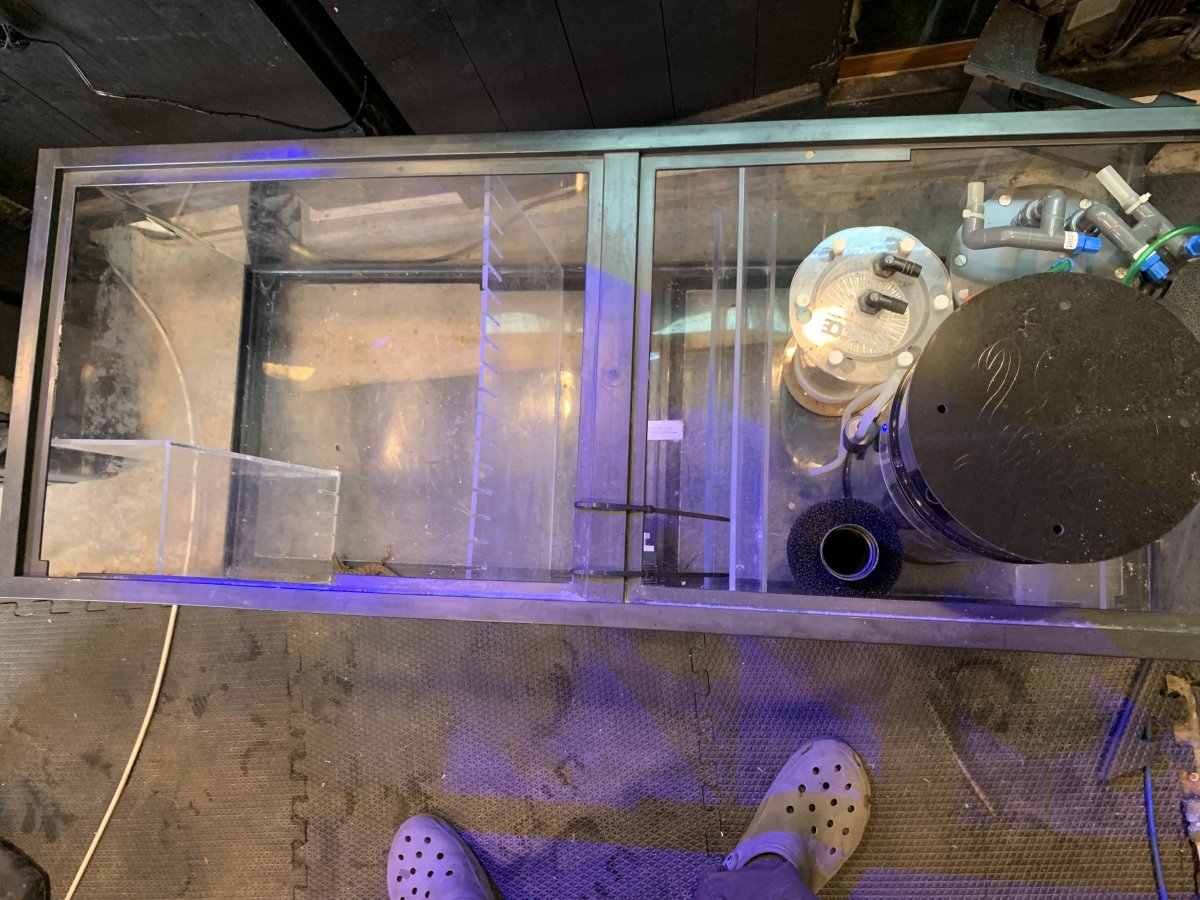
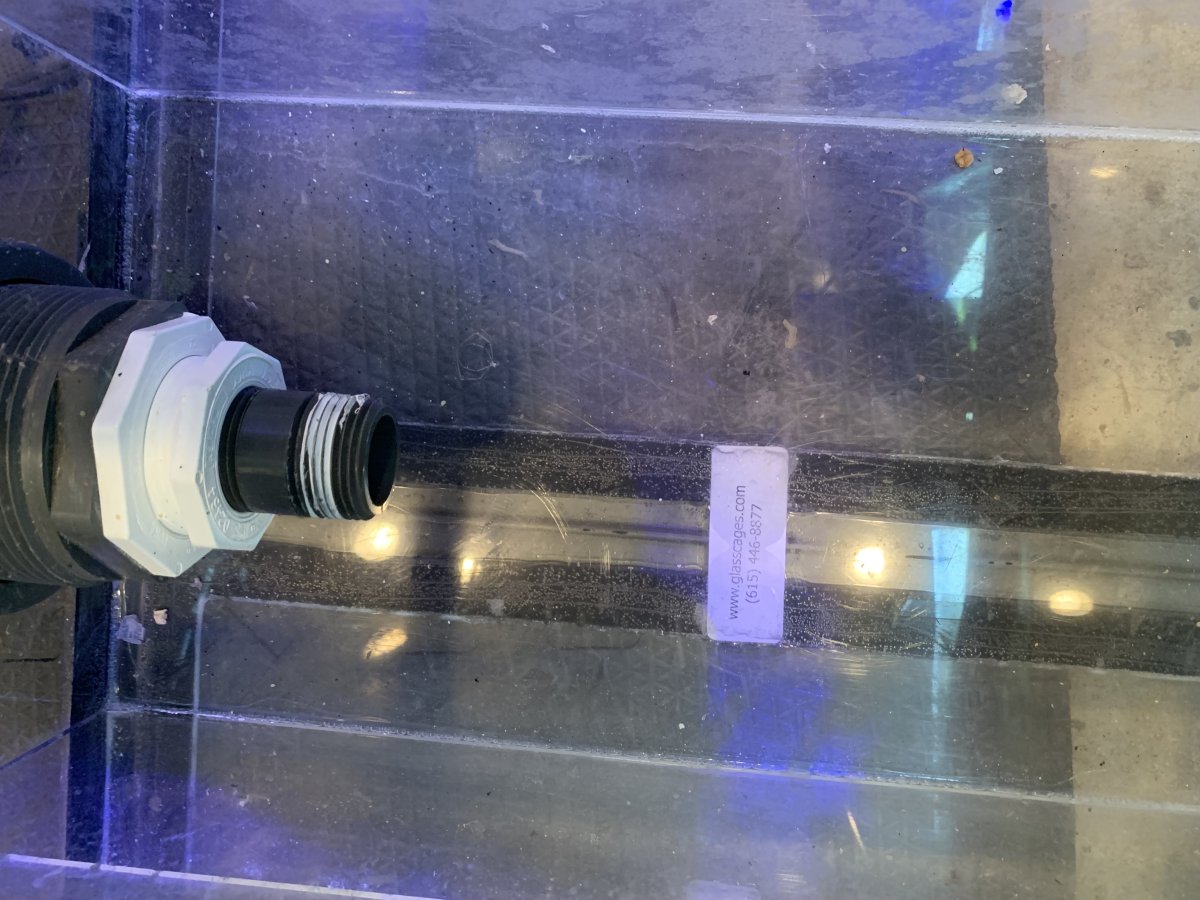
I’ve actually got that acrylic, rimmed, 60G Glass cages sump pulled out right now! As I look at it more and more, I’m not actually quite sure how it was originally plumbed to work…

Care to offer some professional insight on what is likely a trip down memory lane for you?
IMG_0261.jpeg
IMG_0260.jpeg
IMG_0262.jpeg


— it appears to me that this sump has a skimmer chamber on one end, and a refuge chamber on the other end… each chamber is rather large, and each has what appears to be either a filter sock or return pump chamber…

— my best guess is that it this sump was initially designed for a dual overflow tank, with drains on each side, and return in the center… am in the ballpark there?

(Also, I have NO clue how that alligator lizard found its way into the sump… I released the poor little guy in the garden! 🤣 )
wow, I dont recall that one. I really dont. We build so many things to someone else's specifications without any explanation of how they plan to use it.

Sorry, I dont recall the one.....
 
Small update:

— all tools and materials aside from the silicone have arrived!


The portable glass edging machine ended up being a bit of a joke… simply put: damaged in shipping, not as advertised, and does significant damage to a glass edge with even a well dressed grinding wheel. It’s getting returned.

IMG_0404.jpeg
IMG_0406.jpeg


On a lighter note, I did finish building my ugly, but effective disposable vent hood… including duct plumbing and an in-line high velocity fan plumbed in series to the low velocity, high volume roof vent fan.

IMG_0410.jpeg
IMG_0411.jpeg
IMG_0386.jpeg


— A ~2” strip around the entire perimeter of this 5’x2’ hood is all that can intake air, keeping surface air speeds high over the large hood surface area…

— I’m still considering adding another 6” duct straight through the center of the hood to droop into the tank, preventing negative pressure inside the tank while venting fumes, and enabling me to direct fresh air to designated areas within the tank!


Next steps:

— I’m going to try to carve out some time tomorrow to get back on the glass saw. Trimming overflow box panes, and cutting the requisite panel out of the donor R425’s 10mm bottom pane…

— assuming all goes well there, I’ll likely try a few test 6mm scrap glass laminations with ASI 502 silicone I have on hand already, leaving me better prepared to start tackling overflow box laminations early next week (once the case of Momentive RTV108 arrives)!

— I then need to cut down my assembly table’s 8”, to 30” tall, allowing me to comfortably reach in the tank without a step stool at ~52” tall to tank rim…

— next, I’ll need to rope a buddy into helping me lug this ~220lb tank out to the garage…

— then, I can proceed with tank glass cleaning/prep, and execute my bottom pane lamination, clamping from bottom of table to top of a lumber block across top of glass lamination… excess extruded silicone will be cut from bulkhead holes after curing, barring drilling holes in the assembly table to tool drilled holes from underneath while silicone is still wet…

— once the big hurdles related to overflow box and bottom pane lamination are cleared, I can move on to the “relatively straightforward” part: installing glass bars and rods to compose top and bottom eurobraces, top center braces, and vertical seam reinforcements!
 
I’m going to try to carve out some time tomorrow to get back on the glass saw.
Well, that took longer than expected! Life does love to get in the way of personal projects…

I threw a few hours at it this evening, thoroughly scraping/scrubbing all six overflow panes of factory Red Sea silicone… then, I very carefully made eleven trimming cuts on the glass saw!

IMG_0461.jpeg


— 2x 1/4” width trims off two of four overflow box side panes (I picked the two worst factory cut edges between the four panes to trim.)

— 1x ~1/2” width trim off one large front overflow pane.

— 2x glass notch wings trimmed off same narrowed front overflow pane.

— 6x 3/8” height trimming, every pane.

Because I don’t have any spare smoked 6mm (~1/4”) glass in stock, I did these cuts the slow/safe way; setting blade depth to achieve 1/32” depth of cut on each pass, before finally making a full depth cut when there was ~1/16” of glass thickness remaining. Using this technique, I was able to achieve consistent ground glass remains as thin as .008” (1/128”) without having them fracture off my work piece.

I ran out of both energy, and daylight to get into cutting the bottom pane of the R425XL today… but, that’s probably for the best, considering that I should really do a test fit of everything I have cut already to confirm exactly what size piece I’m going to need from the R425XL…


— next up: test laminations, then overflow glass laminations and bottom pane lamination!

— a case of Momentive RTV108 finally showed up, so the only things holding me back now are help to move the tank onto my assembly table, and raw time!
 
Small update:

— no significant progress as of yet, work has been busy, and several injuries to the hands/arms have left me hesitant to do high precision tasks like running the wet saw…

— I have acquired industrial grade acetone (>=99% purity)… (the technical grade acetone available at local hardware stores/etc is typically 95-99% purity, despite what the label might say…) this should help with the glass prep near intact silicone seams, prior to the final 99.9% anhydrous IPA prep!

— I have taken a deep dive on the actual cure process of RTV silicone, and decided to do a strip lamination on the overflow box panes, vs. slab laminating. This will yield a ~21 day curing time, vs. 2+ months curing times for a 9.5” wide slab lamination… (single-part Room Temperature Vulcanizing (RTV) silicone requires some relative exposure to atmospheric air to actually cure; if a slab is made too wide, you start seeing the ~1mm/day cure rate some quote…)

— I plan to make duplicate laminations on scrap glass to match both the overflow panes, and bottom pane doubler laminations. These duplicates will be cut and sampled prior to removing the FrankenReefer from the assembly bench for water testing, ensuring a full cure has been achieved.

— I’ve revised the top reinforcements to stack two layers thick; center braces under eurobrace. This adds a tremendous amount of strength to the center brace’s silicone joints. However, it does mean dropping the overflow box height probably another ~1/4”, just so waves aren’t lapping on the center braces! (Good thing I have exactly the tool for that job!)
 
Finally, an update:

— I found some time last night to make my final trim cuts (2mm lamination seam thickness compensation) on the overflow box short side panes, those went very smoothly!

— I set up, marked out, aligned, and shimmed the 10mm R425 bottom pane for cutting last night, then saw that it was nearly 9pm already… so that got vetoed to avoid disturbing neighbors (thanks daylight savings…)

IMG_0646.jpeg


— I got back on the 10mm bottom pane again this evening, and got 16.625” of it cut cleanly with a helper spotting the long side to prevent it falling… this was done 1-2mm per-pass, grinding an ever deeper groove until I had maybe 2-3mm of glass thickness remaining, and it split cleanly along my groove!

IMG_0647.jpeg


— Now, the hard part’s over, and I was able to comfortably work by myself on the remaining ~30” pane… so, I repeated the progressive grooving method, and managed to remove another clean 16.625” pane segment!

— from here, I spun the remaining 13”x~21.5” piece of glass with holes 90 degrees, reset my saw, and did a third round of progressive grooving, successfully ending up with this 13.120”x 5.060” doubler plate!

IMG_0648.jpeg
IMG_0649.jpeg

(Yes, the holes are off-center… that’s red sea’s factory configuration, not my sloppy craftsmanship! — I took the dead center of the bottom pane out, equidistant from tank centerline and each overflow box side!)

As you can see, this was then beveled as-needed, and will be sanded down 1.2mm (~1/16”) on each saw cut edge to remove any potential micro fracturing.

IMG_0651.jpeg

Fits like a glove!

— for edge sanding, the manual diamond wet sanding block method seems to be a fools errand; it’s simply too slow… removing .5mm of material from 6mm thick glass along a 20” edge took 15mins with a 60grit block…and, the portable edge grinding machine was a joke… so, figured I’d try out something a bit different; diamond sanding pads for multi-tools!
image.jpg

I already own several very nice vibratory multi-tools, so I’m hoping just switching the sanding pad type will get me through the bulk of the material removal, before I revert back to manual diamond block wet sanding for 200+ grit finishing passes, and arris forming! (Only a test piece of glass will tell if this is another useless method, or if it’s worth pursuing… maybe I’ll have time for that tomorrow night…)


— finally, it sounds like I’ve got a buddy roped into helping me move the FrankenReefer into the garage, and onto the assembly table by this weekend, so I should be able to begin the actual assembly process in the coming week!
 
Last edited:
Finally, and update:

— I found some time last night to make my final trim cuts (2mm lamination seam thickness compensation) on the overflow box short side panes, those went very smoothly!

— I set up, marked out, aligned, and shimmed the 10mm R425 bottom pane for cutting last night, then saw that it was nearly 9pm already… so that got vetoed to avoid disturbing neighbors (thanks daylight savings…)

IMG_0646.jpeg


— I got back on the 10mm bottom pane again this evening, and got 16.625” of it cut cleanly with a helper spotting the long side to prevent it falling… this was done 1-2mm per-pass, grinding an ever deeper groove until I had maybe 2-3mm of glass thickness remaining, and it split cleanly along my groove!

IMG_0647.jpeg


— Now, the hard part’s over, and I was able to comfortably work by myself on the remaining ~30” pane… so, I repeated the progressive grooving method, and managed to remove another clean 16.625” pane segment!

— from here, I spun the remaining 13”x~21.5” piece of glass with holes 90 degrees, reset my saw, and did a third round of progressive grooving, successfully ending up with this 13.120”x 5.060” doubler plate!

IMG_0648.jpeg
IMG_0649.jpeg

(Yes, the holes are off-center… that’s red sea’s factory configuration, not my sloppy craftsmanship! — I took the dead center of the bottom pane out, equidistant from tank centerline and each overflow box side!)

As you can see, this was then beveled as-needed, and will be sanded down 1.2mm (~1/16”) on each saw cut edge to remove any potential micro fracturing.

IMG_0651.jpeg

Fits like a glove!

— for edge sanding, the manual diamond wet sanding block method seems to be a fools errand; it’s simply too slow… removing .5mm of material from 6mm thick glass along a 20” edge took 15mins with a 60grit block…and, the portable edge grinding machine was a joke… so, figured I’d try out something a bit different; diamond sanding pads for multi-tools!
image.jpg

I already own several very nice vibratory multi-tools, so I’m hoping just switching the sanding pad type will get me through the bulk of the material removal, before I revert back to manual diamond block wet sanding for 200+ grit finishing passes, and arris forming! (Only a test piece of glass will tell if this is another useless method, or if it’s worth pursuing… maybe I’ll have time for that tomorrow night…)


— finally, it sounds like I’ve got a buddy roped into helping me move the FrankenReefer into the garage, and onto the assembly table by this weekend, so I should be able to begin the actual assembly process in the coming week!
It really makes you appreciate the amount of work custom makers put in into these tanks and the cost suddenly starts to make sense. Not only is low iron costly, the craftsmanship it takes to make something that sounds as simple as a glass box is crazy.
 
It really makes you appreciate the amount of work custom makers put in into these tanks and the cost suddenly starts to make sense. Not only is low iron costly, the craftsmanship it takes to make something that sounds as simple as a glass box is crazy.
It is indeed! There’s a ton of specialty tooling and precision measurement involved! I I’ve found myself starting to say “glass is an incredibly unforgiving, but incredibly precise and rewarding material to work with”…

— for context, I can literally hit a cutting tolerance of +-.001” repeatedly with just a pair of calipers and this wet saw… NASA’s tolerance for flight hardware is typically +-.0005”!

The little <=20g big box store tanks seem to predominantly be held together by the plastic rims and interior fillet of silicone, and are assembled to varying levels of competence… economies of scale are the only thing making them so cheap!

— making a glass box (basically a display case) actually isn’t that challenging! Making a 1,000lb+ glass pressure vessel that looks pristinely crafted on the other hand? Non-trivial!!
 
looks fabulous! well done!
Thank you!

I was nervous about this one, given that it’s another essentially irreplaceable piece of glass… but, it went smoothly, and I now have every single major component required to ensure that not one drop of Red Sea silicone ever contacts water, or bears significant load in this tank!
 
Small update:

— I found an hour or so to mess around with the diamond sanding pads on a vibratory multi-tool this evening, and am pleasantly surprised with the results! — I definitely need a much better working setup, probably with water pumped over the workpiece, and a deeper bin… it was MESSY!

IMG_0699.jpeg


— I’ve sanded down all three cut edges of the 10mm doubler ~.75mm via 60 grit, and will subsequently follow up with 120, then 200/400 grits until I’ve removed a full 1mm from each cut edge! (“Rule of thumb” is sanding down a saw cut edge equal to 6-10% of glass thickness to remove any potential for micro fractures propagating; so .6-1mm in this case!)

— I have another several dozen linear feet of 1/2” (12.7mm) glass to edge sand, so this is going to eat some time… thankfully, I can do it in phases; only prepping what gets installed immediately after!


— as an aside, and as much as It’s going to be inconvenient, I think I’ll be rebuilding the stand under this tank… it’s got several things wrong with it, including >4ft spans of 2x4 with no center bracing, and a terribly cut bulkhead pass-through hole…

image.jpg
 
It’s been a busy weekend, but I still managed to sneak in a few hours of prep work, given that I might be able to rope a buddy into helping me do the big tank move tomorrow!

— I did an embarrassing amount of layout on my assembly table to decide exactly where to drill tank bulkhead hole access in the table, before remembering I already have a precise glass template to do exactly that:

IMG_0825.jpeg


— for those of you that didn’t know, drilling a relief hole for the chips from your hole saw to evacuate into can make deep holes drill WAY faster:
IMG_0826.jpeg


— The holes drilled in the assembly table are 1/8” oversized vs. the tank’s glass holes, and have a 1/8” routed radius on the top perimeter, primarily to allow silicone tooling access by reaching up from under the table:

IMG_0827.jpeg

IMG_0828.jpeg


— I then cut the assembly table’s legs down 9”, making the table 29” tall… the ~21.5” tall tank should leave me at a comfortable working height of ~ 50” at tank rim!

— from here, I proceeded to start prep on my bulkhead doubler’s box press platen, with matching holes to the tank glass, offset by 1/4” (allowing bulkhead doubler to rear tank pane silicone tooling clearance), with a 45, then 22.5 degree routed relief angle to the top side of the platen’s holes…

IMG_0829.jpeg


— I still need to trim around 1” of width off the far side of the platen, trim it to length, then plane both faces immediately before adding a layer of packing tape as silicone mold release, plus a lumber spine for my bar clamps to compress the platen, and doubler through… (mitigating deflection in the ~4.5” x 13” x 1.5” redwood heart platen)

(These holes in the table/clamp face not only let me access the glass bulkhead holes to clean any extruded/still-wet silicone from inside them, but also serve as a ventilation path to help the silicone lamination cure from the inside-out, even while being clamped in place!)


— next up is laying neoprene foam on the assembly table, cutting identical holes in that, then setting the tank in place… let’s hope that can happen after work tomorrow!
 
I can't wait to see the first leak test.... I admire your determination to get this done! Good luck!

I’m not concerned about a leak test, as it technically still holds water in factory format!

— I’m essentially using the factory tank as a precision jig to build a new structural skeleton inside, bridging any factory silicone in the primary load bearing areas!

— The leak test will be more of a formality, confirming that I hit target silicone joint thicknesses, and am seeing the silicone stretch values I’m looking for to confirm that the new “skeleton” is indeed bearing the hydrostatic force!

This has honestly been a very refreshing learning experience for me… I spent my entire life not understanding an entire genre of very versatile material, and now have a LOT more respect for professional glaziers, glassblowers, and aquarium fabricators!
 
I’m not concerned about a leak test, as it technically still holds water in factory format!

— I’m essentially using the factory tank as a precision jig to build a new structural skeleton inside, bridging any factory silicone in the primary load bearing areas!

— The leak test will be more of a formality, confirming that I hit target silicone joint thicknesses, and am seeing the silicone stretch values I’m looking for to confirm that the new “skeleton” is indeed bearing the hydrostatic force!

This has honestly been a very refreshing learning experience for me… I spent my entire life not understanding an entire genre of very versatile material, and now have a LOT more respect for professional glaziers, glassblowers, and aquarium fabricators!

That makes sense...

Definitely, working with glass is a whole other animal, even more so with fish tanks where physics/engineering are more important.
 
That makes sense...

Definitely, working with glass is a whole other animal, even more so with fish tanks where physics/engineering are more important.

The scientific glassblowing guys do some pretty mind-bending work, too!

here’s what I consider to be an incredibly interesting video on some of the finer nuances of scientific glassblowing, from a craftsman’s perspective!

 
The scientific glassblowing guys do some pretty mind-bending work, too!

here’s what I consider to be an incredibly interesting video on some of the finer nuances of scientific glassblowing, from a craftsman’s perspective!


I'll check it out, some of the stuff out there hurts my brain lol.
 
Update:

No luck moving the tank as of yet… I stopped by my LFS after work today and talked the owners into lending a hand this weekend, though!

Work’s been crazy this week, that definitely hasn’t helped with glass prep work… though, I’m hoping I can sneak in another few hours of final lamination prep this weekend, with the plan of actually performing my laminations on Tuesday, when wetter weather and more preferable natural humidity (~70-75%) are expected to arrive!

IMG_0845.png


— As a rather comical side note, over lunch, I decided to roughly estimate how much (industrial) diamond I have on hand between my various blades and sanding/grinding tools… around 150-170 carats!
 
Success!

I finally managed to get this glass brick moved into the garage, and onto the assembly bench!

IMG_0927.jpeg
IMG_0926.jpeg
IMG_0928.jpeg


A big thanks to the mom&pop LFS owners whom stuck to their word and helped me get this 220lb paperweight lugged into place this evening!

So, now it’s finally time to actually start test fitting parts, and prepping laminations! I have a LOT of work to do in the coming week(s), before probably a two month long cure…


I suppose that will let me pivot to several other personal projects, such as my long overdue plans to build the same LFS a very unusual tank for Their checkout counter!
 
And to think I just want to get a few scratches out of my glass. This new glass is to soft!

Very interesting. Wish I could have seen this project up close and personal.

Shelley
 
And to think I just want to get a few scratches out of my glass. This new glass is to soft!
The secret here is Cerium oxide, either as a buffing compound manually/painstakingly rubbed in, or embedded in a rubberized buffing wheel (often called a “BD wheel”, or a “mud wheel” for glass buffing/polishing)!

Work with cerium oxide wet, not dry… ideally in a well ventilated area! — it’s a respiratory irritant!
 

TOP 10 Trending Threads

Back
Top
Home
Post thread…
Market
What's new