




- Joined
- May 4, 2025
- Messages
- 4,944
- Reaction score
- 5,989
- Location
- Monterey Bay area, California
- What state or country do you live in
- California
Well, the time has finally come to start documenting the build process of this abomination…
Backstory (abridged):
I had taken a few years off the hobby, letting my tanks sit idle. I already had a 180g drilled and sumped freshwater tank, plus a little 35G hexagon saltwater tank… but I knew I would quickly outgrow the latter…
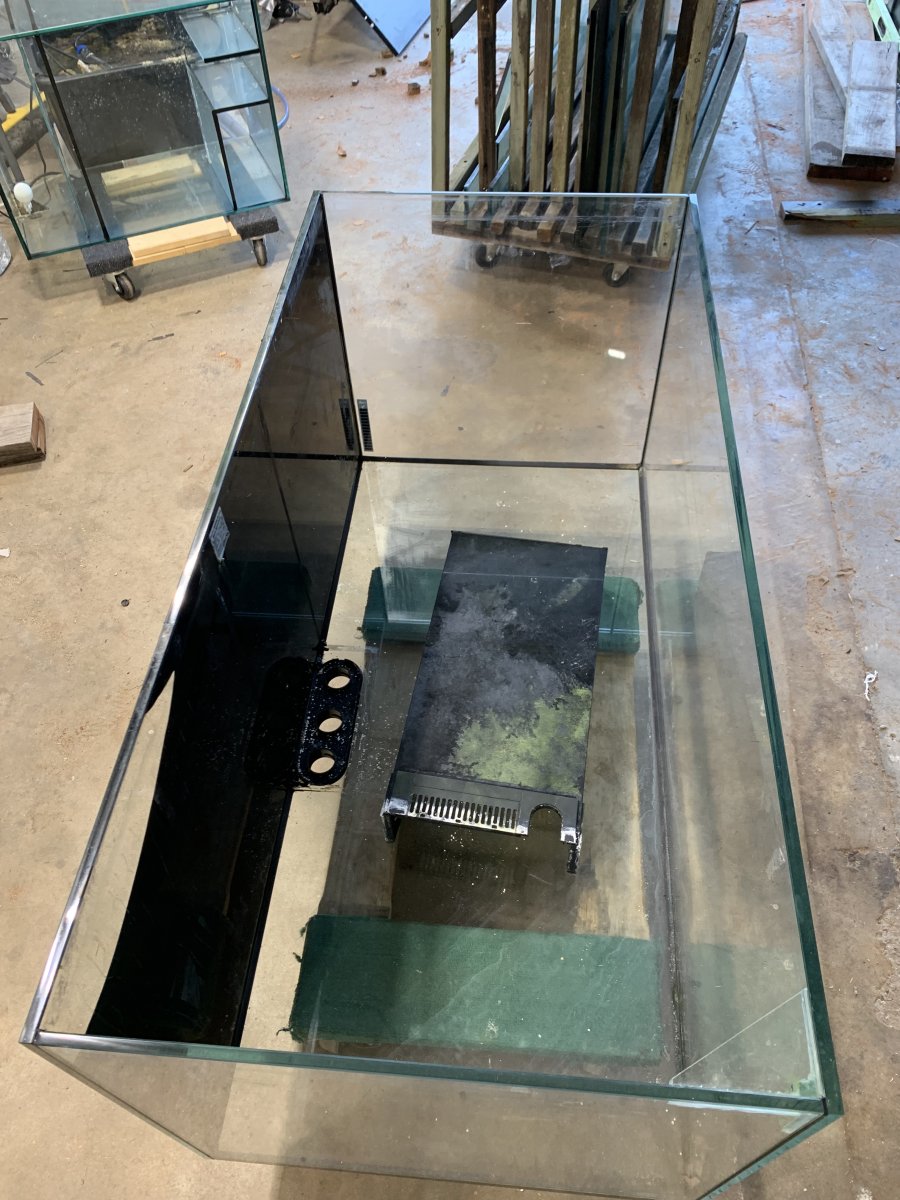
So, I got to measuring, and determined that I could fit a 60” x 21” x 21-24” tank into my remaining free man cave/fish room space more or less perfectly!
Next up, was going hunting for a tank… not knowing anything about the Red Sea silicone debacle at this time, I was shocked when I found a Reefer 450 complete system listed for free!
I snagged this Gen 2 Reefer 450 as a running system around nine months ago… the previous owner had a skimmer motor short out and nuke the tank (he had zero GFCI protection, and was using two prong ungrounded adapters for all power strips to plug into ungrounded outlets...)
It all seemed way too good to be true, until I decided to take a closer look at the tank, and do a bit of research on the brand here on R2R…
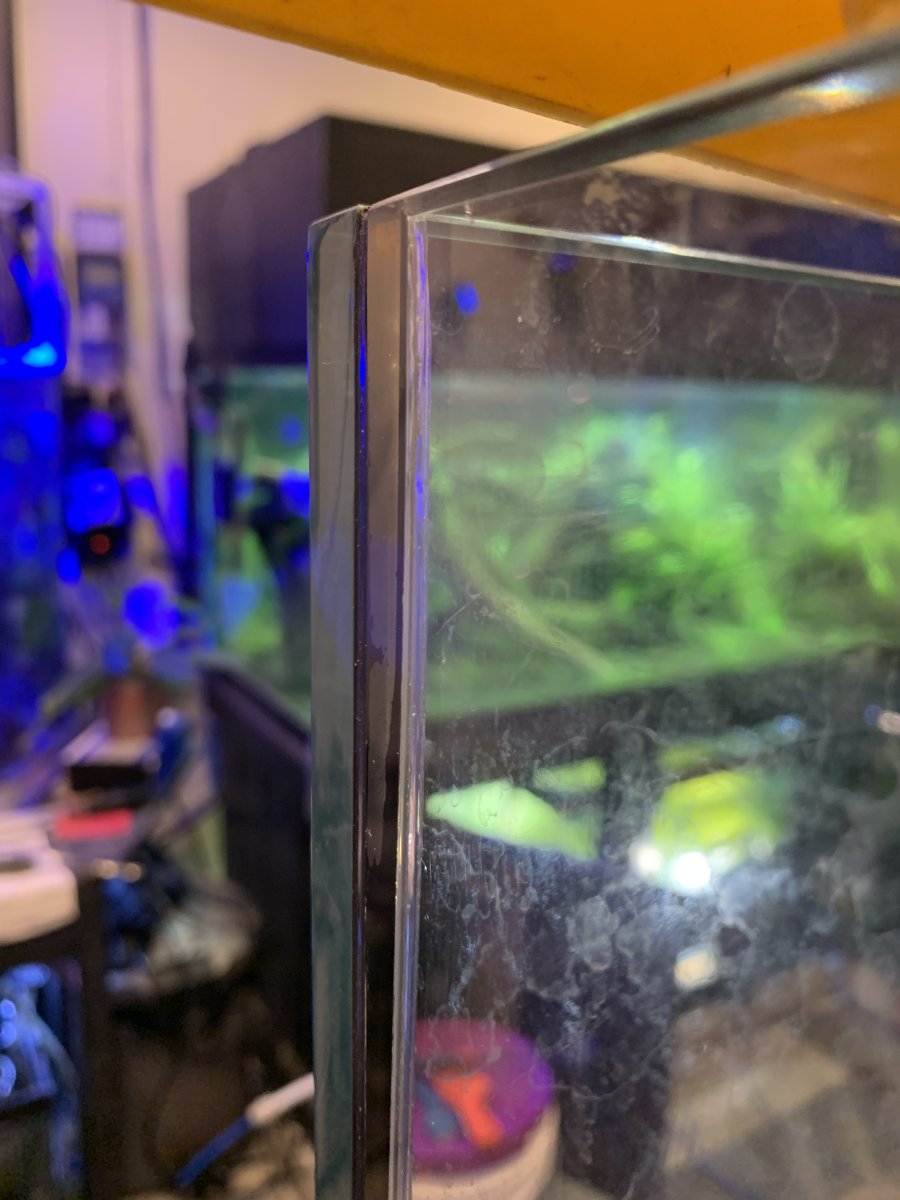
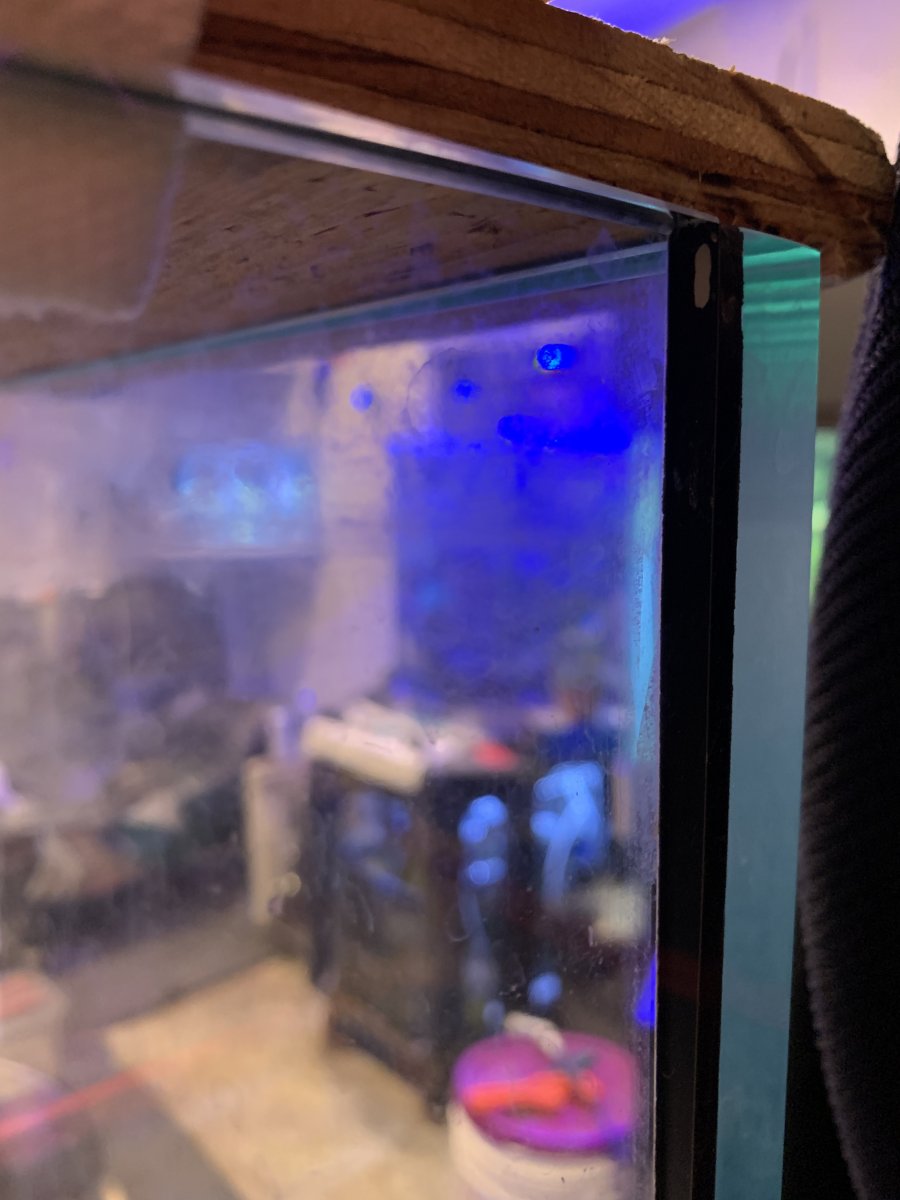
Here’s what I found (and what many of you have probably seen already)…
Front right vertical seam, rear view of seam:
Front left vertical seam, rear view of seam:
The project:
So, at this point, the brakes got put on this project very quickly, and I had some decisions to make:
A — break the tank down to panes of glass to rebuild it using quality silicone
B — break the tank down to scrap it for project glass
C — test out my glass reinforcement process on every single seam of this tank, in addition to adding top corner bracing and center braces
Option A is a bit easier said than done, as these 5/8” thick 5ft long panes of glass weigh right around 78lbs apiece…
Option B seems like the nuclear option, I’m not ready to cut matching set of panes apart into new things I haven’t even thought of yet…
Option C seems interesting… it’s possible to do by myself, and represents a more real-world application that someone with a bit of hands-on experience could duplicate for their failing Reefer!
— considering that my man cave/fish room is detached from the primary residence, on a concrete slab, and is sloped to multiple drainage points; I decided that I’m willing to take the risk of a leaky tank for the sake of stress testing these glass reinforcements in a real-world edge case!
Sourcing materials:
So, now I have my plan, but I don’t have nearly enough 12mm+ thick glass to execute… conveniently, this was right around the time glass prices went up 400-500% last year…
— this is where I came to the conclusion that the most viable, cost effective source for thick annealed glass was actually old aquariums…
— it was around this time that a local reefer contacted me for help with his failing Reefer 425XL (G1), which is a story into itself… but, the conclusion is that I ended up with his old Reefer 425 to break down for project glass, in addition to a second 70g, 1/2” thick glass tank! So, I build a quick and dirty glass rack to keep me from breaking anything, and got to loading it!
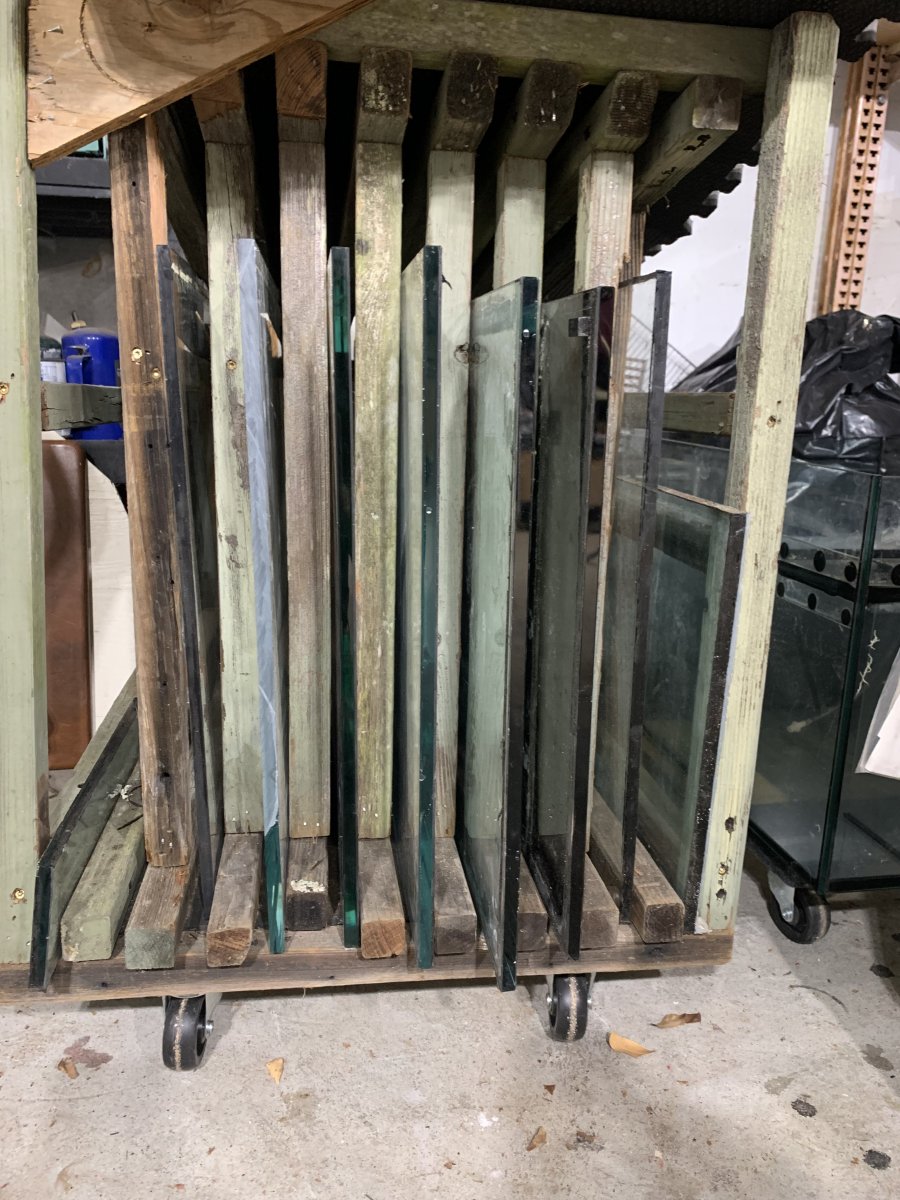
At this point, I had everything I needed to get going, short of the free time… work got nuts and I set the project aside, short of cutting a full set of glass reinforcement for @Evensong ’s 120G!
https://www.reef2reef.com/threads/t...featuring-evensong-and-uncommonsense.1137294/
Fast forward to now:
Life has calmed down a bit, and I’ve carved out some free time to get a vast majority of my glass pieces cut, from two separate donor tanks!
— All wider format glass bars/triangles are .497” thick standard float glass, for bottom seam reinforcements/bracing, and top braces.
— all thin rods are .462” thick low-iron glass, for vertical seam reinforcements.
20+ piece kit:
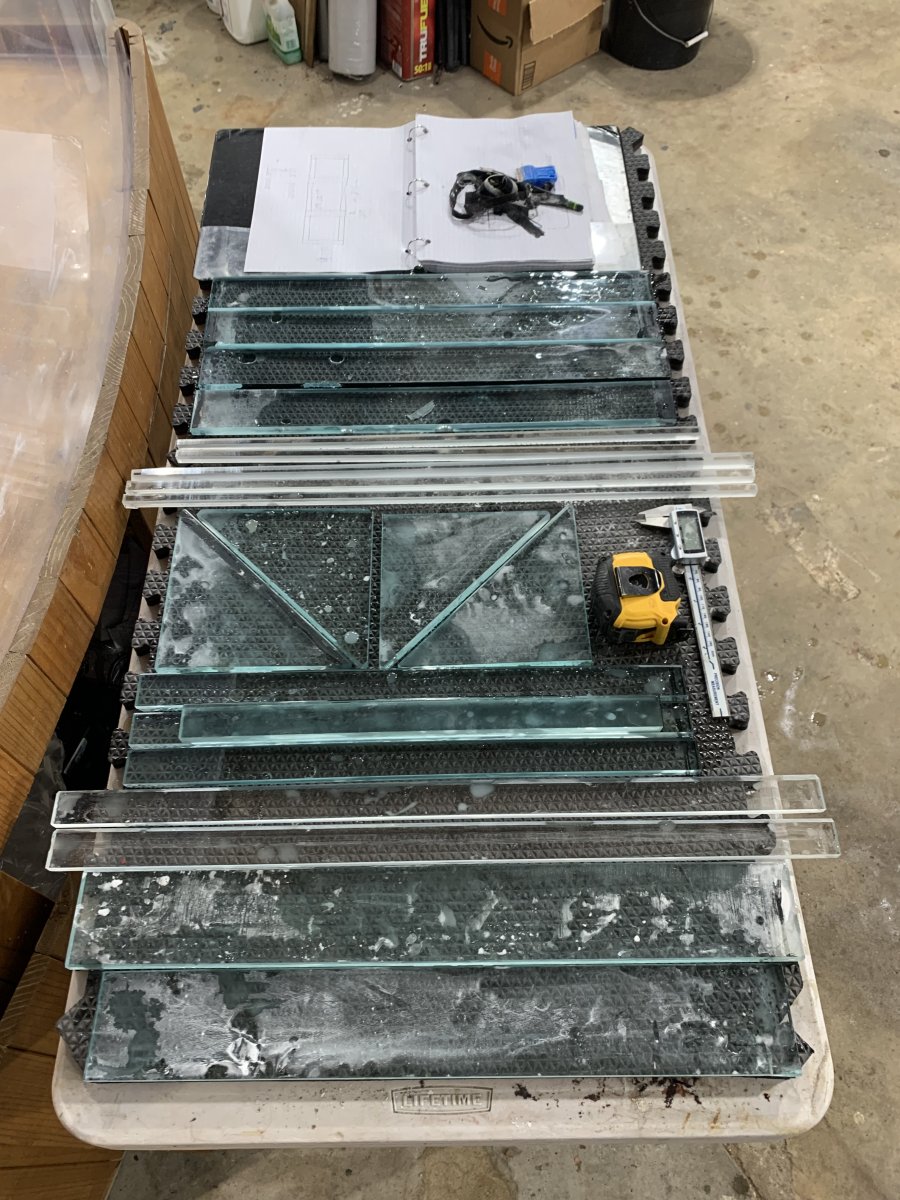
At this point, I’m more or less ready to set the R450 on an assembly bench and get to work, aside from one big question mark: the overflow box….
I decided it would be prudent to revisit the bottom pane of the R425XL I had broken down, to see what could be learned about the proprietary plastic piece which serves as a form of “bulkheads” for the plumbing, as documented here:
https://www.reef2reef.com/threads/red-sea-aquarium-autopsy-reefer-xl425-g1.1146139/
Having learned much more about the factory silicone adhesion, overflow design, and hole sizing/placement from this exercise, I’ve come to a few conclusions about how I’m going to have to reinforce this thing to have a good chance of success…
The plan:
Basically, I plan to cut the non-tempered 10mm thick bottom pane of the glass donor R425XL, specifically saving the section which contains the three drilled bulkhead holes… this will get doubled up over the bulkhead holes on my R450 both to increase the glass cross section between holes and glass rim, and to provide a stacked structural seam between bottom pane and rear pane of the tank…
— this will, of course, call for me to trim down the factory glass overflow box by 10mm (~3/8”) prior to reinstalling, which is fine by me, considering I’m rebuilding it anyways to get rid of factory Red Sea silicone… I’ll likely also cannibalize my second identical overflow from the R425XL for its 6mm smoked glass to double up overflow box wall thickness on my R450!
Here’s an incredibly crude diagram I sketched up to indicate how glass will be added to this FrankenReefer:

White lines: factory glass
Red lines: bottom left to right reinforcements, including doubled up drilled overflow box glass
Blue lines: front to rear top and bottom braces, top corner gussets, stacked glass bars against overflow bottom seams
Blue dots: 1/2”x1/2” right pentagon profile glass rods (tight clearance areas, high visibility areas)
The progress:
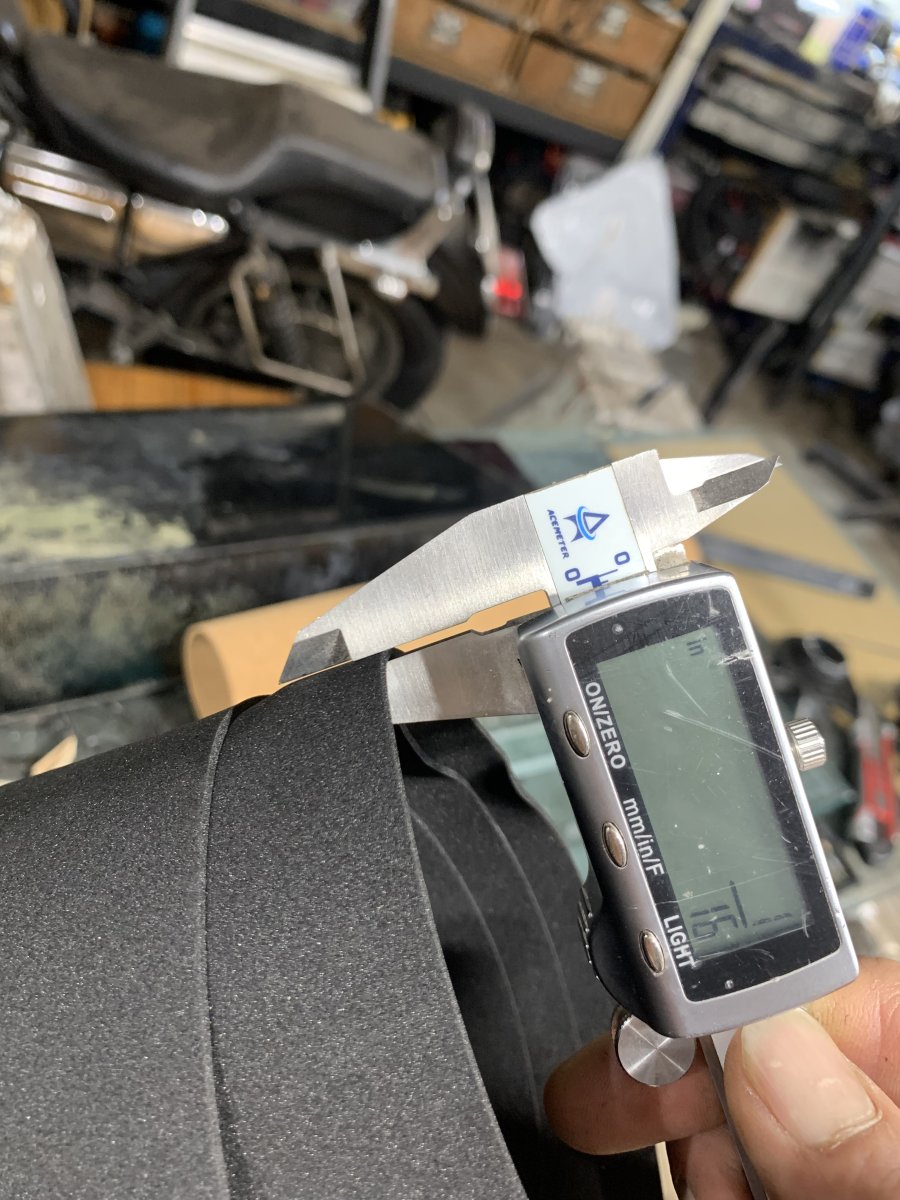
— 1/8” thick closed cell neoprene for the leveling mat needs to be reordered after 1/16” thick was accidentally shipped to me…
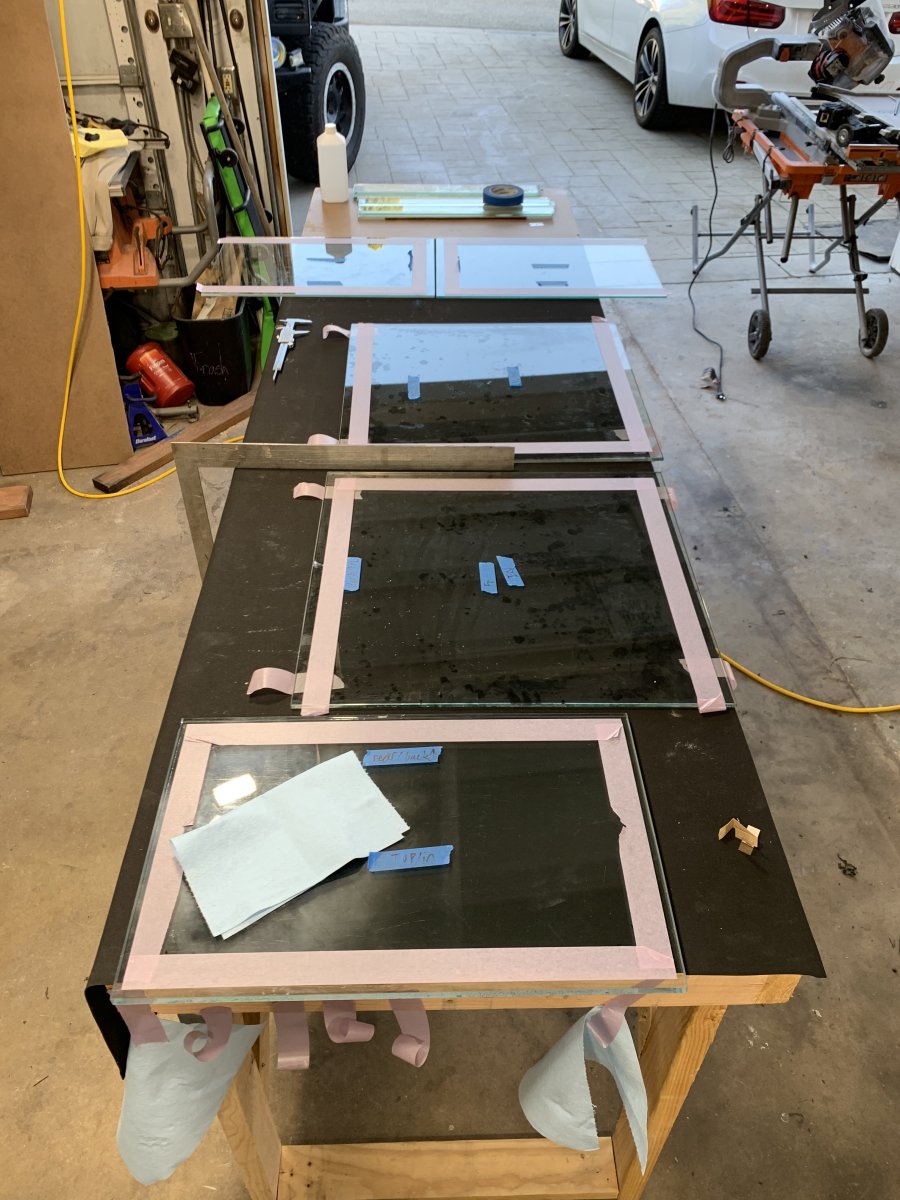
— Assembly table has been constructed:
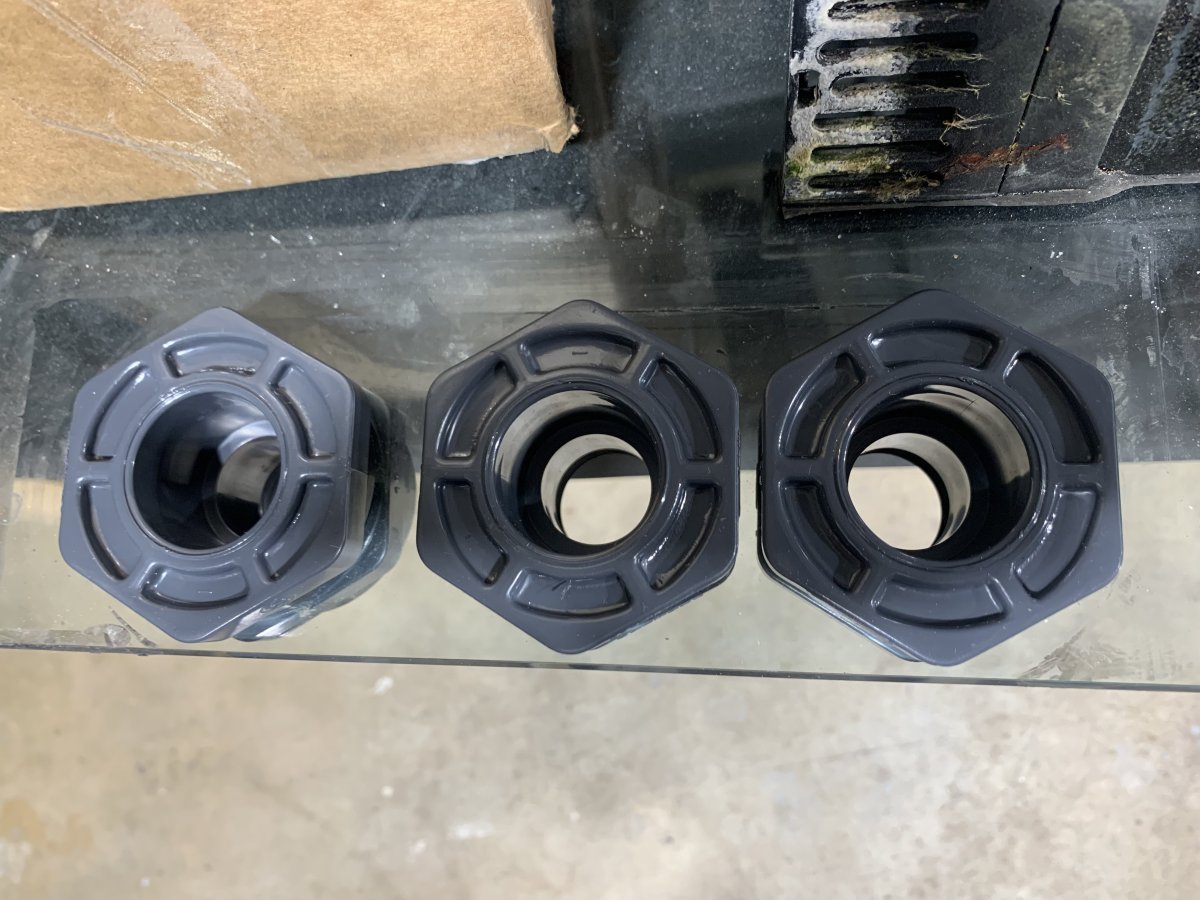
— Hayward 1” slip X thread bulkheads arrived this evening, and just BARELY fit, as anticipated!
— I’m ready to start cutting into the overflow box on the R450 now for my proposed rebuild/reinforcement, then I’ll be cutting those bulkhead holes out of the R425XL bottom pane… from there, it’s just a lot of careful test fitting and measuring/part trimming, then a very meticulous installation!
— there’s likely dozens of paragraphs I’ve already forgotten, in addition to those I’ve tried to leave out for brevity as I realize what an essay this has become….. there will definitely be more to come, I haven’t even started on the stand plans, or the 60g rimmed acrylic Glass Cages sump I’ve got under it, for example!
Backstory (abridged):
I had taken a few years off the hobby, letting my tanks sit idle. I already had a 180g drilled and sumped freshwater tank, plus a little 35G hexagon saltwater tank… but I knew I would quickly outgrow the latter…
So, I got to measuring, and determined that I could fit a 60” x 21” x 21-24” tank into my remaining free man cave/fish room space more or less perfectly!
Next up, was going hunting for a tank… not knowing anything about the Red Sea silicone debacle at this time, I was shocked when I found a Reefer 450 complete system listed for free!
I snagged this Gen 2 Reefer 450 as a running system around nine months ago… the previous owner had a skimmer motor short out and nuke the tank (he had zero GFCI protection, and was using two prong ungrounded adapters for all power strips to plug into ungrounded outlets...)
It all seemed way too good to be true, until I decided to take a closer look at the tank, and do a bit of research on the brand here on R2R…
Here’s what I found (and what many of you have probably seen already)…
Front right vertical seam, rear view of seam:
Front left vertical seam, rear view of seam:
The project:
So, at this point, the brakes got put on this project very quickly, and I had some decisions to make:
A — break the tank down to panes of glass to rebuild it using quality silicone
B — break the tank down to scrap it for project glass
C — test out my glass reinforcement process on every single seam of this tank, in addition to adding top corner bracing and center braces
Option A is a bit easier said than done, as these 5/8” thick 5ft long panes of glass weigh right around 78lbs apiece…
Option B seems like the nuclear option, I’m not ready to cut matching set of panes apart into new things I haven’t even thought of yet…
Option C seems interesting… it’s possible to do by myself, and represents a more real-world application that someone with a bit of hands-on experience could duplicate for their failing Reefer!
— considering that my man cave/fish room is detached from the primary residence, on a concrete slab, and is sloped to multiple drainage points; I decided that I’m willing to take the risk of a leaky tank for the sake of stress testing these glass reinforcements in a real-world edge case!
Sourcing materials:
So, now I have my plan, but I don’t have nearly enough 12mm+ thick glass to execute… conveniently, this was right around the time glass prices went up 400-500% last year…
— this is where I came to the conclusion that the most viable, cost effective source for thick annealed glass was actually old aquariums…
— it was around this time that a local reefer contacted me for help with his failing Reefer 425XL (G1), which is a story into itself… but, the conclusion is that I ended up with his old Reefer 425 to break down for project glass, in addition to a second 70g, 1/2” thick glass tank! So, I build a quick and dirty glass rack to keep me from breaking anything, and got to loading it!
At this point, I had everything I needed to get going, short of the free time… work got nuts and I set the project aside, short of cutting a full set of glass reinforcement for @Evensong ’s 120G!
https://www.reef2reef.com/threads/t...featuring-evensong-and-uncommonsense.1137294/
Fast forward to now:
Life has calmed down a bit, and I’ve carved out some free time to get a vast majority of my glass pieces cut, from two separate donor tanks!
— All wider format glass bars/triangles are .497” thick standard float glass, for bottom seam reinforcements/bracing, and top braces.
— all thin rods are .462” thick low-iron glass, for vertical seam reinforcements.
20+ piece kit:
At this point, I’m more or less ready to set the R450 on an assembly bench and get to work, aside from one big question mark: the overflow box….
I decided it would be prudent to revisit the bottom pane of the R425XL I had broken down, to see what could be learned about the proprietary plastic piece which serves as a form of “bulkheads” for the plumbing, as documented here:
https://www.reef2reef.com/threads/red-sea-aquarium-autopsy-reefer-xl425-g1.1146139/
Having learned much more about the factory silicone adhesion, overflow design, and hole sizing/placement from this exercise, I’ve come to a few conclusions about how I’m going to have to reinforce this thing to have a good chance of success…
The plan:
Basically, I plan to cut the non-tempered 10mm thick bottom pane of the glass donor R425XL, specifically saving the section which contains the three drilled bulkhead holes… this will get doubled up over the bulkhead holes on my R450 both to increase the glass cross section between holes and glass rim, and to provide a stacked structural seam between bottom pane and rear pane of the tank…
— this will, of course, call for me to trim down the factory glass overflow box by 10mm (~3/8”) prior to reinstalling, which is fine by me, considering I’m rebuilding it anyways to get rid of factory Red Sea silicone… I’ll likely also cannibalize my second identical overflow from the R425XL for its 6mm smoked glass to double up overflow box wall thickness on my R450!
Here’s an incredibly crude diagram I sketched up to indicate how glass will be added to this FrankenReefer:
White lines: factory glass
Red lines: bottom left to right reinforcements, including doubled up drilled overflow box glass
Blue lines: front to rear top and bottom braces, top corner gussets, stacked glass bars against overflow bottom seams
Blue dots: 1/2”x1/2” right pentagon profile glass rods (tight clearance areas, high visibility areas)
The progress:
— 1/8” thick closed cell neoprene for the leveling mat needs to be reordered after 1/16” thick was accidentally shipped to me…
— Assembly table has been constructed:
— Hayward 1” slip X thread bulkheads arrived this evening, and just BARELY fit, as anticipated!
— I’m ready to start cutting into the overflow box on the R450 now for my proposed rebuild/reinforcement, then I’ll be cutting those bulkhead holes out of the R425XL bottom pane… from there, it’s just a lot of careful test fitting and measuring/part trimming, then a very meticulous installation!
— there’s likely dozens of paragraphs I’ve already forgotten, in addition to those I’ve tried to leave out for brevity as I realize what an essay this has become….. there will definitely be more to come, I haven’t even started on the stand plans, or the 60g rimmed acrylic Glass Cages sump I’ve got under it, for example!
Last edited:








 )
)








