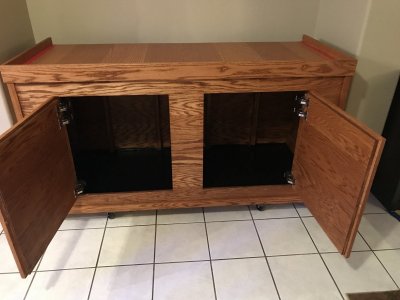
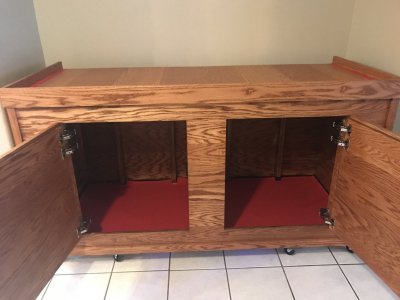
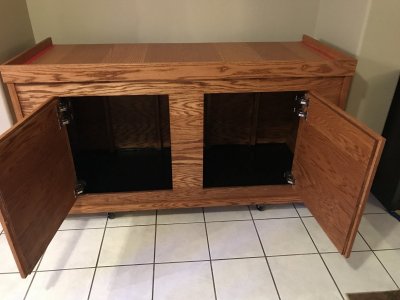
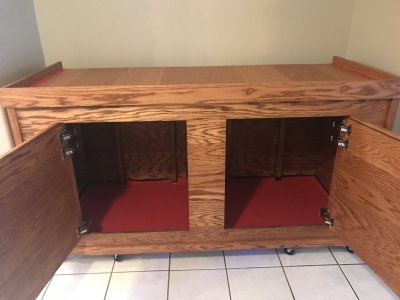
The tale of a newb, a sump and a Glasscage.

OP
OP
dreamcatcherr9

dreamcatcherr9

Well-Known Member
View Badges
Joined
Jan 23, 2020
Messages
840
Reaction score
1,046
Location
Las Vegas
Rating - 0%
0   0   0
Building the SW mixing station was fun and very educational (and great practice).

An interesting note, I am sure the experts are well aware of, but for us newbs:

I had a feeling I didn’t use enough thread seal paste (I will be more generous on the tank build). There still is a small drip (sort of) from the barbed to hose connections. I wrapped it now with a clear water tape used to seal leaks in hoses. Then a small piece of FlexSeal Tape.

The drip continued (not a lot, I have a paper towel underneath and it absorbs and leaves a half-dollar size wet spot overnight, but not soaked). BUT, when I turn on the pump and have the water circulated, it stops completely. I experimented several times and the bottom line, when the pump is off and the water is sitting, the pressure pushes water through small leaks.

When the pump is left on, and water is constantly circulating, no leaks! Soooo I guess she stays on 99.9% of the time unless I have a need to unplug)

Just to share, it’s in a closet (carpeted), so I placed a marine vinyl (used for water craft) as a layer of protection underneath a plastic dog crate mat with a 3/4” lip to hold any water leakage. I also have placed a water alarm detector to alert me.

Baby steps, a long way to go. Lots of prep and little things to do!
 

fishguy242

Cronies..... INSERT BUILD THREAD BADGE HERE !!
View Badges
Joined
Jan 21, 2020
Messages
43,366
Reaction score
250,124
Location
Illinois
Rating - 100%
1   0   0
WELL..i thought i was following ,caught up now ,waitin for them tank in house pic's ;) :cool:
 
OP
OP
dreamcatcherr9

dreamcatcherr9

Well-Known Member
View Badges
Joined
Jan 23, 2020
Messages
840
Reaction score
1,046
Location
Las Vegas
Rating - 0%
0   0   0
It begins!!!

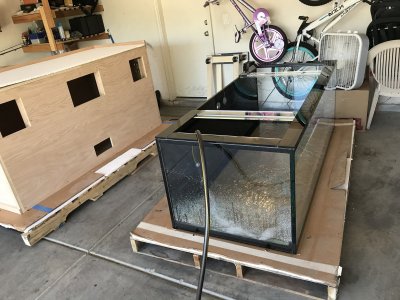
Thanks to GlassCages and to the shipper (R+L Carriers), my tank and stand arrived Friday July 3rd! Packing was great. Unboxing was fun (lol).

Slow and steady, here we go!

Day 1: Tank and stand arrived! I unpacked and removed all shipping protection, then inspected for damage (everything was beautiful).

I proceeded to do a water leak test to tank (I was safely past the “wait” time), and cleaned up the work space in garage (stuff was everywhere).

I had a few (6) friends come over later that night, and we managed to move the tank inside. Stand stayed outside to stain and prep.

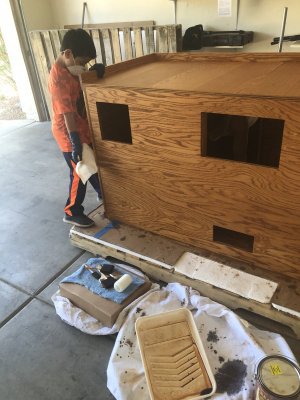
Day 2: My son (8) helped me stain the stand. 3 coats, 24 hours to dry, then I moved the stand inside!

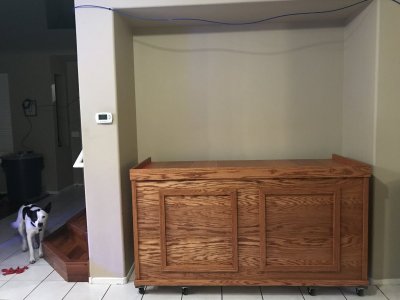
Day 3: I added a layer of FlexSeal to the bottom of stand. Then I added a sheet of marine vinyl for extra waterproofing (that’s 3 layers of redundancy)

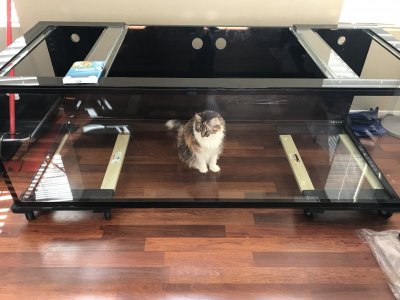
Day 4: Tank and stand inside house (my cat thought the tank was for her), I took a deep breath. And back to regular work for now...

077EAA1F-22B2-4EF8-A9E2-E7E7B9B60FF5.jpeg 21EFF5D9-99FD-49D6-A9F6-53BE900E072A.jpeg 52B5FDB5-6801-433C-8E92-99CB4CCAA128.jpeg 2BEB78E2-9191-48FD-9240-DD1ED2704F70.jpeg 5A080F6F-2E23-4ECC-BA1A-7B4DE60ED853.jpeg B4875D31-C284-472D-9F79-C639149C3DCC.jpeg
 
OP
OP
dreamcatcherr9

dreamcatcherr9

Well-Known Member
View Badges
Joined
Jan 23, 2020
Messages
840
Reaction score
1,046
Location
Las Vegas
Rating - 0%
0   0   0
Day 5:

It’s crazy that with HOB equipment, I can have a tank set up in a day! My anxiety and OCD wants me to push and get it done, but I thankfully want to do it right the first time, and that means patience.

Next big step is getting the tank on the stand. I’ll need those 6 friends again, and probably won’t have them here till this weekend, so in the meantime, I’ll try to do a little something every day.

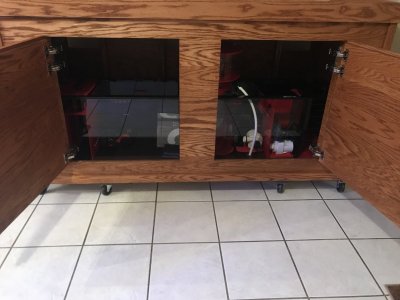
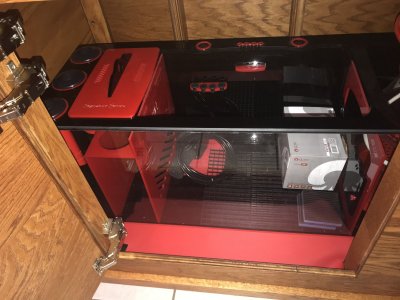
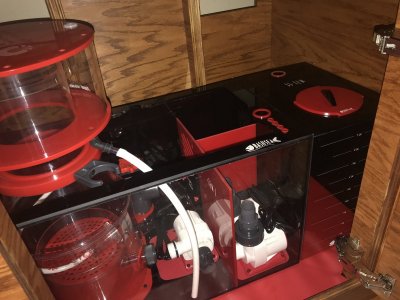
Today, I put the sump and ATO reservoir in the stand! Boy it was beyond a tight fit. Tank is 72” long, but the interior dimensions of the stand was only 70”. The sump is 60”, the ATO res is 10”. Math says it should fit.... .

It fit! Oh just barely and what a tight fit. I must admit I hated the sound of the acrylic slightly scrapping each other. But it fit! Tomorrow I’ll do a little more. Whatever I can till I can get that tank on the stand!

Here’s some pics!

C46849F8-8B9D-4C98-903D-7B73E6A5D632.jpeg BAEB172C-2BFB-4E94-902E-043B86EB16EC.jpeg 5B623605-25FF-43DA-8DBA-E4E7FD0FC19D.jpeg 2DEE1941-9951-4E3F-8446-01C72B03AADA.jpeg BAC3A930-082A-44A2-9B68-8A0664315381.jpeg
 

naterealbig

pea brain
View Badges
Joined
Sep 1, 2018
Messages
1,965
Reaction score
2,585
Location
Winter Garden
Rating - 100%
1   0   0
Day 5:

It’s crazy that with HOB equipment, I can have a tank set up in a day! My anxiety and OCD wants me to push and get it done, but I thankfully want to do it right the first time, and that means patience.

Next big step is getting the tank on the stand. I’ll need those 6 friends again, and probably won’t have them here till this weekend, so in the meantime, I’ll try to do a little something every day.

Today, I put the sump and ATO reservoir in the stand! Boy it was beyond a tight fit. Tank is 72” long, but the interior dimensions of the stand was only 70”. The sump is 60”, the ATO res is 10”. Math says it should fit.... .

It fit! Oh just barely and what a tight fit. I must admit I hated the sound of the acrylic slightly scrapping each other. But it fit! Tomorrow I’ll do a little more. Whatever I can till I can get that tank on the stand!

Here’s some pics!

C46849F8-8B9D-4C98-903D-7B73E6A5D632.jpeg BAEB172C-2BFB-4E94-902E-043B86EB16EC.jpeg 5B623605-25FF-43DA-8DBA-E4E7FD0FC19D.jpeg 2DEE1941-9951-4E3F-8446-01C72B03AADA.jpeg BAC3A930-082A-44A2-9B68-8A0664315381.jpeg

Things are looking great, and WOW that is a tight fit! The sump looks great in there, are you planning on some LED lighting in the cabinet to show it off? The tank looks really sharp too, with the Eurobracing and black back! What are you planning on getting done until the friends can come over and help?
 
OP
OP
dreamcatcherr9

dreamcatcherr9

Well-Known Member
View Badges
Joined
Jan 23, 2020
Messages
840
Reaction score
1,046
Location
Las Vegas
Rating - 0%
0   0   0
Things are looking great, and WOW that is a tight fit! The sump looks great in there, are you planning on some LED lighting in the cabinet to show it off? The tank looks really sharp too, with the Eurobracing and black back! What are you planning on getting done until the friends can come over and help?
Thanks! Since I can’t get tank on stand for another 2-3 days, I will basically just go stir crazy! Lol

Actually, I’ll unpack some more equipment, re fresh / read some set up and user guides. And yes, lights are a great idea for sump!

I got some simple stick on LED light(s), I’ll install them tonight. I also considered installing a little box I am rigging to house the controllers in, but I hesitate to do to much before plumbing.

Plumbing is #1 priority, and I want to leave as much working space as possible. Once plumbing is done, everything else can fall into place.
 

fishguy242

Cronies..... INSERT BUILD THREAD BADGE HERE !!
View Badges
Joined
Jan 21, 2020
Messages
43,366
Reaction score
250,124
Location
Illinois
Rating - 100%
1   0   0
morning,just a thought ,you may have covered already,ground probe in tank and 2nd in sump,battery back up ,unless you have a generac ;) :cool:
 
OP
OP
dreamcatcherr9

dreamcatcherr9

Well-Known Member
View Badges
Joined
Jan 23, 2020
Messages
840
Reaction score
1,046
Location
Las Vegas
Rating - 0%
0   0   0
morning,just a thought ,you may have covered already,ground probe in tank and 2nd in sump,battery back up ,unless you have a generac ;) :cool:
Thank you! All advice is appreciated. I did get a ground probe! But just 1(?). I was going to put in sump.

Do I need a second ground probe for display tank?

No battery back up or generator. I considered a battery back up, but it was hard to find the “right” model (that was space efficient, cost efficient and lasted the longest). Any suggestions for battery back is greatly appreciated!
 

fishguy242

Cronies..... INSERT BUILD THREAD BADGE HERE !!
View Badges
Joined
Jan 21, 2020
Messages
43,366
Reaction score
250,124
Location
Illinois
Rating - 100%
1   0   0
i would and always do add second,to dt,better safe than sorry for 10$ ;) as far as back up look into computer back ups,only need to run p head and or air stone ,in normal outage:)
 

naterealbig

pea brain
View Badges
Joined
Sep 1, 2018
Messages
1,965
Reaction score
2,585
Location
Winter Garden
Rating - 100%
1   0   0
Thanks! Since I can’t get tank on stand for another 2-3 days, I will basically just go stir crazy! Lol

Actually, I’ll unpack some more equipment, re fresh / read some set up and user guides. And yes, lights are a great idea for sump!

I got some simple stick on LED light(s), I’ll install them tonight. I also considered installing a little box I am rigging to house the controllers in, but I hesitate to do to much before plumbing.

Plumbing is #1 priority, and I want to leave as much working space as possible. Once plumbing is done, everything else can fall into place.

Some good ideas here, and yes - the lights will definitely show off the inside (and make it easier for you to see when working - albeit, less important :) ). Battery backup isn't a bad idea, but I do have a 7.5 kW gas/propane portable generator and a chiller.... The chiller is there in case my AC goes out, and the generator + chiller is there in case the power goes out. I live in Florida, so both of these things are common, especially during hurricane season, and even in the winter the temperature can hover in the mid-nineties. This equipment is less important if you live in a more temperate area (Like IL?).

$80 for a good battery backup will keep the tank going for a few extra hours if your power goes out, and is a relatively small investment. Just plug it into the wall and attach a powerhead or two to it. As the amount of money you have spent on livestock goes up (you can easily get into the tens of thousands here), and you develop an attachment to your pets, the benefits will eventually outweigh the risks. Just something to think about as you progress .

It is clear you have put a lot of thought into the process - something that can be very hard to do.... It only took me 20 years in the hobby to learn this lesson :) . You may not appreciate it as much as the next guy, as you will not feel the pain of the simple but costly mistakes that could have easily been prevented!

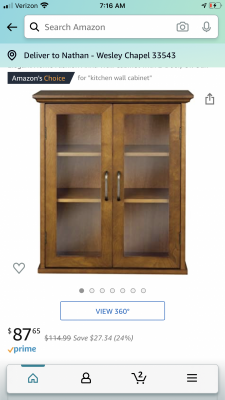
As you contemplate your electrical setup, keep in mind your goal will be to keep these pieces of equipment dry, and minimize exposure to humidity and salt creep. You can easily double the life of your electronics if you can do this successfully. A small cabinet attached to the outside of your stand can often accomplish this, and might be something else to consider. Something like this perhaps?

1AC39B9D-D9A8-4437-8B4D-56F161CB836A.png

Either way - great job! I wish I was making progress as quickly as you with my new build! Keep us posted and keep the pics coming - this already looks incredible, and will be down-right amazing once you get some rock, water, fish in there.

Best,

Nathan
 

naterealbig

pea brain
View Badges
Joined
Sep 1, 2018
Messages
1,965
Reaction score
2,585
Location
Winter Garden
Rating - 100%
1   0   0
Doh! Just realized you don't have room on either side of the stand. In the case you have to mount the electronics inside the stand, keeping them furthest away from bubbles in your sump (likely above your topoff container?), and wiping the equipment down every week or two is the second best option :) .
 
OP
OP
dreamcatcherr9

dreamcatcherr9

Well-Known Member
View Badges
Joined
Jan 23, 2020
Messages
840
Reaction score
1,046
Location
Las Vegas
Rating - 0%
0   0   0
Doh! Just realized you don't have room on either side of the stand. In the case you have to mount the electronics inside the stand, keeping them furthest away from bubbles in your sump (likely above your topoff container?), and wiping the equipment down every week or two is the second best option :) .

You a wise man! Above the ATO container (on the right side panel interior wall) I will mount the 4 controllers (2 Reef Octo for return pumps, 1 Reef Octo for Skimmer and the Tunze ATO controller box).

I got a cheap acrylic box (for jewelry?) off Amazon. I drilled a hole (since I had the bit) and added a uniseal to make it look nicer (I used bulkheads on sw mixing station instead of uniseals).

Thanks again for the advise (and following!).
 
OP
OP
dreamcatcherr9

dreamcatcherr9

Well-Known Member
View Badges
Joined
Jan 23, 2020
Messages
840
Reaction score
1,046
Location
Las Vegas
Rating - 0%
0   0   0
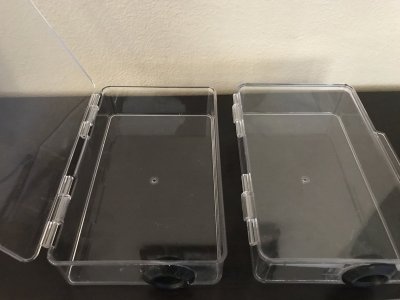
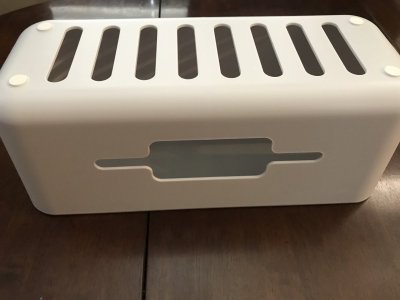
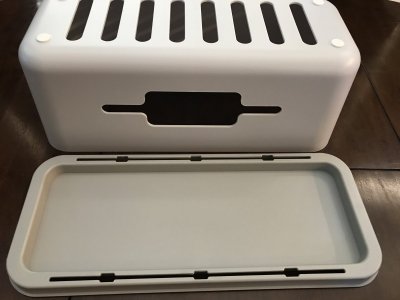
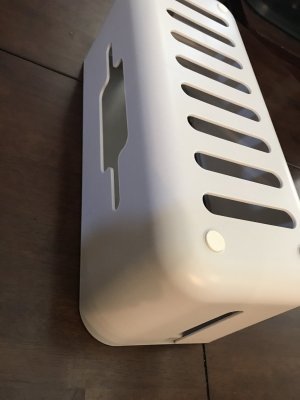
From amazon as well, I got these boxes to house the power strips and cords. It will sit behind sump on floor. But the boxes are well ventilated, plastic and have a lip (1/4”) to keep them off the ground themselves. A little extra protection....

42643C26-C317-432A-A0B3-E4C468720221.jpeg 596763E6-6869-4351-B41D-4D454C34C6C7.jpeg AAC20671-62D5-4561-A4F5-0F2D91B01DBB.jpeg
 
OP
OP
dreamcatcherr9

dreamcatcherr9

Well-Known Member
View Badges
Joined
Jan 23, 2020
Messages
840
Reaction score
1,046
Location
Las Vegas
Rating - 0%
0   0   0
Oh!!! With the promise of chicken wings, I am trying to get my 6 friends back over tonight to get the tank on the stand!!

If that happens, I am off tomorrow and will have all weekend to begin to play!!

With my 8yr old wanting to help, it will go slower then planned, but worth more in the end! ❤️
 

fishguy242

Cronies..... INSERT BUILD THREAD BADGE HERE !!
View Badges
Joined
Jan 21, 2020
Messages
43,366
Reaction score
250,124
Location
Illinois
Rating - 100%
1   0   0
poss drill a few small holes in plastic controller boxes also for venting??
 
OP
OP
dreamcatcherr9

dreamcatcherr9

Well-Known Member
View Badges
Joined
Jan 23, 2020
Messages
840
Reaction score
1,046
Location
Las Vegas
Rating - 0%
0   0   0
Ok. Finally some updates! Work had me busy all week (thankful to have a job!). But with Thursday night, I had some friends over and finally got the tank on the stand!

Day 6 and 7 were a work day’s, but By the end of day 7, the tank was on stand! Day 8 (Friday) was a stay home day! Time to play!

My son excited to help (and my daughter under foot, lol), we began to measure, cut (the practice white pvc) and dry fit!

Starting with the drains, encountered my first problem. One drain line would be obstructed by skimmer. Yes, if emergency line, I could drop “almost anywhere” in sump, but space is starting to get tight and I wanted to semi stay to my original plan.

As I sat and pondered, my son (8) suggests just to run the drain pipes along back of tank. I explained to my son that I cared about aesthetics as well as functionality (I wanted to see pipes inside stand, not hidden against the wall). My son then says, just move the one that’s in the way along the back......

Dang, good suggestion. He was right! So we did! Looks good so far, I am pleasantly surprised for my first time plumbing a sump (working with pvc, etc). Still dry fit stage.

Ran into second problem when I went to start return lines and found I ordered a wrong size fitting. I immediately ordered (online) the correct version. Then I spent day Day 9 (today) in search of the missing fitting locally (even though I ordered the correct), I thought if I found a keep sch 40 version I could at least continue the dry fit. No such luck.

With the main project temporarily on hold, I had time to update here finally. I will spend Day 10 (tomorrow) rebuilding a new SW mixing station. With lessons learned from first pass, I want to try again.

Here’s a few pics, some are not great, I am no photographer. LOL.
 

Reefing threads: Do you wear gear from reef brands?

  • I wear reef gear everywhere.

    Votes: 17 14.5%
  • I wear reef gear primarily at fish events and my LFS.

    Votes: 7 6.0%
  • I wear reef gear primarily for water changes and tank maintenance.

    Votes: 1 0.9%
  • I wear reef gear primarily to relax where I live.

    Votes: 18 15.4%
  • I don’t wear gear from reef brands.

    Votes: 66 56.4%
  • Other.

    Votes: 8 6.8%
Back
Top