Has anyone done this before? I'm looking to build a 15 or 20 gallon ATO reservoir. My question comes at what thickness of acrylic should I use for something this size?

Navigation
Install the app
How to install the app on iOS
Follow along with the video below to see how to install our site as a web app on your home screen.
Note: This feature may not be available in some browsers.
More options
You are using an out of date browser. It may not display this or other websites correctly.
You should upgrade or use an alternative browser.
You should upgrade or use an alternative browser.
Thinking about building an ATO reservoir
- Thread starter leighton.bingham
- Start date
- Tagged users None


I've built a few over the years. A 5 gallon container works well in most situations but building a custom ATO can take advantage of space and be designed for a larger volume. 1/4" is probably the minimum thickness but you'll likely see bowing if it's a larger volume. I prefer using 1/2" for the added rigidity even if it's for a smaller volume. I'll also use #40 instead of #3 or #4 as it's a lot stronger but working with it is a lot different.
OP
OP
Thank you for the reply. I travel for 14-15 days at a time throughout the year and have someone to feed the fish and can dose for the coral. But dont want them to have to refill the water nd my tank consumes about 1 gallon of water a day so I figured a 15-20 gallon would be the right size. Ill have to get a 1/2" and see how that works.I've built a few over the years. A 5 gallon container works well in most situations but building a custom ATO can take advantage of space and be designed for a larger volume. 1/4" is probably the minimum thickness but you'll likely see bowing if it's a larger volume. I prefer using 1/2" for the added rigidity even if it's for a smaller volume. I'll also use #40 instead of #3 or #4 as it's a lot stronger but working with it is a lot different.

Why though if you can already buy one ready to go? Although it could be as easy as a 20g brute can inside a nice cabinet matching your tank stand. I use a banshee 10g for mine which is fine for 9 days.
You might consider doing what I did... no reservoir at all. RODI supply is plumbed directly to the ATO, with a redundant shut off system to insure reliability. Never again refill your reservoir, and it saves all that space 
In my system, water from the RO/DI system comes through an electric ball valve, into a manual valve manifold, with lines running to the ATO, the Kalkwasser Reactor, and the salt mixing station. The electric ball valve only opens for an hour, twice a day, and when I'm refilling the mixing station barrel. That way, the system runs on demand, avoiding on/off flutter, and the TDS creep associated with that.
Each line terminates at a float valve. Each float valve has a float switch mounted just above it, so that if the float valve fails, water will rise an inch or so, and trip the float switch. Float switches trigger an Apex alarm, and automatically closes the electric ball valve, shutting down all incoming water until I can get it fixed. Add in a cheap water alarm on the floor in the sump area, and I feel pretty safe with this system. Been in place for what, 8 years now? Flawless.
Now that's cool. Can you post some pics of the key features?You might consider doing what I did... no reservoir at all. RODI supply is plumbed directly to the ATO, with a redundant shut off system to insure reliability. Never again refill your reservoir, and it saves all that space
In my system, water from the RO/DI system comes through an electric ball valve, into a manual valve manifold, with lines running to the ATO, the Kalkwasser Reactor, and the salt mixing station. The electric ball valve only opens for an hour, twice a day, and when I'm refilling the mixing station barrel. That way, the system runs on demand, avoiding on/off flutter, and the TDS creep associated with that.
Each line terminates at a float valve. Each float valve has a float switch mounted just above it, so that if the float valve fails, water will rise an inch or so, and trip the float switch. Float switches trigger an Apex alarm, and automatically closes the electric ball valve, shutting down all incoming water until I can get it fixed. Add in a cheap water alarm on the floor in the sump area, and I feel pretty safe with this system. Been in place for what, 8 years now? Flawless.

Sure.
Here's the electric ball valve I'm using:
Amazon part number: B06XXPZHVB
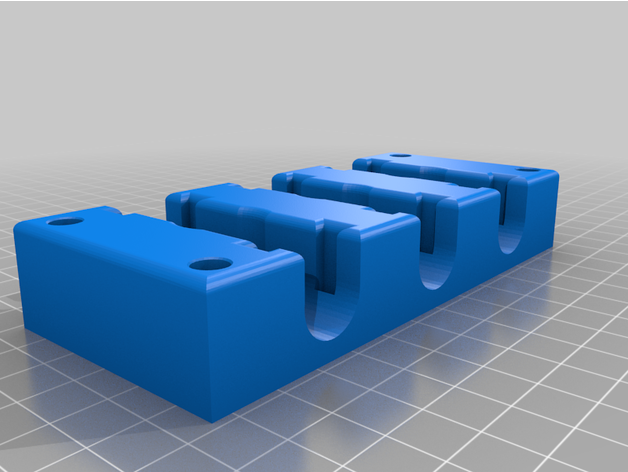
The valve manifold is just 3 cheap 1/4" ball valves, in a 3D printed body I designed. It's available here:
 www.thingiverse.com
The float switches I used are here:
Amazon part number: B071ZG4Y34
And the float valves I used are here:
Amazon part number: B0077RAUTA
For some reason, the forum is messing up straight Amazon links. Search those part numbers, you'll get there.
A few pics... just took 'em, sorry if it's not all clean and shiny in my sump closet. Oh, the electric ball valve is nearly impossible to get a photo of... and the round 'thing' below the manifold is a pressure reduction valve. My RO system works at 60 psi, and I find that these float valves don't work reliably that high. This device reduces the pressure to 30 psi.


Here's the electric ball valve I'm using:
Amazon part number: B06XXPZHVB
The valve manifold is just 3 cheap 1/4" ball valves, in a 3D printed body I designed. It's available here:
RO/DI Push Connect Valve Manifold by GreybeardFM
Holds three cheap Amazon 1/4" RO/DI valves easily for mounting. Enjoy :D
www.thingiverse.com
The float switches I used are here:
Amazon part number: B071ZG4Y34
And the float valves I used are here:
Amazon part number: B0077RAUTA
For some reason, the forum is messing up straight Amazon links. Search those part numbers, you'll get there.
A few pics... just took 'em, sorry if it's not all clean and shiny in my sump closet
. Oh, the electric ball valve is nearly impossible to get a photo of... and the round 'thing' below the manifold is a pressure reduction valve. My RO system works at 60 psi, and I find that these float valves don't work reliably that high. This device reduces the pressure to 30 psi.
Last edited:
- Joined
- Apr 9, 2019
- Messages
- 1,050
- Reaction score
- 906
Sure.
Here's the electric ball valve I'm using:
Amazon part number: B06XXPZHVB
The valve manifold is just 3 cheap 1/4" ball valves, in a 3D printed body I designed. It's available here:
RO/DI Push Connect Valve Manifold by GreybeardFM
Holds three cheap Amazon 1/4" RO/DI valves easily for mounting. Enjoy :D
The float switches I used are here:
Amazon part number: B071ZG4Y34
And the float valves I used are here:
Amazon part number: B0077RAUTA
A few pics... just took 'em, sorry if it's not all clean and shiny in my sump closet
Awsome idea and set up.
Take a look at these >>>> https://www.tenecoraquariums.com/collections/ato-reservoirs-designer-seriesHas anyone done this before? I'm looking to build a 15 or 20 gallon ATO reservoir. My question comes at what thickness of acrylic should I use for something this size?
These are sized for silicone assembly. We have been working on an easier solvent welding process for our DIY kits and have come up with some ideas. Would you like to be our first lab rat? It would be a no risk propostion.

OP
OP
Yes i would love to the only issue is I would like a 15-gallon kit if you have one?Take a look at these >>>> https://www.tenecoraquariums.com/collections/ato-reservoirs-designer-series
These are sized for silicone assembly. We have been working on an easier solvent welding process for our DIY kits and have come up with some ideas. Would you like to be our first lab rat? It would be a no risk propostion.
- Joined
- Mar 20, 2017
- Messages
- 1,339
- Reaction score
- 1,204
after considering all the options i could think of i just resolved to using a standard 10 gallon tank with a plastic lid i cut to size. cheap, looks good you can easily see the water level and easily replaceable should something occur.
Well you got some cool DIY skills. I take it you have a large tank set up and need a lot of top off?Sure.
Here's the electric ball valve I'm using:
Amazon part number: B06XXPZHVB
The valve manifold is just 3 cheap 1/4" ball valves, in a 3D printed body I designed. It's available here:
RO/DI Push Connect Valve Manifold by GreybeardFM
Holds three cheap Amazon 1/4" RO/DI valves easily for mounting. Enjoy :D
The float switches I used are here:
Amazon part number: B071ZG4Y34
And the float valves I used are here:
Amazon part number: B0077RAUTA
For some reason, the forum is messing up straight Amazon links. Search those part numbers, you'll get there.
A few pics... just took 'em, sorry if it's not all clean and shiny in my sump closet
Can I be a lab rat? That skinny 5 gallon looks like it would be great for my wife's classroom tank.Take a look at these >>>> https://www.tenecoraquariums.com/collections/ato-reservoirs-designer-series
These are sized for silicone assembly. We have been working on an easier solvent welding process for our DIY kits and have come up with some ideas. Would you like to be our first lab rat? It would be a no risk propostion.
Similar threads
- Price: $187.00
- Shipping Available
- Replies
- 0
- Views
- 229
- Replies
- 2
- Views
- 141
- Replies
- 48
- Views
- 1,556


