Thoughts in Progress: My Big Tank

OP
OP
Bleigh

Bleigh

The best bad influence
View Badges
Joined
Jan 15, 2019
Messages
9,075
Reaction score
22,375
Location
Charlotte, NC
Rating - 0%
0   0   0
Have you set a “deadline” for yourself to making a decision on a final plan and begin turning the plan into a new tank?

no. I was watching. The recent brs videos of Ryan putting in his tank that he’s been talking about for 10 years. LOL. I don’t think it will take me that long, but it made me feel better to see that other people take a while figuring out their dream tanks too.
 

TexanCanuck

Active Member
View Badges
Joined
Feb 10, 2021
Messages
277
Reaction score
259
Location
Dallas, TX
Rating - 0%
0   0   0
Have you settled on a final size yet?

If you're thinking about anything in the 150 to 180 gallon size, why not think about going all the way to 225? It opens up some options for some full-size angelfish.

I have a 130 display now and wish I'd gone bigger, and am now thinking about my "next" tank. My first introduction to reef fish was as a kid snorkeling in the Bahamas and I still remember being amazed by the French Angel and Queen Angel ... and have always wanted to be able to build a tank to bring them into my home. Unfortunately, a lot of these species require a 225 (or larger).

Could be a great option for your FOWLR tank.
 

TexanCanuck

Active Member
View Badges
Joined
Feb 10, 2021
Messages
277
Reaction score
259
Location
Dallas, TX
Rating - 0%
0   0   0
One other thought ... based on my experience with my 130, I'd also strongly suggest putting the tank somewhere you can build a "fish room" for the sump and associated equipment.

When I first built my tank I put everything in the stand. While it all fit, it was always a pain in the butt every time I wanted to tweak something or experiment with a new piece of hardware.

After 18 months I finally broke down and arranged for my LFS to "board" my fish for a week while I moved the tank to the opposite side of the room where it would share a wall with a closet in another room. That allowed me to punch a couple of holes in the wall and move all the equipment into the closet, where it would be easier for me to access. Even thought the closet is small (essentially the same footprint as the stand), the ability to access all the equipment from above makes maintenance MUCH easier, and I was Abe to build shelves above it to hold my Apex, Trident, and everything else. Made my life much easier.
 
OP
OP
Bleigh

Bleigh

The best bad influence
View Badges
Joined
Jan 15, 2019
Messages
9,075
Reaction score
22,375
Location
Charlotte, NC
Rating - 0%
0   0   0
One other thought ... based on my experience with my 130, I'd also strongly suggest putting the tank somewhere you can build a "fish room" for the sump and associated equipment.

When I first built my tank I put everything in the stand. While it all fit, it was always a pain in the butt every time I wanted to tweak something or experiment with a new piece of hardware.

After 18 months I finally broke down and arranged for my LFS to "board" my fish for a week while I moved the tank to the opposite side of the room where it would share a wall with a closet in another room. That allowed me to punch a couple of holes in the wall and move all the equipment into the closet, where it would be easier for me to access. Even thought the closet is small (essentially the same footprint as the stand), the ability to access all the equipment from above makes maintenance MUCH easier, and I was Abe to build shelves above it to hold my Apex, Trident, and everything else. Made my life much easier.
I’m going to do a 120-180 gallon lps tank and a 300-400 gallon sps tank. For the bigger tank I’m either going to make the garage a tank room or build a false wall for a tank room. Right now it’s on the list of house projects. Just finished getting all the windows in the house replaced, so getting closer! ❤️
 

TexanCanuck

Active Member
View Badges
Joined
Feb 10, 2021
Messages
277
Reaction score
259
Location
Dallas, TX
Rating - 0%
0   0   0
Good for you! Don't give up.

The false wall for a tank room is a great idea. That would allow you to access an external overflow from inside the tank room, and keep the plumbing into the sump really simple ... and thus reducing the probability of something going wrong.

However, think about how to bring in fresh air for the skimmer ... you don't want it to suck in air from the garage (if you also use the garage to park your car in). If there isn't anything above the garage, maybe you could bring in air from above?

One other thing to add to your list of things to ponder ... where you are going to keep your reservoirs for fresh and/or salt mix. Having them in the tank room saves a huge amount of hassle but increases the size of the room you need.

Also, do NOT use flat-bottomed storage tanks for your fresh/salt reservoirs ... with a tank this size you are going to need something large for routine water changes, and a large flat-bottom tank will always leave you with a "dead" space that never fully drains ... and this makes cleaning those tanks (prior to making a new batch of water) a HUGE pain. I made this mistake and hated it for the year it took me to build the courage to throw it out and do it over again. Instead, use a "cone-bottom" tank with a separate stand to get it up off the floor. With a "bottom drain" tank adapter, you can install the pump directly under the tank and guarantee that the tank will 100% drain - completely dry - and you'll never have to worry about bacterial growth in your storage tank.

I bought mine at US Plastics Corp ...


TexanCanuck

Active Member
View Badges
Joined
Feb 10, 2021
Messages
277
Reaction score
259
Location
Dallas, TX
Rating - 0%
0   0   0
What have you thought about for mechanical filtration?

For the 120-180 are you going to stick with filter socks? Have you thought about a roller fleece approach instead?

For the 300+ SPS tank (which I assume you will want to have high flow), have you thought about using a drip tray with fleece batting?
 
OP
OP
Bleigh

Bleigh

The best bad influence
View Badges
Joined
Jan 15, 2019
Messages
9,075
Reaction score
22,375
Location
Charlotte, NC
Rating - 0%
0   0   0
Good for you! Don't give up.

The false wall for a tank room is a great idea. That would allow you to access an external overflow from inside the tank room, and keep the plumbing into the sump really simple ... and thus reducing the probability of something going wrong.

However, think about how to bring in fresh air for the skimmer ... you don't want it to suck in air from the garage (if you also use the garage to park your car in). If there isn't anything above the garage, maybe you could bring in air from above?

One other thing to add to your list of things to ponder ... where you are going to keep your reservoirs for fresh and/or salt mix. Having them in the tank room saves a huge amount of hassle but increases the size of the room you need.

Also, do NOT use flat-bottomed storage tanks for your fresh/salt reservoirs ... with a tank this size you are going to need something large for routine water changes, and a large flat-bottom tank will always leave you with a "dead" space that never fully drains ... and this makes cleaning those tanks (prior to making a new batch of water) a HUGE pain. I made this mistake and hated it for the year it took me to build the courage to throw it out and do it over again. Instead, use a "cone-bottom" tank with a separate stand to get it up off the floor. With a "bottom drain" tank adapter, you can install the pump directly under the tank and guarantee that the tank will 100% drain - completely dry - and you'll never have to worry about bacterial growth in your storage tank.

I bought mine at US Plastics Corp ...


I have a mixing station in the garage already. I did make the mistake of flat bottom. I tell everyone to avoid those now also. They are only 35 gallons. It works for the tanks I have now, but when I upgrade to a larger tank, I will need bigger ones anyway, and will switch to the cone shaped ones. If nothing else, they may be able to hold extra rain water to water my plants with so they are not a total waste.

I have considered doing a partial false wall that stops about 8 foot up. I think the walls are 10 feet high, so that would likely help tremendously with the air exchange. The room has two entry points, one is a large archway and one is a small door off the kitchen that doesn't make sense. I thought I could block it off and create a hallway type space. I hope to have a really nice set up made for it. So it would depend on how that turns out on whether I would even put a door on it.
 
OP
OP
Bleigh

Bleigh

The best bad influence
View Badges
Joined
Jan 15, 2019
Messages
9,075
Reaction score
22,375
Location
Charlotte, NC
Rating - 0%
0   0   0
What have you thought about for mechanical filtration?

For the 120-180 are you going to stick with filter socks? Have you thought about a roller fleece approach instead?

For the 300+ SPS tank (which I assume you will want to have high flow), have you thought about using a drip tray with fleece batting?

I have not looked at drip trays. What are they? Right now I am thinking roller mat. I regularly forget to change my filter socks until they are completely blocked. I did not think I would mind washing them, but going on 2 years, it's more of a hassle than I anticipated.

first world problems ugh GIF by GIPHY Studios Originals
 

TexanCanuck

Active Member
View Badges
Joined
Feb 10, 2021
Messages
277
Reaction score
259
Location
Dallas, TX
Rating - 0%
0   0   0
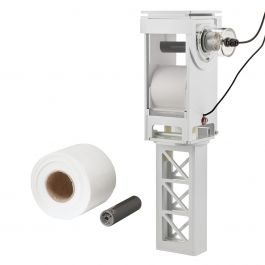
When I moved my tank I too switched from filter socks (which I hated) to a roller mat. It has been both a blessing and a curse.

I started with KLIR Di-4 drop-in system in my existing sump. I thought it would be a great low-cost way to get away from filter socks without having to buy a new sump. Total nightmare. The unit was always jamming and it was a total pain the butt to change the fleece. CoralVue was helpful and sent me a new (bigger) motor to overcome the jamming problem - it helped, but never really solved it.


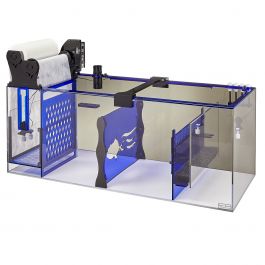
So I finally gave up and I purchased the Trigger Systems Platinum 39 for my 130 display. It has some really thoughtful features and I liked the idea of having a roller fleece that was integral to the sump as a way of reducing the number of things that could go wrong.


It too had a lot of growing pains. I think I was one of the early adopters of the unit, as Trigger Systems ended up reaching out to me and sending a technician to my house to help me trouble shoot. The ended up swapping out a number of parts over the course of three visits and two weeks. Eventually, after replacing the controller board, the motor, the fleece support brackets, and the float switches, the unit was much more reliable. Since then I've had it running for about 1 year without major problems. I can run the unit for a good 6 weeks between having to change fleece rolls.

I think I got lucky, as it turns out that Trigger Systems actually manufactures the units right here in the Dallas area, so it was easy for them to send an engineer to my house to sort me out (which they were really great about - even during the early days of the pandemic). Not sure what someone else's experience might be if they weren't nearby. Then again, I notice they now show the unit on their website as "V2" so perhaps they have worked the bugs out by now.

Having said all of the above, the unit still can be temperamental - "tuning" the unit to get the right working water level in the sump and the float switches set at just the right place is not as intuitive as one would hope. Also, in the event the unit does breakdown, you have no backup alternative ... it's not like you can easily go back to filter socks again until you can get spare parts.

If I were to do it again, I might think about one of the units from Royal Exclusiv - they are about 50% more expensive, but I think they are made with more robust materials. I also really like the "pull out" design they have for changing the fleece roll ... definitely better than the Trigger Systems Platinum approach which can be tedious.


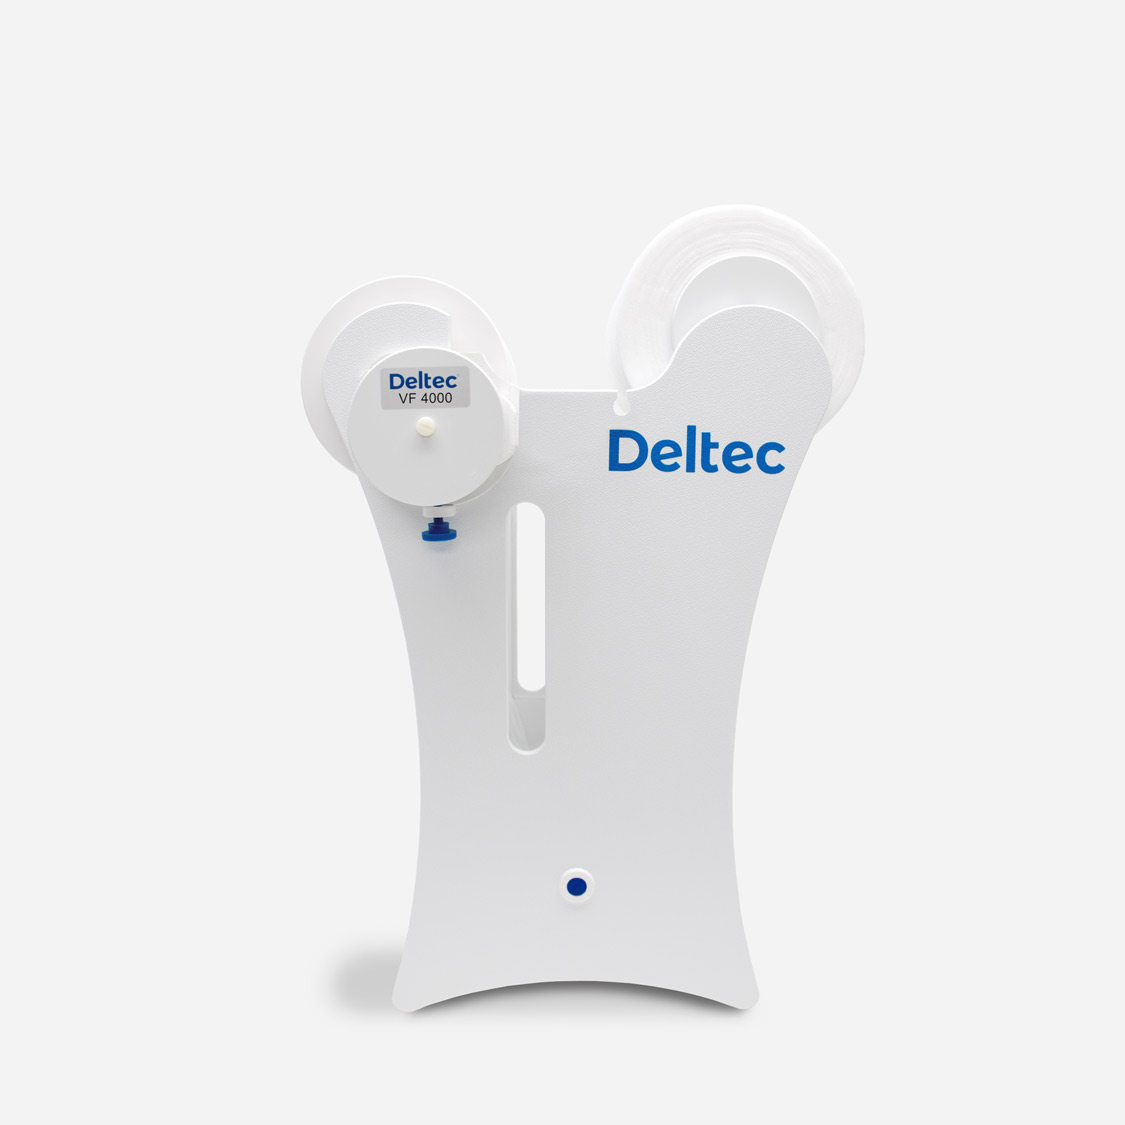
I also see that Deltec has since release the VF series of fleece filters. While these are not drop-in replacements for filter socks, they still need to be added to a standard sump so they give you a little more flexibility. They also look much more robust, although they are also quite expensive considering you still have to buy/build a sump around them.


Nonetheless I think one of the above options would be the way to go for your 120-180.

For your large SPS tank, a drip tray may be worthwhile. A drip tray is one of the original "wet/dry" approaches we used back in the 90s when the "trickle filter" was the rage. The idea was to take the drain line from your overflow and route it into a shallow horizontal box (the width of the sump) that has a pattern of small holes through the bottom surface. The causes the water to "rain" down from this tray kind of like a shower head. Underneath that tray, you would have a second tray the same size with the same pattern of holes underneath, but this tray would be lined with a flat sheet of fleece. This would provide mechanical filtration before the water would then drip from that tray into the third tray would would be the same horizontal dimensions (length and width) but several times taller ... and this tray would be filled with bio balls or similar media. The thinking back then was that the rain-like pattern of water would flow chaotically over the bio balls and provide a very large air/water interface, which combined with the large surface area of the bio balls would provide ideal biological filtration. The water would then exit this last tray at the bottom of the sump and now flow horizontally into the next section which was the skimmer section or refugium.

Of course we now have much better sumps with much more effective biological media the operates fully submerged.

Nonetheless, the "drip tray" approach (i.e. the first two trays) are still a great way to provide a very large and very effective mechanical filter (you can layer different densities of fleece on top of each other in a gradient - say 100 micron on top of 50 micron on top of 20 micron - to give you maximum control/flexibility). But the biggest benefit of this design is that since you would buy fleece in flat sheets or rolls from any source available, it is incredibly cheap to run this filter and the maintenance is very low ... you simply slide/lift the tray out, pull out the fleece and throw it away, and drop in new fleece and you're done. Unlike filter socks, since the fleece is so cheap you don't have to bother trying to wash and recycle the fleece (although you can if you want).

The other big benefit from this design is you can build it yourself for next to nothing - so if you don't like it, you can throw it away and try something different without losing any sleep.

Here's a great DIY video that shows you how (this guy builds them for freshwater applications, but it's exactly the same ... but instead of using the bio balls under the drip tray you would used need submerged bio media such as ceramic plates or bricks)


Anyway ... it's good food for thought.

PS - in the video above, he quickly talks about "fluidized bed" filters. These are really cool too but I would not recommend them for a 300 gal tank as they still would need a more effective mechanical filter upstream of the tumbling media - but if you haven't seen one of them before it's very educational.
 

TexanCanuck

Active Member
View Badges
Joined
Feb 10, 2021
Messages
277
Reaction score
259
Location
Dallas, TX
Rating - 0%
0   0   0
What have you thought about for a skimmer?

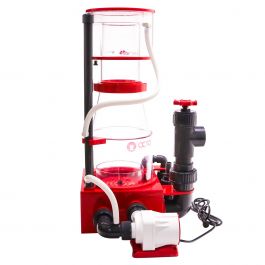
I started out with a becket-style skimmer because for many years it was understood to be the most powerful method of producing a massive air/water interface. When I bought my 130 the only people still making them was Bashsea aquatics ... so I purchased their "Twisted Skimmer" 6-30. It is a BEAST.


While the build quality is amazing, the unit is not for everyone. It does produce an amazing amount of bubbles, but the skimmer is very difficult to tune. Because it is very difficult to tune, it is very hard to use when cycling a tank and going through the initial stages of stocking the tank - you end up sizing the skimmer for the bio load you think you're going to end up once the tank is fully stocked, but there is virtually no way to turn the unit down to accommodate a much lighter bio load for the first 6 to 12 months of setting up a new tank.

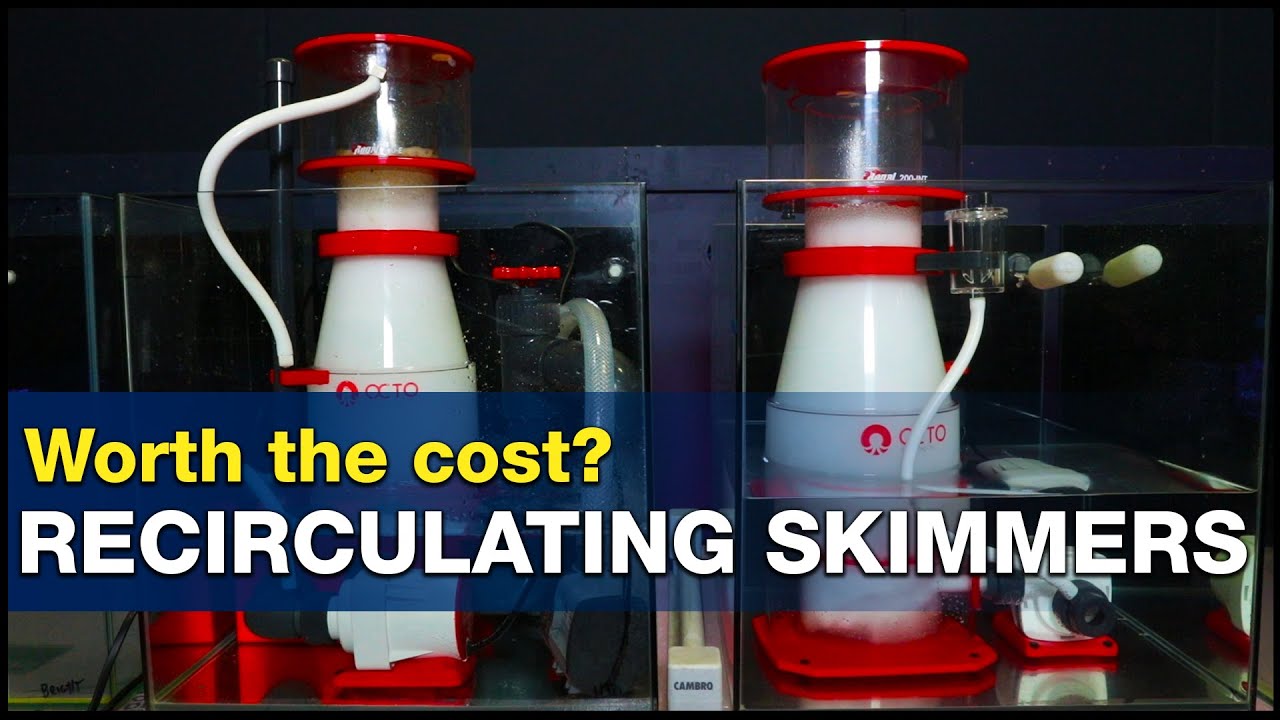
Have you thought about a recirculating skimmer?

BRS did a really get video series on the pros and cons of recirculating skimmers that is well worth watching.


After watching this (and the associated series they did about how to really tune a skimmer), I got hooked on the idea of a recirculating skimmer and purchased the Reef Octopus Regal 200 EXT. I LOVE THIS SKIMMER! It is so easy to tune this unit exactly as BRS shows in their video series. I can't believe I've had saltwater aquariums for 30 years and never discovered this before! I will never look at a skimmer the same way again.


It also helped to plumb the skimmer external to the sump (which is super easy to do with a recirculating design) since it freed up a TON of space in my sump for a larger refugium and bio media.

Can't say enough good things about an externally-plumbed recirculating skimmer. It has significantly improved my water quality (both becasue of better skimmer performance AND a larger refugium) while significantly reducing maintenance.

Lastly, with tanks this big you should definitely think about an external skim mate collection reservoir. I purchased the matching 6" waste collector from Reef Octopus and the float switch integrates with the VarioS pump on the skimmer to provide an extra layer of safety for the floor in the fish room! And now I only empty the waste collector once a week!


Anirban

5000 Club Member
View Badges
Joined
Sep 18, 2015
Messages
5,353
Reaction score
9,480
Location
Chapel Hill
Rating - 100%
1   0   0
You can look into Fiji cube sump. They are good ones and also do custom work too. I got one for my new build and they also come with all the essential things you get in a more custom build.
 
OP
OP
Bleigh

Bleigh

The best bad influence
View Badges
Joined
Jan 15, 2019
Messages
9,075
Reaction score
22,375
Location
Charlotte, NC
Rating - 0%
0   0   0
When I moved my tank I too switched from filter socks (which I hated) to a roller mat. It has been both a blessing and a curse.

I started with KLIR Di-4 drop-in system in my existing sump. I thought it would be a great low-cost way to get away from filter socks without having to buy a new sump. Total nightmare. The unit was always jamming and it was a total pain the butt to change the fleece. CoralVue was helpful and sent me a new (bigger) motor to overcome the jamming problem - it helped, but never really solved it.


So I finally gave up and I purchased the Trigger Systems Platinum 39 for my 130 display. It has some really thoughtful features and I liked the idea of having a roller fleece that was integral to the sump as a way of reducing the number of things that could go wrong.


It too had a lot of growing pains. I think I was one of the early adopters of the unit, as Trigger Systems ended up reaching out to me and sending a technician to my house to help me trouble shoot. The ended up swapping out a number of parts over the course of three visits and two weeks. Eventually, after replacing the controller board, the motor, the fleece support brackets, and the float switches, the unit was much more reliable. Since then I've had it running for about 1 year without major problems. I can run the unit for a good 6 weeks between having to change fleece rolls.

I think I got lucky, as it turns out that Trigger Systems actually manufactures the units right here in the Dallas area, so it was easy for them to send an engineer to my house to sort me out (which they were really great about - even during the early days of the pandemic). Not sure what someone else's experience might be if they weren't nearby. Then again, I notice they now show the unit on their website as "V2" so perhaps they have worked the bugs out by now.

Having said all of the above, the unit still can be temperamental - "tuning" the unit to get the right working water level in the sump and the float switches set at just the right place is not as intuitive as one would hope. Also, in the event the unit does breakdown, you have no backup alternative ... it's not like you can easily go back to filter socks again until you can get spare parts.

If I were to do it again, I might think about one of the units from Royal Exclusiv - they are about 50% more expensive, but I think they are made with more robust materials. I also really like the "pull out" design they have for changing the fleece roll ... definitely better than the Trigger Systems Platinum approach which can be tedious.


I also see that Deltec has since release the VF series of fleece filters. While these are not drop-in replacements for filter socks, they still need to be added to a standard sump so they give you a little more flexibility. They also look much more robust, although they are also quite expensive considering you still have to buy/build a sump around them.


Nonetheless I think one of the above options would be the way to go for your 120-180.

For your large SPS tank, a drip tray may be worthwhile. A drip tray is one of the original "wet/dry" approaches we used back in the 90s when the "trickle filter" was the rage. The idea was to take the drain line from your overflow and route it into a shallow horizontal box (the width of the sump) that has a pattern of small holes through the bottom surface. The causes the water to "rain" down from this tray kind of like a shower head. Underneath that tray, you would have a second tray the same size with the same pattern of holes underneath, but this tray would be lined with a flat sheet of fleece. This would provide mechanical filtration before the water would then drip from that tray into the third tray would would be the same horizontal dimensions (length and width) but several times taller ... and this tray would be filled with bio balls or similar media. The thinking back then was that the rain-like pattern of water would flow chaotically over the bio balls and provide a very large air/water interface, which combined with the large surface area of the bio balls would provide ideal biological filtration. The water would then exit this last tray at the bottom of the sump and now flow horizontally into the next section which was the skimmer section or refugium.

Of course we now have much better sumps with much more effective biological media the operates fully submerged.

Nonetheless, the "drip tray" approach (i.e. the first two trays) are still a great way to provide a very large and very effective mechanical filter (you can layer different densities of fleece on top of each other in a gradient - say 100 micron on top of 50 micron on top of 20 micron - to give you maximum control/flexibility). But the biggest benefit of this design is that since you would buy fleece in flat sheets or rolls from any source available, it is incredibly cheap to run this filter and the maintenance is very low ... you simply slide/lift the tray out, pull out the fleece and throw it away, and drop in new fleece and you're done. Unlike filter socks, since the fleece is so cheap you don't have to bother trying to wash and recycle the fleece (although you can if you want).

The other big benefit from this design is you can build it yourself for next to nothing - so if you don't like it, you can throw it away and try something different without losing any sleep.

Here's a great DIY video that shows you how (this guy builds them for freshwater applications, but it's exactly the same ... but instead of using the bio balls under the drip tray you would used need submerged bio media such as ceramic plates or bricks)


Anyway ... it's good food for thought.

PS - in the video above, he quickly talks about "fluidized bed" filters. These are really cool too but I would not recommend them for a 300 gal tank as they still would need a more effective mechanical filter upstream of the tumbling media - but if you haven't seen one of them before it's very educational.


I have an acrylic habitats sump right now. It has the option of putting a board down instead of the filter socks. It’s just one layer, so not quite a drip tray, but it sounds similar. I’ll take a picture in a bit and post it.

If I decided I was going to spend a lot of $$$, Id really love something super nice and custom from adaptive reef. I LOVE his builds. I’ve seen him use roller mats as well, but I’d double check what he’s using after reading your saga. My current tank was my experimental tank. The next two will be go big or go home on the equipment. I want to buy it once and be done.
 

TexanCanuck

Active Member
View Badges
Joined
Feb 10, 2021
Messages
277
Reaction score
259
Location
Dallas, TX
Rating - 0%
0   0   0
Not knocking anything Adaptive Reef makes (he's a fellow Canadian, after all), but if you really want to look at amazing build quality go check out the Royal Exclusiv "Dreambox 3.0" ... it too can be yours for as little as $7,892!!! (with skimmer)


TexanCanuck

Active Member
View Badges
Joined
Feb 10, 2021
Messages
277
Reaction score
259
Location
Dallas, TX
Rating - 0%
0   0   0
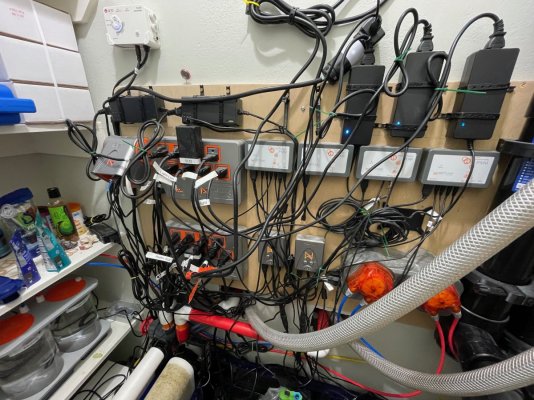
As long as you are looking at Adaptive Reef, the one product he offers that I would HIGHLY recommend is his APEX Controller Board. Especially for your larger reef where you are going to end up with a large amount of automation.

I made my own, but compared to the Adaptive Reef solution it's kind of emabarassing.

I'm attaching a photo here, purely to provide an objective example of how NOT to do things (don't judge me). I definitely have fixing this mess on my to-do list!
 

Attachments

  • IMG_0978.jpeg
    IMG_0978.jpeg
    264.3 KB · Views: 37
OP
OP
Bleigh

Bleigh

The best bad influence
View Badges
Joined
Jan 15, 2019
Messages
9,075
Reaction score
22,375
Location
Charlotte, NC
Rating - 0%
0   0   0
So my husband just green lighted this project. I was thinking I'd do an 120-180 LPS first. But after we talked, he said it makes more sense to keep the 60 as an LPS until it's totally shot, and get the SPS stuff up and going. Have I mentioned how lucky I am to have a supportive partner? Cause I am! I am so excited right now.

So problems... even though I have been talking about this for ages, I'm not really sure whatI want to do. I am thinking @Elder1945 for a sump, but no clue on stand or tank. I know I don't want it TOO deep, as my 25 inch is already hard for me to reach the bottom of and I end up avoiding maintenance for the bottom third of the tank cause it is so hard to reach, but that my be unavoidable. It will be bare bottom and I want the flow to be KILLER.
 
OP
OP
Bleigh

Bleigh

The best bad influence
View Badges
Joined
Jan 15, 2019
Messages
9,075
Reaction score
22,375
Location
Charlotte, NC
Rating - 0%
0   0   0
I guess I need to officially start a build for the new tank. Got the stand modified so that the doors open on both sides.


Caring for your picky eaters: What do you feed your finicky fish?

  • Live foods

    Votes: 7 22.6%
  • Frozen meaty foods

    Votes: 25 80.6%
  • Soft pellets

    Votes: 7 22.6%
  • Masstick (or comparable)

    Votes: 1 3.2%
  • Other

    Votes: 2 6.5%
Back
Top