60 Gal cube Build From Scratch :D

GnarleyMarley

Well-Known Member
View Badges
Joined
May 23, 2010
Messages
500
Reaction score
282
Location
Charoltte N.C.
Rating - 0%
0   0   0
Well I figured i may as well go ahead and start my build thread :)
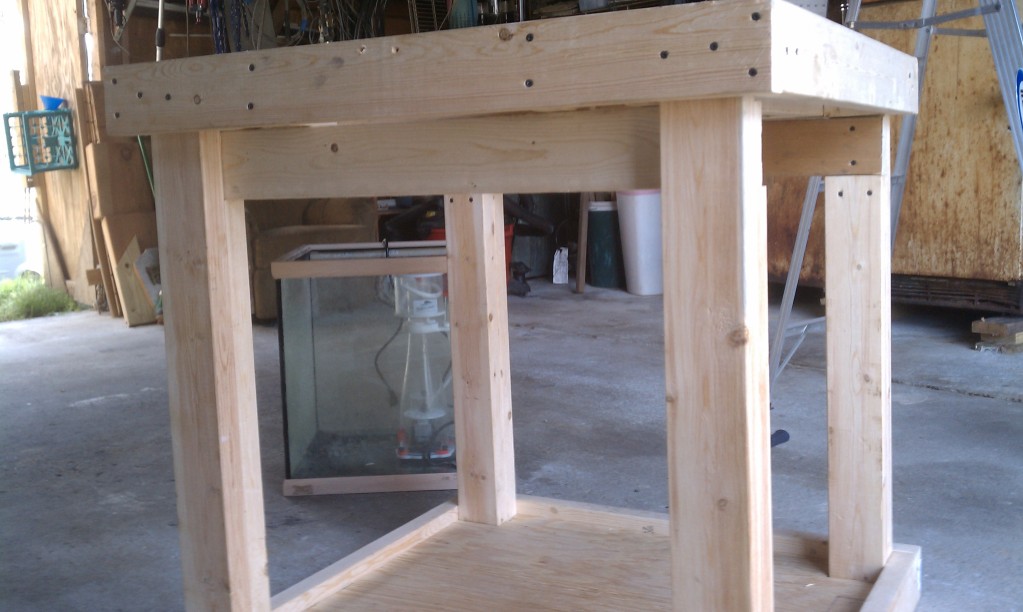
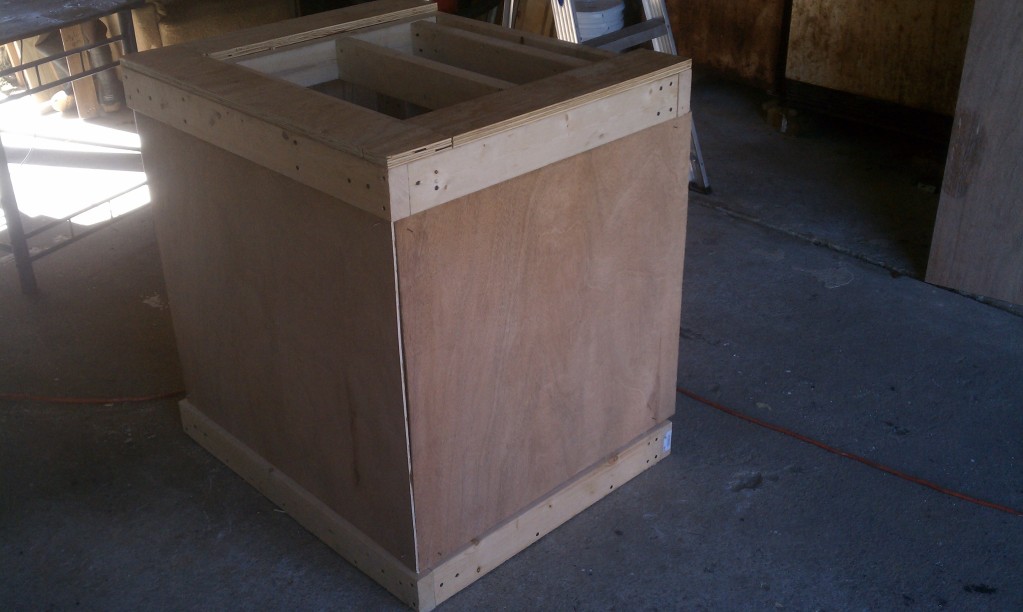
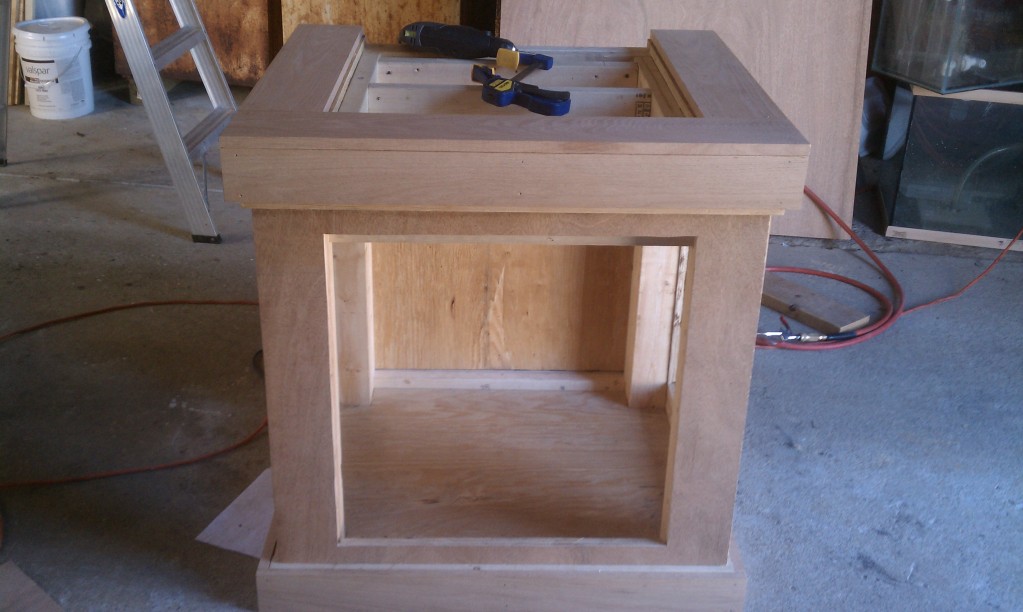
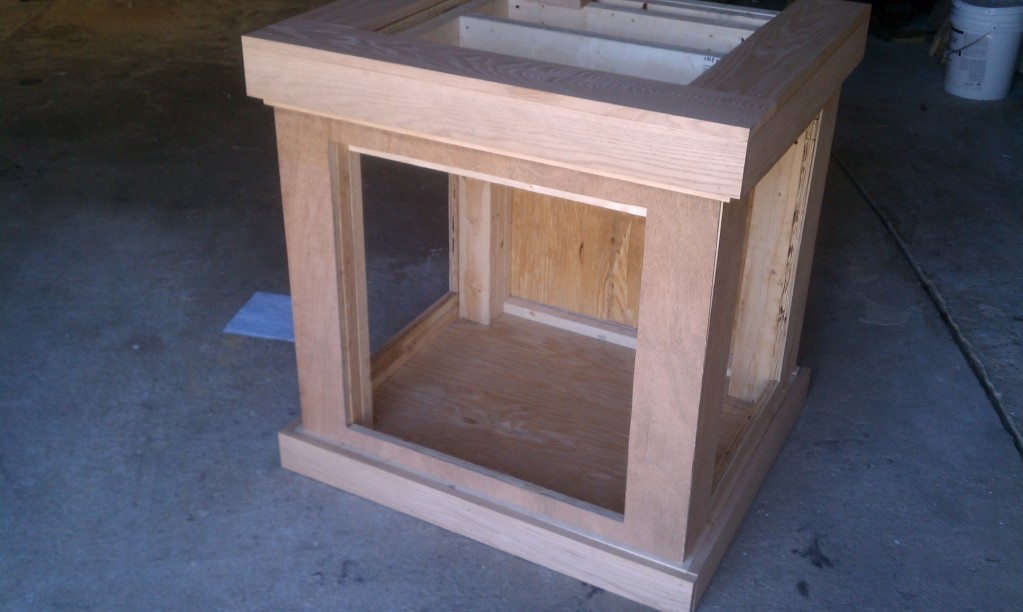
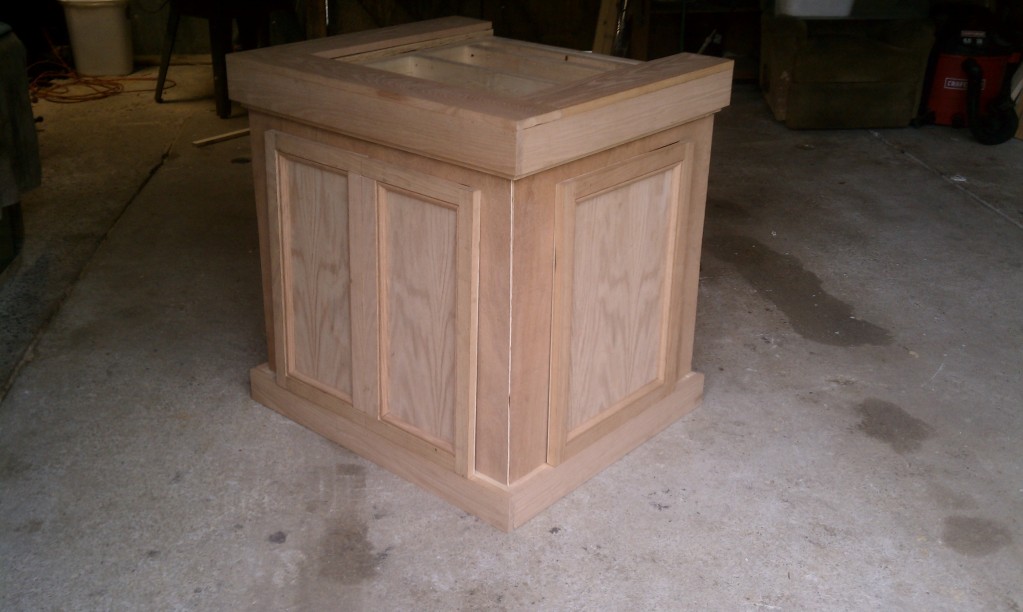
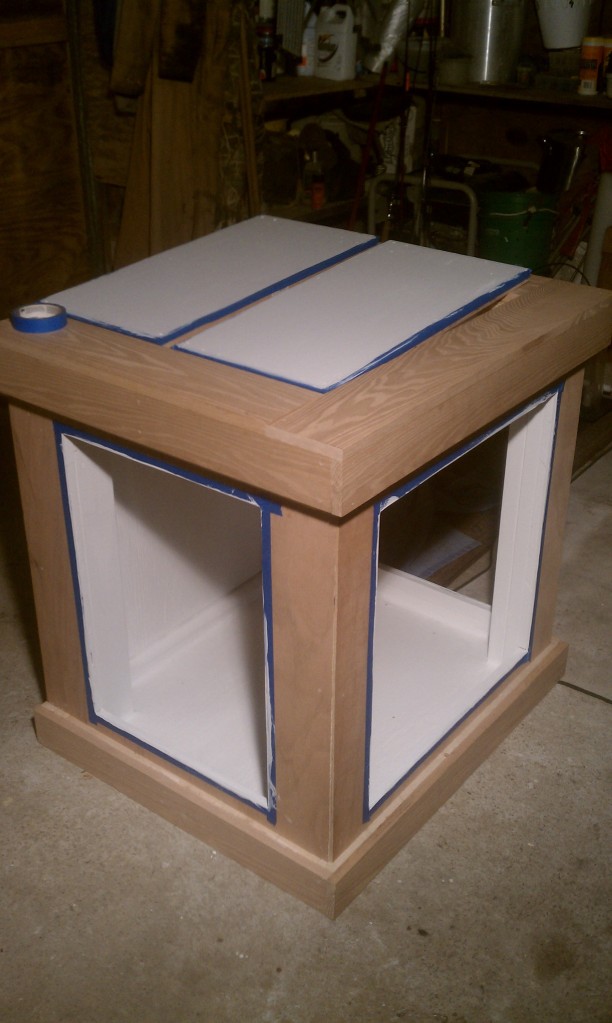
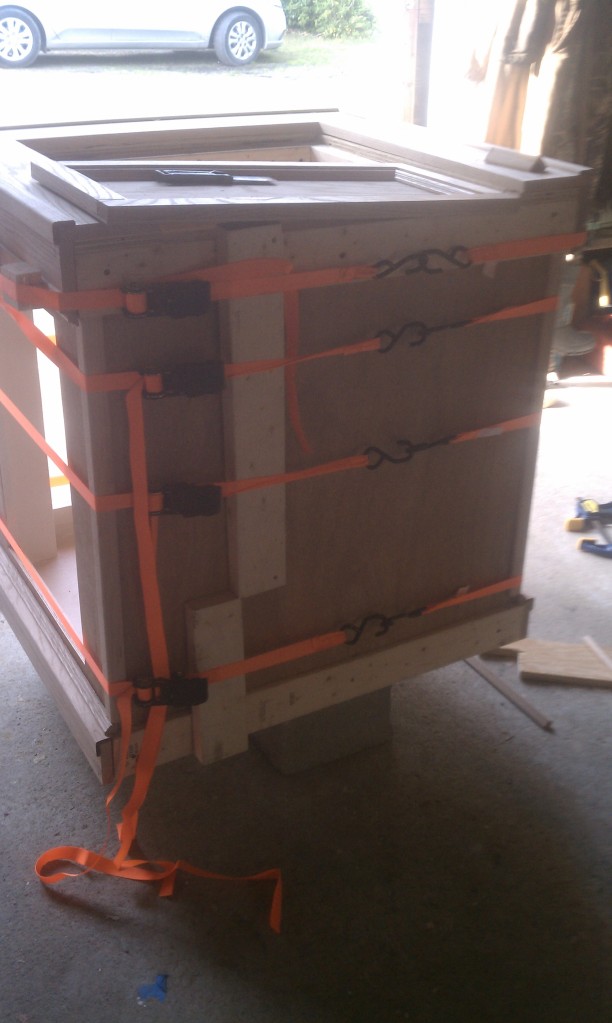
I am building a rimless 60 gal cube (2x2x2) with a 3x3x3 red oak stand. I had to tear apart the tank when i bought it so as of now it is 4 panes of glass and i am waiting to get the bottop pane from the glass shop.
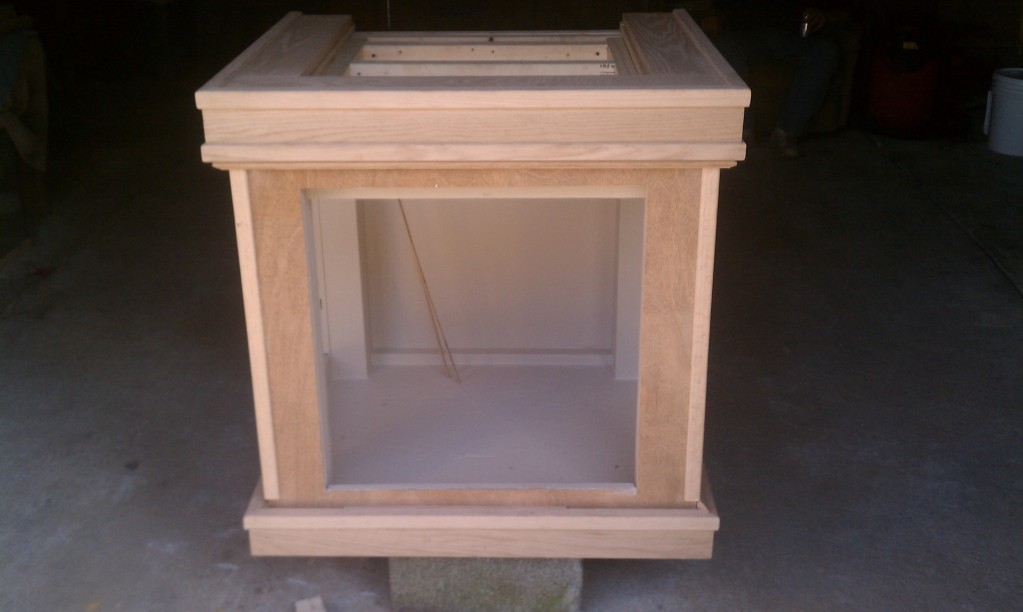
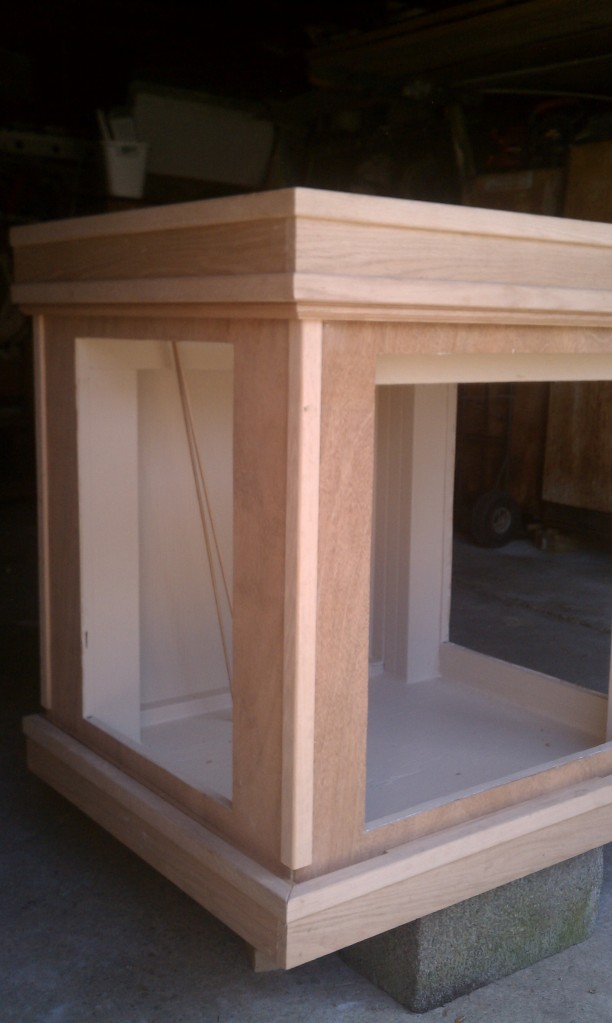
My plan for the stand is 3x3x3 so that i can have a 6" lip all the way around the tank and in the rear have the plumbing lines go thru the top of the stand rather than having a bunch of pipes hanging behind the tank/stand. Also this will allow more than enough room for a 30x24 or 30x30 custom rimless sump. And as of now i am thinking about stealing some of adamT's sump design and building a compartment in the sump sor an ATO resevoir, but i havn't gotten that far yet.
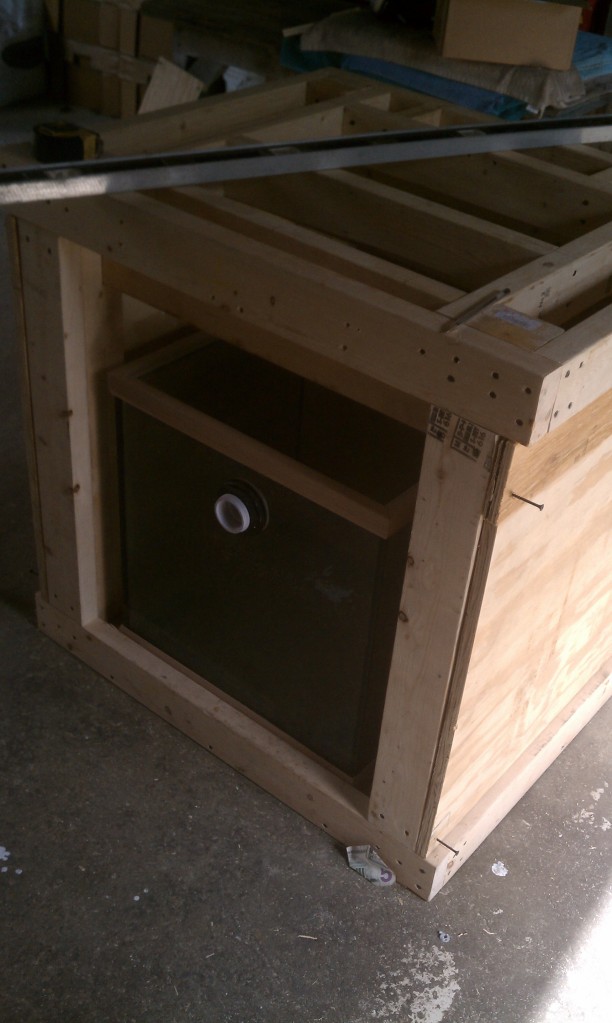
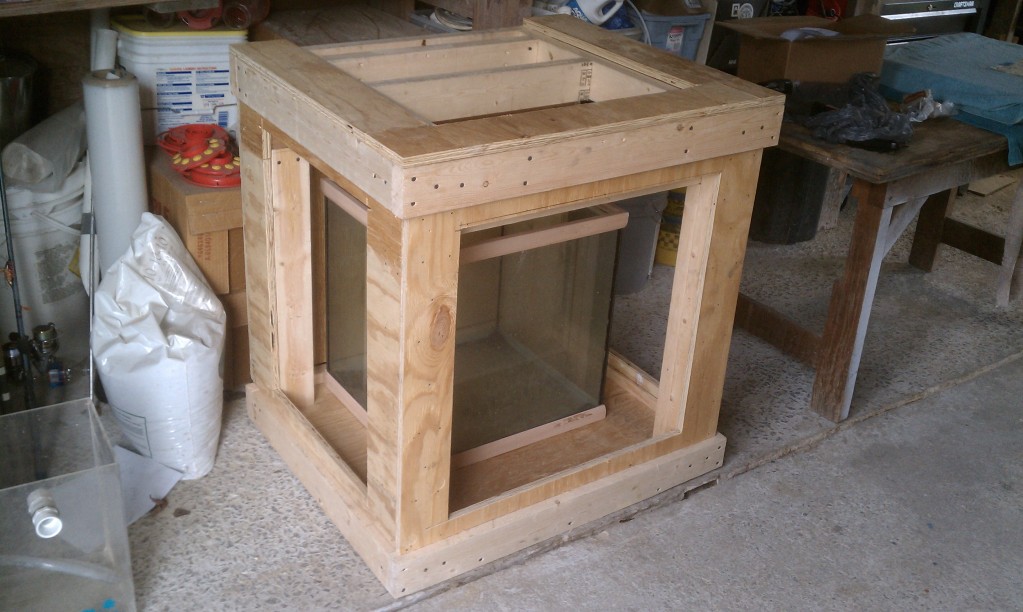
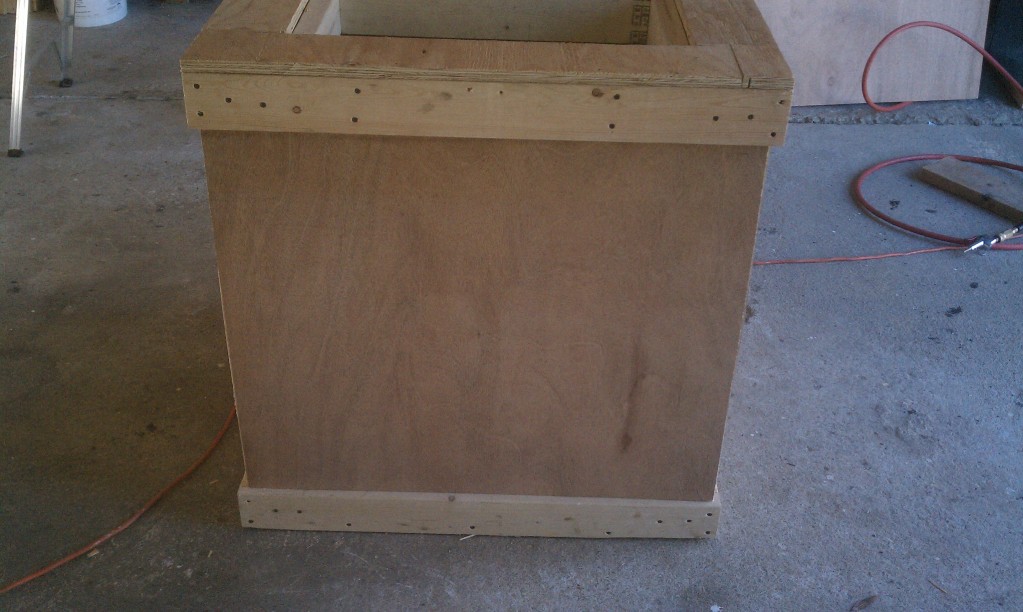
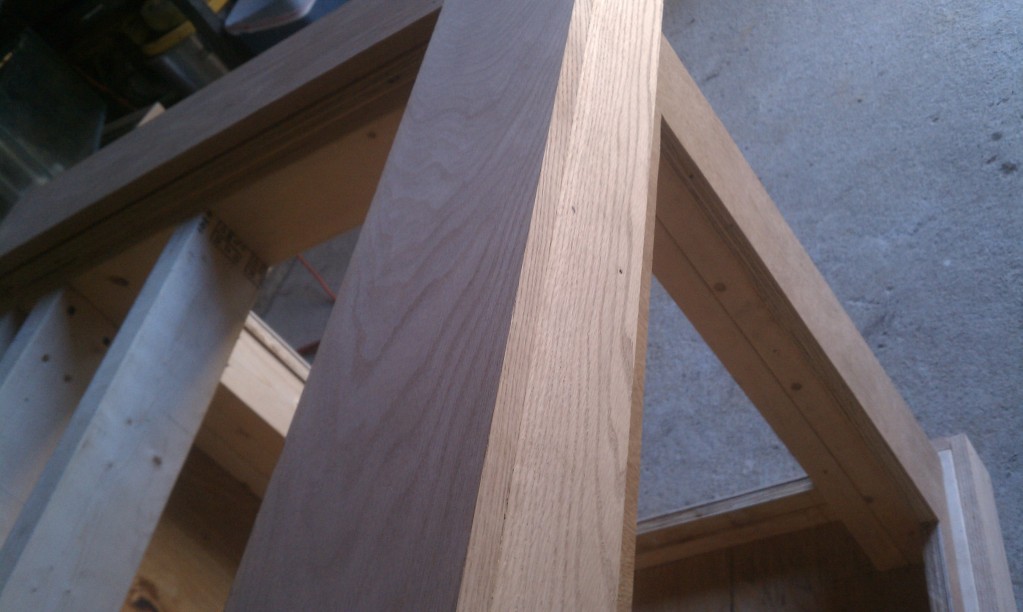
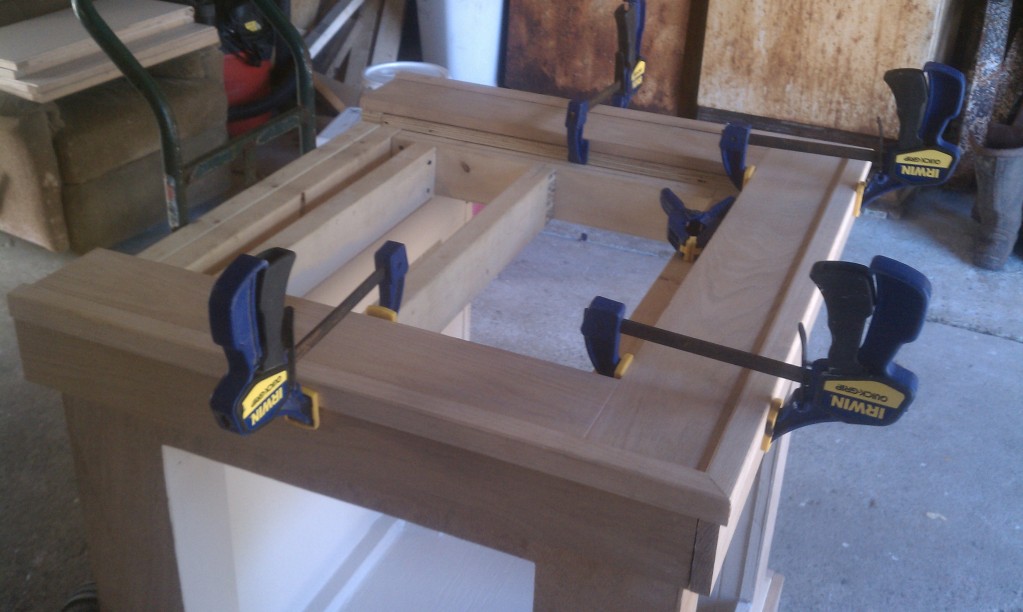
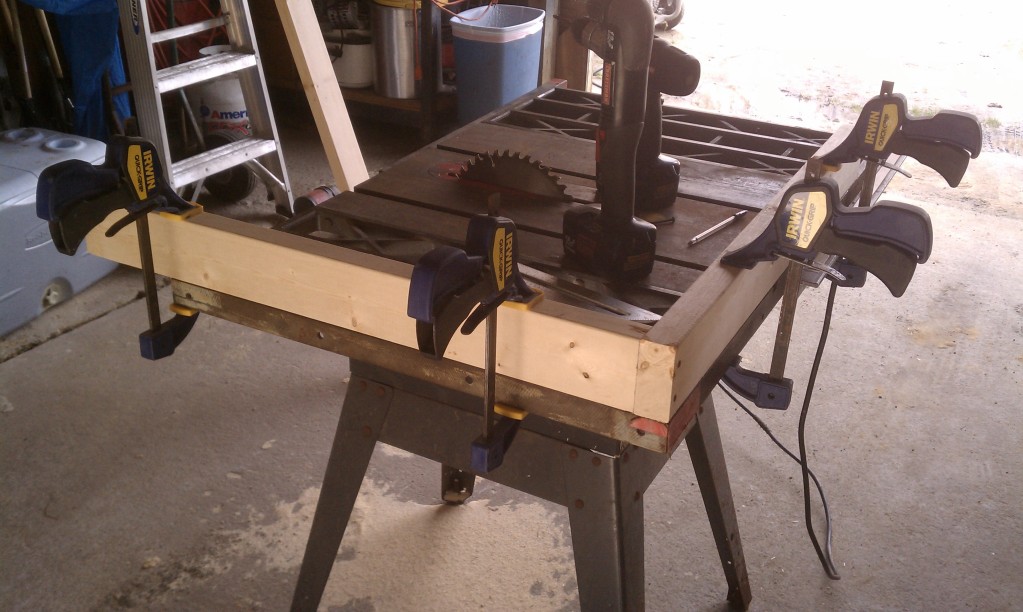
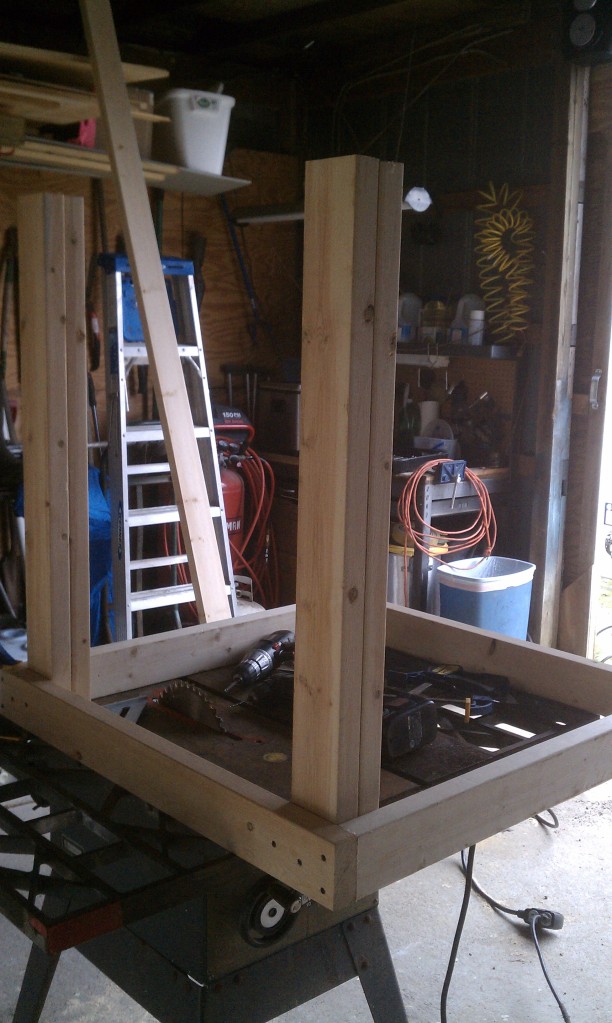
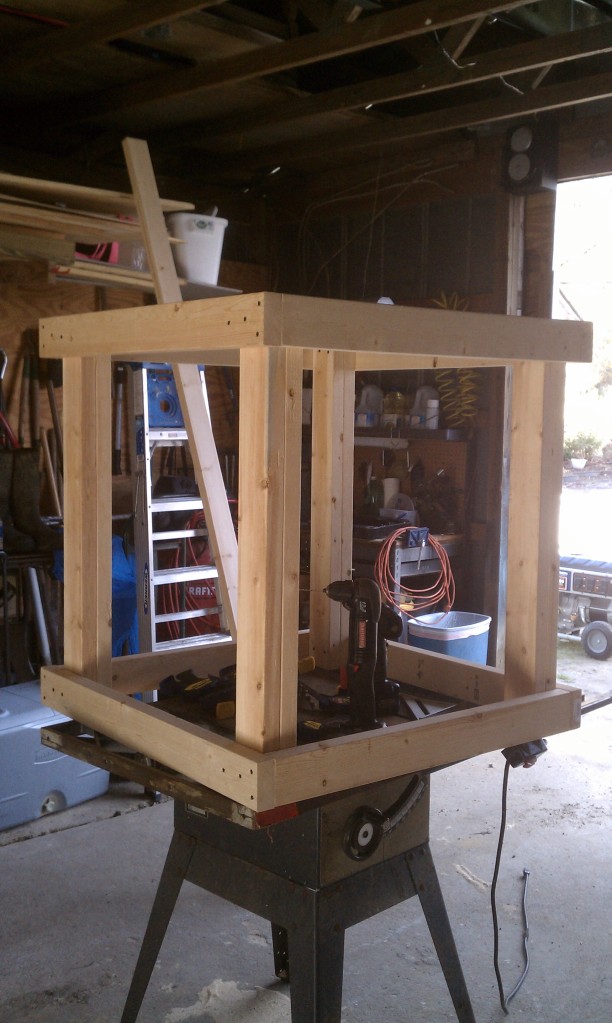
What i have done is build the frame for the tank. And i will work on skinning it sometime this week or next weekend, depending on when i have time.

So without further adeu, here is the stand build....
IMAG0221.jpg

IMAG0222.jpg

IMAG0223.jpg

IMAG0224.jpg

IMAG0225.jpg

IMAG0226.jpg


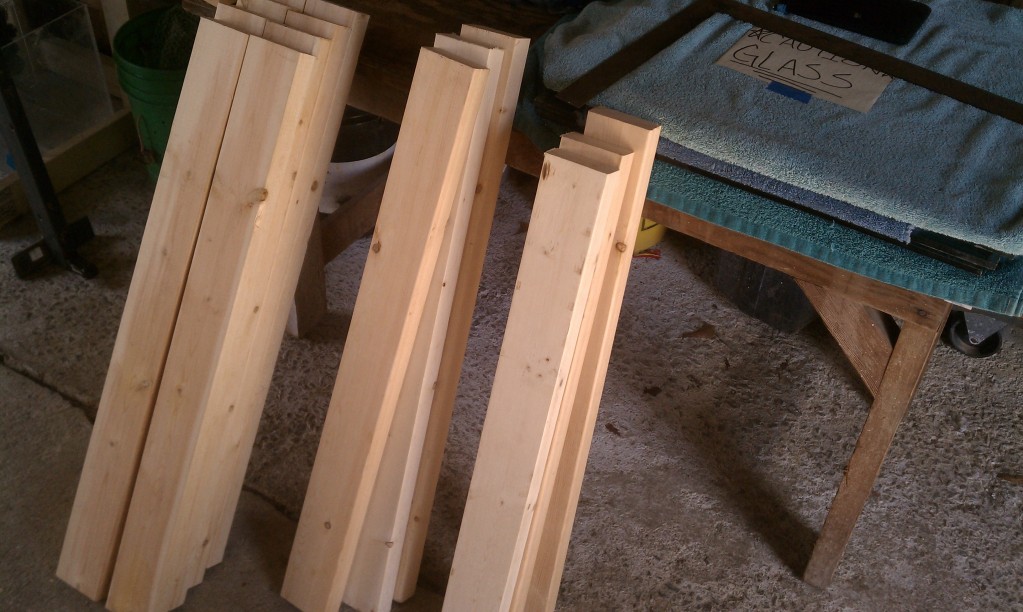
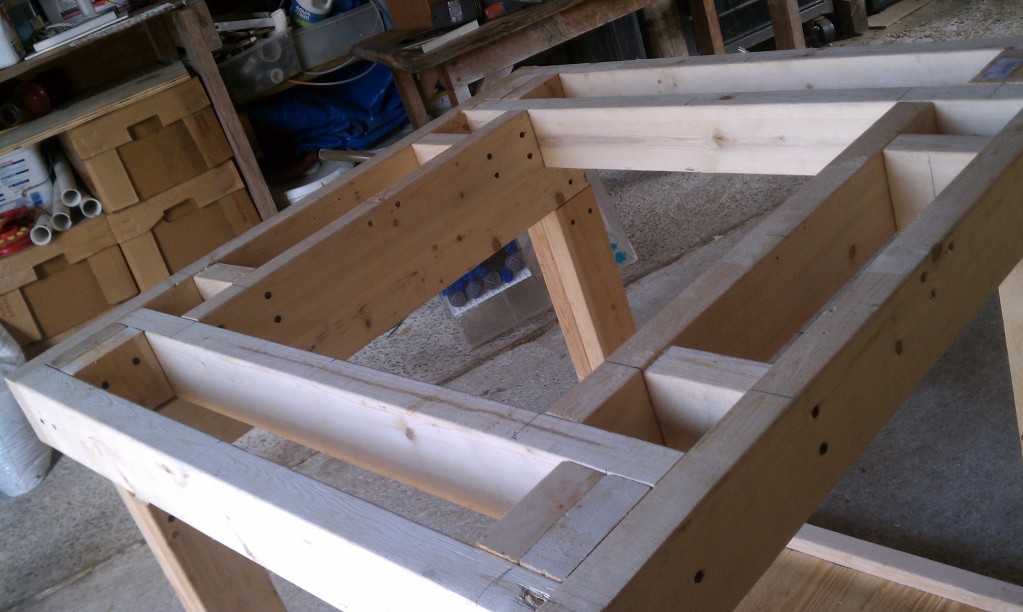
I used my CAD program to design my stand and get the exact measurements for each board so i didnt have to do any math or figuring when i got to work cutting, and I'm glad i did because out of 5 2x4x12 boards this is what i had left over.
IMAG0227.jpg

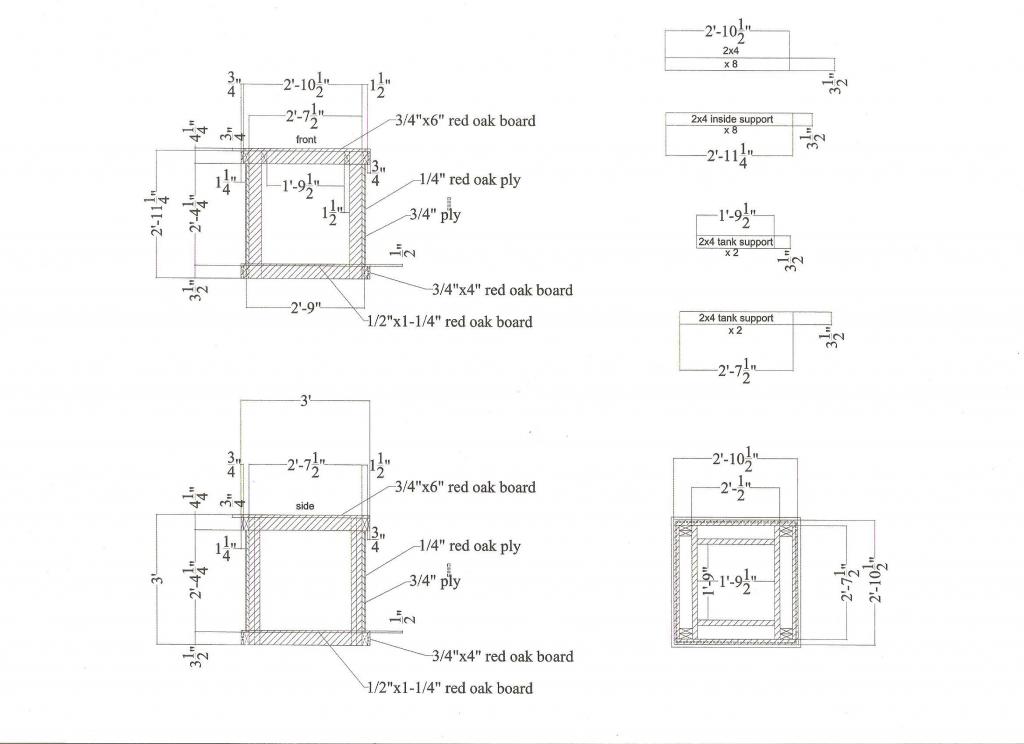
and here is the plan that i am going off of
stand001.jpg

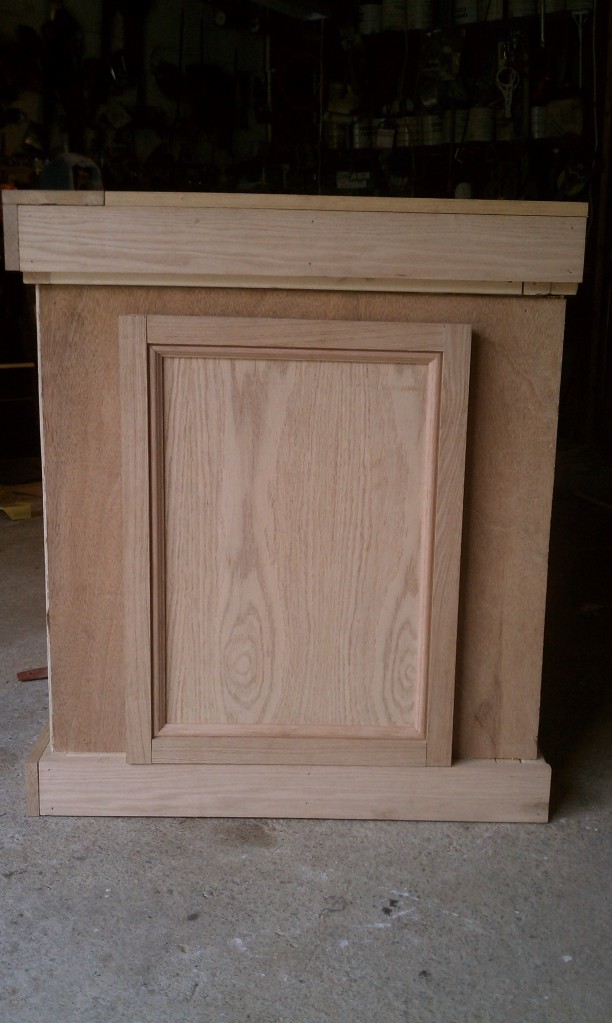
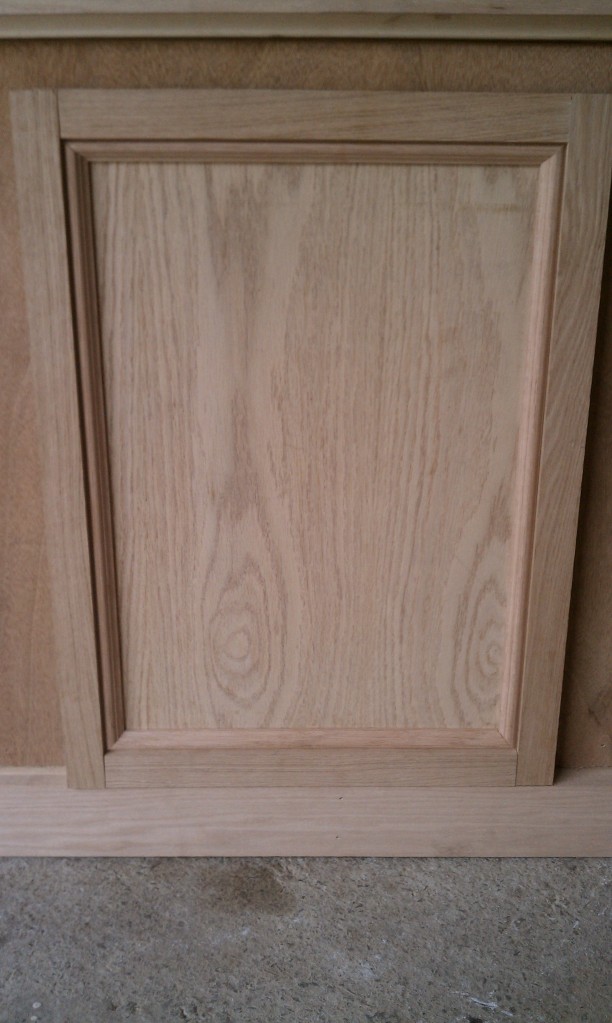
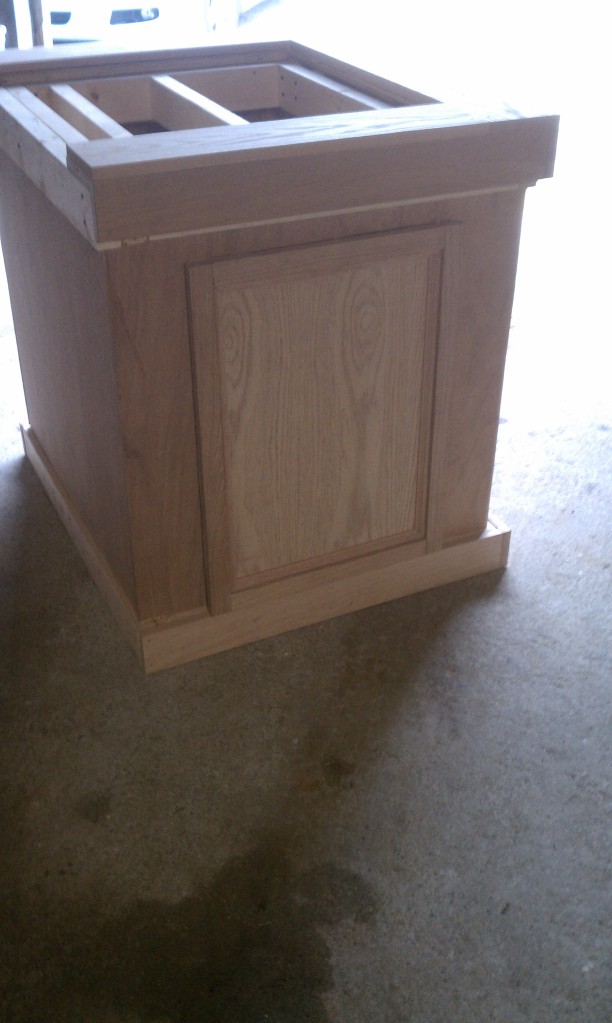
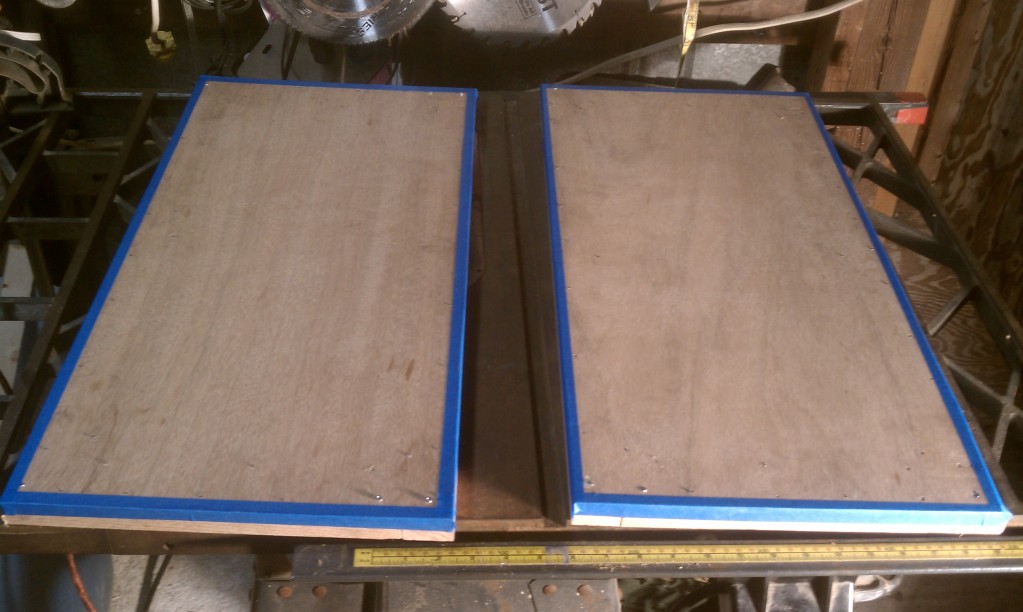
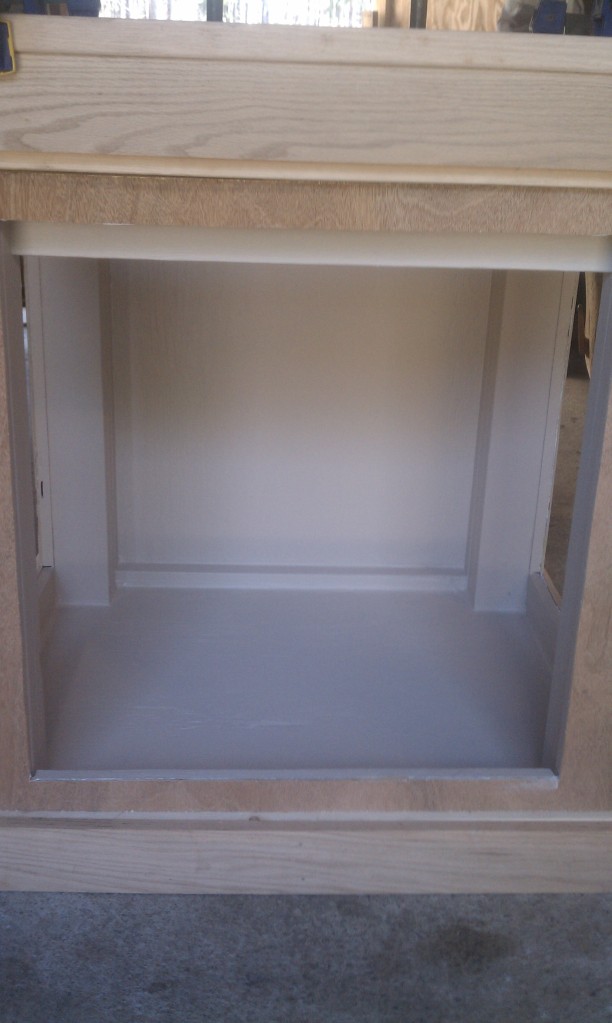
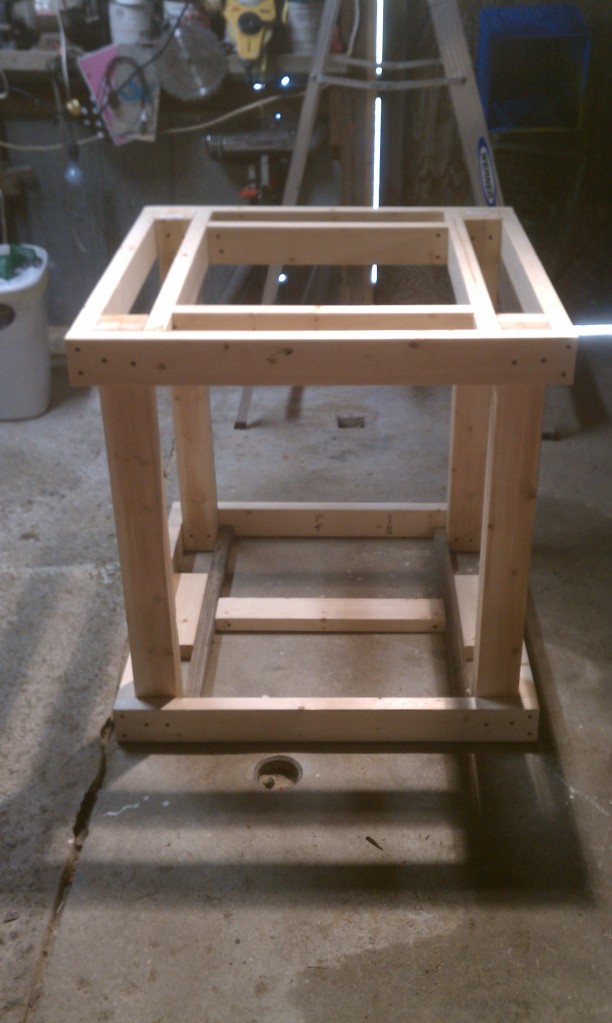
I still have a few odds and ends to tie up b4 i can begin skinning it. I want to add a couple more 2x4 on the bottom to support the floor which will b recessed about 2" below the bottom lip of the stand then epoxied to give me a few extra mins in the case of an overflow... but i'm in no rush and will b taking my time to make this setup all that i want it to b.
 
OP
OP
GnarleyMarley

GnarleyMarley

Well-Known Member
View Badges
Joined
May 23, 2010
Messages
500
Reaction score
282
Location
Charoltte N.C.
Rating - 0%
0   0   0
*Update*
So over the weekend i worked on the stand a little more, I beefed up the frame a little more and placed a couple of "headers" under where the tank will be sitting and attached them to a notched out section of the 4x4 leds. Then i cut the 3/4" plywood skin that will go on b4 i finish it off with the 1/4" red oak.
Heres what it looked like
IMAG0245.jpg

IMAG0246.jpg


Then Saturday morning while on the ay to work on it I thought of somthing that no one else has...... if the tank is 36x36x36 after i put on the trim it will probobly add an inch or soo (does anyone see where im going with this?) It will not fit in a standard door!!!!! no matter how i turn it =O So i spent the 1st part of my saturdat cutting 6" off the back, which i didnt really want to do but it gave me a little more support and i still have my 6" tabletop on 3 sides. So after shortening the stand i had to re-cut my skin then i cut the holes for my doors and stopped for the day....
So that is where i am now....
After shortening it
IMAG0277.jpg

IMAG0279.jpg


With skin and door holes
IMAG0282.jpg

IMAG0283.jpg

BTW if u notice i skinned the top of th stand except where the tank will b inset even though there will be a 1x6 red oak table top. I did this because i plan on using that blue foam stuff and still want the tank to be inset :)
Also i took the advice of a couple of members and since i had to loose the 6" off of the rear the tank will now b sitting on the rear 2x4 of the stand so i added 2 more 2x4s on the rear legs that are sanwiched between the top and bottom rim of the stand. If this thinng cannot hold that 60 then NOTHING will LOL
And as another side note i have decided not to use the 30 cube for the sump as i had originally planned, it only gave me about 8" of clearance above it which is nowhere near enough, so i'm now thinking of using a rimless 20 long which i have had stored for a couple years :)
 

revsgirl

5000 Club Member
View Badges
Joined
Sep 16, 2009
Messages
7,468
Reaction score
190
Location
ga
Rating - 0%
0   0   0
Lookin' forward to seeing how it comes along! :D
 

revhtree

Owner Administrator
View Badges
Joined
May 8, 2006
Messages
47,738
Reaction score
86,850
Rating - 100%
1   0   0
Looking great buddy!
 
OP
OP
GnarleyMarley

GnarleyMarley

Well-Known Member
View Badges
Joined
May 23, 2010
Messages
500
Reaction score
282
Location
Charoltte N.C.
Rating - 0%
0   0   0
*Update*
Got the skin on, and 1x6 tabletip, now i just need to work on the doors, and find some corner molding, and some quarter round to finish it off, then i'll stain the outside, paint the inside and probobly put some lonoleum for flooring inside the stand.
Here is the updated pics...
Skinned...
IMAG0290.jpg

IMAG0291.jpg

With door holes....
IMAG0297.jpg

IMAG0300-1.jpg

IMAG0304.jpg

IMAG0301-1.jpg


I also converted a 10gal wet dry sump into a 5ish gallon ATO resevoir...
IMAG0306-1.jpg

IMAG0307-1.jpg

I left all the stuff inside so i can put a piece of eggcrate on the bottom about 3-4" above the bottom and then i can use it to dose kalk with the ato to keep my alk up with the mini ca reactor i picked up :)
 
Last edited:

Cubed Reefer

Well-Known Member
View Badges
Joined
Mar 23, 2013
Messages
570
Reaction score
99
Location
Fort Myers,FL
Rating - 0%
0   0   0
Hello! Wow great looking stand brother, I was wondering if you have a list of all the cuts/number of a cut you need. I tried to count the diagram but I think I do not have the right numbers =/ any help would be great. wanna build this killer stand. Thank you!

CR
 
OP
OP
GnarleyMarley

GnarleyMarley

Well-Known Member
View Badges
Joined
May 23, 2010
Messages
500
Reaction score
282
Location
Charoltte N.C.
Rating - 0%
0   0   0
Yea I had to make a couple changes due to it not being able to get it thru a std door lol. I can get u a revised diagram if u want :)


And here's a little update, built my 2 side doors and almost finished my front door. Now if only I could find some red oak corner molding

IMAG0335.jpg

IMAG0336.jpg
 

Cubed Reefer

Well-Known Member
View Badges
Joined
Mar 23, 2013
Messages
570
Reaction score
99
Location
Fort Myers,FL
Rating - 0%
0   0   0
What mods did you make? Never thought about the door way! Either way I am almost ready to pay for a list of cuts and stuff lol driving me crazy!

CR
 
OP
OP
GnarleyMarley

GnarleyMarley

Well-Known Member
View Badges
Joined
May 23, 2010
Messages
500
Reaction score
282
Location
Charoltte N.C.
Rating - 0%
0   0   0
Lol, the biggest change was a cut 6" off of the back. My original plan was to have a 6" tabletop all the way around the tank so I just went with 6" on 3 sides. Next mod was I added a header and made it so the weight of the tank will b distributed to the legs instead of being supported by hardware. And lastly I added a sheet of 3/4" plywood to the top, under the 1x6 red oak so I can place a 2x2 square of the Styrofoam insulation under the tank and still have the tank inset 3/4".I will work on getting u a parts list, and Mabye get u some more detailed pics of how I assembled everything.I went a little crazy on the stand and I think u could easily park a semi on it lol, but at least I know that it is built to last :)
 

Cubed Reefer

Well-Known Member
View Badges
Joined
Mar 23, 2013
Messages
570
Reaction score
99
Location
Fort Myers,FL
Rating - 0%
0   0   0
Thank man, ya I figured that is what it was I am gonna build it 36x24x40. then do some sheets of the little bathroom tiles in a cool color on the 6" inlays XD

CR
 
OP
OP
GnarleyMarley

GnarleyMarley

Well-Known Member
View Badges
Joined
May 23, 2010
Messages
500
Reaction score
282
Location
Charoltte N.C.
Rating - 0%
0   0   0
That will b sweet, an idea that u may not have thought about would b granite countertop. I had a buddy who made a 4-5" tabletop around his 240 and then contacted a local granite countertop place and was able to buy some of their scrap and get it cut for pennies on. The dollar and it looked amazing! Just an idea that may b worth looking into. I personally love that granite look :)
 

Cubed Reefer

Well-Known Member
View Badges
Joined
Mar 23, 2013
Messages
570
Reaction score
99
Location
Fort Myers,FL
Rating - 0%
0   0   0
That will b sweet, an idea that u may not have thought about would b granite countertop. I had a buddy who made a 4-5" tabletop around his 240 and then contacted a local granite countertop place and was able to buy some of their scrap and get it cut for pennies on. The dollar and it looked amazing! Just an idea that may b worth looking into. I personally love that granite look :)

I will be checking into that this week!

CR
 
OP
OP
GnarleyMarley

GnarleyMarley

Well-Known Member
View Badges
Joined
May 23, 2010
Messages
500
Reaction score
282
Location
Charoltte N.C.
Rating - 0%
0   0   0
*UPDATE*
finished my doors!!!!! Now all i have to do is paint the inside and hang them up.
I also found a place that can get me outside corner molding in red oak, Its all special cut to orsder so i'm a little scared to see the price =O oh well it'll b worth it, whatever it is.
Anyways on to the progress :)
IMAG0337.jpg

IMAG0338.jpg

IMAG0336.jpg
 
OP
OP
GnarleyMarley

GnarleyMarley

Well-Known Member
View Badges
Joined
May 23, 2010
Messages
500
Reaction score
282
Location
Charoltte N.C.
Rating - 0%
0   0   0
ORDERED MY CORNER MOLDING!!!!!!! I found a place in new bern called precision molding and wood works that is going to custom cut my outside corner molding in red oak!! And they can get me the exact dimension that I want :) I put my down payment on it yesterday so hopefully I will b able to show off a pic next weekend with all the trim and everything on. Then it will just b a matter of caulking the flooring inside the stand painting ot with latex paint then painting the inside with the colored paint i bought. Then all I will have to do is put a clear gloss stain over the outside and ill b ready to start putting the tank back together :D
 
OP
OP
GnarleyMarley

GnarleyMarley

Well-Known Member
View Badges
Joined
May 23, 2010
Messages
500
Reaction score
282
Location
Charoltte N.C.
Rating - 0%
0   0   0
Thanks man, its my 1st real woodworking project and i think its coming along pretty well :D there are a couple of mistakes that i have made but nothing anyone would notice and nothing some nice molding won't hide :D
 
OP
OP
GnarleyMarley

GnarleyMarley

Well-Known Member
View Badges
Joined
May 23, 2010
Messages
500
Reaction score
282
Location
Charoltte N.C.
Rating - 0%
0   0   0
OK ready for another update!!!!!!!!!!!!!
here we go....
Spent a lot of time the past couple weekends working on it. Started off by caulking the bottom of the stand. I caulked every seam within the bottom 4-5 inches so it should retain quite a bit of water shold i have anything disasterous happen that causes the sump to overflow

Gotta love painters tape!!!
IMAG0363.jpg

IMAG0365-1.jpg

IMAG0370-1.jpg

Idid more caulking but forgot to take pics :p
Next step was to start painting. I went with 2 coats of an exterior latex paint in white as a base, then went over it with another 2 coats of my color which is actually a tanish color, and is kind of hard to get to show up in the pics i took with my phone.
IMAG0374-2.jpg

IMAG0379.jpg

IMAG0380.jpg


now the inside of the stand :D
IMAG0376.jpg

If u notice i didnt paint all the way to the edge of the doors because when they are closed i dont want ANY pain to be visible :D
 
OP
OP
GnarleyMarley

GnarleyMarley

Well-Known Member
View Badges
Joined
May 23, 2010
Messages
500
Reaction score
282
Location
Charoltte N.C.
Rating - 0%
0   0   0
Next i finally got my Corner molding!!!!! Thank you Precision Molding in newbern!!!!!!
so i spent last weekend starting to put it on....
IMAG0386.jpg

IMAG0392-1.jpg

IMAG0392-1.jpg

IMAG0387.jpg

I need to buy some more clamps!!! but when in a pinch use what u have :D
IMAG0395.jpg

IMAG0394.jpg


And here is what she looks like today. I stall have some more work to do with the molding, but its getting there, I'll hopefully be done with all the wood working by this weekend then i will just have to sand it down and put a few coats of Polyurethane on it to give it a nice finished look :D
IMAG0237.jpg

IMAG0358.jpg

IMAG0396.jpg
 

Being sticky and staying connected: Have you used any reef-safe glue?

  • I have used reef safe glue.

    Votes: 53 85.5%
  • I haven’t used reef safe glue, but plan to in the future.

    Votes: 4 6.5%
  • I have no interest in using reef safe glue.

    Votes: 2 3.2%
  • Other.

    Votes: 3 4.8%
Back
Top