60 Gal cube Build From Scratch :D

OP
OP
GnarleyMarley

GnarleyMarley

Well-Known Member
View Badges
Joined
May 23, 2010
Messages
500
Reaction score
282
Location
Charoltte N.C.
Rating - 0%
0   0   0
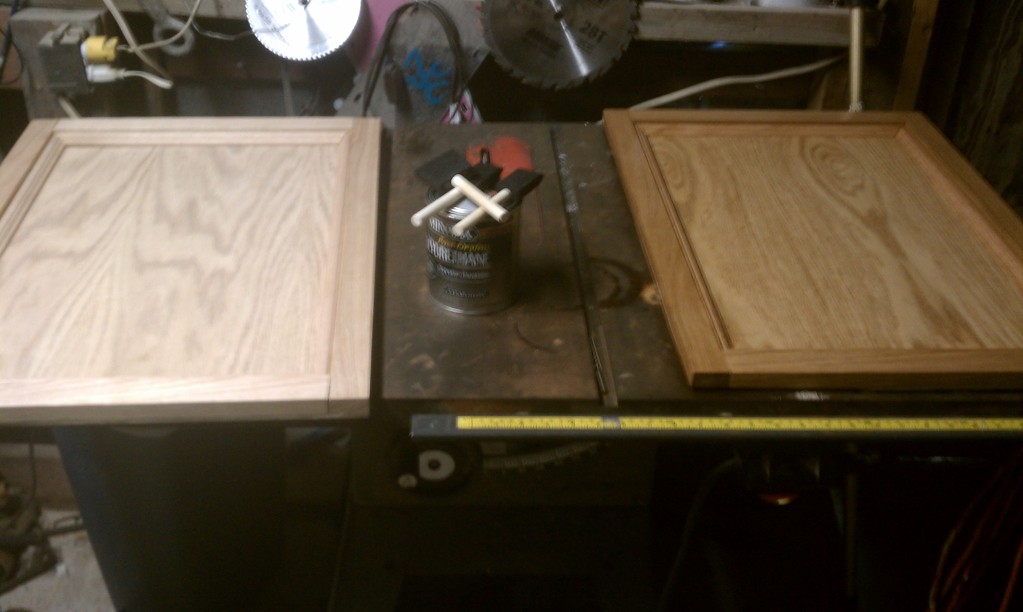
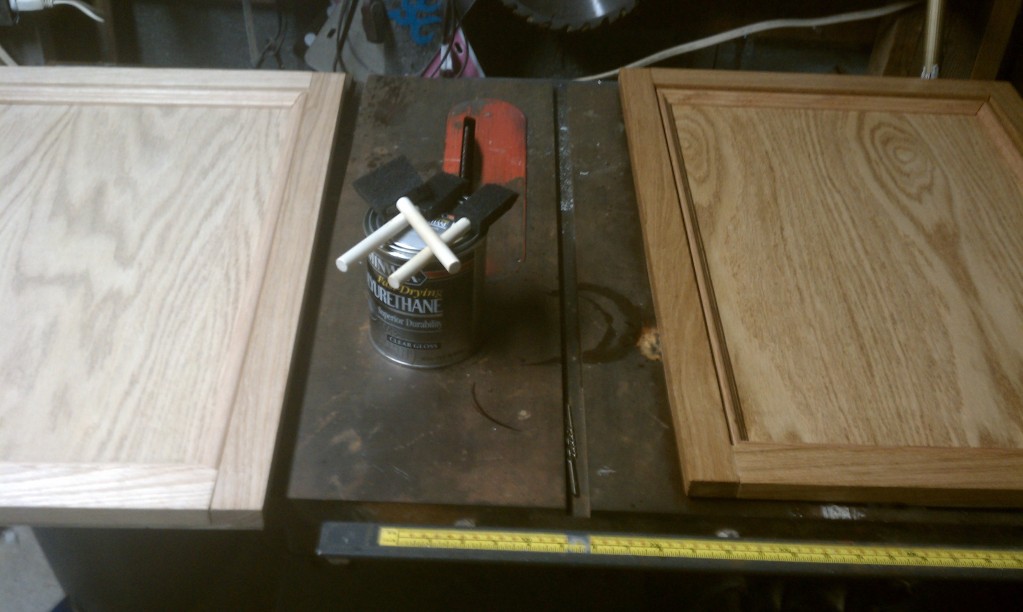
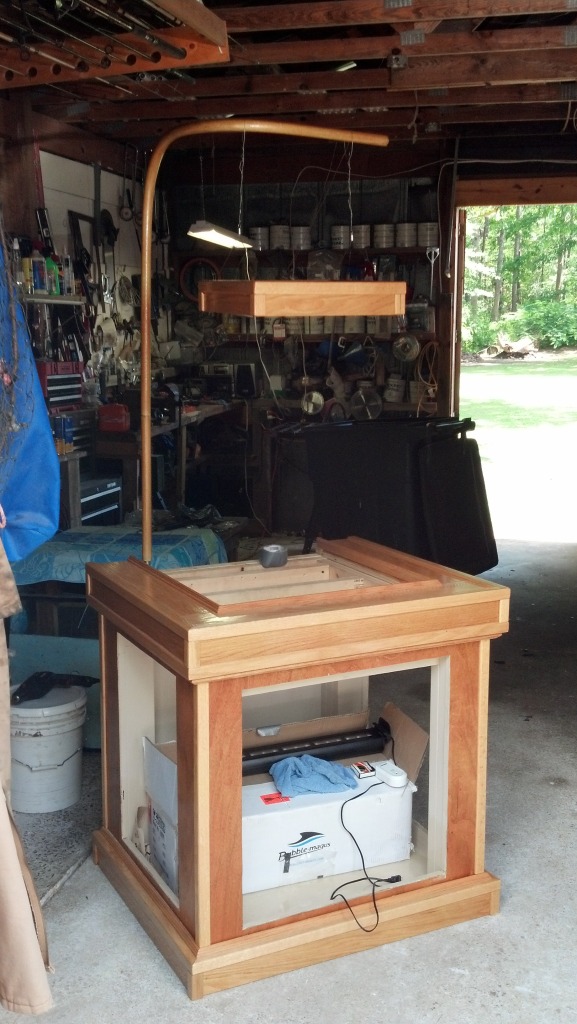
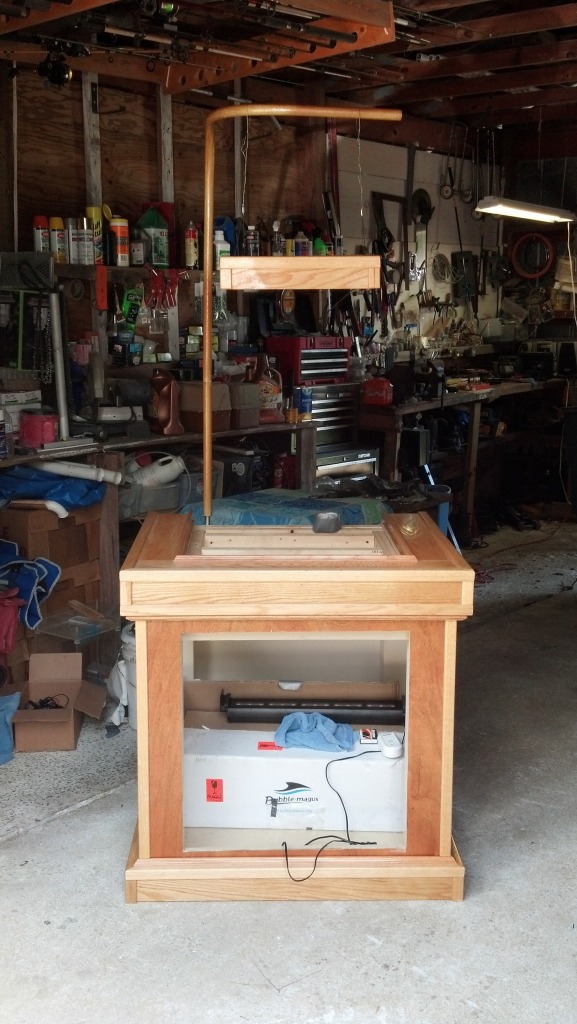
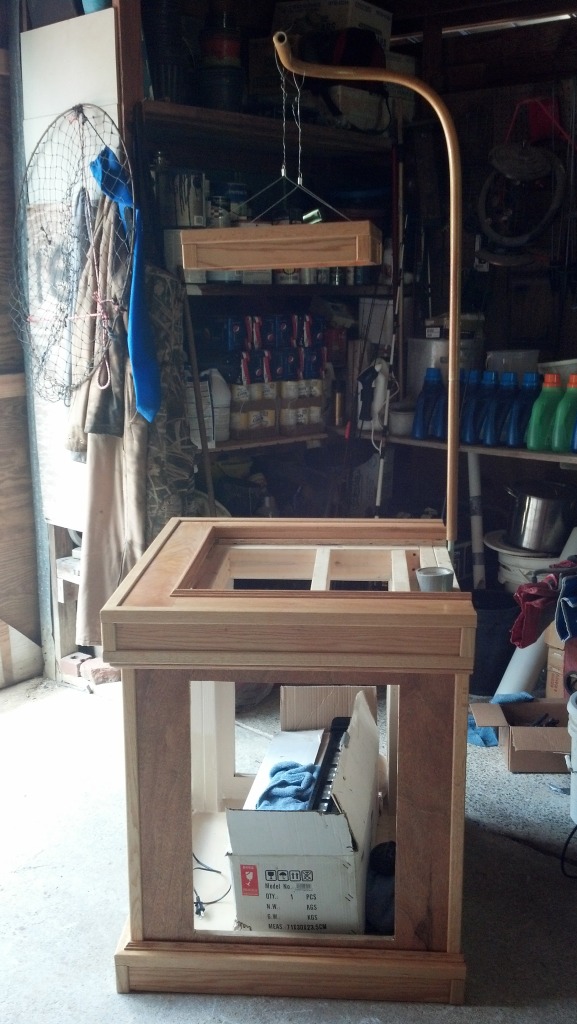
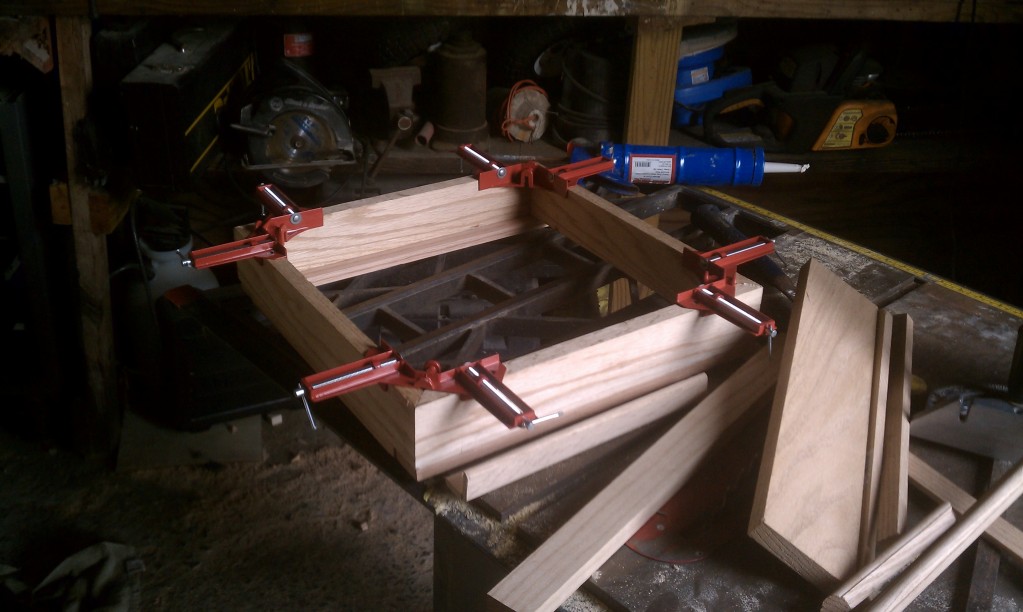
OK so time for another small update.
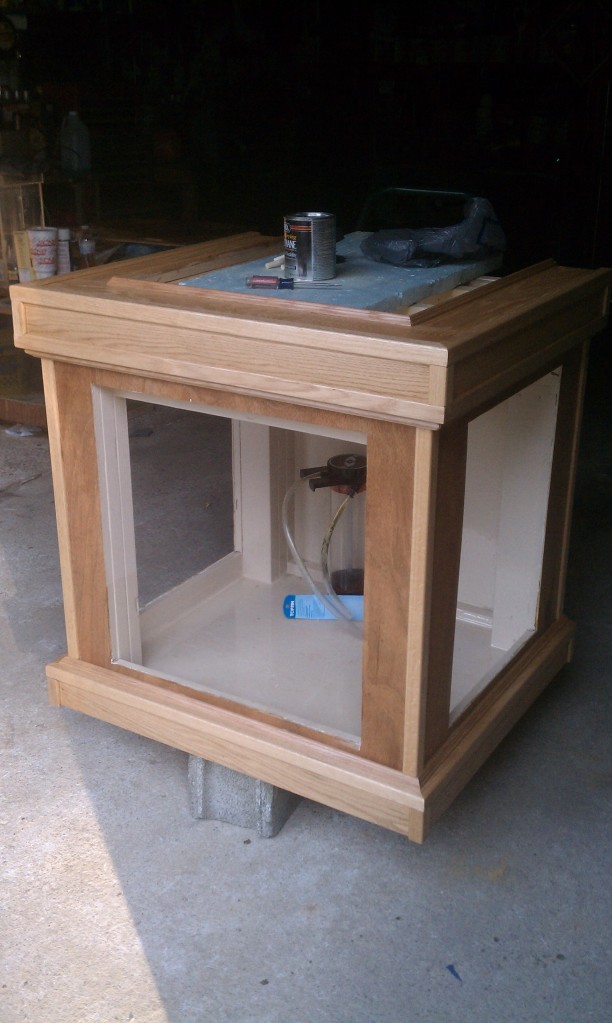
I have to take some pics of the new progress to the stand but lets take a minute to check out my new project... a floating canopy :D
I decided I want to make a small floating canopy to mount my radion in, I wanted it to be somthing that adds to the tank and does not take away from it, As most of u know this can be a challenge sometimes when dealing with a rimless, or shallow tank.
So my plan was to buils a 16x16x5-6" box to match the stand and mount the light, and b able to hide the hanging kit.
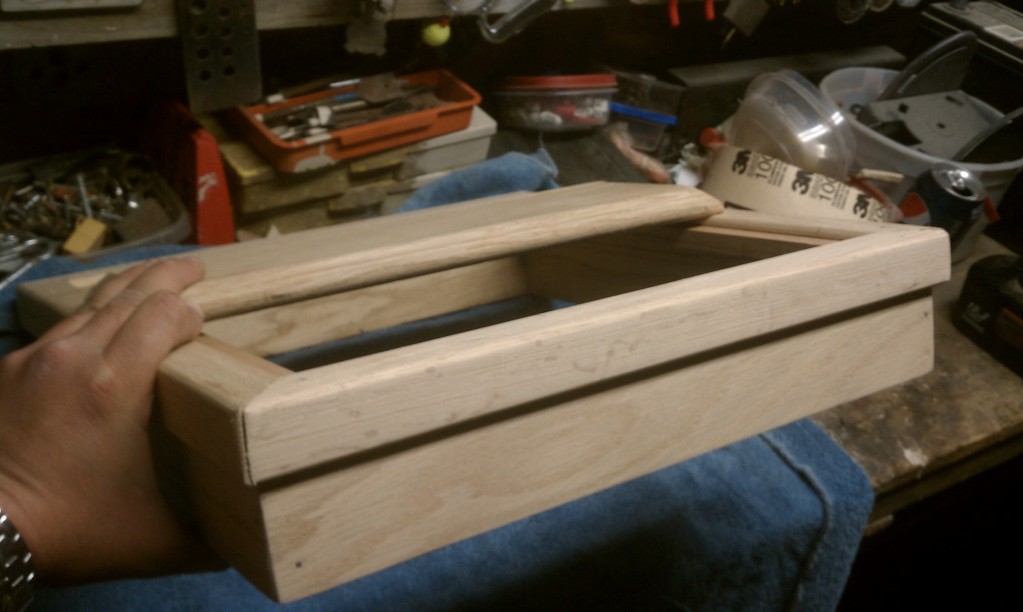
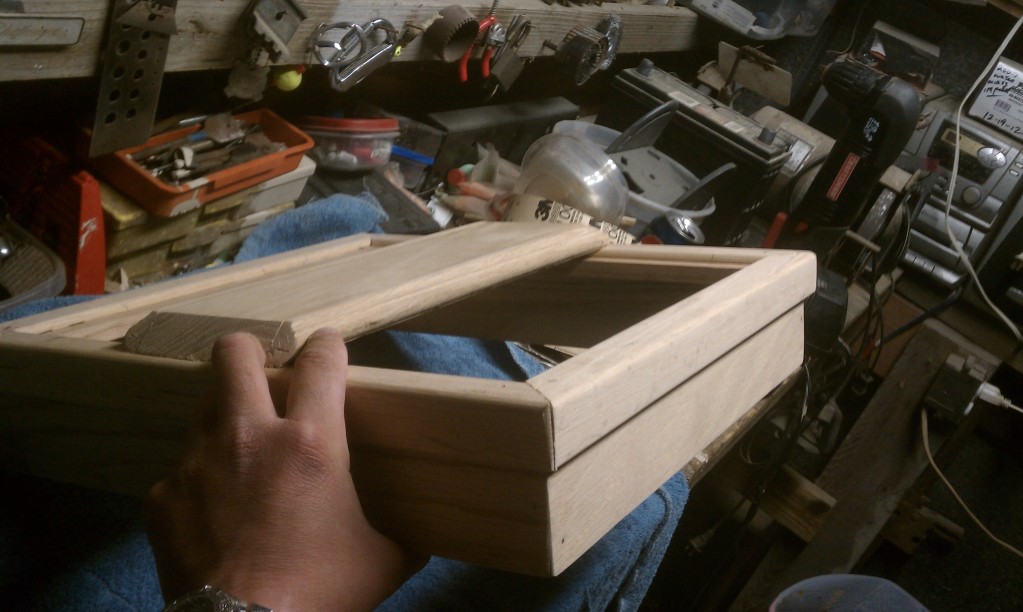
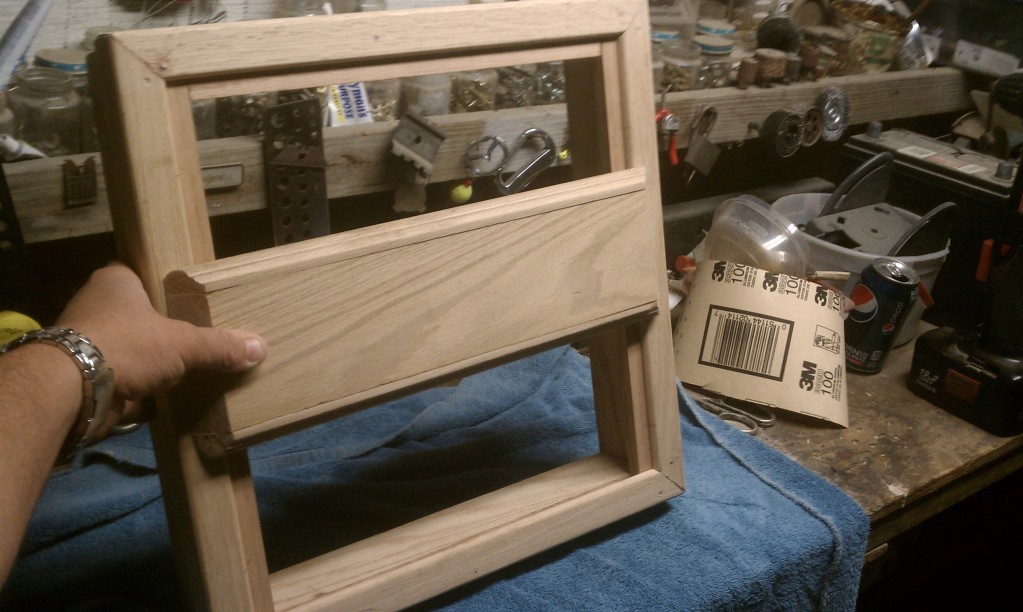
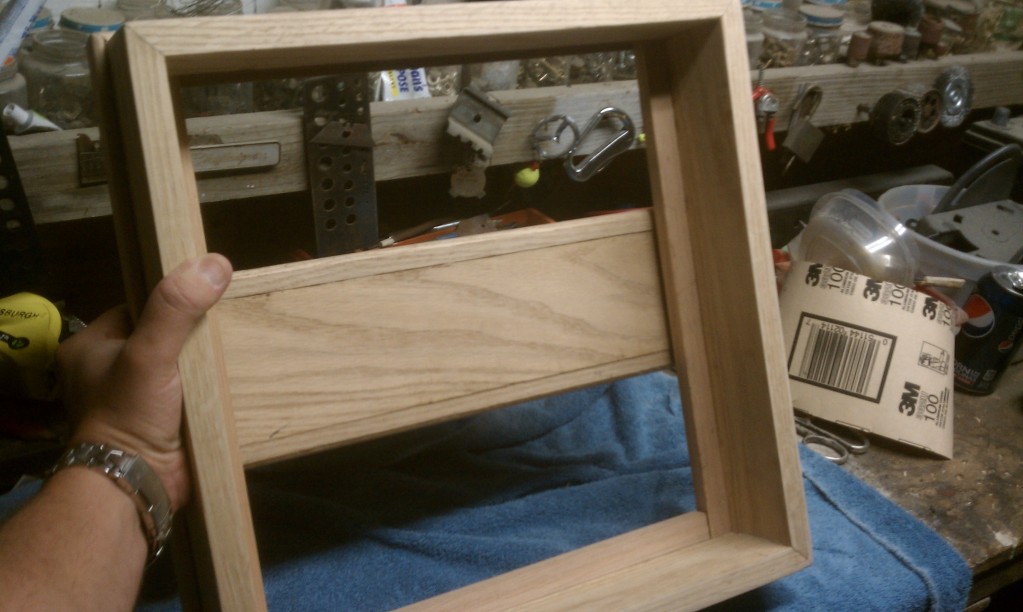
It is still a work in progress but this is what i have keep in mind i still have quite a bit of work to do...
IMAG0423.jpg


I have not mounted the top piece yet I plan on mounting it on the center and mounting a small fan in the center of it, to help suck air out.
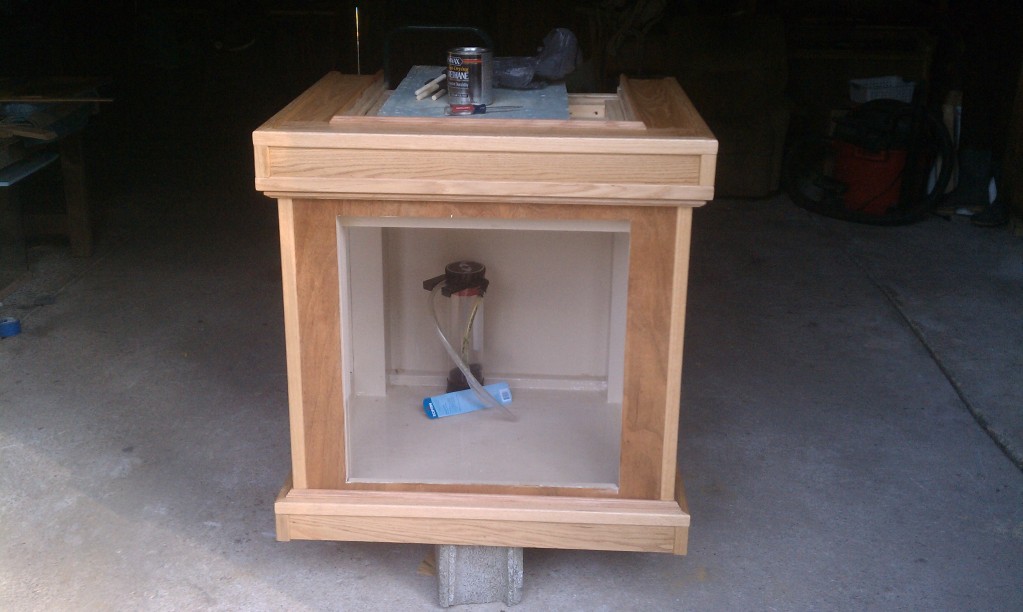
IMAG0424.jpg

IMAG0425.jpg

IMAG0428.jpg

IMAG0426.jpg
 

bairdimusprime

Bill
View Badges
Joined
Jan 19, 2012
Messages
1,622
Reaction score
610
Location
Union Beach, New Jersey
Rating - 0%
0   0   0
Love the canopy I need to make one myself but have no carpentry skills. Do you have plans for it by any chance?


Sent Via the R2R Forum APP
 
OP
OP
GnarleyMarley

GnarleyMarley

Well-Known Member
View Badges
Joined
May 23, 2010
Messages
500
Reaction score
282
Location
Charoltte N.C.
Rating - 0%
0   0   0
Love the canopy I need to make one myself but have no carpentry skills. Do you have plans for it by any chance?


Sent Via the R2R Forum APP


Its pretty straight foward man :) all i did was cut 45°s on the ends of 4 16" 1x4s and then nailed them in place and covered the nails with corner molding very simple, if i can do it so can anyone else!!!

UPDATE*****
Polyurethaned my doors and canopy last night :) Here is a shot of a a door with 1 coat of poly on it next to a raw door. I ended up getting 2 coats on yesterday b4 it got too late. I plan on doing at least 1 more coat then its on to the stand :D

IMAG0535.jpg

IMAG0537.jpg
 
OP
OP
GnarleyMarley

GnarleyMarley

Well-Known Member
View Badges
Joined
May 23, 2010
Messages
500
Reaction score
282
Location
Charoltte N.C.
Rating - 0%
0   0   0
OK this is a little teaser update :)
I managed to put on my second coat of Poly on the stand this morning after i sanded it down with some 400 grit. I have to say i wish u guys could feel this stand its is smoother and softer than a baby's butt!!!!

Anyway on to some pics
1st coat...
IMAG0539.jpg

IMAG0538.jpg

I'm really glad i used the backside of the Red Oak Ply i really like the contrast it gave me! It's going to look killer once i get the doors on it.
Also if u notice the bottom of the stand is wet and shiney ;) thats because Brian_e hooked me up with some of the epoxy he used to make his plywood tank, so now i can fill the bottom of the stand with about 5 or so gallons of water without having to worry about it leaking onto the floor :)
Second coat of Poly...
IMAG0541.jpg

I am planning on doing at least 3-4 coats on the doors and the stand b4 i call it good, as of right now i am at 2 coats o the doors and the stand.... U guys don't know how much work it is to sand the whole stand and doors between every coat, then having to go over it with mieral spirits and finally a tack rag b4 each and every coat. Its been a lot of work but I swear it is shaping up to be worth every minute!!!!
 
OP
OP
GnarleyMarley

GnarleyMarley

Well-Known Member
View Badges
Joined
May 23, 2010
Messages
500
Reaction score
282
Location
Charoltte N.C.
Rating - 0%
0   0   0
While waiting on the third and final coat of poly to dry on the light holder I did some more homework onn the DAP black silicone that I was going to use for the tank build and got scared so.... I ended up biteing the bullet and bought 2 tubes of RTV 103 industrial silicone. I scoured the internet today and this stuff is more highly recommended for tank building than any other silicone on the market, so rather than being cheap and regretting it down the road I bit the bullet and dropped the 30 for 2 tubes on amazon (thank God for Prime's free 2 day shipping) so it should be here by Friday and I should b able to finaly put that thing together this weekend.
I'm going to prep the glass tomorrow afternoon after work so it should b ready to go Saturday morning.
Also while i'm on the subject look what showed up at my door :D
IMG_20130605_164926_430.jpg

I got a Brand new curve 7 from walter aka coralreefnc Saturday and this thing is a freaking monster. I had my doubts about the curve 5 but I have absolutely no concerns about this 7 it is easily twice the size of the 5 :) I'm so stoked!!!!!
IMG_20130603_163806_412.jpg

IMG_20130603_163832_284.jpg

BTW that's my size 14 shoe for refrence ;)
And here are some teaser pics of the bracket I made to mount my floating canopy ;) If u cant tell the theme of the stand is red oak lol
IMG_20130602_202618_658.jpg

IMG_20130602_202356_567.jpg
 
Last edited:

Telefonica007

unregistered
View Badges
Joined
Jan 21, 2013
Messages
610
Reaction score
2
Location
South Carolina
Rating - 0%
0   0   0
I give u a lot if respect! Looks great! I built a stand for a biocube last September and got my hand caught in the chop saw!! Months of therapy and a surgery.... Kept all my fingers but still not the same :'( be careful!

Sent Via the R2R Forum APP
 
OP
OP
GnarleyMarley

GnarleyMarley

Well-Known Member
View Badges
Joined
May 23, 2010
Messages
500
Reaction score
282
Location
Charoltte N.C.
Rating - 0%
0   0   0
Well guys disaster struck again LOL. I was putting the tank together today. Got 2 panes in place and put on the third, turned around for a second and.... CRASH!!!!! broke another pane :( So that's it i'm throwing in the towel and biting the bullet and buying a Brand new Rimless 60 cube from deep blue. My lfs quoted me 320 for a reef ready one and I think i'm going to get one that's not drilled and drill it myself (or get brin_e to drill it again lol)


So after the broken glass I was pretty bummed and just did a little work on the stand to lift my spirits :) either way here is the progress as of today (my goal is too have this thing ready for a tank in the next week!


IMG_20130608_140323_888.jpg

IMG_20130608_140315_111.jpg

IMG_20130608_140337_775.jpg


I also picked up the template to mount the hinges today. I have to go to Smithfield tomorrow to deal with some work stuff so maybe i'll get a chance to work on it Monday night and get the doors up :D


Sooooo.... Watcha think????

Btw dude that six about your fingers, glad to hear u r recovering well :)
 

GeoHawk

Well-Known Member
View Badges
Joined
Oct 12, 2010
Messages
613
Reaction score
9
Location
Trenton, MI
Rating - 0%
0   0   0
WOW! Nice work on the stand. Wish I had those skills. I paid someone alot of money to build mine. Looking good.
 

revhtree

Owner Administrator
View Badges
Joined
May 8, 2006
Messages
47,740
Reaction score
86,907
Rating - 100%
1   0   0
Beautiful work on the stand and light!
 

dson78

Active Member
View Badges
Joined
Feb 3, 2011
Messages
164
Reaction score
66
Location
Orlando
Rating - 0%
0   0   0
Holy wood work Batman....awesome progress so far. Keep up the good work.
 

SunCorals

Active Member
View Badges
Joined
Mar 20, 2013
Messages
214
Reaction score
14
Location
DeLand FL
Rating - 0%
0   0   0
Awesome looks great, our tanks and stands are almost the.same! I built mine too the one from deep blue just looks so plain.
 

Caring for your picky eaters: What do you feed your finicky fish?

  • Live foods

    Votes: 3 21.4%
  • Frozen meaty foods

    Votes: 10 71.4%
  • Soft pellets

    Votes: 4 28.6%
  • Masstick (or comparable)

    Votes: 0 0.0%
  • Other

    Votes: 2 14.3%
Back
Top