Aquascape with STAX think dimensionally!

120reefkeeper

Reef keeping with Military Precision!
View Badges
Joined
Jan 5, 2016
Messages
3,956
Reaction score
7,799
Location
Las Marias, Puerto Rico
Rating - 0%
0   0   0
IMG_0074.JPG


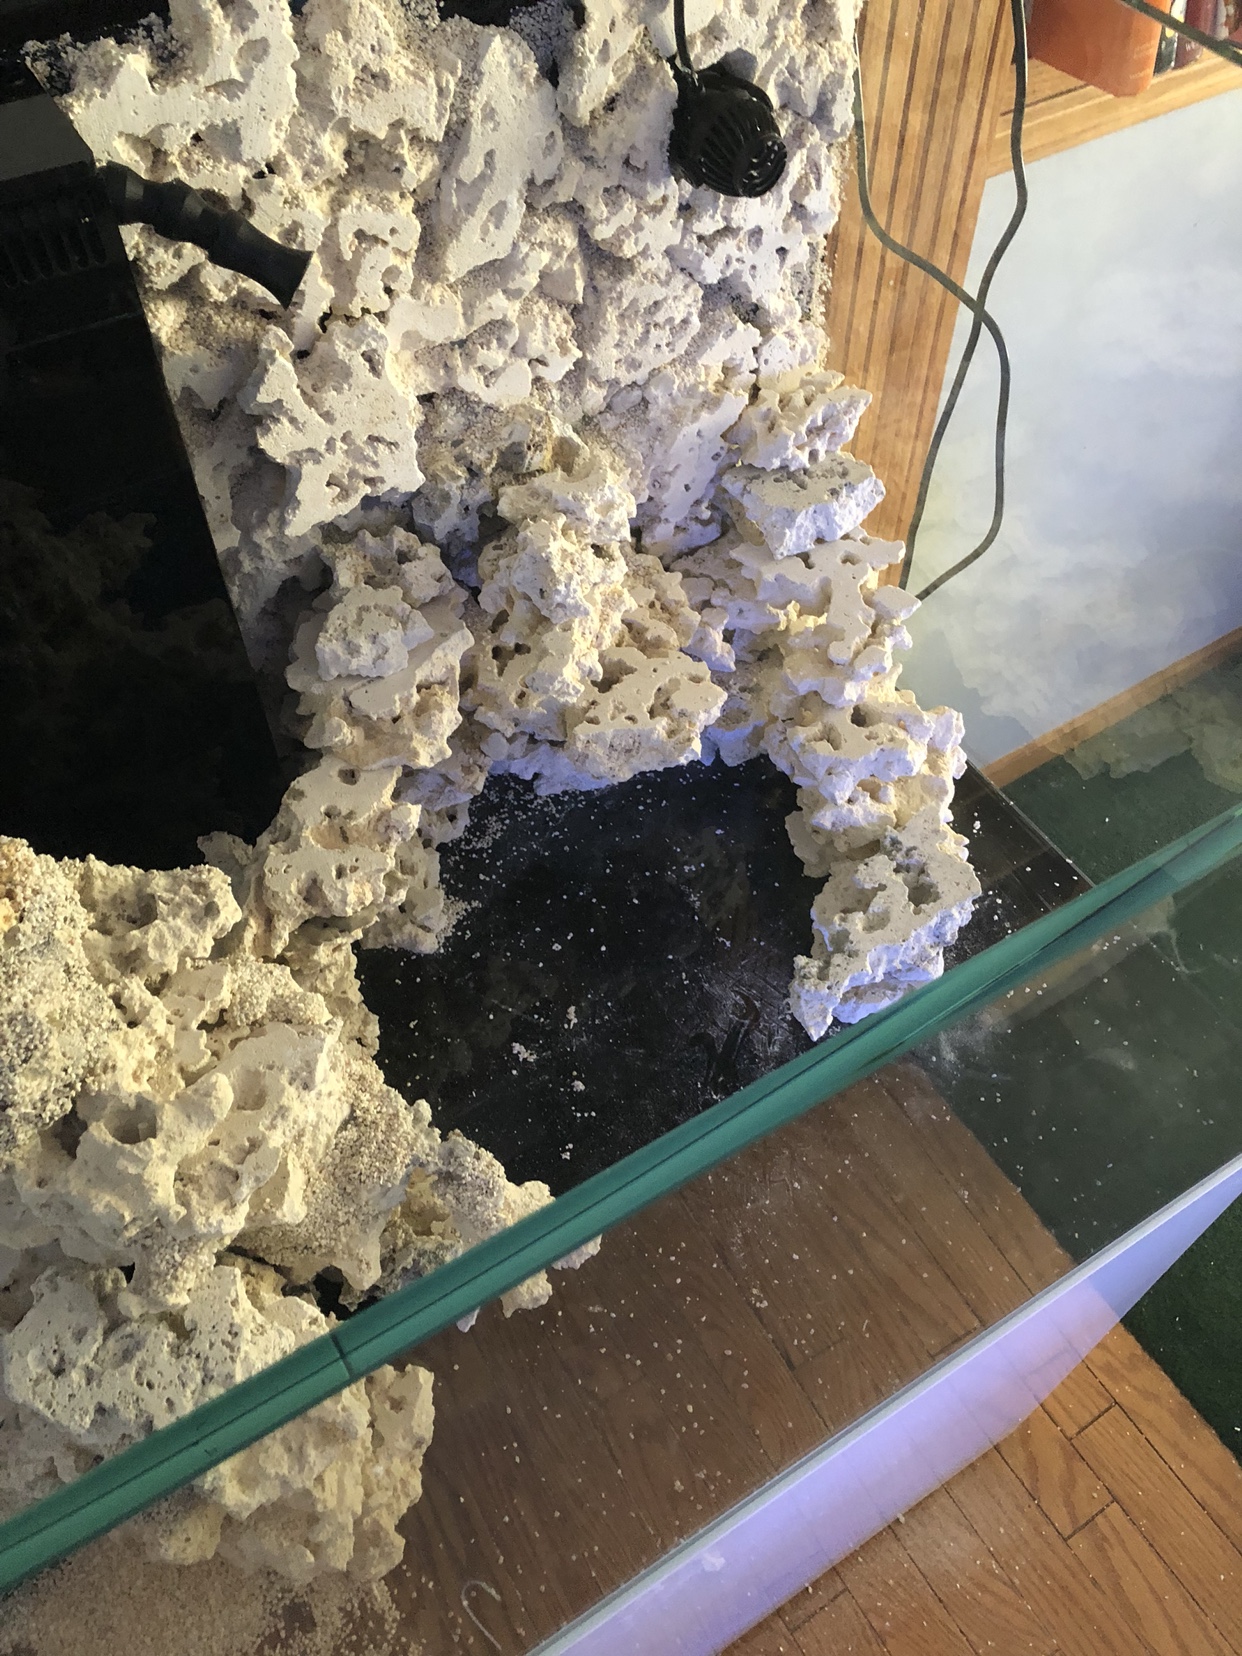
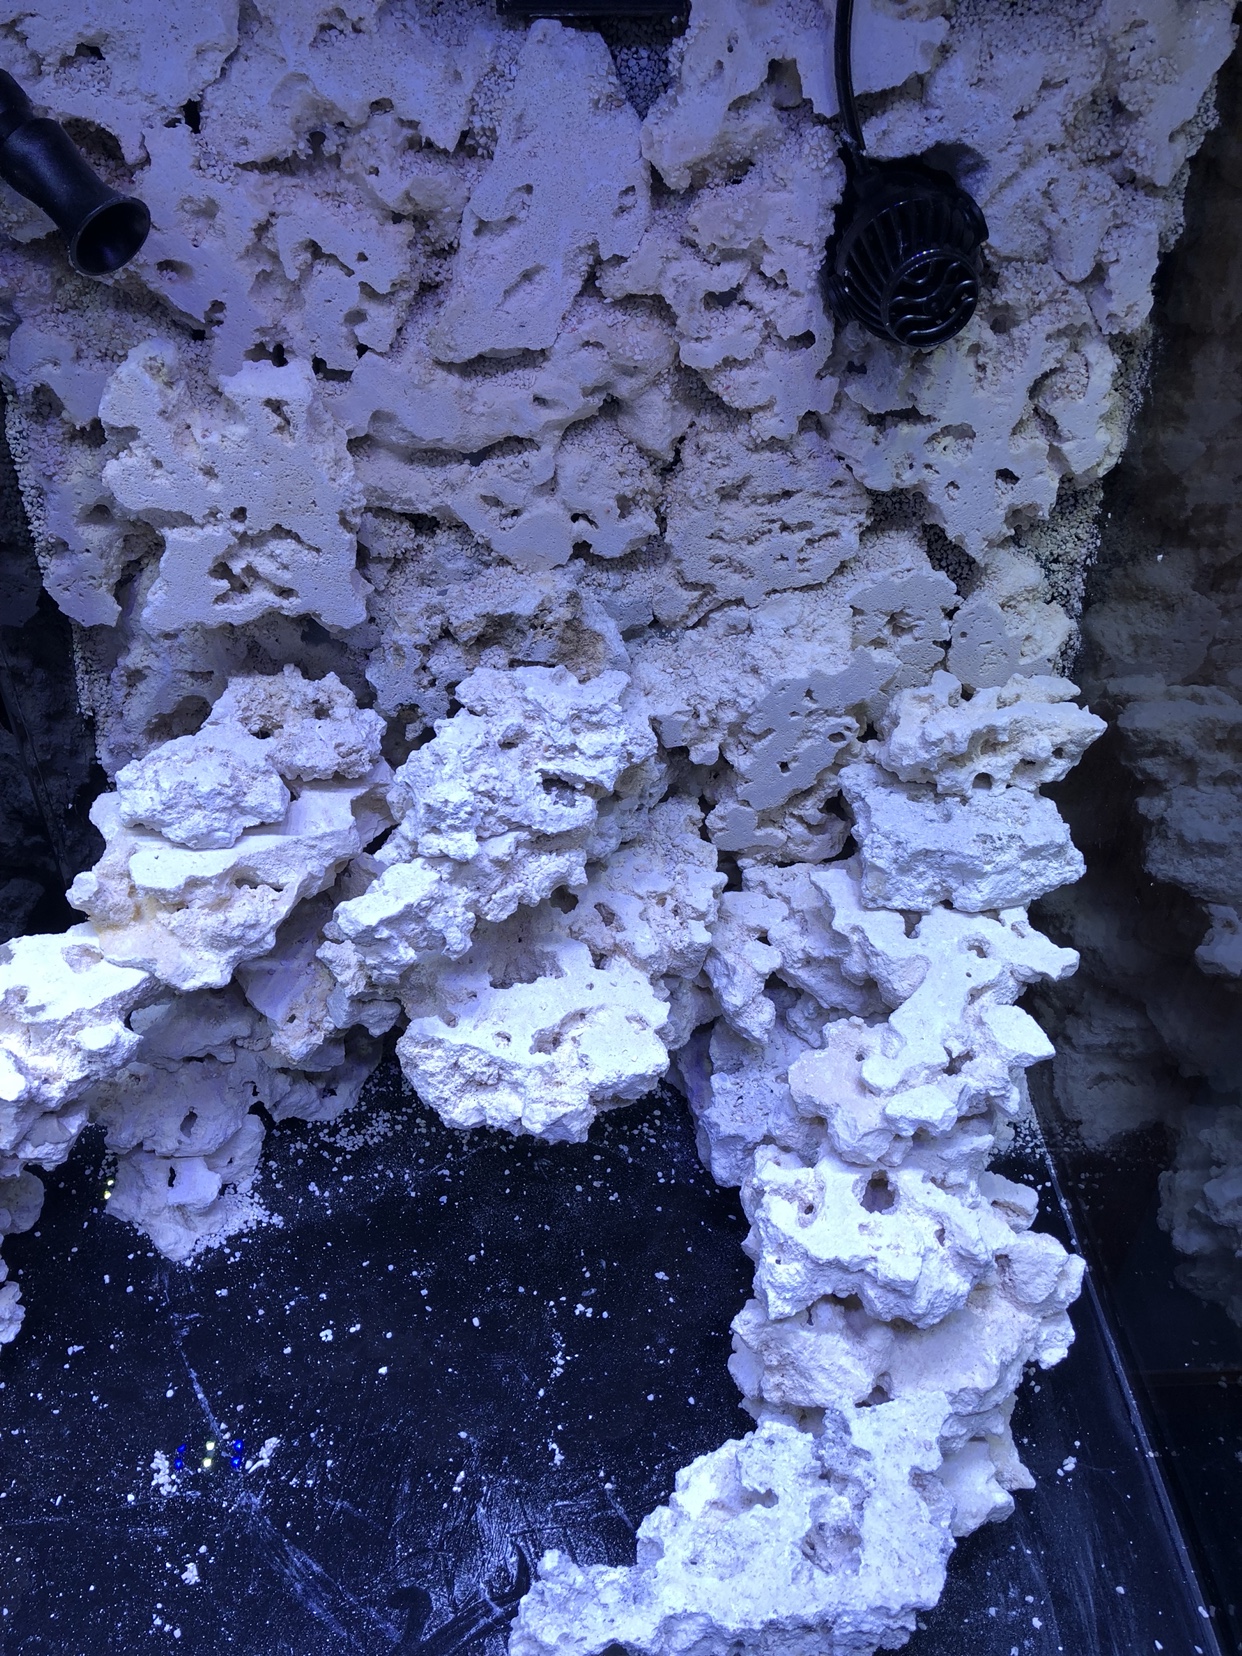
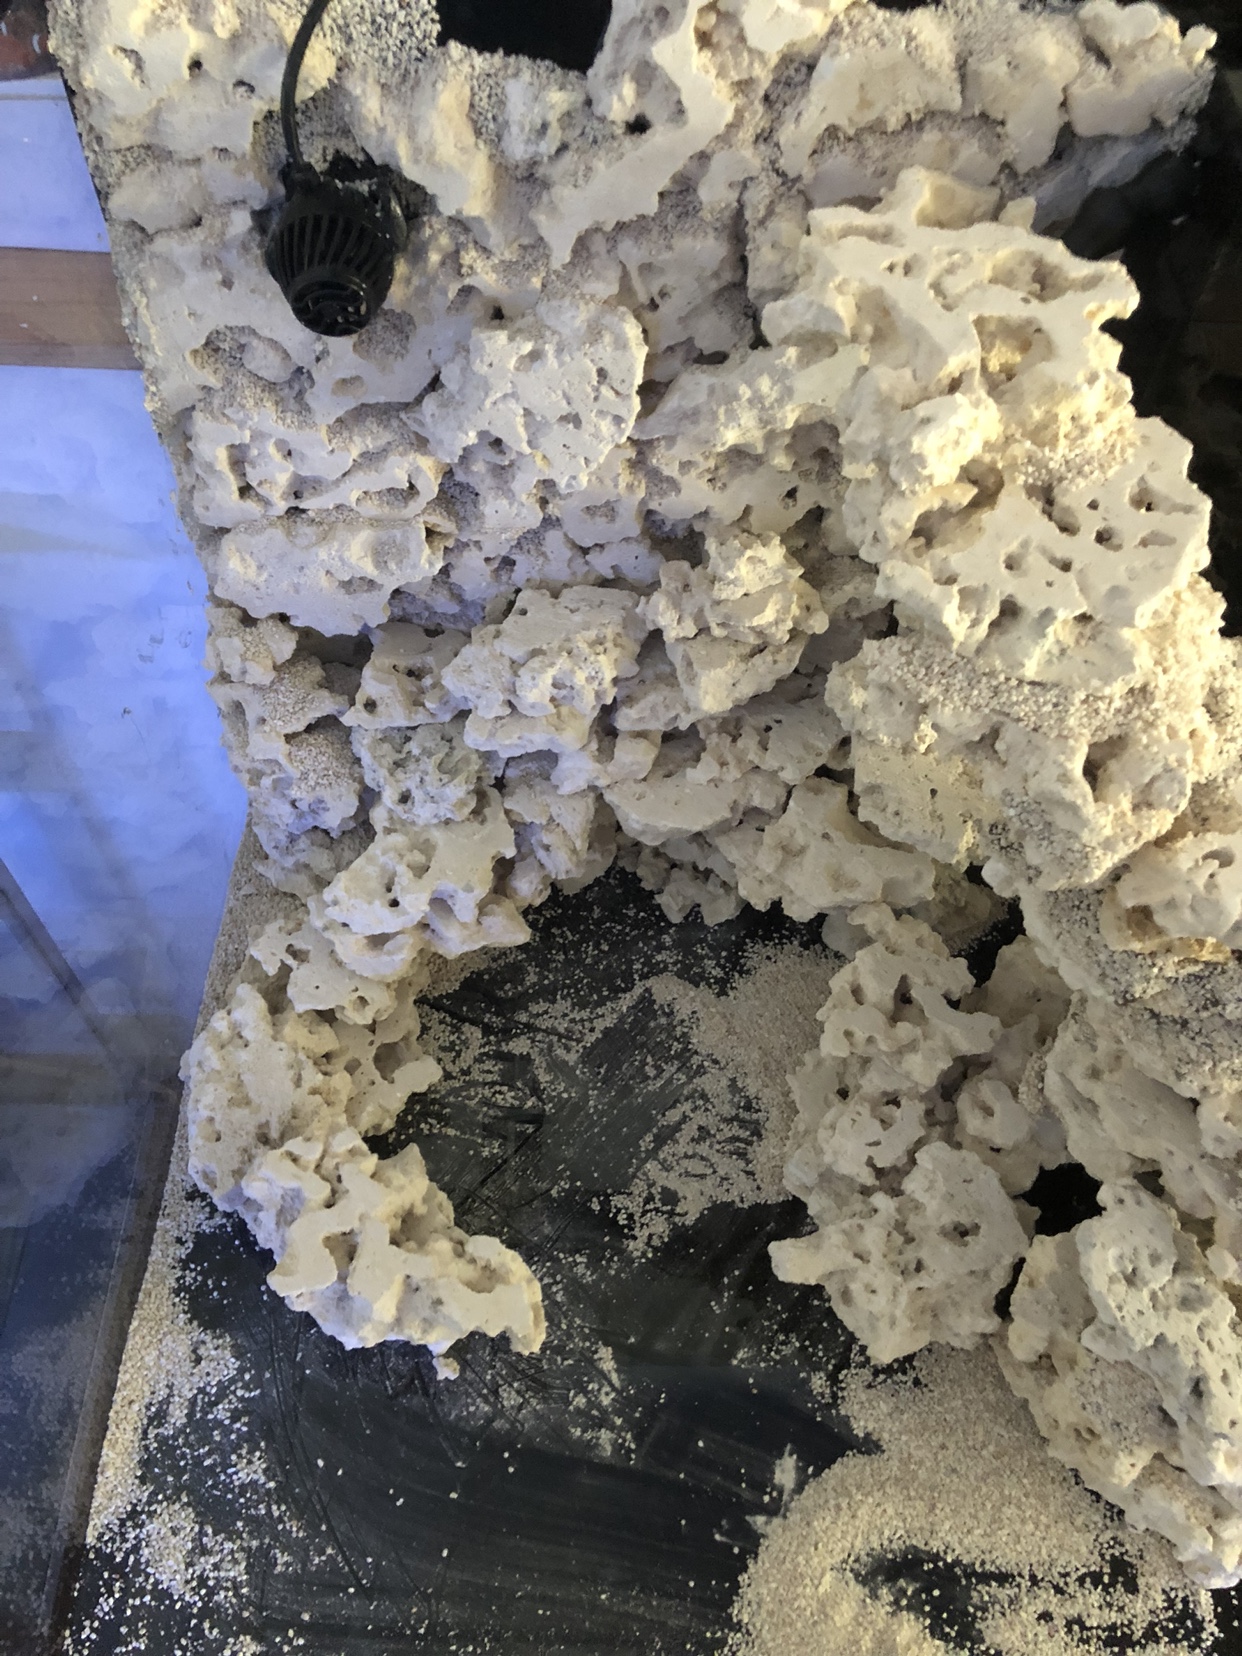
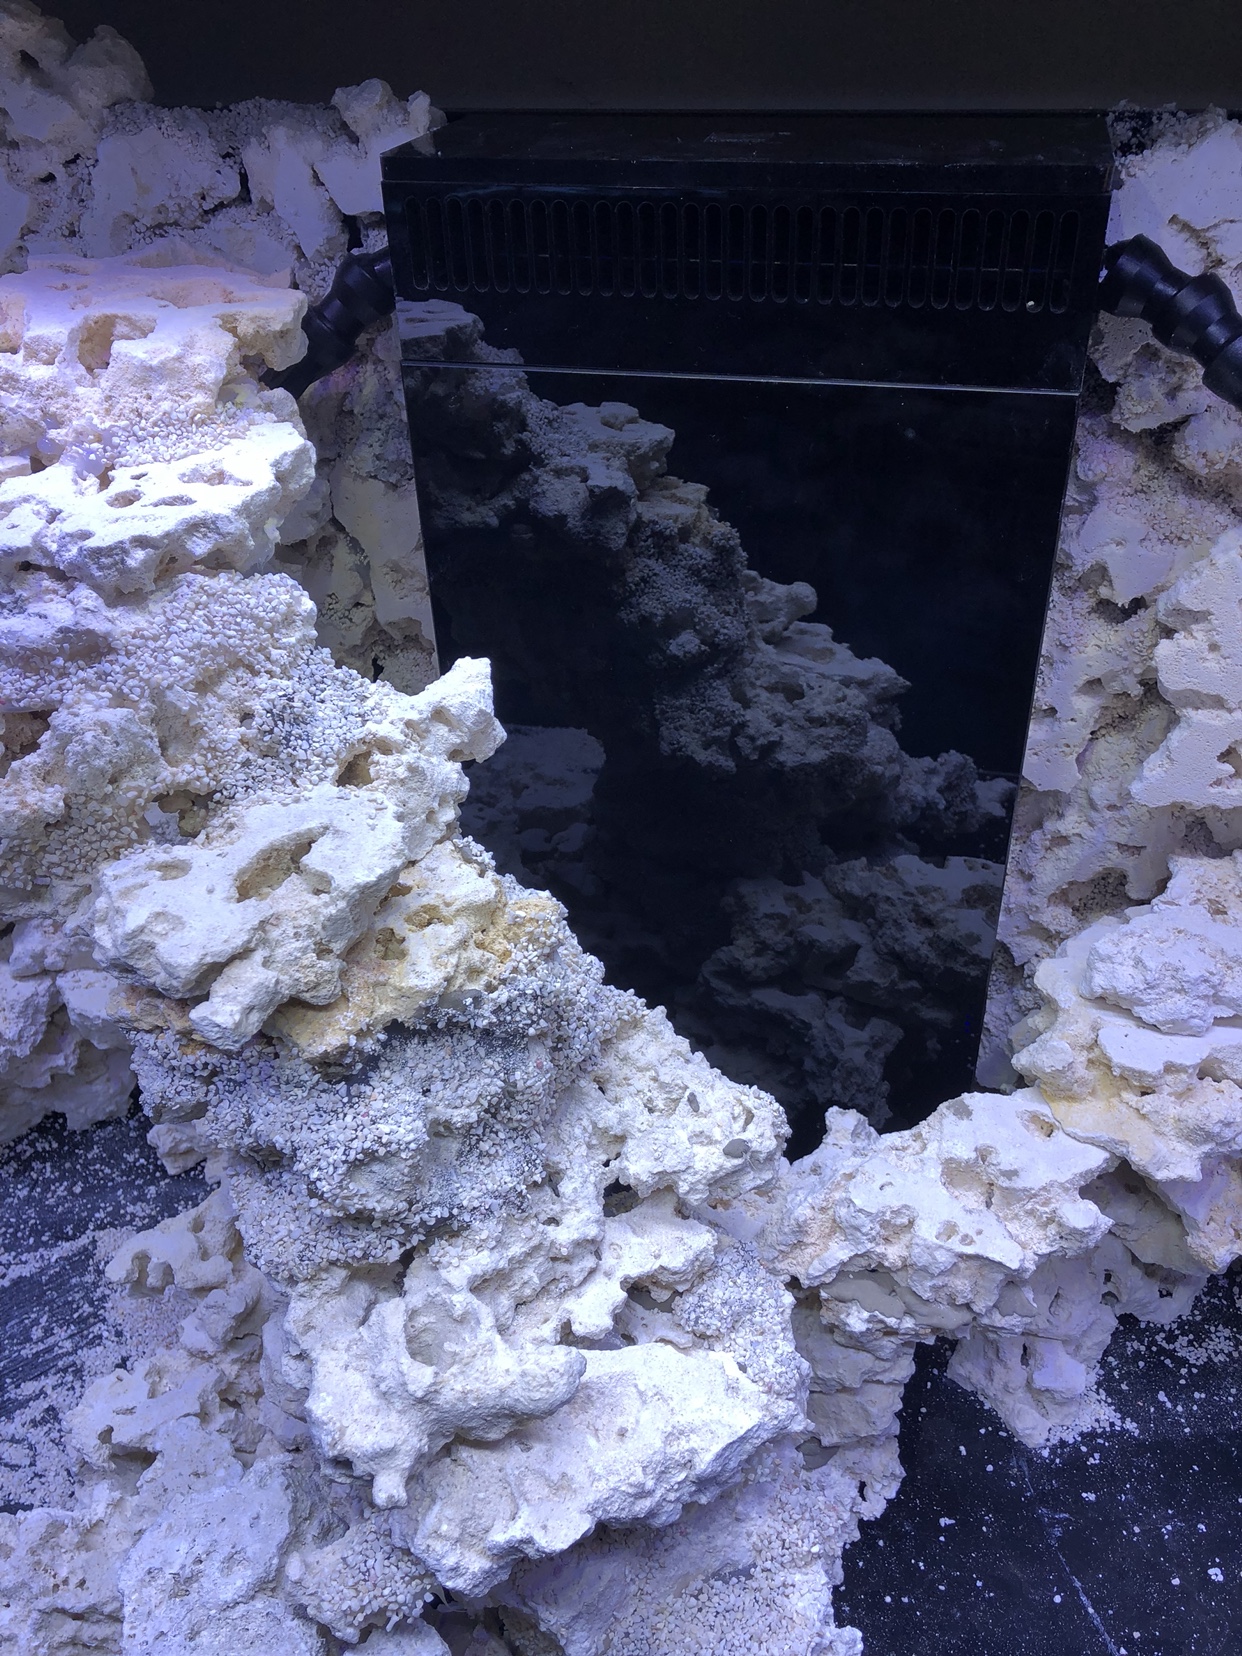
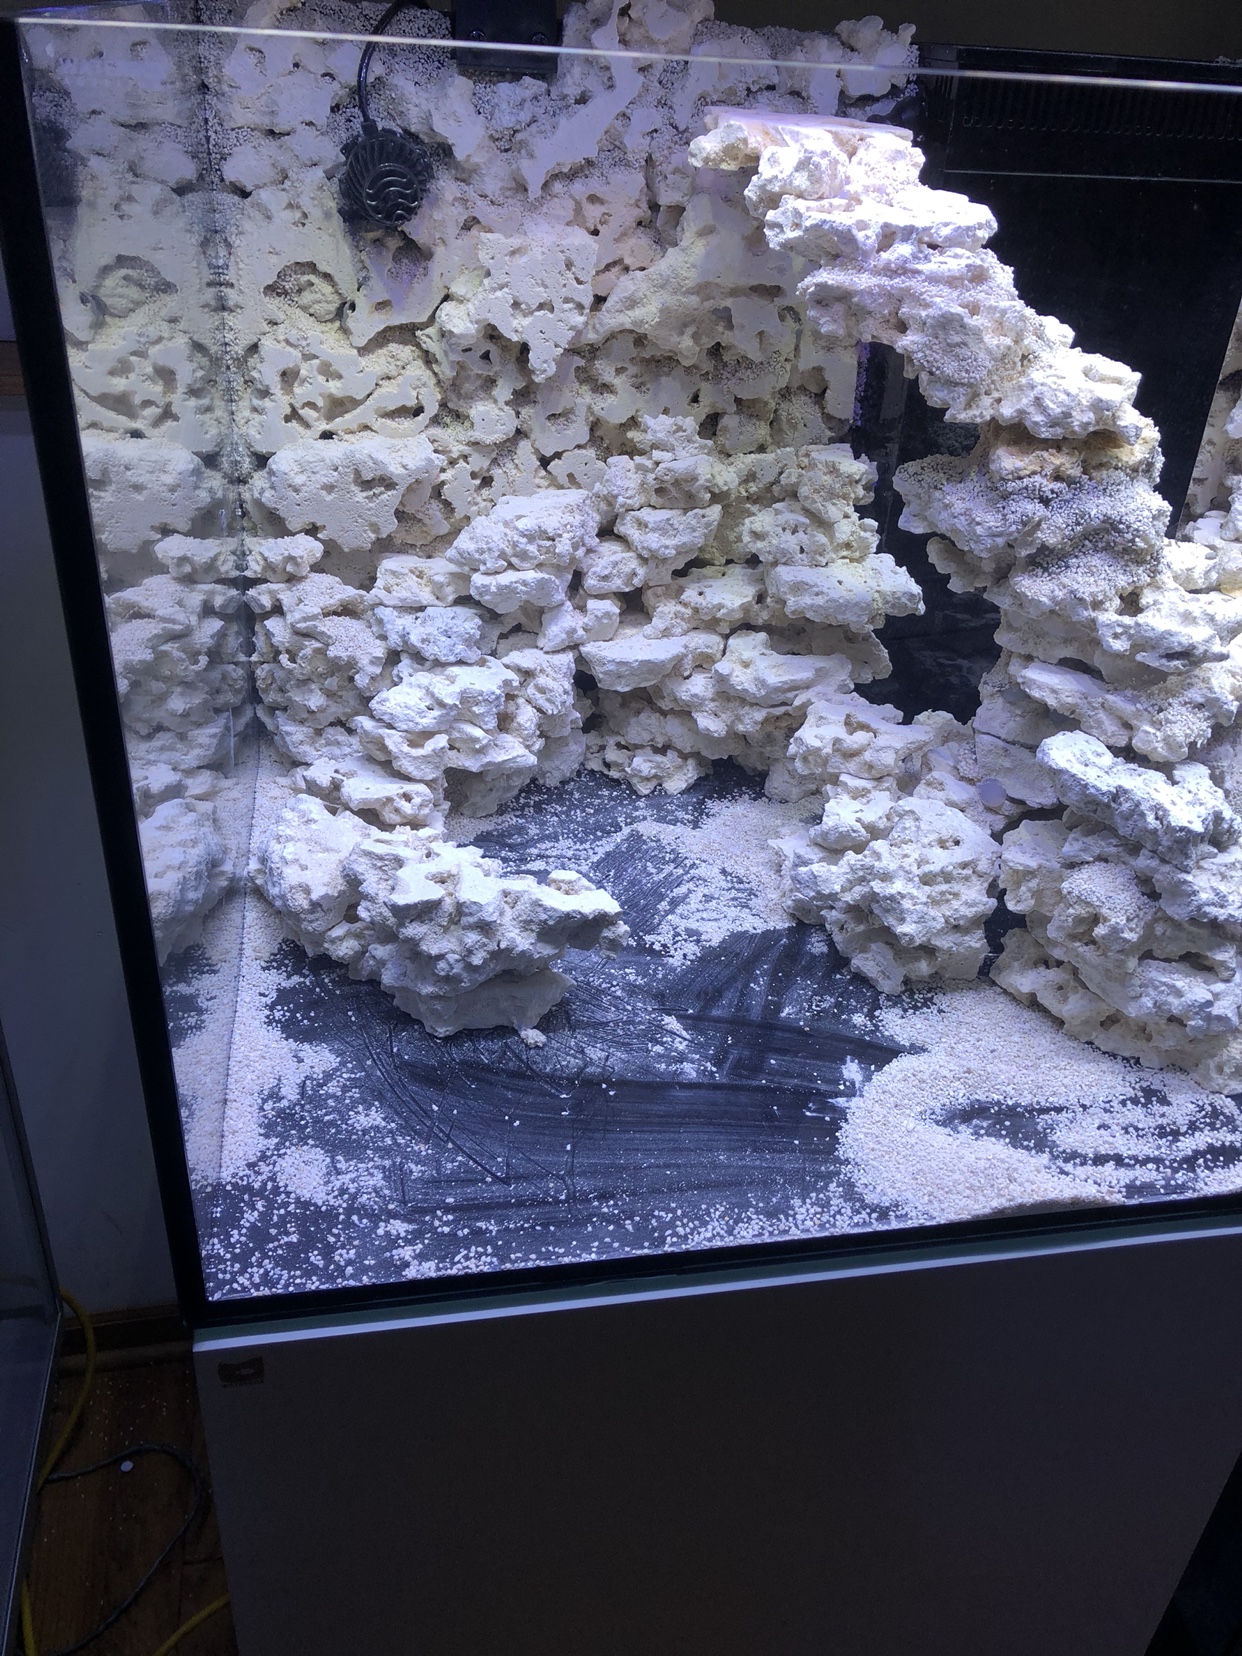
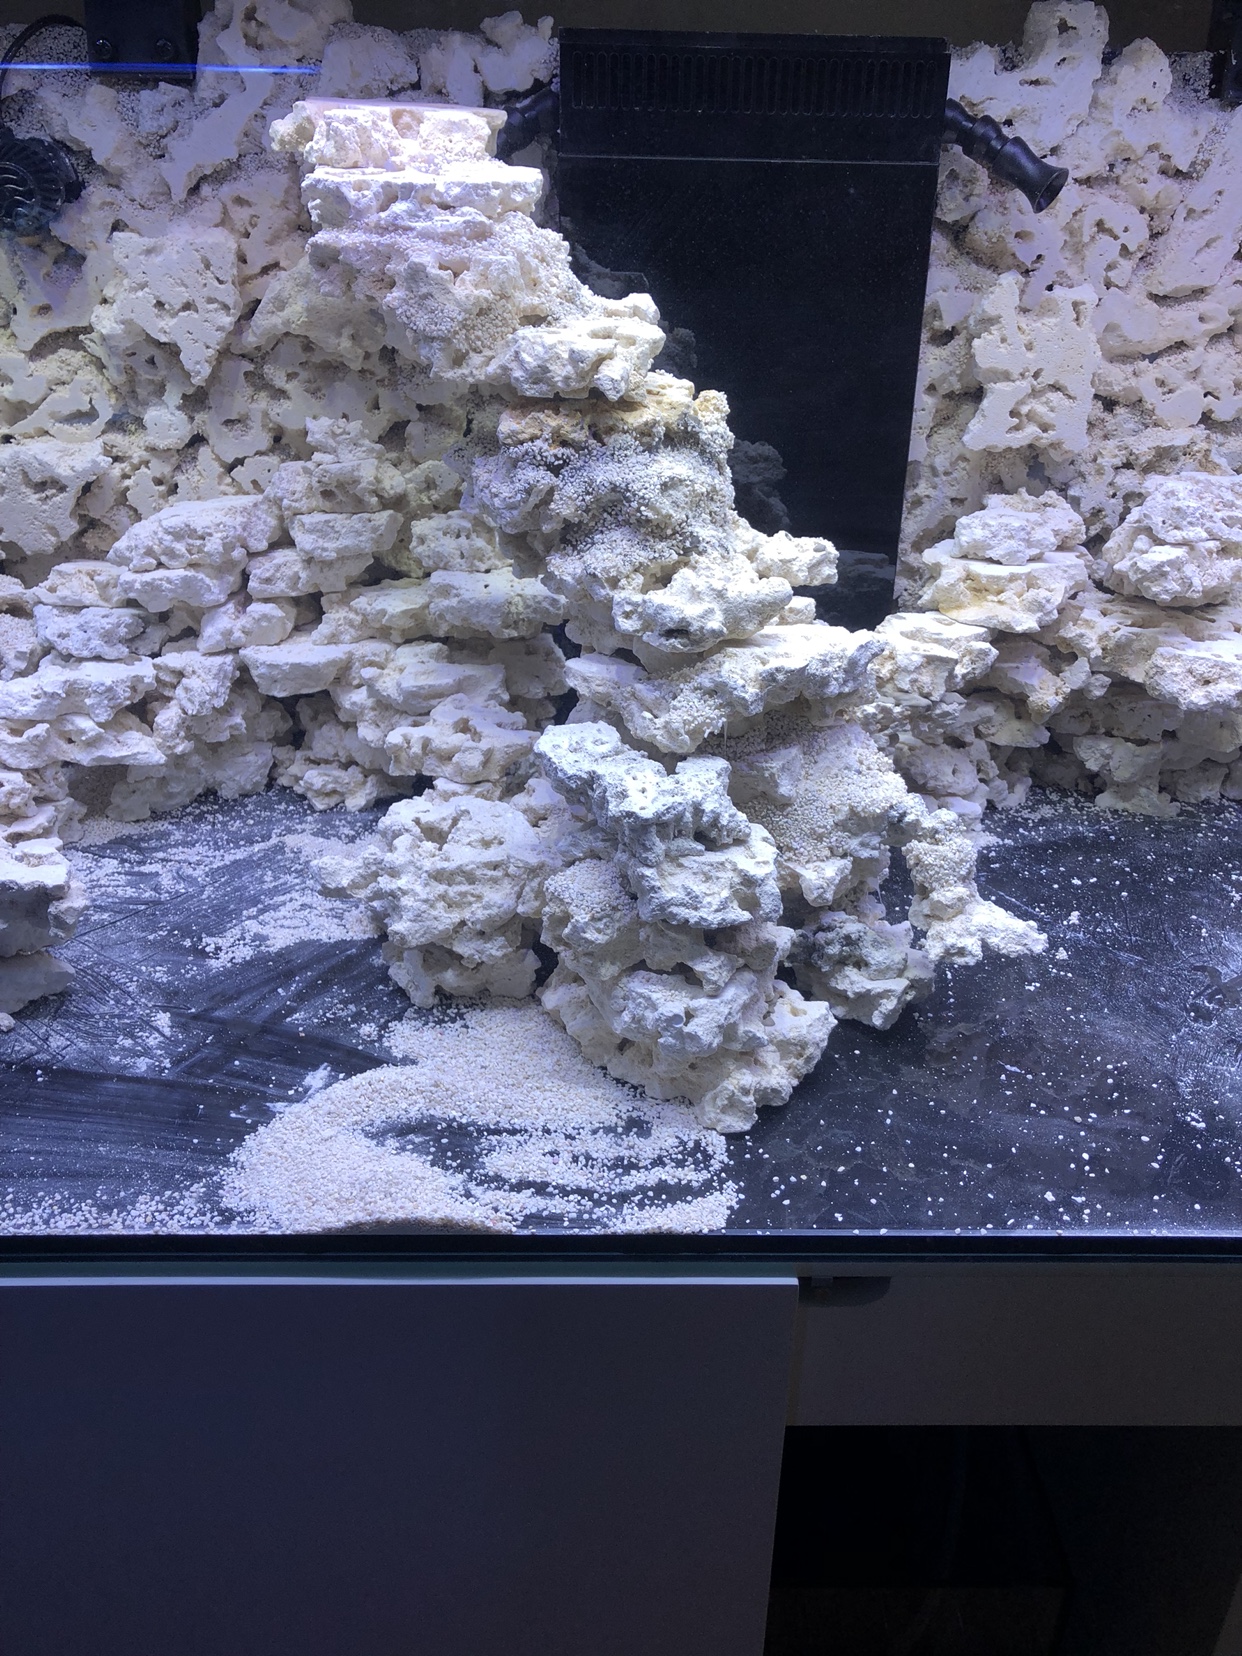
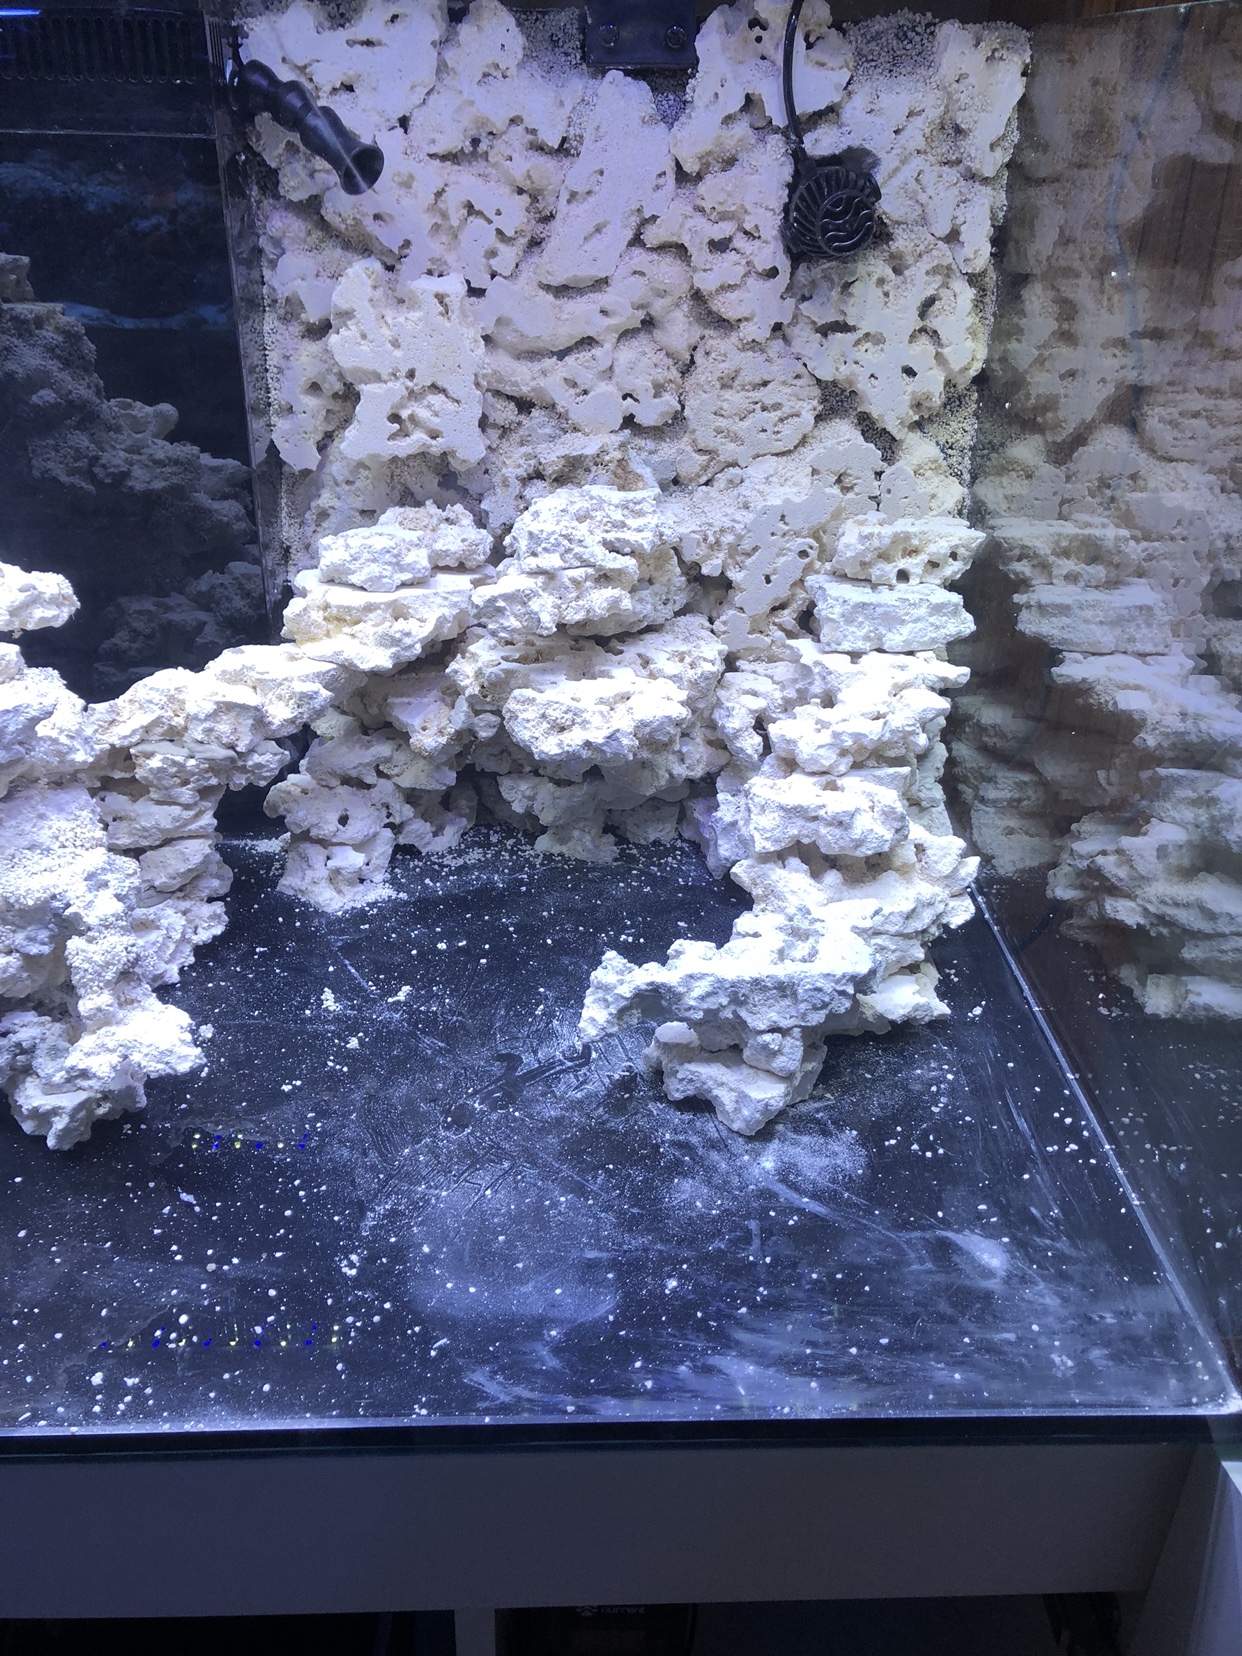
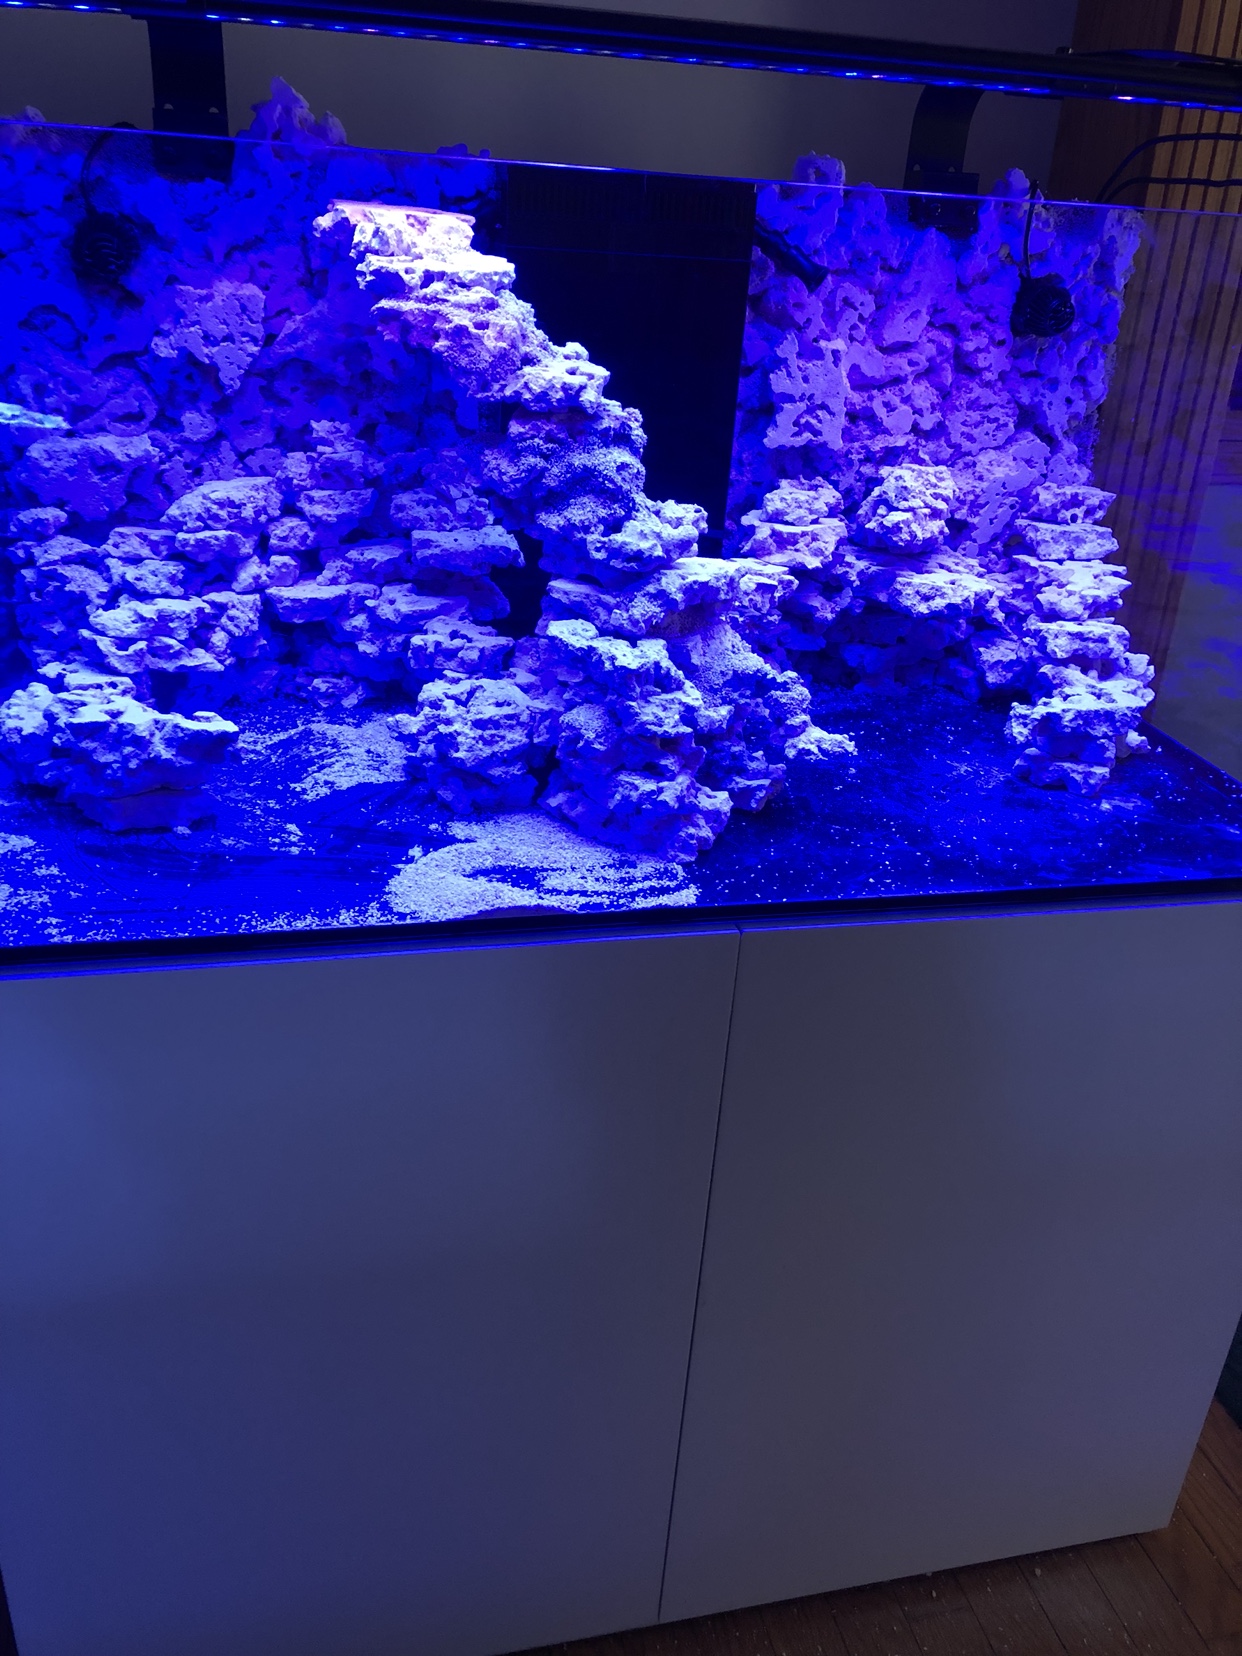
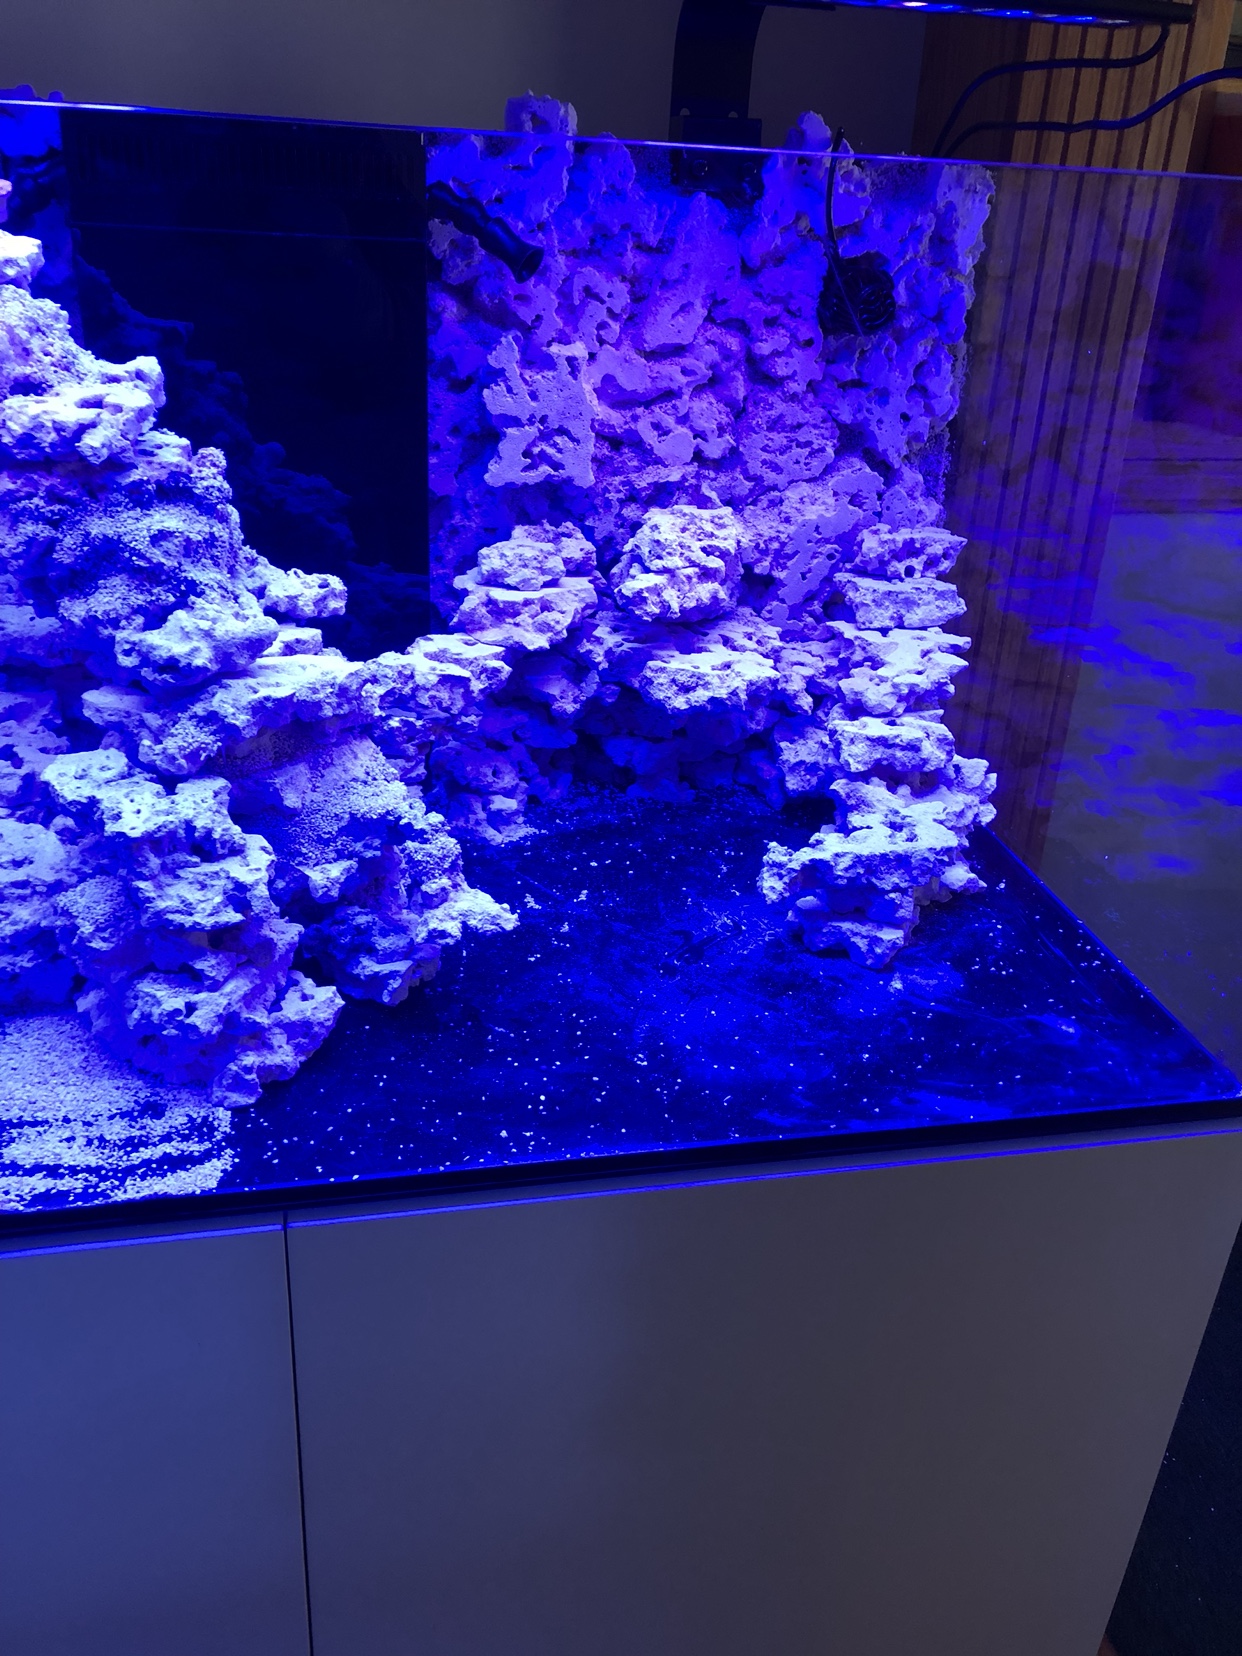
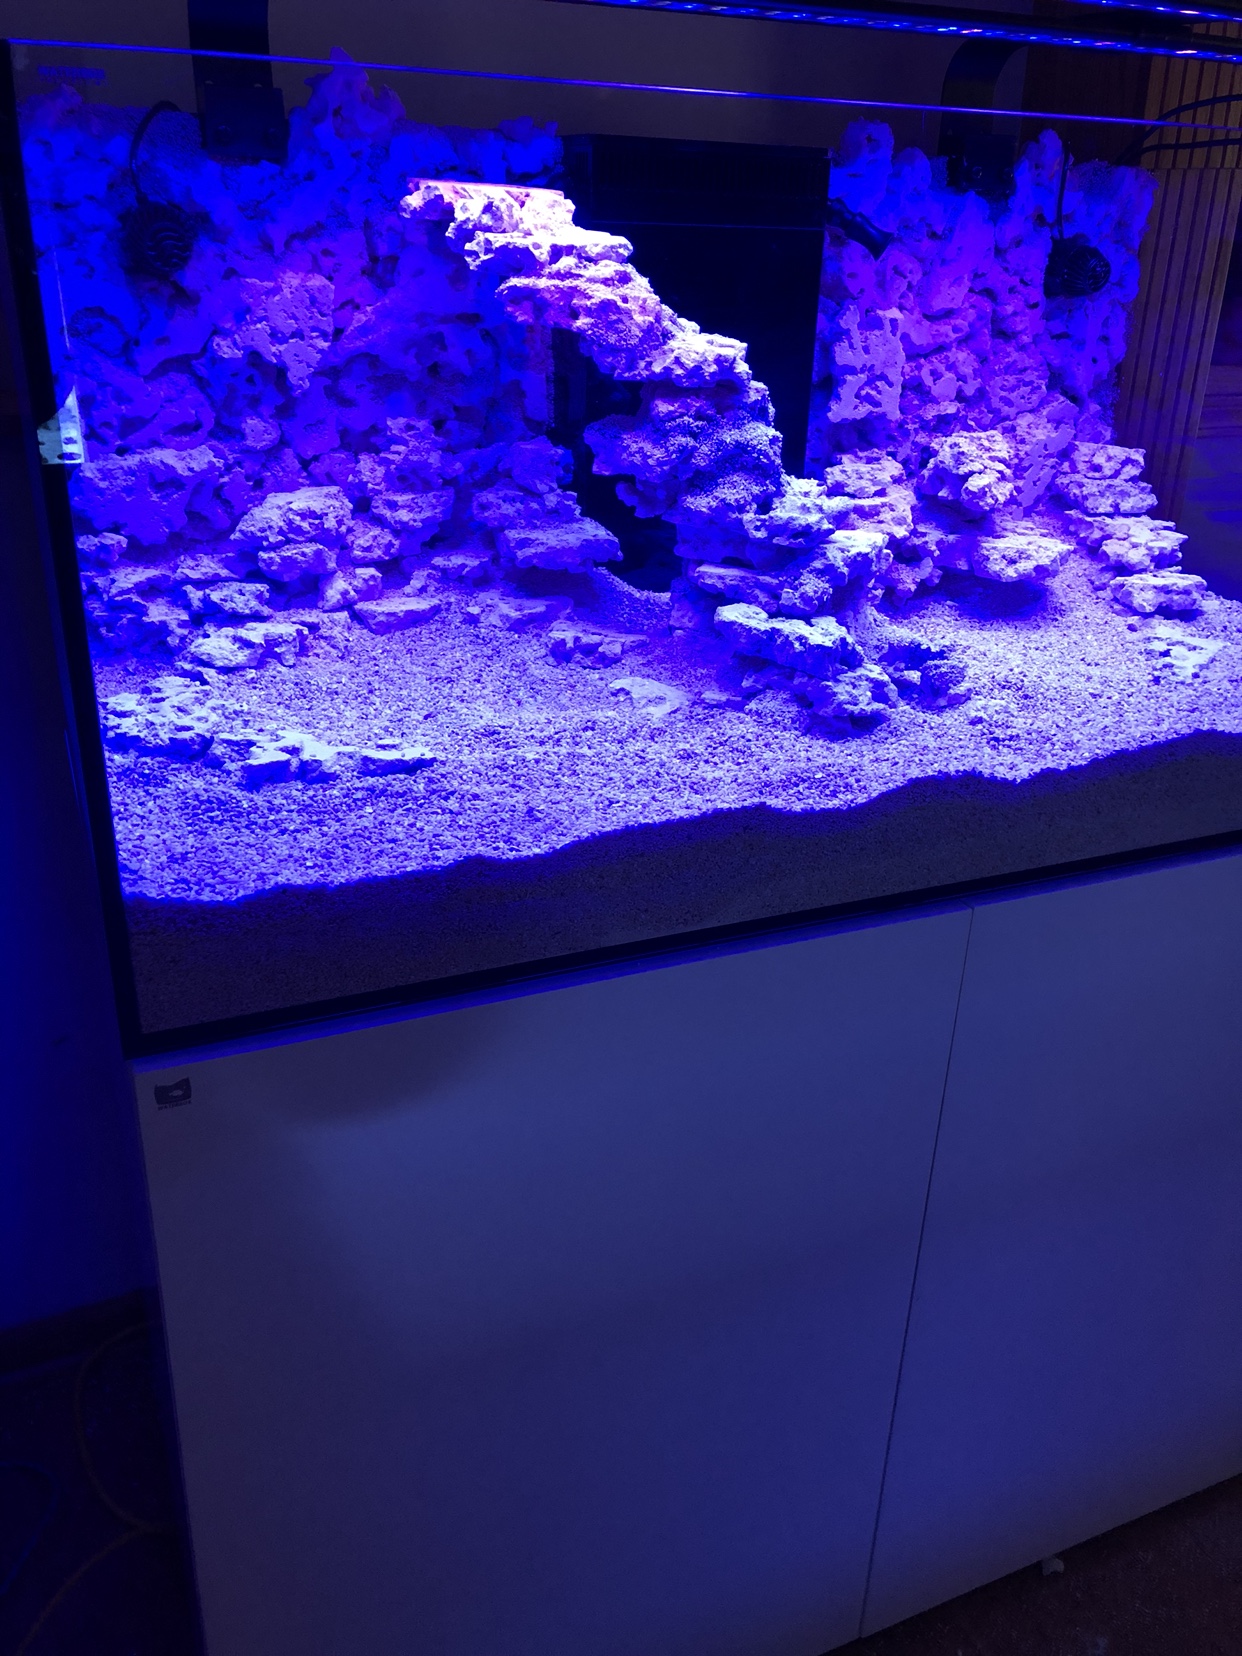
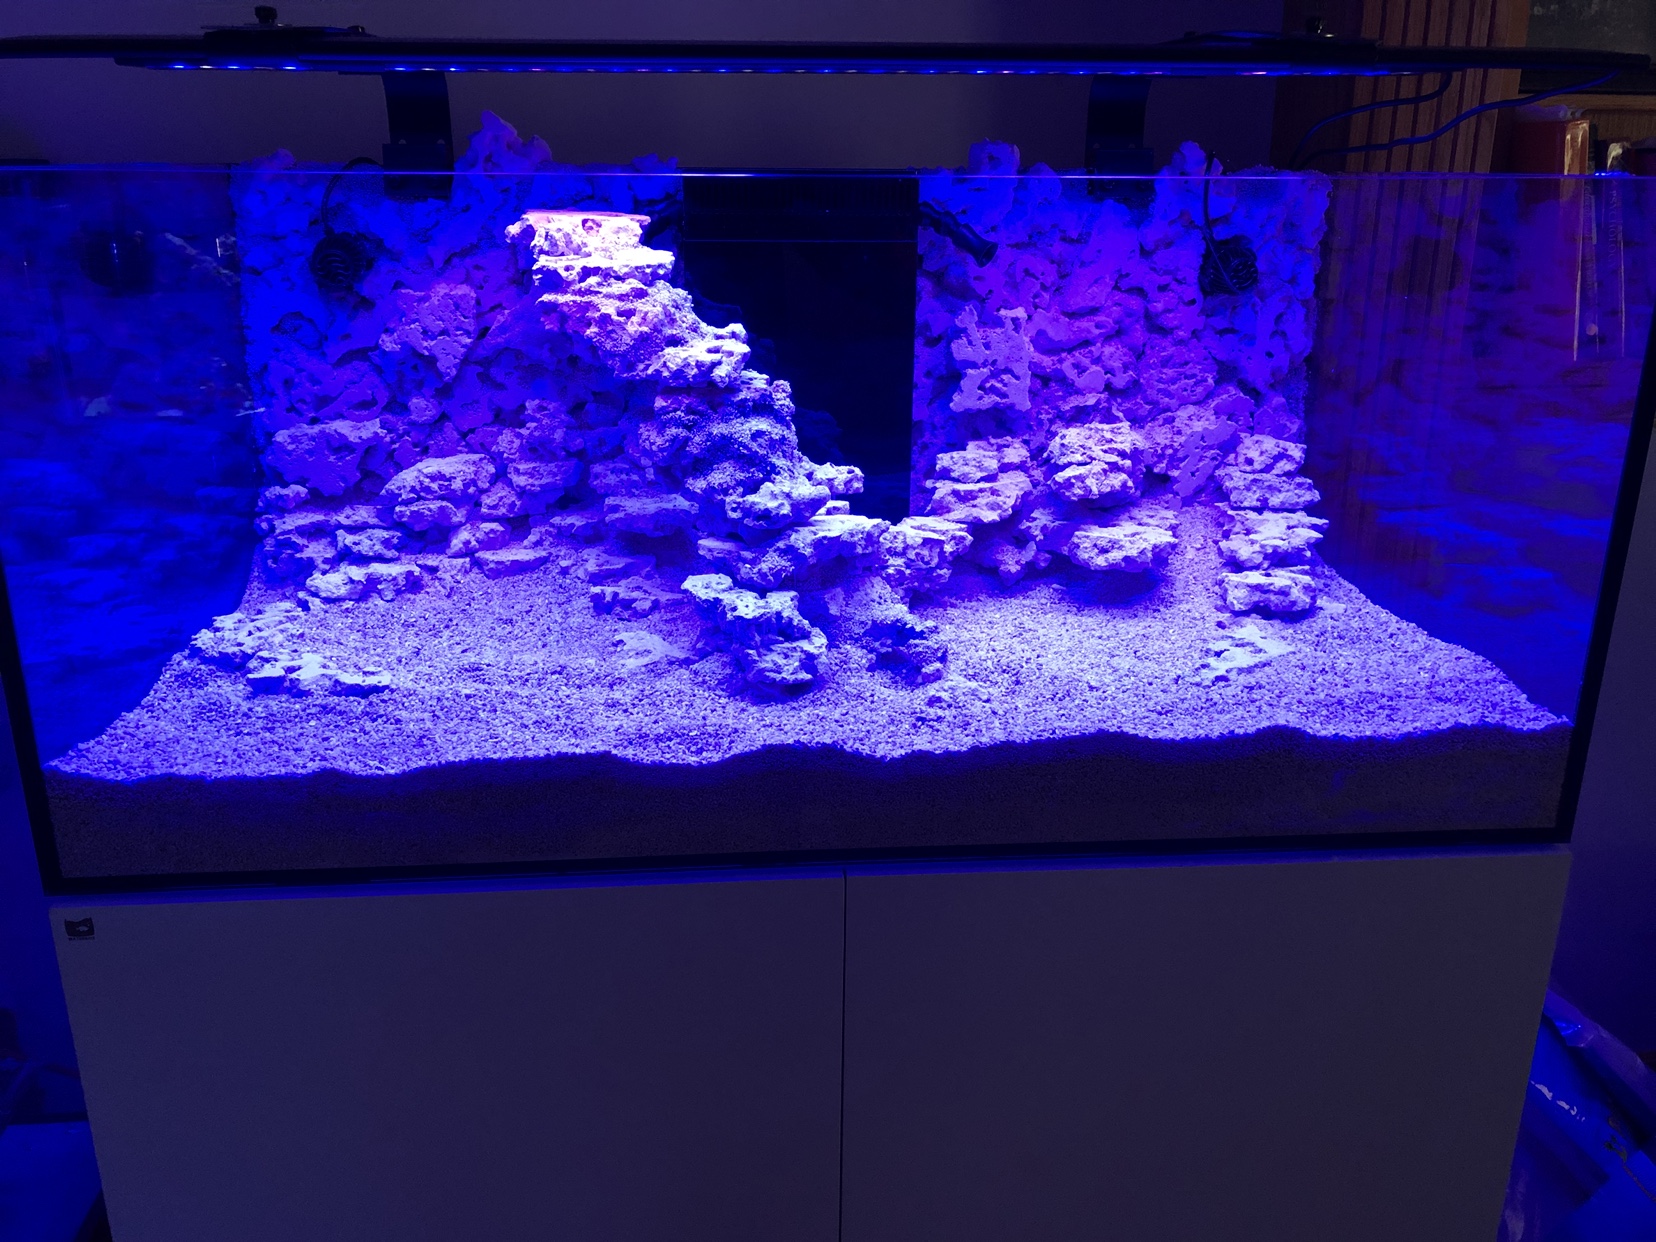
This is the end result of a lot of work and thinking dimensionally. Yes thats right dimensionally! Lol

I will try to walk through and show you how I went about building this amazing Aquascape in my newest build. Please feel free to ask questions along the way and I will happily answer any that you might have. [emoji4]
 
Last edited:
OP
OP
120reefkeeper

120reefkeeper

Reef keeping with Military Precision!
View Badges
Joined
Jan 5, 2016
Messages
3,956
Reaction score
7,799
Location
Las Marias, Puerto Rico
Rating - 0%
0   0   0
So where to begin?? Oh yes a brand new build. Lol

Over the years I’ve had many different types of Aquariums and Aquascape’s. I’ve learned to think dimensionally and use textures in my builds. This build was going to be much different than some I’ve done.

First I’d say because I was very busy with work and life during this build it actually turned out better. Why?? It gave me a chance so slow down and really create my Aquascape, not just dump in some rock and fill the tank. I wanted to use images in my mind from past builds, and dives I’ve been on.

I wanted to experiment with texture, contrast, depth and fresh ideas.

Thinking outside of the box!

So with a clean slate, a concept, imagination and 120lbs of STAX Rock I set to work.

The materials involved:

New Aquarium [emoji736]

IMG_1519.JPG


120lbs of STAX [emoji736]

IMG_1601.JPG


Aquaforest Stone Fix [emoji736]

IMG_2523.JPG


Aquarium safe silicone [emoji736]

IMG_2524.JPG


Tropic Eden Reef Flakes [emoji736]

IMG_2525.JPG
 
OP
OP
120reefkeeper

120reefkeeper

Reef keeping with Military Precision!
View Badges
Joined
Jan 5, 2016
Messages
3,956
Reaction score
7,799
Location
Las Marias, Puerto Rico
Rating - 0%
0   0   0
So where did this idea come from?

Well I am an avid diver and I’ve enjoyed diving many many times over the years. One of my favorite dive spots is just off the coast of Puerto Rico. They have an amazing wall dive there. You descend down to the reef at about 40 feet and at the edge of the reef a scene straight from the movie “ Finding Nemo “ comes to mind. It’s an absolute drop off! Thousands of feet straight down!

What’s really remarkable about this dive is you can descend along side of this completely vertical drop to a depth of about 100 feet and level off. Looking to your right you’ll see an absolutely beautiful world of colors and movement. The reef is teaming with life and vigorous growth of coral colonies that have been there for millennia. The corals bask in the light from above and the cool upwelling currents carrying all the nourishment they need. Simply awe inspiring!

I have these images of where I want to take this tank.

So with all of that fresh in my mind I sit down and think... how can I recreate even a snapshot of this truly wonderful creation??

I knew from the onset that I wanted to use STAX Rock. Why??

It was just perfect for creating my wall and the only way to do that in my mind was to adhere the STAX to the back glass of the Aquarium.

Yes you heard right! The back glass!

Now ... how to do it hmmmmmm.
 
OP
OP
120reefkeeper

120reefkeeper

Reef keeping with Military Precision!
View Badges
Joined
Jan 5, 2016
Messages
3,956
Reaction score
7,799
Location
Las Marias, Puerto Rico
Rating - 0%
0   0   0
Luckily for me STAX Rock has a lot of holes in it. Great for attaching coral to and hopefully to my back glass I thought. [emoji4]

I must admit I truly didn’t know if it was going to work or not. It took some guts and belief that it would all work out if I just continued to push through!

So no time like the present to start I suppose.

Stage one “ Scary “ lol

I applied the Aquarium safe silicone to the back of my first rock and pressed it against the back glass at the bottom corner. I almost immediately took it off. Lol I thought.... you can’t do that! You’ll ruin the tank... what if it looks bad ... your gonna have a lot of scraping to do!

Still I shook it off and pressed on!

Here is a picture of the beginning.

IMG_1661.JPG
IMG_1658.JPG
 
OP
OP
120reefkeeper

120reefkeeper

Reef keeping with Military Precision!
View Badges
Joined
Jan 5, 2016
Messages
3,956
Reaction score
7,799
Location
Las Marias, Puerto Rico
Rating - 0%
0   0   0
I decided against the nagging feeling I was getting to just do it dude! Just go for it!

So I continued on... yikes!

I applied silicone to each rock individually and I wasn’t light on the silicone! I applied it heavy! I went through a lot of tubes! Lol .... A LOT!

Each time I placed a rock on the back glass I pressed firmly, squeezing silicone out of the sides and holes. Yes I wore nitrile gloves.

I did one layer . One layer on the bottom across the entire tank. I waited 24 hours for it to cure. I then preceded with the next layer. Slowly climbing up the back wall . Each time I waited 24 hours for cure time. Along the way I added shelves and used containers or whatever I had to hold the rock in place until it cured, then I proceeded . In some areas I added more than one layer horizontally “ stacking on top of a previously cured layer.” Like this.

IMG_1681.JPG
 
OP
OP
120reefkeeper

120reefkeeper

Reef keeping with Military Precision!
View Badges
Joined
Jan 5, 2016
Messages
3,956
Reaction score
7,799
Location
Las Marias, Puerto Rico
Rating - 0%
0   0   0
Onwards and upwards I went adding dimension and shelves along the way. I did this to both the left and right sides of the back glass of the Aquarium. I intentionally left the overflow in black acrylic, because I loved the reflection I would get of the back of the rock work I was creating outside of the Aquarium.

IMG_1678.JPG


IMG_0009.JPG


I then proceeded by building the curved structure you see above outside of the tank on a cardboard box. For this I used the Aquaforest stone fix , and it worked fantastic!

After the stone fix had cured I went back and applied a thin layer of silicone over it and while it was still wet I applied some of the Tropic Eden reef flakes. This served the purpose of nothing more than aesthetics. The stone fix would be just fine with normal live rock and would blend in well. For this Aquascape being very bright I thought the sand would blend in better , it did.

I decided to do the exact same procedure to the entire Aquascape. Between all the rock on the back glass , I went back and applied a thin layer of silicone in between all of the rocks and sprinkled , pushed in, or even blew in with a straw the Reef Flakes. Perfect!

a37fab467ab52f783d5b02766da31c94.jpg
 
Last edited:
OP
OP
120reefkeeper

120reefkeeper

Reef keeping with Military Precision!
View Badges
Joined
Jan 5, 2016
Messages
3,956
Reaction score
7,799
Location
Las Marias, Puerto Rico
Rating - 0%
0   0   0
With my new found confidence, I continued with my creative thinking [emoji848]! [emoji23]

I decided to build in some coves and more dimension. Nothing is straight in nature.... remember that.

Slopes , curves, jagged edges. Different heights , depths and textures. This is how nature is... expect the unexpected. [emoji4]

IMG_0007.JPG
6d570e637d8f55f72e05e86945fd9e8f.jpg
 
OP
OP
120reefkeeper

120reefkeeper

Reef keeping with Military Precision!
View Badges
Joined
Jan 5, 2016
Messages
3,956
Reaction score
7,799
Location
Las Marias, Puerto Rico
Rating - 0%
0   0   0
Ahh now we have something!! More dimension, more curves, more layers!! Yes!

Then you reach a point where everything says STOP!!

Don’t move !

Don’t breath!!!!

Your done! If you move anything or add anymore then you’ll just loose the completeness of your work. This is the time to [emoji113] stop.

Step back.....


Look.....

Imagine filled with coral and fishes.....


Ahhhh yes!!!

e8392421b2a4895e432bf1df7197ccf4.jpg
 
OP
OP
120reefkeeper

120reefkeeper

Reef keeping with Military Precision!
View Badges
Joined
Jan 5, 2016
Messages
3,956
Reaction score
7,799
Location
Las Marias, Puerto Rico
Rating - 0%
0   0   0
Now for the sand and light! Yes time to tune and massage everything into place.

I continued with adding the sand and setting up my final lighting program!
a4cb5ee39d804cfb52c674991e090b2c.jpg
818151228ce28117d4dc46393d9dfecf.jpg
c46f72f9ac5c6e9075c0b22db90cbcb0.jpg
e1b5e54b5964ad0985ff5391356bdf91.jpg
96383f6e577129ff6d4c322a0eeda70a.jpg
e86bece30696889a5858166f62705793.jpg
fb5a07662effac08e0045b64ef29d3b7.jpg
e9b7e72b6a257d97605979c5e5eb7d3f.jpg
408c0d2e55098ff8a8f169447706a171.jpg
 

High pressure shells: Do you look for signs of stress in the invertebrates in your reef tank?

  • I regularly look for signs of invertebrate stress in my reef tank.

    Votes: 36 31.3%
  • I occasionally look for signs of invertebrate stress in my reef tank.

    Votes: 28 24.3%
  • I rarely look for signs of invertebrate stress in my reef tank.

    Votes: 21 18.3%
  • I never look for signs of invertebrate stress in my reef tank.

    Votes: 30 26.1%
  • Other.

    Votes: 0 0.0%
Back
Top