Biglurr's 175 Build With Pics!

Biglurr54

Well-Known Member
View Badges
Joined
May 28, 2017
Messages
986
Reaction score
444
Rating - 0%
0   0   0
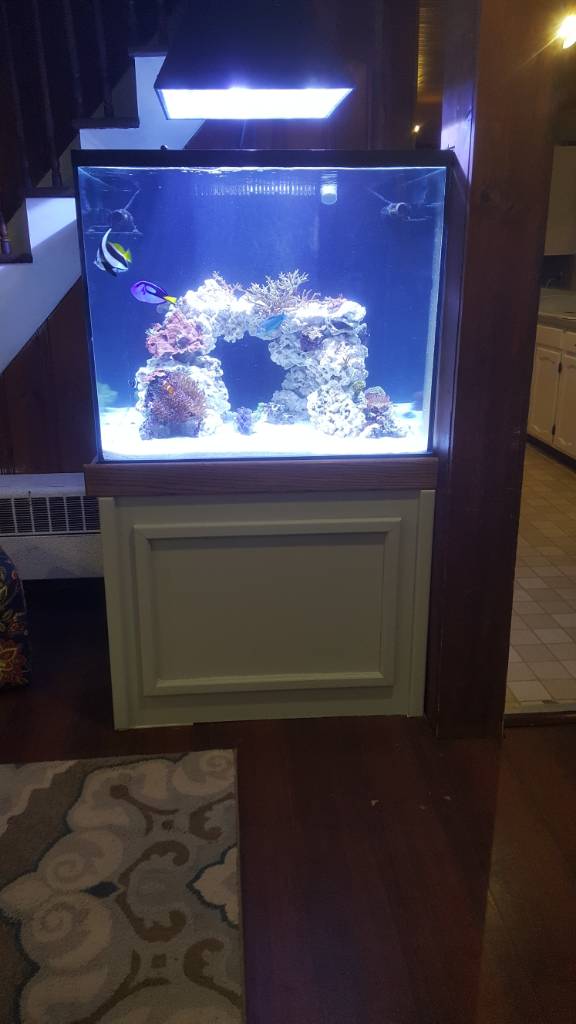
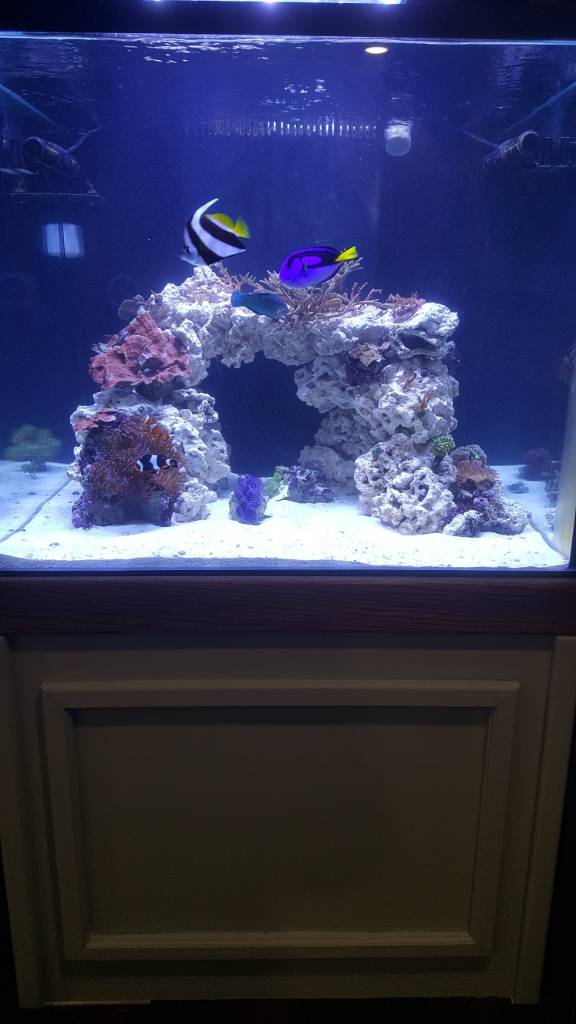
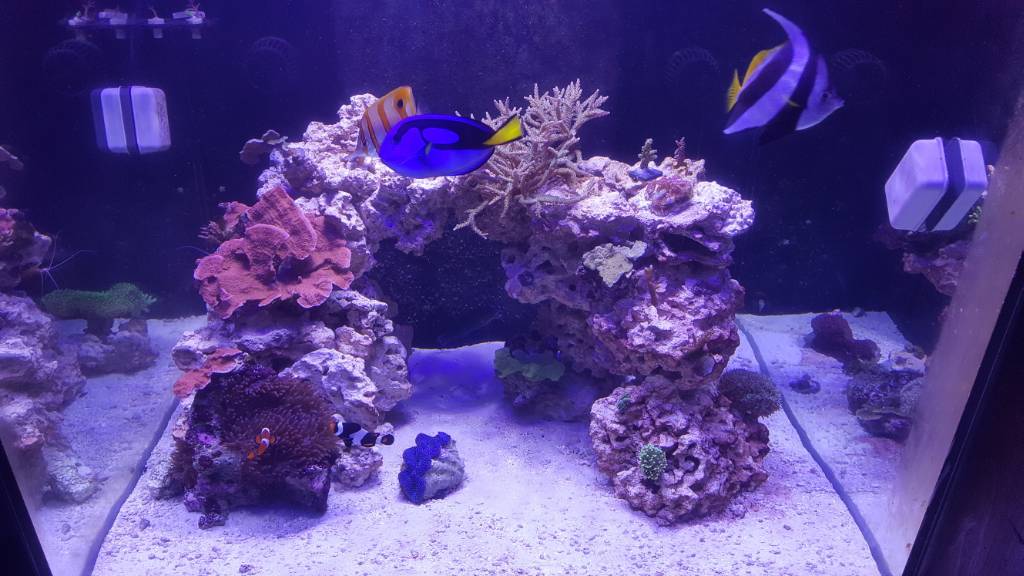
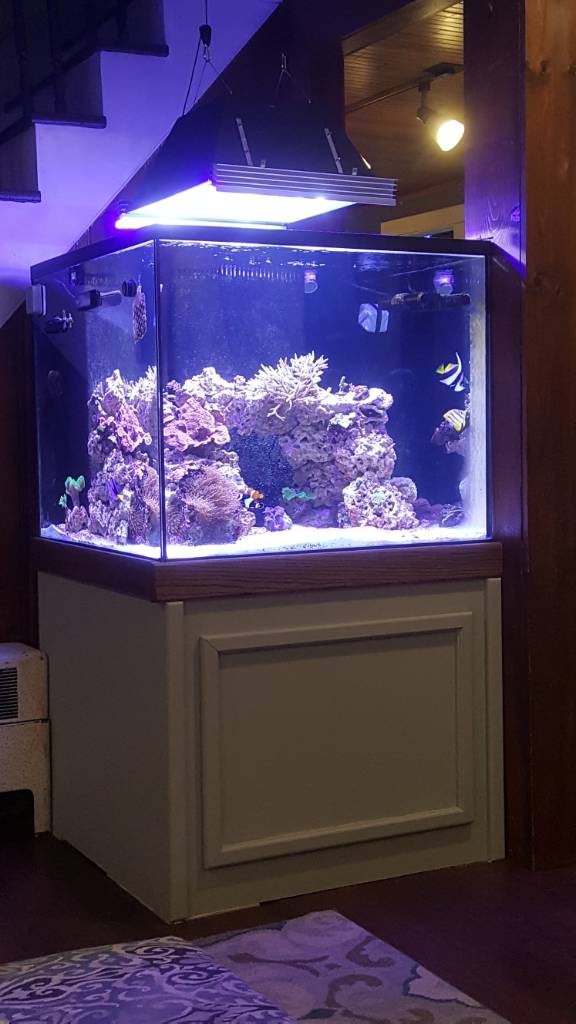
Its time to create a build thread for my new tank. I have a 60 cube that has been running for 3 years and my wife and I have been planning on upgrading the tank for about a year. I found a glasscages tank on craigslist. It was a complete setup that had been run for 2 years then left with water in it for 1 years then drained and left dirty for 2 years. It was a complete setup that no expense was spared on when it was built. I purchased the tank and equipment for a steal. The tank was 3 hours away so I drove down in my Yukon Xl and loaded everything I could into the truck. The stand and canopy was on the roof full of equipment. Then whole truck was full to the brim with equipment. I had to leave a couple of totes of random equipment behind because I couldn’t fit anywhere. Once the tank was home I unloaded the truck slowly taking inventory as everything came out. The tank dimensions are 36x36x31. A 175 cube. When it came time to move the tank into the house I discovered that my 32” doors are more like 30.5” doors due to the jams and framework of my 1830 post and beam house. The tank sat out on my front porch for 2 months while I figured out how to move the tank in and waited for warmer weather. I ended up taking a large picture window out and hired a bunch of buddies to lift the tank up and through the window. Once it was inside it seemed much larger than when it was out on the porch!

Window.PNG

lift.PNG


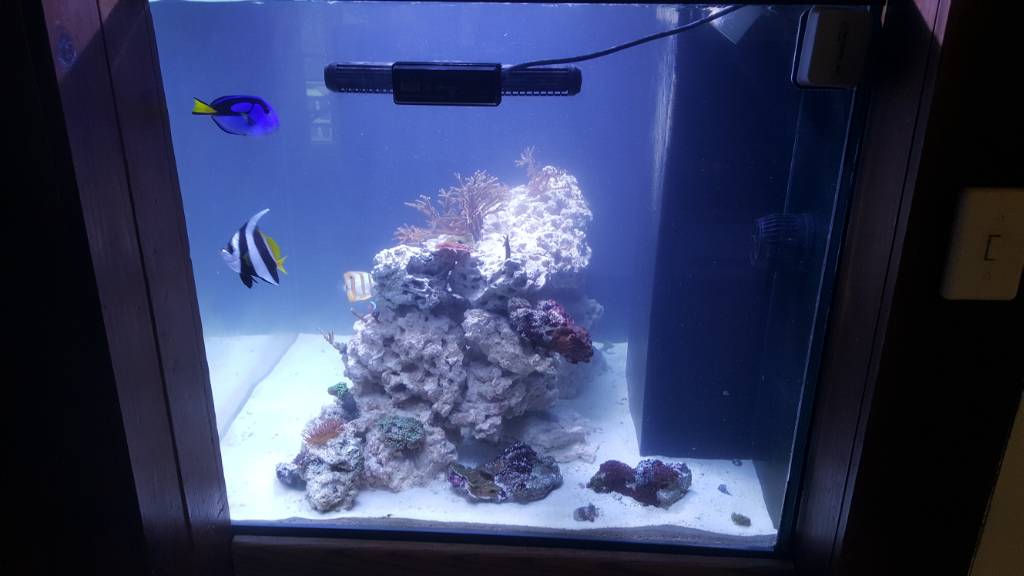
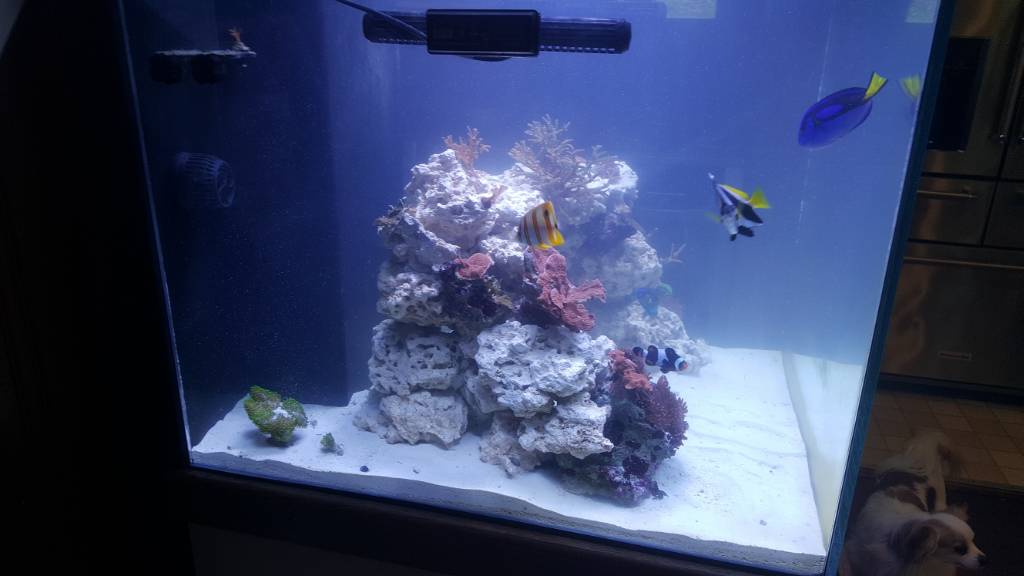
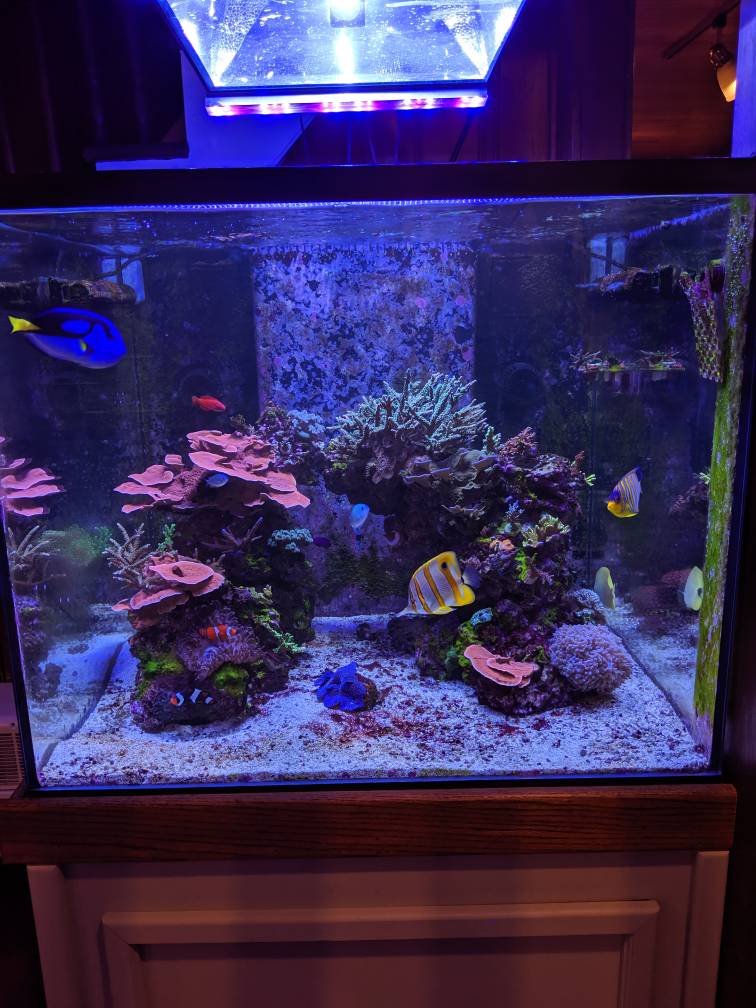
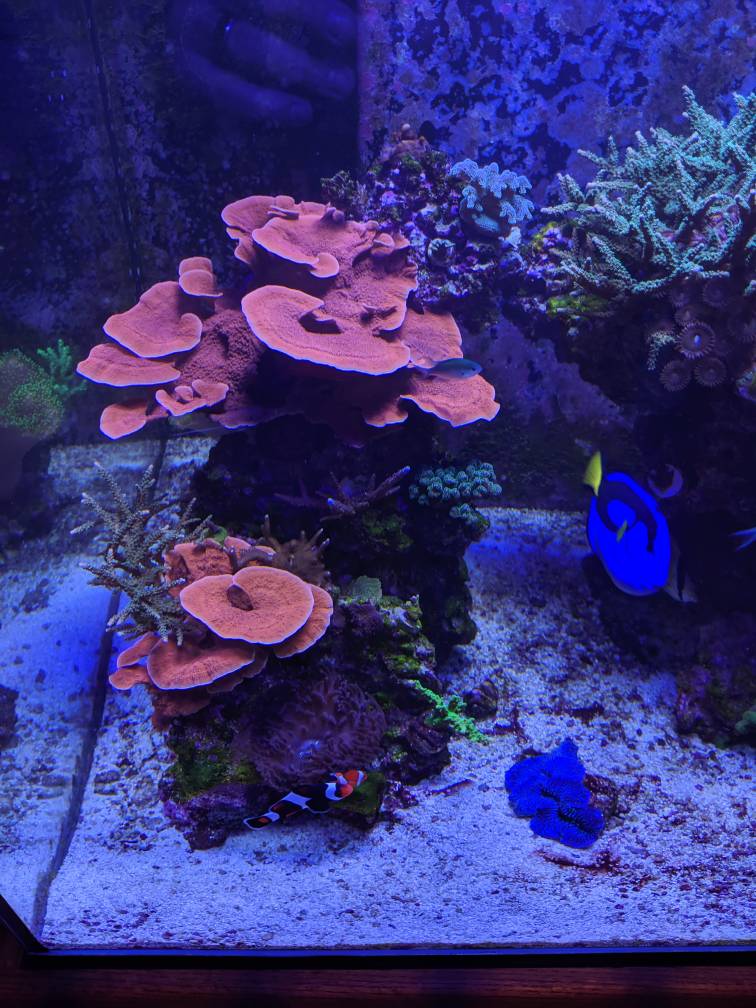
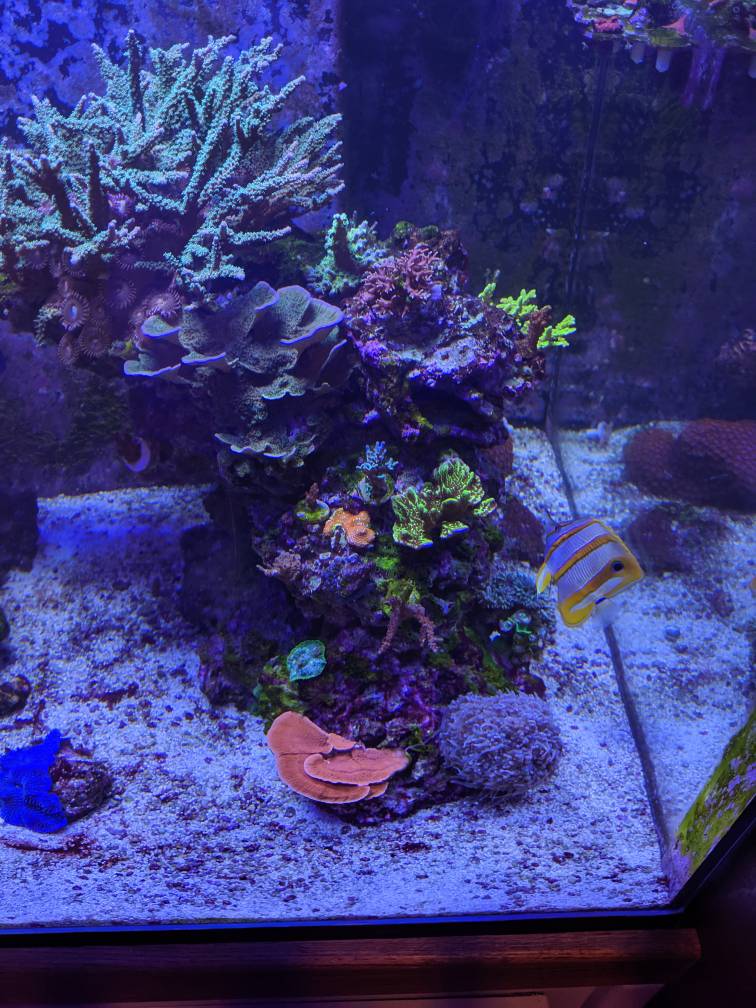
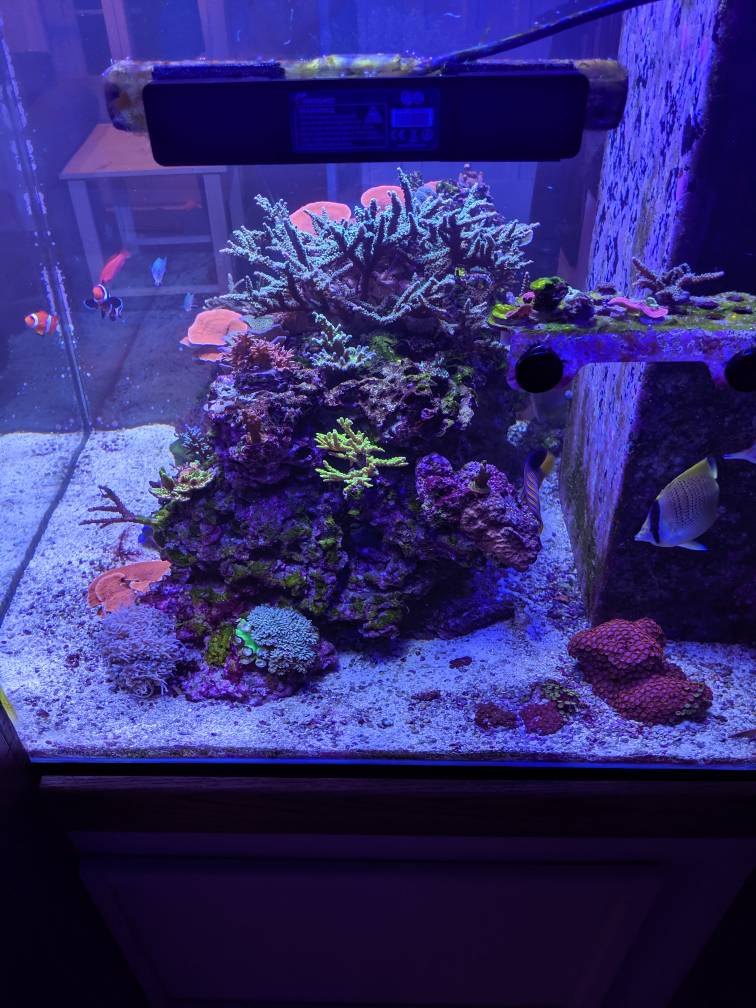
Here's my 60 Cube. I have stocked up and started growing a bunch more sticks for the 175 since this pic.

20171215_164244.jpg


I took the majority of the equipment and sold it off individually so I could purchase what I wanted for the tank. I was able to recoup the money I paid for the setup plus made enough money to buy the majority of the equipment I needed for my set up.


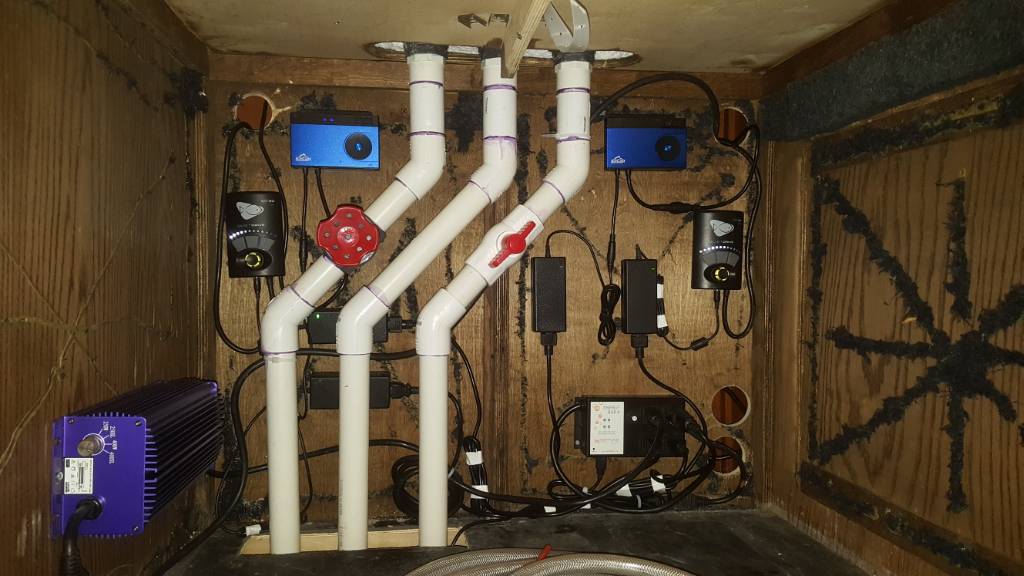
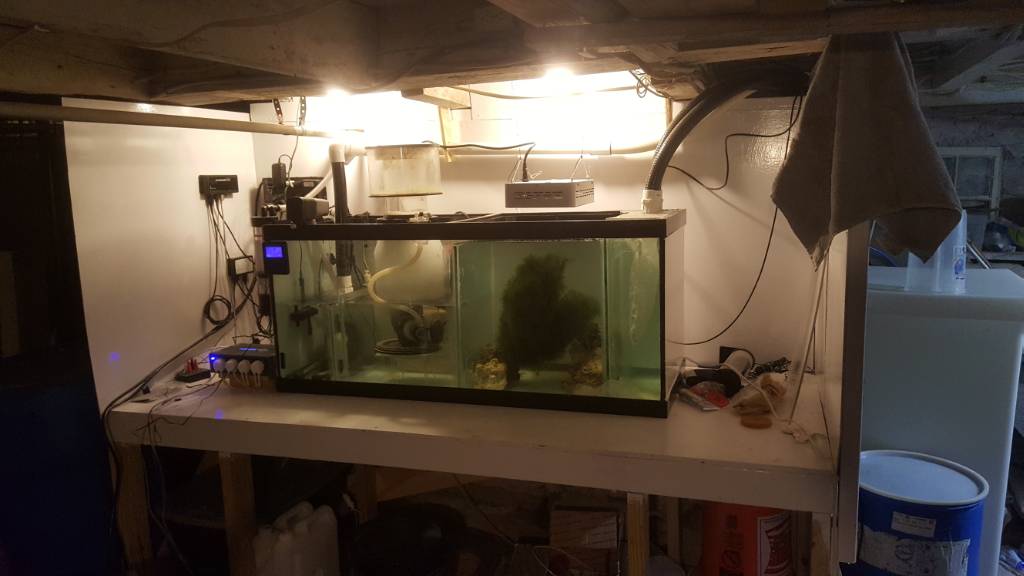
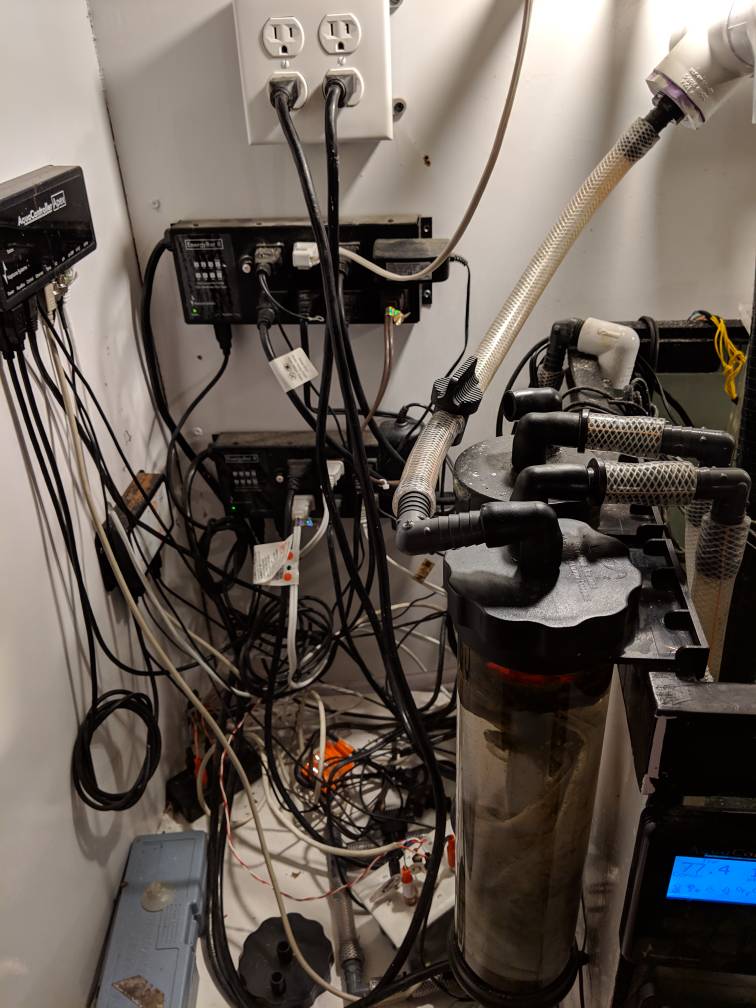
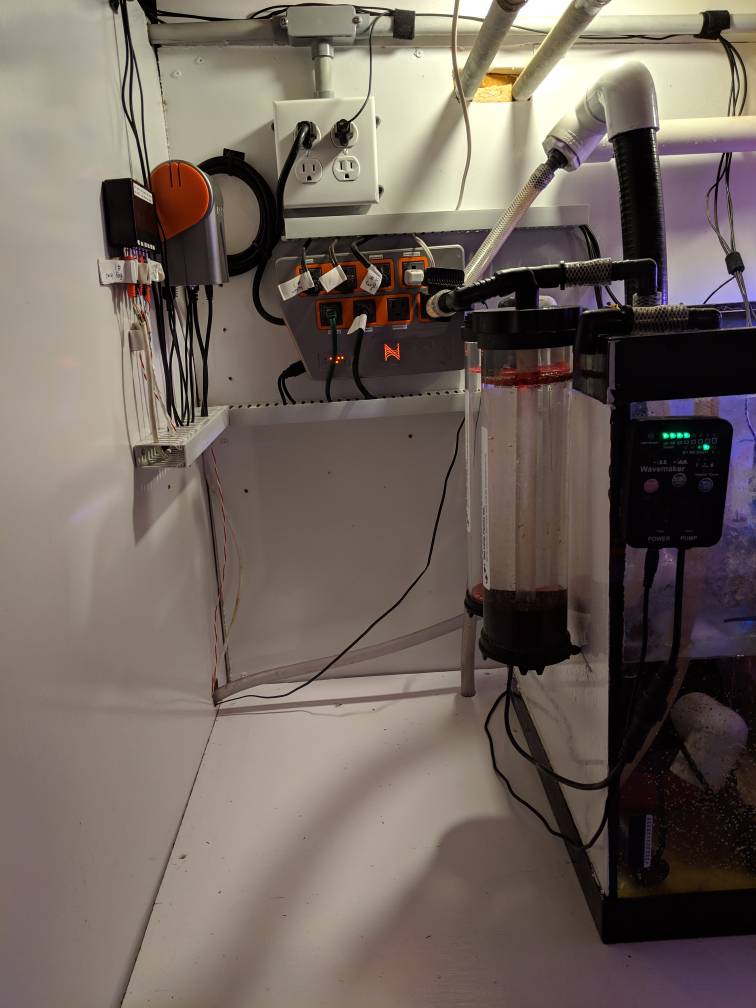
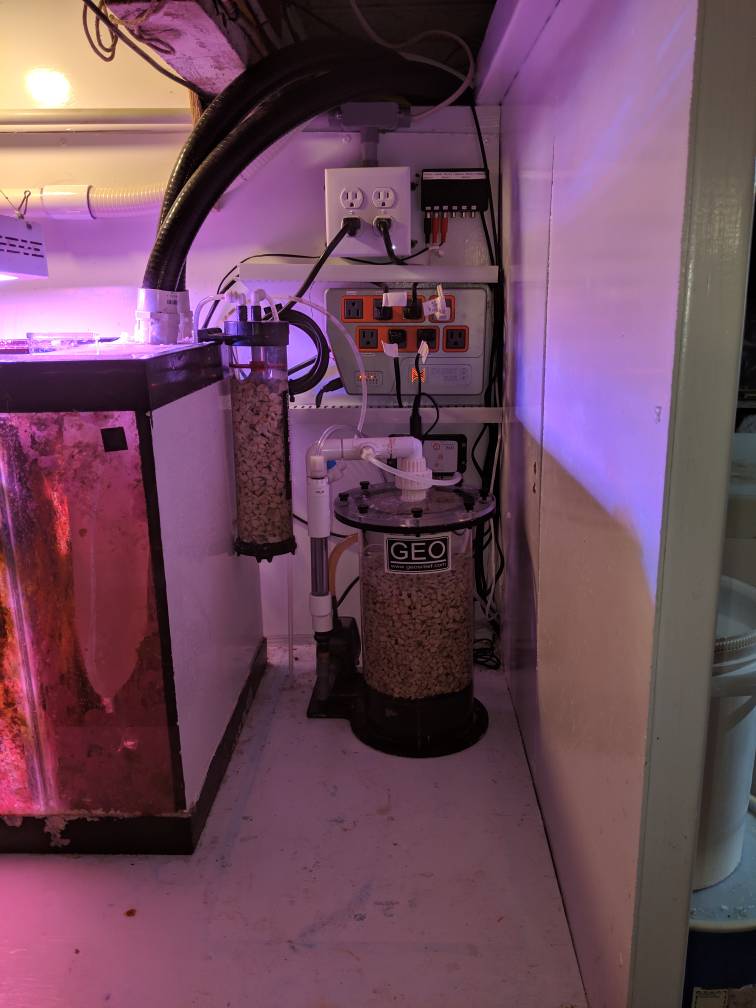
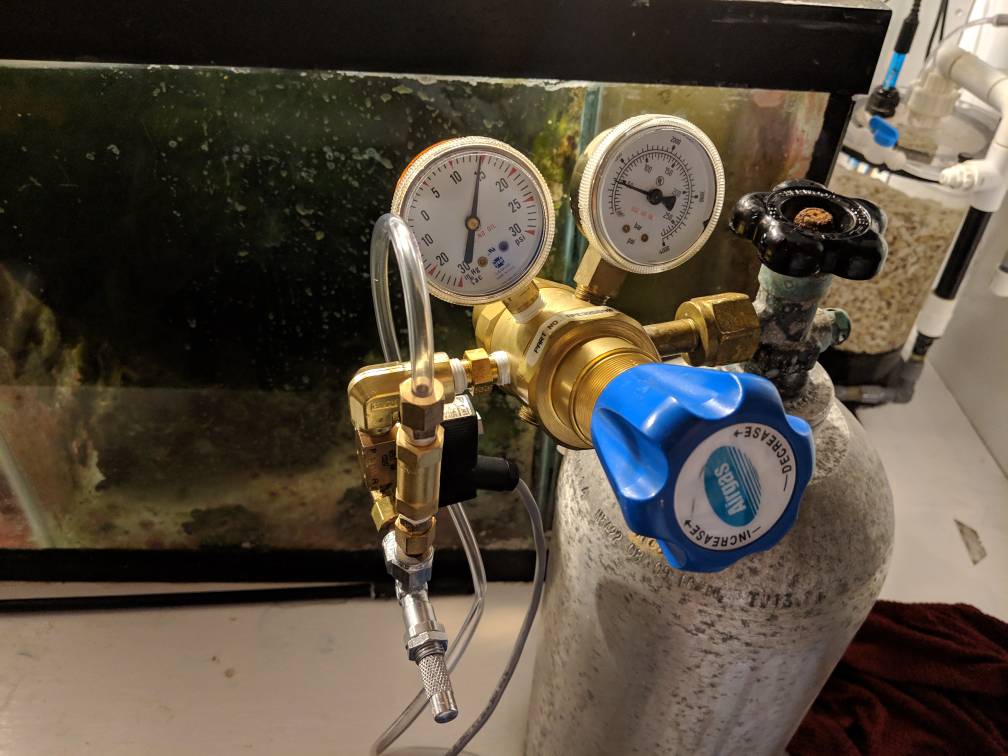
I kept the tank, stand, Apex Classic with 2 eb8s, display and bobs, 2 bnib Fluval SP6’s for returns, a SP4, a 1/4 hp chiller, heaters, Hanna checkers, SRO INT3000sss, and a few odds and ends.


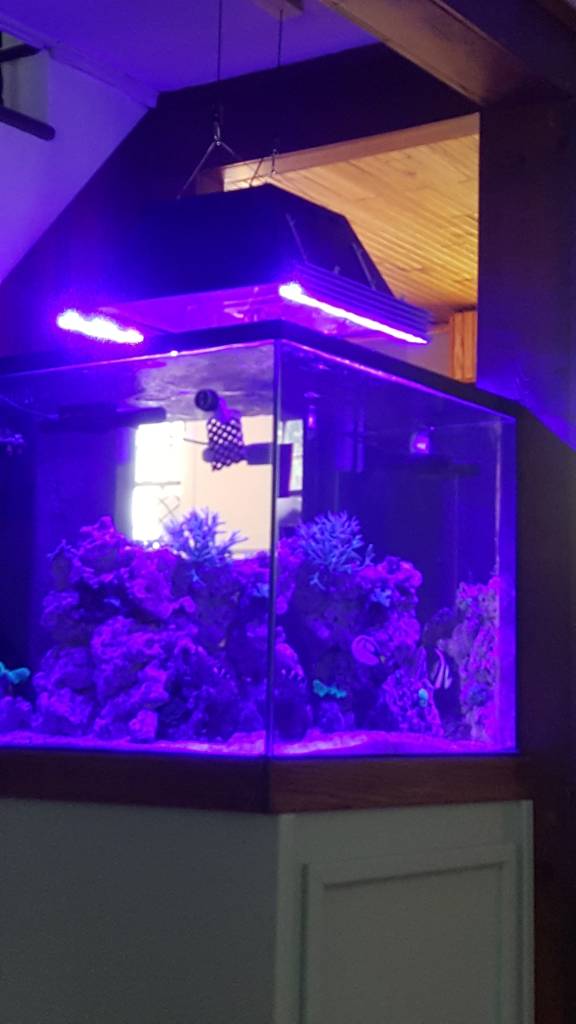
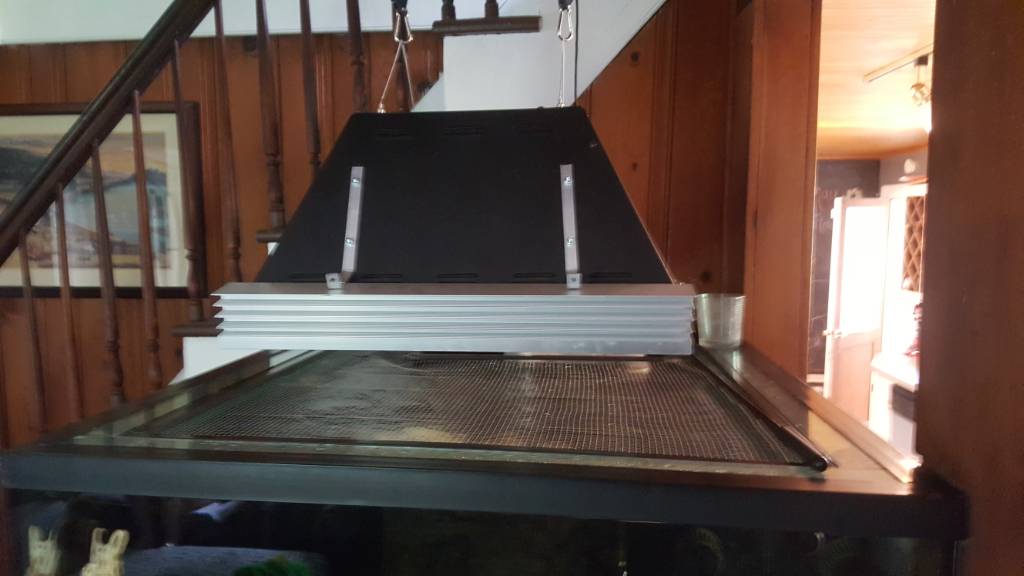
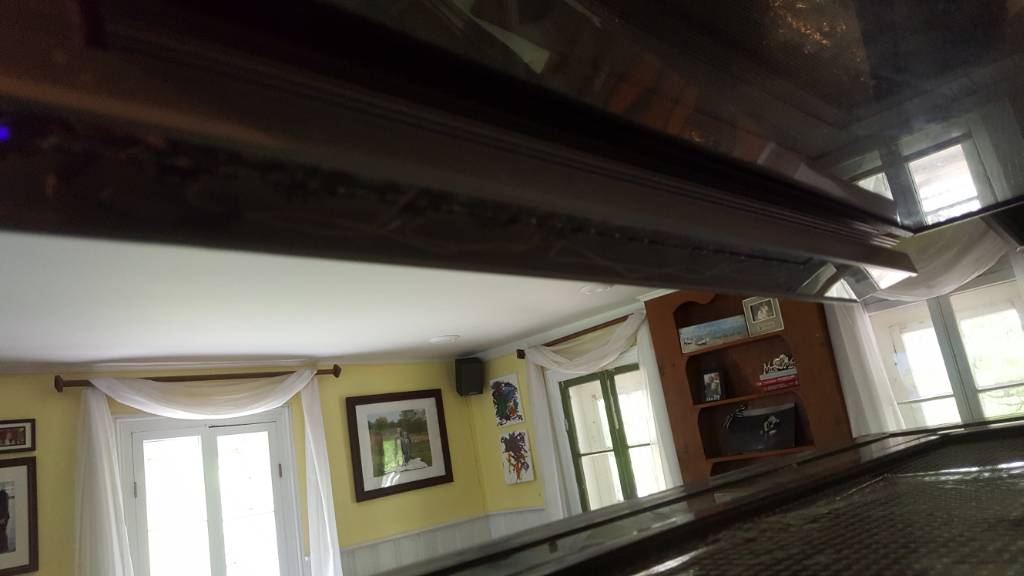
The 175 is in our living room and it straddled by 2 8x8 beams. (Post and Beam house). Additional support columns were added in the dirt basement to give added support. It was a long road just to get the tank into the house but it was finally in!

Inside.PNG


received_10100225938839295.jpeg
 
OP
OP
B

Biglurr54

Well-Known Member
View Badges
Joined
May 28, 2017
Messages
986
Reaction score
444
Rating - 0%
0   0   0
I took what I learned from my 60 gallon build and applied it to the 175 build. My 60 has issues room in the sump. I cant get the skimmer out with out draining the sump and pulling it out of the stand. This is an issue because the fuge light bleeds over to the skimmer and I get large amounts of coraline in the skimmer every month! This convinced me to go with a basement sump for the 175. Sump space would not be an issue!


I do wood working in my basement as an additional hobby and it is a dirt basement so dirt and dust is an issue. I wanted a clean area with some working space and storage in the basement for the sump. I decided that there wasn’t enough space to wall off and create a fish room. I decided to create a large work bench, and enclose the top of the work bench. I built the bench and insulated the three sides of it. I painted the inside of the “bench” with epoxy paint. This is my sump area! I have designed it so I can completely close it off to the basement when I am doing wood working and then open it up after the dust settles so the tank can breathe. The basement is cool and damp so evap wont be terrible, and it will work as a chiller in the summer. Winters are going to be tough to keep heat in which is why I over insulated it. I am considering building a heat exchanger and heating the tank from the boiler.

20180226_223154.jpg
20180304_224143.jpg
20180305_203242.jpg
 
OP
OP
B

Biglurr54

Well-Known Member
View Badges
Joined
May 28, 2017
Messages
986
Reaction score
444
Rating - 0%
0   0   0
So now I had my tank inside and my sump closet built. Next was to build the sump. The sump is a 75 gallon tank with baffles made from an old 55 gallon tank. The sump is based off the triton method. The overflows feed the first chamber in the sump.

Water in.jpg


The water then flows over the baffle and into a second chamber. This chamber is designed to be able to place a filter sock in if needed. (I rarely use filter socks but like having the option). All the water has to pass through the sock then down through the chamber.

Filter Sock.jpg


Holes were drilled in the baffle in the bottom of the chamber. These holes lead into the Fuge chamber.

Sock Out.jpg


The fuge is approximately 25 gallons. Water then flows into the skimmer section. To keep splashing and noise down with the large height difference between the fuge and skimmer section, I drilled holes in the Fuge baffle. I then created a baffle to cover the holes out of acrylic. The acrylic baffle is adjustable with screws and slots routed in it. This allow for adjustment of the flow through the holes. I can adjust the baffle to have just a trickle of water going over it with the majority of the water flowing through the adjustable holes.
Fuge 1.jpg

Fuge 2.jpg


I created a large skimmer section that will house any additional equipment I may need down the road. It also houses a marine pure brick. After the Skimmer there is a bubble trap and a drop to a return chamber. The return chamber has the heaters, probes, ATO and reactor returns in it. This section is very busy and may get re configured someday.

Skim Return.jpg

Reactors.jpg

APEX.jpg


Th fuge is going to be lit by a 300w Mars Hydra LED (currently on the 60). Skimming is being handled by the SRO 3000SSS. Heat is currently being completed by 2 250w aqueon Pro heaters. A 4x4x8 marine pure brick is in the sump for biological filtration. (Currently being seeded in the 60 sump) The return pump is a Fluval SP6. The return tees off and feeds two TLF Phosban reactors, one for GAC and one for GFO as needed. I added a PM2 and Salinity Probe for the APEX.
 
OP
OP
B

Biglurr54

Well-Known Member
View Badges
Joined
May 28, 2017
Messages
986
Reaction score
444
Rating - 0%
0   0   0
The ATO is a 25 gallon tote under the stand. A sicce 1.5 pump feeds the sump which is controlled by the APEX. The container is connected to the APEX for level monitoring. When the ATO reservoir gets low, I get a notification. I can log into Fusion and tell my Apex to fill the reservoir. That will open a solenoid valve and the RODI fills the reservoir. Apex turns everything off when its full and then defaults the outlet off so it will not cycle each time the tank calls for water. This will help me monitor the amount of evap. and prevent a major flood of top off water from a malfunction. My goal is to only have to interact with the ATO in Fusion and never have to touch the physical piece of equipment.

20180411_160425.jpg


The other side of the sump Closet has my water change reservoir. It’s a 65 gallon poly tank used for chemical storage. This tank is set up the same as the ATO reservoir. I have set up the float switches to notify me when the reservoir hits the 50 gallon low mark. I then fill the res via fusion and add one bag of reef crystals. This keeps the water exactly where I need it and saves on measuring and messing with the salt mix. It also provides 15 gallons of reserve if I need to do a water change.

20180411_160414.jpg


I am using my 90gpd 5 stage RODI filter and have added a booster pump to improve the efficiency. I have 31tds natural spring source water so the RODI isn’t taxed!


I plan on doing 1.5 gallon a day water changes with a Neptune DOS just to keep things from building up. I also am toying with the idea of putting the SP4 in the sump and plumbing it into the main house drain for easy large water changes.
 
OP
OP
B

Biglurr54

Well-Known Member
View Badges
Joined
May 28, 2017
Messages
986
Reaction score
444
Rating - 0%
0   0   0
The tank is lit by a 400w Halide. The bulb is in a Cozumel Sun reflector and being driven by a Lumatek selectawatt ballast at 400 HQI setting. I plan to eventually build some led supplement bars with RB and UV leds. In due time!

Front.jpg

Left.jpg

Right.jpg


I am having a difficult time selecting which bulb to use. I currently have a Radium and an Ushio 14k. I like the Ushio 14k but I think i would like a tough more blue. I just ordered a Giesemann 17.5k Crystal. Its in the mail and i am hoping that is the ticket!

Radium=
Radium.jpg


Ushio 14k=
Ushio 14k.jpeg


Flow in the tank is completed by 2 gyre 3k’s. They are controlled by the apex outlets. They run at 100% and are on for 90 minutes each with 15 minutes of overlap where they are both on at the same time. They are mounted on the sides of the tank and pointed directly at each other. On the backwall I have 2 MP40QD’s. One on either side of the center overflow. They are set to reef crest at around 75%. Their job is to add randomness to the gyre flow. When everything is going, the water is turbulent! It’s hard to tell how the flow is with just rock in the tank though.


I built the rock work out of dry rock and used live sand for the sand bed. I tried using emacro 300 cement and did not like it. Nothing stuck. All it did was make my rock gray in some areas. I ended up using the drill and fiber glass rod method. Its not the best but it is sturdy for now. I put an EB4 at the tank to control the light, and the gyre’s. Eventually I will get a WXM for the vortechs and a VDM for the LEDs when I build them.
 
OP
OP
B

Biglurr54

Well-Known Member
View Badges
Joined
May 28, 2017
Messages
986
Reaction score
444
Rating - 0%
0   0   0
The tank was filled over 3 days and officially stated on March 28th, 2018. I put one table shrimp in the display and one in the sump which found its way to the return and got shredded. I placed the Marine Pure Brick in the 60 gallon fuge area to get seeded. I put an automatic feeder on the sump that dumps in front of the return and feeds pellets 2 x daily.

After 1 week I sucked sand out of the 60 and dumped it into the 175. At week 2, I did the same again. Some zoas got sucked up from the 60 on the first round and they are open and enjoying the more powerful halide in the 175. The cycle is going well and I have maintained detectable Ammonia.

Next week (week 3), I plan on taking the Marine pure out of the 60 and place it into the 175. Week 4 I will transfer the first batch of fish over. I think the tang, heniochus, and Mel wrasse will be first. I will transfer ½ the rock over with them. The rock is covered with coral so I will be hoping for the best at this point. I will then wait 2 weeks and then transfer the rest of the live stock over including all the rock, coral, clam, anemones, fish, and sand. All this is dependent on water params.
 
OP
OP
B

Biglurr54

Well-Known Member
View Badges
Joined
May 28, 2017
Messages
986
Reaction score
444
Rating - 0%
0   0   0
Thank you. I got the 17.5k bulb in and it looks very similar to the 14k. I like it though. With some led supplements it should be just right!
 
OP
OP
B

Biglurr54

Well-Known Member
View Badges
Joined
May 28, 2017
Messages
986
Reaction score
444
Rating - 0%
0   0   0
Well the move happened today. 4 1/2 weeks in and the tank handled the cycle well with stable nitrate and phosphate.

I match params the best I could and them did drip acclimation one 5gallon bucket at a time. Took all day and I feel like I spent the day surfing but everything settled in well and seems happy.
e88ffa22eab65785d7065006b5ca6ed9.jpg
03d95fb9c1014c2af89ba8ad4700c417.jpg
6471e0585251424866d007634b928c7c.jpg
85defc967eecc3a61f95974a2bc6100a.jpg
9b96b9144d143ea1076f4f84f999fdd1.jpg
 
OP
OP
B

Biglurr54

Well-Known Member
View Badges
Joined
May 28, 2017
Messages
986
Reaction score
444
Rating - 0%
0   0   0
Update:

I have added a diy build Actinic LED Bars to the halide set up to give additional blue spectrum and dusk to dawn effect. I took 2 22” HD Heat sink from Steves LEDS and ran 8 Luxeon RB 4 Hyperviolet (430) and 2 Trueviolet (410) leds on each bar. I am running the RB leds at 1000ma and the violet leds at 700ma. These are all controlled by the apex. I bent and drilled some aluminum stock bar and then bolted the bars to the halide reflector fixture. I then bolted the led heat sinks to the bars. I provided enough room to angle the led bars inwards I also left mounting tabs on the outside of the aluminum bars so that I can mount a floating canopy to hide the reflector and the leds. All in all, the project came out well. It produces a ton of light. I was running a ramp up to 100% but my corals were bleaching so I dropped the ramp to 65% and the corals appear to be adjusting. As the tank matures, I will experiment with turning the leds up slowly. What I need is to have BRS come out to NY with their equipment and take par and pur reading for my lighting set up. Think they will?

I have also started Automatic water changes via the apex. I did not use a DOS but instead i used two sicce 1.5 pumps. One in the new salt water container and one in the sump plumbed to the main house sewage. The apex tops off the tank and waits 2 minutes. Then it turns on the drain pump until a low limit switch is triggered. Then it fills the sump up to the ATO switch. I manually check Salinity with a freshly calibrated refractometer ever other day when I check Alk. I also monitor salinity with PM2. This method has been working great with no swings and constant 1.5 gallon water changes 2x a day.
 
OP
OP
B

Biglurr54

Well-Known Member
View Badges
Joined
May 28, 2017
Messages
986
Reaction score
444
Rating - 0%
0   0   0
Here are the updated pics of the lights with the led bars. Everything has been running well.
afa6dd1089b3f61ca224f5888fc32ecc.jpg
f04c3e69ca098bdc008fe247611fbfff.jpg
a2852603373edbda5fadaf56b7f3f70d.jpg
1523fa524f121ca3c0db437d2001acf4.jpg
97eda33bb3549b63ea96e06e622bb421.jpg
19dfbc5a256c8c022e65e09ba58b6b00.jpg
044b0b158db46f7b6f28e5343fc39dbf.jpg
 
OP
OP
B

Biglurr54

Well-Known Member
View Badges
Joined
May 28, 2017
Messages
986
Reaction score
444
Rating - 0%
0   0   0
Its been a while since I have updated this build threat. Ive done a lot since my last post and will have a hard time remembering everything!


I switched out the 3k gyres with 2 xf250s and an ICV6. They Gyres provide a good amount of extra flow but I am now considering stepping up to xf280s.


I added a Geos Reef 612 Calcium reactor that was fed with a materflex pump and a custom dual stage regulator that I built. I then upgraded to a Geo 618 reactor.


I added a Geo 618 kalk reactor that is fed with a masterflex pump.


I have been off and on with my automatic water changes but I am more and more seeing the value in them so they will be a routine part of the tank moving forward. ICP tests are showing decreased elements from not doing water changes.


I changed the halide bulb to a radium 400w and kept the blue leds on. All is good on the lighting front!


I have wired my basement sump area with two dedicated 20 amp GFCI circuits. I got a 2016 Apex, 2 eb832s, and a wxm module. I now have an EB8 at the tank, eb4 under the sump for the reactor and the masterflexs, and two eb832s at the sump. I added a back up heater in the sump (Total of 3 heaters.) I also changed out my Fluval SP6 for two Sp4s. Each one on its own circuit. All my wiring got tucked away and managed nicely.


Lastly, I have added a few fish and a lot of corals!


My next projects are to clean up my screen top on the tank and to add a heat exchanger so I can heat my tank in the winter with my domestic hot water, which is heated by a wood boiler. Wood fired reef!
 
OP
OP
B

Biglurr54

Well-Known Member
View Badges
Joined
May 28, 2017
Messages
986
Reaction score
444
Rating - 0%
0   0   0
Here is the before and after of the wiring.
c44942427f80c3837515734e4809d358.jpg
00b13ec0bbce0d4e2eb916ce99d75a94.jpg
fd9f339f272c980ee3a2e348f3cee2b9.jpg
 
OP
OP
B

Biglurr54

Well-Known Member
View Badges
Joined
May 28, 2017
Messages
986
Reaction score
444
Rating - 0%
0   0   0
I am terrible at updating... Where to begin. Top down I guess.

The lights are the same. I have decent growth and amazing color now. i have toyed with the idea of adding alot more leds. Just not high on the priority list.

Flow: I added 2x xf250s. This is a total of 4x xf250s and 2 mp40s if your keeping count. I changed out the return pump for a jebao 15000 and kept a sp6 as a back up. If the apex senses any issue with the Jebao, it turns on the SP6. They are on separate eb832s and on separate gfci circuits for redundancy.

I havent run a filter sock in probably a year now. so that chamber is empty.

The Fuge: I changed out to a Kessil h380 and added a mp40 for flow. My Chaeto didnt grow and my nutrients spiked wildly! po4 reached 0.35. I set up my jebao doser with Chaetogro and the algae took off! I then wanted an area to grow out corals and store frags. a seperate frag tank is not in the cards at the moment so the fuge was swapped with a DIY Algae Reactor (https://www.reef2reef.com/threads/diy-chaeto-reactor-clean-look.698777/) I mounted an old DIY LED that I made and built a frag rack for the fuge area. I kept the MP40 but I am going to change it out for a XF330 most likely. It was an easy transition and i run the frag /grow out section on opposite light schedules from the display.

Alk and Calc supplement:
I upgraded the Geo 612 to the Geo 618. I installed a geo 618 kalk reactor as well. I run both off upgraded Masterflex digital drive pumps. I drip both 24hr 7 days a week. My regulator is still working great!

I added a Jebao 55w uv sterilizer in hopes to cure some dinos. My water was never clearer and my dinos went away along with water changes and dosing Vibrant. I am looking to upgrade the UV to a lifeguard 55w unit plumbed into my siphon overflow.

I began dosing Amino acids and saw a huge improvement in coral appearance so now the Jebao doser is dosing acropower 2x a day.

Im still stocking up on corals and have gotten into more high end stuff and moving the beginner stuff to the fuge area or other reefers tanks. My next project will be the uv or adding more leds!

Top Down Day light with no filter:
IMG_20200403_152644_2 (1).jpg
IMG_20200403_152747.jpg


Top Down LEDS only with orange filter:
IMG_20200405_203607.jpg
IMG_20200405_204125.jpg
 
OP
OP
B

Biglurr54

Well-Known Member
View Badges
Joined
May 28, 2017
Messages
986
Reaction score
444
Rating - 0%
0   0   0
here are the reactors, a full sump shot, and a shot of the grow out frag section.

IMG_20200420_131520.jpg
IMG_20200420_131716.jpg
IMG_20200420_131735.jpg
 

ajjw0828

Active Member
View Badges
Joined
Dec 12, 2019
Messages
485
Reaction score
449
Rating - 0%
0   0   0
Nice Setup! Curious of a couple things. With your Kalk reactor, do you just suck water from the tank and into the reactor slowly to pretty much drip it? How did you figure your initial dosing amount, I'm guessing just start out slow and adjust?

Was also wondering about your aminos. Just started manually dosing acropower once a day, but want to hook it up to my dose. Can you give more details as to your dosing regimen and if you leave your protein skimmer on while dosing or not?

Again, tank looks awesome! Thanks!
 

Caring for your picky eaters: What do you feed your finicky fish?

  • Live foods

    Votes: 4 22.2%
  • Frozen meaty foods

    Votes: 14 77.8%
  • Soft pellets

    Votes: 4 22.2%
  • Masstick (or comparable)

    Votes: 0 0.0%
  • Other

    Votes: 2 11.1%
Back
Top