First off-

Well- sort of a build. I got this setup used off of Mantis, and slowly piecing it together. Money has been extremely tight for me lately, so it's more of a "find pieces that I can use" than just go to the shop and buy everything I need. I don't mind it, sort of the way I've always pieced together setups, makes it more fun for me.
This tank is going to be for my LPS and Zoa collection, and later down the road I'll be refocusing my other frag tank (the 30 gallon one) to be a higher quality setup for doing SPS growouts/frags.
Going to post as I go, Tabasco was kind enough to point out that if I got too busy with the build, I might not be able to spend enough time here trying to win a place in the R2R give-away, so thanks Edit: woman (ooops, sorry!!!) :tongue: !
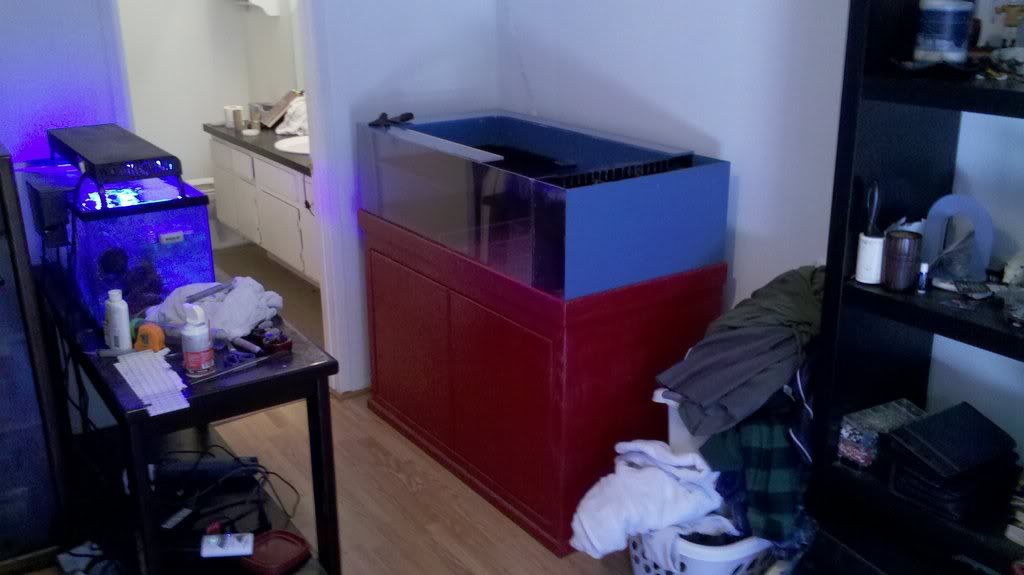
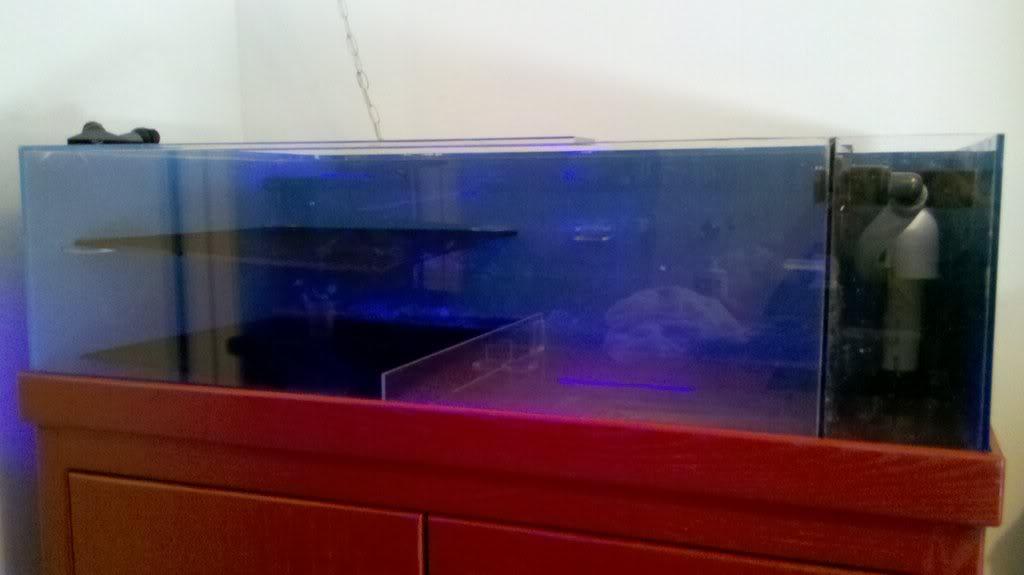
Basics: Tank is 4x2x14"- acrylic (boo) but oh well. Has a semi-coast to coast overflow on one of the short ends, with a single drain, duel returns (split from a y in the overflow area.) Wanted to run a drain with a gate valve (forgot what name people like putting on these, I just call them 'drain with a gate valve' and have seen them used since the days of the undergravel) with a back-up taller stand-pipe in case of overflow- but again, decided just to get things running and will hopefully deal with it down the road. Would need to drill tank and stand, then buy all the stuff for it, so for now, just going to live with it- tank's going in the bedroom though, so hopefully won't be too horribly loud.
Stand: Wood stand, drilled, large opening. Was going to sand and repaint (in the only color that should be on a stand, black :tongue) but with all my space shortages, decided to just deal with it and get the tank setup.
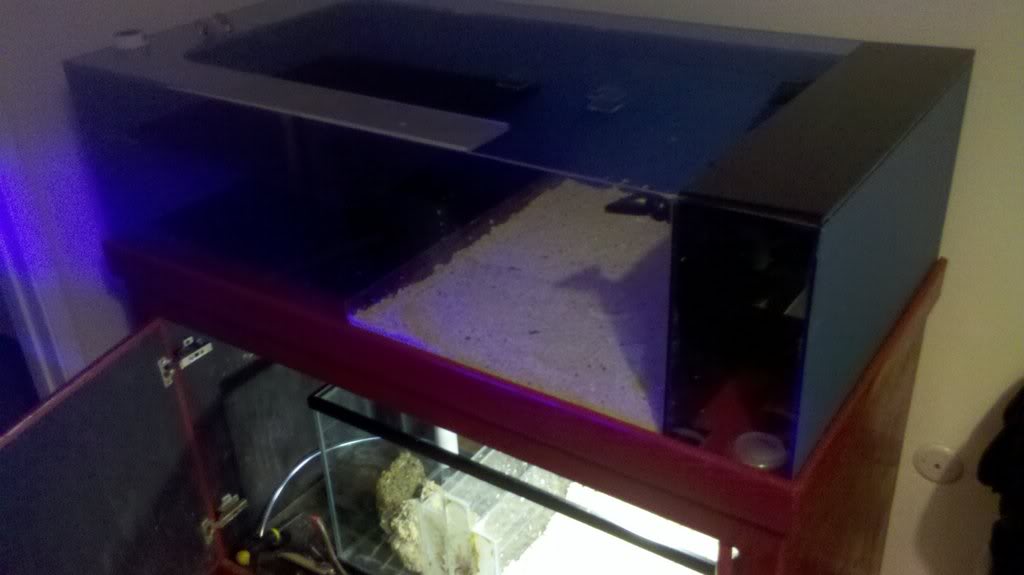
Sump: 40 gallon glass sump with some pre-existing acrylic baffles. was going to knock them all out and replace with glass, but again, just decided to get it going. Changed one baffle that was an upper to a downer (as in glued to the bottom of the sump, not to the upper section) giving me 3 chambers that all overflow from the top to the next:
-- Drain line/Skimmer chamber (will need some recommendations for a decent (LPS quality) skimmer with a 9 x ? footprint at some point) (this one has a triple baffle exiting from it, forcing water down, then up, hopefully eliminate most of the bubbles before entering the 'fuge. Will also be a good place for a heater and pump for the carbon reactor.)
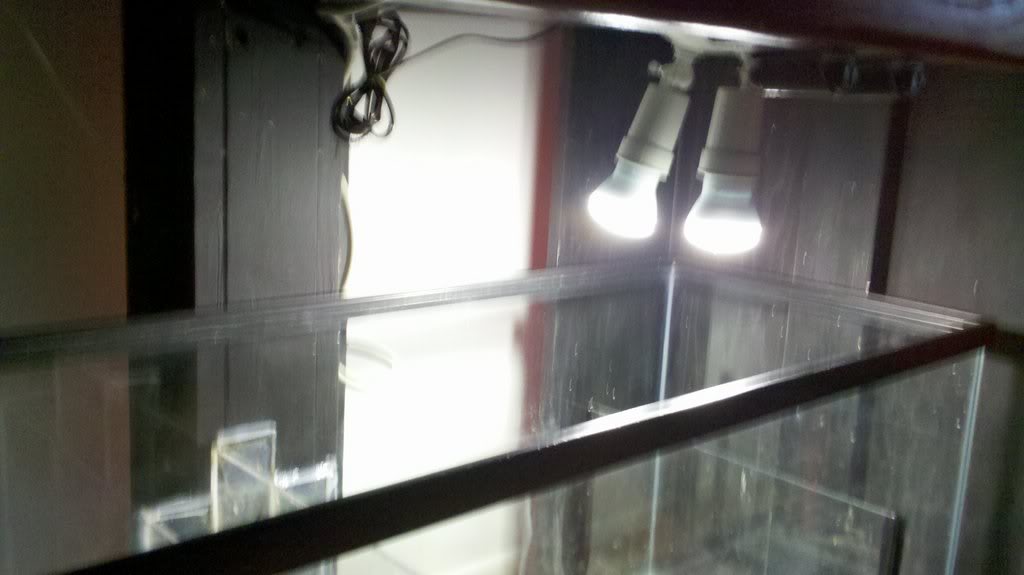
-- Large fuge: thick bed of mineral mud (you can tell me it's worthless, I'm ok with it, I got it in a trade so just using it just cause,) capped with some aragonite sand, then probably chaeto and mangroves. May do some of the red 'kelps', or may do a caulerpa 'fuge with 24 hour lighting to prevent melt-off. A cheapy home depot outdoor fixture with two cfl 60watt equiv bulbs that kick out 3500k
-- Pump chamber, can't recall measurements off the top of my head, but sort of on the small side, hoping to compensate this by hooking up an ATO down the road. For now just going to live with it.
Other equipment:
-- TLF Reactor, crammed full of carbon.
-- Mag drive 700 for main pump. Came with it, know it's undersized but with the LPS focus, hoping to be ok with it. Also going to have an MP10 hooked onto the tank (not sure placement, may do opposite wall of the return lines, but probably going to do back wall shooting "forwards" to prevent deconstructive interference on the wave currents). Have a box of Koralia's that may get utilized to eliminate any flow issues I see.
--For now, going to have to run with my current 24" NEP and just light a portion of the tank. Will upgrade down the road, but undecided what I'll end up with. May purchase an LED system, or perhaps run T5's on half, LED's on the other half and that way I can do a comparison.
--Heater- It's a heater, I don't know which one I'll use, and I don't get that excited about heaters to go find it. So yea, it's a heater.
Down the road, I'd like to invest in a controller and automated dosing system- for now, my budget dictates that I get off my bum and just do the work on my own.
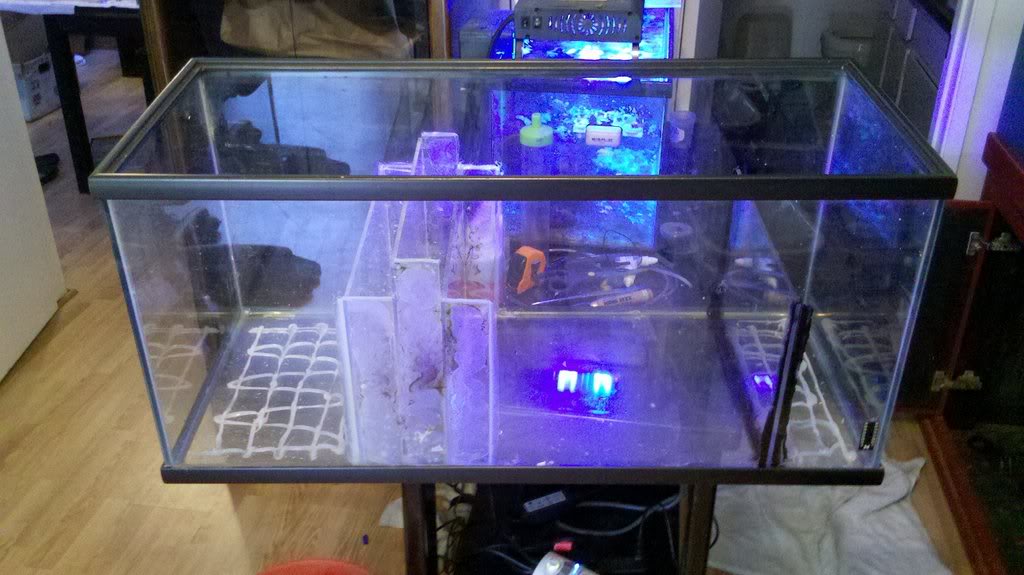
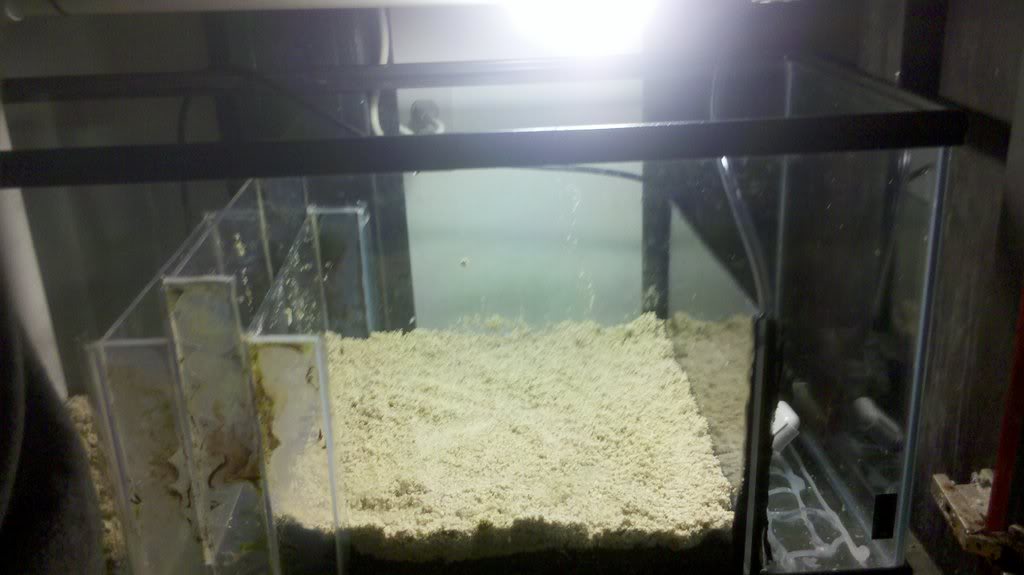
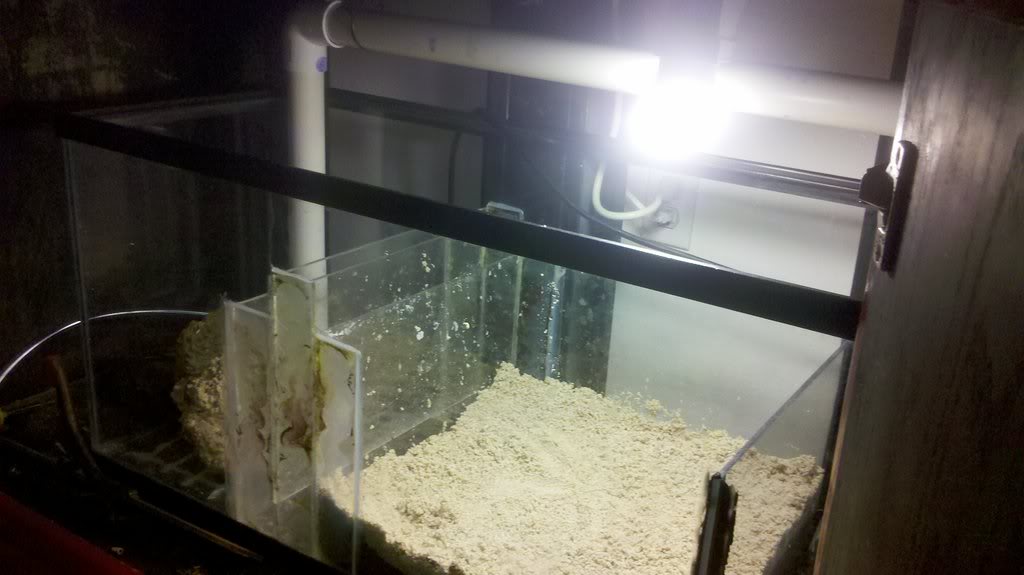
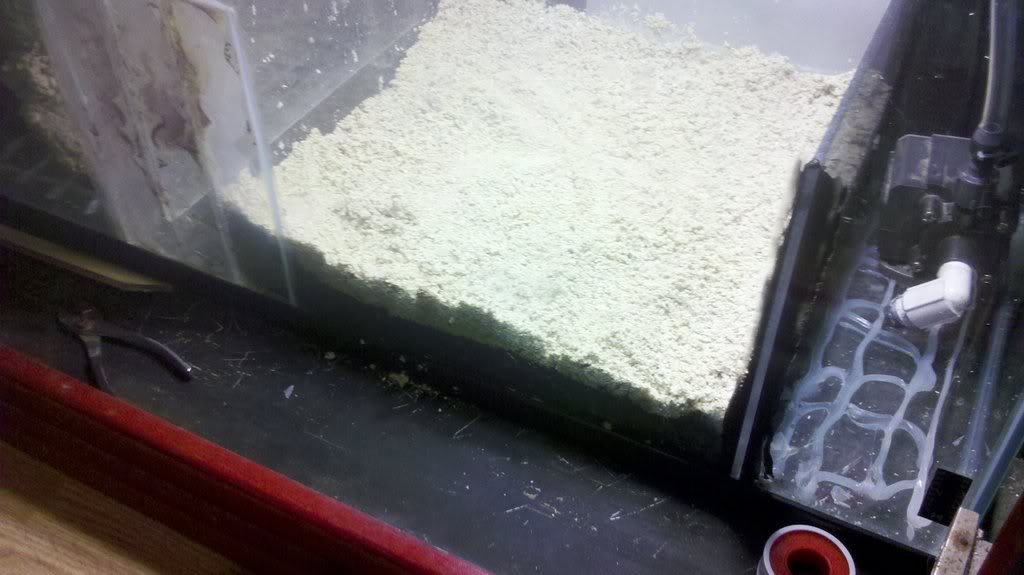
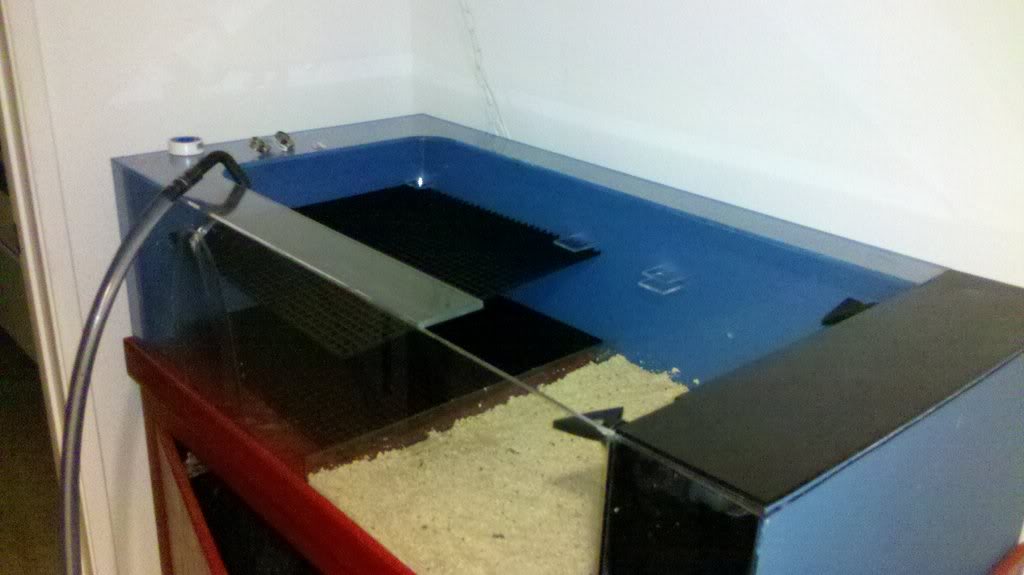
Other stuff- because I'm me, I decided a simple looking tank wouldn't do. So the tank is split in half- half will have a BB with frag rack a few inches off the bottom, the other half will have a sand bed. See the pictures to see how this will work (basically an acrylic 'Wall' will hold the sand back to some degree.) I like BB for cleanliness, and honestly, even for looks in some situations. That said, I prefer seeing chalices grow on sand, same with Acans. Also, as I feed VERY heavily, I believe CUC prefer to have sand to live in. May regret it down the road, but should be easy enough to siphon out should I change my mind.
Both halves of the tank have acrylic supports in place to hold an eggcrate 'shelf.' Initial plan is to have one shelf, with it being real easy to move the shelf from one side to the other when I need to gain access bellow it. Knowing me, I'll probably end up making two shelves eventually (total of 3, the one 'rack' and the 2 'shelves') but we'll see, I do want this tank to be easy to access so I can feed as often and easily as possible.
CUC will be several cucumbers, a few nassarius (not too many, they tick me off and steal food out of chalices too often, jerks!) some snails of other varieties, and possible a Sand sifting star-but never been a huge fan of those, so we'll see.
Sand bed is going to be fairly thick- probably 1~2" or so, just depending on aesthetics more than anything else (I like sand beds, it's just life.)
Uhm...can't think of anything else about the basic setup-ask away any questions and I'll try to answer them, or just be honest and tell you I don't know :tongue:
But here's some pics of the progress so far...
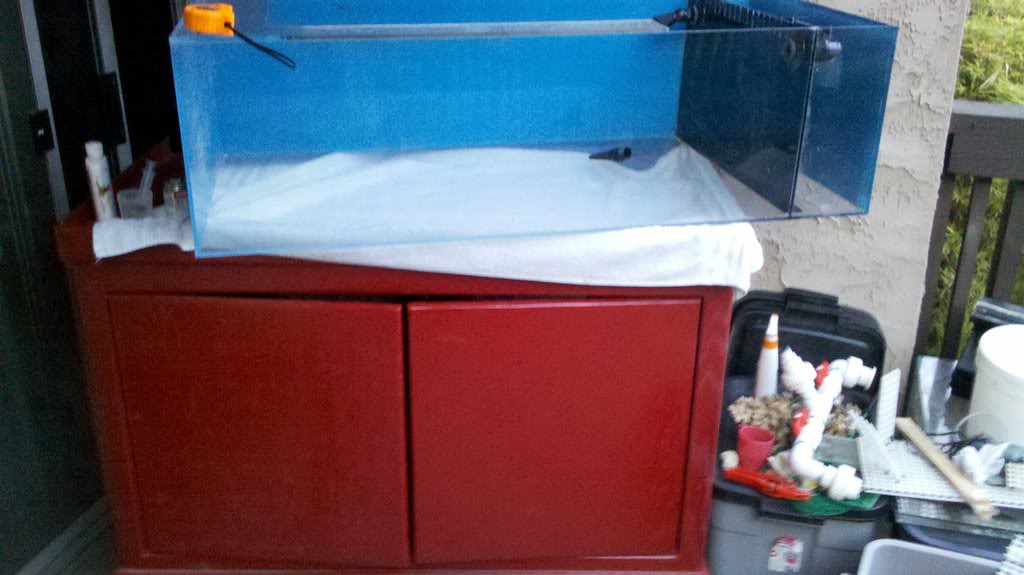
Tank out on the balcony while I work on it- sump is sitting in the living room with a compress on it's acrylic baffle that got siliconed (don't have any good clamps, so using salt mix bags- want to make sure there's good pressure while the silicone cures considering it's a glass-acrylic bond, which sucks at the best of times.) You can see the lovely color of the stand...
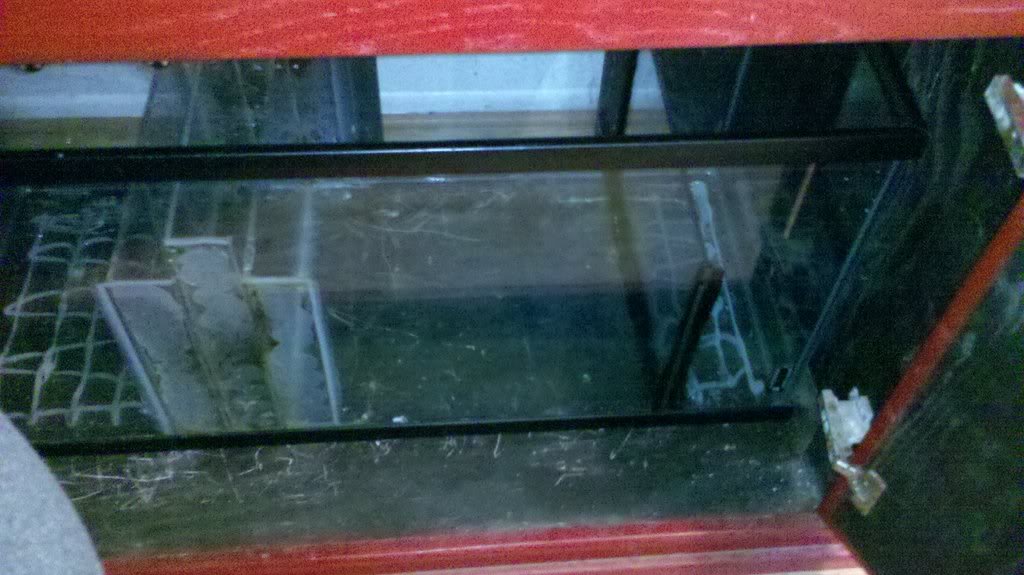
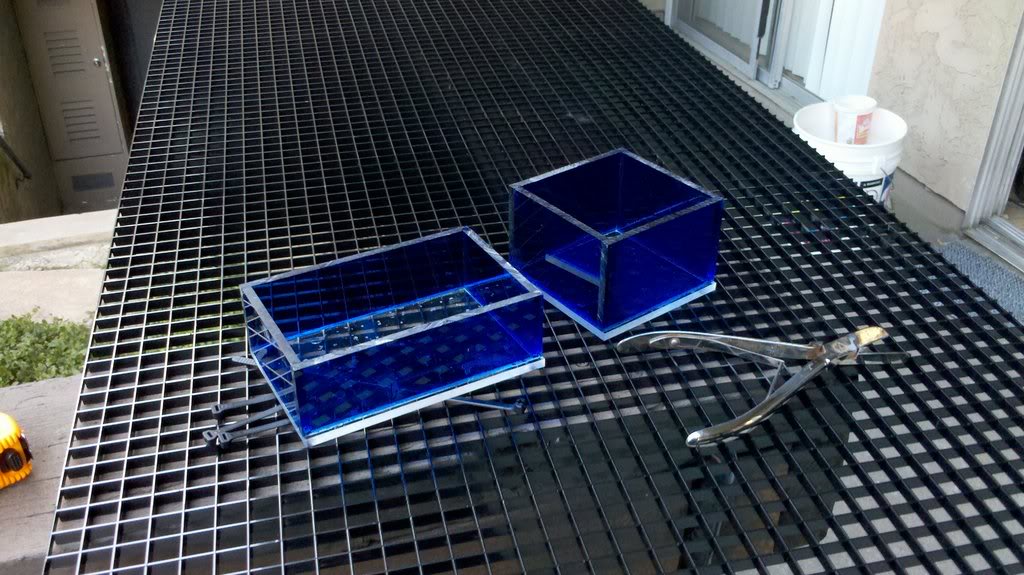
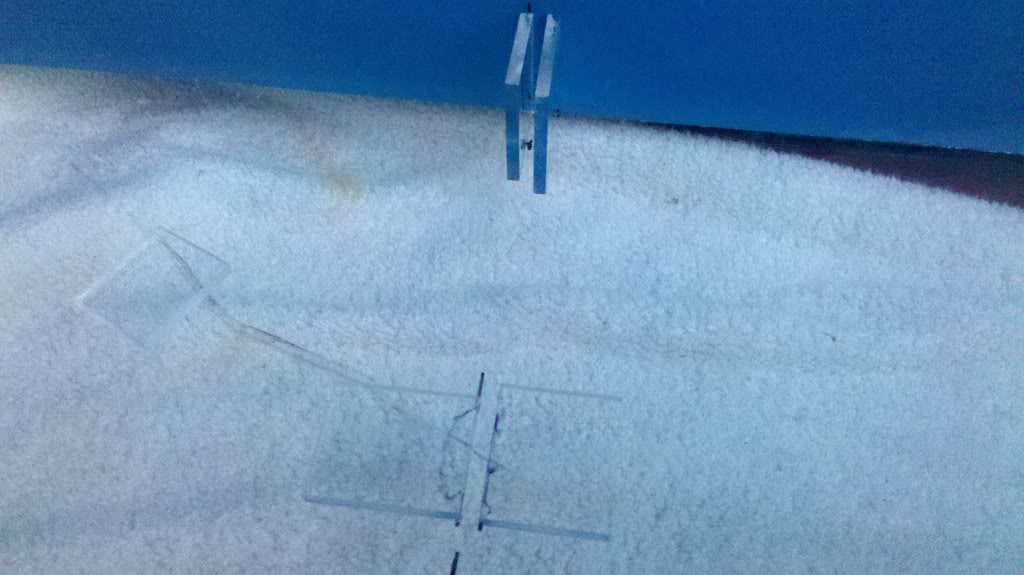
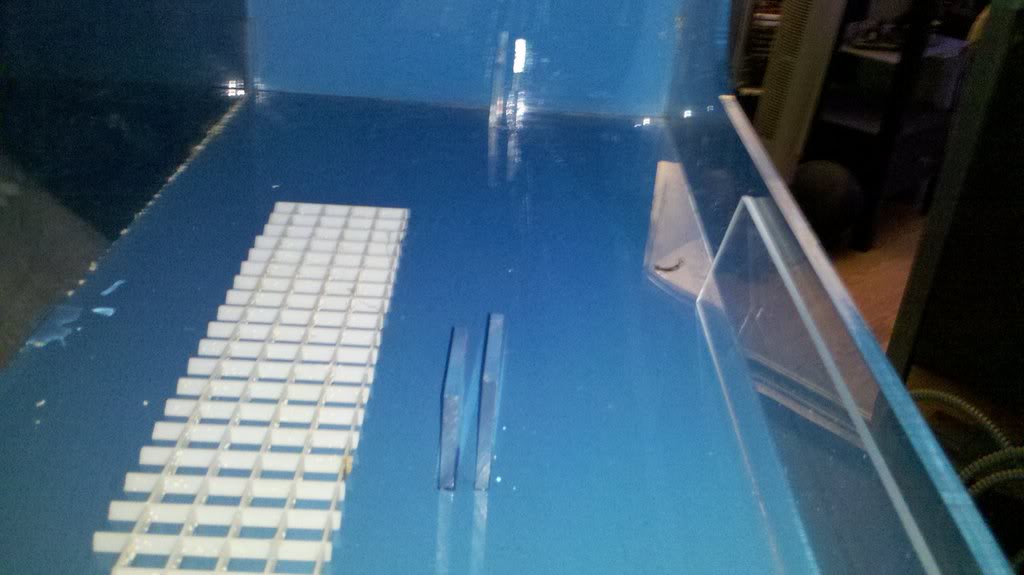
Acrylic holders for the Sand Wall- doing it this way so if I decide to remove the sand bed, or continue it the whole way across, I won't have to bust out the whole Wall, I can just remove it (it's not going to be glued in) and then cut off the tall tabs and cover up the short ones.
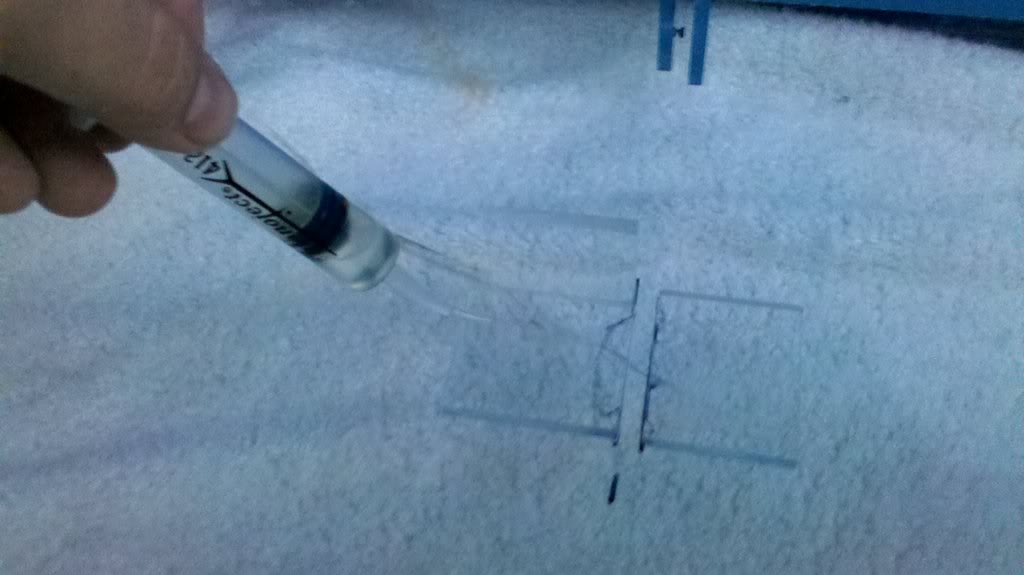
Continued... (using a syringe as can't find the needle-bottle applicator, after the wedding the acrylic supplies sort of went everywhere. Cleaning the apartment would help greatly, but I'm a guy and recently single, so enjoying the bachelor pad for a little bit)
The Great Sand Wall
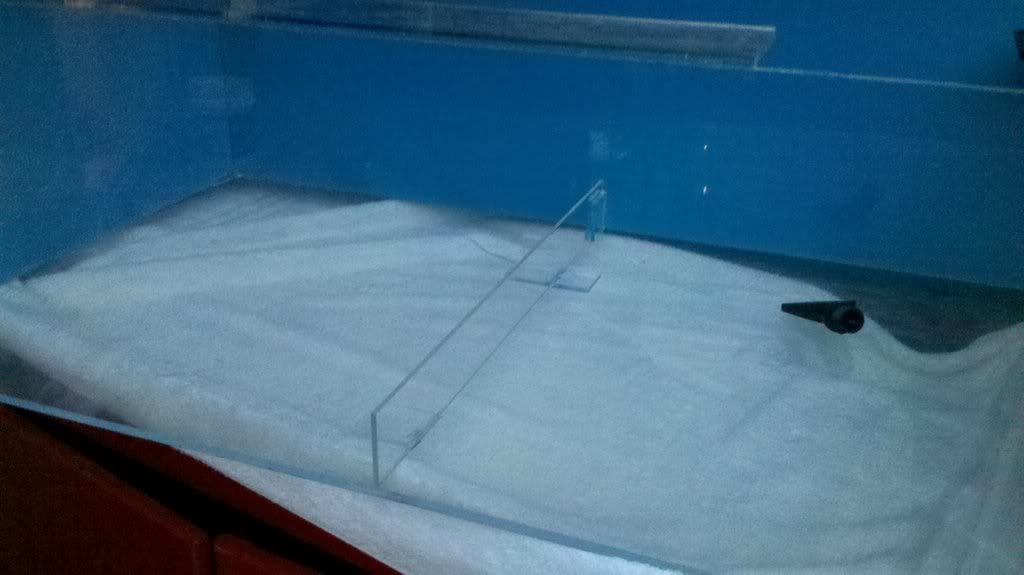
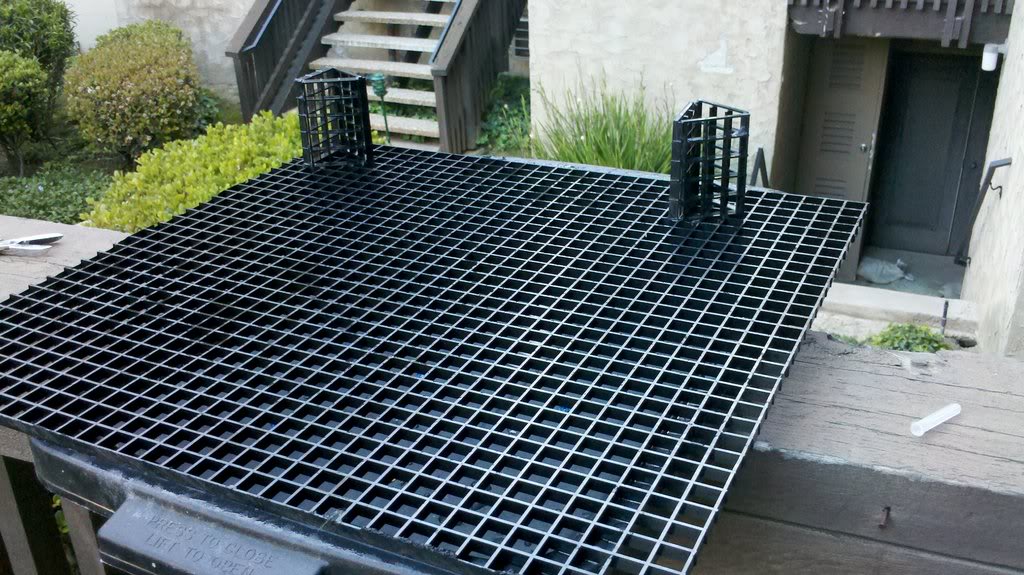
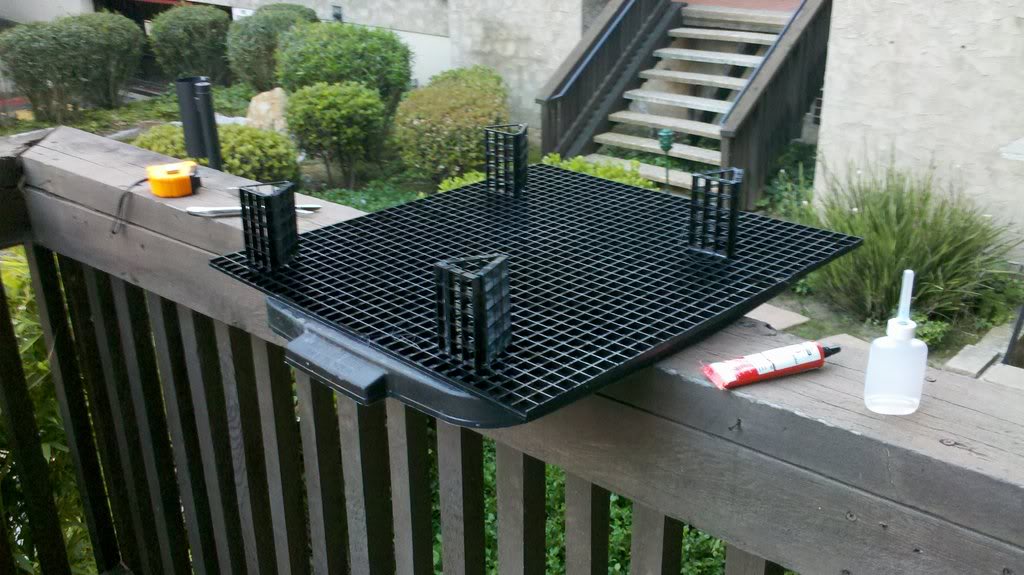
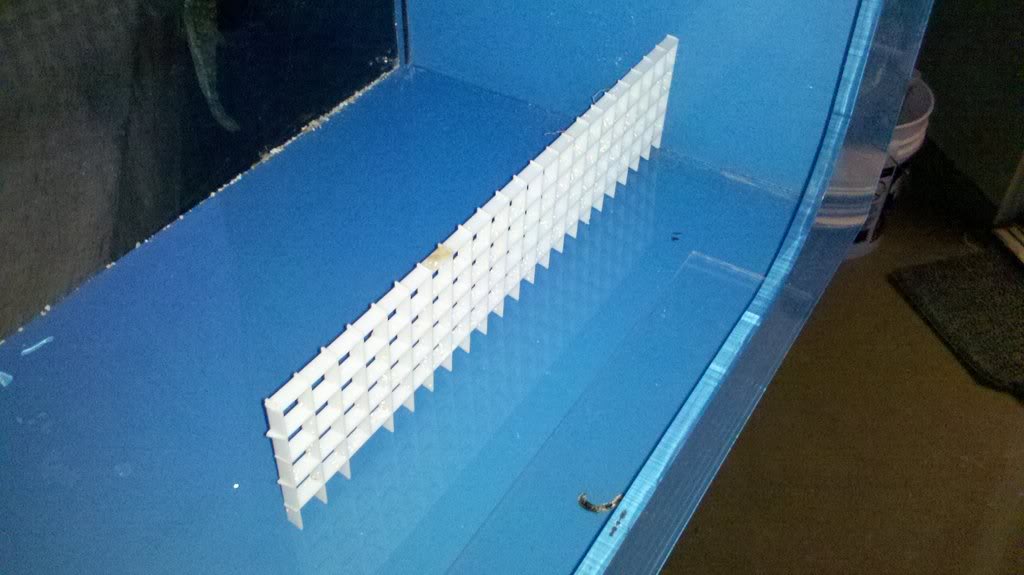
The shelf system- the ones on the back wall are doubles (a tab on top and bottom) as with only a single side tab (no middle support after all) I'm counting on the tabs holding the eggcrate in place. If the eggcrate itself sags too much, I can always brace it up with some runners. The white eggcrate is just for measurements (well, not measurements, using fuzzy numbers on this build) and I'll be using only black eggcrate in this build and see if I don't have as many algae issues. Each shelf will be 20"x21"
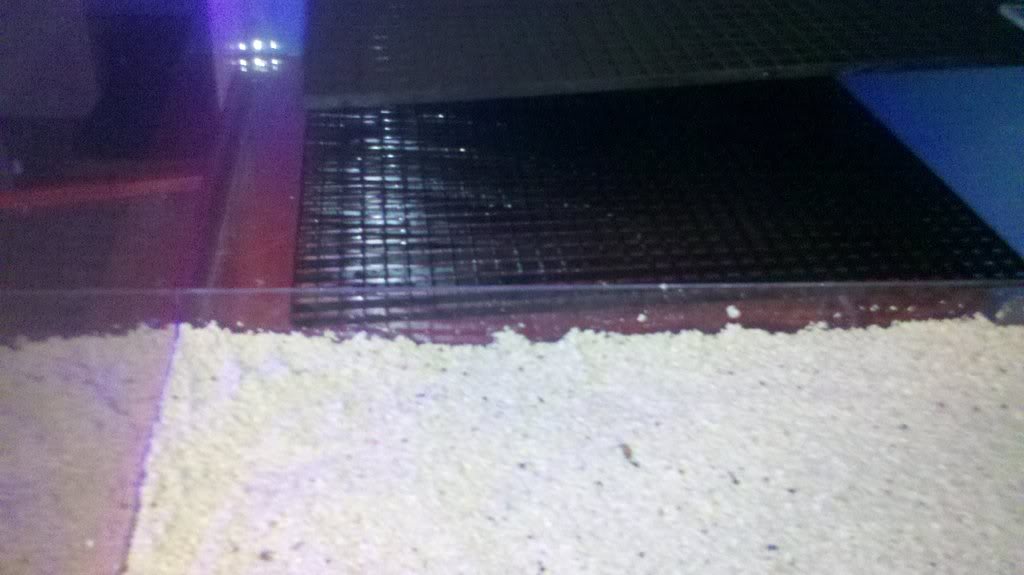
The coast to coast with the tab support. Right now has 3/4" nozzles, but I do have some 1/2" locline with 12" of neck and a valve, so going to play around with the flow to maximize what I can get out of the mag7
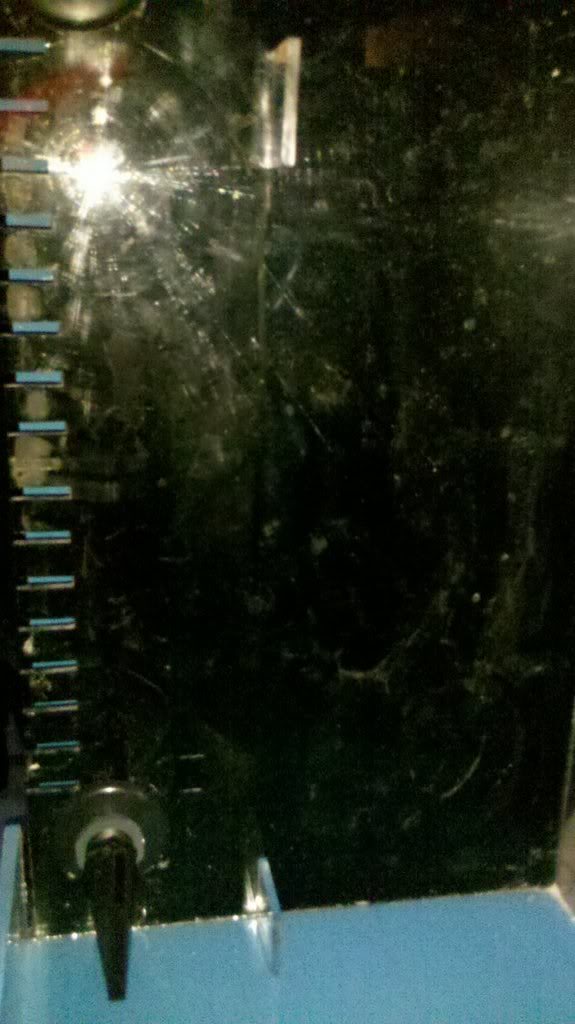
Another shot of the tabs
Going to move this into my bedroom tonight, realized I should have done it while my roommate was here, but that would have been thinking ahead.
Next things on the to-do list
Edit: updating this list :bigsmile:
DONE!-Place the sump (may rush it, may let the silicone cure another 24 hours, not sure, will depend how excited I get)
DONE!-Mount the sump/fuge lighting
DONE!-Run the drain line
DONE!-Set the pump in and run it's line (just using flex hose as it's a real short straight shot, and with a probable pump upgrade down the road, no need to make it permanent)
DONE!-Get the fuge chamber filled up with Mineral Mud and sand (need to wash the sand first)
DONE!-Wash and fill the sand on the right hand side of the tank.
Not Done :cry: -Fill with water
cursing at RO unit to work faster? DONE!
This system will most likely at some point also host the water for a 12 gallon flatback hex tank I'm planning on for my blue-striped pipefish. Will do a macro-algae/zoa (or mushroom?) garden tank with fairly low flow for them. Want to create an environment where their offspring have hopes of surviving on the micro-fauna in the tank, so will drill that tank, and just run a small pump to it from this system, with a floss-covered drain coming back (to prevent babies getting sucked up.)
Thanks for looking all!
Well- sort of a build. I got this setup used off of Mantis, and slowly piecing it together. Money has been extremely tight for me lately, so it's more of a "find pieces that I can use" than just go to the shop and buy everything I need. I don't mind it, sort of the way I've always pieced together setups, makes it more fun for me.
This tank is going to be for my LPS and Zoa collection, and later down the road I'll be refocusing my other frag tank (the 30 gallon one) to be a higher quality setup for doing SPS growouts/frags.
Going to post as I go, Tabasco was kind enough to point out that if I got too busy with the build, I might not be able to spend enough time here trying to win a place in the R2R give-away, so thanks Edit: woman (ooops, sorry!!!) :tongue: !
Basics: Tank is 4x2x14"- acrylic (boo) but oh well. Has a semi-coast to coast overflow on one of the short ends, with a single drain, duel returns (split from a y in the overflow area.) Wanted to run a drain with a gate valve (forgot what name people like putting on these, I just call them 'drain with a gate valve' and have seen them used since the days of the undergravel) with a back-up taller stand-pipe in case of overflow- but again, decided just to get things running and will hopefully deal with it down the road. Would need to drill tank and stand, then buy all the stuff for it, so for now, just going to live with it- tank's going in the bedroom though, so hopefully won't be too horribly loud.
Stand: Wood stand, drilled, large opening. Was going to sand and repaint (in the only color that should be on a stand, black :tongue) but with all my space shortages, decided to just deal with it and get the tank setup.
Sump: 40 gallon glass sump with some pre-existing acrylic baffles. was going to knock them all out and replace with glass, but again, just decided to get it going. Changed one baffle that was an upper to a downer (as in glued to the bottom of the sump, not to the upper section) giving me 3 chambers that all overflow from the top to the next:
-- Drain line/Skimmer chamber (will need some recommendations for a decent (LPS quality) skimmer with a 9 x ? footprint at some point) (this one has a triple baffle exiting from it, forcing water down, then up, hopefully eliminate most of the bubbles before entering the 'fuge. Will also be a good place for a heater and pump for the carbon reactor.)
-- Large fuge: thick bed of mineral mud (you can tell me it's worthless, I'm ok with it, I got it in a trade so just using it just cause,) capped with some aragonite sand, then probably chaeto and mangroves. May do some of the red 'kelps', or may do a caulerpa 'fuge with 24 hour lighting to prevent melt-off. A cheapy home depot outdoor fixture with two cfl 60watt equiv bulbs that kick out 3500k
-- Pump chamber, can't recall measurements off the top of my head, but sort of on the small side, hoping to compensate this by hooking up an ATO down the road. For now just going to live with it.
Other equipment:
-- TLF Reactor, crammed full of carbon.
-- Mag drive 700 for main pump. Came with it, know it's undersized but with the LPS focus, hoping to be ok with it. Also going to have an MP10 hooked onto the tank (not sure placement, may do opposite wall of the return lines, but probably going to do back wall shooting "forwards" to prevent deconstructive interference on the wave currents). Have a box of Koralia's that may get utilized to eliminate any flow issues I see.
--For now, going to have to run with my current 24" NEP and just light a portion of the tank. Will upgrade down the road, but undecided what I'll end up with. May purchase an LED system, or perhaps run T5's on half, LED's on the other half and that way I can do a comparison.
--Heater- It's a heater, I don't know which one I'll use, and I don't get that excited about heaters to go find it. So yea, it's a heater.
Down the road, I'd like to invest in a controller and automated dosing system- for now, my budget dictates that I get off my bum and just do the work on my own.
Other stuff- because I'm me, I decided a simple looking tank wouldn't do. So the tank is split in half- half will have a BB with frag rack a few inches off the bottom, the other half will have a sand bed. See the pictures to see how this will work (basically an acrylic 'Wall' will hold the sand back to some degree.) I like BB for cleanliness, and honestly, even for looks in some situations. That said, I prefer seeing chalices grow on sand, same with Acans. Also, as I feed VERY heavily, I believe CUC prefer to have sand to live in. May regret it down the road, but should be easy enough to siphon out should I change my mind.
Both halves of the tank have acrylic supports in place to hold an eggcrate 'shelf.' Initial plan is to have one shelf, with it being real easy to move the shelf from one side to the other when I need to gain access bellow it. Knowing me, I'll probably end up making two shelves eventually (total of 3, the one 'rack' and the 2 'shelves') but we'll see, I do want this tank to be easy to access so I can feed as often and easily as possible.
CUC will be several cucumbers, a few nassarius (not too many, they tick me off and steal food out of chalices too often, jerks!) some snails of other varieties, and possible a Sand sifting star-but never been a huge fan of those, so we'll see.
Sand bed is going to be fairly thick- probably 1~2" or so, just depending on aesthetics more than anything else (I like sand beds, it's just life.)
Uhm...can't think of anything else about the basic setup-ask away any questions and I'll try to answer them, or just be honest and tell you I don't know :tongue:
But here's some pics of the progress so far...
Tank out on the balcony while I work on it- sump is sitting in the living room with a compress on it's acrylic baffle that got siliconed (don't have any good clamps, so using salt mix bags- want to make sure there's good pressure while the silicone cures considering it's a glass-acrylic bond, which sucks at the best of times.) You can see the lovely color of the stand...
Acrylic holders for the Sand Wall- doing it this way so if I decide to remove the sand bed, or continue it the whole way across, I won't have to bust out the whole Wall, I can just remove it (it's not going to be glued in) and then cut off the tall tabs and cover up the short ones.
Continued... (using a syringe as can't find the needle-bottle applicator, after the wedding the acrylic supplies sort of went everywhere. Cleaning the apartment would help greatly, but I'm a guy and recently single, so enjoying the bachelor pad for a little bit)
The Great Sand Wall
The shelf system- the ones on the back wall are doubles (a tab on top and bottom) as with only a single side tab (no middle support after all) I'm counting on the tabs holding the eggcrate in place. If the eggcrate itself sags too much, I can always brace it up with some runners. The white eggcrate is just for measurements (well, not measurements, using fuzzy numbers on this build) and I'll be using only black eggcrate in this build and see if I don't have as many algae issues. Each shelf will be 20"x21"
The coast to coast with the tab support. Right now has 3/4" nozzles, but I do have some 1/2" locline with 12" of neck and a valve, so going to play around with the flow to maximize what I can get out of the mag7
Another shot of the tabs
Going to move this into my bedroom tonight, realized I should have done it while my roommate was here, but that would have been thinking ahead.
Next things on the to-do list
Edit: updating this list :bigsmile:
DONE!-Place the sump (may rush it, may let the silicone cure another 24 hours, not sure, will depend how excited I get)
DONE!-Mount the sump/fuge lighting
DONE!-Run the drain line
DONE!-Set the pump in and run it's line (just using flex hose as it's a real short straight shot, and with a probable pump upgrade down the road, no need to make it permanent)
DONE!-Get the fuge chamber filled up with Mineral Mud and sand (need to wash the sand first)
DONE!-Wash and fill the sand on the right hand side of the tank.
Not Done :cry: -Fill with water
cursing at RO unit to work faster? DONE!
This system will most likely at some point also host the water for a 12 gallon flatback hex tank I'm planning on for my blue-striped pipefish. Will do a macro-algae/zoa (or mushroom?) garden tank with fairly low flow for them. Want to create an environment where their offspring have hopes of surviving on the micro-fauna in the tank, so will drill that tank, and just run a small pump to it from this system, with a floss-covered drain coming back (to prevent babies getting sucked up.)
Thanks for looking all!
Last edited:


")