DIY Nano Cube Canopy

redfishbluefish

Stay Positive, Stay Productive
View Badges
Joined
Mar 22, 2012
Messages
11,705
Reaction score
25,724
Location
Sayreville, NJ
Rating - 0%
0   0   0
This DIY will be a work-in-progress. I don’t know if this build will work, so it could be a documented failure. I am starting this on January 7, 2013, and will update as I am permitted to spend a little free time in the shop without the boss screaming.


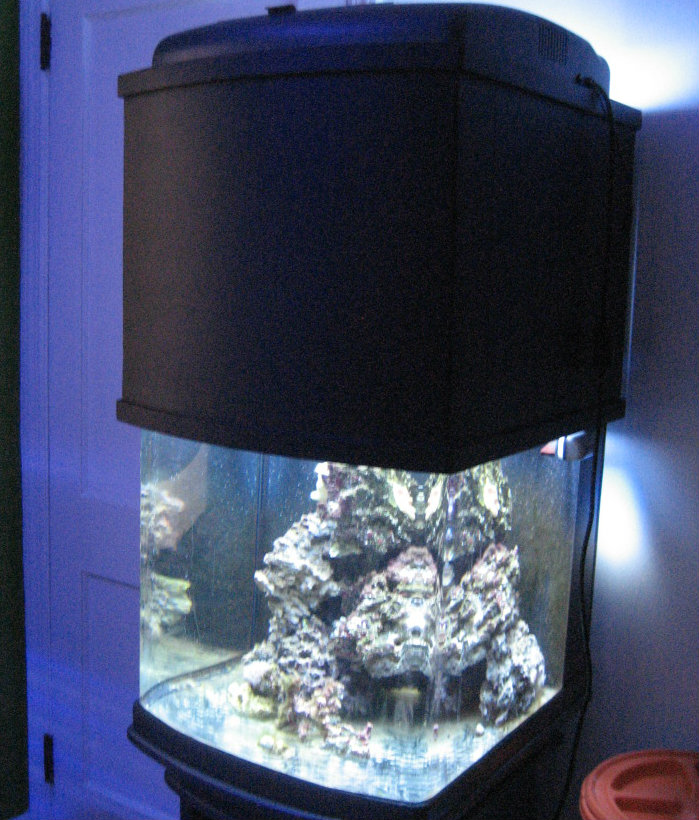
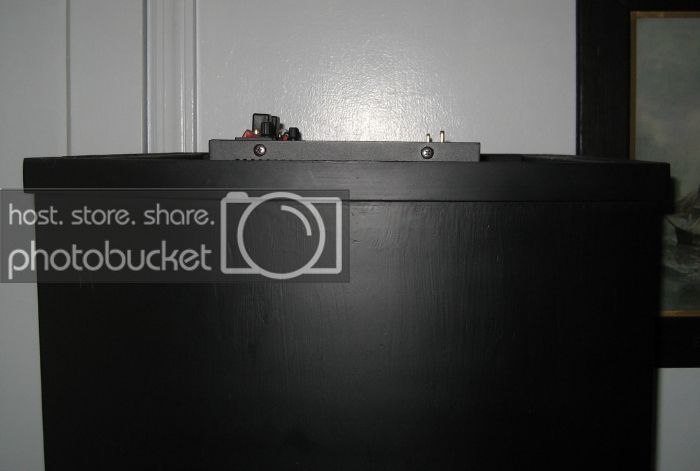
I am going to attempt to build a canopy for a nano cube. In particular a JBJ 28. However, this could be done with any nano cube by adjusting the dimensions. I’m actually not going to give dimensions, because I fit every piece and mark with a pencil.


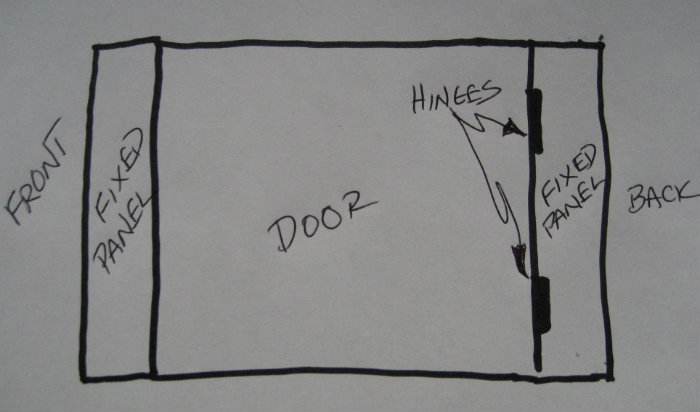
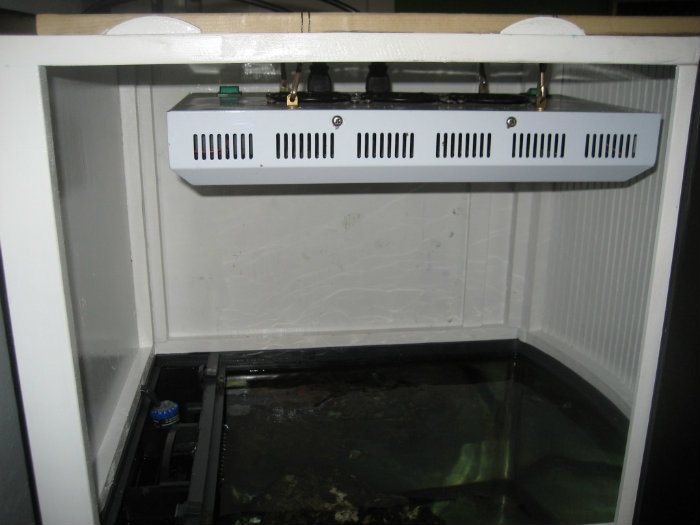
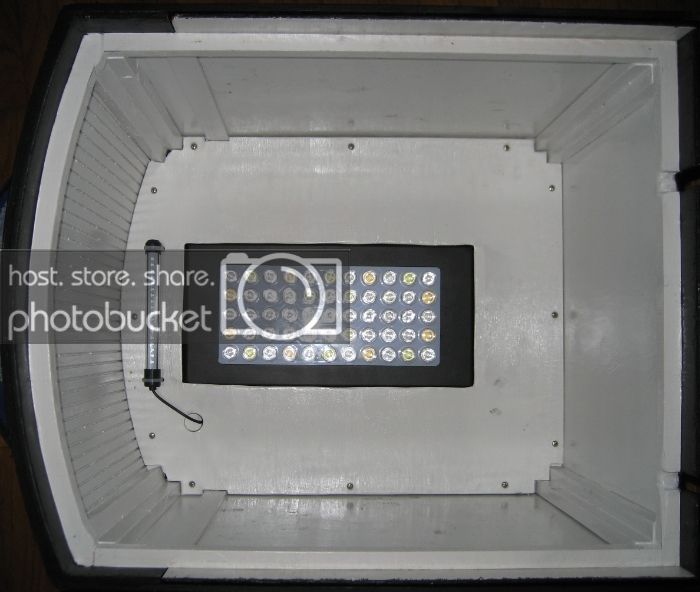
The reason I’m doing this is twofold. The primary reason is that I would like to switch to LEDs, and I find the JBJ hood and any retro kits to be too costly, so I’m considering one of those dimmable Chinese jobs for around $170. The second reason is that I snapped one of the hinge pieces, and in attempting to change it by unscrewing those miniature screws, both of those screws, which were well rusted, snapped off.


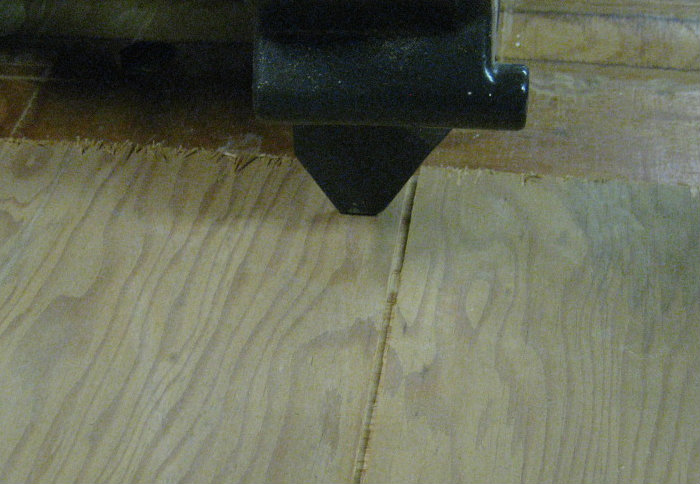
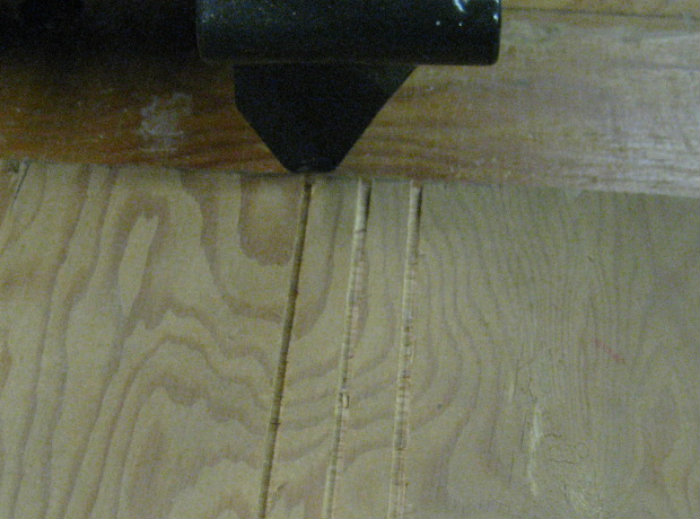
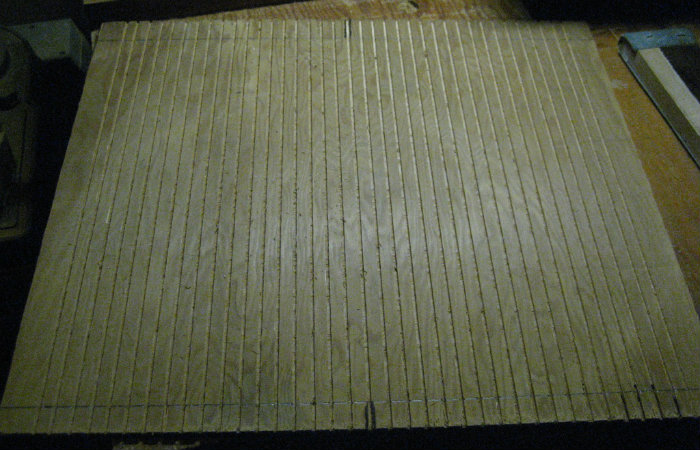
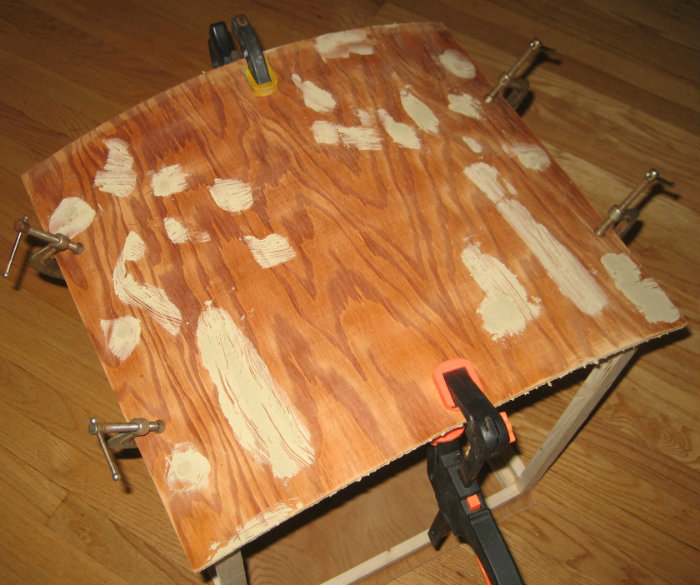
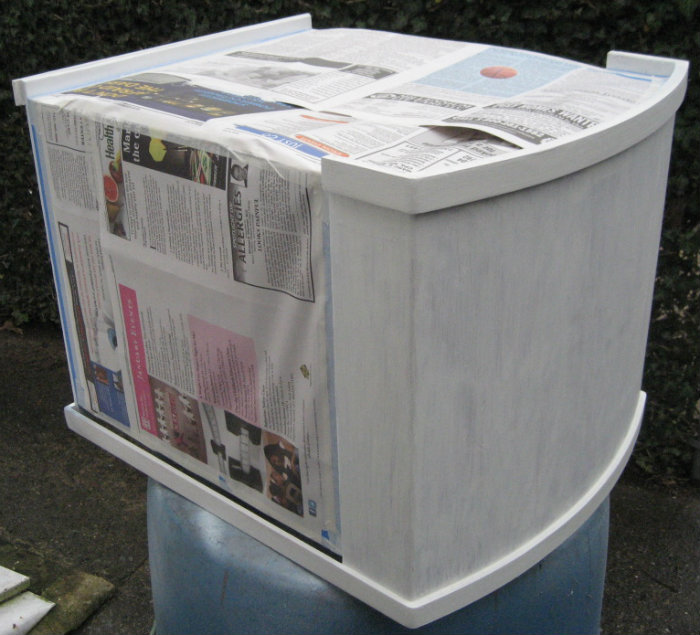
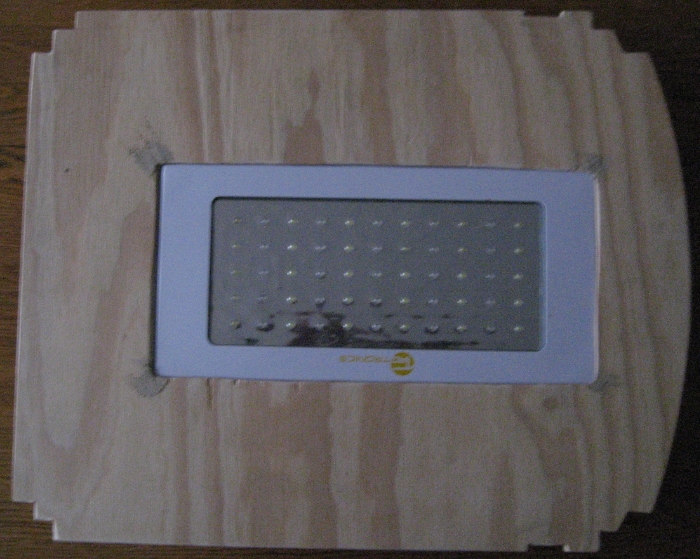
The main use of materials will be inexpensive fir strips (ca 2 ½†x 5/8â€) for the carcass and ¼ plywood for the skin.


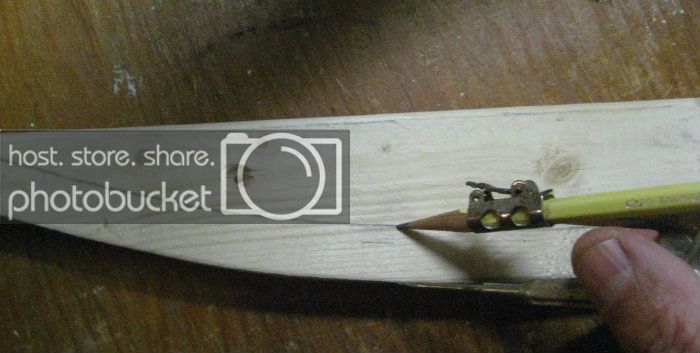
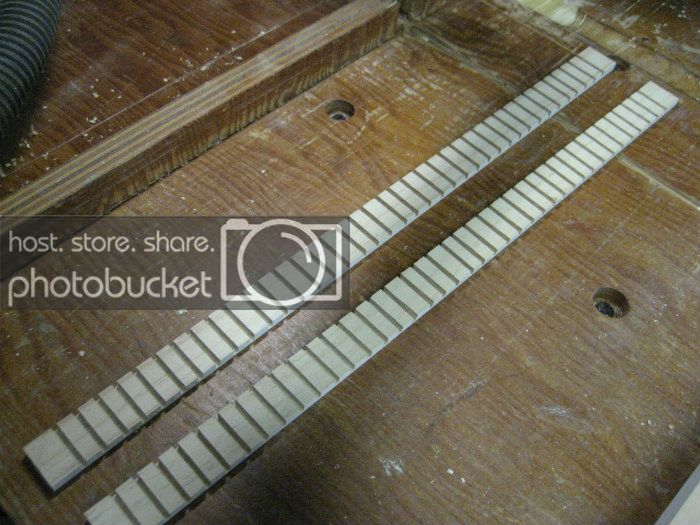
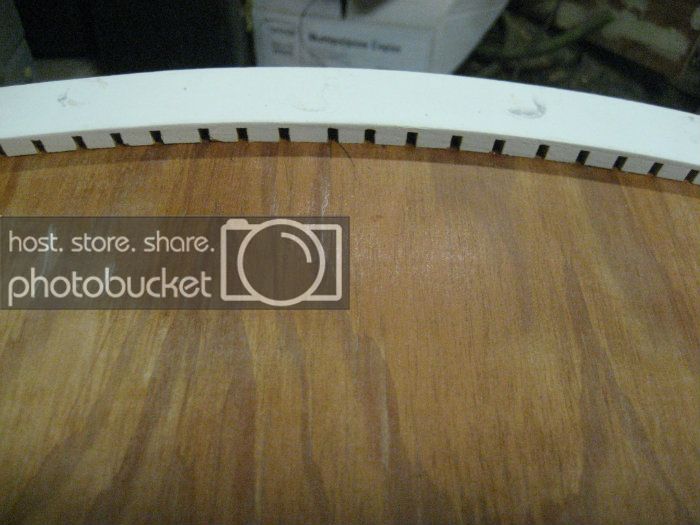
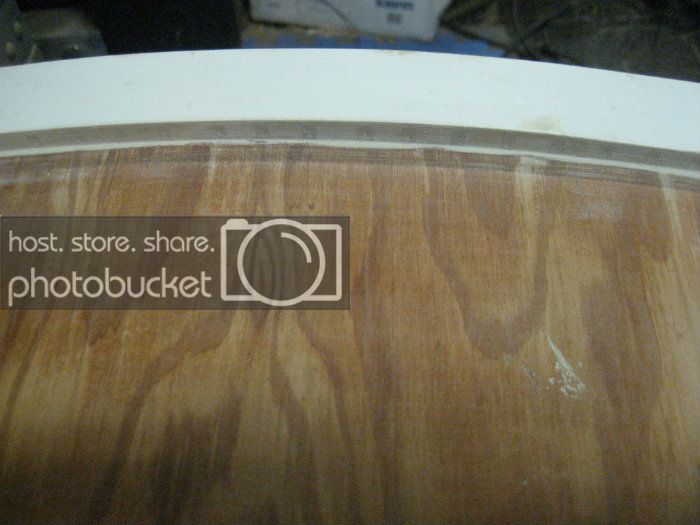
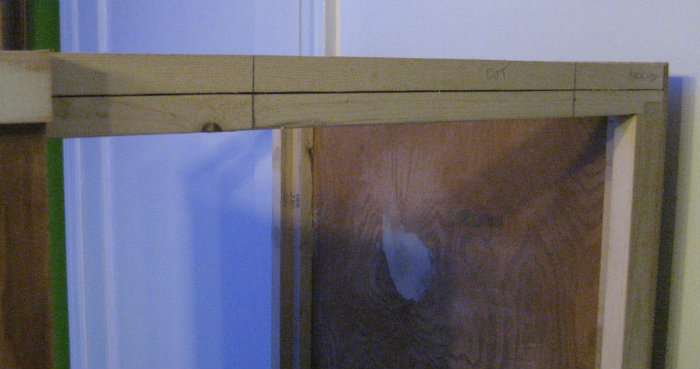
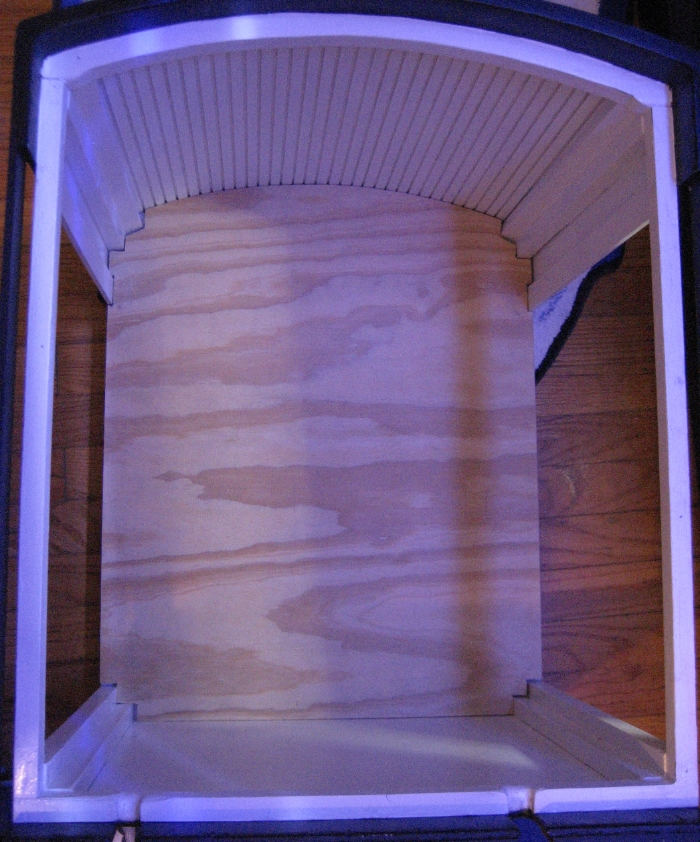
The first thing I did was to trace the front arch of the tank on a piece of fir strip, screwed this to a second piece, and cut that out on the band saw. I know not everyone has a band saw, so a saber saw or coping saw could be used. I cut the line “fat†and then used a power rasp to bring it to the line (Hand rasping or a belt sander would work as well):

CanopyArch.jpg


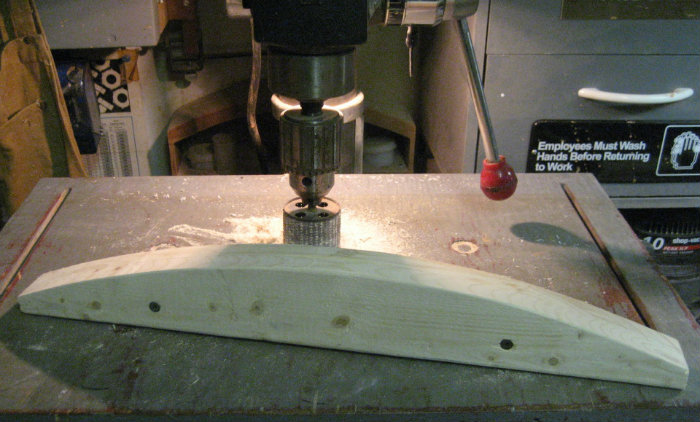
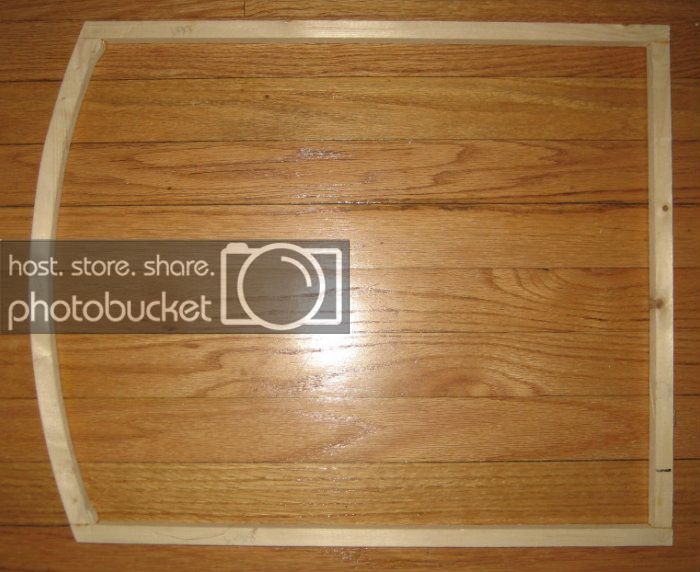
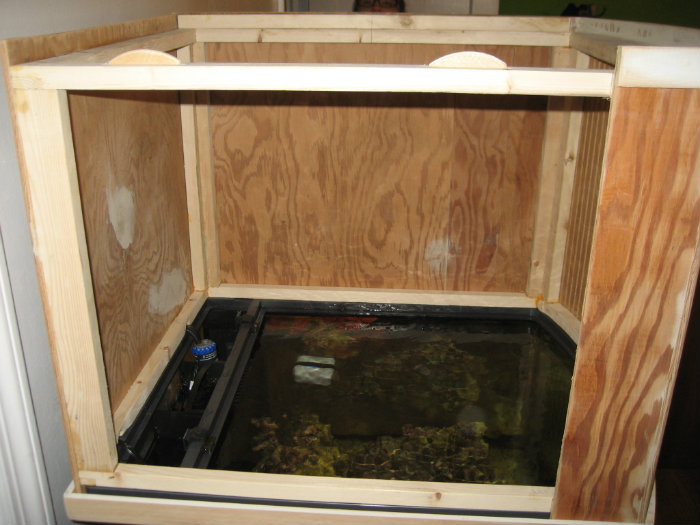
One of these pieces will be the top front brace and the other the lower front brace of the carcass.


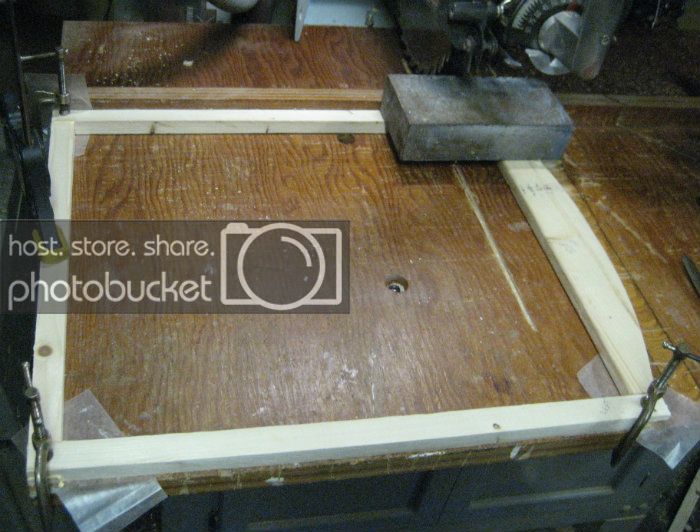
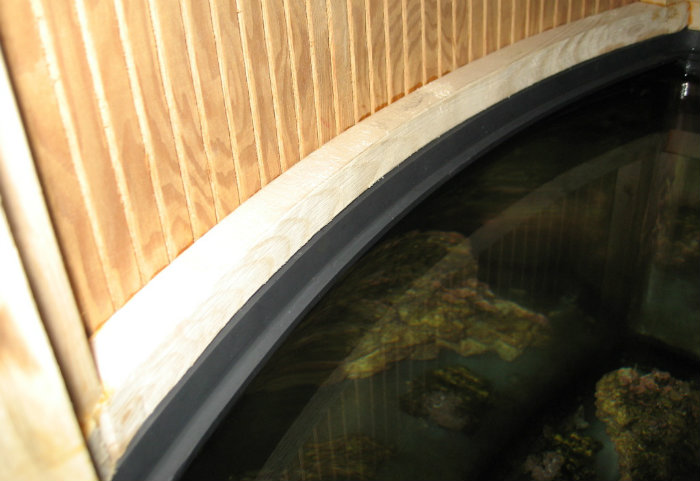
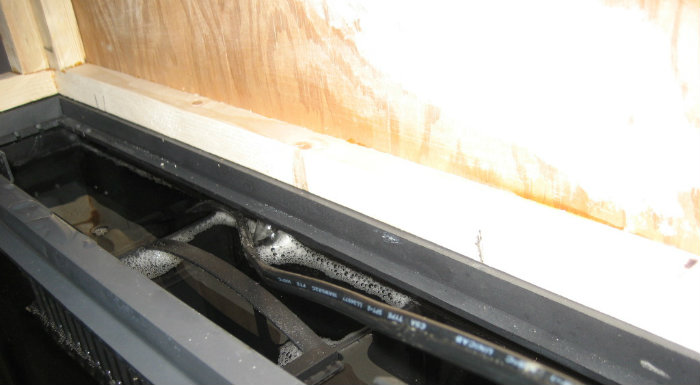
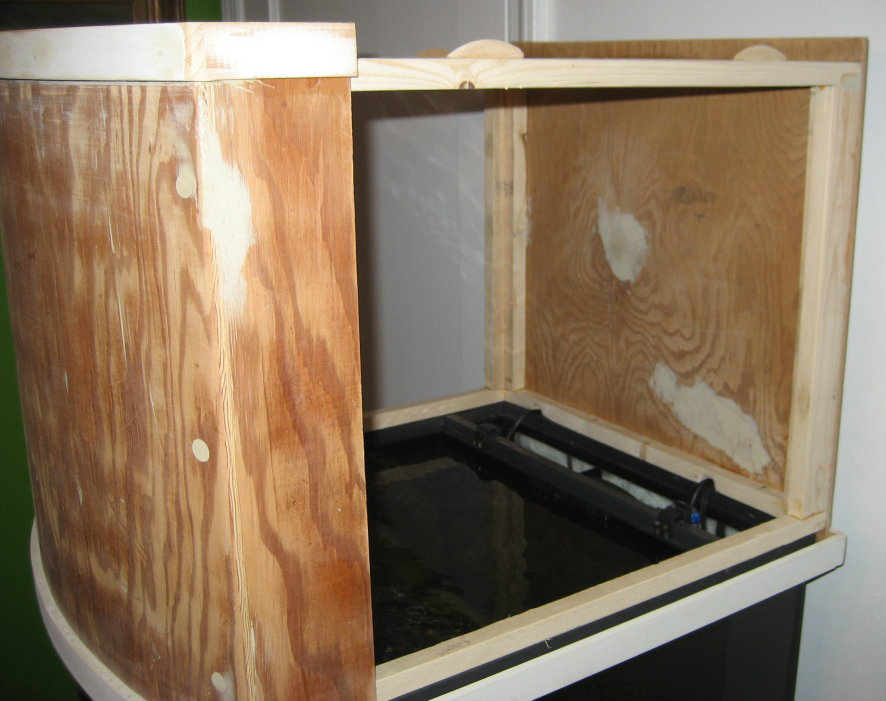
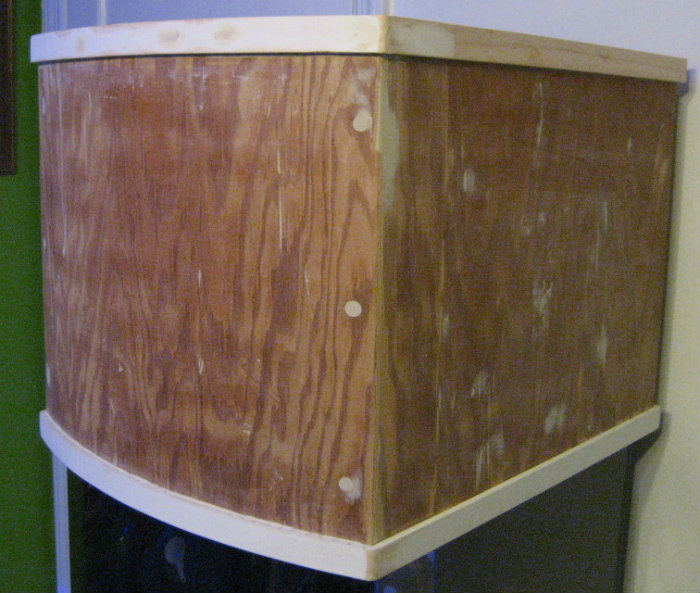
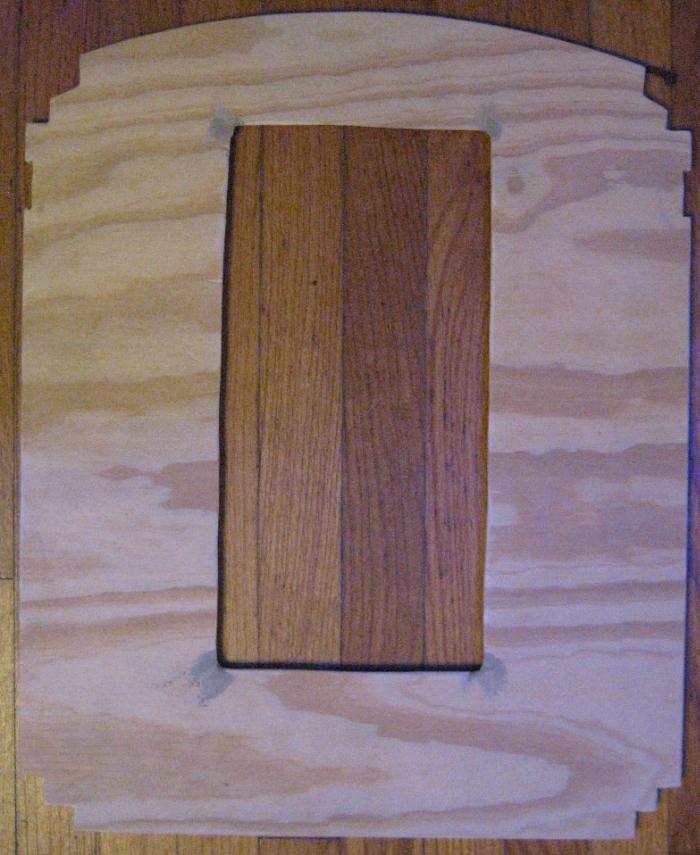
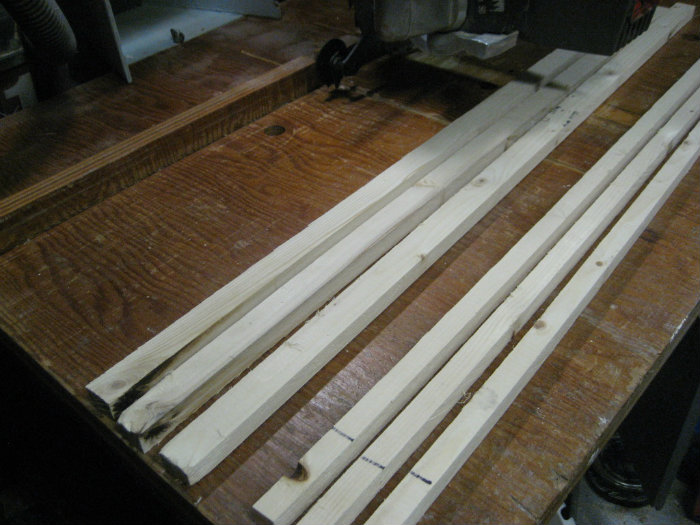
Next were the side and back brace pieces. The lower pieces I ripped at 5/8†wide while the upper pieces were ripped at 1 inch wide. The 5/8 pieces will nicely fit on the frame of the nano, while I wanted a little more meat on the upper pieces…..I tend to over-build.


CanopyCarcassSideandBack.jpg


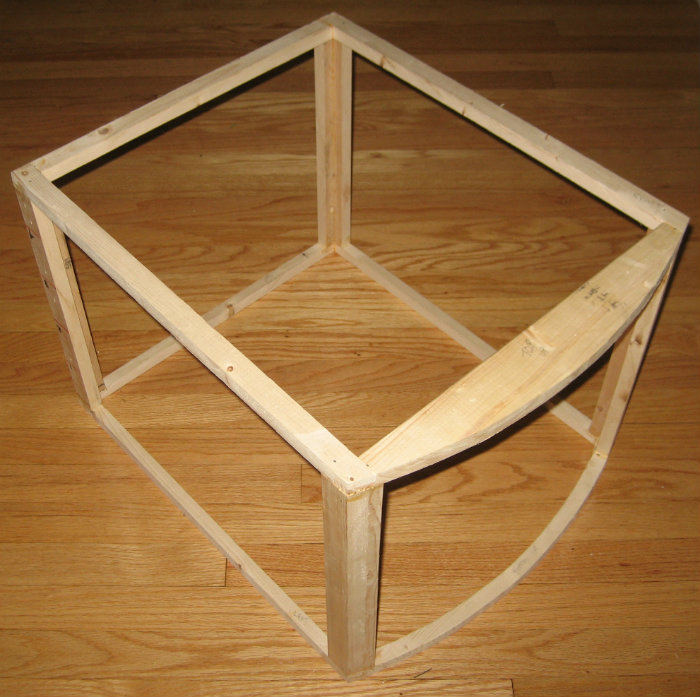
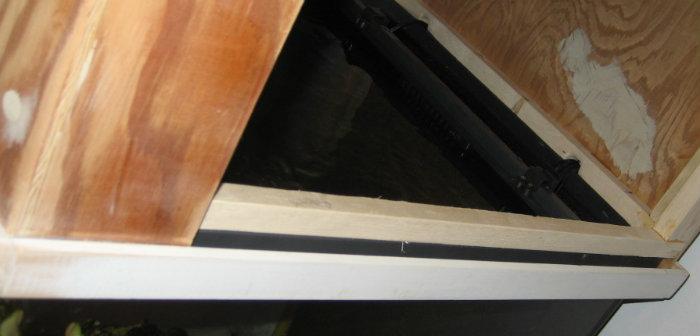
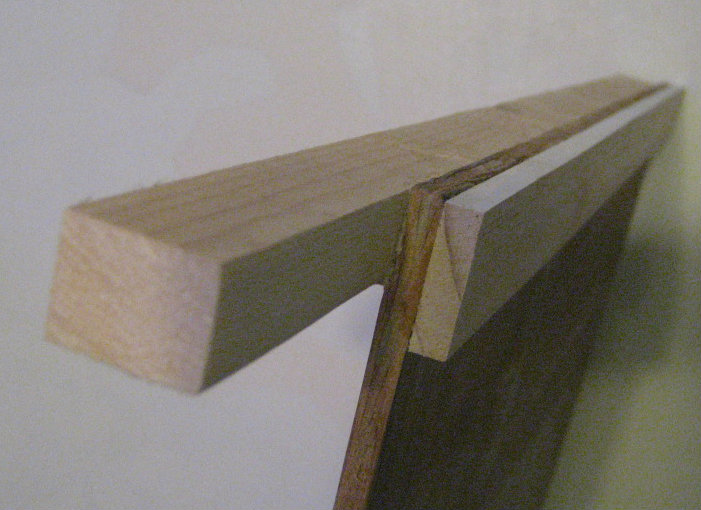
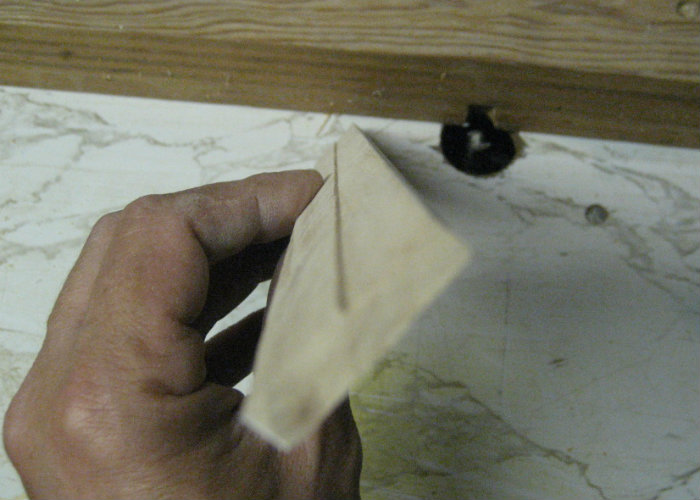
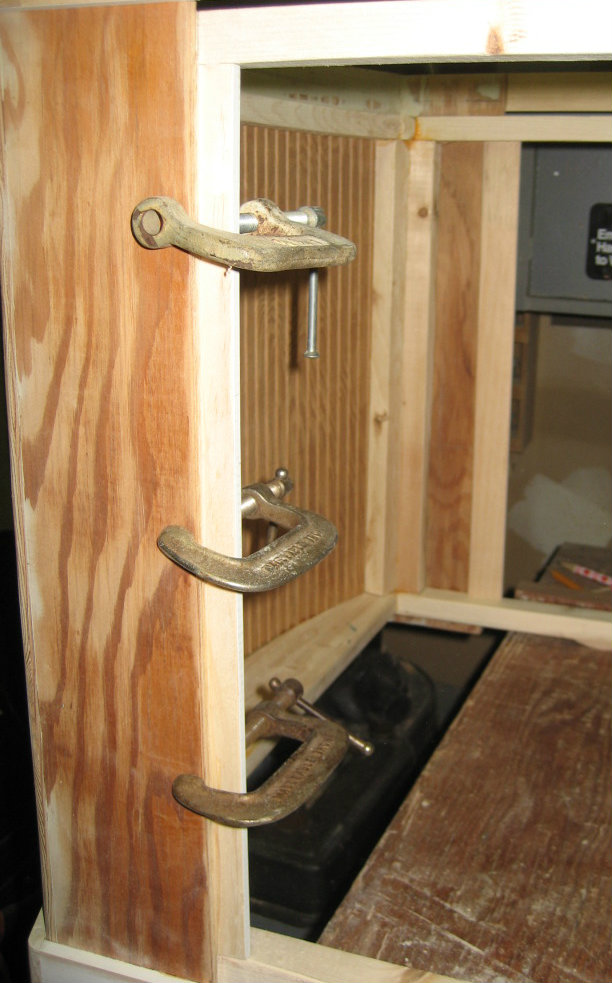
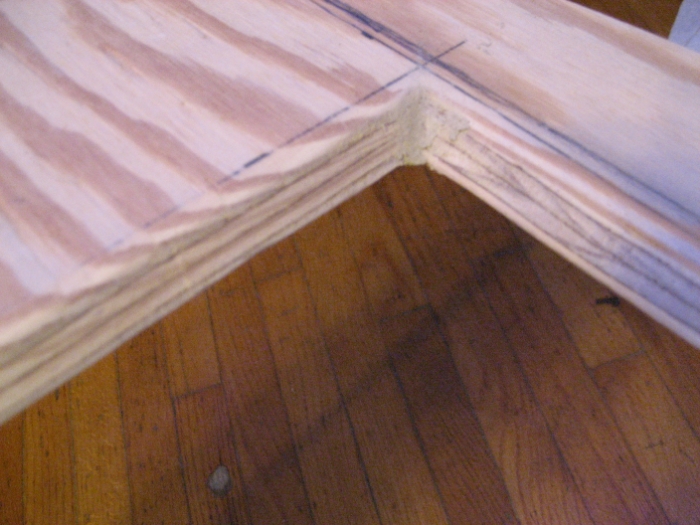
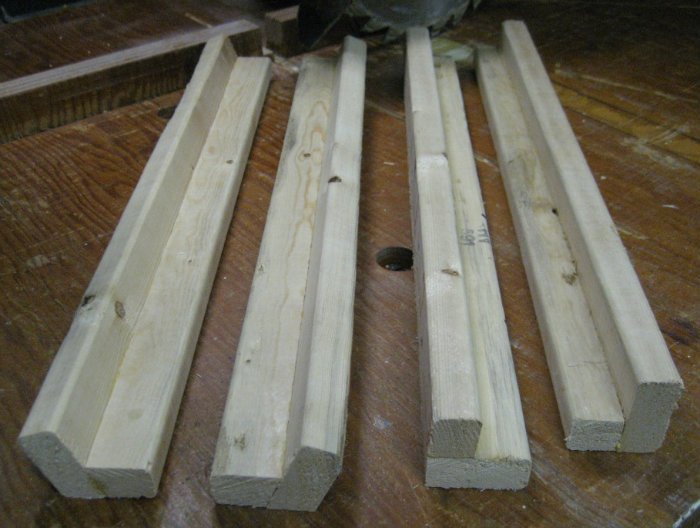
For the upright supports, I made L-brackets by ripping the fir stripping. With the front uprights, I first determined the angle at the corners so that I could adjust the angle of the saw:


AngleofCornerArch.jpg


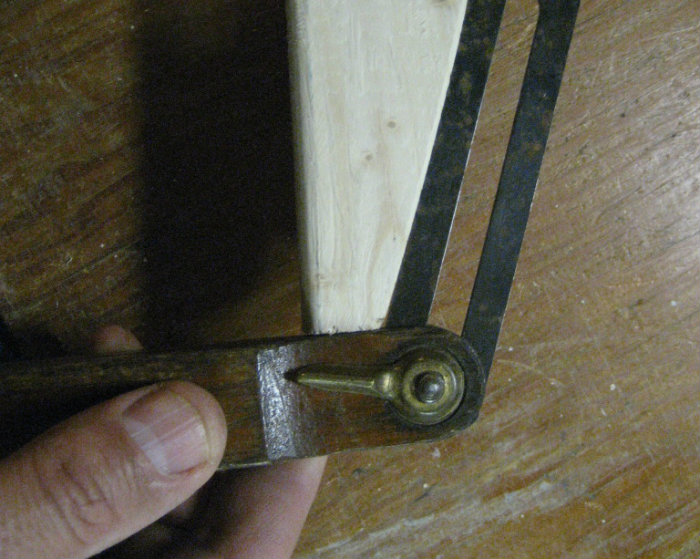
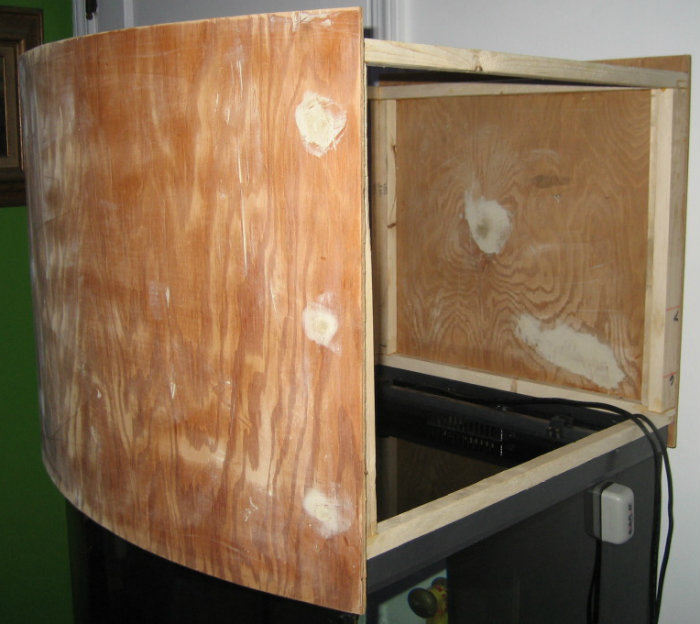
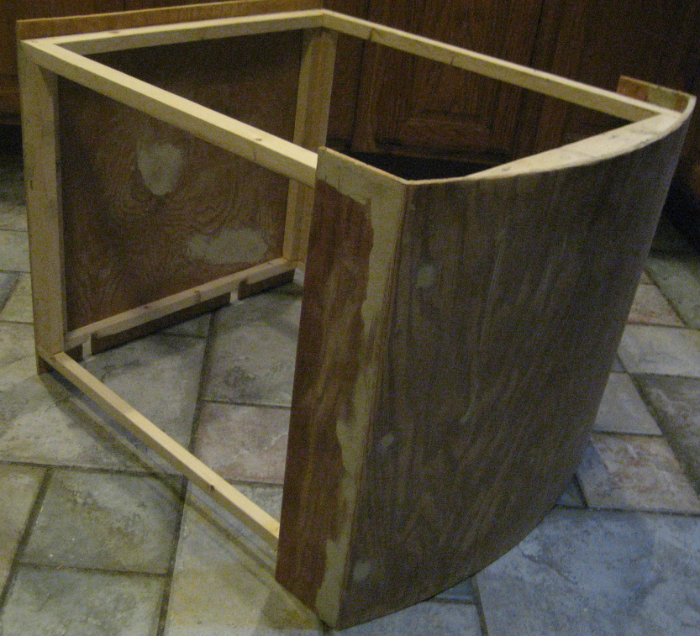
The boards were ripped, glued (waterproof glue), and nailed. The 90o L brackets will be for the two back uprights, while the angled ones go up front. I will throw this one number at you…..I’m looking to make this canopy about 16-17 inches high, so these L-brackets are 16 inches right now.


CanopyUprights.jpg


More to come…..
 
OP
OP
redfishbluefish

redfishbluefish

Stay Positive, Stay Productive
View Badges
Joined
Mar 22, 2012
Messages
11,705
Reaction score
25,724
Location
Sayreville, NJ
Rating - 0%
0   0   0
Going back to the lower front arched brace, I scribed a line approximately 5/8 inches wide. This was done by eye, and not actually measured.


LowerFrontBraceScribed.jpg


Using the band saw, I cut this line fat and rasped up to the line. Again, the top front frame piece was left whole.


With all the lower frame pieces done, the front, side and back braces were given lap joints and glued up. Here’s the lower frame all finished:


BottomFramePiece.jpg


And here’s the top frame clamped to my saw table to assure it is nice and square while the glue dries. (The same was actually done for the bottom frame.)


TopFramePiece.jpg


This might be a good place to stop for today. My wife will be home from work momentarily and I also need for these glue joints to dry.


More tomorrow……
 
OP
OP
redfishbluefish

redfishbluefish

Stay Positive, Stay Productive
View Badges
Joined
Mar 22, 2012
Messages
11,705
Reaction score
25,724
Location
Sayreville, NJ
Rating - 0%
0   0   0
I snuck down to the shop after dinner tonight and assembled the carcass. Glue and 3d nails hold this thing together.


CarcassSkeleton_zpseeb5c2c4.jpg


Tomorrow I’ll start skinning it with ¼ ply.


I was originally thinking of hinging the doors on the back upright, but now think I’ll hinge this on the top brace on both sides. Still kicking that one around.
 
OP
OP
redfishbluefish

redfishbluefish

Stay Positive, Stay Productive
View Badges
Joined
Mar 22, 2012
Messages
11,705
Reaction score
25,724
Location
Sayreville, NJ
Rating - 0%
0   0   0
AsphaltPays, Mstansbery, and Reefing8EZ, thanks for the kind words. Here’s more:


Skinning the Canopy

I used ¼ inch exterior plywood salvaged from a job. To bend the front piece over the arced front, I cut grooves the entire height of the plywood about half way through. To simplify this process, I began by making the first cut down the middle, than moved the saw over a half inch.


PlywoodOneGroove.jpg


I then made a pass, flipped the board around and made a second pass….now three gooves:


PlywoodThreeGrooves.jpg


I continued this process, moving a half inch and making two cuts, until the entire board was grooved every half inch.


FrontPlywoodtotallygroved.jpg


All these gooves every half inch make bending the board over the arc very easy. The back was glued on and the front was glued, clamped and screwed on the two outer uprights. Small scratches and the screw holes were filled with wood filler.


FrontPuttiedUp.jpg


While this glue and filler dries, I’m now scratching my head over the doors. Whatever the design, I plan on putting doors on both sides of the canopy. My original thought was to have a small fixed panel on the front and back side, with a door in the middle of these two panels, hinged at the back.

PLAN A

PLANA.jpg


This then changed to the door hinged at the top.

PLAN B

PLANB.jpg


And this then changed to only one front panel and the door hinged all the way at the back.

PLAN C

PLANC.jpg


And the latest thought is to have no hinges….they rust up within a couple months anyway….and put in two grooved pieces, front and back, and have the door simply slide up and off the canopy.

PLAN D

PLAND.jpg


I want to give these options more thought before proceeding. I’m also open to suggestions.


If the filler dries enough tonight I think I’ll prime what I have so far with Kilz Complete.
 
OP
OP
redfishbluefish

redfishbluefish

Stay Positive, Stay Productive
View Badges
Joined
Mar 22, 2012
Messages
11,705
Reaction score
25,724
Location
Sayreville, NJ
Rating - 0%
0   0   0
The First Fitting


Sanded the filler and put the canopy on the tank tonight. The first fitting:


TheFirstFitting.jpg


I’m happy with the way it fits. The front brace fits like a glove:


FrontBraceFit.jpg


As well as the back brace:


BackBraceFit.jpg


I marked for the two pump wires and the heater wire to relieve the lower back brace. Even though they have wire chases on the sides, I’m going to run the wires out the back.
 
OP
OP
redfishbluefish

redfishbluefish

Stay Positive, Stay Productive
View Badges
Joined
Mar 22, 2012
Messages
11,705
Reaction score
25,724
Location
Sayreville, NJ
Rating - 0%
0   0   0
So I didn’t get much done today.


Too busy during the day, and the wife home at night.


I was able to attach two fixed side panels, slap on a bunch of wood filler, and do a fair amount of sanding. You can also see the wire cut-outs I did last night in the back portion of the canopy.


Canopy010913.jpg


I also cut out the doors and slapped a good bit of wood filler on them as well…..to be worked on tomorrow.
 
OP
OP
redfishbluefish

redfishbluefish

Stay Positive, Stay Productive
View Badges
Joined
Mar 22, 2012
Messages
11,705
Reaction score
25,724
Location
Sayreville, NJ
Rating - 0%
0   0   0
Thanks jefstathiou.


Anyway, I’ve made a decision on the two doors…..no hinges, magnets or anything metal. They will slide in and out, but not like Plan D above (post 7.) They will look more like Plan C, but no hinges, and no noticeable sliding components.


So the next step was molding. I wanted something simple, so I went with regular lattice strips (ca 1 1/16†x 1/4â€.) I actually cut my own from extra molding stock I had. The molding will be applied on the whole upper and lower edges of the canopy. I began with the two pieces on the front curved section.


Just like with the plywood on the front, I cut kerfs in the molding every half inch, about 2/3’s the way through.


FrontMoldingCut.jpg


This were glued on the top and bottom edges of the front piece…..with loads of clamps….here is the last one glued with just two clamps left to remove.


FrontMoldingGlued.jpg


The kerfs were then filled with wood filler.


FrontMoldingPutty.jpg


Need to wait until the glue and filler dries……..tomorrow.
 
Last edited:
OP
OP
redfishbluefish

redfishbluefish

Stay Positive, Stay Productive
View Badges
Joined
Mar 22, 2012
Messages
11,705
Reaction score
25,724
Location
Sayreville, NJ
Rating - 0%
0   0   0
The Doors


This is the end
Beautiful friend
This is the end
My only friend, the end.


Oh, I’m sorry, I just had a déjà vu moment to Jim Morrison and The Doors!


But this project is close to the end. So here is the design I used for the doors.


As I mentioned in the above post, I installed the lattice molding. For the lower side, I continued that molding all the way to the back with no plywood side below.


LowerSideTrimMolding.jpg


This open molding portion will fit the lower part of the side door just by sliding behind the molding.


For the top portion of the side door, I began by cutting a second board the same width as the top brace, but a few inches shorter. I placed this on the top side brace and marked were I was going to cut biscuit slots, top and bottom (four inches from either end).


TopSideDoorCleat.jpg


Biscuit slots were cut top and bottom and biscuits glued into the lower brace only.


BiscuitsCut.jpg


So now this top brace (cleat) with the biscuit cuts will be put on top of the glued biscuits and the plywood side put in place (with glue on the side of the brace). Clamps are installed to hold the plywood side and this top cleat. After the glue dries, the clamps are removed and the top of the side door looks like this….cleat, plywood and top molding.


ToporDoor.jpg


So the open side of the canopy, with molding installed, and biscuits installed, looks like this.


CanopyOpenSide.jpg


So with the side panel installed….HERE IT COMES…..here is how the new canopy looks (without paint).


THECANOPYUnfinished.jpg


I must admit, I really like my choice of the size of the opening….it will make access very easy.


Canopyopenleftside.jpg


Now, while I finish up doing the final fittings and painting, I need to fit an LED fixture to put into this thing.
 
OP
OP
redfishbluefish

redfishbluefish

Stay Positive, Stay Productive
View Badges
Joined
Mar 22, 2012
Messages
11,705
Reaction score
25,724
Location
Sayreville, NJ
Rating - 0%
0   0   0
Today’s Progress


Today I spent some time fitting the doors. I want them to slip very easily in and out now, because I figure the paint will add some thickness to them, albeit very thin. Most of the “fitting” was rasping down the side of the top brace.


I also did a fair amount of touching up with wood filler and sanding. Hopefully I’ll be able to prime tonight.


The last thing I installed on the canopy were lattice strips where the fixed plywood side meets the plywood on the door. The concern was that a sliver of light would shine through this slit if I didn’t cover it. Before putting on these pieces, I cut a smidge off of half the length using the router table.


LightCleat.jpg


This would assure that any paint thickness on these pieces won’t interfere with the door sliding in and out.


These were glued and clamped into place.


LightCleatInstalled.jpg
 
OP
OP
redfishbluefish

redfishbluefish

Stay Positive, Stay Productive
View Badges
Joined
Mar 22, 2012
Messages
11,705
Reaction score
25,724
Location
Sayreville, NJ
Rating - 0%
0   0   0
What type of paint are you going to use? I'm building my stand now and the canopy is next.


My absolute favorite primer for stands and canopies is Kilz Complete. It is Kilz’s oil based primer, and it sticks like grim death. I have not seen any latex that holds up under wet conditions….that initial bond to the wood is critical, and Kilz Complete does it. My only complaint with Kilz Complete is that the vapors stink something terrible.

I will then cover the Kilz with any good latex. I prefer exterior latex as the top coat…… and it’s usually Behr, because HD is close by and very convenient, but I believe any quality latex will work as the top coat.
 
OP
OP
redfishbluefish

redfishbluefish

Stay Positive, Stay Productive
View Badges
Joined
Mar 22, 2012
Messages
11,705
Reaction score
25,724
Location
Sayreville, NJ
Rating - 0%
0   0   0
PAINTING


The whole canopy was primed with Kilz Complete. I usually then paint the inside and out with a quality exterior latex. But this time I decided to use spray paint……. for two reasons. The canopy is relatively small (not much paint), and those kerfs on the inside of the front panel were a pain to prime with a brush. Gloss white on the inside, flat black on the outside…..both are the $0.99/can at HD.


So the inside was painted first….no taping or paper covering. This was allowed to dry overnight. The gloss white looked good.


Because some of the pieces were a mix of white and black, I will need to tape and paper this thing. I was expecting to pay less than a buck for a painter’s tape, and was shocked to find blue painter’s tape at $3.20/roll….and that was for the thinnest, 0.7 inches. Next to this 3M product was the same size and length, but regular colored, light tan tape, called Tartan. This cost $0.70/roll. I purchased a roll of each so I could test out this Tartan. Once home I found it had a similar feeling to the 3M….a paper tape with low tack. But the test would be if it releases from the surface, without damaging the surface, while at the same time leaving no residue. So I used a little of both when I taped up the canopy.


CanopyPrimedandTaped.jpg


So the plan is to give this thing three or four coats of top coat, let it dry well, and then sand with a 400 grit paper. That will be followed with one more finish coat. Here it is after two coats:


CanopyFirstCoat.jpg
 
OP
OP
redfishbluefish

redfishbluefish

Stay Positive, Stay Productive
View Badges
Joined
Mar 22, 2012
Messages
11,705
Reaction score
25,724
Location
Sayreville, NJ
Rating - 0%
0   0   0
Fini


Well I’m a little PO’ed. When I pulled off the tape and newspaper, some of the ink from the newspaper transferred to the paint. This was especially true on the flat door panels.


Doorwithpapermarks.jpg


I’m still playing with the final fitting…..some of the paint it too thick and I’m rasping it off, along with additional wood. I’ll just do paint touch-up when it’s all fitting nicely. But here it is:

Canopyfinished.jpg


CanopyFinishedandOpen.jpg


And I took the current JBJ hood and put it on top to get an idea of how it will look.


NewCanopywithJBJLight.jpg
 
OP
OP
redfishbluefish

redfishbluefish

Stay Positive, Stay Productive
View Badges
Joined
Mar 22, 2012
Messages
11,705
Reaction score
25,724
Location
Sayreville, NJ
Rating - 0%
0   0   0
I ordered a full spectrum dimmable 120 W “Chinese” fixture off ebay. Although unbranded, I think it’s an Evergrow D120…..comes with 90 degree optics. While I waited for the fixture to arrive, I temporarily hung a 120W TauTronics fixture in the canopy.


TaoTronicsLight.jpg


Since it wasn’t dimmable, and feeling 120W of LED’s was too much for a JBJ 28, I ran white only or blues only…..never both at the same time.


What I noticed over the next couple weeks was that my water evaporation rate went through the roof. With the conventional JBJ hood, I was consuming maybe 1 to 2 cups per day. With the new canopy and temporary lights, I was now up to 2 to 3 quarts per day. I believe this excess amount of evaporation was coming from two things……..The open top of the canopy and the fan action coming from the lights being within the canopy.


To cut down on evaporation, I decided to close up the canopy and move the lights outside the canopy….the fans and exhaust anyway. A half inch piece of plywood was cut to fit the top. Here is the canopy upside down with the plywood top lying inside.


IMG_5954_zps7db1a2f3.jpg


A hole was cut into this top, slightly smaller than the dimension of the light fixture.


IMG_5959_zpse88f2f08.jpg


Now this cut was actually done at a 45 degree angle (from the top side), so that the bevel on the light fixture would rest in this hole:


IMG_5960_zps4c63732d.jpg


The new fixture arrived and I’ve temporarily hung that in the canopy to acclimate the livestock in the tank. It just so happens to be that it is the same size and design of the TauTronics, so here is that fixture resting in the canopy top, so you can get the idea of what I’m talking about. No hanging stuff needed….the light will simply rest on the top of the canopy, fitting in the beveled cut-out.


View From The Top:

41aa46a2-e428-41b3-9bfb-7d4c5dab7ca2_zps76f4010b.jpg


View From the Bottom:

IMG_5967_zps7a289e08.jpg


Now to paint this up and install it….with screws, just in case I want to take it out.
 
OP
OP
redfishbluefish

redfishbluefish

Stay Positive, Stay Productive
View Badges
Joined
Mar 22, 2012
Messages
11,705
Reaction score
25,724
Location
Sayreville, NJ
Rating - 0%
0   0   0
Hopefully here’s the final build part of this canopy….the new top cover, lights and moonlights. The moon light (EBay – ca $10), was hardwired and therefore I had to drill a big hole into the top to slide the light in (7/8 inch hole). I made a plug to cover this hole. You can see this plug in photos below.


View From the Inside (actually I have the canopy off the tank and upside down.):


1b8921a1-2424-479e-a5d6-eea96d88dc85_zps410d5bc4.jpg


View From the Top:


567dcd35-81fa-4cbe-8c31-decceedb0f16_zps146a68e7.jpg


View Form the Front (with camera lens level to the top):


7fd445d2-1146-47d2-aa71-ab1f1500e98d_zpsa149ccee.jpg


I’m so happy with the way this build turned out, I’m now thinking of the design of a new stand…..about four or five inches higher than the current stand, and it will have the bellied front, just like the canopy.
 
Last edited:

High pressure shells: Do you look for signs of stress in the invertebrates in your reef tank?

  • I regularly look for signs of invertebrate stress in my reef tank.

    Votes: 42 31.1%
  • I occasionally look for signs of invertebrate stress in my reef tank.

    Votes: 31 23.0%
  • I rarely look for signs of invertebrate stress in my reef tank.

    Votes: 28 20.7%
  • I never look for signs of invertebrate stress in my reef tank.

    Votes: 34 25.2%
  • Other.

    Votes: 0 0.0%
Back
Top