Erk's CNC router build

OP
OP
erk

erk

Valuable Member
View Badges
Joined
Mar 19, 2014
Messages
1,382
Reaction score
2,049
Location
DFW
Rating - 0%
0   0   0
if your planning on using that shop-vac for dust collection get shielded cables! i have seen steppers do some weird stuff because of static. maybe even splurge for a low/no static hose for it. cant wait to see your first projects! more and more hobby based machines hitting the market making cnc accessible to those who want to use it.;Bookworm

Glad you mentioned the static from the shop-vac. I am going with shielded motor cables, mostly to reduce noise, but that should help deal with static buildup. I also want to run a ground wire with the vac hose to try and reduce static as well. Getting to the point where all these small details need to be fleshed out. Can't wait to get this thing started up and running!
 

Dennis Cartier

Valuable Member
View Badges
Joined
Aug 25, 2016
Messages
1,950
Reaction score
2,388
Location
Brampton, Ontario
Rating - 0%
0   0   0
I have a shapeoko that I previously used for various tank related projects. I wanted something bigger so I purchased the plate set to build an Ox. I end up moving and my CNC hobby is on hold until I can get a space at the new house where the noise and dust will not be a problem. I also used GRBL on an Arduino for the Shapeoko. Good little controller. For gcode I previously used a python library to code the toolpaths. The footprint you are doing (1m × 1m) is a great choice for project size.

When I do get around to building my next machine, I am hoping to do a full 4x8 build with linear rails and some nice servo steppers that have come on the scene recently.

Dennis
 
OP
OP
erk

erk

Valuable Member
View Badges
Joined
Mar 19, 2014
Messages
1,382
Reaction score
2,049
Location
DFW
Rating - 0%
0   0   0
I have a shapeoko that I previously used for various tank related projects. I wanted something bigger so I purchased the plate set to build an Ox. I end up moving and my CNC hobby is on hold until I can get a space at the new house where the noise and dust will not be a problem. I also used GRBL on an Arduino for the Shapeoko. Good little controller. For gcode I previously used a python library to code the toolpaths. The footprint you are doing (1m × 1m) is a great choice for project size.

When I do get around to building my next machine, I am hoping to do a full 4x8 build with linear rails and some nice servo steppers that have come on the scene recently.

Dennis
I wish I had the room to do a nice 4x8 machine. Do you plan to use rack and pinion to drive the machine or some other method? I'd like to upgrade this machine to eventually use a rack and pinion drive method instead of the belt and pinion.
 

Dennis Cartier

Valuable Member
View Badges
Joined
Aug 25, 2016
Messages
1,950
Reaction score
2,388
Location
Brampton, Ontario
Rating - 0%
0   0   0
I wish I had the room to do a nice 4x8 machine. Do you plan to use rack and pinion to drive the machine or some other method? I'd like to upgrade this machine to eventually use a rack and pinion drive method instead of the belt and pinion.

Just going through my options on how to build a workshop/loft above my garage. The important part will be to keep tbe dust and debris from getting onto the vehicles parked below.

For drives, I favour ballscrews where possible, but screw whip will make an 8 ft length impracticle. The easiest method would be rack and pinion, but I have always wanted to try a DIY version of a servo belt. I will probably work with a local automation vendor, so it will probably depend on what they can provide. If I do go with some nice beefy step servos, it would be nice to have a low backlash drive system to make the most of the precision from the steppers.

Dennis
 
OP
OP
erk

erk

Valuable Member
View Badges
Joined
Mar 19, 2014
Messages
1,382
Reaction score
2,049
Location
DFW
Rating - 0%
0   0   0
It's been a bit since I updated with images. I pulled a muscle in my back recently and it has made it hard to work on the router for any length of time. Trying to take it easy so it heals faster. I took a video though of where I'm at. I have the router in place and the motor wiring laid out. Going to work on the controller side a bit since that doesn't require any physical effort.


IMG_20180304_133602811.jpg
 
OP
OP
erk

erk

Valuable Member
View Badges
Joined
Mar 19, 2014
Messages
1,382
Reaction score
2,049
Location
DFW
Rating - 0%
0   0   0
Oh , sorry to hear that. Take some time off, and rest.

things looking good on the build side :)
I'm trying to rest, but so difficult with so many things I want to do. [emoji1]

Thanks for the compliment. I'm really trying to go slow so I don't have any big regrets once I'm finished.
 
OP
OP
erk

erk

Valuable Member
View Badges
Joined
Mar 19, 2014
Messages
1,382
Reaction score
2,049
Location
DFW
Rating - 0%
0   0   0
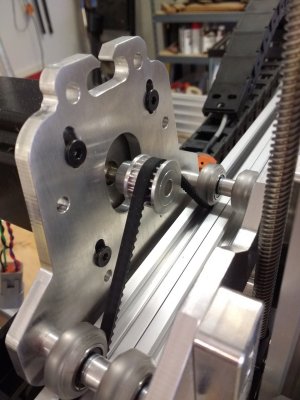
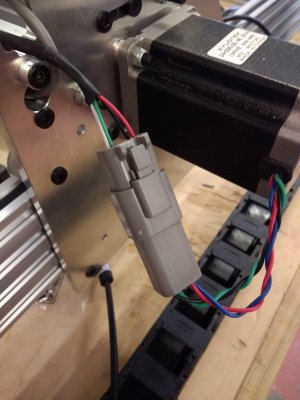
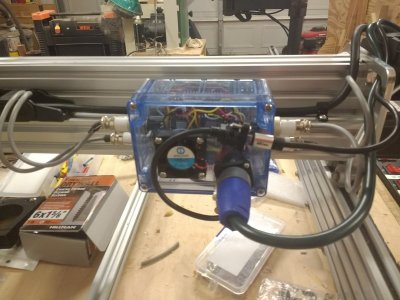
I installed the drive belts and pinions, and finished the motor side of the drive cables. I need to make a run to HD or Lowes and get some material to make brackets for the cable management. I also need to figure out how I will get power to the router. Cable is too short on it for a single run, but contemplating replacing plug on it with a locking power connector or maybe extending the cable. Not sure yet.

IMG_20180317_165812956.jpg

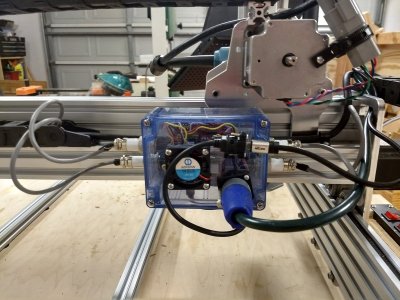
I got 10 pairs of these sealed automotive connectors off Amazon for cheap. Way better than dealing with Digikey or Mouser.
IMG_20180317_165824167.jpg

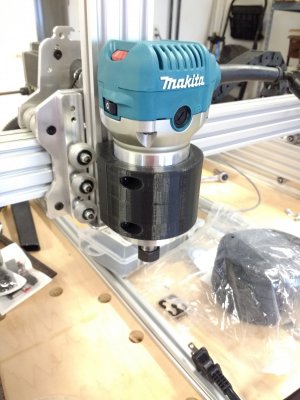
I went with a 3D printed collar to hold the router. It's made specifically for this Makita router. Holds very well. Got it from a guy on eBay.
IMG_20180317_165844065.jpg
 
OP
OP
erk

erk

Valuable Member
View Badges
Joined
Mar 19, 2014
Messages
1,382
Reaction score
2,049
Location
DFW
Rating - 0%
0   0   0
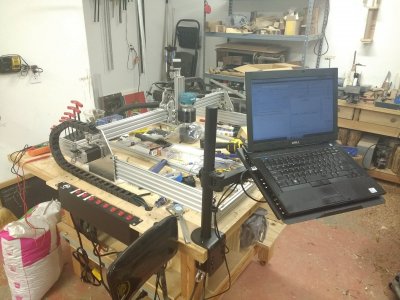
Wiring is pretty much done. I routed everything, now I just need to solder on connectors. Need to tidy up the wiring as well, but not too worried about that. Will work on a platform to hold the controller tomorrow. Only something temporary until I can make a nice case. I've installed Linux CNC on the laptop and loaded GRBL to the Arduino Uno. I ordered a laptop stand to hold the laptop to the table. In the home stretch now.

IMG_20180324_191258373.jpg
IMG_20180324_191305683.jpg
IMG_20180324_191335149.jpg
 
OP
OP
erk

erk

Valuable Member
View Badges
Joined
Mar 19, 2014
Messages
1,382
Reaction score
2,049
Location
DFW
Rating - 0%
0   0   0
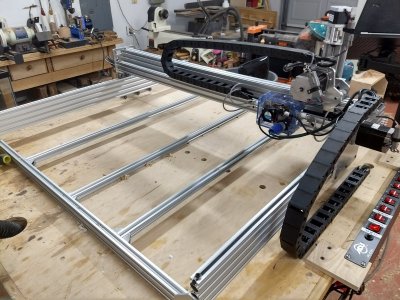
First the good news. The mechanical portion of the router is *done*. I will explain what that means in the bad news. Software is installed on the laptop and everything is ready to go. I had to install GRBL Controller and not Linux CNC, because it turns out the Arduino is actually processing the G-Code. Didn't realize this. I want to use GRBL Panel, but it is only available for Windows. The next best was GRBL Controller, so I'm sticking with that for now.

Now for the bad news. I was cheap and bought a cheap arduino/CNC shield combo with cheap foreign stepper drivers. I thought the drivers were just like the Pololu version, but when it came to setting the VREF for current limiting the drivers, it wasn't straight forward and there was no datasheet to explain. So in my effort to find the reference point on the drivers, I burned out one... ;Eggonface or at least that is all I thought I burned. I disconnected power, removed the burned out driver and reconnected power.

POP. HISS. And a small bloom of smoke... ;Facepalm

There went another driver. Disconnect and remove driver and power up again. Of the remaining two drivers, only one appears to be OK. I disconnect 24VDC and connect the USB. No response from the Arduino.

So in all, I fried 3 drivers (trashing all 4), a cheapo Arduino Uno, and probably the CNC shield. Better to replace the shield. Thank goodness it's a cheap controller.

With the replacement, I'm going for the DRV8825 drivers instead. More efficient and higher power. I should have the replacements by next weekend, then setup the software and begin routing/machining! ;Woot

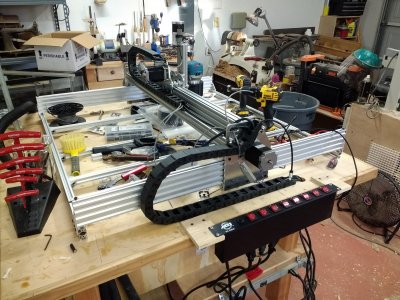
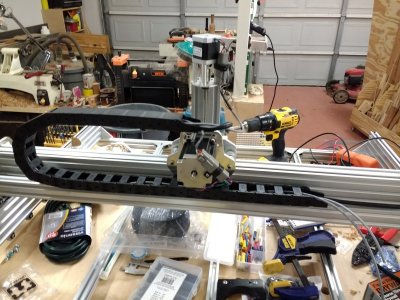
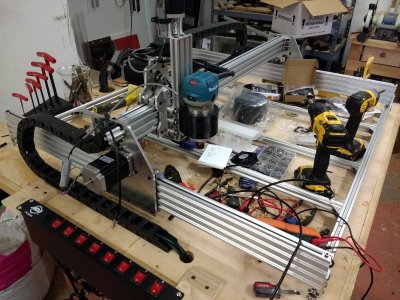
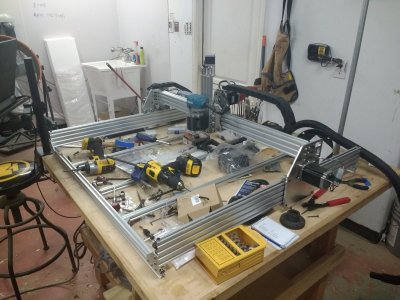
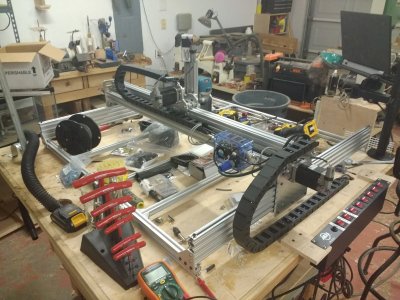
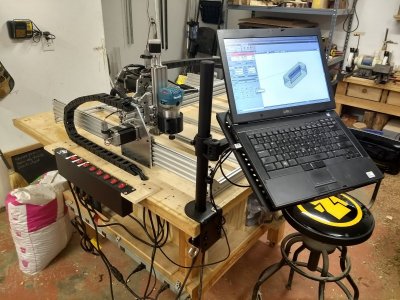
Now that the updates are done, here are some shots of the completed setup.

IMG_20180331_232056873.jpg

IMG_20180331_232110854.jpg

IMG_20180331_232125131.jpg

IMG_20180331_232136571.jpg
 

Skep18

Valuable Member
View Badges
Joined
Feb 3, 2018
Messages
1,092
Reaction score
849
Location
Southeast US
Rating - 100%
1   0   0
Following. Very cool. I just bought myself a Makita router as well with the idea of making my own sump. I didn't realize the CNC table could be that affordable. Definitely going to look into it.
 
OP
OP
erk

erk

Valuable Member
View Badges
Joined
Mar 19, 2014
Messages
1,382
Reaction score
2,049
Location
DFW
Rating - 0%
0   0   0
Router is in motion. Finally. Need to increase the current limit a bit and replace the Z drive with a Nema 23 motor. Current motor isn't strong enough to lift the spindle.

 
OP
OP
erk

erk

Valuable Member
View Badges
Joined
Mar 19, 2014
Messages
1,382
Reaction score
2,049
Location
DFW
Rating - 0%
0   0   0
I finally broke down and bought genuine Pololu DRV8825 drivers. The cheap Chinese no brand ones are a mess. I can't easily set Vref because the trim pots won't turn easily and seem to have broken down. I did have the current limit too low on the Z axis, making it difficult to move the spindle up. Once the new drivers come in, I will set the max feed rates, limits, etc. Then I can start some test builds.
 
OP
OP
erk

erk

Valuable Member
View Badges
Joined
Mar 19, 2014
Messages
1,382
Reaction score
2,049
Location
DFW
Rating - 0%
0   0   0
I'm leveling the spoilboard today. Also learning how to program bCNC at the same time. Took several attempts to get it to start leveling correctly.
 

techhnyne

Well-Known Member
View Badges
Joined
Oct 6, 2017
Messages
516
Reaction score
152
Rating - 0%
0   0   0
think this design can be used and swap a router for a laser?
 

coseal

Active Member
View Badges
Joined
Feb 15, 2009
Messages
313
Reaction score
322
Rating - 0%
0   0   0
think this design can be used and swap a router for a laser?

sure, a diode laser would work! the gantry is not ideal for a flying optic design as used in most co2 laser systems. it really depends on what you hope to achieve with the machine.
 

Creating a strong bulwark: Did you consider floor support for your reef tank?

  • I put a major focus on floor support.

    Votes: 54 40.0%
  • I put minimal focus on floor support.

    Votes: 28 20.7%
  • I put no focus on floor support.

    Votes: 48 35.6%
  • Other.

    Votes: 5 3.7%
Back
Top