"Giant Mini Fridge" - Red Sea MAX E-170

OP
OP
revnull

revnull

Active Member
View Badges
Joined
Oct 5, 2016
Messages
108
Reaction score
53
Location
Morgan Hill, Ca
Rating - 0%
0   0   0
Post from Dec 20, 2017:

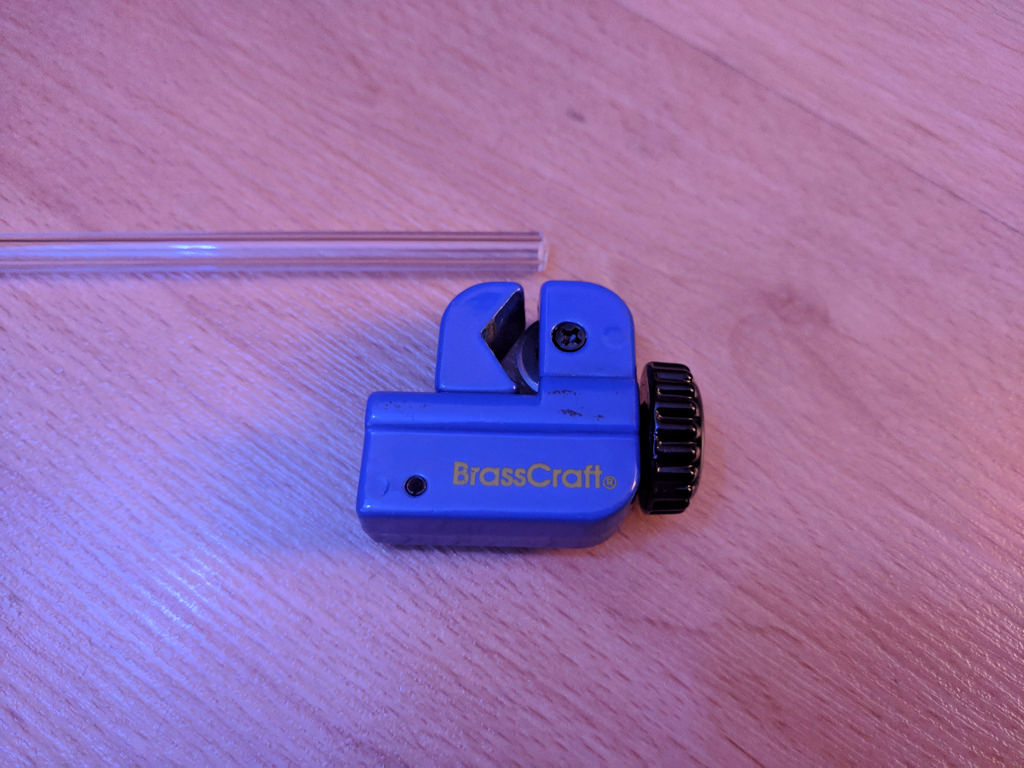
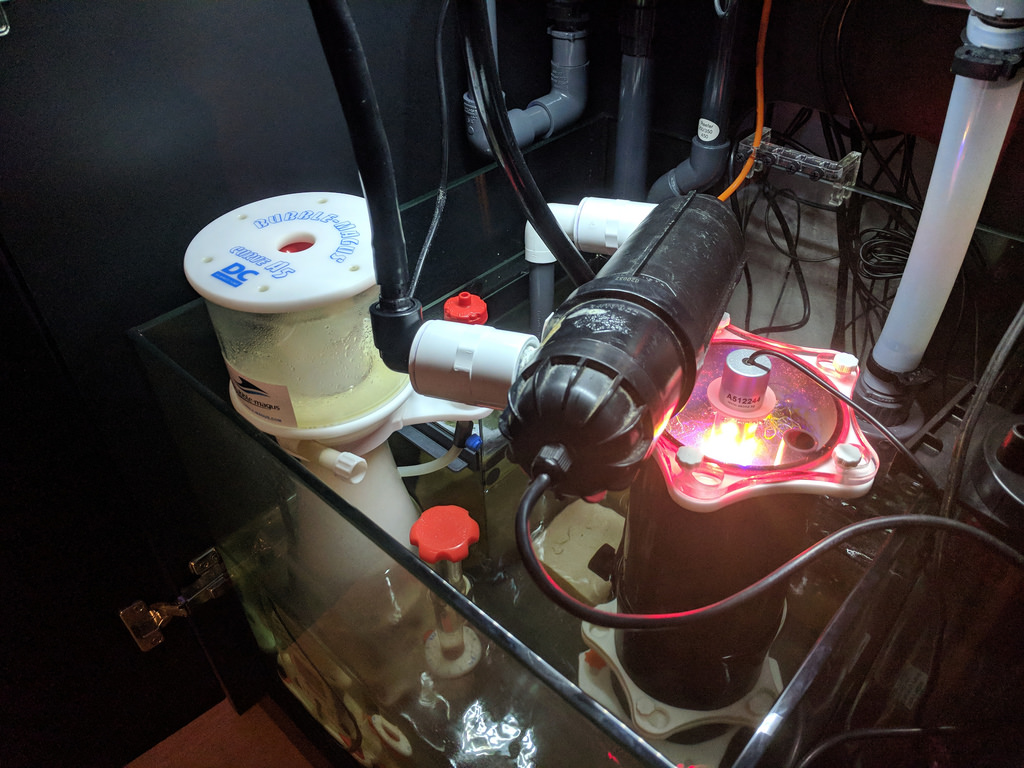
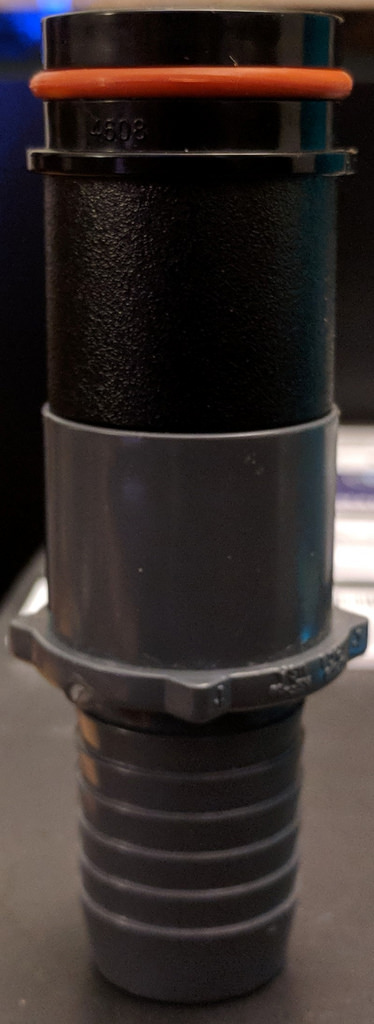
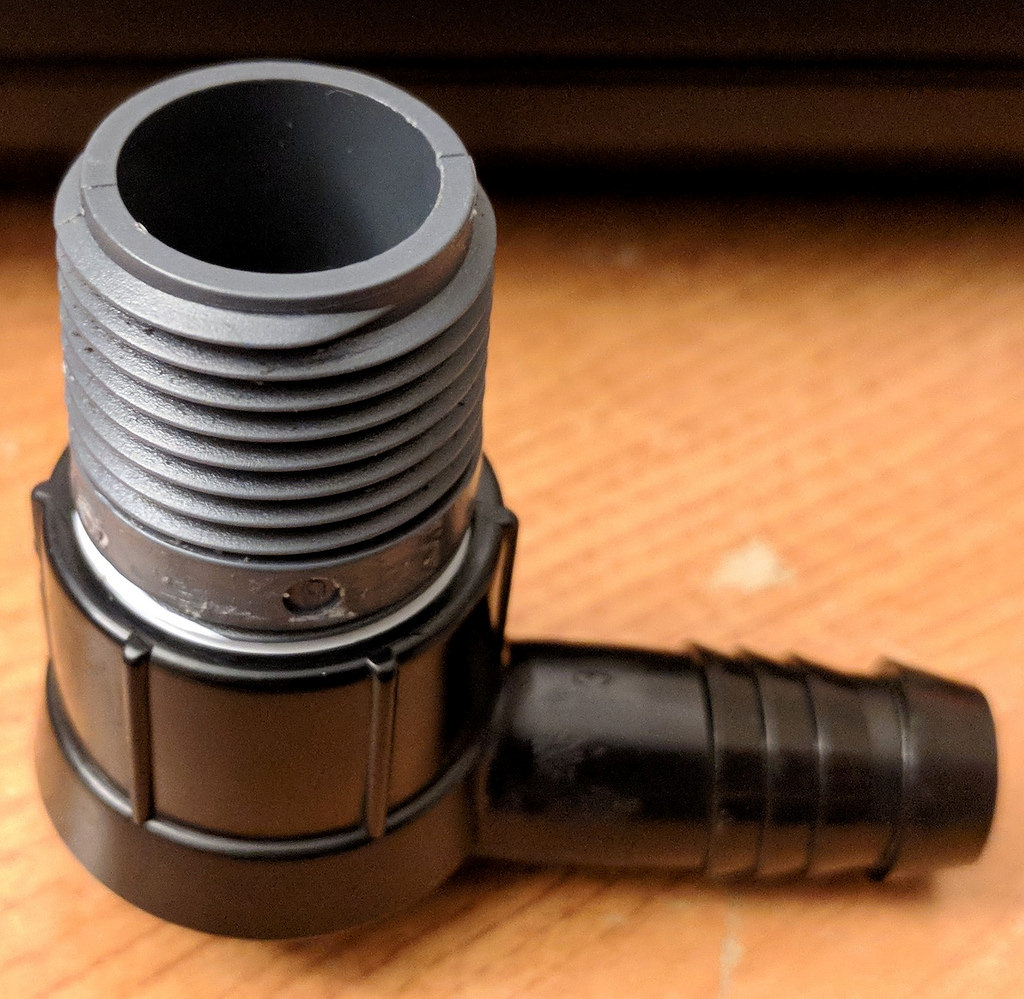
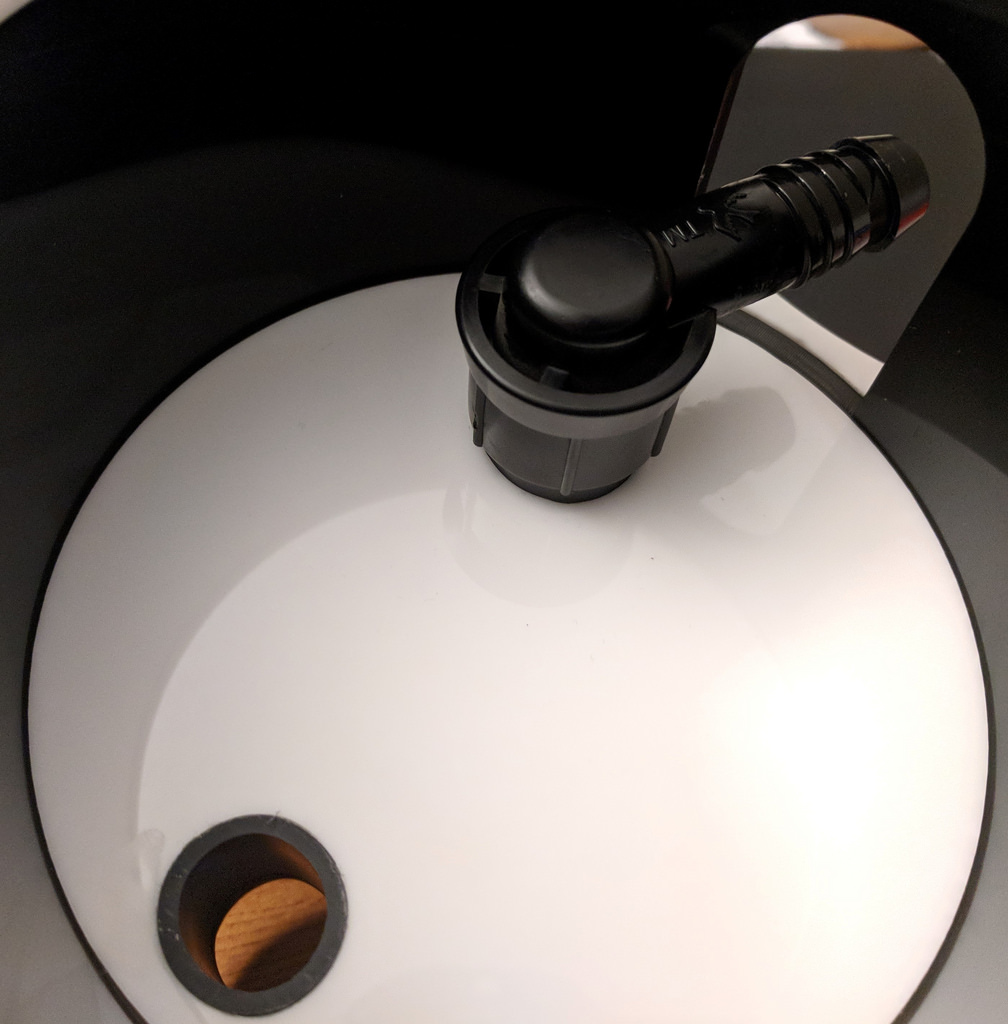
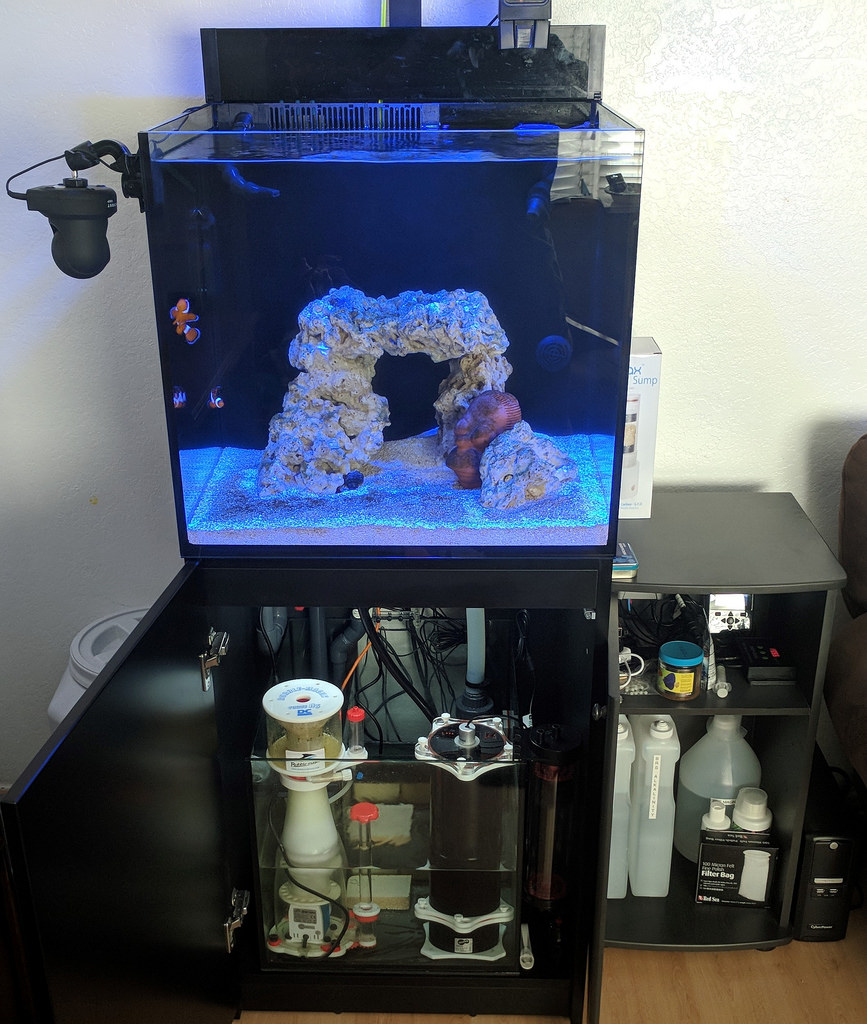
I'm totally bummed out tonight. I got a call from my wife this afternoon that there was water on the floor next to the tank. Like a pro, she powered everything off and soaked up the water before it could do any damage. When I got home I turned the return pump back on fearing that my new manifold was to blame. Turns out that I was half right. The leak was a slow drip coming from Red Sea barbed adapter on the return line. I replaced the stock barb with a 1-in to 3/4-in threaded barb. I've read others have had good luck using 3/4-in NPT adapters with a ton of PTE tape. I opted to use RectorSeal 5 and made sure not to over tighten. It held for 3 days without a drip. Then today, it developed a hairline crack almost dead center in the middle of the fitting. I'm sure this is my fault for trying to use NPT and BSP together. I'm guessing I'll need to order a new adapter from Red Sea and try to find the correct BSP barbed fitting to get this to work.
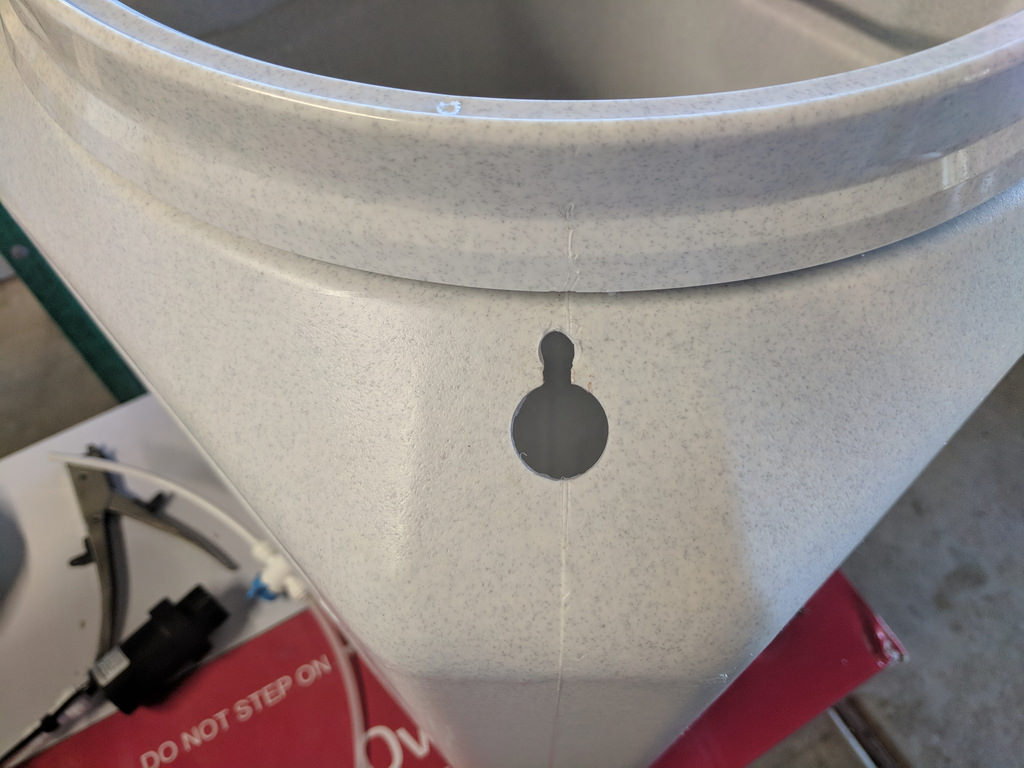
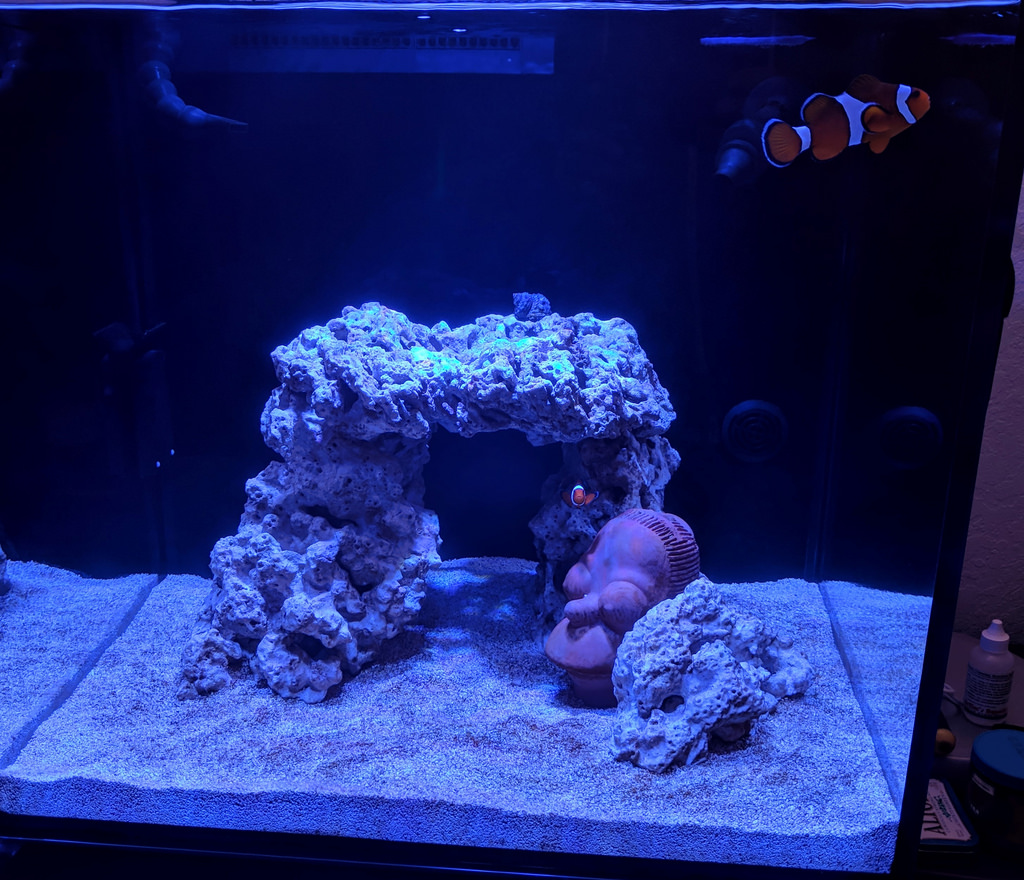
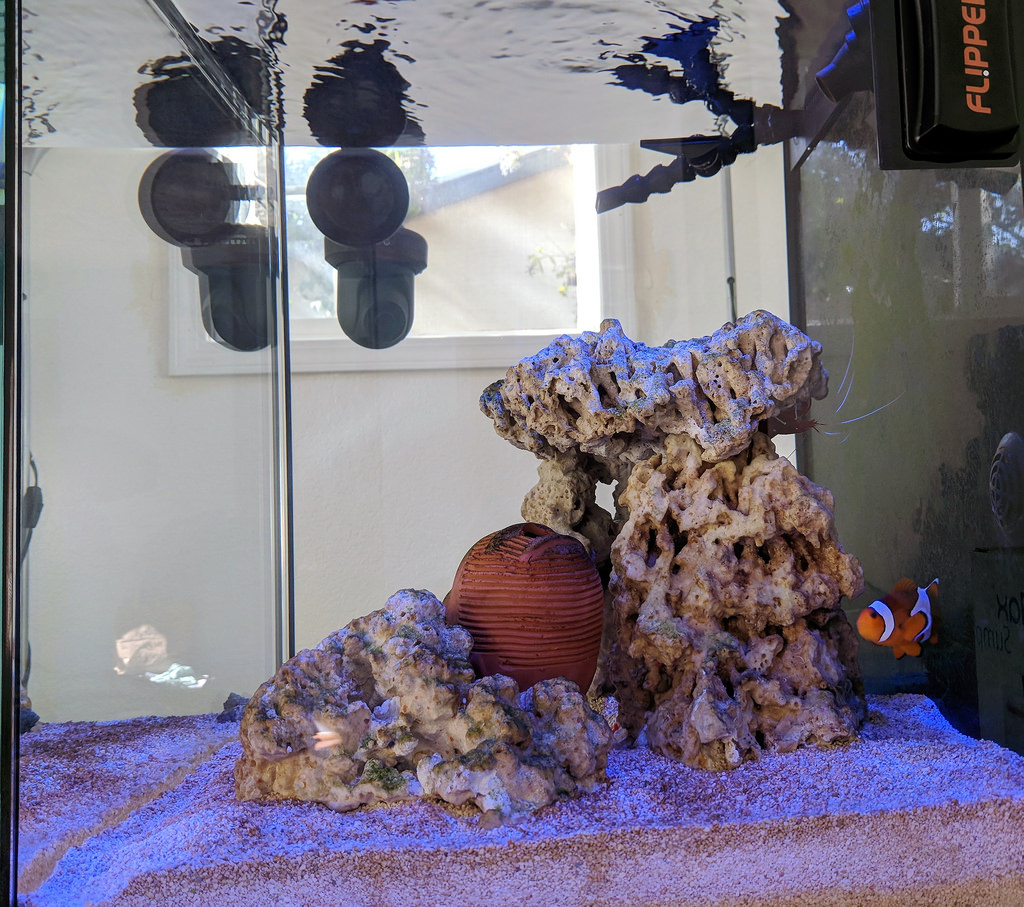
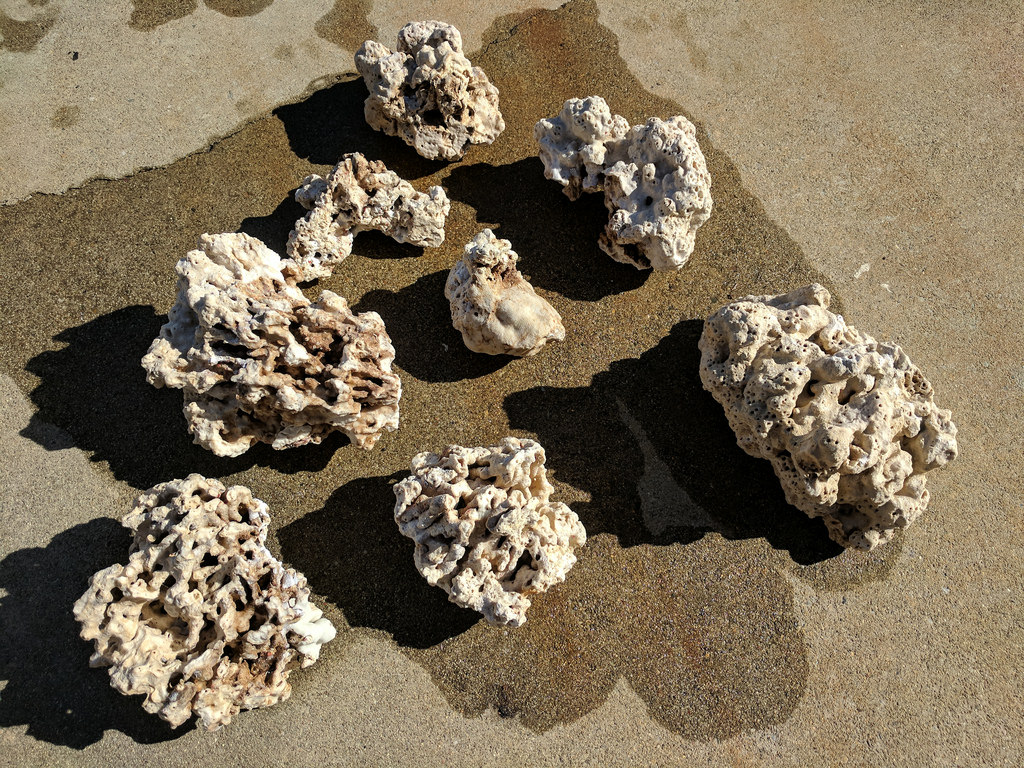
 
OP
OP
revnull

revnull

Active Member
View Badges
Joined
Oct 5, 2016
Messages
108
Reaction score
53
Location
Morgan Hill, Ca
Rating - 0%
0   0   0
Post from Dec 21, 2017:

Since this is the 2nd Red Sea fitting that I've cracked, I feel like the inside pressure (along with doing dumb things like I did) is it's achilles heal. I'm thinking of buying a 32mm slip x slip coupler to try and reinforce things from the outside. The outer diameter of the Red Sea fitting is just shy of 32mm. The OD of my 1-in spigot to 1-in barb is 33.3mm.

38333531885_bd172b40f2_b.jpg


If I sand down ~0.7mm of the circumference of my 1-in barbb (slip side), it should fit in to the 32mm coupler nicely and still leave plenty of "meat" for structural rigidity.

39182077172_3da3c9c31d_b.jpg
 
OP
OP
revnull

revnull

Active Member
View Badges
Joined
Oct 5, 2016
Messages
108
Reaction score
53
Location
Morgan Hill, Ca
Rating - 0%
0   0   0
Post from Dec 23, 2017:

Today is my first attempt un-breaking the bared fitting. I found that the inside diameter of the lasco 1 1/4-in female thread to 1-in barb adapter was a near perfect fit for the outer diameter of the Red Sea fitting. After a little loctite plastic epoxy I think I have a solid bond. I only have about a 1mm gap between the edge of the lasco adapter and the twist lock ring, but it still spins.

39220468712_d32432e320_b.jpg


An extra layer of epoxy along the inner seam will hopefully prevent any leaks.

38372347985_da26daac31_b.jpg
 
OP
OP
revnull

revnull

Active Member
View Badges
Joined
Oct 5, 2016
Messages
108
Reaction score
53
Location
Morgan Hill, Ca
Rating - 0%
0   0   0
Post from Jan 24, 2018:

I recently picked up a Skimz MBR127 algae reactor. Out of the box it runs a Skimz Quietpro 1.2 DC pump.

39885007901_c2cfeb0597_b.jpg


I wanted to see what it would take to run this reactor from my manifold and started to take things apart.

39885008701_1b5a256061_b.jpg


Based on the size of the pump hole a 1/2-in close nipple and 90 degree female thread to 1/2-in barbed adapter (found both in Home Depot sprinkler section) seems to fit nicely.

39885009011_c67d4ac450_b.jpg


39885009811_0e41c99415_b.jpg


Add a 1/2-in flexable elbow from my old TLF phosban reactor and we are ready to plumb.

39885010761_79c2b70927_b.jpg


39885011591_162e63b04b_b.jpg


Now I'm just waiting for my "clean" cheato from aglea barn to fire it up.
 
OP
OP
revnull

revnull

Active Member
View Badges
Joined
Oct 5, 2016
Messages
108
Reaction score
53
Location
Morgan Hill, Ca
Rating - 0%
0   0   0
Post from Feb 3, 2018:

My Algae Barn order showed up this week.

40069980691_294bf8e22e_b.jpg


The chaeto from Algea Barn lived up to it's name, it was very clean, but I do not recall my old chaeto ball being this brittle in my last tank.

40069973771_79a6d3192c_b.jpg


At night with the lights out, I dosed 1 bag of pods to the display and the other directly to the reactor. I let the pods marinate for about 30min before turning the main return pump back on.

40069974921_66934cc2f5_b.jpg


The next day, fully plumbed with the lights on.

39198581834_40358a5678_b.jpg


Today's project was increasing the size of my ATO container in preparation of an upcoming trip. I picked up a 50lb Vittles Vault from chewy.com that holds about 13 gallons of water. Using a stepper bit, I drilled a 3/4-in hole near the top for a BRS 1/4-in bulkhead. Using a nibbler, I cut a small channel for the PMUP power cord and rounded it out with a drill bit. This has the side benefit of allowing air into the container to break the vacuum.

40069976271_1c1681d5c4_b.jpg


40069977651_b13b045262_b.jpg


I installed a check valve to prevent back siphoning. Since the check creates a small mount of back pressure, I figured it would be better to locate it in the container with the PMUP where the head pressure is the strongest.

40069978671_7ae09c1973_b.jpg


All filled up and ready to rock. Next step is to install a level sensor (I still have 1 open port on my FMM) to notify me when I'm down to ~1/4 tank.

40069979551_8bb1919ef5_b.jpg
 
OP
OP
revnull

revnull

Active Member
View Badges
Joined
Oct 5, 2016
Messages
108
Reaction score
53
Location
Morgan Hill, Ca
Rating - 0%
0   0   0
Alright, that brings us up to today. Please feel free to comment or question on anything in past posts. I realize there are gaps and things I just forgot to post about. I'll try post more consistently moving forward.
 

Zack K

The Butterfly Guy
View Badges
Joined
Jan 6, 2017
Messages
2,354
Reaction score
2,228
Location
Wisconsin
Rating - 0%
0   0   0
I see clowns in that last picture... I think we need an updated Full tank shot, as well as a stocking list. Also what lights did you settle down on?
-Zack
 
OP
OP
revnull

revnull

Active Member
View Badges
Joined
Oct 5, 2016
Messages
108
Reaction score
53
Location
Morgan Hill, Ca
Rating - 0%
0   0   0
Current livestock list:
  • A mated pair of clowns (they were my first livestock purchase 12+ years ago; older than my children)
  • 2 Turbo Snails
  • 4 Scarlet Hermit Crabs
  • 1 Blood Shrimp
  • No corals in this tank, yet. (Sold off my softies 2 tanks ago when considering taking a break from the hobby)

As for the lights, I ended up keeping the AI Hydra 26HD (for now). I miss the shimmer and Apex integration of my Kessils, but while I FOLR, the Hydra is more than enough.

Current tank shots:

39184420045_0eccb7d03d_b.jpg


40050356052_37a47dc49a_b.jpg


Yes, Chia Homer made it into the scape. :) I drilled out a 2" hole in the back of his head to make another hiding spot for future fish.

40050357342_d3d6f39561_b.jpg


40083185181_dd07fec024_b.jpg


Side shot from my favorite chair (after dosing Alk, hence the cloud).

25210971347_b84fc76f3b_b.jpg
 
OP
OP
revnull

revnull

Active Member
View Badges
Joined
Oct 5, 2016
Messages
108
Reaction score
53
Location
Morgan Hill, Ca
Rating - 0%
0   0   0
This evening I spent some time preparing my BRS space saver containers for the day I finally decide on a doser (I'm open to suggestions based on personal experience). I picked up a length of 1/4-in ridged acrylic tubing from Tap Plastics and cut a 13.5-in section with a small pipe cuter.

28308975289_b49dcd8e6c_b.jpg


28308976789_05f22a777e_b.jpg


Using a stepper drill bit and BRS 1/4-in bulkheads, I drilled the caps and assembled all the parts.

28308972589_a19b1d02b3_b.jpg


It all came together nicely if I do say so myself. :)

28308973919_e35c6a08a9_b.jpg
 
OP
OP
revnull

revnull

Active Member
View Badges
Joined
Oct 5, 2016
Messages
108
Reaction score
53
Location
Morgan Hill, Ca
Rating - 0%
0   0   0
Sorry, a couple more blasts from the past.

Post from Dec 30, 2016:

Today, I decided to up my water change game.

Step 1 was to add a 2nd RO/DI chamber to ensure absolute 0 TDS.

31878435521_ef103e5e7a_b.jpg


Step 2, install and plumb a new 35 gallon norwesco holding tank from Tractor Supply in Gilroy.

31185549873_b3f8f2dd9b_b.jpg


I added a 3/4" 90 degree threaded street elbow as a "pickup" tube so i can drain the tank to as close to bottom as possible.

31957674856_e6bdb5f0b5_b.jpg


My float valve mounted near the neck of the main opening so I can make fine adjustments without dunking my arm in the tank.

31185551803_0831807d01_b.jpg


31995372405_4a65725923_b.jpg


3/4" street elbow -> ball valve -> union -> barb. Still need to find some good flexible hose to finish it all up.

31154931814_c3689ce113_b.jpg


Just a little sharpie to highlight the raised numbers. Not sure why it doesn't come like this from the manufacturer.

31979519076_ec02a7041f_b.jpg


A few small updates to my RO/DI water setup. Swapped my ball valve for a stop valve. It gives me a little better control of the flow without the added height of a full gate valve.

31250762354_dd4c9ebe62_b.jpg


Decided to try a couple of flexible sprinkler hoses for my fill hose. I'm getting a few drips of a leak at the coupler in the middle. Not sure why. I may just switch back to a 3/4" barb and flexible bilge tubing.

31250775994_000afd47e1_b.jpg


I re-plumbed my RO/DI setup to separate the RO from the DI section. The old setup used a 4 canister bracket with a single bracket add on. After bit of reading, I moved my pressure gauge between my stage 3 carbon block and my RO membrane input line. Not sure why it was not plumbed like this to begin with, but I bought the system a decade ago so who knows. Now the RO stages are on a more compact 3 canister bracket and my dual DI stages and new TDS meter are on a separate 2 canister bracket. Small changes, but I like the way it all turned out.

31435985194_3d9f190894_b.jpg
 
Last edited:
OP
OP
revnull

revnull

Active Member
View Badges
Joined
Oct 5, 2016
Messages
108
Reaction score
53
Location
Morgan Hill, Ca
Rating - 0%
0   0   0
Post from Feb 12, 2017:

Picked up a new (to me) toy. A friend of mine gave me a great deal on his extra Amcrest PTZ IP camera. It lived on a tripod for a few days until I picked up this suction cup mount today.

32696782202_c1125b26c9_b.jpg


Anyone want to take bets on how long it will take to fall off? :)

32850373265_94cf3ef134_b.jpg
 
Last edited:

revhtree

Owner Administrator
View Badges
Joined
May 8, 2006
Messages
47,787
Reaction score
87,409
Rating - 100%
1   0   0
Glad to have you documenting your build here!
 
OP
OP
revnull

revnull

Active Member
View Badges
Joined
Oct 5, 2016
Messages
108
Reaction score
53
Location
Morgan Hill, Ca
Rating - 0%
0   0   0
Just a few days after I added my cheato, pods and started dosing live phyto, I start getting hazy/green water with TONS of film algae on the glass. It was so bad that about an hour after cleaning my glass, is was covered once again. All of my water params are good, but I performed a 20% water change anyway. Still no luck. After reading about others with similar issues, I decided to dust off my old Turbo Twist 6x UV sterilizer. This thing has been through hell, epoxied case that leaks a little, been installed on tanks and ponds for different family members. It's almost a family heirloom. :)

I hacked together quick and dirty plumbing that attached it to my return manifold. Then rigid plumbing on the output that flows directly into my 100 micron filter sock.

26279977938_31dc7b12a7_b.jpg


Its been running for about 12hrs so far and the water is MUCH better. (Sorry, no before pic)

40123828342_1b02fef5eb_b.jpg


Another interesting side effect of adding the UV was an increase in pH. Not sure why.

39254565485_319d647c7a_o.png


This bout with algae blooms has me thinking I should add a permanent UV sterilizer to my setup. Does anyone have an opinion one way or the other? Do modern sterilizers use LEDs now? Seems silly to burn 20w of power on fluorescent since LED technology has advanced so quickly in the last few years.
 

Kayzah

Community Member
View Badges
Joined
Feb 1, 2016
Messages
70
Reaction score
28
Rating - 0%
0   0   0
That build is just awesome!!! Congrats

Following with a close eye.
 
OP
OP
revnull

revnull

Active Member
View Badges
Joined
Oct 5, 2016
Messages
108
Reaction score
53
Location
Morgan Hill, Ca
Rating - 0%
0   0   0
So about 60hrs after adding UV, my water is near crystal clear. :)

39477733864_ec1dafb240_b.jpg


Skimming has been extra wet for the past couple of days. I assume its been picking up the die off of whatever was clouding the water. Next step is a full set of parameter tests to see if my water chemistry was adversely affected by this bloom.
 
Last edited:

Eggpaul

Well-Known Member
View Badges
Joined
Feb 15, 2018
Messages
504
Reaction score
248
Rating - 0%
0   0   0
Post from Oct 1, 2017:

After a 40 hour bleach soak and a power wash.

23591169308_462cc1eea2_b.jpg


After the power wash, I let the rock dry in the sun for a few hours. I dumped the bleach water, gave the trash can a good rinse and scrub. Filled back up with fresh tap water and a double dose of Prime. I'll let that stew for a few days then rinse and repeat with RO/DI + Prime.
Nice. I got some used reefsaver rock, "power washed" it with a hose on the jet setting, and soaked it in bleach/water for 10 days. The rocks looks amazing now! but it smells like a swimming pool. I dumped the water and soaked it in RO-DI water for a day. dumped that, then added tap water with a decholrinator. smells a little less like a pool now, but I'm soaking it in RO-DI water again. After that should I just let it dry outside and I should be good?
 
OP
OP
revnull

revnull

Active Member
View Badges
Joined
Oct 5, 2016
Messages
108
Reaction score
53
Location
Morgan Hill, Ca
Rating - 0%
0   0   0
If I recall, I did 3 100% water changes. Each with a triple dose of Prime. They still had a slight bleach smell untill after they dried in the sun. I think the remaining bleach gasses off while drying.
 
OP
OP
revnull

revnull

Active Member
View Badges
Joined
Oct 5, 2016
Messages
108
Reaction score
53
Location
Morgan Hill, Ca
Rating - 0%
0   0   0
Today I added a new optical level sensor to my top off reservoir.

39779737704_b3c72b8e3d_b.jpg


I used an old magnetic single probe holder that seems very similar to the one that ships with the other version of the stand alone sensor saving me $10. (I probably paid more than $10 for that probe holder years ago. :) )

26619061148_3505b60060_b.jpg


Oddly, when I plugged in the new optical sensor it was recognized as a flow sensor. I re-inserted the cable into the FMM and it was then correctly identified as an optical sensor. All good, except the state of the sensor was stuck in the "Open" state despite being in or out of the water. Several more inserts ans reboots later, still no luck. The solution I found was to reconfigure the FMM module. I disabled "auto detection" on the port and made sure it was set to "Optical Sensor". For whatever reason this fixed my issue. I'm guessing, the auto detection in the FMM firmware is still a little buggy.

26619059218_3ca7522cf5_z.jpg
 

Creating a strong bulwark: Did you consider floor support for your reef tank?

  • I put a major focus on floor support.

    Votes: 53 40.2%
  • I put minimal focus on floor support.

    Votes: 27 20.5%
  • I put no focus on floor support.

    Votes: 48 36.4%
  • Other.

    Votes: 4 3.0%
Back
Top