HELP!!!!! I cannot keep a consistent water level in my tank!

NalonT

Community Member
View Badges
Joined
Jan 15, 2019
Messages
82
Reaction score
31
Rating - 0%
0   0   0
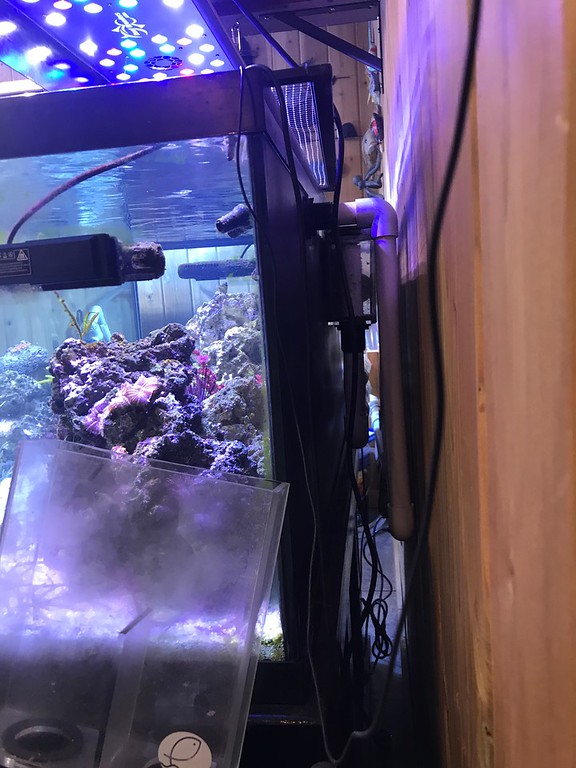
I am lost. I have a 100g Mode Infintiy Aquarium. It has a ghost overflow. It’s an awesome tank but for about the past 2-3 months I’ve not been able to keep a consistent water level. The tank has a gate valve and I try to adjust that but the swing of the water level is huge. The level will be super low so I would adjust the gate valve just a tiny bit and walk away. When I would come back, the water level in the overflow would be almost to the top of the emergency overflow. When the water is too high, my ATO empties into my tank. When it’s too low, the skimmer would go insane. Has anyone had this issue and does anyone know a solution? Im losing grip of my levels because of this. My salinity swings because of the RO being dumped in. Thank you for any help. Thank you.
 
OP
OP
NalonT

NalonT

Community Member
View Badges
Joined
Jan 15, 2019
Messages
82
Reaction score
31
Rating - 0%
0   0   0
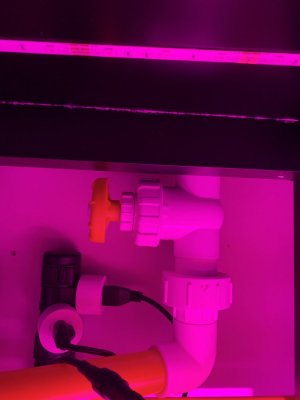
The company actually sent me a replacement so I changed the old one out and cleaned the plumbing. It worked for about 3-4 days but then went back to this

E0836F63-24F8-4C2A-84FD-619A39EF7DE3.jpeg
 

PPPPPP42

Community Member
View Badges
Joined
Jan 18, 2020
Messages
54
Reaction score
88
Rating - 0%
0   0   0
I had to actually look the tank up to see how that setup works.

Can you get a better picture of whatever is on top of the pipe with the gate valve in it? I looked at the pics on their website but the view is blocked, it looks like some sort of white cap or something, I see the emergency pipe has an open top from their pics.
Mine is a totally different setup but it has a U shaped pipe on top of the return pipe (the one with the valve on yours) and the factory didn't completely drill through a little vent hole on the top of the U so it was able to build up a vaccuum and do some really weird annoying things that messed the flow all up until I figured that out. So investigating whatever that part is on yours might tell you something. You could temporarily totally remove the top piece if it isnt glued on and see if it fixes it, then work out what the issue is.

2nd guess:
Assuming the pump is sized correctly can the speed be adjusted more? You might just need to balance things out.
 

Greg P

Valuable Member
View Badges
Joined
Oct 4, 2019
Messages
2,038
Reaction score
1,797
Location
Burnaby BC
Rating - 0%
0   0   0
When you say you adjust the gate valve just a tiny bit, I think of mine where I do only about a 1/8 turn or less, but mine's a different brand.
Sounds like your valve has less turns to require full open-close travel and you need to turn it even less per adjustment.
Try turning it even less and see what happens.
 

Greg P

Valuable Member
View Badges
Joined
Oct 4, 2019
Messages
2,038
Reaction score
1,797
Location
Burnaby BC
Rating - 0%
0   0   0
I had to actually look the tank up to see how that setup works.

Can you get a better picture of whatever is on top of the pipe with the gate valve in it? I looked at the pics on their website but the view is blocked, it looks like some sort of white cap or something, I see the emergency pipe has an open top from their pics.
Mine is a totally different setup but it has a U shaped pipe on top of the return pipe (the one with the valve on yours) and the factory didn't completely drill through a little vent hole on the top of the U so it was able to build up a vaccuum and do some really weird annoying things that messed the flow all up until I figured that out. So investigating whatever that part is on yours might tell you something. You could temporarily totally remove the top piece if it isnt glued on and see if it fixes it, then work out what the issue is.

2nd guess:
Assuming the pump is sized correctly can the speed be adjusted more? You might just need to balance things out.
Didn't realize your unit was a 'built' system.
Go with the above advice first
 
OP
OP
NalonT

NalonT

Community Member
View Badges
Joined
Jan 15, 2019
Messages
82
Reaction score
31
Rating - 0%
0   0   0
I had to actually look the tank up to see how that setup works.

Can you get a better picture of whatever is on top of the pipe with the gate valve in it? I looked at the pics on their website but the view is blocked, it looks like some sort of white cap or something, I see the emergency pipe has an open top from their pics.
Mine is a totally different setup but it has a U shaped pipe on top of the return pipe (the one with the valve on yours) and the factory didn't completely drill through a little vent hole on the top of the U so it was able to build up a vaccuum and do some really weird annoying things that messed the flow all up until I figured that out. So investigating whatever that part is on yours might tell you something. You could temporarily totally remove the top piece if it isnt glued on and see if it fixes it, then work out what the issue is.

2nd guess:
Assuming the pump is sized correctly can the speed be adjusted more? You might just need to balance things out.
 

WVNed

The fish are staring at me with hungry eyes.
View Badges
Joined
Apr 11, 2018
Messages
10,206
Reaction score
43,616
Location
Hurricane, WV
Rating - 0%
0   0   0
You would have to change a few things to make that work. It's ok if a tiny bit of water goes down the emergency overflow.
I just watched the video on youtube about your tank and the drains are too high.
The top of the emergency drain should be approximately level with the bottom of the weir teeth. The other drain should be a full siphon drain controlled with a valve.
The tank in the video had the same water level in the overflow box as the tank. If you do that you get what is happening to you. Minor changes in the water level of the overflow box are actually changing how much water is in the tank. You have no control.


If you dont want to mess with the stock stuff get a piece of PVC pipe that fits in the bulkheads in the overflow box.

Turn off the ATO

Turn off your return pump. Careful you dont overflow your sump. Your ATO has been adding extra water.

Open the valve on the overflow all the way.

Cut a piece of PVC pipe so that when installed as the emergency drain it is slightly lower than the bottom of the weir teeth.

Take the stuff out of the other drain, the one with the valve from inside the overflow box. Leave it out for now.

Start the return pump. Water should fill the tank and enter the overflow and go straight back down through the drain with the open valve. Probably very noisily. Slowly close the valve. At some point the water should start to rise in the overflow box. It may surge a bit. If it does close it a tiny bit more. You want this drain to go to full siphon and purge all the air. Now you have control of the flow through the box with the valve. Close the valve in tiny increments until the water rises to the level of the emergency drain. Let a tiny trickle go down it.
You should have a correctly functioning silent overflow at this time.

You do not want an emergency drain that is so high that it backs up water into the display before it works.

If you want to change the level a bit in the overflow you put a new piece of PVC in the emergency drain, either longer or shorter. This will give you control over the water level in the overflow box and at the same time the water level in the display tank.

Where you want it exactly will depend on the weir teeth and how big your return pump is.

Gee, that's a lot of words.
In short. You want 98% of the water to go dawn a full siphon drain with a valve. The other 2% goes down a standpipe that also sets the water level in the overflow box.

Like this. Except I have 2 full siphon drains and 2 emergency drains. Lots of water flows through this box


The 2 drain version on my 75 gallon tank
IMG_1840-XL.jpg
 
OP
OP
NalonT

NalonT

Community Member
View Badges
Joined
Jan 15, 2019
Messages
82
Reaction score
31
Rating - 0%
0   0   0
I’ll grab a pic tomorrow. It’s just a cap with a vent hole in the top and an opening on the side. I was thinking the same thing though about taking the cap off.
I’ve also adjusted the return pump like crazy. It’s definitely the right size. I actually bought a new return pump thinking that was the issue but it still continued
 
OP
OP
NalonT

NalonT

Community Member
View Badges
Joined
Jan 15, 2019
Messages
82
Reaction score
31
Rating - 0%
0   0   0
I
Didn't realize your unit was a 'built' system.
Go with the above advice first

Yeah. It comes with everything pre cut and somewhat ready to go. I’ve spoken to many people with the same tank and no one else has this issue. It’s really odd
 
Last edited:

stacksoner

Well-Known Member
View Badges
Joined
Jul 29, 2018
Messages
810
Reaction score
1,163
Rating - 0%
0   0   0
Have you tried closing it all the way and opening it with microadjustments in 30-45 second intervals? It works for the same issue on Reefer tanks
 
OP
OP
NalonT

NalonT

Community Member
View Badges
Joined
Jan 15, 2019
Messages
82
Reaction score
31
Rating - 0%
0   0   0
You would have to change a few things to make that work. It's ok if a tiny bit of water goes down the emergency overflow.
I just watched the video on youtube about your tank and the drains are too high.
The top of the emergency drain should be approximately level with the bottom of the weir teeth. The other drain should be a full siphon drain controlled with a valve.
The tank in the video had the same water level in the overflow box as the tank. If you do that you get what is happening to you. Minor changes in the water level of the overflow box are actually changing how much water is in the tank. You have no control.


If you dont want to mess with the stock stuff get a piece of PVC pipe that fits in the bulkheads in the overflow box.

Turn off the ATO

Turn off your return pump. Careful you dont overflow your sump. Your ATO has been adding extra water.

Open the valve on the overflow all the way.

Cut a piece of PVC pipe so that when installed as the emergency drain it is slightly lower than the bottom of the weir teeth.

Take the stuff out of the other drain, the one with the valve from inside the overflow box. Leave it out for now.

Start the return pump. Water should fill the tank and enter the overflow and go straight back down through the drain with the open valve. Probably very noisily. Slowly close the valve. At some point the water should start to rise in the overflow box. It may surge a bit. If it does close it a tiny bit more. You want this drain to go to full siphon and purge all the air. Now you have control of the flow through the box with the valve. Close the valve in tiny increments until the water rises to the level of the emergency drain. Let a tiny trickle go down it.
You should have a correctly functioning silent overflow at this time.

You do not want an emergency drain that is so high that it backs up water into the display before it works.

If you want to change the level a bit in the overflow you put a new piece of PVC in the emergency drain, either longer or shorter. This will give you control over the water level in the overflow box and at the same time the water level in the display tank.

Where you want it exactly will depend on the weir teeth and how big your return pump is.

Gee, that's a lot of words.
In short. You want 98% of the water to go dawn a full siphon drain with a valve. The other 2% goes down a standpipe that also sets the water level in the overflow box.

Like this. Except I have 2 full siphon drains and 2 emergency drains. Lots of water flows through this box


The 2 drain version on my 75 gallon tank
IMG_1840-XL.jpg


I was actually just reading about this earlier this evening and was wondering if they were too long. I was reading to do what you said with the emergency and have the other drain about 6” lower. It makes sense so I think I’m going to try this for sure. I’ll probably head to Home Depot tomorrow and grab some pvc to test it on. Really appreciate this and everyone’s responses.
 
OP
OP
NalonT

NalonT

Community Member
View Badges
Joined
Jan 15, 2019
Messages
82
Reaction score
31
Rating - 0%
0   0   0
Have you tried closing it all the way and opening it with microadjustments in 30-45 second intervals? It works for the same issue on Reefer tanks

I’ve opened and closed it multiple times. Probably not in those increments but still not much luck. I do think the pvc pipes are too long in there after doing some more research.
 
OP
OP
NalonT

NalonT

Community Member
View Badges
Joined
Jan 15, 2019
Messages
82
Reaction score
31
Rating - 0%
0   0   0
What @WVNed said will work perfectly for you. Easy fix.

thanks for the reassurance. When I read about this, it sounded good but I was hesitant to start cutting pvc. I’m newer to a sump tank so I’ve been lost. It’s nice to hear you both recommending to do this so I definitely feel more confident now.
 

stacksoner

Well-Known Member
View Badges
Joined
Jul 29, 2018
Messages
810
Reaction score
1,163
Rating - 0%
0   0   0
You would have to change a few things to make that work. It's ok if a tiny bit of water goes down the emergency overflow.
I just watched the video on youtube about your tank and the drains are too high.
The top of the emergency drain should be approximately level with the bottom of the weir teeth. The other drain should be a full siphon drain controlled with a valve.
The tank in the video had the same water level in the overflow box as the tank. If you do that you get what is happening to you. Minor changes in the water level of the overflow box are actually changing how much water is in the tank. You have no control.


If you dont want to mess with the stock stuff get a piece of PVC pipe that fits in the bulkheads in the overflow box.

Turn off the ATO

Turn off your return pump. Careful you dont overflow your sump. Your ATO has been adding extra water.

Open the valve on the overflow all the way.

Cut a piece of PVC pipe so that when installed as the emergency drain it is slightly lower than the bottom of the weir teeth.

Take the stuff out of the other drain, the one with the valve from inside the overflow box. Leave it out for now.

Start the return pump. Water should fill the tank and enter the overflow and go straight back down through the drain with the open valve. Probably very noisily. Slowly close the valve. At some point the water should start to rise in the overflow box. It may surge a bit. If it does close it a tiny bit more. You want this drain to go to full siphon and purge all the air. Now you have control of the flow through the box with the valve. Close the valve in tiny increments until the water rises to the level of the emergency drain. Let a tiny trickle go down it.
You should have a correctly functioning silent overflow at this time.

You do not want an emergency drain that is so high that it backs up water into the display before it works.

If you want to change the level a bit in the overflow you put a new piece of PVC in the emergency drain, either longer or shorter. This will give you control over the water level in the overflow box and at the same time the water level in the display tank.

Where you want it exactly will depend on the weir teeth and how big your return pump is.

Gee, that's a lot of words.
In short. You want 98% of the water to go dawn a full siphon drain with a valve. The other 2% goes down a standpipe that also sets the water level in the overflow box.

Like this. Except I have 2 full siphon drains and 2 emergency drains. Lots of water flows through this box


The 2 drain version on my 75 gallon tank
IMG_1840-XL.jpg


Incredible. This sounds like a major design flaw, which is not something we normally think about. Reminds me of this ozone reactor I bought from Atomic Reactors. I drove myself bananas trying to figure out why I couldn't get water to flow through it. A physics professor at the University of Miami explained to me that the design required a pump with an impossible flow rate to make it work.
 

WVNed

The fish are staring at me with hungry eyes.
View Badges
Joined
Apr 11, 2018
Messages
10,206
Reaction score
43,616
Location
Hurricane, WV
Rating - 0%
0   0   0
The valve won't do much until you get to a certain point restricting the flow. Then 1/16th of a turn will change the flow a lot and make the water go up and down in the overflow.
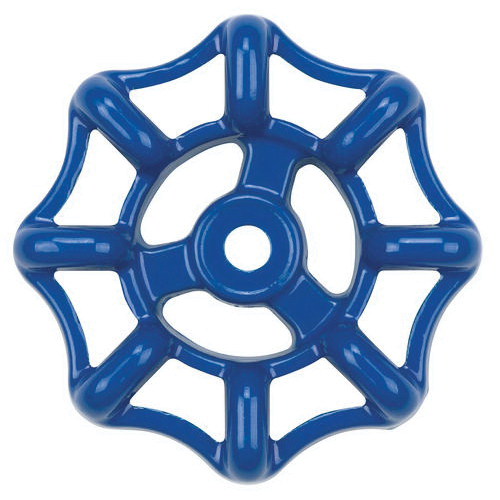
My handles look something like this
serveimage

Imagine a pointer right at the top. I adjust in increments of from bump to valley. Even finer once you have it close to perfect. I also mark the right spot at the top with a sharpie so I dont lose it. It will change a bit over time but it still gives you a good place to start if you have to open or close the valve all the way for some reason.
 

Osric

Community Member
View Badges
Joined
Jan 12, 2020
Messages
33
Reaction score
69
Rating - 0%
0   0   0
I think that @WVNed's fix will also work for a day or two without replacing the emergency drain. Your water level will be higher than you want it, but done right the full siphon will keep the level exactly at the top of the emergency drain. You could play with this tonight and buy your new standpipe tomorrow.

If it was me, I'd remove the siphon standpipe as recommended, and then set the gate valve closed enough that the water level is rising. Once it's about halfway up the overflow, open it up until you can see the water level very slowly falling. Then absolutely tiny turns to tighten it up until you're not sure if the water is level or rising. If you can barely perceive the rise or fall over the course of 5 minutes you're probably close to good, and once it's rising super slowly you can wait for it to reach the emergency standpipe and the water level will stop there and stay there. Then tomorrow you can briefly turn off the pump, remove the emergency standpipe and replace it with the valves closed, and then turn on again to perfect at the wier water level in the display.
 

WVNed

The fish are staring at me with hungry eyes.
View Badges
Joined
Apr 11, 2018
Messages
10,206
Reaction score
43,616
Location
Hurricane, WV
Rating - 0%
0   0   0
I think that @WVNed's fix will also work for a day or two without replacing the emergency drain. Your water level will be higher than you want it, but done right the full siphon will keep the level exactly at the top of the emergency drain. You could play with this tonight and buy your new standpipe tomorrow.

If it was me, I'd remove the siphon standpipe as recommended, and then set the gate valve closed enough that the water level is rising. Once it's about halfway up the overflow, open it up until you can see the water level very slowly falling. Then absolutely tiny turns to tighten it up until you're not sure if the water is level or rising. If you can barely perceive the rise or fall over the course of 5 minutes you're probably close to good, and once it's rising super slowly you can wait for it to reach the emergency standpipe and the water level will stop there and stay there. Then tomorrow you can briefly turn off the pump, remove the emergency standpipe and replace it with the valves closed, and then turn on again to perfect at the wier water level in the display.

As long as there is not too much water in the system you can turn off the ATO and then you can put in and take out the standpipe while everything runs. It will drain down when you remove it and go back up when you replace it. Once you get the overflow settled in you turn the return pump off and set your maximum sump level where you want it. Then you turn it all on and set your ato sensor and turn it back on.

Then you correct your salinity and you are done.
 
OP
OP
NalonT

NalonT

Community Member
View Badges
Joined
Jan 15, 2019
Messages
82
Reaction score
31
Rating - 0%
0   0   0
The valve won't do much until you get to a certain point restricting the flow. Then 1/16th of a turn will change the flow a lot and make the water go up and down in the overflow.
My handles look something like this
serveimage

Imagine a pointer right at the top. I adjust in increments of from bump to valley. Even finer once you have it close to perfect. I also mark the right spot at the top with a sharpie so I dont lose it. It will change a bit over time but it still gives you a good place to start if you have to open or close the valve all the way for some reason.

Because if you’re reply, I believe I might have switched some pvc around when assembling the plumbing. The one thing the tank did not come with was instructions or a go by for setting up the plumbing. I was just talking to someone with the 75g version of my tank and he sent me some pics of his overflow. The emergency pipe is definitely lower than mine. His siphoning drain is just a little lower than the mergency but it seems to work well for him. I’ll definitely be trimming the emergency drain tomorrow. Thanks again!
 
Back
Top