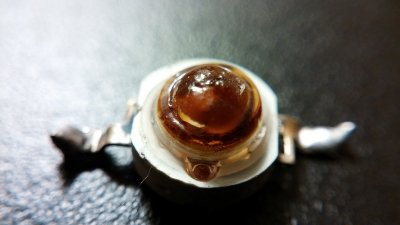
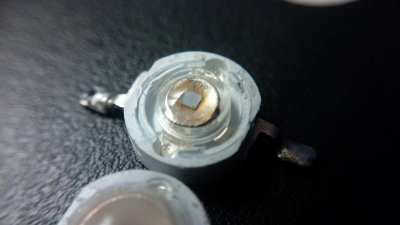
LED Diode Replacement – Instructional Article

OP
OP
ihavecrabs

ihavecrabs

2500 Club Member
View Badges
Joined
Nov 25, 2014
Messages
2,792
Reaction score
3,679
Location
Illinois
Rating - 0%
0   0   0
Excellent tuto...
I got few questions. I got a JBJ canopy that I want to repurpose. But 4 of the 5 strips don't light up. I already checked the board where it connect each strip with the one that light up. And all the channel works. How can I identify the diode that might be causing the strip not to light? Or it could be something else? How can I diagnosed the posible cause of not lighting it up?

Hey Gino!

Sorry for the delay. It sounds as if you might have a few dead LED's causing the strips to not light up. My recommendation would be to pick up a cheap 2-AA battery holder and solder to leads off of the pack. One on the positive and the other on the negative. Keep in mind to try to match the voltage as close as possible to what each LED would be driven with.

Once you have done that, I would go through each one matching up the positive and negative terminals from the pack with the LED on the board to see which fire up and which ones are dead.

Hope this helps!
 

Gino

Active Member
View Badges
Joined
Jan 31, 2016
Messages
390
Reaction score
344
Location
Tampa, Florida
Rating - 0%
0   0   0
]Hey Gino!

Sorry for the delay. It sounds as if you might have a few dead LED's causing the strips to not light up. My recommendation would be to pick up a cheap 2-AA battery holder and solder to leads off of the pack. One on the positive and the other on the negative. Keep in mind to try to match the voltage as close as possible to what each LED would be driven with.

Once you have done that, I would go through each one matching up the positive and negative terminals from the pack with the LED on the board to see which fire up and which ones are dead.

Hope thi
Hey Gino!

Sorry for the delay. It sounds as if you might have a few dead LED's causing the strips to not light up. My recommendation would be to pick up a cheap 2-AA battery holder and solder to leads off of the pack. One on the positive and the other on the negative. Keep in mind to try to match the voltage as close as possible to what each LED would be driven with.

Once you have done that, I would go through each one matching up the positive and negative terminals from the pack with the LED on the board to see which fire up and which ones are dead.

Hope this helps!

Thanks for your time. I would do that. Probably on the weekend and let you know how it went.
 

kecked

Active Member
View Badges
Joined
Dec 9, 2017
Messages
380
Reaction score
218
Rating - 0%
0   0   0
You all had better read my post.....

If you put a diode in that doesn’t require the same or more current rating or has a different forward voltage and is in a string, you will burn the new diode out or it will not work at all. You have to match current rating and voltage. If the diode is by itself on the driver you can just worry about the current and not the forward voltage. Here’s where it might be a problem. You put a blue in place of a red. You place a diode with an array in where a single was before....etc.... most drivers are adjustable for current. The voltage adjust on its own but they need to have a certain minimum.

Red 3v
Blue green 6-8v. Can work on 5 sometimes.
 

kecked

Active Member
View Badges
Joined
Dec 9, 2017
Messages
380
Reaction score
218
Rating - 0%
0   0   0
Hey Gino!

Sorry for the delay. It sounds as if you might have a few dead LED's causing the strips to not light up. My recommendation would be to pick up a cheap 2-AA battery holder and solder to leads off of the pack. One on the positive and the other on the negative. Keep in mind to try to match the voltage as close as possible to what each LED would be driven with.

Once you have done that, I would go through each one matching up the positive and negative terminals from the pack with the LED on the board to see which fire up and which ones are dead.

Hope this helps!
God no! You must use current limiting. If you give diode raw voltage the current will run away and damage the diode. You might get away with it but it’s not good practice. Buy a driver and set the current low around 200ma. That is plenty to test. This will regulated both the current and voltage. You should separate the string from the driver it’s hooked too.

If you must cheat at least do this. Put four AA is series and add a 22 or 33 ohm resistor. This will limit the current to about 250 ma. You need the 6v. To drive most blue or white leds.
 
OP
OP
ihavecrabs

ihavecrabs

2500 Club Member
View Badges
Joined
Nov 25, 2014
Messages
2,792
Reaction score
3,679
Location
Illinois
Rating - 0%
0   0   0
You all had better read my post.....

If you put a diode in that doesn’t require the same or more current rating or has a different forward voltage and is in a string, you will burn the new diode out or it will not work at all. You have to match current rating and voltage. If the diode is by itself on the driver you can just worry about the current and not the forward voltage. Here’s where it might be a problem. You put a blue in place of a red. You place a diode with an array in where a single was before....etc.... most drivers are adjustable for current. The voltage adjust on its own but they need to have a certain minimum.

Red 3v
Blue green 6-8v. Can work on 5 sometimes.
God no! You must use current limiting. If you give diode raw voltage the current will run away and damage the diode. You might get away with it but it’s not good practice. Buy a driver and set the current low around 200ma. That is plenty to test. This will regulated both the current and voltage. You should separate the string from the driver it’s hooked too.

If you must cheat at least do this. Put four AA is series and add a 22 or 33 ohm resistor. This will limit the current to about 250 ma. You need the 6v. To drive most blue or white leds.
Thanks for the details! I'll get the posts updated to match it.
 

redfishbluefish

Stay Positive, Stay Productive
View Badges
Joined
Mar 22, 2012
Messages
11,705
Reaction score
25,724
Location
Sayreville, NJ
Rating - 0%
0   0   0
Very nice write up. Well thought out and organized. Having done a number of LED jobs, I looked for errors and omissions :rolleyes:.....none. :cool: Again, fantastic instructions to replace LED's. I will definitely be referencing this article.


However I do have a question. For the life of me I have difficulty with those LED's that use thermal adhesive. By the time I get done removing them, they are in ten pieces, and the board looks like a mess. Do you have any tips or tricks in removing thermal adhesive LEDs?

And finally, if someone does not feel comfortable in doing this DIY, but has a board that is need of repair, SB Reef Lights sells an entire board for $70....simply plug it in and you're ready to go. Note that this board does not fit the older light boxes that have the large tapered sides.
 

redfishbluefish

Stay Positive, Stay Productive
View Badges
Joined
Mar 22, 2012
Messages
11,705
Reaction score
25,724
Location
Sayreville, NJ
Rating - 0%
0   0   0
There is thermal grease and thermal adhesive. I know first hand Fathom LEDs have adhesive. You have to chisel them off. I don't know what thermal adhesive they use, but here's an example from Arctic Silver (who also makes grease.)
 

reeferfoxx

5000 Club Member
View Badges
Joined
Sep 8, 2015
Messages
6,514
Reaction score
6,511
Rating - 0%
0   0   0
I know first hand Fathom LEDs have adhesive.
Oh ok. So you are talking about the same 1w-3w epistar/bridgelux chips. That kind of bites they used thermal adhesive. Arctic Silver 5 compound is what I use for my chip. It doesnt crust up like that.

I asked because I thought you were talking about Cree or Osram chip that require a heat plate or flap jack iron.
 

redfishbluefish

Stay Positive, Stay Productive
View Badges
Joined
Mar 22, 2012
Messages
11,705
Reaction score
25,724
Location
Sayreville, NJ
Rating - 0%
0   0   0
This is one of the better looking UV chips I chiseled out of the Fathom Hydra fixture.

LED Broken.JPG
 

reeferfoxx

5000 Club Member
View Badges
Joined
Sep 8, 2015
Messages
6,514
Reaction score
6,511
Rating - 0%
0   0   0
This is one of the better looking UV chips I chiseled out of the Fathom Hydra fixture.

LED Broken.JPG
:eek:

FWIW, with those UV chips, I've been decapping the secondary 120deg lens thats glue to them. They seem to last much longer that way. Actually, I don't want to toot my horn to quick in that regard. As of yet no issues without the secondary lens.
 

redfishbluefish

Stay Positive, Stay Productive
View Badges
Joined
Mar 22, 2012
Messages
11,705
Reaction score
25,724
Location
Sayreville, NJ
Rating - 0%
0   0   0
It's my understanding the UV's don't last long anyway....it's the weak link. Of the nine Fathom fixtures I fixed, it was the UV bead that went bad, putting out the whole string. In some cases that bead lasted about a year.

When you say decapping, are you talking about simply leaving off the lense? It's my understanding that the "scatter" lenses on UV chips are critical is scattering that UV. Here's what a UV scatter lens looks like:

UV scatter Lens.jpg
 

reeferfoxx

5000 Club Member
View Badges
Joined
Sep 8, 2015
Messages
6,514
Reaction score
6,511
Rating - 0%
0   0   0
It's my understanding the UV's don't last long anyway....it's the weak link. Of the nine Fathom fixtures I fixed, it was the UV bead that went bad, putting out the whole string. In some cases that bead lasted about a year.

When you say decapping, are you talking about simply leaving off the lense? It's my understanding that the "scatter" lenses on UV chips are critical is scattering that UV. Here's what a UV scatter lens looks like:

UV scatter Lens.jpg
No i'm talking about the secondary lens on the chip itself.

Before
20170605_210104.jpg

After
20180111_184323.jpg
 

redfishbluefish

Stay Positive, Stay Productive
View Badges
Joined
Mar 22, 2012
Messages
11,705
Reaction score
25,724
Location
Sayreville, NJ
Rating - 0%
0   0   0
I wonder if that helps in keeping the chip that much cooler? Although your before picture looks like that lens is cooked anyway.
 

reeferfoxx

5000 Club Member
View Badges
Joined
Sep 8, 2015
Messages
6,514
Reaction score
6,511
Rating - 0%
0   0   0
I wonder if that helps in keeping the chip that much cooler? Although your before picture looks like that lens is cooked anyway.
UV cooks the lens. I've tried everything to keep it from happening. It wasnt until I decapped it that I didnt have the issue.
 

redfishbluefish

Stay Positive, Stay Productive
View Badges
Joined
Mar 22, 2012
Messages
11,705
Reaction score
25,724
Location
Sayreville, NJ
Rating - 0%
0   0   0
Interesting. Here's the board from a Fathom with D2 and D5 the UV chips. This is before I did the fix on D5, which was the problem bead. D2 was still working. Notice no browned lenses on either one.

Fathom LED board.JPG
 

reeferfoxx

5000 Club Member
View Badges
Joined
Sep 8, 2015
Messages
6,514
Reaction score
6,511
Rating - 0%
0   0   0
Interesting. Here's the board from a Fathom with D2 and D5 the UV chips. This is before I did the fix on D5, which was the problem bead. D2 was still working. Notice no browned lenses on either one.

Fathom LED board.JPG
Yep, I've heard of people not having the issue I am having. However, I've yet to find any iron clad UV chips that don't do it on my board.
 

reeferfoxx

5000 Club Member
View Badges
Joined
Sep 8, 2015
Messages
6,514
Reaction score
6,511
Rating - 0%
0   0   0
BTW I'm talking about the 385nm-395nm UV. My 410 and 420nm don't do it.
 

redfishbluefish

Stay Positive, Stay Productive
View Badges
Joined
Mar 22, 2012
Messages
11,705
Reaction score
25,724
Location
Sayreville, NJ
Rating - 0%
0   0   0
That must be it.....original specs on Fathom UV's, 415-420 nm, and that's what I sourced from China (ebay) for the replacements....10 beads for $5.80.
 
Last edited:
OP
OP
ihavecrabs

ihavecrabs

2500 Club Member
View Badges
Joined
Nov 25, 2014
Messages
2,792
Reaction score
3,679
Location
Illinois
Rating - 0%
0   0   0
Very nice write up. Well thought out and organized. Having done a number of LED jobs, I looked for errors and omissions :rolleyes:.....none. :cool: Again, fantastic instructions to replace LED's. I will definitely be referencing this article.


However I do have a question. For the life of me I have difficulty with those LED's that use thermal adhesive. By the time I get done removing them, they are in ten pieces, and the board looks like a mess. Do you have any tips or tricks in removing thermal adhesive LEDs?

And finally, if someone does not feel comfortable in doing this DIY, but has a board that is need of repair, SB Reef Lights sells an entire board for $70....simply plug it in and you're ready to go. Note that this board does not fit the older light boxes that have the large tapered sides.

Thanks for the kind words!

I have not found an easy way to remove ones with thermal adhesive yet. If you find one please let me know! [emoji23]
 

Creating a strong bulwark: Did you consider floor support for your reef tank?

  • I put a major focus on floor support.

    Votes: 40 43.0%
  • I put minimal focus on floor support.

    Votes: 20 21.5%
  • I put no focus on floor support.

    Votes: 31 33.3%
  • Other.

    Votes: 2 2.2%
Back
Top