Let’s Mix it Up! Designing and Using a Water Mixing Station

OP
OP
dbl

dbl

It Takes Less Energy to be Nice
View Badges
Joined
Mar 13, 2014
Messages
15,945
Reaction score
90,199
Location
SW Florida
Rating - 0%
0   0   0
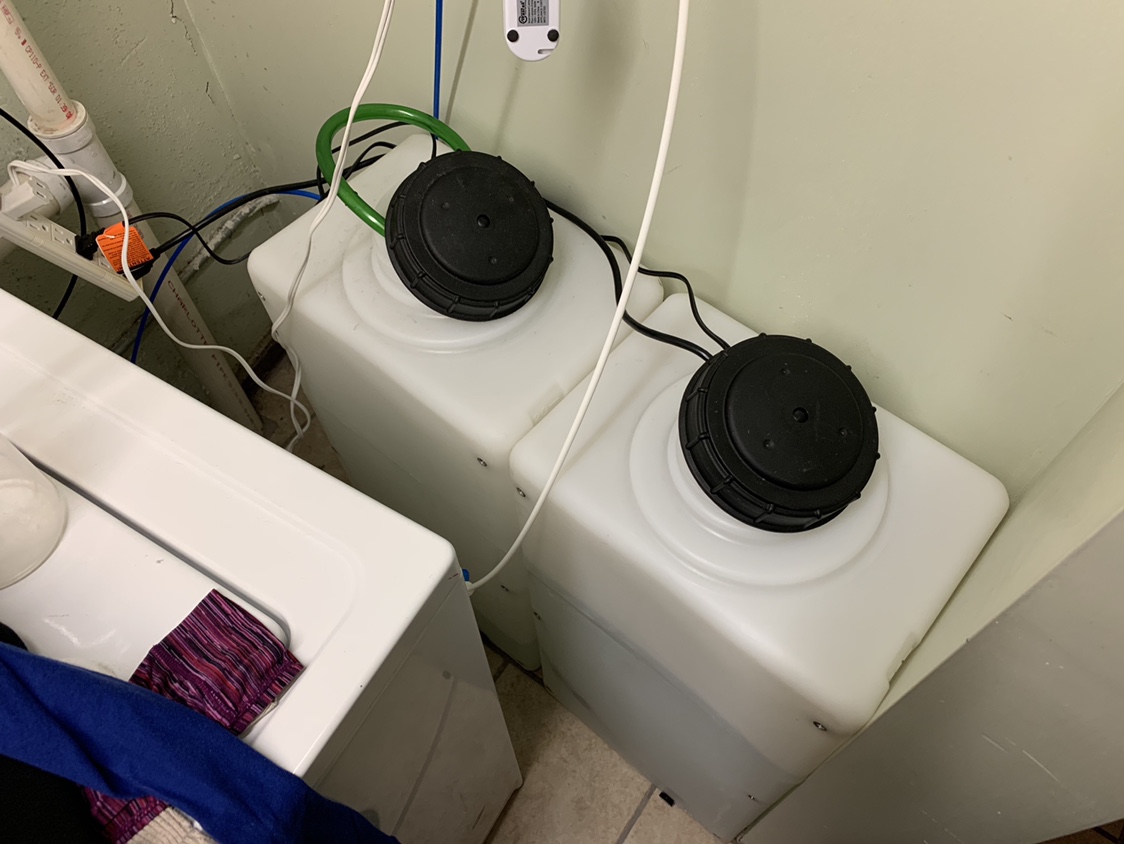
...I am wondering if I just have a small pump circulating water in there at all times if it will keep it from getting nasty...

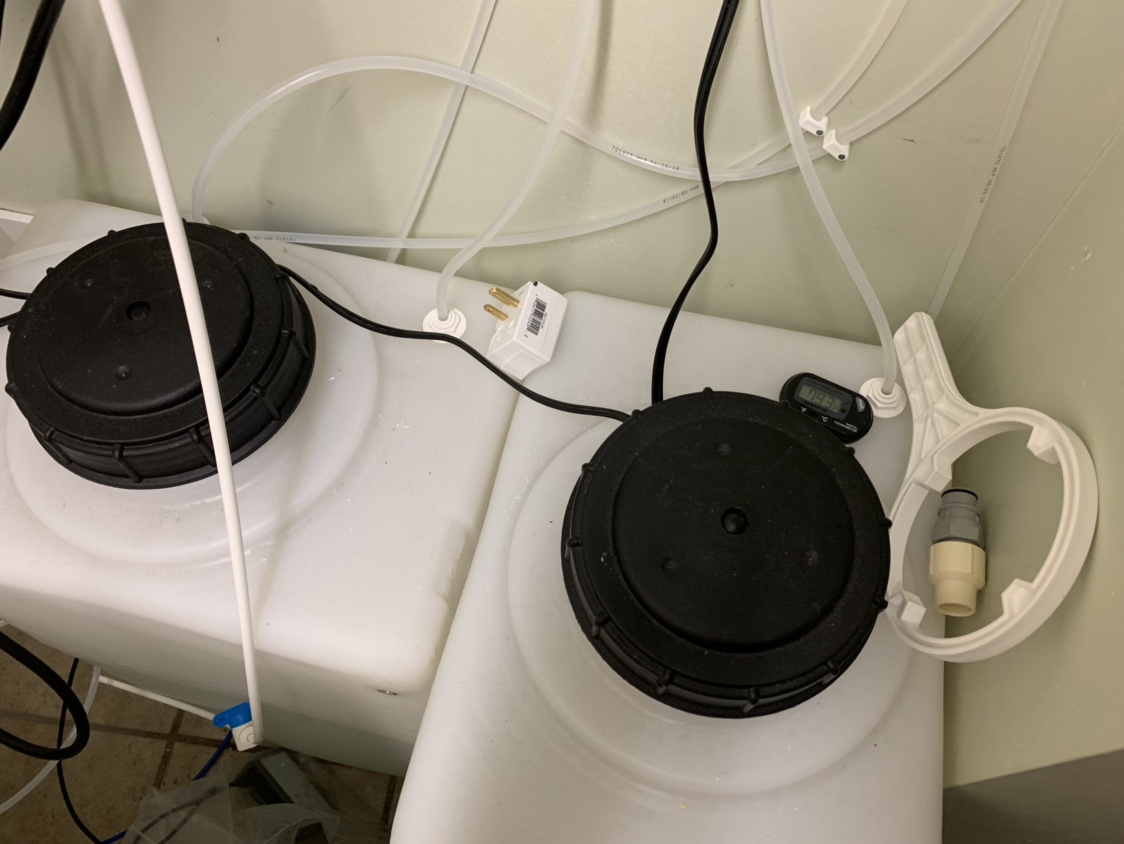
Oddly I found the opposite to be the case. I used to run a powerhead for several minutes a couple times a day after setting this system up. In a little over a year, the container was looking very nasty. So I cleaned it out and did a little homework.

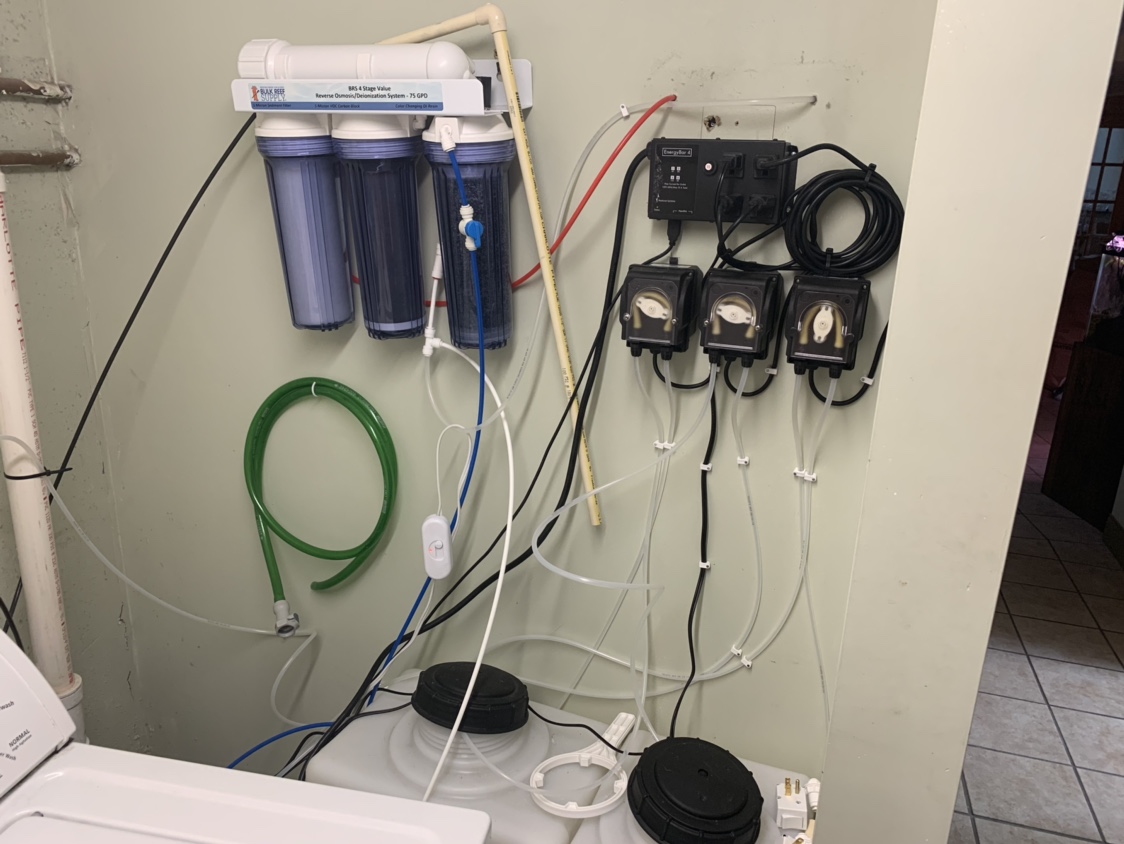
In my case, using Red Sea CP salt at the time, I discovered keeping it aerated was the likely cause of the build up. So I stopped running it except for right before use, the continued has stayed clean and clear. I can't say this is the case for all salt brands, but it was for RSCP.

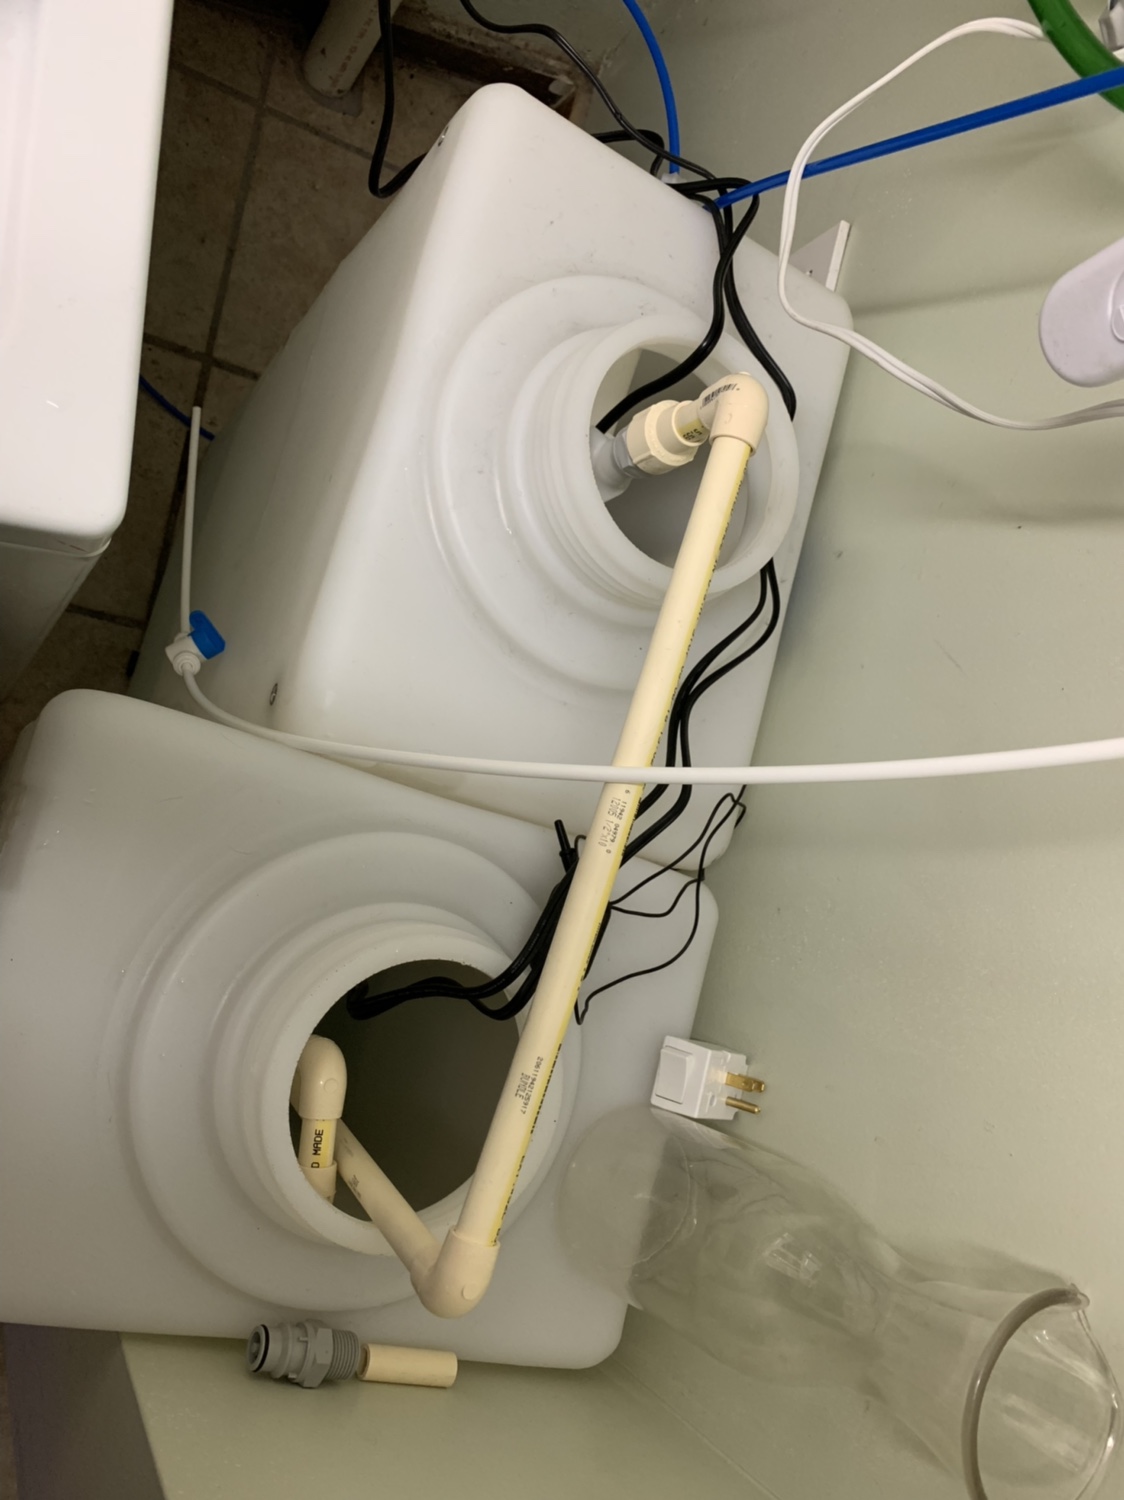
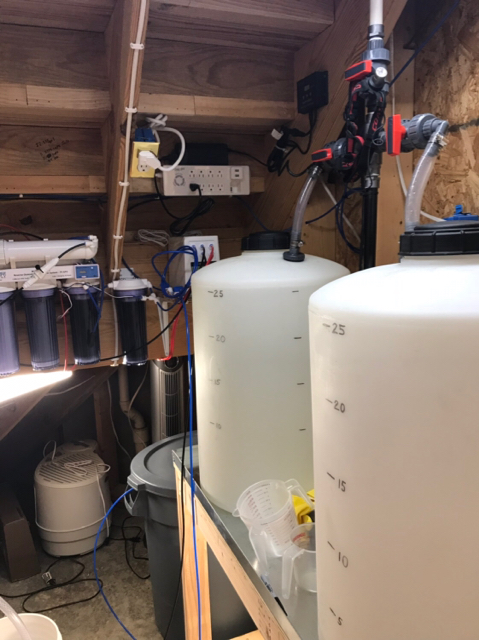
And yes, the clear roto-mold type containers are a pain to clean. A lot of vinegar and a homemade long-handled, very course brush. Not a fun afternoon for sure.
 

KIRBLIT

Active Member
View Badges
Joined
May 4, 2016
Messages
125
Reaction score
157
Rating - 0%
0   0   0
If you need a big mixing tank the best way to go is a roto mold batch tank. They have removable tops so that you don't have to try and clean the tank through an 8" opening, just remove the whole top for easy scrubbing.
 

tdlawdo

Valuable Member
View Badges
Joined
Sep 4, 2018
Messages
2,327
Reaction score
13,613
Location
Elizabethtown, KY
Rating - 0%
0   0   0
I'm still working on this but it is mostly there. Inside the saltwater tank (righthand tank) there is a pipe that extends near the bottom with a 90% nozzle to create a clockwise stirring motion. I will be running 1/4-inch tubing from the RO water tank to the DT for ATO using a BRS dosing pump. The tanks are 65 gallon from Rural King (free shipping on these). I have a third 68 gallon low-profile rectangular tank that fits in the back of my SUV that I use to transport ocean water from Scripps Pier in San Diego. I'll store that in the saltwater tank for water changes or mix my own with HW Marinemix Reefer. Valves are all Cepex from BRS. Pump is Vectra M1 (overkill I know but I want DC to adjust the flow depending on what I'm doing and it has to work externally and not have leaky fittings).
IMG_1863.JPG
IMG_1864.JPG
what do you do about the dead space and the salt water left in that shared pipe when you switch to RODI?
 

tdlawdo

Valuable Member
View Badges
Joined
Sep 4, 2018
Messages
2,327
Reaction score
13,613
Location
Elizabethtown, KY
Rating - 0%
0   0   0
what does everyone do with these set ups and the shared pipe allowing some salt water to mix with the RODI next time you switch and deliver RODI? or do you just waste some?
 

cromag27

octoaquatics.com - ig = @octoaquatics. view my sig
View Badges
Joined
Sep 7, 2013
Messages
8,249
Reaction score
11,239
Location
arizona
Rating - 0%
0   0   0
what does everyone do with these set ups and the shared pipe allowing some salt water to mix with the RODI next time you switch and deliver RODI? or do you just waste some?

purge it or it could be diluted if you’re running enough rodi through it.
 

don_chuwish

Smells something fishy
View Badges
Joined
Mar 21, 2012
Messages
3,013
Reaction score
3,387
Location
A better place
Rating - 0%
0   0   0
what does everyone do with these set ups and the shared pipe allowing some salt water to mix with the RODI next time you switch and deliver RODI? or do you just waste some?
My vertical setup means the only thing I use for both salt and fresh is the 50' of hose that take either to the tank. When I've done a water change and have salt water in the hose I just connect it to the RO container and flush out the last bit into the tank. Now the hose is ready to refill the ATO reservoir.
 

tdlawdo

Valuable Member
View Badges
Joined
Sep 4, 2018
Messages
2,327
Reaction score
13,613
Location
Elizabethtown, KY
Rating - 0%
0   0   0
It appears the section of pipe between the pump ball valves That lead to the various water containers at one point contain salt atet being recirculated for mix and at other’s times is deliver to RODI to the hose connection for your top off?
 

cromag27

octoaquatics.com - ig = @octoaquatics. view my sig
View Badges
Joined
Sep 7, 2013
Messages
8,249
Reaction score
11,239
Location
arizona
Rating - 0%
0   0   0
for those of you who use norwesco tanks, where are the full lines supposed to be? i know they’re not there physically, i just don’t know where to stop at. below the numbers, above the numbers, in the middle of the numbers?
 
OP
OP
dbl

dbl

It Takes Less Energy to be Nice
View Badges
Joined
Mar 13, 2014
Messages
15,945
Reaction score
90,199
Location
SW Florida
Rating - 0%
0   0   0
for those of you who use norwesco tanks, where are the full lines supposed to be? i know they’re not there physically, i just don’t know where to stop at. below the numbers, above the numbers, in the middle of the numbers?

The tanks in the first post of this thread, the gallon marks are actually right on the numbers themselves. I actually measured it when I filled them the first time. Others may very however.
 

cromag27

octoaquatics.com - ig = @octoaquatics. view my sig
View Badges
Joined
Sep 7, 2013
Messages
8,249
Reaction score
11,239
Location
arizona
Rating - 0%
0   0   0
The tanks in the first post of this thread, the gallon marks are actually right on the numbers themselves. I actually measured it when I filled them the first time. Others may very however.

yeah i have a 35g horizontal.
 

tdlawdo

Valuable Member
View Badges
Joined
Sep 4, 2018
Messages
2,327
Reaction score
13,613
Location
Elizabethtown, KY
Rating - 0%
0   0   0
ok, so i finished my replica of your setup and the varios leaks like a sieve from the connection of the Volute white plastic threads and the union connection. did you glue, pvc cement or what? it cant be tightened enough to stop the leak. ugh


Let’s Mix it Up!

There is one undeniable fact in this hobby – WE ALL NEED WATER! In fact, two types of water. Clean fresh water (FW) run through a quality RODI system and the obvious saltwater (SW). Secondly, we all know what a water change is. This is not an article on whether or not water changes are required or necessary, nor is it an article to discuss frequency. Your research and ultimate reefing philosophy will determine those answers for you.

Water changes can be done using something as simple as a 5 gallon bucket. If that is how you currently do it, and you’re okay with that, you can stop reading and move on. But if you’re looking for something a little more formal, and might I add potentially easier, you may want to continue reading. I’ll try not to bore your too much!

My personal goal was to never lift another bucket again…simple as that. So I started searching the internet for ideas. Between Google, forums, Yourtube and Mytube, I quickly realized I didn’t need to recreate the wheel. There is a plethora of designs out there to choose from…pick one. Remember, imitation is the highest form a flattery!

The most critical component of making water is obviously the RODI unit. All I will say is, if you don’t have one yet, get one! I am of the opinion that having control of your water is vital. Making your own (nothing against LFS’s, I love mine) is about the only way to insure you know the exact quality of your water.

The Equipment

Subject to the design you choose, here’s a simple breakdown of what you will and/or may need:

  • RODI unit you already have or will be buying (hint-hint)
  • A shut-off valve and float switch – no flooding necessary!
  • Water storage containers with lids – two of them preferably
    • One for FW, and one for new SW
    • These should be food-grade quality containers, preferably they will be NSF Approved
    • Size determined by your needs/system capacity
    • The grey Brute trash cans are very common and often used
    • Although more costly, the water storage containers found online and in farm supply stores work nicely as well
  • Plumbing
    • I like to use good old PVC (we usually have some laying around anyway right)
    • Ball valves, T’s, Elbows and Unions
  • Connections – Plumbing in to container walls and/or tops
    • Bulkheads for flat surfaces
    • Uniseals for curved surfaces
  • Pump for mixing
    • If designed properly, you can use one pump for mixing and distribution
  • Powerhead and Heater – resides in the SW container
  • A switched Power strip for easy control (optional)
  • Hose long enough to reach your display/sump/top-off reservoir
    • Or if you have the ability to hard plumb to your display, even better.
The Location

Obviously this will be unique to your environment. My biggest suggestion is in a controlled environment, meaning it’s heated and/or cooled depending on your climate. If you’re lucky enough to have a fish room, then it’s pretty obvious! If not, then maybe it’s a spare closet, the laundry room, the garage or basement may work if temperatures are at least somewhat stable. Note: Garages and basements, particularly non-insulated ones, can cause issues with RODI unit production during extreme temperatures, so choose your space wisely.

You may have to get creative. In my case, my wife wanted me to redo the foyer. Through intense negotiations (which I rarely win) I was able to commandeer the coat closet that had become the dumping grounds for all things junk. I took that space, which happened to back to our laundry room. So she got a new foyer and I got the perfect spot for a mixing station. Use your creativity and you’ll be surprised what you can come up with.

One thing you do have to keep in mind is access to water supply and drainage. That RODI unit you already had or will be getting soon (hint-hint) doesn’t come with its own water! That’s why a laundry room works great. You’ll have both the supply and drain for the washing machine right there at your disposal.

The Assembly

By now, you should have already flattered someone by using their design, but here is a breakdown of the basics. To try to make this easier, the image below is a picture of mine just after setting it up. I’ve labeled things and will refer to this image moving forward.

3.jpg

You can see my RODI unit mounted above. The lettered items are “equipment” and the numbered items are “valves”. This is merely for reference and by no means the only (or best for that matter) way of putting together a mixing station.
The main idea of doing all this is to mix and move water, so at a minimum, your new mixing station should be able to:
  • Transfer water between containers
  • Pump/circulate water within the SW mixing container for well, mixing!
  • Pump both FW and SW to the display and/or top-off reservoir.
  • You will want to be able to empty the containers in case of prolonged power outage or a visit from Mr. Murphy - the inevitable pump failure.
In both containers, you’ll need a connection towards the bottom. In the SW container, you’ll also want one towards the top of the container. This will allow circulation within the container for mixing. Your containers will determine how this accomplished – uniseal or bulkhead.

The Operations – (Using the picture above for reference)

Your RODI system will produce FW and be stored in the first container A. You will use this FW for top-offs, as well as supply your second container B with water that will become your new SW after mixing. With this design, and the turning of a few valves, pump C does all the work. Said differently, no more buckets!!! So let’s move some water:

For discussion purposes, assume all valves are closed (like pictured) at the beginning of each task – represented by numbered items below. I would recommend closing all valves at the end of any task to lessen the chances of cross-contaminating the FW and SW. You will also need a hose with a ball valve on the output end. Again, if you can hard plumb to your display/sump/ATO reservoir, all the better.

  1. Move FW to top-off reservoir in the stand under display (in my case)
    • Attach hose to the outlet of valve 2 (there is a hose bib converter on the end of that valve)
    • Open valves 2 and 4, turn on pump C to fill reservoir via hose
  2. Move FW to the SW container B for mixing
    1. o Open valve 1 and valve 4, turn on pump C to pump over to container B.
  3. Mixing new SW
    • o Put salt into container B
    • o Open valve 1 and valve 3, turn on pump C and begin mixing salt via circulation
    • Editor Note: In my case, I built a shelf over my mixing station, so I purchased the hopper D to add salt. Totally unnecessary if you have access to the top of your container.
  4. Move SW to Display for Water Change
    • Open valves 2 and valve 3, turn on pump C to pump SW to display via hose
  5. Empty Containers without pump due to power outage or visit from Mr. Murphy
    • Attached hose to end of either valve 5 or 6, and open the valve. Gravity will do its thing
Heating:

I have a heater inside container B. I only heat just prior to using the SW. Some will argue this is not necessary dependent on the quantity of your water change, which may very well be true. But since I have the heater already, I just try to match the display.

Water Storage and Continued Mixing:

This is another area of debate among hobbyists. We’ve all seen the threads asking “How long can I keep mixed saltwater?” And “Should I keep it mixed”. There are far too many choices/options to discuss here. Me personally, I mix up about 50 gallons at a time. I mix and heat just prior to performing a water change.

When it comes to storing your RODI water, the important factor is to keep it sealed as tightly as possible. Very simply put, RODI water has been stripped of all things bad, and if allowed, it will try to grab those bad things back! So an air tight lid is best and no stirring necessary.

Over time your containers interior may build up some nasty’s and need to be cleaned. An annual cleaning (or more often if necessary) is recommended – let vinegar be your friend.

Extras

You may have noticed on my station a couple things under the RODI unit. In addition to a powerhead and heater, I also have a salinity monitor and thermometer inside the SW container. I didn’t want to drill a hole in the lid, so I came up with this.
4.jpg
Are there fancier ways of doing this, sure? Did I have this stuff already lying amongst my fish stuff, heck yes! It works great and is essentially air tight once the uniseal is capped with the PVC. Lastly, although I do not have a picture, all the interior items in my SW container are zipped tied to a long piece of PVC that rests inside the container. So if need be, I can pull that one piece of PVC out and bring all the equipment with it. That is the one thing I thought of myself!!!

Let your imagination run wild with one goal in mind…what you can do to make things easier on yourself. This hobby can be difficult enough on its own. Something as simple as a well-designed mixing station can make your weekly/bi-weekly/monthly/whenever water changes a little easier.

I hope this has helped at least give you an idea of the what’s and how’s of a mixing station. Don’t be afraid to put yours together. Having control of the water quality will be something you will never regret. Never lifting another bucket isn’t bad either.

Happy Reefing!
 

Saveafish

Well-Known Member
View Badges
Joined
Nov 30, 2018
Messages
844
Reaction score
1,497
Rating - 0%
0   0   0
IMG_0425.JPG
IMG_0485.JPG
IMG_0485.JPG
I'll share my build pics. I think I started but I messed up the thread
 

Brock0019

Active Member
View Badges
Joined
Mar 25, 2016
Messages
409
Reaction score
175
Location
Michigan
Rating - 0%
0   0   0
for those of you who have plumbed through the floor, what kind of connections did you use?

my water station will be in the basement, under the tank upstairs.
I was thinking of drilling a hole, probably 1 inch, in the floor behind the tank. Hard plumbing the mixing station to said hole and having a quick connect fitting there in the floor.
Possibly use a Y valve there to a ball valve so the line could be utilized for water changes, the fill and empty task.
 

lbacha

Valuable Member
View Badges
Joined
Nov 16, 2017
Messages
1,911
Reaction score
2,465
Location
Cleveland
Rating - 0%
0   0   0
My water change station is on the smaller side

2 x 20g upright storage tanks (this is before they were hooked up for my AWC
5cc0578d8e668d5ceb9c9abec944683b.jpg


Added 2 Quite One 1200 pumps for getting water out and for circulating water in the salt tank (I used quick disconnects to make changing out hose or hard plumbing easily)
08dbe28133c59d4ac2ef27a66bc51149.jpg


The hard pipe elbow to fill the salt tank from my RODI tank
8c0b80826bd1688132f11a6679200b71.jpg


My full AWC setup and RODI unit
49195ef254d6a68a13a85cd11747b13a.jpg


Added some 1/4” mur-lol bulkheads since the pic above
9335a5e79f521befa1813f9f79bf88a3.jpg


1/4” RODI tubing running to my tank (waste salt, new salt and RODI, the Apex Aquabus is below) it’s run in cable management tunes from Home Depot. I need a longer Aquabus cable as the one I’m using is 2 15’ers once I get a 30’ cable I’ll run it in the cable management tube as well.
48d2b771c9ffbf4ed5a204b8c281db4f.jpg

fbd551e0c13a4aa826056b8cd12704fb.jpg
 

radiata

Valuable Member
View Badges
Joined
Nov 2, 2015
Messages
1,091
Reaction score
764
Rating - 0%
0   0   0
for those of you who have plumbed through the floor, what kind of connections did you use?

my water station will be in the basement, under the tank upstairs.
I was thinking of drilling a hole, probably 1 inch, in the floor behind the tank. Hard plumbing the mixing station to said hole and having a quick connect fitting there in the floor.
Possibly use a Y valve there to a ball valve so the line could be utilized for water changes, the fill and empty task.

Are you using the same tubing for draining water and loading water?

Suggest you re-think the 1" hole - your basement pump is going to encounter some head pressure. I'd be inclined to use at lease 1" reinforced tubing, requiring a larger hole.
 

siggy

My Aquariums Going Again
View Badges
Joined
Feb 16, 2017
Messages
7,123
Reaction score
21,418
Location
MI
Rating - 0%
0   0   0
for those of you who have plumbed through the floor, what kind of connections did you use?
I plan on drilling into a wall and putting a wall plate just like I would romex for electric. I plan on selling at some point. Auto water change and top-off only require 3 @ 1/4". If your doing a sump well I guess all bets are off. You could still run multiple 3/4" between drywall.
 

GWHouston

Well-Known Member
View Badges
Joined
Jan 3, 2018
Messages
535
Reaction score
906
Location
North AL
Rating - 0%
0   0   0
My set up is downstairs in the basement. I pump up roughly 12 ft to the top of the DT. I’m using a Jaebo 10000 dc pump which has enough head pressure to get it there. I’m running 3/4 pvc to the room where I have a gate valve and a short water hose. My mixing tanks are also turned over with the same pump. You can look at the pictures for details.

My rodi is a 1/4 line from the basement also. I use a smart buddie booster pump to make and deliver the rodi water. My waste water goes straight into the septic system.
8482086f7c9805cf97031e79e4259fac.jpg

8d0d22441e5a0b34538bf555077176f2.jpg

63f8ad5ae85ef90330af789cbc1b48b9.jpg
 

LbulletM

Valuable Member
View Badges
Joined
Sep 7, 2016
Messages
1,425
Reaction score
990
Rating - 0%
0   0   0
Is there any reason not to use regular polyethylene tubing from Lowes for RODI water? Wanting to do some plumbing this weeping.
 
OP
OP
dbl

dbl

It Takes Less Energy to be Nice
View Badges
Joined
Mar 13, 2014
Messages
15,945
Reaction score
90,199
Location
SW Florida
Rating - 0%
0   0   0
Is there any reason not to use regular polyethylene tubing from Lowes for RODI water? Wanting to do some plumbing this weeping.

I don't see an issue with it.
 

When to mix up fish meal: When was the last time you tried a different brand of food for your reef?

  • I regularly change the food that I feed to the tank.

    Votes: 45 21.3%
  • I occasionally change the food that I feed to the tank.

    Votes: 73 34.6%
  • I rarely change the food that I feed to the tank.

    Votes: 70 33.2%
  • I never change the food that I feed to the tank.

    Votes: 19 9.0%
  • Other.

    Votes: 4 1.9%
Back
Top